1 minute read
Height adjustment of rotors (rake height


66172
2
66172
A 1

B
2
1 33 13.1.4Height adjustment of rotors (rake height) Mechanical height adjustment
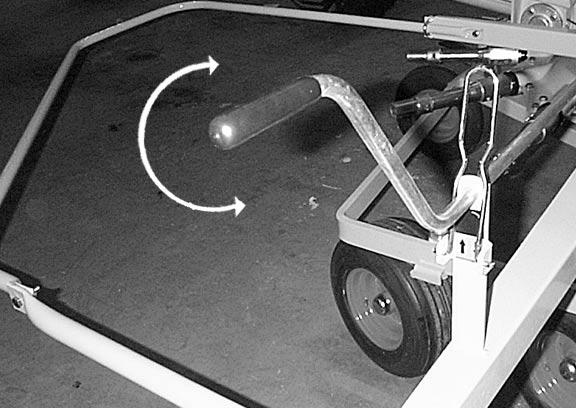
Use the height adjusting spindle to lower all rotors until the crop is taken up cleanly over the entire working width. Proceed as follows: • Flip the spring clamp(1) upwards Fig. To lower the rotors: • Turn the crank(2) clockwise (direction A). To raise the rotors: • Turn the crank (2) counter-clockwise (direction B).
Note!
This setting can be affected by vibrations during field operations.
• When the adjustment has been made, secure the crank(2) with the spring clamp(1). (Fig.33,34)
34
Swather with ISOBUS Terminal 35
36 Hydraulic rotor height adjustment
(Additional equipment - only with ISOBUS Terminal)
Attention!
To avoid damaging the spring tines, the height can only be adjusted in the working position. – Bring swather to the working position.
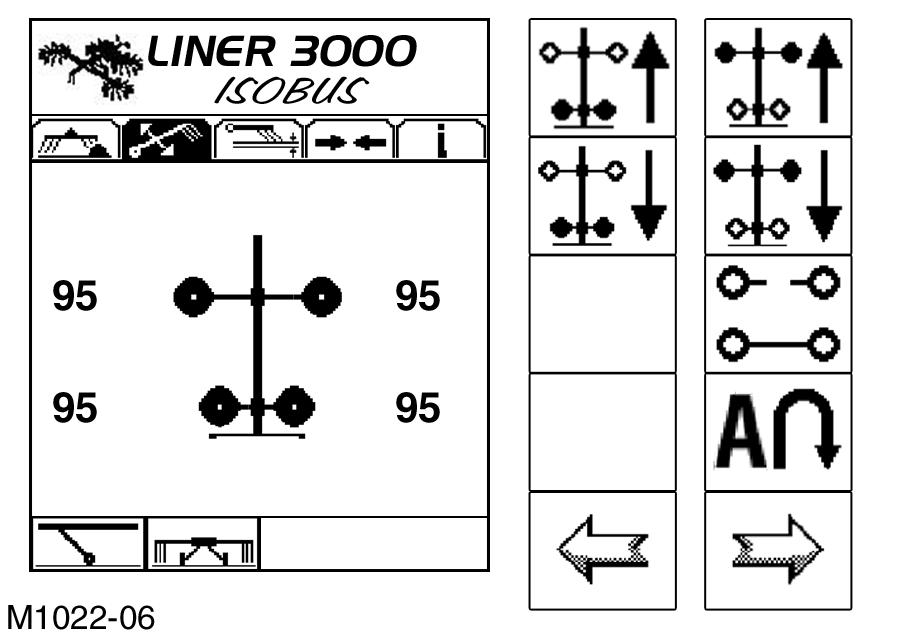
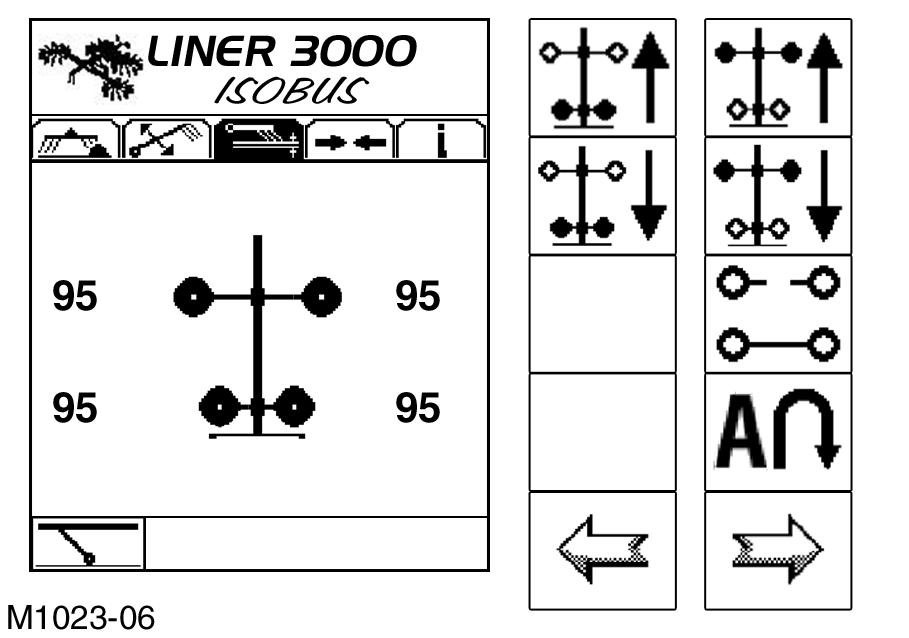
Use the hydraulic height adjustment to lower all rotors until the crop is taken up cleanly over the entire working width. The rake height can be set individually for every rotor or in pairs. The screen for adjusting the rake height can be opened from the following screens: – “Working Width” (Fig.7, page127), – “Working Width” (Fig.15, page129), – “Lift both sides” (Fig.17, page129), – “Lift left/right (Fig.18,19, page129). The tabs are changed with the following soft keys: “next” = next menu,
“back” = previous menu –see Menu bar, page76. As an example, switching tabs with the “Lift both sides” screen (Fig.35) is described below: In the screen “Lift both sides” (Fig.35) press soft key “next”. – The submenu “Rake height” is opened –the
“Rake height” icon is shown inverse (Fig.36). The rake height is adjusted similarly to the procedure described in the chapter Working with individual rotors, page129.