3 minute read
Pressure relief valve 10 bar

from CLAAS COMBINE VARIANT 260 VARIANT280 ADJUSTING THE ENDLESS BELTS Assembly instructions Manual_DE_EN_

3
2 E
O
M Z
3 D PRESSURE RELIEF VALVE 10 BAR
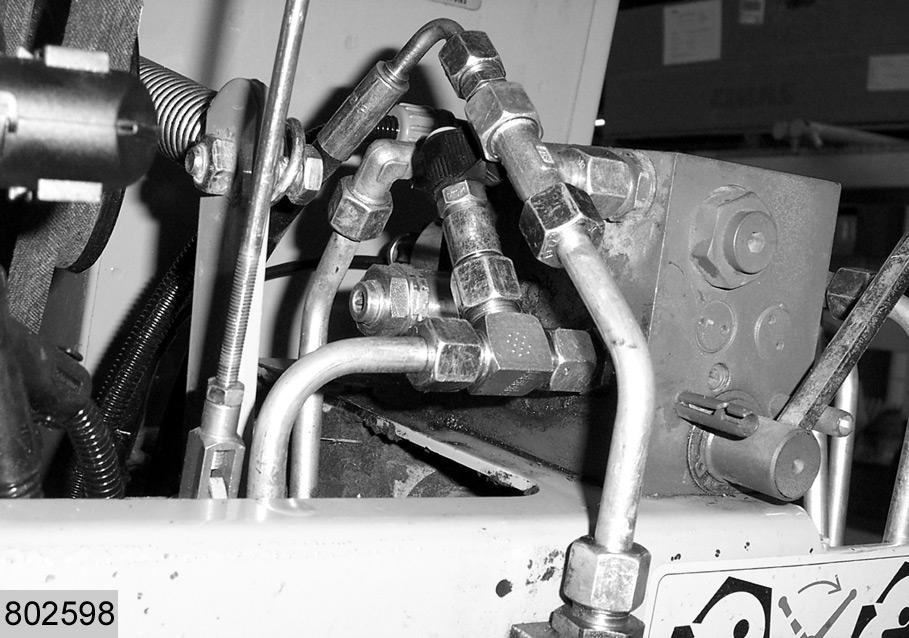
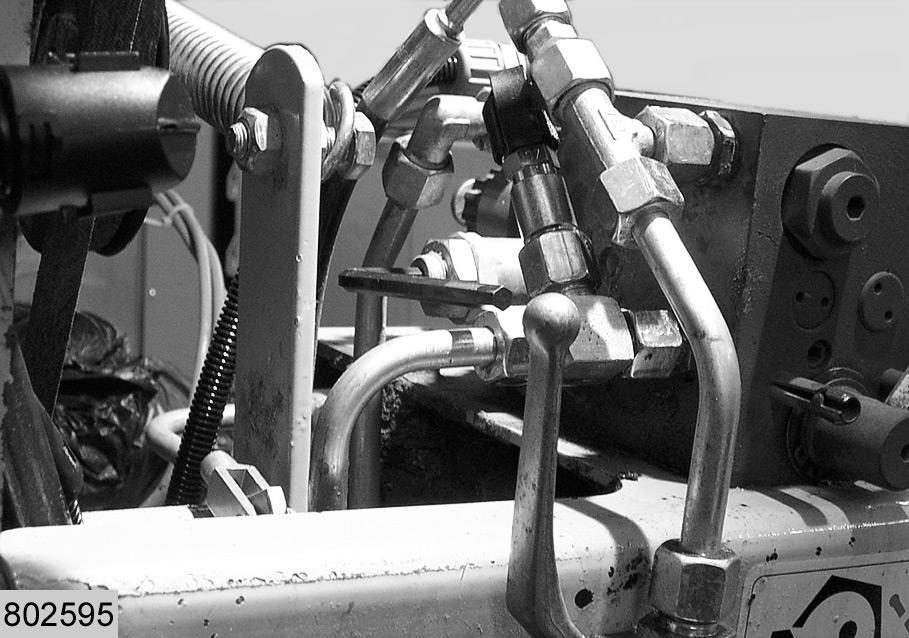
Connect T-fitting (2) and Minimess port (3) to outlet (E) of the hydraulic block. (Fig.9)
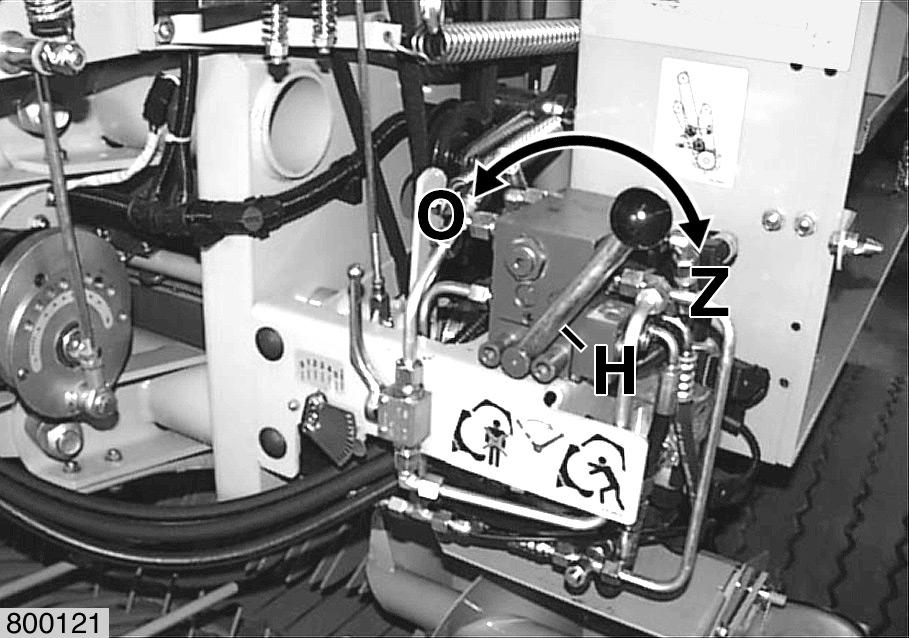
Open tailgate. Shift lever (M) to securing position (Z). (Fig.10)
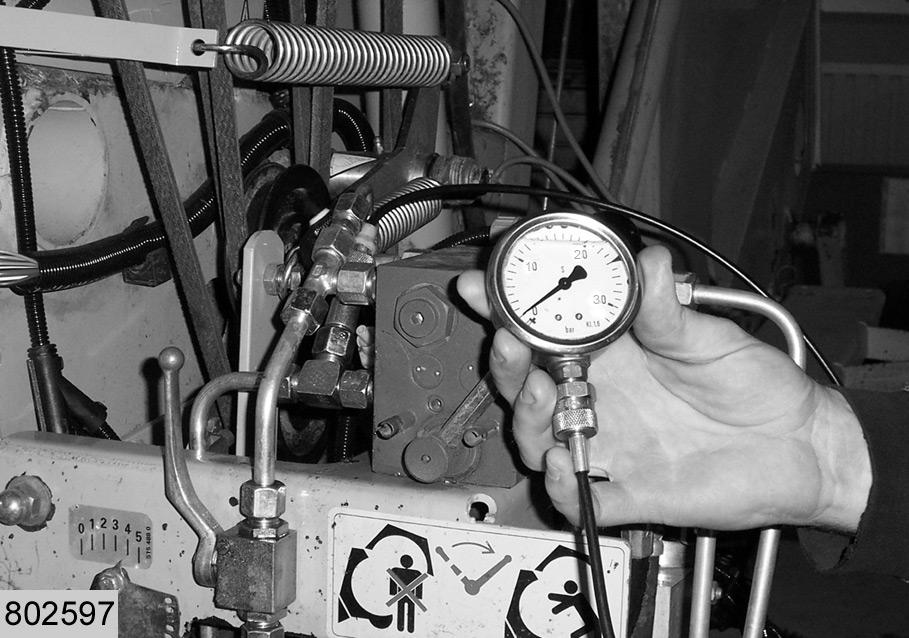
Raise upper and lower tensioning arm up against the stop, by activating tail gate opening on the tractor mounted hydraulic control valve (simulated opening). Maintain opening of the tailgate for 3-5 seconds. Lower both tensioning arms by activating tailgate closing on the tractor mounted control valve (simulated closing). Connect a pressure gauge (0-30 bar) to the Minimess port (3). Switch the tractor mounted control valve for 30 seconds to position "Back/Floating". Record the reading of the pressure gauge. Unlock lever (M). Close the tailgate. Remove pressure gauge (D). (Fig.11)
The nominal pressure on outlet (E) is 8-15 bar. (Fig.11)
9
10
11
G H
J
J
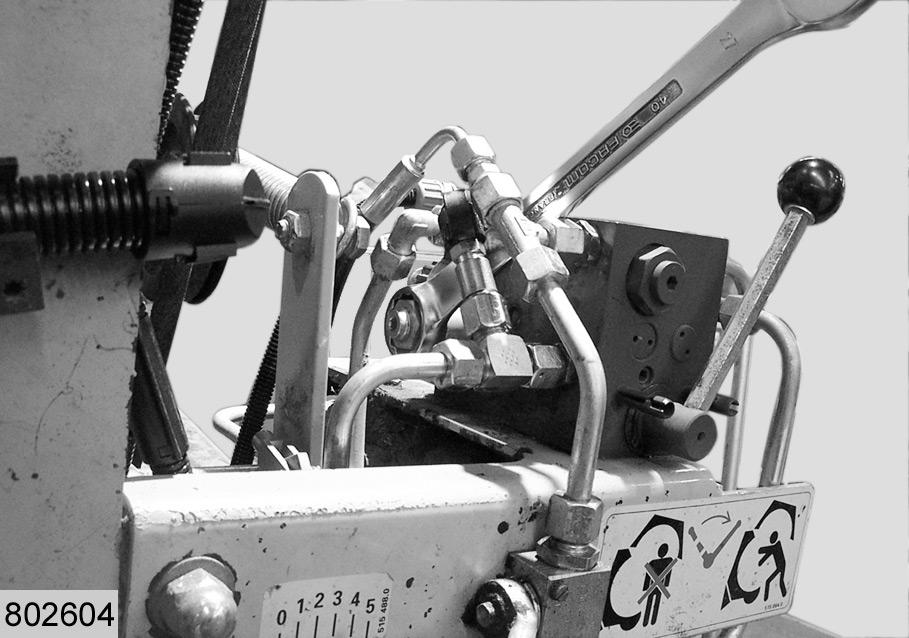
If the measured pressure is not between 8 and 15 bar, the pressure needs to be adjusted at outlet (E):
Measured pressure higher than 15 bar
–Loosen counter nut (H) on pressure relief valve (J). –Slacken bolt (G) for quarter of a turn. –Retighten counter nut (H) without changing the position of bolt (G). –Repeat the test described on the previous page. –If necessary readjust bolt (G).
Measured pressure lower than 8 bar
–Loosen counter nut (H) on pressure relief valve (J). –Tighten bolt (G) for quarter of a turn. –Retighten counter nut (H) without changing the position of bolt (G). –Repeat the test described on the previous page. –If necessary readjust bolt (G). (Fig.12)
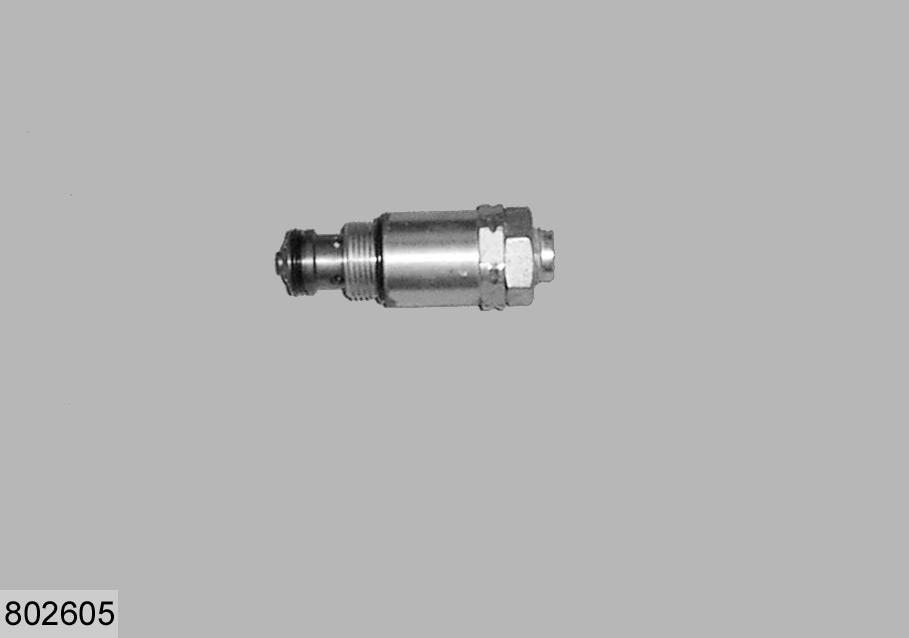
Measured pressure is zero
If the measured pressure is zero you must check the pressure relief valve. Disassemble pressure relief valve (J) from the hydraulic block. (Fig.13)
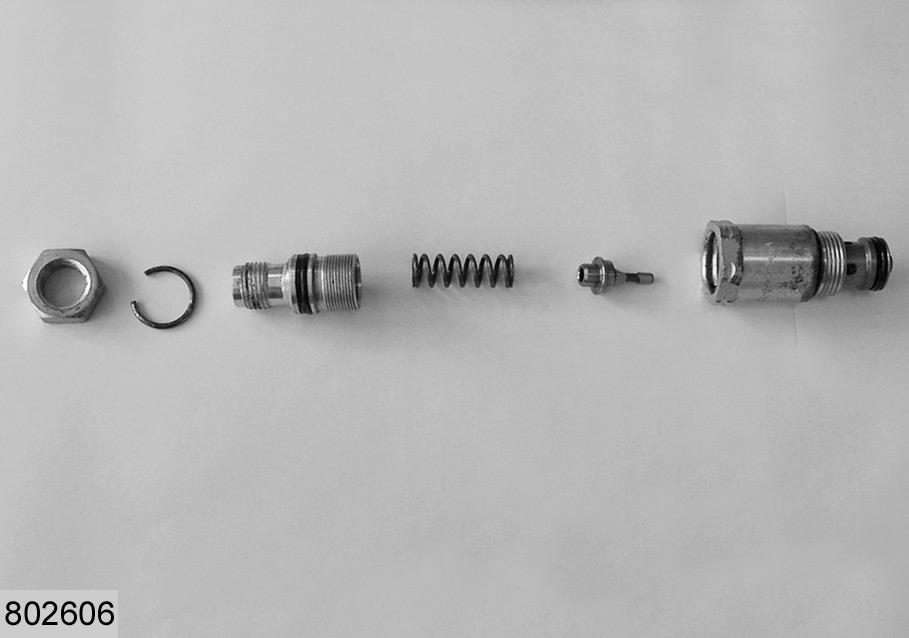
Check the condition of seals (K) and (L) in the pressure relief valve, replace if necessary. (Fig.14)
13
14
6 7 8 9 10 11
O
M Z
3 D 15
16
17
Dismantling the pressure relief valve –Slacken counter nut (6). –Turn screw (8) completely in. –Pull circlip (7) out of the pressure relief valve housing (11) by applying pressure to the section of the circlip, which is opposite the gap. –Turn screw (8) completely out. –Pull out spring (9) and pin (10). –Check the condition of the seals, replace if necessary. (Fig.14,15)
Clean all parts of the pressure relief valve with a suitable cleansing agent. Then reassemble the pressure relief valve in reverse order. Install the pressure relief valve into the hydraulic block.
Check the pressure relief valve once again. Open tailgate. Shift lever (M) to securing position (Z). (Fig.16) Raise upper and lower tensioning arm up against the stop, by activating tail gate opening on the tractor mounted hydraulic control valve (simulated opening). Maintain opening of the tailgate for 3-5 seconds. Lower both tensioning arms down to their stops by activating tailgate closing on the tractor mounted hydraulic control valve (simulated closing).
Connect a pressure gauge (0-30 bar) to the Minimess port (3). (Fig.17) Switch the tractor mounted control valve for 30 seconds to position "Back/Floating". Record the reading of the pressure gauge. Unlock the lever. Close the tailgate.
Remove pressure gauge (D) from the port. –Once the pressure has dropped to zero clean tractor and baler hydraulics. Change the filter (see spare parts list). Perform the processes described before once again. –If the pressure is still zero, replace the 10 bar pressure relief valve (see spare parts list).