SERVICE AND REPAIR MANUAL Type : Drawing no.: Valid as of serial no. : Preparation of data : Author:
CL 19 Transfer case in CLAAS SFM Grassland machine VGZ 75-521 01 22.01.2007 Rauh
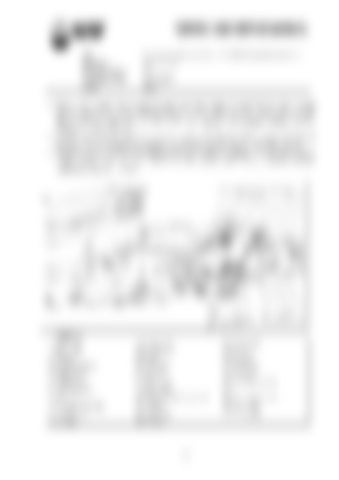
• Place a new gasket (No.11) between and from above place housing (No.15) onto housing (No.16). Support by carefully hitting the housing with a rubber hammer. Tighten both housing halves with hex bolts (No. 13, 14, 99 & 118) together with locking washers (No.98). Tightening torque is 67 Nm. • Install washer (No.71) with 24 compression springs (No.70) into shifting sleeve (No.69) and housing (No.15) and insert the shifting sleeve (No.69) onto the spline of the shaft (No.36). • Install new gasket (No.57) and O-ring (No.59) and mount the complete all wheel drive release shifter, tighten with hex bolts (No.55 & 56) together with locking washers (No.96). Tightening torque is 115 Nm.
Figure 15 7. Shift fork 8. Hex. Bolt 9. Washer 10. Spacer sleeve 19. Shear pin 42. Shift lever 43. Shifting rod 45. Nut 46. Washer package 47. Centering 48. O-ring
49. Shaft seal 50. Piston seal 51. Seal 52. Cylinder 53. Cover 54. Hex. bolt 79. Seal ring 80. Electric shifting sensor 87. O-ring 89. Seal ring 90. Piston
29
91. Snap ring 92. O-ring 93. O-ring 94. Snap ring 95. Washer 96. Locking washer 97. 98. Locking washer 99. Hex. bolt 117. Bushing


