Periodic Maintenance/Tune-Up Tighten all nuts, bolts, and cap screws. Make sure rivets holding components together are tight. Replace all loose rivets. Care must be taken that all calibrated nuts, bolts, and cap screws are tightened to specifications (See General Information/Foreword). It is advisable to lubricate certain components periodically to ensure free movement. Apply light oil to the components using the following list as reference: A. Throttle Lever Pivot/Cable Ends
KM095A
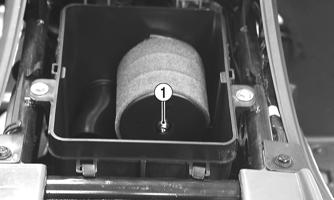
3. Remove the air filter retaining cap screw (1); then remove the foam elements (2) from the frame.
B. Brake Lever Pivot C. Auxiliary Brake Pivot/Clevis D. Choke Cable Upper End E. Shift Lever/Ball Joints F. Idle RPM Screw SPECIAL TOOLS
A number of special tools must be available to the technician when performing service procedures in this section. Refer to the current Special Tools Catalog for the appropriate tool description.
KM097A
NOTE: When indicated for use, each special tool will be identified by its specific name, as shown in the chart below, and capitalized. Description
p/n
Compression Tester Kit
0444-213
Tappet Adjuster
0444-189
NOTE: Special tools are available from the Textron Off Road Service Parts Department.
Air Filter Use the following procedure to remove the filter and inspect and/or clean it. CLEANING AND INSPECTING FILTER
CAUTION Failure to inspect the air filter frequently if the vehicle is used in dusty, wet, or muddy conditions can damage the engine.
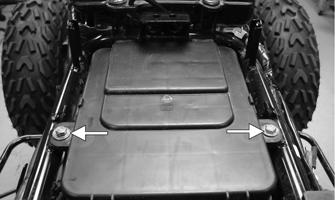
1. Remove the seat. 2. Remove the air filter housing cover from the retaining clips.
6
KM098A
4. Place the elements in a pan larger than each element and spray generously with cleaning solvent. Let sit approximately three minutes. NOTE: Foam Filter Cleaner and Foam Air Filter Oil Aerosol are available.
5. In a pan larger than each element, with a mild detergent (dish soap) and water, wash all the dirt and oil off by squeezing each element, not twisting them wringing out or twisting the filters can cause damage). 6. Rinse off any remaining soap.