2 minute read
r3.3 Upper Coolant Pipes, Removing and Installing


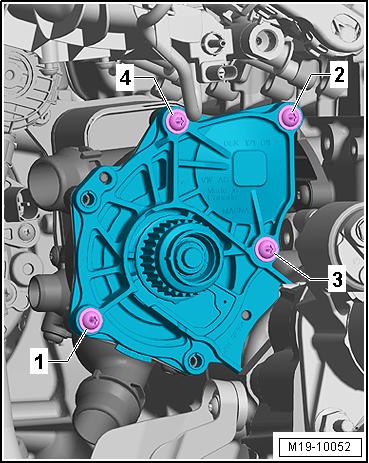
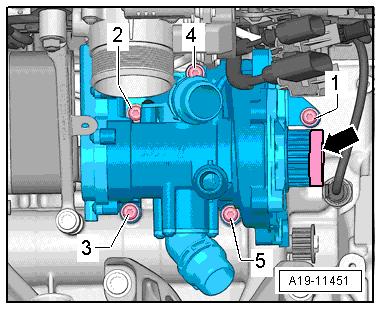
Protected by copyright . Copying for pivate or commerci al p r po s e s , i n p a r t r o r in w ho le, is not permitted unless authorised by Volkswagen AG. Volkswagen AG does notguarantee or accept any liabilit y wi th res pect t o t h e c o r r e c t n e ss o f in format ion in this document. Copyright by Volkswagen AG. – Disconnect the connector -1- from the Oil Pressure Switch -2-. – Remove the bolts -arrows- and remove the toothed belt cover. u – Loosen the bolts -1 to 4- and remove the toothed belt from the coolant pump. – Remove the bolts -1 through 4-, and remove the coolant pump from the Engine Temperature Control Actuator - N493- . Golf 2015 ➤ , Golf Variant 2015 ➤ Engine Mechanical, Fuel Injection and Ignition - Edition 04.2015
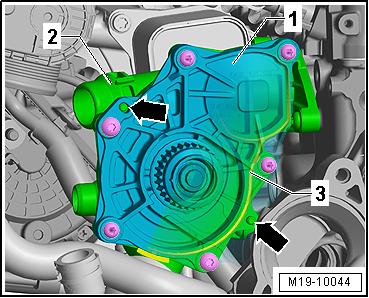
Installing Install in reverse order of removal. Note the following: – Install the coolant pump and toothed belt. – Pay attention to the seating of the centering piece -arrows- and seal -3-.
– If a new coolant pump was installed, remove the protective cap -arrow-.
– Fill with coolant. Refer to ⇒ page 218 . Tightening Specifications ♦ Refer to ⇒ “2.1 Overview - Coolant Pump/Thermostat”, page 223 ♦ Refer to ⇒ “3.1 Overview - Air Filter Housing”, page 293
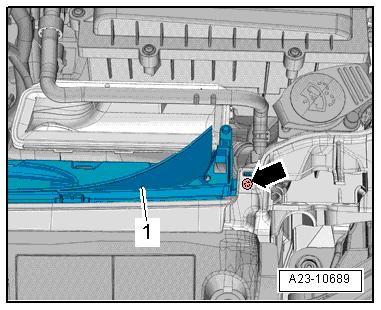
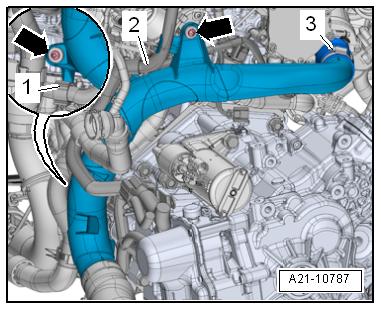
Golf 2015 ➤ , Golf Variant 2015 ➤ Engine Mechanical, Fuel Injection and Ignition - Edition 04.2015 Proected by copyright . Copying for pivate or commerci al p r po s e s , i n p a r t r o r in w ho le, is not permitted unless authorised by Volkswagen AG. Volkswagen AG does notguarantee or accept any liabilit y wi th res pect t o t h e c o r r e c t n e ss o f in format ion in this document. Copyright by Volkswagen AG. 2.8 Coolant Pump Toothed Belt, Removing and Installing u Special tools and workshop equipment required ♦ Torque Wrench 1331 Insert - Ring Wrench - 12mm - T10360♦ Torque Wrench 1410 - VAG1410Removing – Drain the coolant. Refer to ⇒ “1.3 Coolant, Draining and Filling”, page 217 . – Remove the air filter housing. Refer to ⇒ “3.2 Air Filter Housing, Removing and Installing”, page 294 . – Free up the wiring harness -1 and 2- from the air guide pipe. – Loosen the screw-type clamp -3-. – Remove the bolts -arrows-. t – Loosen the hose clamp -arrow- and remove the charge air hose -1- with the air guide pipe downward.

– Remove the bolt -arrow- on the left and right. – Unclip and remove the lower section -1- of the air duct.