2 minute read
5 Special Tools


Protectd by copyright . Co ying for pivate or co merci al pur po s e s , i n p a r t r o r in w ho le, is not permitted unless authorised by Volkswagen AG. Volkswagen AG does notguarantee or accept any liabilit y wi th res pect t o t h e c o r r e c t n e ss o f in format ion in this document. Copyright by Volkswagen AG. – Remove the Oil Pressure Switch -1-. Installing Note To prevent oil loss, insert the Oil Pressure Switch - F1- in the opening immediately. m Install in reverse order of removal. Note the following: – Check the oil level. Refer to ⇒ Maintenance ; Booklet 36.1 ; Procedure Descriptions; Engine Oil Level, Checking . Tightening Specifications ♦ Refer to ⇒ “4.2 Overview - Oil Pressure Switch/Oil Pressure Regulator Valve”, page 198 . p 4.4 Reduced Oil Pressure Switch - F378- , Removing and Installing e Special tools and workshop equipment required ♦ Socket and Jointed Extension - 24mm - T40175Golf 2015 ➤ , Golf Variant 2015 ➤ Engine Mechanical, Fuel Injection and Ignition - Edition 04.2015 Caution
Mandatory Replacement Parts ♦ Seal - Reduced Oil Pressure Switch
Removing
Note
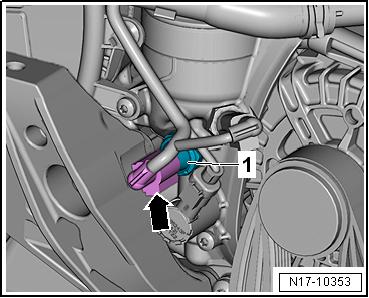
♦ Place a cloth under the accessory assembly bracket to collect leaking engine oil. ♦ Replace the seal after each time the oil pressure switch is loosened.
– Disconnect the electrical connector -arrow- on the Reduced
Oil Pressure Switch - F378- .
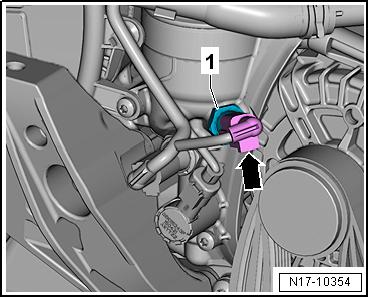
Golf 2015 ➤ , Golf Variant 2015 ➤ Engine Mechanical, Fuel Injection and Ignition - Edition 04.2015 Protectd by copyrigh . Copying fo pivate or co merci al p r po s e s , i n p a r t r o r in w ho le, is not permitted unless authorised by Volkswagen AG. Volkswagen AG does notguarantee or accept any liabilit y wi th res pect t o t h e c o r r e c t n e ss o f in format ion in this document. Copyright by Volkswagen AG. – Remove the Reduced Oil Pressure Switch -1-. Installing Install in reverse order of removal. Note the following: Note Insert the Reduced Oil Pressure Switch - F378- immediately to prevent losing any engine oil. u – Check the oil level. Refer to ⇒ Maintenance ; Booklet 36.1 ; Procedure Descriptions; Engine Oil Level, Checking . Tightening Specifications ♦ Refer to ⇒ “4.2 Overview - Oil Pressure Switch/Oil Pressure Regulator Valve”, page 198 . m 4.5 Oil Pressure Switch, Level 3 - F447- , Removing and Installing r Special tools and workshop equipment required ♦ Socket and Jointed Extension - 24mm - T40175t Caution e This procedure contains mandatory replaceable parts. Refer to component overview prior to starting procedure.
Mandatory Replacement Parts ♦ Seal - Oil Pressure Switch, Level 3
Note
Removing – Remove the noise insulation. Refer to ⇒ Body Exterior; Rep.
Gr. 66 ; Noise Insulation; Overview - Noise Insulation . – Remove the air filter housing. Refer to ⇒ “3.2 Air Filter Housing, Removing and Installing”, page 294 . – Free up the wiring harness -1 and 2- from the air guide pipe. – Loosen the screw-type clamp -3-.


