1 minute read
6.30 Removal and installation of the loudspeaker


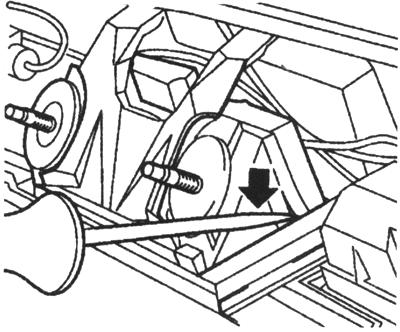
Fig. 7.30. Withdrawal Sensor - Switch castle Doors back of
Installation is performed in reverse order of removal. Pay attention to the cabling.
Broadband speakers (front and rear)
NOTE Loudspeakers enshrined in door assemblies. At models Astra GTC rear speakers fixed on sidewalls baggage th offices.
To access the loudspeaker clear trim / finish of the corresponding door / sidewall.
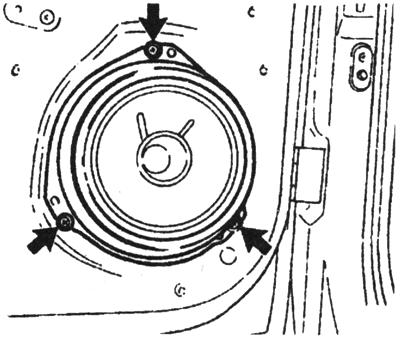
Fig. 7.31. Mounting loudspeaker
Remove the 3 mounting screws and remove the speaker, then disconnected the wiring harness connector (Figure 7.31). Installation is performed in reverse order of removal. Front tweeter Using a plastic wedge separate triangular pad the front door, remove the foam insert. Disconnected connector wiring Tweeter, press the latch and remove the speaker of the planting slot (Fig. 7.32).
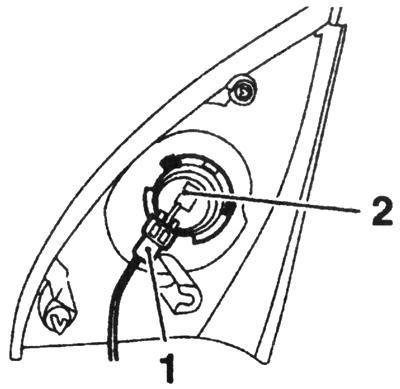
Fig. 7.32. Connector wiring high-frequency loudspeaker:
1 - connector wiring, 2 - speaker Installation is performed in reverse order of removal.
Loudspeaker on dashboard
Using a plastic wedge poddente and separate the cover from the loudspeaker of the instrument panel (Figure 7.33). With the appropriate configuration disconnected the wiring connector and remove the sensor of sunlight on the back side of the cover.
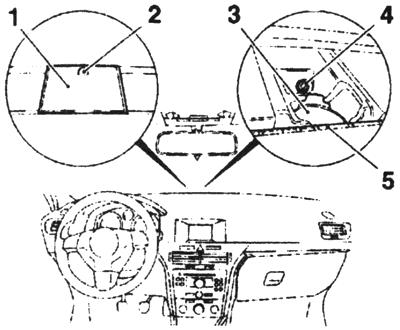
Fig. 7.33. Withdrawal loudspeaker with pa-nonlinear devices: 1 - cover the loudspeaker, 2 - sensor sunlight; 3 - speaker 4 - fixing screw; 5 - Deflection blowing the windscreen
NOTE Not miss cable in hole pa-nonlinear devices.
Separate deflectors blowing the windscreen of the dashboard and remove the fixing screw located beneath them. Remove the mounting screw, remove the speaker and disconnected the wiring harness connector. Installation is performed in reverse order of removal.


