1 minute read
Disassembly outer constant velocity joints


Replace the hinge protective cover and secure it with clamps, screwdriver, lift the inner edge of the cover, to equalize the air pressure under the cover. For mounting clamps to the application of the special tool (see Figure 3.113). Sponge tool set at the corners of clamp time, and in this position tighten the screw sponges.
Mark the position of clips and body joint. Turn the hub joint in the body and pull each ball. Tie balloons in the order of removal, for subsequent re-installation in the original position.
Fig. 3.114. Fetching balls
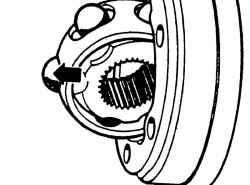
Turn the cage pivot, so that two rectangular slits were combined with the shell, then remove the separator and the clip (Fig. 3.114).
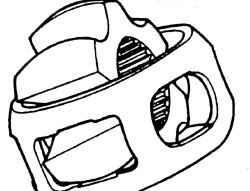
Fig. 3.115. Removing the separator
and clips
Rotate the clip in the cage so that one part of the clips came in one of the rectangular slit in the cage, turn the clip and remove it (Fig. 3.115). Clear all the details of joint and check their status. If there are signs of wear or corrosion, replace the hinge. Apply 45 grams of body joint, then set the separator with an internal clamp into the body joint. Successively insert the balls into the clip, and check that the clip in the cage and the body established in the initial position (as previously made mark). Install a new circlip, then push in the remaining half of the joint lubrication (45 grams).


