3 minute read
Tire repair kit


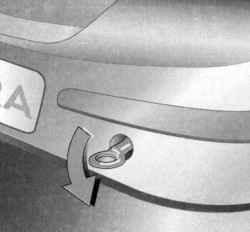
Fig. 1.265. Fixing rear tow loop
Tighten the left towing eyelet and tighten until it stops in a horizontal position (Fig. 1.265). Attach a tow rope or tow bar to the eyelet. Slowly touch the place with. Do not let jerks. Excessive traction may cause damage to cars.
Minor damage to the running surface and the tire sidewalls, such as punctures extraneous objects, can be eliminated with a set of tires for repair. Damage to tires larger than 4 mm, as well as damage to the rim with tire repair kit can not be repaired. Driving with too low pressure in the tire or run flat tire leads to hidden damage that can not be corrected with a set of tires for repair. Park your car and ask for help at service stations.
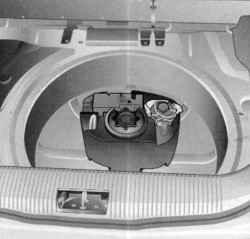
Fig. 1.266. Location tire repair kit
Tire repair kit is located in the luggage compartment, in the recess for the spare wheel (Fig. 1.266).
Using the kit for tire repair
Remove the bag with a tire repair kit from the bay. Carefully remove the parts kit from the bag. Remove the compressor.
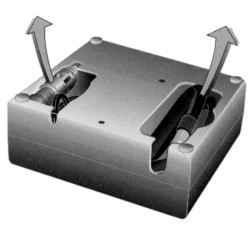
Fig. 1.267. Removing
elektroshnura
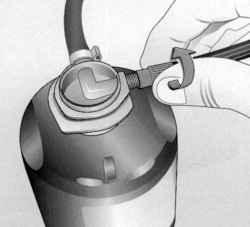
Screw the air hose to the compressor fitting the flask with a sealant (Fig. 1.268). Insert the flask sealed with a holder on the compressor. Install the compressor closer to the wheel to the flask was sealed with the vertical. Unscrew the valve cap of the damaged tire.
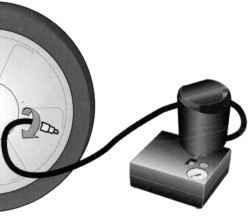
Fig. 1.269. Binding the hose to the
valve to inflate the tires
Screw the hose to inflate a tire valve (Fig. 1.269). Switch the compressor must be in the position. Insert the plug the cord into the outlet of the compressor for supplies or cigarette lighter socket. Turn on the ignition.
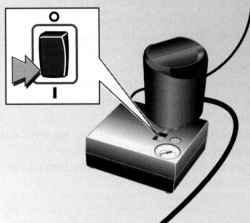
Fig. 1.270. Button on and off the
compressor
Set toggle switch on the compressor in the position I, a tire will be filled with sealant (Fig. 1.270).
NOTE During the devastation of the flask with a sealant (about 30 s) on the gauge will be displayed briefly compressor pressure to 6 bar. After this pressure is lowered.
Sealant will be fully pumped into the tire. After the tire is inflated with air. The target tire pressure should be achieved within 10 min. Turn off the compressor reaches the specified pressure. If the prescribed tire pressure is not reached within 10 minutes, remove tire repair kit. Push the car a distance of about 2 meters (one turn of tires) in the direction of motion or back. Reinstall the tire repair kit, and then continue pumping for another 10 min. If during this time will not achieve the prescribed pressure in the tires, so tire is damaged too much. Park your car and ask for help at service stations.
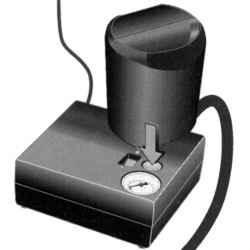
Fig. 1.271. Reset button pressure
NOTE Excessive pressure is reset using the button on the gauge (Fig. 1.271).
NOTICE Do not switch the compressor for longer than 10 minutes.
Remove the tire repair kit. Screw the hose to inflate tires to a free socket flasks with sealant. This prevents leakage of sealant. Remove the tire repair kit in the trunk. Remove speaking sealant with a rag. Fold the warning triangle and remove the trunk. Appended to the kit label the maximum available speed, which allowed to go after the repair tires. Attach the sticker in the driver's field of vision.
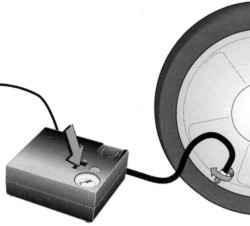
Fig. 1.272. Installation of
compressor
Immediately proceed with a trip to the sealant evenly distributed within the tire. About 10 kilometers (not later than 10 minutes) stop and check the tire pressure. To do this, screw air compressor hose directly to the tire valve (see Fig. 1.272).


