16 minute read
Information display


When time displays make the most of installation button on the device and hold it down for about 2 seconds. When the indicator readings time is flashing, briefly press the button and set the clock. In the same way, set readings minutes.
Customer display on the odometer
InSP - Indication of service intervals. Indication of the race, remaining until the next maintenance. lnSP2 - the failure of the lamp. lnSP3 - discharged battery remote control device. lnSP4 - water in the diesel fuel filter.
NOTE The vehicles with the system of control instead of inscriptions lnSP2 and lnSP3 on Information Display a message is displayed.
ESPoff - electronic stabilization program is disabled. ESP on - electronic stabilization program included.
Information display
Triple information display
Triple information display shows time, outside temperature and the date or an infotainment system, when it is enabled. Time, date and outside temperature can be displayed when ignition is turned off for 15 seconds by briefly pressing one of two buttons below the display. Indication of F on the display indicates a malfunction.
Fig. 1.73. Triple information
display
On-board information display
On-board information display shows time, outside temperature and the date or an infotainment system, when it is enabled. Indication of F on the display indicates a malfunction.
Fig. 1.74. On-board information
display
Graphical or color information display shows time, outside temperature and the date or an infotainment system, when it is included, as well as details of climate control. On the graphical information display information is displayed in monochrome. On color information display, data mapping - color. Some indication on the display in an abbreviated form. Indication of F on the display indicates a malfunction.
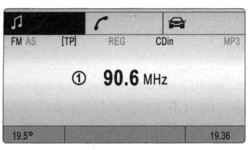
Fig. 1.75. Graphical information
display
Outside temperature
Thermometer responds to lowering the air temperature immediately, but to improve - with time delay.
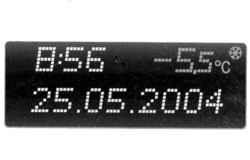
Fig. 1.76. Outside temperature
To prevent icing of the road when the outside temperature is lowered to 3 ° C in the treble or the onboard information display icon . With increasing temperature the icon disappears.
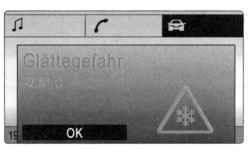
Fig. 1.77. Indications graphic
display
On cars with a graphic or a color information display for the prevention of icing of the road there is a warning message. At temperatures below -5 ° C message does not appear (Figure 1.77).
Set time and date on a triple information display
Turn off the infotainment system, click or under the display as follows:
- Press for 2 seconds, blinks, the date; - Set the testimony of the day;
- Flashing indication of the month; - Set the testimony of the month;
- Flashes indication of the year;
- Flashes the clock; - Set the clock;
- Flashes reading minutes; - Set the reading minutes;
- Hours run.
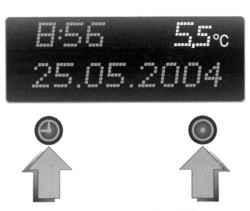
Fig. 1.78. Buttons for setting the
date and time
Correction time
Some radio stations broadcast RDS wrong time. If in connection with these watches often display the wrong time, you should disable the automatic synchronization clock and set the time manually.
Automatic installation is displayed on the display icon .
Plugging and unplugging of the automatic time synchronization
Turn off the infotainment system, click or under the display as follows:
- Hold the approximately 2 s, the time display switches to install;
- Click twice and flashes the testimony of the year;
- Press and hold for about 3 SDS until the display starts flashing and appears «RDS TIME»; - Press, the indication on the display - RDS TIME 0 - disabled; - Press, the indication on the display - RDSTIME 1 - enabled;
- Then tripled.
Choice functions on-board information display
With on-board information display manages the functions and settings of some equipment.
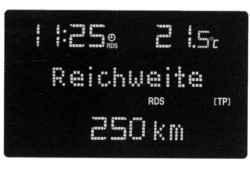
Fig. 1.79. Choice functions on-
board information display
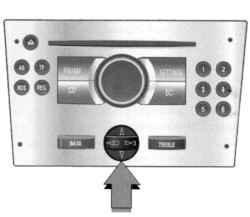
Fig. 1.80. The four-switch
These functions are selected using the keys or the four-switch on the infotainment system (Figure 1.80), and the left control wheel (Figure 1.81) on the steering wheel. In this case the corresponding menu items are displayed alternately. When a warning message display control system does not show any other information. Warning messages should be acknowledged by pressing the right or the left button of the cross-switch or the left switch on the steering wheel. If you receive several warning messages to confirm receipt of their rotation.
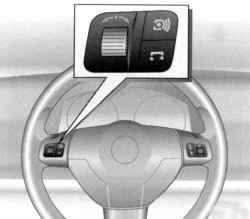
Fig. 1.81. The control wheel on the
steering wheel
Setting up the on-board information display
Press the «Settings» to the infotainment system, with the displayed menu item «Audio» or «System». Press the lower key the four-switch to go to the menu item «System». After pressing the right button will display the four-switch is the first function menu «System».
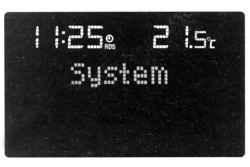
Fig. 1.82. Menu item «System»
Functions are displayed in the following order (some abbreviated): - Time synchronization; - The time clock setting; - Time setting minutes; - Date, setting the day; - Date, setting month; - The date of installation; - The logic of ignition; - Choice of language; - Choice of units.
Correction time
Some radio station RDS reported wrong time. If in connection with these watches often display the wrong time, you should disable the automatic synchronization of time and set the clock manually.
Automatic installation is displayed on the display icon . To correct the system with RDS choose to «Settings» point of time synchronization. Set the desired values.
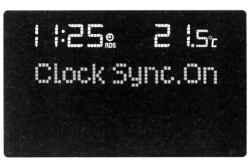
Fig. 1.83. Menu item «Clock Sync.
On »
Set time and date
In the menu «Settings» select the items to set the time and date. Set the desired values. Set after the menu is written in the memory.
Language
Language of text messages, some functions can be changed. This menu «Settings» Locate the language and set a suitable value.
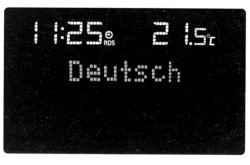
Fig. 1.84. Display language
selection
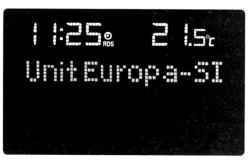
Selecting units
Units can be chosen. This menu «Settings» locate the item selection system of units and set a suitable value. Fig. 1.85. Display selection unit of
measurement
On-board computer gives data on the parameters of motion, which is continuously collected and processed them in electronic form. To display the on-board computer operating data press the Sun on an infotainment system or the left switch on the steering wheel. After selecting the audio function of the bottom line of the selected function onboard computer continues to display. Functions are displayed in the following order (some abbreviated): - Instantaneous fuel consumption; - Average fuel consumption; - The absolute fuel consumption; - Average velocity; - Mileage; - Cruising; - Timer.
Cruising
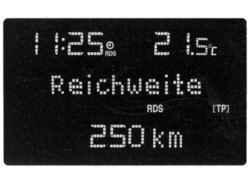
Cruising range is calculated based on the current balance of fuel in the tank and instantaneous fuel consumption. The display shows the average value. Shortly after refueling the car indication of the range is automatically updated. If the contents of the tank missing less than 50 km, displayed «Range».
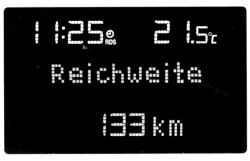
Fig. 1.86. Indication of the range
Instantaneous fuel
Display varies depending on the speed: - Indication of l / h - below 13 km / h; - Indication in l/100 km - above 13 km / h.
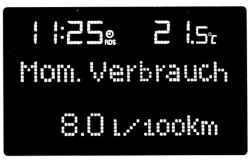
Fig. 1.87. Display of instantaneous
fuel consumption
Average fuel
Shows the average fuel economy display. Calculation at any time to start anew.
Absolute fuel
Displays indication of spent fuel. Measurement at any time to start anew.
Average speed
Displays the average speed indication. Calculation at any time to start anew. It stops along the way, when ignition is turned off is not taken into account.
Timer
Manage timer by using the four-switch. By pressing the right button is included - start / stop. By pressing the left key longer than 2 from discharging.
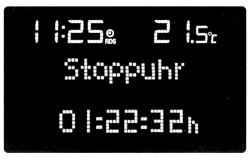
Fig. 1.88. Indication timer
Resetting data on-board computer (reinstall)
The following data on-board computer can be cleared (re-launch measurements or calculations): - Average fuel consumption; - The absolute fuel consumption; - Average velocity; - Run. Please select the required data on-board computer. Zeroing is performed by pressing the left switch on the steering wheel or the right / left button of the cross-switch: - Pressing than 2 to lead to zero current value; - Keystroke longer than 4 to lead to zero for all values.
Interruption of power
After the interruption of power or when there is insufficient battery voltage values recorded in the memory of the onboard computer, erased.
The choice of functions or color graphic information displays
With the help of a graphic or a color information display functions are executed and implemented by setting a certain onboard equipment. These features are highlighted on the display and run through the four-switch, multi-function knobs for information and entertainment system or the left control wheel on the handlebar.
Selection using the four-switch
Select items using the menu buttons or the four-switch on the infotainment system. When a warning message display control system does not show any other information. Warning messages should be confirmed by pressing the right or the left button of the cross-switch. If you receive several warning messages to confirm receipt of their rotation.
Fig. 1.89. The four-switch
Turn handles carries the designation function menu or command to choose the appropriate function. Pressing the knob selects the highlighted item and confirmation of the team. To exit the menu, you should turn the multifunction button to the left or right on the item «Return» or «Main», and select it. When a warning message display control system does not show any other information. Warning messages should confirm with multifunction buttons. If you receive several warning messages to confirm receipt of their rotation.
Manage with the left control wheel on the steering wheel
Wheel up making the transition to the previous menu item. Rotating wheel down makes a transition to the next menu item. Pressing the wheel selects a highlighted item and confirmation of the team. During the display of warning message display control system does not show any other information. Warning messages should be confirmed by pressing the left switch. If you receive several warning messages to confirm receipt of their rotation.
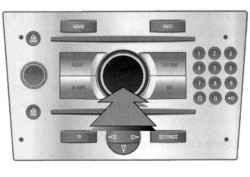
Fig. 1.90. Multifunction pen
For each area there is a function of home ( «Main»), you can select it in the top of the display (except for the infotainment system CD 30) (Fig. 1.90).
Fig. 1.91. The control wheel on the
steering wheel
System Configuration
Setting is carried out in the menu «Settings». Press the Home key «Main» (not available in all systems) for information and entertainment system (the main menu). Press the «Settings» to the infotainment system.
NOTE If infotainment CD 30 can not select the menu.
You'll see a menu «Settings».
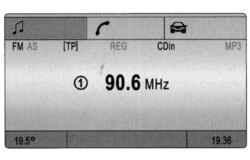
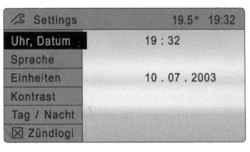
Fig. 1.93. Menu «Settings»
Set time and date
In the menu «Settings» choose the option «Time, Date». A menu «Time, Date». Select the desired menu items and set the correct values.
Correction time
On systems with a GPS receiver with the GPS satellite signal reception time and date are set automatically. If the displayed time does not correspond to local, perform a manual installation or automatic adjustment by signal reception time of RDS. Some radio station RDS reported wrong time. If in connection with this clock shows the wrong time, turn off the automatic synchronization of time and set the clock manually. To correct the time with the help of RDS choose to «Time, Date» menu «Synchron. clock automatical ».
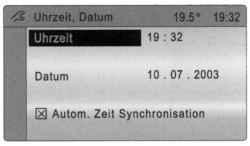
Ris.1.94. Menu «Time, Date»
Field in front of «Synchron. clock automatical »denotes a cross (see Figure 1.94).
Language selection
Language of text messages, some functions may be chosen. This menu «Settings» choose the option «Language», and then displays a list of available languages.
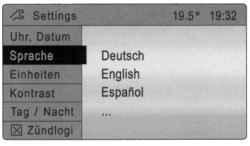
Fig. 1.95. Language selection
Select the desired language
The selected notes symbol before the menu item. On systems with voice informant after changing the display language are asked whether you want to change the language and voice informer.
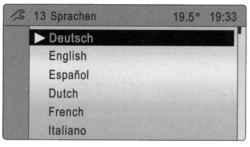
Fig. 1.96. Language
Selecting units
To select the units in the menu «Settings» choose the option «Units». In this case the system displays a list of available units. Select the desired system of units. The selected notes symbol before the menu item.
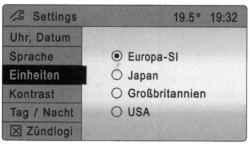
Fig. 1.97. Menu selection unit
Adjust the contrast (graphic information display)
To select this setting in the menu «Settings» choose the option «Contrast». In this case, the menu is displayed «Contrast». Adjust the contrast and confirm your choice.
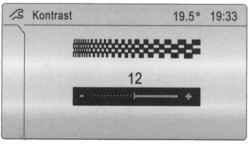
Fig. 1.98. Menu, select Contrast
Setting the display mode
The image on the display can be customized depending on the illumination, ie choose monochrome or, respectively, colored text on a light background, either white or colored text on a dark background. This menu «Settings» choose the option «Day / Night», then you will see the possible values. «Automatic»: automatic adjustment depending on the lighting conditions in the car. «Always day design»: black or colored text on a light background. «Always night design»: a white or colored text on a dark background. The selected notes symbol before the menu item.
Onboard computers provide performance data that is continuously collected and analyzed electronically. Home on-board computer ( «Main») informs you of the range and instantaneous fuel consumption. To display other operational data on-board computer, press the Sun on an infotainment system, select the display menu on-board computer, or press the left switch on the steering wheel.
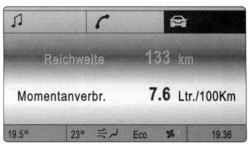
Fig. 1.99. Menu of the range
Cruising
Cruising range is calculated based on the current balance of fuel in the tank and instantaneous fuel consumption. The display shows the average value. Shortly after refueling the car indication of the range is automatically updated. If the contents of the tank missing less than 50 km, displayed «Range». Confirm the warning message.
Instantaneous fuel
Display varies depending on the speed: - Indication of l / h - below 13 km / h; - Indication in l/100 km - above 13 km / h.
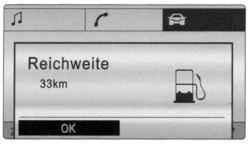
Fig. 1.100. Display of
instantaneous fuel consumption
Mileage
Indicator of the traversed path is given in kilometers. Measurement at any time to start anew.
Average speed
We give a calculation of average speed. Measurement at any time to start anew. It stopover when ignition is turned off is not taken into account.
Absolute fuel
We give a indication of the amount of fuel consumed. Measurement at any time to start anew.
Average fuel
We give a calculation of the average fuel consumption. Measurement at any time to start anew.
Resetting data on-board computer (reinstall)
The following testimony onboard computer can be reset (re-run measurement): - Mileage; - Average velocity; - The absolute fuel consumption;
- The average fuel consumption. Select the menu item on-board computer or Sun 1 Sun 2. Testimony of two on-board computers can be disposed of separately, so the opportunity to assess data for varying lengths of time. Please select the relevant data on-board computer. The value of the selected function is reset and is re-calculated. To reset all data on-board computer, select the menu item "AN values». After the reset the display instead of selected readings on-board computer displays the string . After some time, will re-defined values.
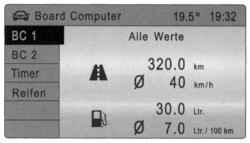
Fig. 1.101. Menu sborsa data
Interruption of power
After the interruption of power or when there is insufficient battery voltage values recorded in the memory of the onboard computer, erased.
Timer
To select this option in the menu «Board Computer» choose the option «Timer», then displays the appropriate menu. To start the timer, select the menu item «Start». To reset the timer, select the menu item «Reset».
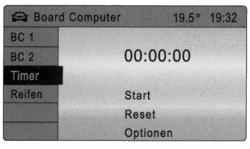
Fig. 1.102. Set the timer menu
Menu «Options»
Menu «Options» is used to set parameters for the timer and has a submenu, listed below.
«Driving Time excl. Stops ».
In this case, measured by the time that the vehicle is in motion. Time stops are not counted.
«Driving Time incl. Stops ».
In this case, measured by the time that the vehicle is in motion. In addition, take into account stops with the key in the ignition.
«Travel Time».
In this case, the measured time between the start and stop the timer manually using the menu items, respectively - «Start» and the «Reset».
Indication of the current tire pressure
To select this option in the menu «Board Computer» choose the option «Tyres», then will show the current value of pressure in each tire.
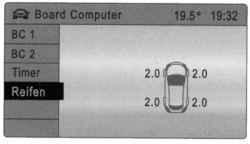
Fig. 1.103. Menu display current
tire pressure
This system monitors the fluid levels, tire pressure, battery remote control device, the device anti-theft alarm, as well as the serviceability of the most important lamp outdoor lighting, including wiring and fuses. When operating the vehicle with a trailer is controlled by the lighting of the trailer. Warning messages are displayed. If there are several warning messages are displayed alternately. Some warning messages are displayed in abbreviated form. Warning messages appear, for example, graphical information display and a color information display. On-board information display some messages displayed in abbreviated form. Confirm the warning message. Unconfirmed warning messages may be after some time reappear on the display.
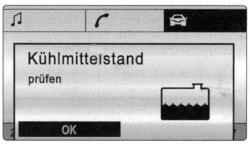
Fig. 1.104. Example display menu
control system
Warning messages
«Remote Control Battery check».
Informs that the battery voltage remote control device is too low.
«Brakelight switch check».
Informs that during braking the brake lights do not burn.
«Safeguard check».
Informs a fault an alarm. In case of failure of the lighting system corresponding source text indicates a failure, for example:
«Brakelight check right».
The vehicles with the system, tire pressure monitoring at too low a tire pressure message will appear indicating the tire that you want to check, for example: «Tyre pressure check rear rightturn» (value in bar). At the first opportunity, check tire pressures with calibrated pressure gauge. The vehicles with the system of monitoring tire pressure with a significant pressure drop, a message will appear indicating the tire, for example: «Attention! Rear left tyre pressure loss »(value in bar). Immediately stop and check the tires.
«Washer Fluid Level check».
The level of drilling fluid cleaning device of glasses is too low.
NOTE At too low a level of liquid washing device rear window and headlights switched off.
«Coolant level check».
Too little fluid in the engine cooling system.


