200CLC,230CLC and 270CLC Excavator OPERATOR’SMANUAL
200CLC,230CLCand270CLC Excavator
OMT187348IssueK3(ENGLISH)
CALIFORNIA
Proposition65Warning
Dieselengineexhaustandsomeofitsconstituentsare knowntotheStateofCaliforniatocausecancer,birth defects,andotherreproductiveharm.
Ifthisproductcontainsagasolineengine:
WARNING
Theengineexhaustfromthisproductcontainschemicals knowntotheStateofCaliforniatocausecancer,birth defectsorotherreproductiveharm.
TheStateofCaliforniarequirestheabovetwowarnings.
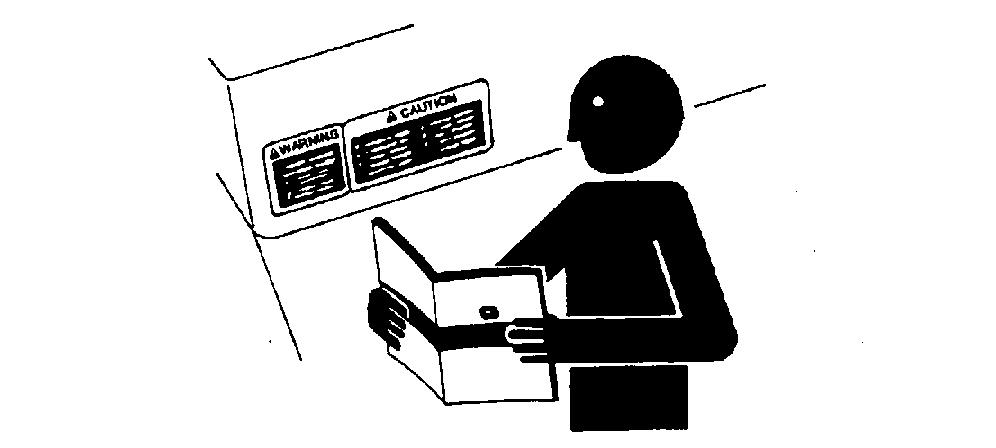
DOWNLOAD OPERATORS MANUAL Introduction Introduction READTHISMANUALcarefullytolearnhowtooperate andserviceyourmachinecorrectly.Failuretodoso couldresultinpersonalinjuryorequipmentdamage. Thismanualandsafetysignsonyourmachinemay alsobeavailableinotherlanguages.(Seeyour authorizeddealertoorder.)
THISMANUALSHOULDBECONSIDEREDa permanentpartofyourmachineandshouldremain withthemachinewhenyousellit.
MEASUREMENTSinthismanualaregiveninboth metricandcustomaryU.S.unitequivalents.Useonly correctreplacementpartsandfasteners.Metricand inchfastenersmayrequireaspecificmetricorinch wrench.
RIGHT-HANDANDLEFT-HANDsidesaredetermined byfacinginthedirectionofforwardtravel.
WRITEPRODUCTIDENTIFICATIONNUMBERS (P.I.N.)intheMachineNumbersSection.Accurately
recordallthenumberstohelpintracingthemachine shoulditbestolen.Yourdealeralsoneedsthese numberswhenyouorderparts.Filetheidentification numbersinasecureplaceoffthemachine.
WARRANTYisprovidedaspartofJohnDeere’s supportprogramforcustomerswhooperateand maintaintheirequipmentasdescribedinthismanual. Thewarrantyisexplainedonthewarrantycertificate whichyoushouldhavereceivedfromyourdealer.
ThiswarrantyprovidesyoutheassurancethatJohn Deerewillbackitsproductswheredefectsappear withinthewarrantyperiod.Insomecircumstances, JohnDeerealsoprovidesfieldimprovements,often withoutchargetothecustomer,eveniftheproductis outofwarranty.Shouldtheequipmentbeabused,or modifiedtochangeitsperformancebeyondtheoriginal factoryspecifications,thewarrantywillbecomevoid andfieldimprovementsmaybedenied.Settingfuel deliveryabovespecificationsorotherwise overpoweringmachineswillresultinsuchaction.
TX03679,0001789–19–24OCT01–1/1
EmissionsControlWarrantyStatement EMISSIONS CONTROL WARRANTY STATEMENT FOR NEW JOHN DEERE CONSTRUCTION EQUIPMENT (U.S. AND CANADA) To determine if the engine in your machine qualifies for the additional warranties set forth below, look for the "Engine Information" label located on your engine. If you reside in the United States and the engine label states: "Engine conforms to US EPA regulations on heavy duty non road diesel cycle engines," you are entitled to the "U.S. Emission Control Warranty Statement." If you reside in California, and the engine label states: "Engine conforms to California regulations on heavy duty non road diesel cycle engines," you are entitled to the "California Emission Control Warranty Statement."
U.S. EPA EMISSIONS CONTROL WARRANTY STATEMENT
Emissions control-related parts and components are warranted by John Deere for five years or 3000 hours of operation, whichever occurs first. John Deere further warrants that the engine covered by this warranty was designed, built, and equipped so as to conform at the time of sale with all U.S. emissions standards at the time of manufacture, and that it is free of defects in materials and workmanship which would cause it not to meet these standards within the period of five years or 3000 hours of operations, whichever occurs first.
Warranties stated on this certificate refer only to emissions-related parts and components of your engine. The complete machine warranty, less emisions-related parts and components, is provided separately as "John Deere "Secure Warranty" For New Construction Products."
CALIFORNIA EMISSION CONTROL WARRANTY STATEMENT
YOUR WARRANTY RIGHTS AND OBLIGATIONS The California Air Resources Board (CARB) and John Deere are pleased to explain the emission control system on your new engine. In California, new heavy-duty engines must be designed, built and equipped to meet the State's stringent anti-smog standards. John Deere must warrant the emission control system on your engine for the periods of time listed below provided there has been no abuse, neglect, or improper maintenance of your machine.
Your emissions control system includes:
Fuel Metering System
Fuel Injection System
Air Induction System
Intake Manifold
Turbocharger System
Charge Air Cooling System
Miscellaneous Items used in Above Systems
Where a warrantable condition exists, i.e. failure due to defect in John Deere-supplied material and/or workmanship, John Deere will repair your heavy-duty engine at no cost to you including diagnosis, parts and labor
JOHN DEERE'S WARRANTY COVERAGE:
The emission control system of your heavy-duty engine is warranted for five years or 3000 hours of operation, whichever occurs first. If any emission-related part on your engine is defective, the part will be repaired or replaced by John Deere. Warranties stated on this certificate refer only to emissions-related parts and components of your engine. The complete machine warranty, less emissions-related parts and components, is provided separately as the "John Deere "Secure Warranty" For New Construction Products."
OWNER'S WARRANTY RESPONSIBILITIES:
As the heavy-duty engine owner, you are responsible for the performance of the required maintenance as outlined in the
Operator's Manual. John Deere recommends that you retain all receipts covering maintenance on your heavy-duty engine, but John Deere cannot deny warranty solely for the lack of receipts or for your failure to ensure the performance of all scheduled maintenance.
However, as the heavy-duty engine owner, you should be aware that John Deere may deny you warranty coverage if your heavyduty engine or a part has failed due to abuse, neglect, improper maintenance or unapproved modifications.
Your engine is designed to operate on diesel fuel only. Use of any other fuel may result in your engine no longer operating in compliance with California's emissions requirements.
You are responsible for initiating the warranty process. The CARB suggests that you present your machine to the nearest authorized John Deere dealer as soon as a problem is suspected. The warranty repairs should be completed by the service dealer as expeditiously as possible.
If you have any questions regarding your warranty rights and responsibilities, you should contact John Deere at 1-319-2925400, or the State of California Air Resources Board, Mobile Source Operation Division, PO Box 8001, El Monte, CA 91731-2900
The warranty period begins on the date the machine is delivered to an ultimate purchaser, or when otherwise put into service.
John Deere warrants to the ultimate purchaser and each subsequent purchaser that the engine is designed, built and equipped so as to conform with all applicable regulations adopted by the Air Resources Board, and that it is free from defects in materials and workmanship which would cause the failure of a warranted part.
Any warranted part which is scheduled for replacement as required maintenance by the operator's manual is warranted by John Deere for the period of time prior to the first scheduled replacement point for that part. If the part fails prior to the first scheduled replacement point, the part shall be repaired or replaced under warranty. Any such part repaired or replaced under warranty is warranted for the remainder of the period prior to the first scheduled replacement point for that part.
Any warranted part which is not scheduled for replacement as required maintenance, or which is scheduled only for regular inspection to the effect of repairing or replacing as necessary, is warranted for the warranty period.
Repair or replacement of a warranted part will be performed at no charge to you by an authorized John Deere dealer. You will not be charged for diagnostic labor which leads to the determination that a warranted part is defective, if the diagnostic work is performed by a John Deere dealer.
John Deere is liable for damages to other engine components caused by failure under warranty of any warranted part.
John Deere is NOT liable for travel or mileage on extended emissions warranty service calls.
Any replacement part may be used in the performance of any maintenance or repairs, and such use will not reduce the warranty obligations of John Deere. However, the use of add-on or modified parts are grounds for disallowing a warranty claim.
TechnicalInformationFeedbackForm Weneedyourhelptocontinuallyimproveourtechnical publications.PleasecopythispageandFAXormailyour comments,ideasandimprovements.
SENDTO: JohnDeereDubuqueWorks P.O.Box538
Attn:PublicationsSupervisor,Dept.303 Dubuque,IA52004-0538
FAXNUMBER: 563-589-5800
Ideas,Comments(PleaseStatePageNumber): OVERALL,howwouldyouratethequalityofthispublication?(Checkone)
CompanyName:
TechnicianName:
Address:
Phone:
FaxNo.:
DealerAcct.No.:
THANKYOU!
Allinformation,illustrationsandspecificationsinthismanualarebasedon thelatestinformationavailableatthetimeofpublication.Therightis reservedtomakechangesatanytimewithoutnotice.
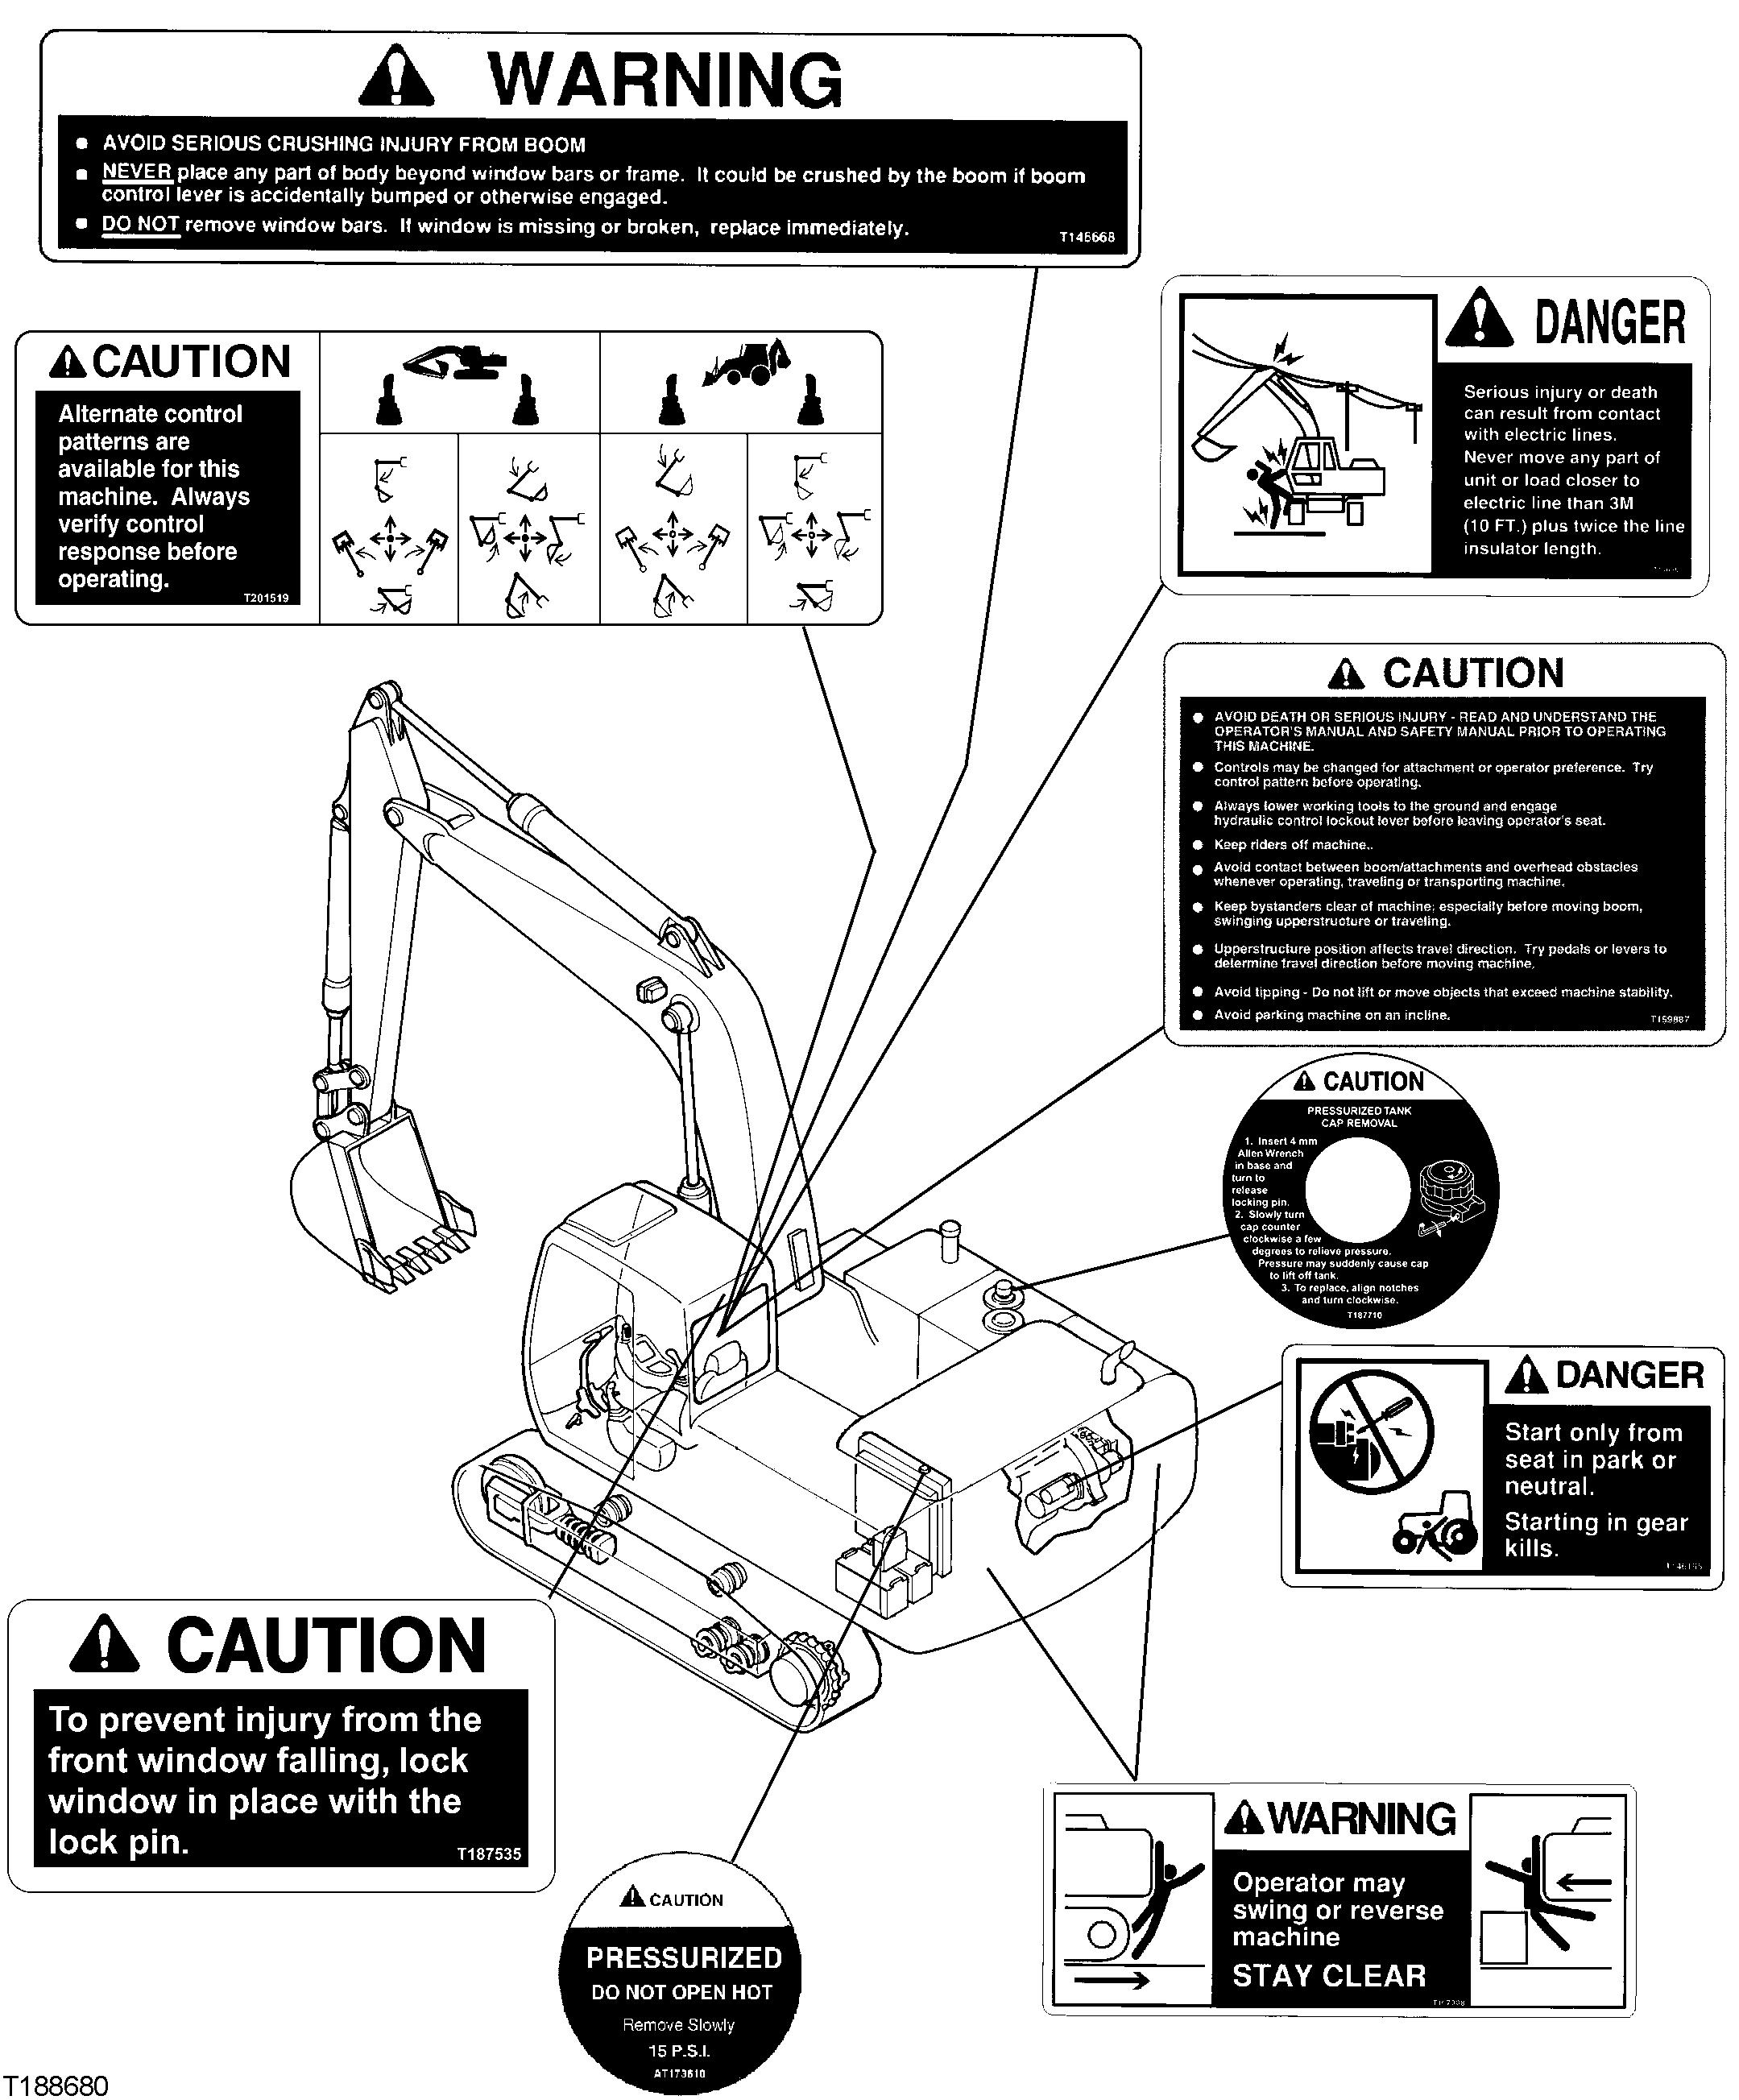
Safety—SafetyFeatures SafetyFeatures Pleaserememberthattheoperatoristhekeyto preventingaccidents.
1.Seatbelt. Aseatbeltisprovidedfortheoperator.
2.WindowGuarding. Windowbarspreventcontact withamovingboom.
3.RearviewMirrors. Rearviewmirrorsofferthe operatoraviewofactivitybehindhim.
4.SecondaryExit. Thefrontwindowprovidesalarge exitpathifthecabdoorisblockedinanemergency situation.Asecondaryexittoolisalsoprovided.
5.PilotControlShut-off. Alevernearthecabexit remindstheoperatortodeactivatehydraulicfunctions beforeleavingthemachine.
6.Steps. Wide,slip-resistantstepsmakeentryand exiteasier.Stepsalsoprovideaplacetocleanshoes.
7.Handholds. Large,convenientlyplacedhandholds makeiteasytoenterorexittheoperator’sstationor servicearea.
8.SwingBrake. Swingbrakeengagesautomatically whentheswingisnotoperated.Helpssecure upperstructurewhentransportingthemachine.
9.BypassStartProtection. Shieldingoverthestarter helpspreventdangerousbypassstarting.
10.TravelAlarm. Alertsbystandersofmachine movementwhenpropelling.
11.EngineFanGuard. Asecondaryfanguardinside theenginecompartmenthelpspreventcontactwiththe enginefanblades.
Safety—GeneralPrecautions RecognizeSafetyInformation Thisisthesafetyalertsymbol.Whenyouseethis symbolonyourmachineorinthismanual,bealert forthepotentialofpersonalinjury.
Followtheprecautionsandsafeoperatingpractices highlightedbythissymbol.
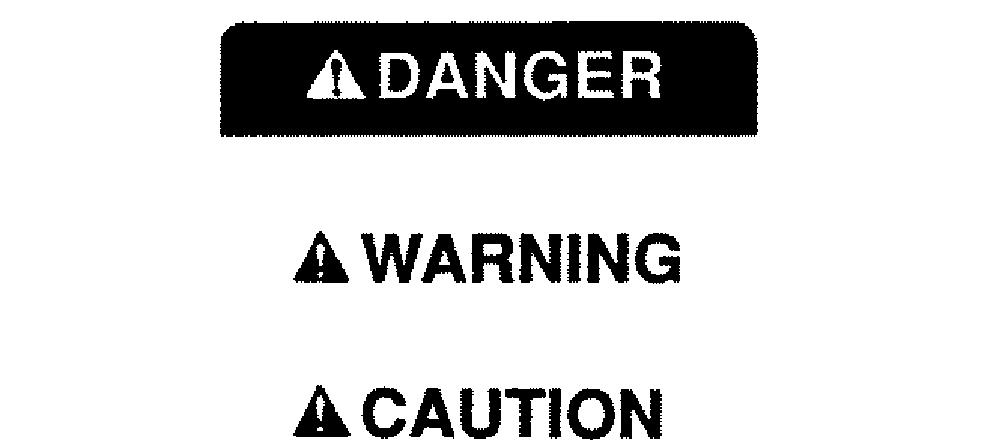
Asignalword—DANGER,WARNING,orCAUTION—is usedwiththesafetyalertsymbol.DANGERidentifiesthe mostserioushazards.
Onyourmachine,DANGERsignsareredincolor, WARNINGsignsareorange,andCAUTIONsignsare yellow.DANGERandWARNINGsignsarelocatednear specifichazards.GeneralprecautionsareonCAUTION labels.
TX03679,00016CC–19–21AUG00–1/1
FollowSafetyInstructions Readthesafetymessagesinthismanualandonthe machine.Followthesewarningsandinstructionscarefully. Reviewthemfrequently.
Besurealloperatorsofthismachineunderstandevery safetymessage.Replaceoperator’smanualandsafety labelsimmediatelyifmissingordamaged.
OperateOnlyIfQualified Donotoperatethismachineunlessyouhavereadthe operator’smanualcarefullyandyouhavebeen qualifiedbysupervisedtrainingandinstruction.
Familiarizeyourselfwiththejobsiteandyour surroundingsbeforeoperating.Tryallcontrolsand
TX03679,00016F9–19–28AUG00–1/1
machinefunctionswiththemachineinanopenarea beforestartingtowork.
Knowandobserveallsafetyrulesthatmayapplyto yourworksituationandyourworksite.
TX03679,00016FA–19–30OCT00–1/1
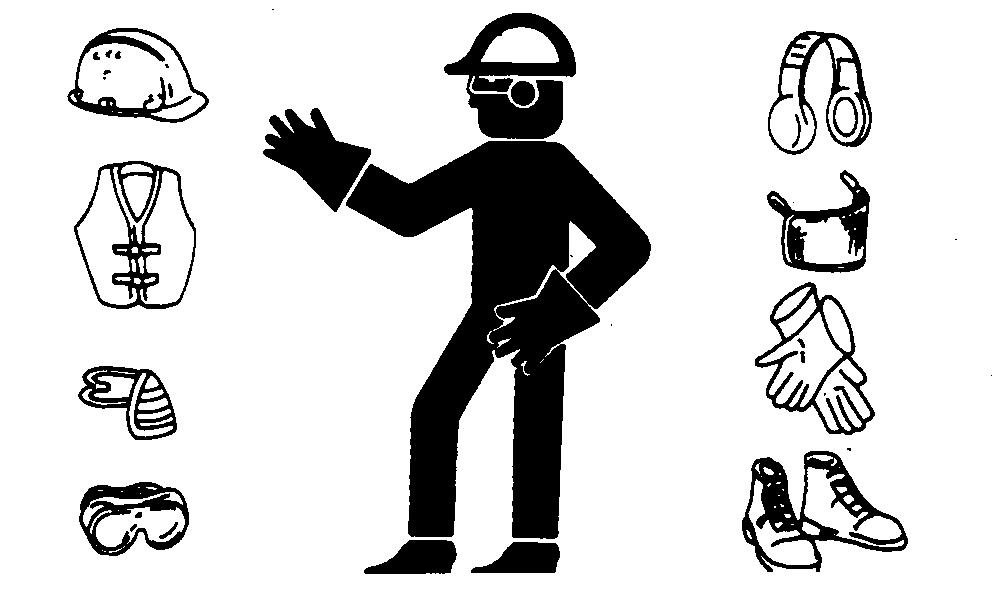
WearProtectiveEquipment Guardagainstinjuryfromflyingpiecesofmetalordebris; weargogglesorsafetyglasses.
Wearclosefittingclothingandsafetyequipment appropriatetothejob.
Prolongedexposuretoloudnoisecancauseimpairment orlossofhearing.Wearsuitablehearingprotectionsuch asearmuffsorearplugstoprotectagainstobjectionableor uncomfortableloudnoises.
TX03679,00016D0–19–30OCT00–1/1
AvoidUnauthorizedMachineModifications Modificationsofthismachine,oradditionof unapprovedproductsorattachments,mayaffect machinestabilityorreliability,andmaycreateahazard fortheoperatororothersnearthemachine.
Alwayscontactanauthorizeddealerbeforemaking machinemodificationsthatchangetheintendeduse, weightorbalanceofthemachine,orthatalter machinecontrols,performanceorreliability.
TX03679,00016B7–19–30OCT00–1/1
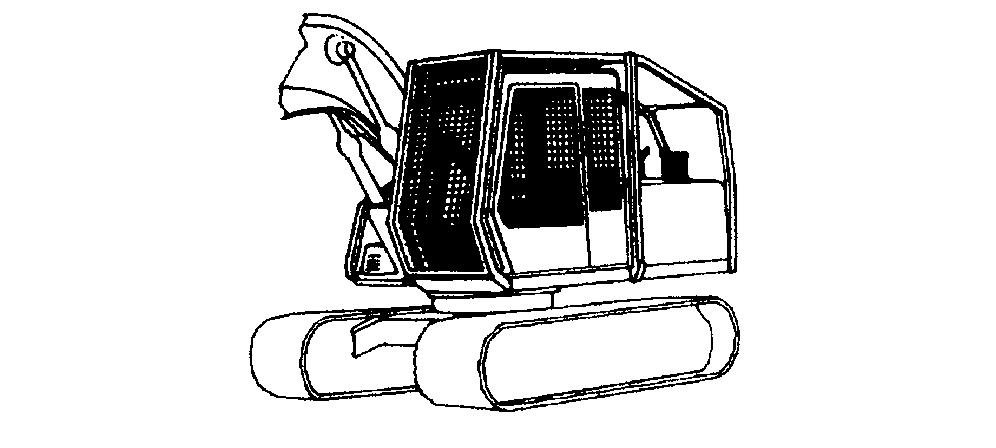
AddCabGuardingForSpecialUses Specialworksituationsormachineattachmentsmay createanenvironmentwithfallingorflyingobjects. Workingnearanoverheadbank,doingdemolitionwork, usingahydraulichammer,orworkinginawoodedarea, forexample,mayrequireaddedguardingtoprotectthe operator.
FOPS(fallingobjectprotectivestructures)andspecial screensorguardingshouldbeinstalledwhenfallingor flyingobjectsmayenterordamagethemachine.Contact yourauthorizeddealerforinformationondevicesintended toprovideprotectioninspecialworksituations.
TX03679,00016CE–19–30OCT00–1/1
InspectMachine Inspectmachinecarefullyeachdaybywalkingaroundit beforestarting.
StayClearOfMovingParts Entanglementsinmovingpartscancauseseriousinjury.
Stopenginebeforeexamining,adjustingormaintaining anypartofmachinewithmovingparts.
Keepallguardsandshieldsingoodconditionand properlyinstalled.Fixdamageandreplacewornorbroken partsimmediately.Payspecialattentiontohydraulic hosesandelectricalwiring. TX03679,00016D2–19–30OCT00–1/1
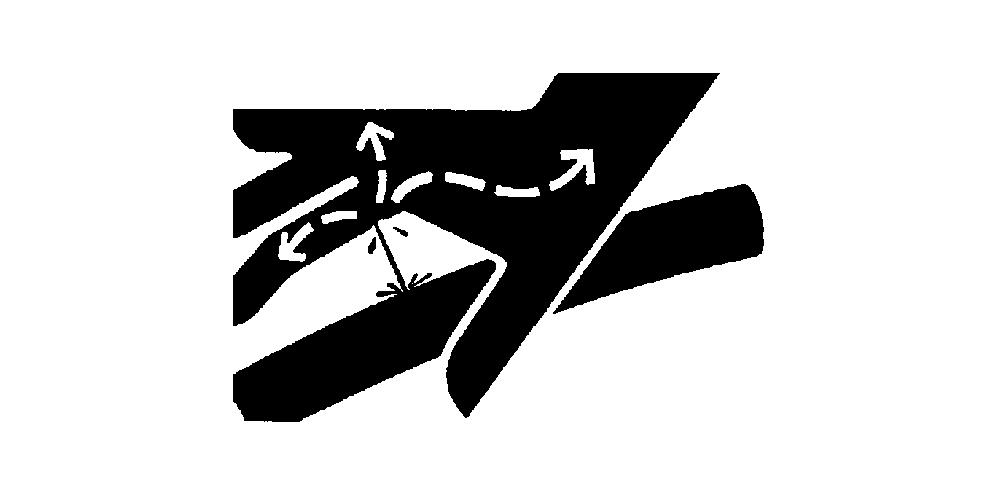
AvoidHigh-PressureFluids Thismachineusesahigh-pressurehydraulicsystem. Escapingfluidunderpressurecanpenetratetheskin causingseriousinjury.
Neversearchforleakswithyourhands. Protecthands. Useapieceofcardboardtofindlocationofescapingfluid. Stopengineandrelievepressurebeforedisconnecting linesorworkingonhydraulicsystem.
Ifhydraulicfluidpenetratesyourskin,seeadoctor immediately.Injectedfluidmustberemoved surgicallywithinhoursorgangrenemayresult. ContactaknowledgeablemedicalsourceortheDeere& CompanyMedicalDepartmentinMoline,Illinois,U.S.A.
Keepguardsandshieldsinplace.Replaceanyguardor shieldthathasbeenremovedforaccessassoonas serviceorrepairiscomplete. TX03679,00016D3–19–30OCT00–1/1
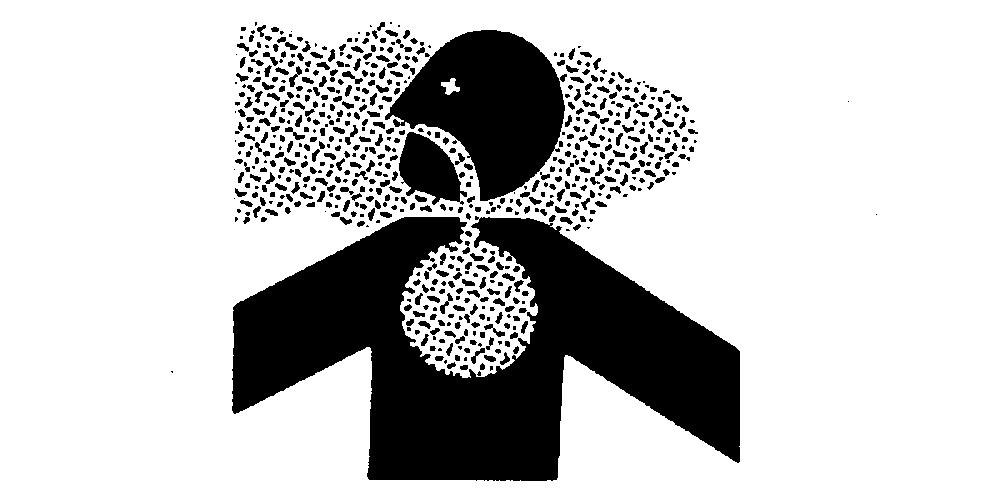
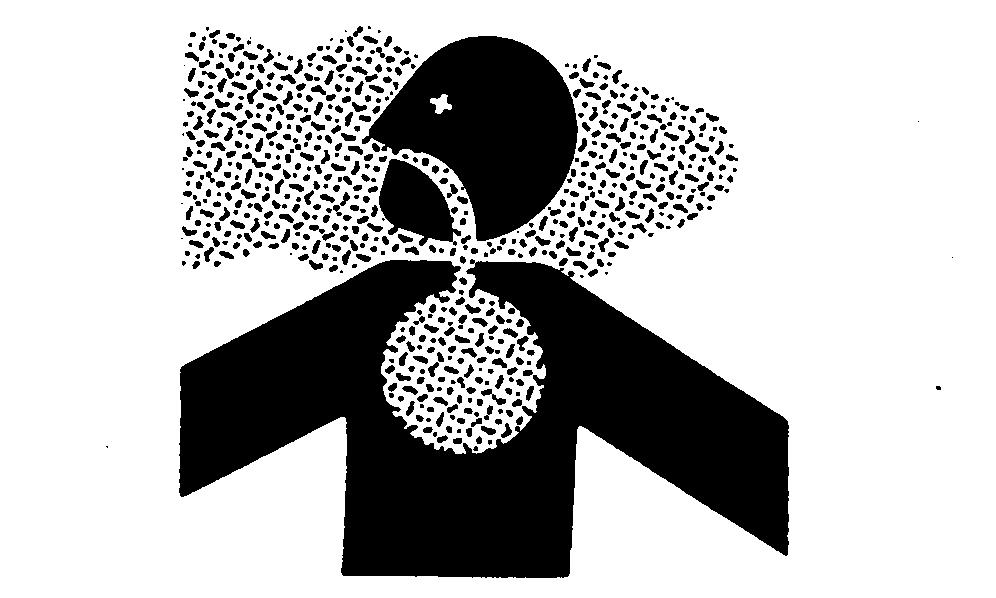
BewareOfExhaustFumes Preventasphyxiation.Engineexhaustfumescancause sicknessordeath.
Ifyoumustoperateinabuilding,provideadequate ventilation.Useanexhaustpipeextensiontoremovethe exhaustfumesoropendoorsandwindowstobring outsideairintothearea.
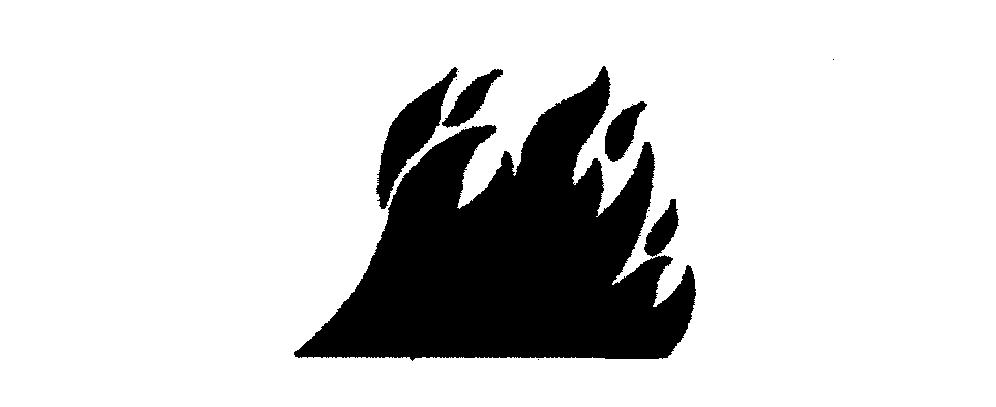
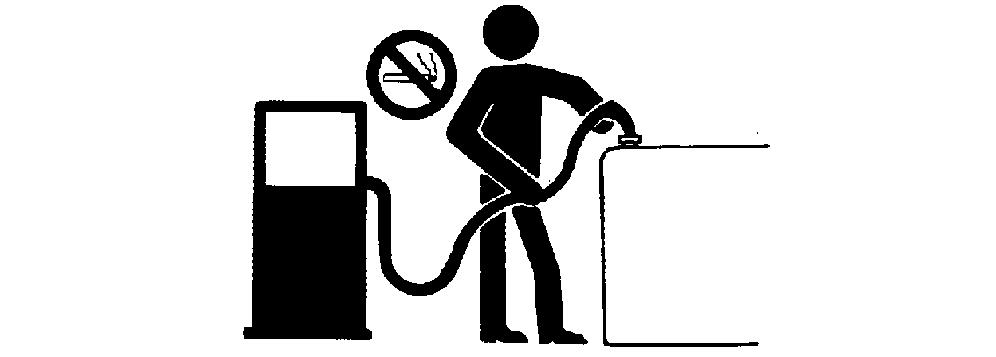
PreventFires HandleFuelSafely: Storeflammablefluidsawayfrom firehazards.Neverrefuelmachinewhilesmokingorwhen nearsparksorflame.
CleanMachineRegularly: Keeptrash,debris,grease andoilfromaccumulatinginenginecompartment,around fuellines,hydrauliclinesandelectricalwiring.Neverstore oilyragsorflammablematerialsinsideamachine compartment.
MaintainHosesandWiring: Replacehydraulichoses immediatelyiftheybegintoleak,andcleanupanyoil spills.Examineelectricalwiringandconnectorsfrequently fordamage.
KeepAFireExtinguisherAvailable: Alwayskeepa multi-purposefireextinguisheronornearthemachine. Knowhowtouseextinguisherproperly.
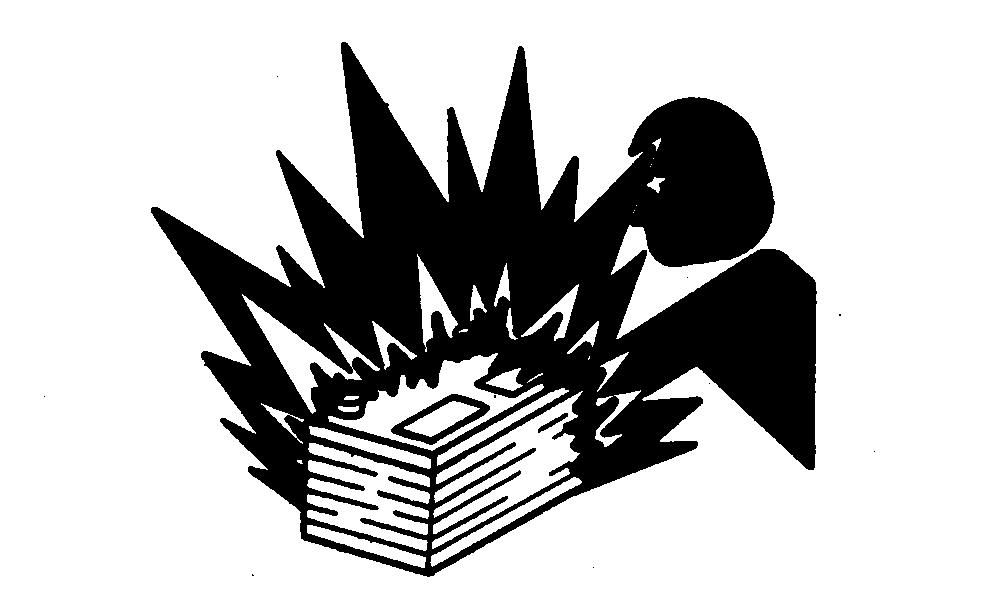
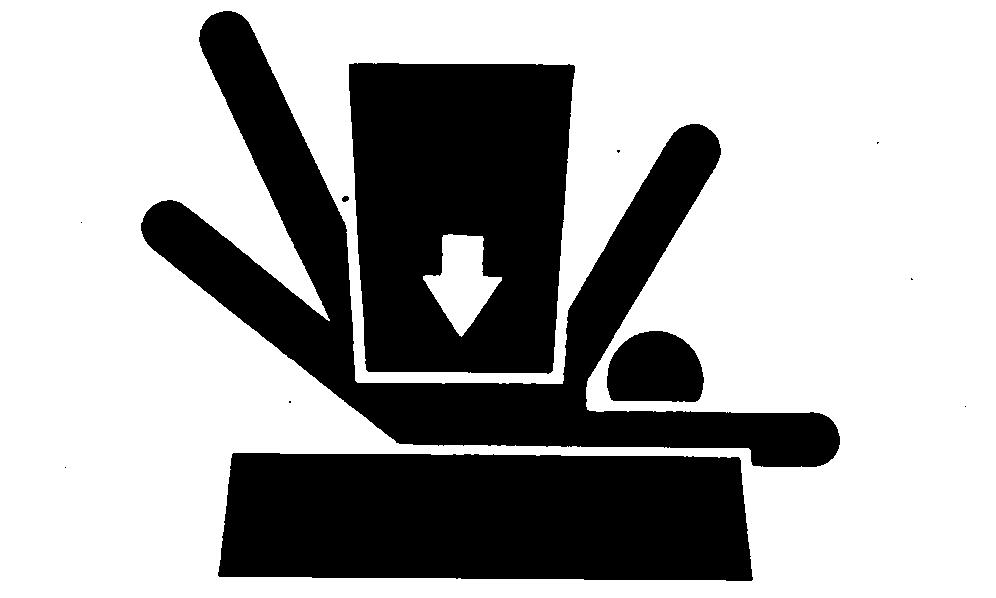
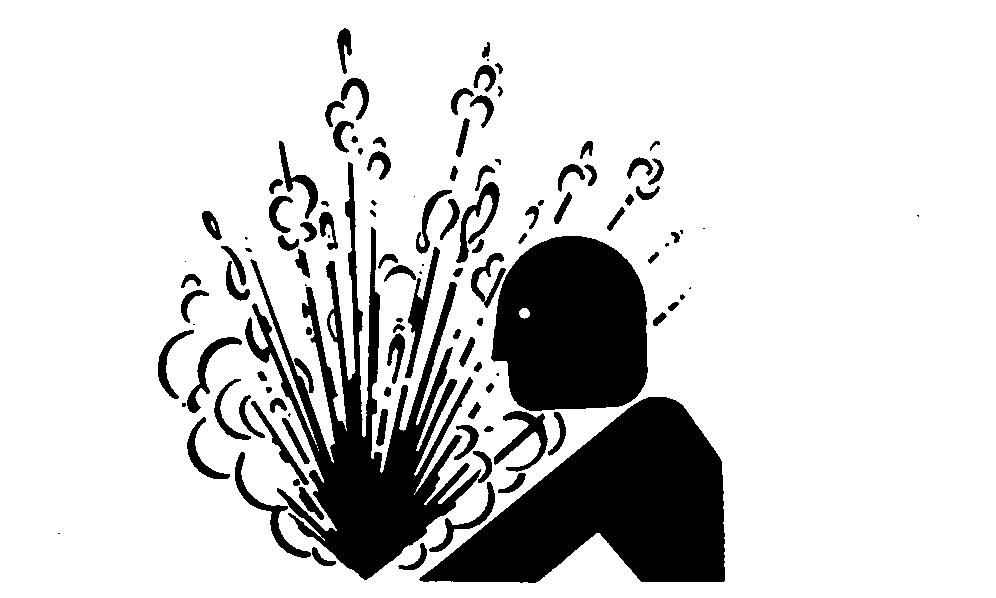
PreventBatteryExplosions Batterygascanexplode.Keepsparks,lightedmatches, andopenflameawayfromthetopofbattery.
Nevercheckbatterychargebyplacingametalobject acrosstheposts.Useavoltmeterorhydrometer.
Donotchargeafrozenbattery;itmayexplode.Warm batteryto16°C(60°F).
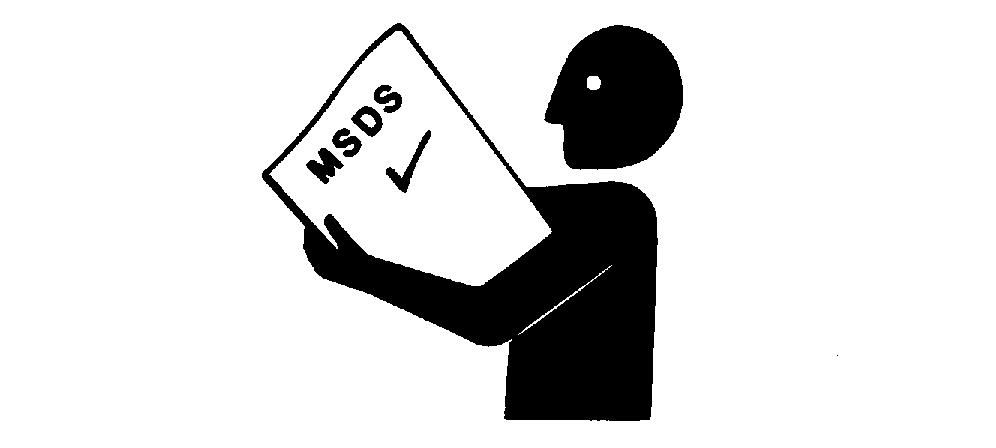
HandleChemicalProductsSafely Exposuretohazardouschemicalscancauseserious injury.Undercertainconditions,lubricants,coolants, paintsandadhesivesusedwiththismachinemaybe hazardous.
Ifuncertainaboutsafehandlingoruseofthesechemical products,contactyourauthorizeddealerforaMaterial SafetyDataSheet(MSDS)orgotointernetwebsite http://www.jdmsds.com.TheMSDSdescribesphysical andhealthhazards,safeuseprocedures,andemergency responsetechniquesforchemicalsubstances.Follow MSDSrecommendationstohandlechemicalproducts safely.
DisposeOfWasteProperly Improperdisposalofwastecanthreatentheenvironment. Fuel,oils,coolants,filtersandbatteriesusedwiththis machinemaybeharmfulifnotdisposedofproperly.
Neverpourwasteontotheground,downadrain,orinto anywatersource.
Airconditioningrefrigerantscandamagetheatmosphere. Governmentregulationsmayrequireusingacertified servicecentertorecoverandrecycleusedrefrigerants.
Ifuncertainaboutthesafedisposalofwaste,contactyour localenvironmentalorrecyclingcenteroryourauthorized dealerformoreinformation.
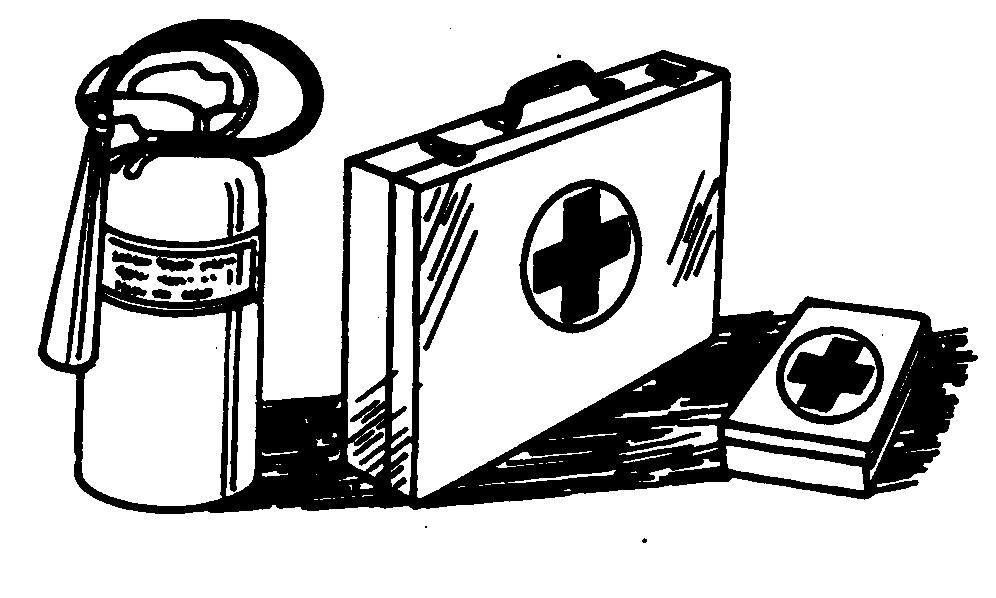
PrepareForEmergencies Bepreparedifanemergencyoccursorafirestarts.
Keepafirstaidkitandfireextinguisherhandy.
Keepemergencynumbersfordoctors,ambulanceservice, hospital,andfiredepartmentnearyourtelephone.
TX03679,00016D7–19–05AUG02–1/1
TX03679,0001733–19–14SEP00–1/1
Safety—OperatingPrecautions UseStepsAndHandholdsCorrectly Preventfallsbyfacingthemachinewhenyougetonand off.Maintain3-pointcontactwithstepsandhandrails. Neverusemachinecontrolsashandholds.
StartOnlyFromOperator’sSeat Avoidunexpectedmachinemovement.Startengineonly whilesittinginoperator’sseat.Ensureallcontrolsand workingtoolsareinproperpositionforaparkedmachine.
Neverattempttostartenginefromtheground.Donot attempttostartenginebyshortingacrossthestarter solenoidterminals.
Useextracarewhenmud,snow,ormoisturepresent slipperyconditions.Keepstepscleanandfreeofgrease oroil.Neverjumpwhenexitingmachine.Nevermountor dismountamovingmachine. TX03679,0001799–19–02MAY01–1/1
UseAndMaintainSeatBelt Useseatbeltwhenoperatingmachine.Rememberto fastenseatbeltwhenloadingandunloadingfromtrucks andduringotheruses.
Examineseatbeltfrequently.Besurewebbingisnotcut ortorn.Replaceseatbeltimmediatelyifanypartis damagedordoesnotfunctionproperly.
Thecompleteseatbeltassemblyshouldbereplaced everythreeyears,regardlessofappearance.
TX03679,00016F2–19–14SEP00–1/1
TX03679,00016DD–19–17OCT00–1/1
PreventUnintendedMachineMovement Becarefulnottoaccidentallyactuatecontrolleverswhen co-workersarepresent.Pullpilotcontrolshut-offleverto lockedpositionduringworkinterruptions.Pullpilotcontrol shut-offlevertolockedpositionandstopenginebefore allowinganyonetoapproachmachine.
Alwayslowerworkequipmenttothegroundandpullpilot controlshut-offlevertolockedpositionbeforestandingup orleavingtheoperator’sseat.Stopenginebeforeexiting.
TX03679,0001746–19–30OCT00–1/1
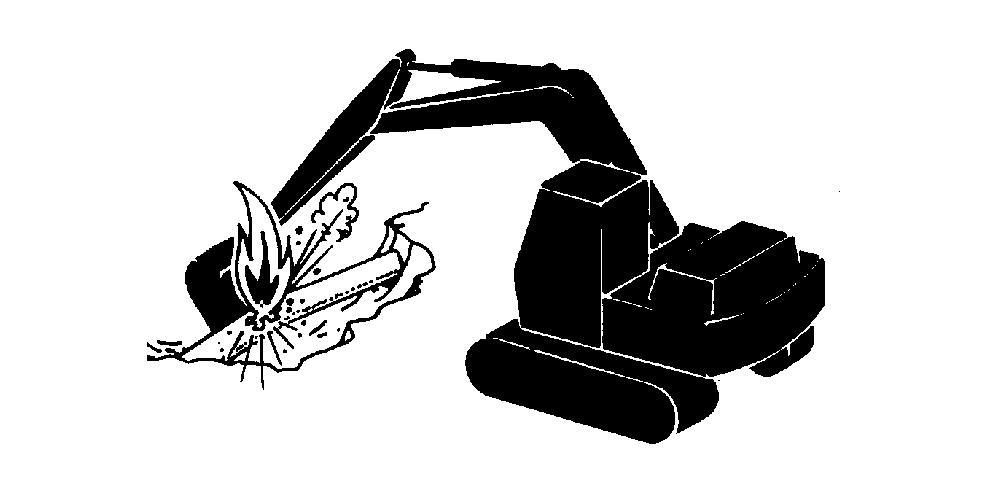
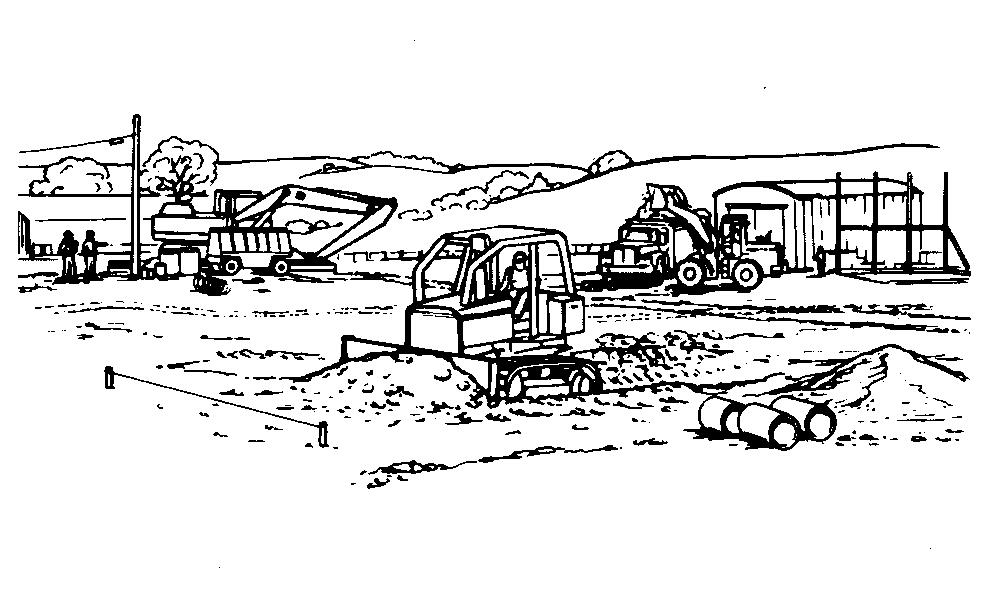
AvoidWorkSiteHazards Avoidcontactwithgaslines,buriedcablesandwater lines.Callutilitylinelocationservicestoidentifyall undergroundutilitiesbeforeyoudig.
Prepareworksiteproperly.Avoidoperatingnear structuresorobjectsthatcouldfallontothemachine. Clearawaydebristhatcouldmoveunexpectedlyifrun over.
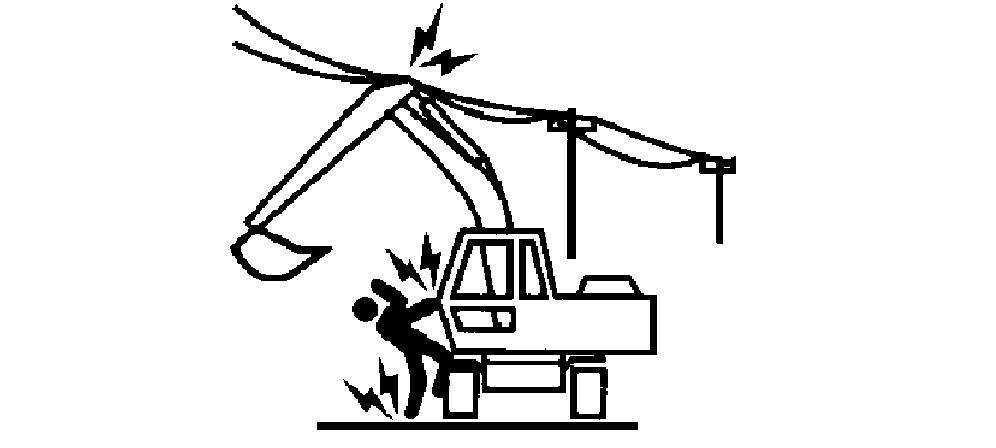
Avoidboomorarmcontactwithoverheadobstacles oroverheadelectricallines. Nevermoveanypartof machineorloadcloserthan3m(10ft)plustwicetheline insulatorlengthtooverheadwires.
Keepbystandersclearatalltimes. Usebarricadesora signalpersontokeepvehiclesandpedestriansaway.Use asignalpersonifmovingmachineincongestedareasor wherevisibilityisrestricted.Alwayskeepsignalpersonin view.Coordinatehandsignalsbeforestartingmachine.
Operateonlyonsolidfooting withstrengthsufficientto supportmachine.Whenworkingclosetoanexcavation, positionpropelmotorsawayfromthehole.
TX03679,0001748–19–30OCT00–1/1
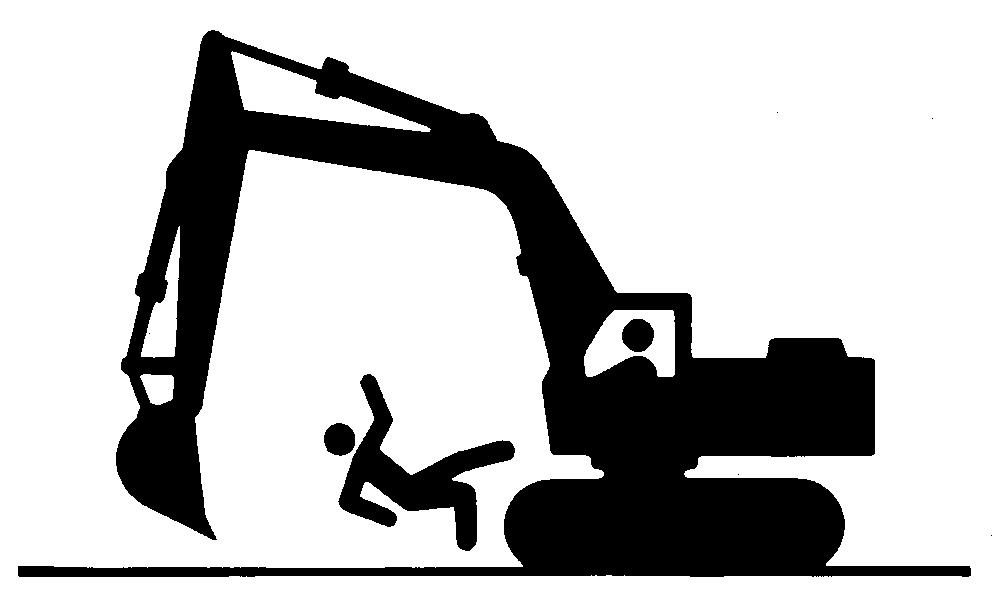
KeepRidersOffMachine Onlyallowoperatoronmachine.
Ridersaresubjecttoinjury.Theymayfallfrommachine, becaughtbetweenmachineparts,orbestruckbyforeign objects.
Ridersmayobstructoperator’svieworimpairhisabilityto operatemachinesafely.
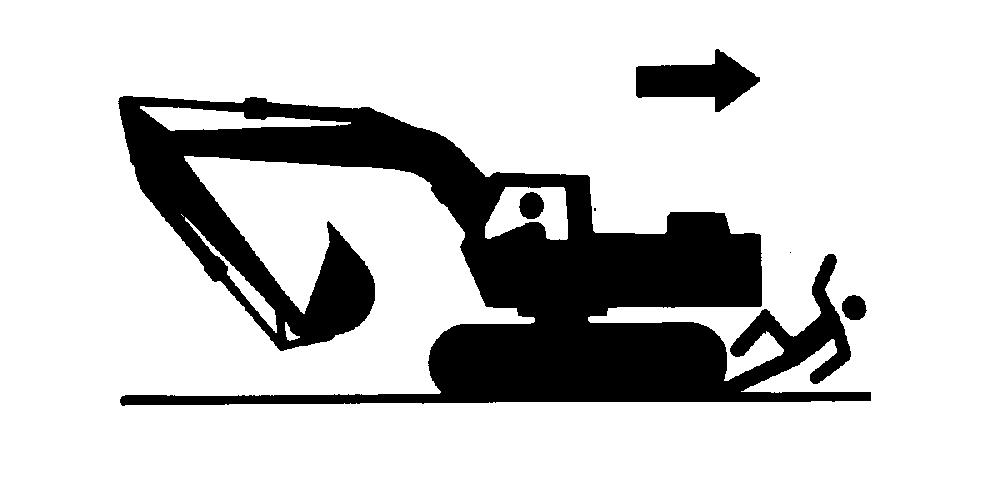
AvoidBackoverAccidents Beforemovingmachine,besureallpersonsareclear ofbothtravelandswingpaths. Turnaroundandlook directlyforbestvisibility.Usemirrorstoassistinchecking allaroundmachine.Keepwindowsandmirrorsclean, adjusted,andingoodrepair.
Becertaintravelalarmisworkingproperly.
Useasignalpersonwhenbackingifviewis obstructedorwheninclosequarters. Keepsignal personinviewatalltimes.Useprearrangedhandsignals tocommunicate.
TX03679,0001726–19–14SEP00–1/1
TX03679,00016F3–19–14SEP00–1/1
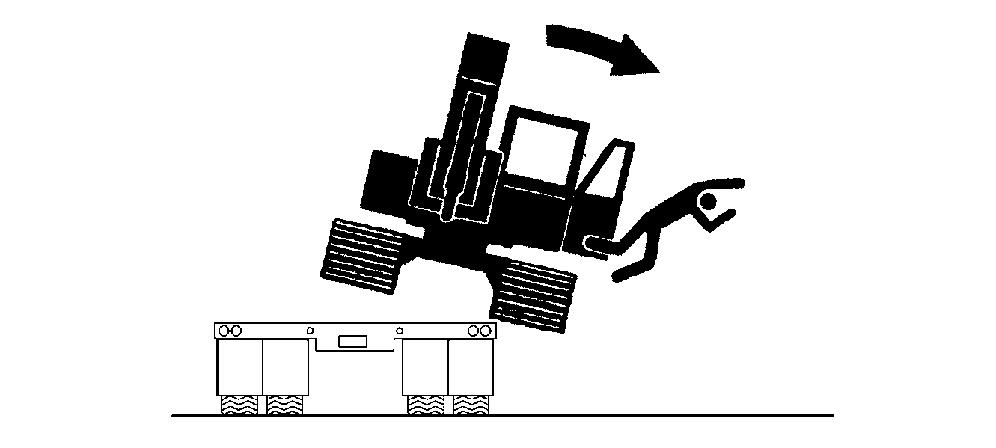
AvoidMachineTipOver Useseatbeltatalltimes.
Donotjumpifthemachinetips. Youwillbeunlikelyto jumpclearandthemachinemaycrushyou.
Loadandunloadfromtrucksortrailerscarefully. Be suretruckiswideenoughandonafirmlevelsurface.Use loadingrampsandattachthemproperlytotruckbed. Avoidtruckswithsteelbedsbecausetracksslipmore easilyonsteel.
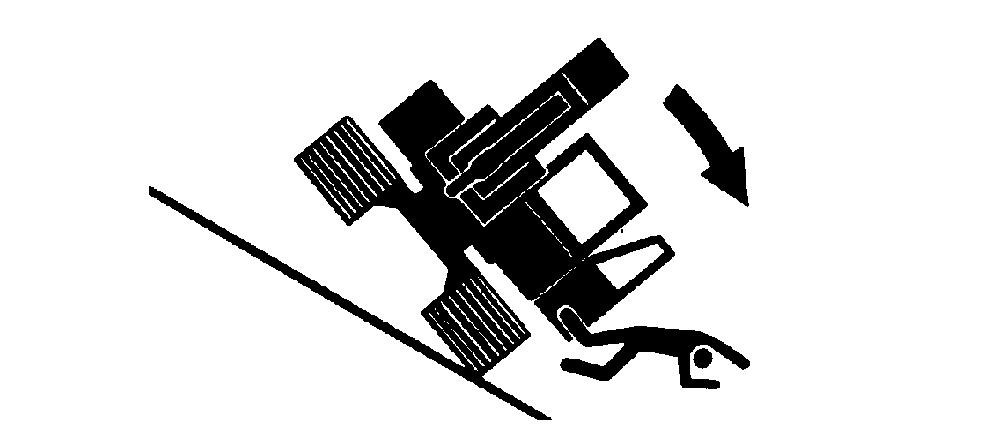
Becarefulonslopes. Useextracareonsoft,rockyor frozenground.Machinemayslipsidewaysinthese conditions.Whentravelingupordownslopes,keepthe bucketonuphillsideandjustabovegroundlevel.
Becarefulwithheavyloads. Usingoversizebucketsor liftingheavyobjectsreducesmachinestability.Extending aheavyloadorswingingitoversideofundercarriage maycausemachinetotip.
Ensuresolidfooting. Useextracarewhenoperating nearbanksorexcavationsthatmaycave-inandcause machinetotiporfall.
TX03679,00016DF–19–25SEP00–1/1
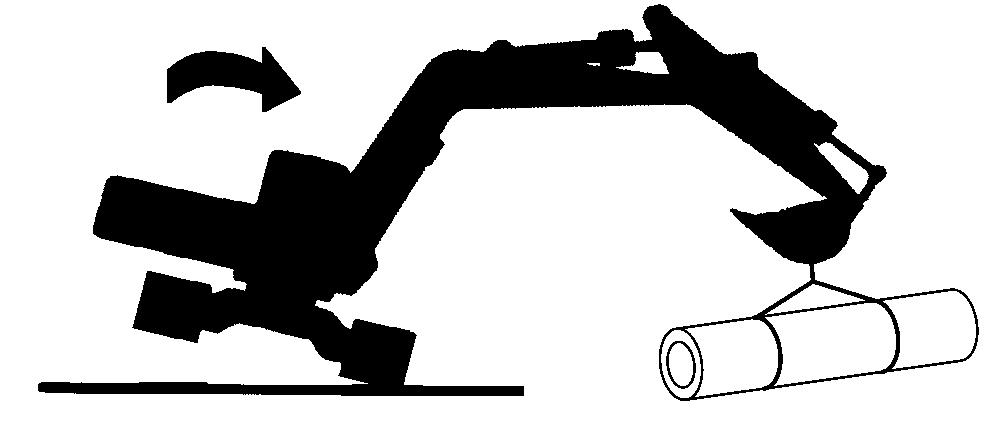
UseSpecialCareWhenLiftingObjects Neverusethismachinetoliftpeople.
Neverliftaloadaboveanotherperson.Keepbystanders clearofallareaswherealoadmightfallifitbreaksfree. Donotleavetheseatwhenthereisaraisedload.
Donotexceedliftcapacitylimitspostedonmachineand inthismanual.Extendingheavyloadstoofarorswinging overundercarriagesidemaycausemachinetotipover.
Useproperriggingtoattachandstabilizeloads.Besure slingsorchainshaveadequatecapacityandareingood condition.Usetetherlinestoguideloadsandprearranged handsignalstocommunicatewithco-workers.
TX03679,00016E1–19–02OCT00–1/1
AddAndOperateAttachmentsSafely Alwaysverifycompatibilityofattachmentsbycontacting yourauthorizeddealer.Addingunapprovedattachments mayaffectmachinestabilityorreliability,andmaycreate ahazardforothersnearthemachine.
Ensurethataqualifiedpersonisinvolvedinattachment installation.Addguardstomachineifoperatorprotection isrequiredorrecommended.Verifythatallconnections aresecureandattachmentrespondsproperlytocontrols.
Carefullyreadattachmentmanualandfollowall instructionsandwarnings.Inanareafreeofbystanders andobstructions,carefullyoperateattachmenttolearnits characteristicsandrangeofmotion.
TX03679,00016F0–19–14SEP00–1/1
Safety—MaintenancePrecautions ParkAndPrepareForServiceSafely Warnothersofservicework. Alwaysparkandprepare yourmachineforserviceorrepairproperly.
• Parkmachineonalevelsurfaceandlowerequipment andattachmentstotheground.
• Placepilotcontrolshut-offleverin“lock”position.Stop engineandremovekey.
• Attacha“DoNotOperate”taginanobviousplacein theoperator’sstation.
Securelysupportmachineorattachmentbeforeworking underit.
• Donotsupportmachinewithboom,arm,orother hydraulicallyactuatedattachments.
• Donotsupportmachinewithcinderblocksorwooden piecesthatmaycrumbleorcrush.
• Donotsupportmachinewithasinglejackorother devicesthatmayslipoutofplace.
Understandserviceproceduresbeforebeginningrepairs. Keepserviceareacleananddry.Usetwopeople whenevertheenginemustberunningforservicework.
TX03679,00016E9–19–17OCT00–1/1
ServiceCoolingSystemSafely Explosivereleaseoffluidsfrompressurizedcooling systemcancauseseriousburns.
Shutoffengine.Onlyremovefillercapwhencoolenough totouchwithbarehands.Slowlyloosencaptofirststop torelievepressurebeforeremovingcompletely.
DX,RCAP–19–04JUN90–1/1
RemovePaintBeforeWeldingorHeating Avoidpotentiallytoxicfumesanddust.
Hazardousfumescanbegeneratedwhenpaintisheated bywelding,soldering,orusingatorch.
Removepaintbeforeheating:
• Removepaintaminimumof101mm(4in.)fromarea tobeaffectedbyheating.Ifpaintcannotberemoved, wearanapprovedrespiratorbeforeheatingorwelding.
• Ifyousandorgrindpaint,avoidbreathingthedust. Wearanapprovedrespirator.
• Ifyouusesolventorpaintstripper,removestripperwith soapandwaterbeforewelding.Removesolventor paintstrippercontainersandotherflammablematerial fromarea.Allowfumestodisperseatleast15minutes beforeweldingorheating.
Donotuseachlorinatedsolventinareaswherewelding willtakeplace.
Doallworkinanareathatiswellventilatedtocarrytoxic fumesanddustaway.
Disposeofpaintandsolventproperly.
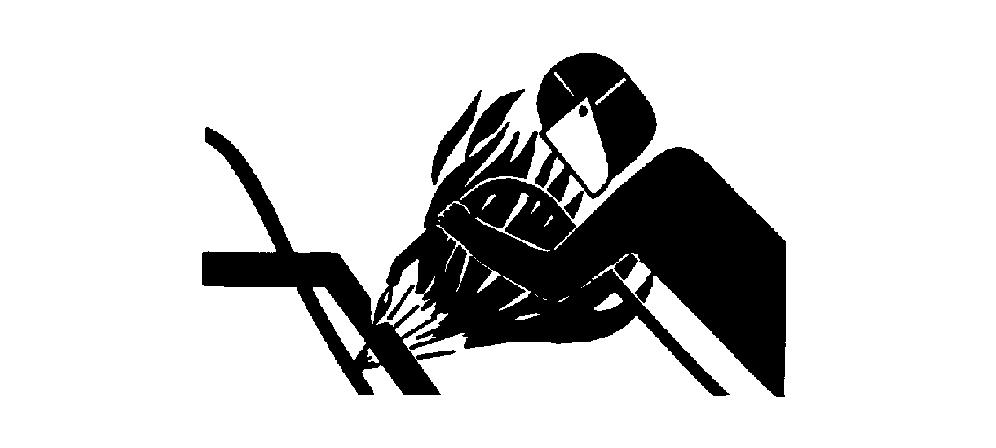
MakeWeldingRepairsSafely NOTE:Disableelectricalpowerbeforewelding.Turnoff mainbatteryswitchordisconnectpositivebattery cable.Separateharnessconnectorstoengineand vehiclemicroprocessors.
Avoidweldingorheatingnearpressurizedfluidlines. Flammablespraymayresultandcausesevereburnsif pressurizedlinesfailasaresultofheating.Donotletheat gobeyondworkareatonearbypressurizedlines.
Removepaintproperly.Donotinhalepaintdustorfumes. Useaqualifiedweldingtechnicianforstructuralrepairs. Makesurethereisgoodventilation.Weareyeprotection andprotectiveequipmentwhenwelding.
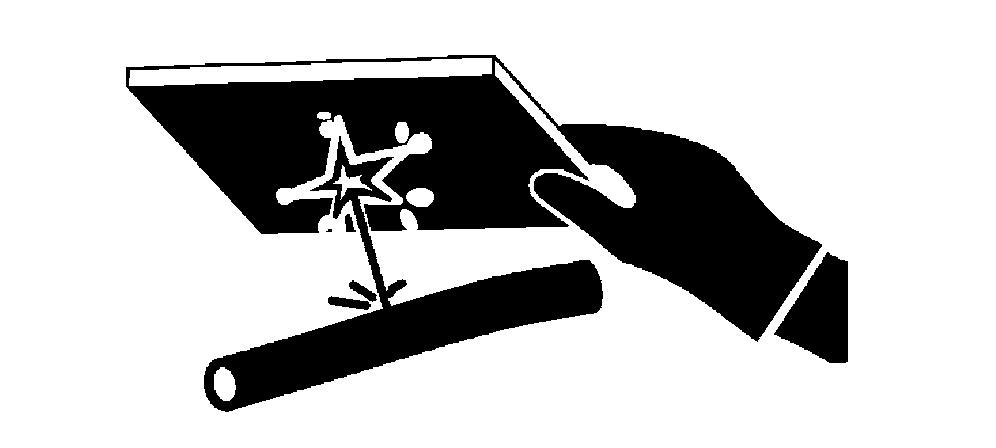
DriveMetalPinsSafely Alwayswearprotectivegogglesorsafetyglassesand otherprotectiveequipmentbeforestrikinghardenedparts. Hammeringhardenedmetalpartssuchaspinsand bucketteethmaydislodgechipsathighvelocity.
Useasofthammerorabrassbarbetweenhammerand objecttopreventchipping.
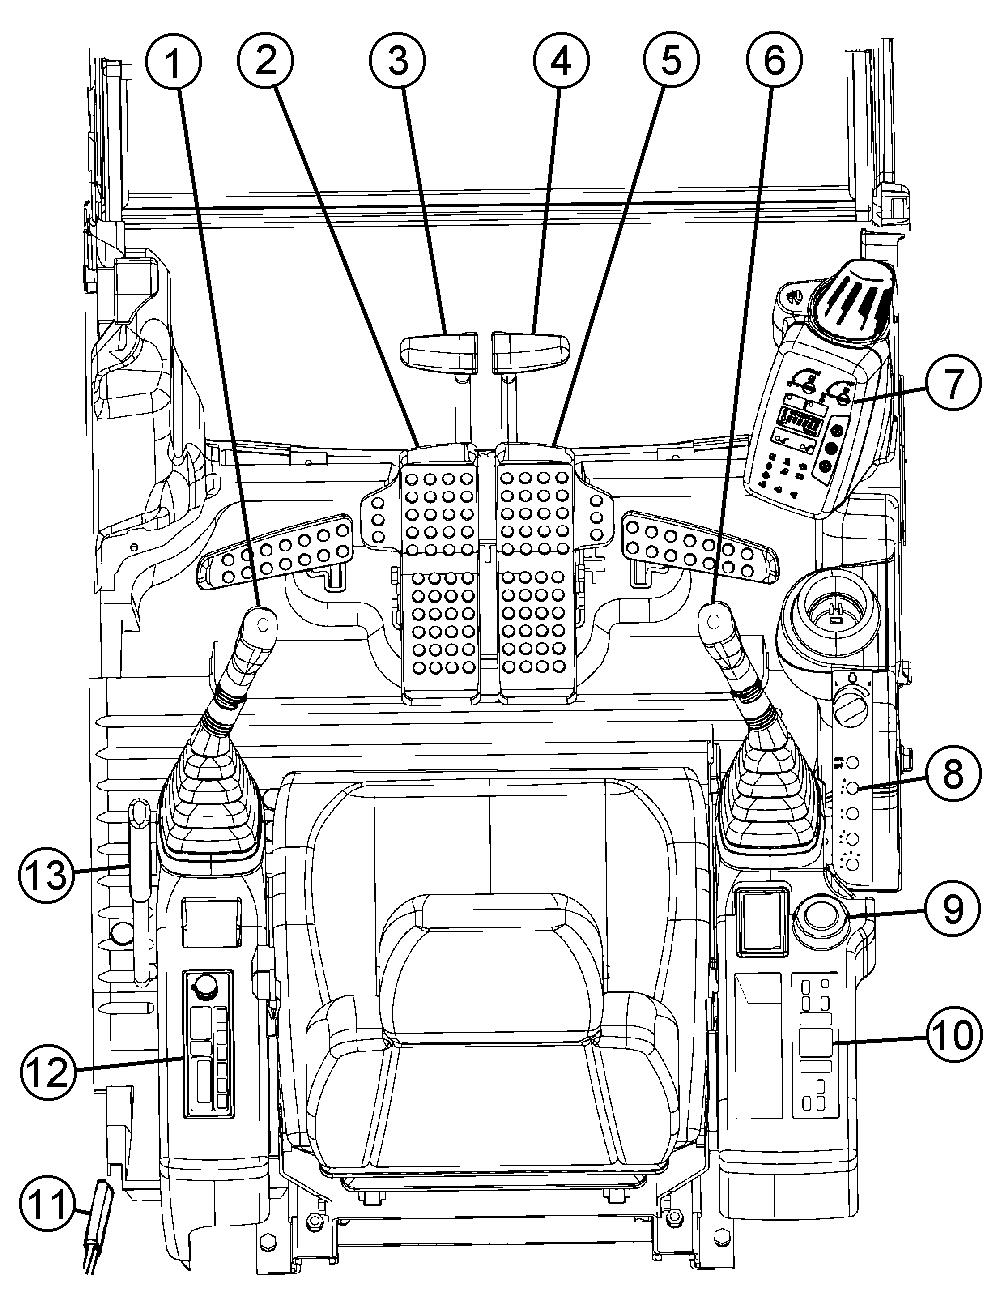
SafetySigns Operation—Operator’sStation Pedals,Levers,AndPanels 1—LeftControlLever/HornSwitch(ontopoflever)
2—LeftTravelPedal
3—LeftTravelLever
4—RightTravelLever
5—RightTravelPedal
6—RightControlLever/PowerBoostSwitch(ontopof lever
7—MonitorPanel 8—SwitchPanel 9—KeySwitch
10—AirConditionerPanel—IfEquipped 11—CabDoorReleaseLever 12—Radio 13—PilotControlShut-OffLever
TX14740,0001C8E–19–09APR03–1/1
MonitorPanel
1—EngineCoolantTemperatureGauge 2—FuelGauge
3—DisplaySelectSwitch 4—SetSwitch
5—WorkModeSwitch
6—FuelLevelIndicator
7—AirFilterRestrictionIndicator 8—AlternatorVoltageIndicator 9—CheckEngineIndicator 10—HydraulicOilFilterRestrictionIndicator—If Equipped 11—EngineOilPressureIndicator 12—Pre-HeatIndicator(notused) 13—EngineCoolantTemperatureIndicator 14—DigModeIndicator 15—AttachmentModeIndicator(notused) 16—MonitorDisplay 17—Auto-IdleIndicator 18—Auto-AccelerationIndicator
MonitorPanelFunctions 1.EngineCoolantTemperatureGauge:
IMPORTANT:Ifneedlepointsto"RED"zone,idle enginetobringbackneedleto "GREEN"zonebeforestopping engine.Ifneedlecontinuestorise, stopengine.
2.FuelGauge: Fuelmachinebeforeneedlereaches “E”.
3.DisplaySelectSwitch: Pressswitchtodisplay HourMeter,TripMeter1orTripMeter2informationin thatorderonthemonitordisplay.
4.SetSwitch: PressswitchtochangesettingsinTrip Meter1orTripMeter2.
5.WorkModeSwitch: PressswitchtoselectDig Mode.
6.FuelLevelIndicator: Indicatorwilllightwhen approximately40liters(10gal)offuelremain.
7.AirFilterRestrictionIndicator: Indicatorwilllight whentheairfilterelementsareclogged.
8.AlternatorVoltageIndicator: Indicatorwilllight withnoorlowalternatoroutput.
9.CheckEngineIndicator: Indicatorwillflashwhen theenginederatereaches50%duetothefollowing conditions:Lowfuelpressure,highfueltemperature, cranksensorfault,defectivefuelinjectionpumpECU, orafailureinECUtoinjectionpumpECU communications.
10.HydraulicOilFilterRestrictionindicator—If Equipped: Indicatorwilllightwhenmainhydraulicfilter elementisrestricted.
11.EngineOilPressureIndicator:
IMPORTANT:Ifengineoilpressurelightcomeson whileoperating,stopengine immediately.
Indicatorwilllightandbuzzerwillsoundwhenengine oilpressureislow.Stopengineimmediately.
NOTE:Coldoil,lowoillevel,orextremeofflevel operationmaycauseindicatortolight.
12.Pre-HeatIndicator: Notused
13.EngineCoolantTemperatureIndicator:
IMPORTANT:DONOTstopenginewhencoolant temperaturelightcomesonor temperaturewillrisefurther.Reduce loadandrunengineatslowidlefor 15seconds.Iftemperaturelight continuestostayON,stopengine.
Indicatorwilllightandbuzzerwillsoundwhenengine coolantoverheats.Reduceloadimmediatelyandrun engineatslowidlefor15seconds.Inspectfordebris aroundradiator.Checkcoolantlevelintheradiator recoverytank.
14.DigModeIndicator: IndicatorwilllightwhenDig Modeisselected.
15.AttachmentModeIndicator: Notused.
16.MonitorDisplay: DisplaysHourMeter,TripMeter 1andTripMeter2information.
17.Auto-IdleIndicator: Indicatorwilllightwhenthe auto-idle/auto-accelerationswitchisturnedtotheA/Ior theA/Aposition.Indicatorwillflashwhenengineis startedandeitherauto-idleorauto-accelerationmode isalreadyactivated.
18.Auto-AccelerationIndicator: Indicatorwilllight whentheauto-idle/auto-accelerationswitchisturnedto theA/Aposition.Indicatorwillflashwhenengineis startedandauto-accelerationmodeisalready activated.
1—EngineRPMDial
2—Auto-Idle/Auto-AccelerationSwitch
3—PowerModeSwitch
4—PropelSpeedSwitch
5—OperatingLightsSwitch
6—Washer/WiperSwitch
FrontSwitchPanelFunctions 1.EngineRPMDial: Turndialclockwisetoincrease enginespeedorcounterclockwisetodecreaseengine speed.
2.Auto-Idle/Auto-AccelerationSwitch: Withengine on,moveauto-idle/auto-accelerationswitchtoA/I. Auto-idleindicatorwilllightwhenauto-idleison.
Theenginewillrunattheenginerpmdialsettingfor4 secondsafterturningkeyswitchON.Theauto-idle systemwillthenslowtheenginetoauto-idleengine speed.
Theauto-idlecircuitautomaticallyreducesengine speedafter4secondswhencontrolleversareplaced inneutralposition.
Enginespeedincreasestoenginerpmdialsetting whenanycontrolleverisoperated.
Withengineon,moveauto-idle/auto-acceleration switchtoAA.Auto-accelerationindicatorwilllight.
Enginerpmwillchangedependingonrpmdialsetting andpositionofcontrollevers.Typicallyusedfor gradingoperations.
Turnauto-idle/auto-accelerationswitchOFFandset enginerpmdialtoimprovemachinecontrolindifficult workareas,loadingandunloading.
3.PowerModeSwitch: Moveswitchtoselectengine speedmode.
H/P(HighPower)Mode
UseH/Pmodewhenextrahorsepowerisneededfor rollinginthearminexcavationwork.
PMode UsePmodewhengeneraldiggingworkisneeded.
E(Economy)Mode
UseEmodetoimprovefuelefficiencyandreduce noiselevelwithasmalldifferenceinenginespeed.
4.PropelSpeedSwitch: Turnswitchtoselectfastor slowspeedtravel.
5.OperatingLightsSwitch: Turnswitchtofirst positiontoturnonoperatinglight.Monitorpanelwill alsolight.
Turnlightswitchtosecondpositiontoturnonboom light,cablights,andoperatinglight.Monitorpanel lightswillgooff.
6.WiperSwitch: Wiperswitchhasseveralpositions: OFF.....Wiperautomaticallystopsoperatingandis retracted.
INT...Wiperoperatesintermittentlyattheinterval selectedbytheswitchposition.
ON.....Wiperoperatescontinuously
NOTE:Thewiperandwasherdonotoperateunless theupperfrontwindowiscompletelyclosed. Alarmwillsoundifeitherwasherorwiperis operatedwiththewindowopen.
WasherSwitch: Pushandholdswitchtosquirtfluid onwindshield.Donotholddownswitchformorethan 20seconds.
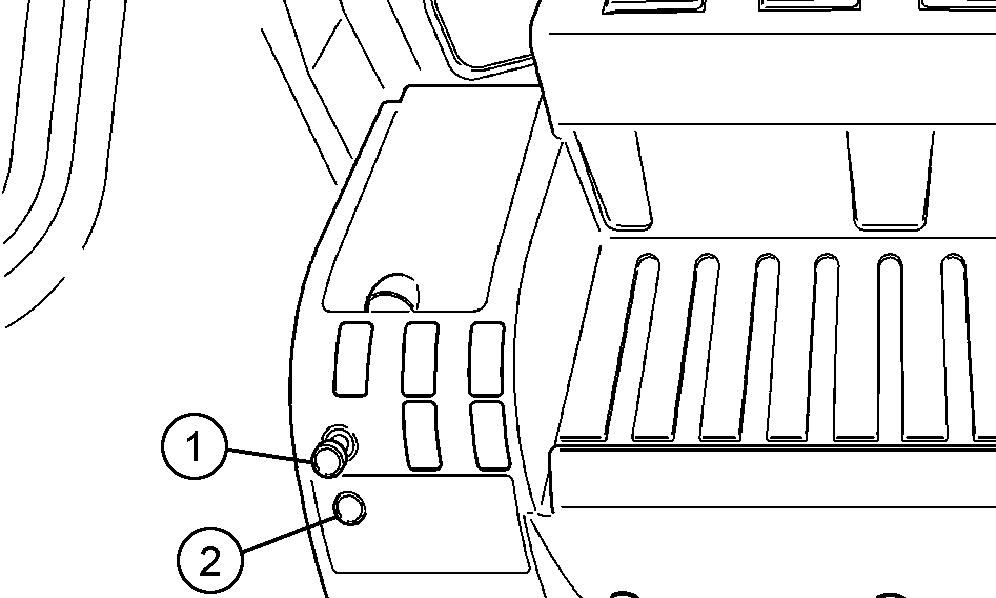
RearSwitchPanel
1.Lighter: Foroperatorconvenience.Canalsobeused asaelectricalportforserviceandmaintenancefor24-volt appliances.
2.AccessoryPowerPort: 12-volt,5-ampelectricalport providedforserviceandmaintenance.
1—Lighter 2—AccessoryPowerPort
Horn
Hornswitch(1)islocatedontopofleftcontrollever.
1—HornSwitch
PowerBoostSwitch
Pressandholddownpowerboostswitch(1)ontopof rightcontrolleverforan8secondincreaseinhydraulic power.Releaseswitchtoresetpowerboostfunction.
Powerboostisautomaticallyactivatedwhenusingany frontendfunctionexceptarm.
1—PowerBoostSwitch
TX14740,0001D8C–19–11OCT01–1/1
TX14740,0001CEA–19–19MAR01–1/1
TX,35,DH5156–19–13SEP01–1/1
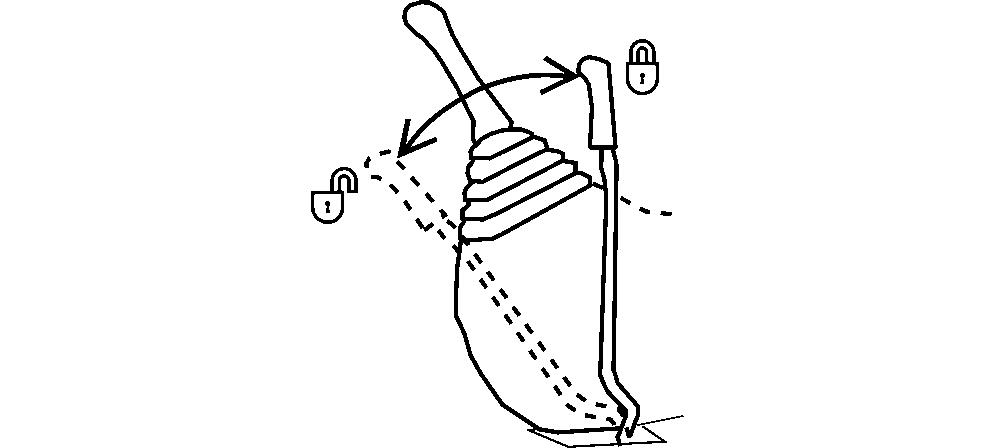
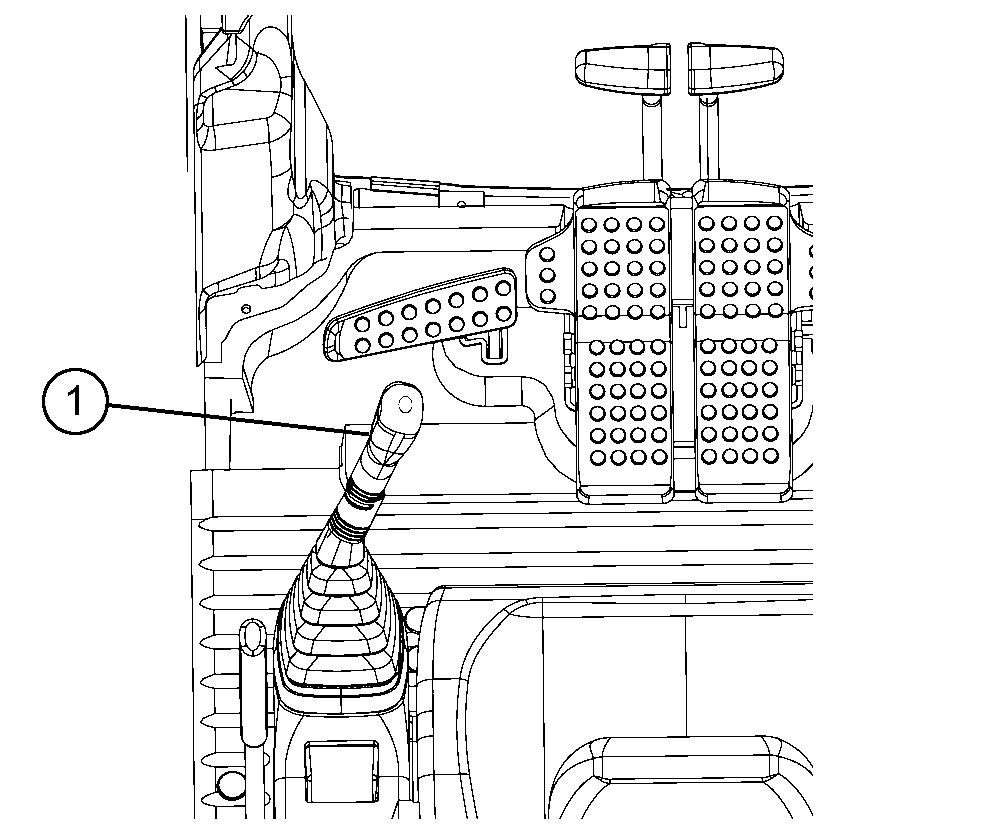
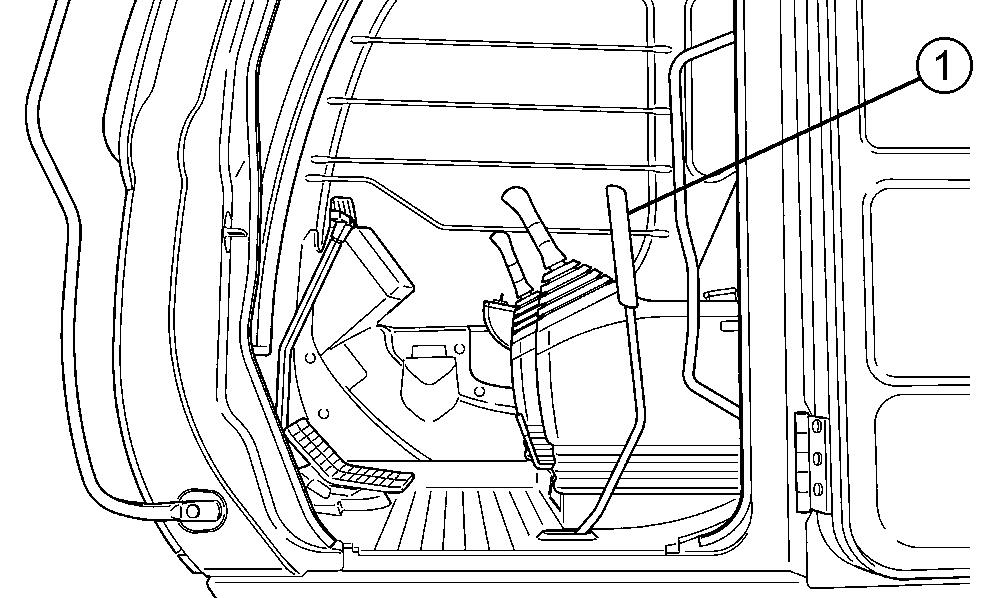
PilotControlShut-OffLever Thepilotcontrolshut-offlever(1)shutsoffhydraulicpilot pressuretoallpilotcontrolvalves.Whenpilotcontrol shut-offleverisinlocked(UP)position,themachinewill notmoveifaleverorpedalisaccidentallymoved.
Alwayspullpilotcontrolshut-offlevertolockedposition whenyoustoptheengineorleavetheoperator’sstation.
Pushpilotcontrolshut-offleverforwardtounlocked positiontooperatemachine.
1—PilotControlShut-OffLever
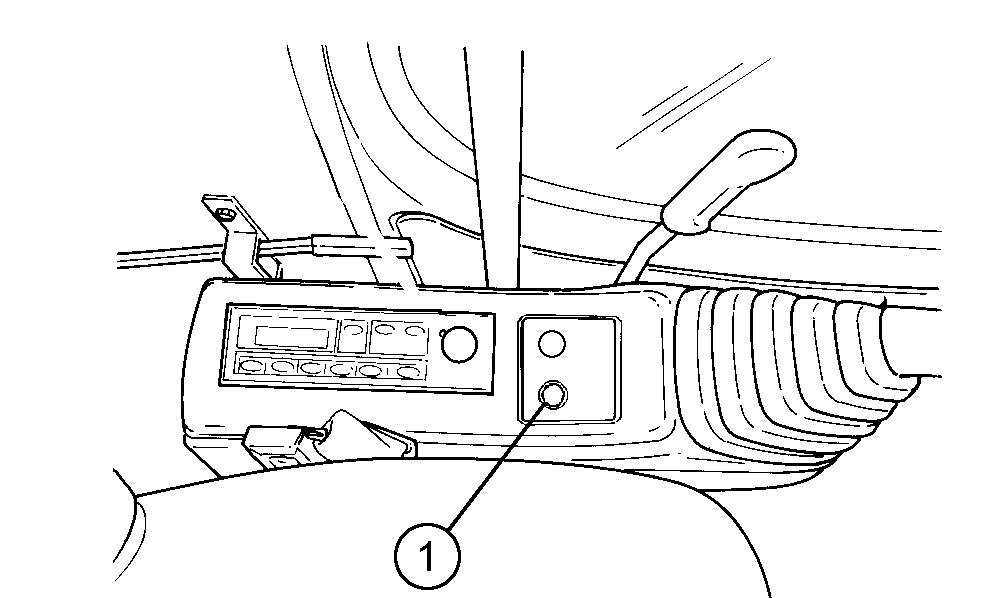
TravelAlarmAndTravelAlarmCancel Switch
Thetravelalarmsoundswhenatravelpedalorleveris activatedandwillcontinueaslongasthetracksare moving.Whentravelmotionstops,thetravelalarmswitch isreset.
Aftertheinitial15secondalarm,alarmcanbesilencedby depressingthetravelalarmcancelswitch(1).
IMPORTANT:Ifalarmisnotoperatingduringnormal transport,orifalarmsoundswhen engineisrunningandmachineis stationaryseeyourauthorizeddealer.
LeverInLockedPosition
TX14740,0001C93–19–08JAN01–1/1
1—TravelAlarmCancelSwitch
TX14740,0001CE9–19–15MAR01–1/1
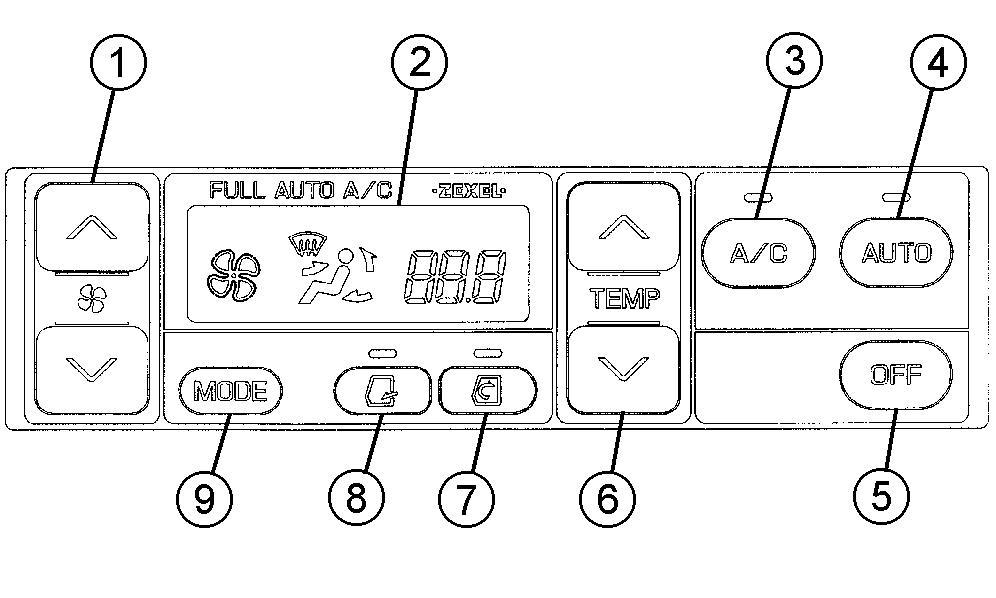
CabHeaterAndAirConditioner
BlowerSwitches: Pressblowerswitchestoselect desiredblowerfanspeed.Selectedfanspeedwillbe displayedonthemonitordisplay.
MonitorDisplay: Displaysblowerfanspeed,selectedair vent,andtemperaturesetting.
A/CSwitch: AirconditionerwillturnonwhenA/Cswitch ispressedandfandisplayoftheblowerswitchison.A/C indicatorwillalsolight.
AUTOA/CSwitch: PressAUTOswitchtoturnAUTOand A/Cindicatorson.Airflow-intemperatureatthevent, blowerspeed,ventlocationsandfreshairportare automaticallycontrolled.
BlowerandA/COFFSwitch: PressOFFswitchtoturn blowerandA/Coff.WhenblowerOFFswitchispressed, theblowerandtheairconditionerwillturnoff.Theblower willturnonifoneoftheblowerswitchesispressed whethertheairconditionerswitchisturnedonoroff.
TemperatureControlSwitches: Pressswitchestoset temperaturefromFull-Cool(FC)toFull-Heat(FH).FC and/orFHwilldisplayonthemonitordisplay.
RecirculatingModeSwitch: Pressrecirculatingmode switchtoclosefreshairventandcirculateairalreadyin cab.Pressswitchagaintoturnoffindicatorandopen freshairsuctionport.
FreshAirModeSwitch: Pressfreshairmodeswitchto routeoutsideairintothecab.Indicatorwillalsolight. Pressswitchagaintoturnoffindicatorlightandclose freshairsuctionport.
ModeSwitch: Presstoselecttheairvent.Selectedair ventisdisplayedonthemonitordisplay.
CabHeaterAndAirConditionerOperation
1.PressAUTOswitch.
2.Presstemperaturecontrolswitchtosettemperature.
3.Pressmodeswitchfordesiredventairflow.
1—BlowerFanSpeedSwitches
2—MonitorDisplay
3—A/CSwitch
4—AUTOA/CSwitch
5—BlowerAndA/COFFSwitch
6—TemperatureControlSwitches
7—RecirculatingModeSwitch
8—FreshAirModeSwitch
9—ModeSwitch(airflowtofrontandrearvents, anddefrostervent)
4.Pressblowerswitchtoselectdesiredblowerspeed.
5.Pressfreshairmodeswitchtomaintaintheairventin thefreshaircirculationmode.
6.Pressrecirculatingmodeswitchtomaintaintheair suctionportinthecirculationmode.
7.Presstemperaturecontrolswitchesandblower switchestoadjustcabtemperature
DefrosterOperation
1.PressAUTOswitch.Temperaturecontrolledairblows out.
2.Presstemperaturecontrolswitchtosettemperature.
3.Pressfreshairventswitchtoselectfreshaircirculation mode.
4.PressModeswitchtoselectthefrontventsorthefront andrearvents.
5.Adjustthelouversonfrontventanddefrosterventto controlairflowdirection.
6.Presstemperaturecontrolswitchesandblower switchestoadjustcabtemperature.
7.PressA/Cswitchonifwindowsbecomecloudedorif dehumidifyingisrequired.
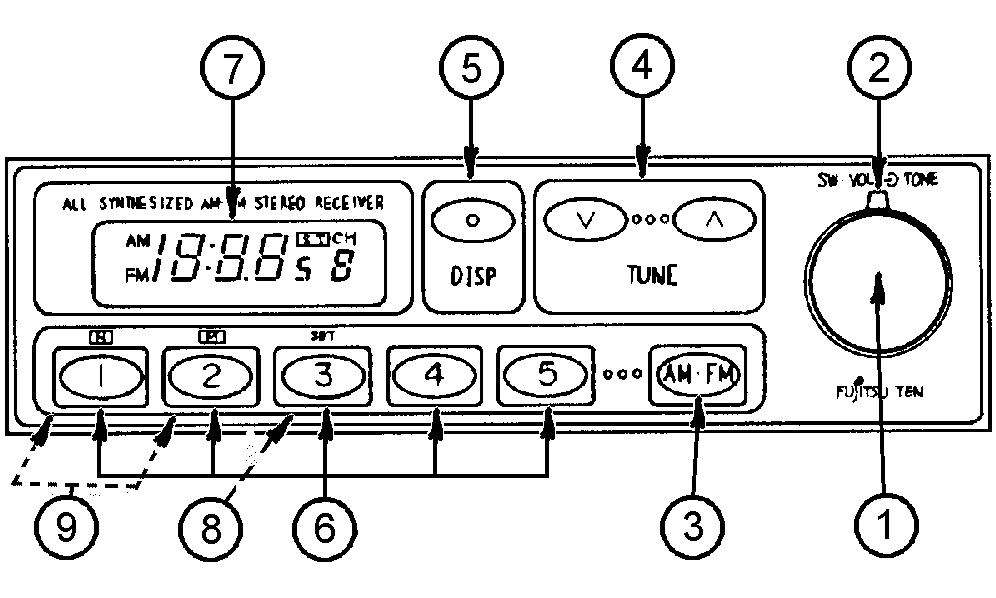
OperatingTheAM/FMRadio Presspowerswitch(1)toturnradioon,andrepeatedly pressoneoftuningswitches(4)untildesiredstationis reached.Topresetastation,selectthedesiredstation usingtuningswitches.Pressandholdstationpreset(6) formorethan2secondsuntilanelectronictoneisheard. Thefrequencyofthepresetstationwillbeindicatedon digitaldisplay(7).
SettingTheClock NOTE:Inordertosettheclock,digitaldisplay(7)must beinthetimedisplaymode.
Whilepressingdisplaymodechangeswitch(5)usetime setswitches(9)andsetswitch(8)tosettheclock.
Presssetswitch(8)toresettheminutedisplayto“00.”
Presstimesetswitchlabeled1tosetcorrecthour.
Presstimesetswitchlabeled2tosetcorrectminute.
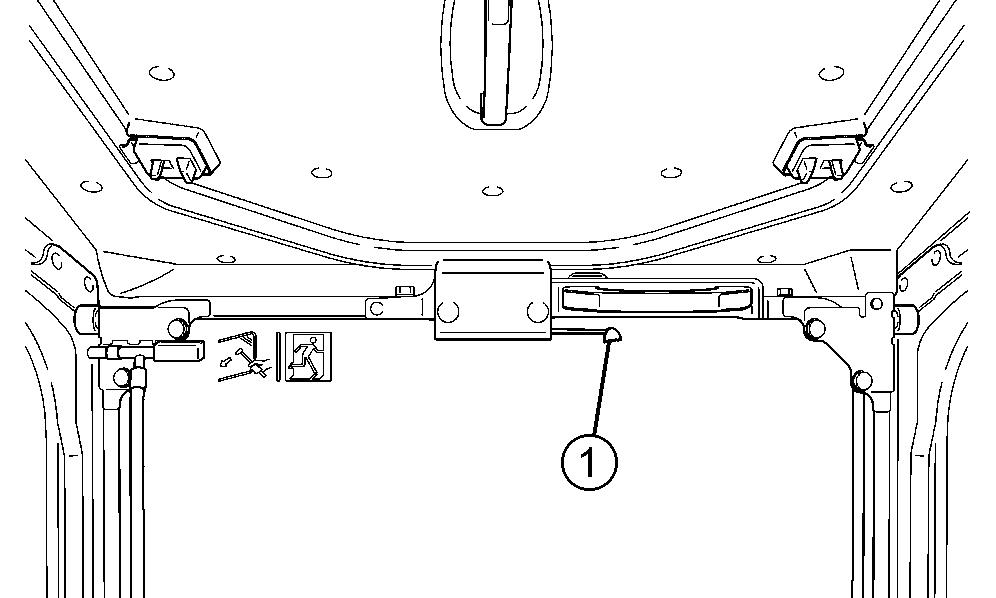
SecondaryExitTool IMPORTANT:FORSECONDARYEXIT.Usetool(1)to breakwindow.Alwayskeeptoolin machine.
1—SecondaryExitTool
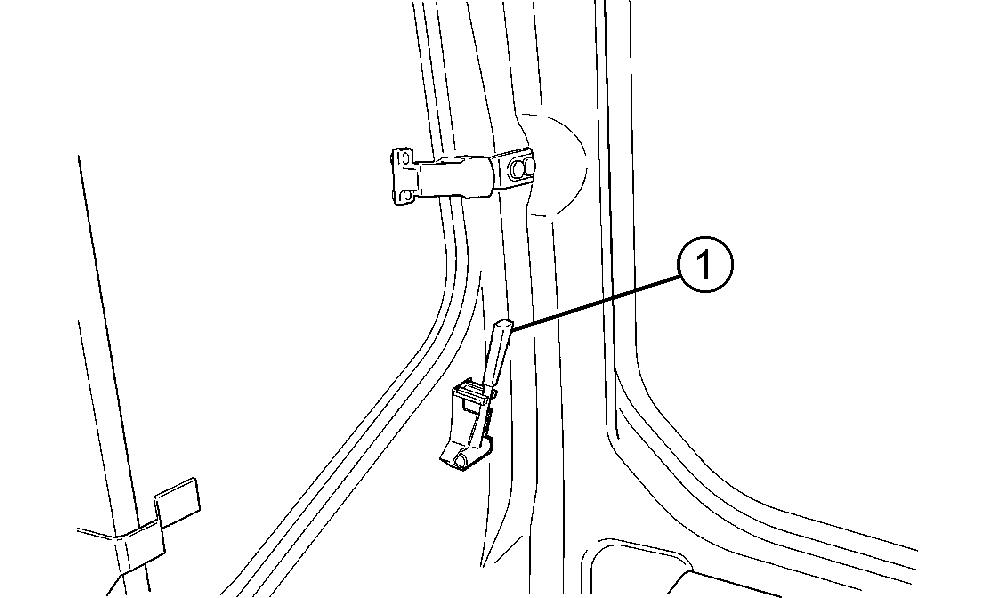
OpeningUpperFront(SecondaryExit) Window
NOTE:Thewasherandwipercannotoperatewiththe upperfrontwindowopened.
1.Presslockreleaselever(1).
1—LockReleaseLever
1—PowerSwitch/VolumeControlKnob
2—ToneAdjustmentRing
3—AM/FMSwitch
4—TuningSwitches
5—DisplayModeChangeSwitch
6—StationPresets
7—DigitalDisplay
8—SetSwitch
9—TimeSetSwitches
TX14740,0001C95–19–08JAN01–1/1
TX14740,0001C99–19–08JAN01–1/1
TX14740,0001C96–19–08JAN01–1/2
WhenParkingOutdoors Makemachineshardtomove:
• Parkinawell-lighted,fencedarea.
• Lowerallequipmenttotheground.
• Removeignitionkey.
• Removebatterywhenunitisstorage.
• Lockcabdoors,windows,andvandal-proofdevices.
ReduceVandalism 1.Installvandal-proofdevices.
2.Participateinaneighborhoodwatchprogram.Take writtennotesofsuspiciousvehiclesorpersonsand reportyourfindingstolawenforcementagency.
3.Regularlyverifythatidentificationplateshavenotbeen removed.Iftheyhave,notifylawenforcementagency. Orderduplicateplatesfromyourdealer.
DX,CRPRV,K–19–04JUN90–1/1
TX,110,DH1093–19–09DEC93–1/1
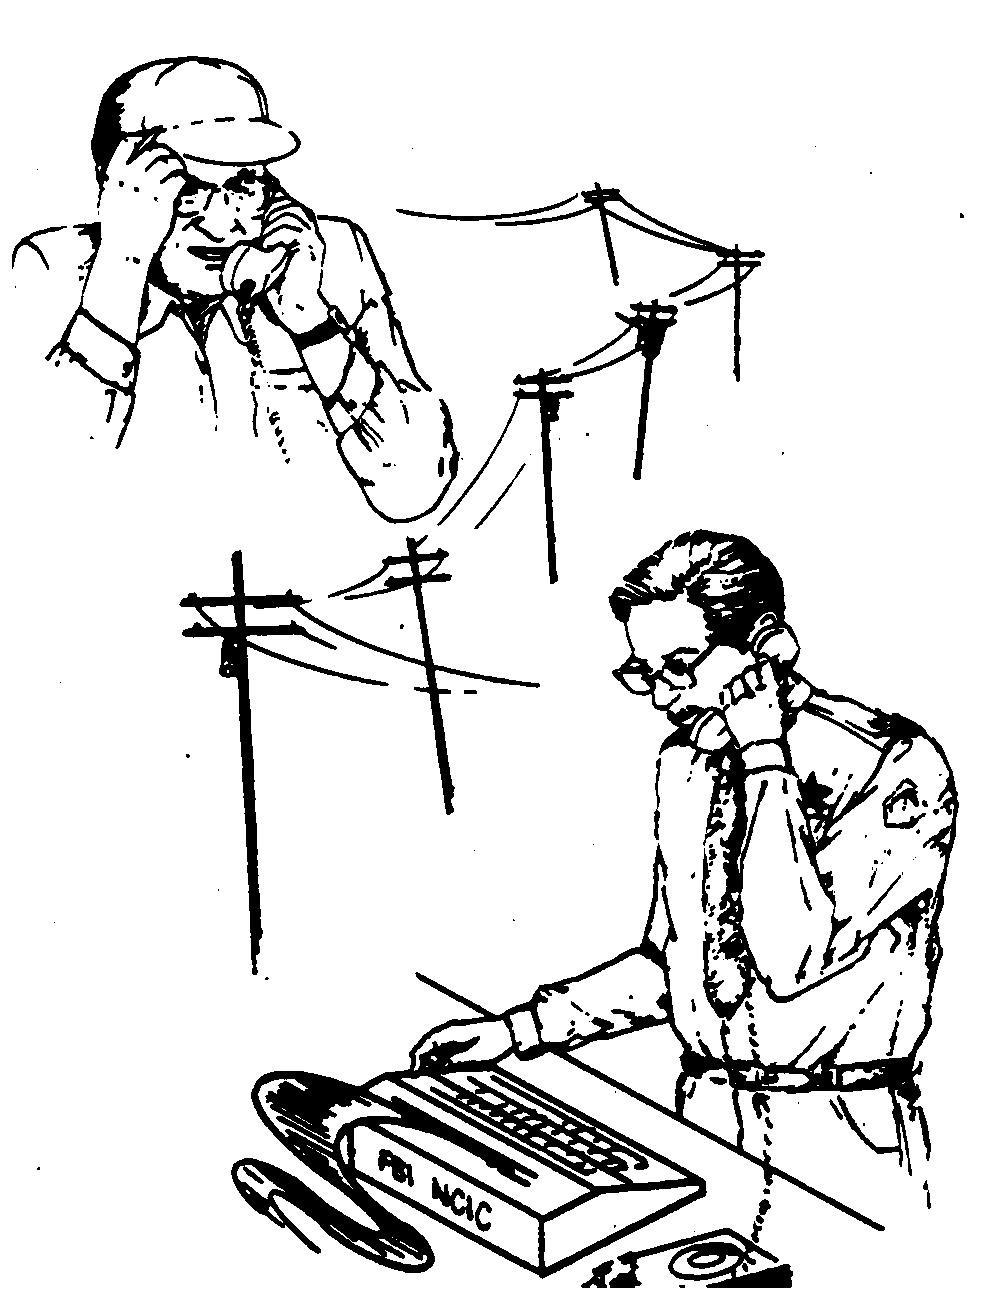
ReportTheftsImmediately 1.Immediatelynotifyyourlocallawenforcementagency andinsuranceagent.
2.Provideacompletedescriptionofthemachine,allof thedocumentedidentificationnumbersandcolor photographs.
3.Requestverificationoftheidentificationnumbersafter theyhavebeenenteredwithanyregionalornational crimeinformationcenter.Doublecheckthenumbersto besuretheyarecorrect.
4.Notifyyourauthorizeddealerofthetheftandrequest thatitslossbepostedwithfulldescriptionand identificationnumbers.