8235R, 8260R, 8285R, 8310R, 8335R, and 8360R Tractors Repair
REPAIR MANUAL
Covered models: 2WD or MFWD - PIN pre x YH models 8235R, 8260R, 8285R, 8310R, 8335R, 8360R
TM110319, May 2013
Table of contents
FOREWORD
DEALER PREDELIVERY INFORMATION FORM
Section 10 - GENERAL INFORMATION
Group 05 - Safety
Group 10 - General Information
Section 20 - ENGINE
Group 00 - Component Removal and Installation
Group 05 - Engine Repair
Section 30 - FUEL AND COOLING SYSTEMS
Group 05 - Diesel Fuel System
Group 10 - Air Intake System
Group 15 - Engine Cooling System
Group 20 - Coolers and Air Conditioning Condenser
Group 25 - Exhaust System
Section 40 - ELECTRICAL
Group 05 - Connectors
Group 10 - Wire Harness Routings
Group 15 - Charging Circuit
Group 20 - Starting Circuit
Group 25 - Relays, Fuses, Solenoids, and Switches
Group 30 - Monitoring Systems and Sensors
Group 35 - Armrest Control
Group 40 - Implement and Accessory Connectors
Group 45 - Convenience and Accessory Components
Section 50 - POWERSHIFT TRANSMISSION
Group 00 - Component Removal and Installation
Group 05 - Miscellaneous Repair
Group 10 - Transmission
Section 51 - AUTOPOWR/IVT TRANSMISSION
Group 00 - Component Removal and Installation
Group 10 - General Repair Procedures
Group 15 - In Tractor Repairs
Group 20 - Transmission Repair
Group 30 - Assemble Transmission
Section 56 - DRIVE SYSTEMS
Group 00 - Component Removal and Installation
Group 05 - Rear Di erential and Input Quill
Group 10 - Primary Brakes
Group 15 - Final Drives
Group 20 - Rear PTO
Group 25 - Hydraulic Pump Drive
Group 30 - MFWD Clutch
Group 35 - Drivelines
Group 40 - Front PTO
Section 57 - 1300 SERIES MFWD AXLES
Group 00 - Component Removal and Installation
Group 05 - Final Drives
Group 10 - Axle Housing
Group 15 - Di erential
Group 20 - Input Gear Train
Group 25 - Oscillation
Section 58 - INDEPENDENT
Group 00 - Component Removal and Installation
Group 05 - Controls
Group 10 - Final Drives
Group 15 - Drive Shafts
Group 20 - Di erential
Group 25 - Steering
Group 30 - Suspension
Group 35 - Front Brakes
Section 59 - 1500 SERIES MFWD AXLE
Group 00 - Component Removal and Installation
Group 05 - Final Drives
Group 10 - Axle Housing
Group 15 - Di erential
Group 20 - Input Gear Train
Group 25 - Oscillation and Tie Rod
Section 60 - STEERING AND BRAKES
Group 05 - Steering Column
Group 10 - Steering Control Assembly
Group 15 - Steering Cylinders
Group 20 - Brake Valve
Group 30 - Hydraulic Trailer Brake
Group 35 - Air Trailer Brake
Section 70 - HYDRAULICS
Group 00 - Component Removal and Installation
Group 05 - Hydraulic System Repair
Group 10 - Integrated Hydraulic Pump
Group 20 - Hitch Valve, Selective Control Valves, and Couplers
Group 30 - Hitch
Group 35 - Front Hitch (S. N. 053100)
Group 40 - Front Hitch (S. N. 053101 )
Section 80 - MISCELLANEOUS
Group 05 - Hood
Group 10 - Front Axle (Two-Wheel Drive)
Group 15 - Wagon And Pick-Up Hitch
Group 20 - Rear Wheels
Section 90 - OPERATOR STATION
Group 00 - Component Removal and Installation
Group 05 - Heating, Ventilating, and Air Conditioning (HVAC)
Group 10 - Air Conditioning System
Group 15 - Air Suspension Seat
Group 20 - ActiveSeat
Group 25 - Armrest
Group 30 - Cab Door and Windshield
Section 99 - DEALER TOOLS
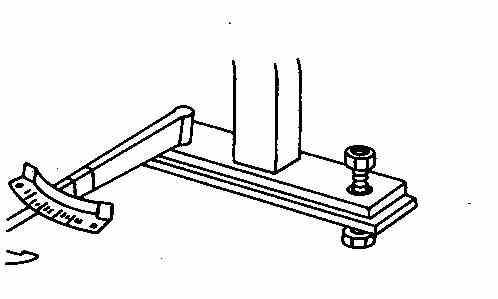
Group 05 - Dealer Fabricated Tools
Group 10 - Essential and Recommended Tools
Foreword
This manual is written for an experienced technician. Essential and recommended tools required in performing certain service work are identi ed in this manual.
Live with safety: Read the safety messages in the introduction of this manual and the cautions presented throughout the text of the manual.
CAUTION:
This is the safety-alert symbol. When you see this symbol on the machine or in this manual, be alert to the potential for personal injury.
Technical manuals are used to provide service information. The Repair Technical Manual tells how to repair the components. The Operation and Test Technical Manual helps you quickly identify the majority of failures.
Information is organized in groups for the various components requiring service instruction. At the beginning of each group are summary listings of all applicable essential and recommended tools, other material needed to do the job, service parts kits, speci cations, wear tolerances, and torque values.
Technical manuals are concise guides for speci c machines. They are on-the-job guides containing only the vital information needed for diagnosis, analysis, testing, and repair.
Fundamental service information is available from other sources covering basic theory of operation, fundamentals of troubleshooting, general maintenance, and basic type of failures and their causes.
Dealer Predelivery Information Form
The John Deere Predelivery Form, when properly lled out and signed by dealer, veri es predelivery and delivery services were satisfactorily performed.
Because of the shipping factors involved, plus extra nishing touches necessary to promote customer satisfaction, there are certain predelivery services that must be performed by the dealer. These services are listed on the predelivery form with the tractor.
Perform all services listed and check each job o as it is completed. Fill form out completely and sign it.
Group 05 - Safety Recognize Safety Information
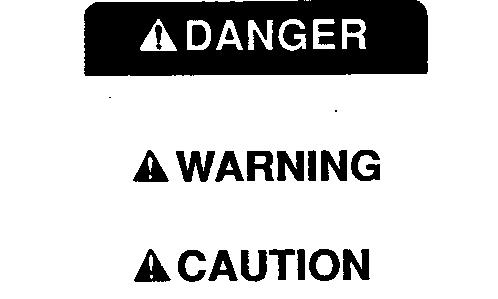
Safety-alert symbol
This is a safety-alert symbol. When you see this symbol on your machine or in this manual, be alert to the potential for personal injury.
Follow recommended precautions and safe operating practices.
Understand Signal Words
Signal Words
A signal word DANGER, WARNING, or CAUTION is used with the safety-alert symbol. DANGER identi es the most serious hazards.
DANGER or WARNING safety signs are located near speci c hazards. General precautions are listed on CAUTION safety signs. CAUTION also calls attention to safety messages in this manual.
Follow Safety Instructions
Safety Messages
Carefully read all safety messages in this manual and on your machine safety signs. Keep safety signs in good condition. Replace missing or damaged safety signs. Be sure new equipment components and repair parts include the current safety signs. Replacement safety signs are available from your John Deere dealer.
There can be additional safety information contained on parts and components sourced from suppliers that is not reproduced in this operator s manual.
Learn how to operate the machine and how to use controls properly. Do not let anyone operate without instruction.
Keep your machine in proper working condition. Unauthorized modi cations to the machine may impair the function and/or safety and a ect machine life.
If you do not understand any part of this manual and need assistance, contact your John Deere dealer.
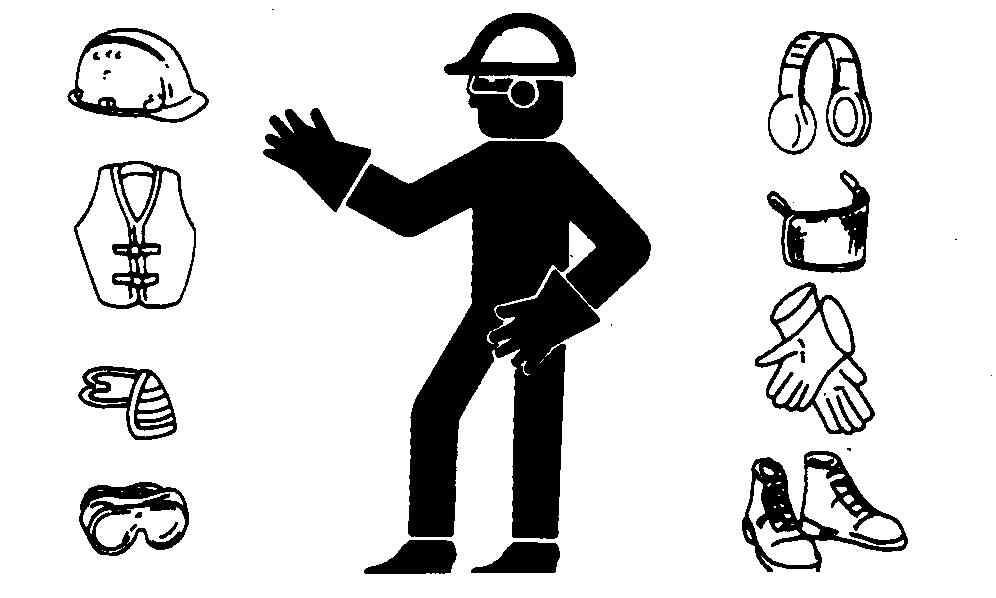
Wear Protective Clothing
Protective Clothing
Wear close tting clothing and safety equipment appropriate to the job.
Prolonged exposure to loud noise can cause impairment or loss of hearing.
Wear a suitable hearing protective device such as earmu s or earplugs to protect against objectionable or uncomfortable loud noises.
Operating equipment safely requires the full attention of the operator. Do not wear radio or music headphones while operating machine.
Service Machines Safely
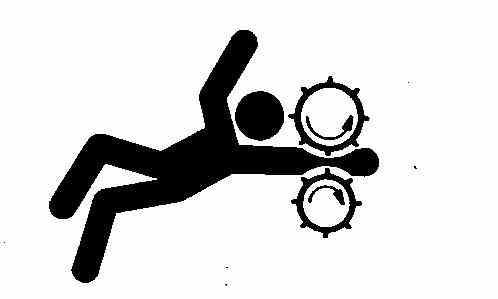
Moving Parts
Tie long hair behind your head. Do not wear a necktie, scarf, loose clothing, or necklace when you work near machine tools or moving parts. If these items were to get caught, severe injury could result.
Remove rings and other jewelry to prevent electrical shorts and entanglement in moving parts.
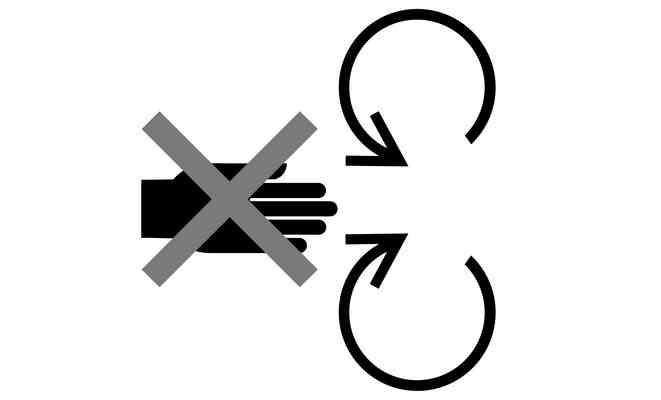
Stay Clear of Rotating Drivelines
Rotating Drivelines
Entanglement in rotating driveline can cause serious injury or death.
Keep all shields in place at all times. Make sure rotating shields turn freely.
Wear close- tting clothing. Stop the engine and be sure that all rotating parts and drivelines are stopped before making adjustments, connections, or performing any type of service on engine or machine driven equipment.
Handle Fluids Safely Avoid Fires
Avoid Fires
When you work around fuel, do not smoke or work near heaters or other re hazards.
Store ammable uids away from re hazards. Do not incinerate or puncture pressurized containers.
Make sure machine is clean of trash, grease, and debris.
Do not store oily rags; they can ignite and burn spontaneously.
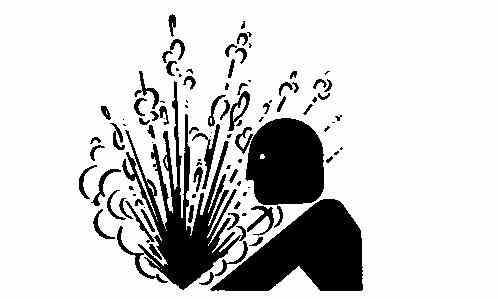
Prevent Battery Explosions
Battery Explosions
Keep sparks, lighted matches, and open ame away from the top of battery. Battery gas can explode.
Never check battery charge by placing a metal object across the posts. Use a volt-meter or hydrometer.
Do not charge a frozen battery; it may explode. Warm battery to 16°C (60°F).
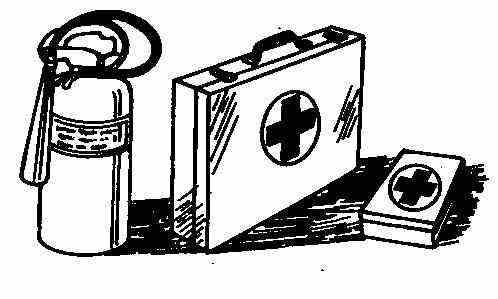
Prepare for Emergencies
First Aid Kit
Be prepared if a re starts.
Keep a rst aid kit and re extinguisher handy.
Keep emergency numbers for doctors, ambulance service, hospital, and re department near your telephone.
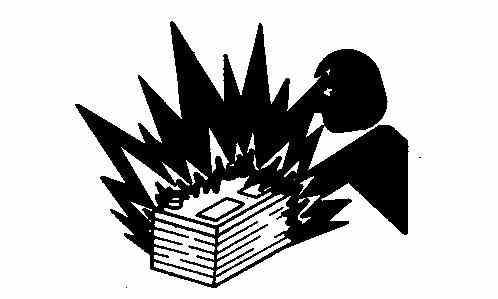
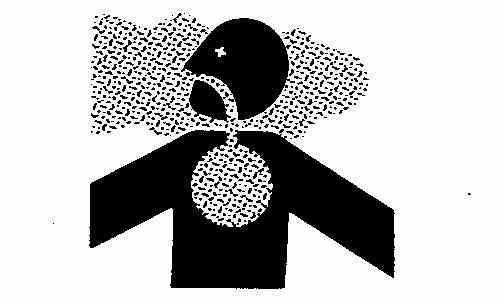
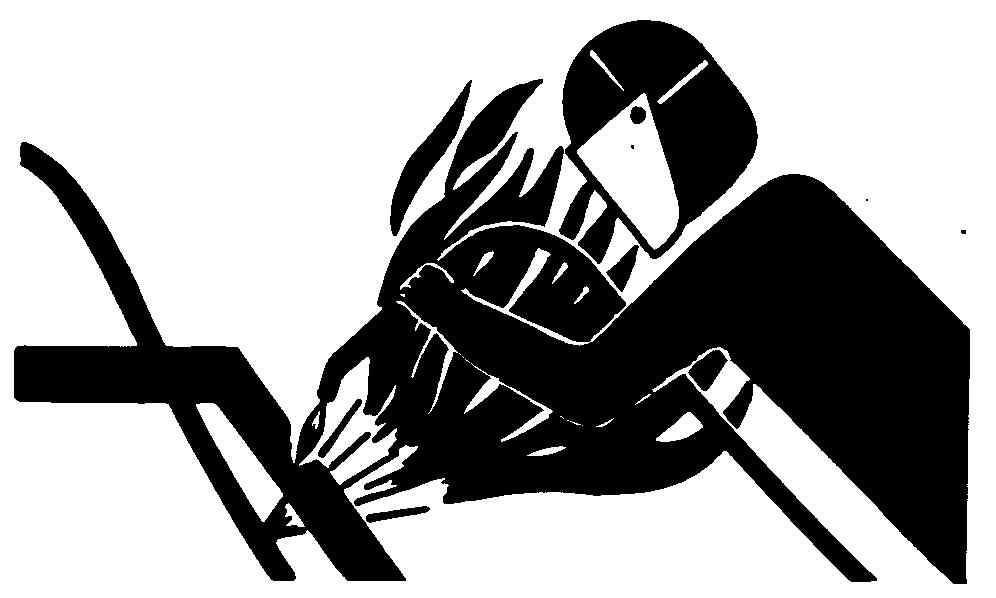
Remove Paint Before Welding or Heating
Toxic Fumes
Avoid potentially toxic fumes and dust.
Hazardous fumes can be generated when paint is heated by welding, soldering, or using a torch.
Remove paint before heating:
Remove paint a minimum of 100 mm (4 in.) from area to be a ected by heating. If paint cannot be removed, wear an approved respirator before heating or welding.
If you sand or grind paint, avoid breathing the dust. Wear an approved respirator. If you use solvent or paint stripper, remove stripper with soap and water before welding. Remove solvent or paint stripper containers and other ammable material from area. Allow fumes to disperse at least 15 minutes before welding or heating.
Do not use a chlorinated solvent in areas where welding will take place.
Do all work in an area that is well ventilated to carry toxic fumes and dust away.
Dispose of paint and solvent properly.
Avoid Heating Near Pressurized Fluid Lines
Flammable Spray
Flammable spray can be generated by heating near pressurized uid lines, resulting in severe burns to yourself and bystanders. Do not heat by welding, soldering, or using a torch near pressurized uid lines or other ammable materials. Pressurized lines can accidentally burst when heat goes beyond the immediate ame area.
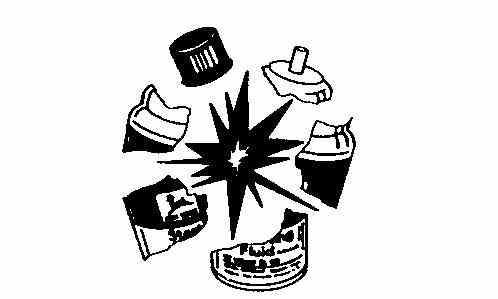
Handle Starting Fluid Safely
Store Safely
Starting uid is highly ammable.
Keep all sparks and ame away when using it. Keep starting uid away from batteries and cables.
To prevent accidental discharge when storing the pressurized can, keep the cap on the container, and store in a cool, protected location.
Do not incinerate or puncture a starting uid container.
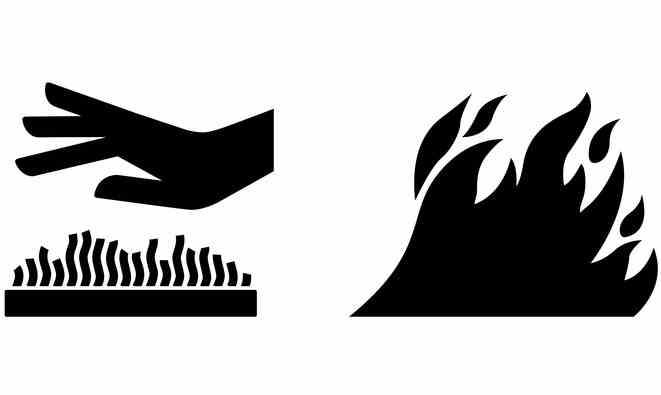
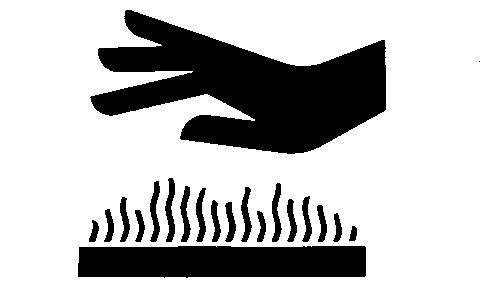
Avoid Hot Exhaust
Safety Hot Parts
Servicing machine or attachments with engine running can result in serious personal injury. Avoid exposure and skin contact with hot exhaust gases and components.
Exhaust parts and streams become very hot during operation. Exhaust gases and components reach temperatures hot enough to burn people, ignite, or melt common materials.
Clean Exhaust Filter Safely
Fire Safety
Hand Over Flame
Moving Parts
Stop
During exhaust lter cleaning operations, the engine may run at elevated idle and hot temperatures for an extended period of time. Exhaust gases and exhaust lter components reach temperatures hot enough to burn people, or ignite or melt common materials.
Keep machine away from people, animals, or structures which may be susceptible to harm or damage from hot exhaust gases or components. Avoid potential re or explosion hazards from ammable materials and vapors near the exhaust. Keep exhaust outlet away from people and anything that can melt, burn, or explode.
Closely monitor machine and surrounding area for smoldering debris during and after exhaust lter cleaning.
Adding fuel while an engine is running can create a re or explosion hazard. Always stop engine before refueling machine and clean up any spilled fuel.
Always make sure that engine is stopped while hauling machine on a truck or trailer.
Contact with exhaust components while still hot can result in serious personal injury.
Avoid contact with these components until cooled to safe temperatures.
If service procedure requires engine to be running:
Only engage power-driven parts required by service procedure
Ensure that other people are clear of operator station and machine
Keep hands, feet, and clothing away from power-driven parts.
Always disable movement (neutral), set the parking brake or mechanism and disconnect power to attachments or tools before leaving the operator s station.
Shut o engine and remove key (if equipped) before leaving the machine unattended.
Prevent Acid Burns
Sulfuric acid in battery electrolyte is poisonous. It is strong enough to burn skin, eat holes in clothing, and cause blindness if splashed into eyes.
Avoid the hazard by:
Filling batteries in a well-ventilated area.
Wearing eye protection and rubber gloves.
Avoiding breathing fumes when electrolyte is added.
Avoiding spilling or dripping electrolyte.
Use proper jump start procedure.
If you spill acid on yourself: Flush your skin with water.
Apply baking soda or lime to help neutralize the acid.
Flush your eyes with water for 15 30 minutes. Get medical attention immediately.
If acid is swallowed:
Do not induce vomiting.
Drink large amounts of water or milk, but do not exceed 2 L (2 quarts).
Get medical attention immediately.
Acid Burns
Handle Agricultural Chemicals Safely
Safety
Safety
Chemicals used in agricultural applications such as fungicides, herbicides, insecticides, pesticides, rodenticides, and fertilizers can be harmful to your health or the environment if not used carefully.
Always follow all label directions for e ective, safe, and legal use of agricultural chemicals.
Reduce risk of exposure and injury:
Wear appropriate personal protective equipment as recommended by the manufacturer. In the absence of manufacturer s instructions, follow these general guidelines:
Chemicals labeled Danger : Most toxic. Generally require use of goggles, respirator, gloves, and skin protection.
Chemicals labeled Warning : Less toxic. Generally require use of goggles, gloves, and skin protections.
Chemicals labeled Caution : Least toxic. Generally require use of gloves and skin protection.
Avoid inhaling vapor, aerosol or dust.
Always have soap, water, and towel available when working with chemicals. If chemical contacts skin, hands, or face, wash immediately with soap and water. If chemical gets into eyes, ush immediately with water.
Wash hands and face after using chemicals and before eating, drinking, smoking, or urination.
Do not smoke or eat while applying chemicals.
After handling chemicals, always bathe or shower and change clothes. Wash clothing before wearing again.
Seek medical attention immediately if illness occurs during or shortly after use of chemicals.
Keep chemicals in original containers. Do not transfer chemicals to unmarked containers or to containers used for food or drink.
Store chemicals in a secure, locked area away from human or livestock food. Keep children away.
Always dispose of containers properly. Triple rinse empty containers and puncture or crush containers and dispose of properly.
Clean Vehicle of Hazardous Pesticides
CAUTION:
During application of hazardous pesticides, pesticide residue can build up on the inside or outside of the vehicle. Clean vehicle according to use instructions of hazardous pesticides.
When exposed to hazardous pesticides, clean exterior and interior of vehicle daily to keep free of the accumulation of visible dirt and contamination.
[1] - Sweep or vacuum the oor of cab.
[2] - Clean headliners and inside cowlings of cab.
[3] - Wash entire exterior of vehicle.
[4] - Dispose of any wash water with hazardous concentrations of active or non-active ingredients according to published regulations or directives.
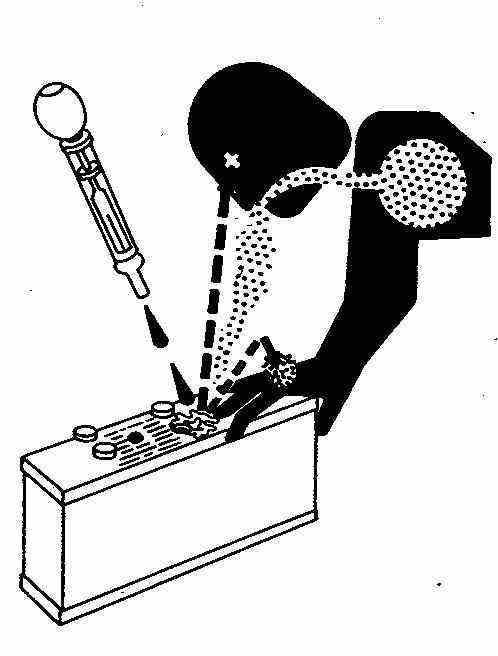
Handling Batteries Safely
Caution
Caution
Battery gas can explode. Keep sparks and ames away from batteries. Use a ashlight to check battery electrolyte level.
Never check battery charge by placing a metal object across the posts. Use a voltmeter or hydrometer.
Always remove grounded (-) battery clamp rst and replace grounded clamp last.
Sulfuric acid in battery electrolyte is poisonous and strong enough to burn skin, eat holes in clothing, and cause blindness if splashed into eyes.
Avoid hazards by:
Filling batteries in a well-ventilated area
Wearing eye protection and rubber gloves
Avoiding use of air pressure to clean batteries
Avoiding breathing fumes when electrolyte is added
Avoiding spilling or dripping electrolyte
Using correct battery booster or charger procedure.
If acid is spilled on skin or in eyes:
Flush skin with water. 1.
Apply baking soda or lime to help neutralize the acid.
Flush eyes with water for 15 30 minutes. Get medical attention immediately.
If acid is swallowed:
Do not induce vomiting.
Drink large amounts of water or milk, but do not exceed 2 L (2 qt.).
Get medical attention immediately.
WARNING: Battery posts, terminals, and related accessories contain lead and lead compounds, chemicals known to the State of California to cause cancer and reproductive harm.Wash hands after handling.
Avoid Harmful Asbestos Dust
Avoid breathing dust that may be generated when handling components containing asbestos bers. Inhaled asbestos bers may cause lung cancer.
Components in products that may contain asbestos bers are brake pads, brake band and lining assemblies, clutch plates, and some gaskets. The asbestos used in these components is usually found in a resin or sealed in some way. Normal handling is not hazardous as long as airborne dust containing asbestos is not generated.
Avoid creating dust. Never use compressed air for cleaning. Avoid brushing or grinding material containing asbestos. When servicing, wear an approved respirator. A special vacuum cleaner is recommended to clean asbestos. If not available, apply a mist of oil or water on the material containing asbestos.
Keep bystanders away from the area.
Asbestos Dust
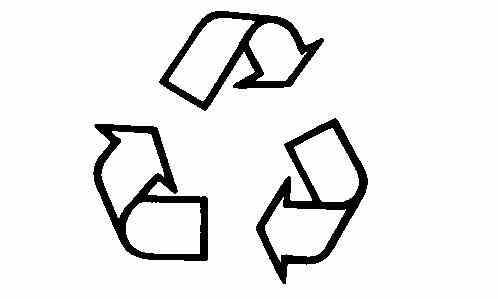
Recycle Waste
Improperly disposing of waste can threaten the environment and ecology. Potentially harmful waste used with John Deere equipment include such items as oil, fuel, coolant, brake uid, lters, and batteries.
Use leakproof containers when draining uids. Do not use food or beverage containers that may mislead someone into drinking from them.
Do not pour waste onto the ground, down a drain, or into any water source.
Air conditioning refrigerants escaping into the air can damage the Earth s atmosphere. Government regulations may require a certi ed air conditioning service center to recover and recycle used air conditioning refrigerants.
Inquire on the proper way to recycle or dispose of waste from your local environmental or recycling center, or from your John Deere dealer.
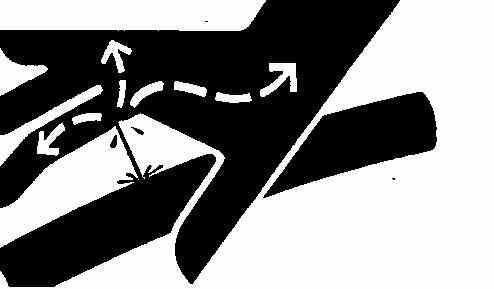
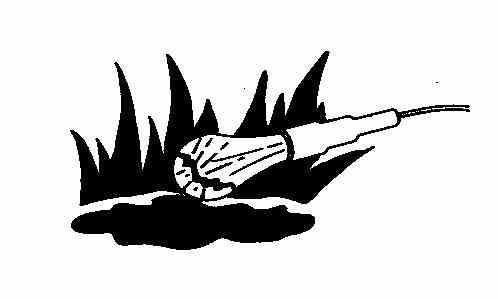
Avoid High-Pressure Fluids
Inspect hydraulic hoses periodically at least once per year for leakage, kinking, cuts, cracks, abrasion, blisters, corrosion, exposed wire braid or any other signs of wear or damage.
Replace worn or damaged hose assemblies immediately with John Deere approved replacement parts.
Escaping uid under pressure can penetrate the skin causing serious injury.
Avoid the hazard by relieving pressure before disconnecting hydraulic or other lines. Tighten all connections before applying pressure.
Search for leaks with a piece of cardboard. Protect hands and body from high-pressure uids.
High Pressure
If an accident occurs, see a doctor immediately. Any uid injected into the skin must be surgically removed within a few hours or gangrene may result. Doctors unfamiliar with this type of injury should reference a knowledgeable medical source. Such information is available in English from Deere & Company Medical Department in Moline, Illinois, U.S.A., by calling 1-800-822-8262 or +1 309-748-5636.
Wait Before Opening High-Pressure Fuel System
High-Pressure Fuel Lines
High-pressure uid remaining in fuel lines can cause serious injury. Only technicians familiar with this type of system should perform repairs. Before disconnecting fuel lines, sensors, or any other components between the high-pressure fuel pump and nozzles on engines with High Pressure Common Rail (HPCR) fuel system, wait a minimum of 15 minutes after engine is stopped.
Service Accumulator Systems Safely
Hydraulic Accumulator
Escaping uid or gas from systems with pressurized accumulators that are used in air conditioning, hydraulic, and air brake systems can cause serious injury. Extreme heat can cause the accumulator to burst, and pressurized lines can be accidentally cut. Do not weld or use a torch near a pressurized accumulator or pressurized line.
Relieve pressure from the pressurized system before removing accumulator.
Relieve pressure from the hydraulic system before removing accumulator. Never attempt to relieve hydraulic system or accumulator pressure by loosening a tting.
Accumulators cannot be repaired.
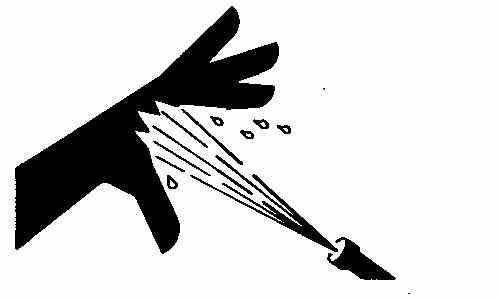
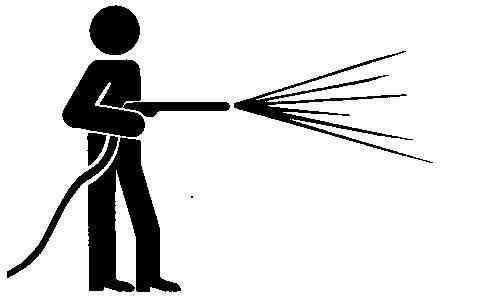
Protect Against High Pressure Spray
High Pressure Spray
Spray from high pressure nozzles can penetrate the skin and cause serious injury. Keep spray from contacting hands or body.
If an accident occurs, see a doctor immediately. Any high pressure spray injected into the skin must be surgically removed within a few hours or gangrene may result. Doctors unfamiliar with this type of injury should reference a knowledgeable medical source. Such information is available from Deere & Company Medical Department in Moline, Illinois, U.S.A.
Service Cooling System Safely
Cooling System
Explosive release of uids from pressurized cooling system can cause serious burns.
Shut o engine. Only remove ller cap when cool enough to touch with bare hands. Slowly loosen cap to rst stop to relieve pressure before removing completely.
Prevent Machine Runaway
Machinery Runaway
Avoid possible injury or death from machinery runaway.
Do not start engine by shorting across starter terminals. Machine will start in gear if normal circuitry is bypassed.
NEVER start engine while standing on ground. Start engine only from operator s seat, with transmission in neutral or park.
Keep ROPS Installed Properly
Roll-Over Protective Structure
Make certain all parts are reinstalled correctly if the roll-over protective structure (ROPS) is loosened or removed for any reason. Tighten mounting bolts to proper torque.
The protection o ered by ROPS will be impaired if ROPS is subjected to structural damage, is involved in an overturn incident, or is in any way altered by welding, bending, drilling, or cutting. A damaged ROPS should be replaced, not reused.
The seat is part of the ROPS safety zone. Replace only with John Deere seat approved for your tractor.
Any alteration of the ROPS must be approved by the manufacturer.
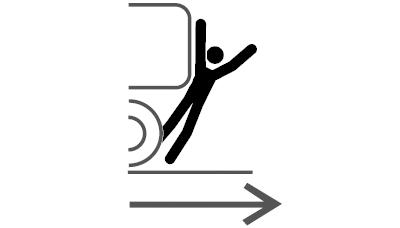
Avoid Backover Accidents
Avoid Backover Accidents
Before moving machine, be sure that all persons are clear of machine path. Turn around and look directly for best visibility. Use a signal person when backing if view is obstructed or when in close quarters.
Do not rely on a camera to determine if personnel or obstacles are behind the machine. The system can be limited by many factors including maintenance practices, environmental conditions, and operating range.
Park Machine Safely
Remove the Key
Before working on the machine:
Lower all equipment to the ground. Stop the engine and remove the key. Disconnect the battery ground strap. Hang a "DO NOT OPERATE" tag in operator station.
Support Machine Properly
Support Properly
Always lower the attachment or implement to the ground before you work on the machine. If the work requires that the machine or attachment be lifted, provide secure support for them. If left in a raised position, hydraulically supported devices can settle or leak down.
Do not support the machine on cinder blocks, hollow tiles, or props that may crumble under continuous load. Do not work under a machine that is supported solely by a jack. Follow recommended procedures in this manual.
When implements or attachments are used with a machine, always follow safety precautions listed in the implement or attachment operator s manual.
Work in Clean Area
Clean Work Area
Before starting a job:
Clean work area and machine. Make sure you have all necessary tools to do your job. Have the right parts on hand.
Read all instructions thoroughly; do not attempt shortcuts.
Work In Ventilated Area
Engine exhaust fumes
Engine exhaust fumes can cause sickness or death. If it is necessary to run an engine in an enclosed area, remove the exhaust fumes from the area with an exhaust pipe extension.
If you do not have an exhaust pipe extension, open the doors and get outside air into the area.
Illuminate Work Area Safely
Work Area Safely
Illuminate your work area adequately but safely. Use a portable safety light for working inside or under the machine. Make sure the bulb is enclosed by a wire cage. The hot lament of an accidentally broken bulb can ignite spilled fuel or oil.
Use Proper Lifting Equipment
Proper Lifting Equipment
Lifting heavy components incorrectly can cause severe injury or machine damage.
Follow recommended procedure for removal and installation of components in the manual.
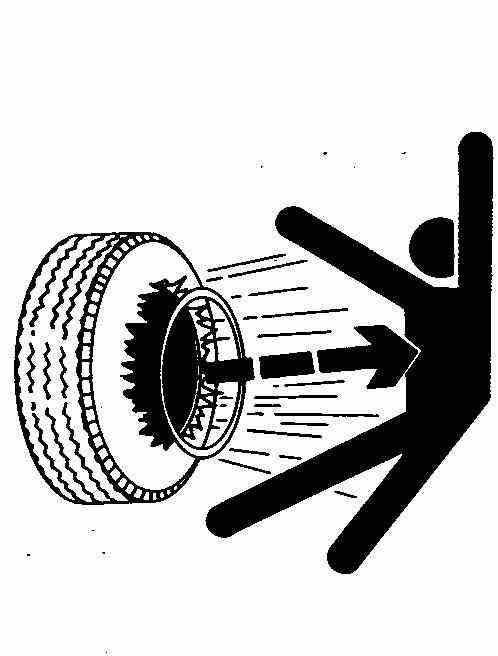
Explosive Tire and Rim Parts
CAUTION:
Explosive separation of a tire and rim parts can cause serious injury or death.
Do not attempt to mount a tire unless you have the proper equipment and experience to perform the job.
Always maintain the correct tire pressure. Do not in ate the tires above the recommended pressure.
Never weld or heat a wheel and tire assembly. The heat can cause an increase in air pressure resulting in a tire explosion. Welding can structurally weaken or deform the wheel.
When in ating tires, use a clip-on chuck and extension hose long enough to allow you to stand to one side and NOT in front of or over the tire assembly. Use a safety cage if available.
Check wheels for low pressure, cuts, bubbles, damaged rims or missing lug bolts and nuts.
Instructional Seat
The instructional seat, if so equipped, has been provided only for training operators or diagnosing machine problems.
Service Front-Wheel Drive Tractor Safely
SafetyTractor Rolling Forward
When servicing front-wheel drive tractor with the rear wheels supported o the ground and rotating wheels by engine power, always support front wheels in a similar manner. Loss of electrical power or transmission hydraulic system pressure will engage the front driving wheels, pulling the rear wheels o the support if front wheels are not raised. Under these conditions, front drive wheels can engage even with switch in disengaged position.
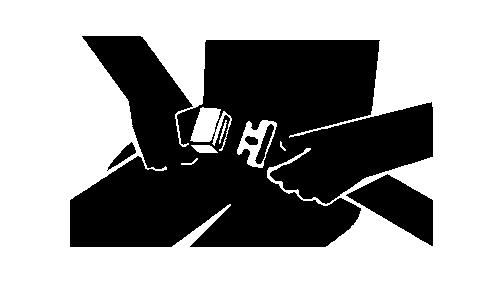
Use Steps and Handholds Correctly
Use Handholds and Steps
Use Seat Belt
Prevent falls by facing the machine when getting on and o . Maintain 3-point contact with steps, handholds, and handrails.
Use extra care when mud, snow, or moisture present slippery conditions. Keep steps clean and free of grease or oil. Never jump when exiting machine. Never mount or dismount a moving machine.
Transport Tractor Safely
Transport Tractor Safely
A disabled tractor is best transported on a atbed carrier. Use chains to secure the tractor to the carrier. The axles and tractor frame are suitable attachment points.
Before transporting the tractor on a low-loader truck or atbed rail wagon, make sure that the hood is secured over the tractor engine and that doors, roof hatch (if equipped) and windows are properly closed.
Never tow a tractor at a speed greater than 10 km/h (6 mph). An operator must steer and brake the tractor under tow.
Keep Area Clean
Understand service procedure before doing work. Keep area clean and dry.
Never lubricate, service, or adjust machine while it is moving. Keep hands, feet , and clothing from power-driven parts. Disengage all power and operate controls to relieve pressure. Lower equipment to the ground. Stop the engine. Remove the key. Allow machine to cool.
Securely support any machine elements that must be raised for service work.
Keep all parts in good condition and properly installed. Fix damage immediately. Replace worn or broken parts. Remove any buildup of grease, oil, or debris.
On self-propelled equipment, disconnect battery ground cable (-) before making adjustments on electrical systems or welding on machine.
On towed implements, disconnect wiring harnesses from tractor before servicing electrical system components or welding on machine.
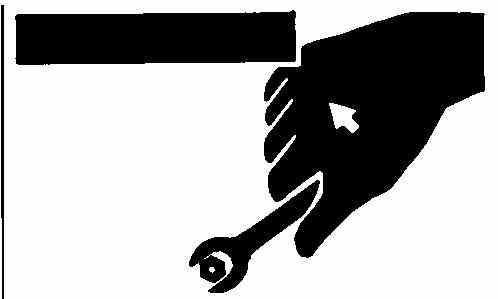
Use Proper Tools
Proper Tools
Use tools appropriate to the work. Makeshift tools and procedures can create safety hazards.
Use power tools only to loosen threaded parts and fasteners.
For loosening and tightening hardware, use the correct size tools. DO NOT use U.S. measurement tools on metric fasteners. Avoid bodily injury caused by slipping wrenches.
Use only service parts meeting John Deere speci cations.
Construct Dealer-Made Tools Safely
Construct Dealer-Made Tools Safely
Faulty or broken tools can result in serious injury. When constructing tools, use proper, quality materials, and good workmanship.
Do not weld tools unless you have the proper equipment and experience to perform the job.
Replace Safety Signs
Safety Signs
Replace missing or damaged safety signs. See the machine operator s manual for correct safety sign placement.
Install All Guards
SafetyFan
Rotating cooling system fans, belts, pulleys, and drives can cause serious injury.
Keep all guards in place at all times during engine operation.
Wear close- tting clothes. Stop the engine and be sure fans, belts, pulleys, and drives are stopped before making adjustments, connections, or cleaning near fans and their drive components.
Live With Safety
Safety Systems
Before returning machine to customer, make sure machine is functioning properly, especially the safety systems. Install all guards and shields.
Group 10 - General Information
List of References
Below is a list of all items within this group.
Trademarks
Sealants and Adhesives Cross-Reference Chart
Metric Bolt and Screw Torque Values
Uni ed Inch Bolt and Screw Torque Values
Face Seal Fittings Assembly and Installation All Pressure Applications
Metric Face Seal And O-Ring Stud End Fitting Torque Chart Standard Pressures
Metric Face Seal and O-Ring Stud End Fitting Torque Chart High Pressure Applications
SAE Face Seal and O-Ring Stud End Fitting Torque Chart Standard Pressures
SAE Face Seal and O-Ring Stud End Fitting Torque Chart High Pressure Applications
Four Bolt Flange Fittings Assembly and Installation All Pressure Applications
SAE Four Bolt Flange Cap Screw Torque Values Standard Pressure Applications
SAE Four Bolt Flange Cap Screw Torque Values High Pressure Applications
External Hexagon Port Plug Torque Chart
Prevent Hydraulic System Contamination
Check Oil Lines and Fittings
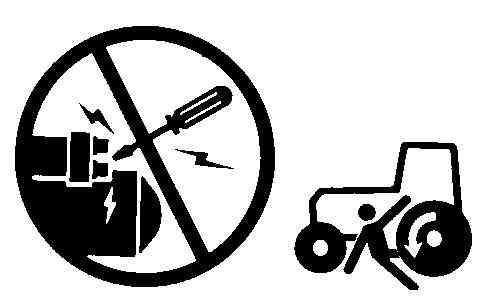
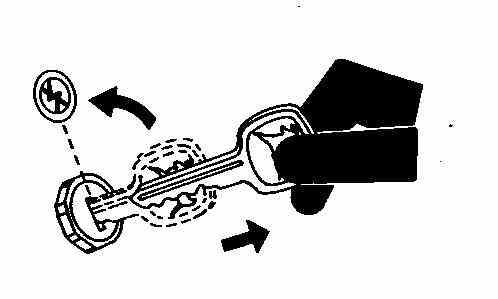
Basic Electrical Component Handling / Precautions For Vehicles Equipped With Computer Controlled Systems
Identify Zinc-Flake Coated Fasteners
Use Torque Wrench Adapter
Servicing and Connecting Snap-To-Connect STC Fittings
Glossary of Terms
Trademarks
Trademarks
Trademarks
AccuDepth
ACS
ActiveSeat
AMBLYGON
AMPSEAL 16
AutoLoad
AutoPowr
AutoPowr /IVT
AutoQuad II
AutoQuad PLUS
AutoTrac
Avdel
Bio Hy-Guard
Break-In
Break-In PLUS
CINCH
ClimaTrak
ComfortCommand
ComfortGard
ComfortGard Deluxe
CommandARM
CommandCenter
CommandQuad
CommandView
COOL-GUARD II
CoolScan
CPC
Deere
DEUTSCH
DURABUILT
E ciency Manager
FieldCruise
Field Doc
Field O ce
GreenStar
HY-GARD
ILS
iPhone®
iPod®
iPod Touch®
iTEC
iTEC Pro
IVT
IVT Selector
JDLink
Trademark of Deere and Company
Trademark of Deere and Company
Trademark of Deere and Company
Trademark of Kluber Lubrication
Trademark of Tyco Electronics
Trademark of Deere and Company
Trademark of Deere and Company
Trademark of Deere and Company
Trademark of Deere and Company
Trademark of Deere and Company
Trademark of Deere and Company
Trademark of Avdel UK Limited
Trademark of Deere and Company
Trademark of Deere and Company
Trademark of Deere and Company
Trademark of Cinch Inc.
Trademark of Deere and Company
Trademark of Deere and Company
Trademark of Deere and Company
Trademark of Deere and Company
Trademark of Deere and Company
Trademark of Deere and Company
Trademark of Deere and Company
Trademark of Deere and Company
Trademark of Deere and Company
Trademark of Deere and Company
Trademark of AMP Incorporated
Trademark of Deere and Company
Trademark of Deutsch Company
Trademark of Camoplast Inc.
Trademark of Deere and Company
Trademark of Deere and Company
Trademark of Deere and Company
Trademark of Deere and Company
Trademark of Deere and Company
Trademark of Deere and Company
Trademark of Deere and Company
Trademark of Apple, Inc.
Trademark of Apple, Inc.
Trademark of Apple, Inc.
Trademark of Deere and Company
Trademark of Deere and Company
Trademark of Deere and Company
Trademark of Deere and Company
Trademark of Deere and Company
Trademarks
JDO ce
John Deere
Loctite
MATE-N-LOC
METRIMATE
METRI-PACK
NEVER-SEEZ
Oilscan
Parallel Tracking
PLUS-50 II
PowrQuad
PowrQuad PLUS
PowerTech
PowerTech Plus
Power Zero
QUICK METAL
QuickTatch
Row-Trak
ServiceADVISOR
SERVICEGARD
StarFire
StarFire iTC
STC
StellarSupport
SUMITOMO
TEFLON
TIA
TLS
TLS Plus
TouchSet
Tractor-Implement Automation
Vari-Cool
Weather Pack
YAZAKI
Trademark of Deere and Company
Trademark of Deere and Company
Trademark of Henkel Corporation
Trademark of AMP Incorporated
Trademark of AMP Incorporated
Trademark of Delphi Packard Electric Systems
Trademark of Bostik-Findley Inc.
Trademark of Deere and Company
Trademark of Deere and Company
Trademark of Deere and Company
Trademark of Deere and Company
Trademark of Deere and Company
Trademark of Deere and Company
Trademark of Deere and Company
Trademark of Deere and Company
Trademark of Henkel Corporation
Trademark of Deere and Company
Trademark of Deere and Company
Trademark of Deere and Company
Trademark of Deere and Company
Trademark of Deere and Company
Trademark of Deere and Company
Trademark of Aeroquip Corporation
Trademark of Deere and Company
Trademark of Sumitomo Corporation
Trademark of DuPont Co.
Trademark of Deere and Company
Trademark of Deere and Company
Trademark of Deere and Company
Trademark of Deere and Company
Trademark of Deere and Company
Trademark of Deere and Company
Trademark of Packard Electric
Trademark of Yazaki Corporation
Sealants and Adhesives Cross-Reference Chart
Sealants and Adhesives Cross-Reference Chart
Metric Bolt and Screw Torque Values
Metric Bolt and Screw
Metric Torque Values
Class 4.8
Lubricated
Bolt or Screw
Size
[ Lubricated means coated with a lubricant such as engine oil, fasteners with phosphate and oil coatings, or M20 and larger fasteners with JDM F13C, F13F or F13J zinc ake coating. ] Dry
[ Dry means plain or zinc plated without any lubrication, or M6 to M18 fasteners with JDM F13B, F13E or F13H zinc ake coating. ]
Class 8.8 or 9.8
Lubricated
[ Lubricated means coated with a lubricant such as engine oil, fasteners with phosphate and oil coatings, or M20 and larger fasteners with JDM F13C, F13F or F13J zinc ake coating. ] Dry
[ Dry means plain or zinc plated without any lubrication, or M6 to M18 fasteners with JDM F13B, F13E or F13H zinc ake coating. ]
Class 10.9
Lubricated
[ Lubricated means coated with a lubricant such as engine oil, fasteners with phosphate and oil coatings, or M20 and larger fasteners with JDM F13C, F13F or F13J zinc ake coating. ] Dry
[ Dry means plain or zinc plated without any lubrication, or M6 to M18 fasteners with JDM F13B, F13E or F13H zinc ake coating. ]
Class 12.9
Lubricated
[ Lubricated means coated with a lubricant such as engine oil, fasteners with phosphate and oil coatings, or M20 and larger fasteners with JDM F13C, F13F or F13J zinc ake coating.
[ Dry means plain or zinc plated without any lubrication, or M6 to M18 fasteners with JDM F13B, F13E or F13H zinc ake coating. ]
Torque values listed are for general use only, based on the strength of the bolt or screw. DO NOT use these values if a di erent torque value or tightening procedure is given for a speci c application. For stainless steel fasteners or for nuts on U-bolts, see the tightening instructions for the speci c application. Tighten plastic insert or crimped steel type lock nuts by turning the nut to the dry torque shown in the chart, unless di erent instructions are given for the speci c application.
Shear bolts are designed to fail under predetermined loads. Always replace shear bolts with identical property class. Replace fasteners with the same or higher property class. If higher property class fasteners are used, tighten these to the strength of the original. Make sure fastener threads are clean and that you properly start thread engagement. When possible, lubricate plain or zinc plated fasteners other than lock nuts, wheel bolts or wheel nuts, unless di erent instructions are given for the speci c application.
Uni ed Inch Bolt and Screw Torque Values
Uni ed Inch Bolt and Screw
Uni ed Inch Bolt and Screw Torque Values
SAE Grade 2
SAE Grade 1
Bolt or Screw Size
Lubricated
[ Lubricated means coated with a lubricant such as engine oil, fasteners with phosphate and oil coatings, or 7/8 in. and larger fasteners with JDM F13C, F13F or F13J zinc ake coating. ] Dry
[ Dry means plain or zinc plated without any lubrication, or 1/4 to 3/4 in. fasteners with JDM F13B, F13E or F13H zinc ake coating. ]
[ Grade 2 applies for hex cap screws (not hex bolts) up to 6 in. (152 mm) long. Grade 1 applies for hex cap screws over 6 in. (152 mm) long, and for all other types of bolts and screws of any length. ]
Lubricated
[ Lubricated means coated with a lubricant such as engine oil, fasteners with phosphate and oil coatings, or 7/8 in. and larger fasteners with JDM F13C, F13F or F13J zinc ake coating. ] Dry
[ Dry means plain or zinc plated without any lubrication, or 1/4 to 3/4 in. fasteners with JDM F13B, F13E or F13H zinc ake coating. ]
Lubricated
[ Lubricated means coated with a lubricant such as engine oil, fasteners with phosphate and oil coatings, or 7/8 in. and larger fasteners with JDM F13C, F13F or F13J zinc ake coating. ] Dry [ Dry means plain or zinc plated without any lubrication, or 1/4 to 3/4 in. fasteners with JDM F13B, F13E or F13H zinc ake coating. ]
Lubricated [ Lubricated means coated with a lubricant such as engine oil, fasteners with phosphate and oil coatings, or 7/8 in. and larger fasteners with JDM F13C, F13F or F13J zinc ake coating. ] Dry [ Dry means plain or zinc plated without any lubrication, or 1/4 to 3/4 in. fasteners with JDM F13B, F13E or F13H zinc ake coating. ]
Torque values listed are for general use only, based on the strength of the bolt or screw. DO NOT use these values if a di erent torque value or tightening procedure is given for a speci c application. For plastic insert or crimped steel type lock nuts, for stainless steel fasteners, or for nuts on U-bolts, see the tightening instructions for the speci c application. Shear bolts are designed to fail under predetermined loads. Always replace shear bolts with identical grade.
Replace fasteners with the same or higher grade. If higher grade fasteners are used, tighten these to the strength of the original. Make sure fastener threads are clean and that you properly start thread engagement. When possible, lubricate plain or zinc plated fasteners other than lock nuts, wheel bolts or wheel nuts, unless di erent instructions are given for the speci c application.
SAE Grade 5, 5.1 or 5.2
SAE Grade 8 or 8.2
Face Seal Fittings Assembly and Installation All Pressure Applications
Face Seal O-Ring to Stud End Installation
[1] - Inspect the tting surfaces. They must be free of dirt and/or defects.
[2] - Inspect the O-ring. It must be free of damage and/or defects.
[3] - Lubricate O-rings and install into groove using petroleum jelly to hold in place.
[4] - Push O-ring into groove with petroleum jelly so O-ring is not displaced during assembly.
[5] - Index angle ttings and tighten by hand pressing joint together to insure O-ring remains in place.
[6] - Tighten tting or nut to torque value shown on the chart per dash size stamped on the tting. DO NOT allow hoses to twist when tightening ttings.
Face Seal Adjustable Stud End O-Ring Installation
[1] - Back o lock nut (jam nut) and washer to full exposed turned down section of the tting.
[2] - Install a thimble over the tting threads to protect the O-ring from nicks.
[3] - Slide the O-ring over the thimble into the turned down section of the tting.
[4] - Remove thimble.
Face Seal Straight Stud End O-Ring Installation
[1] - Install a thimble over the tting threads to protect the O-ring from nicks.
[2] - Slide the O-ring over the thimble into the turned down section of the tting.
[3] - Remove thimble.
Fitting Installation
[1] - Install tting by hand until snug.
[2] - Position adjustable ttings by unscrewing the tting no more than one turn.
[3] - Apply assembly torque per table.
Assembly Torque
[1] - Use one wrench to hold the connector body and one wrench to tighten nut.
[2] - For a hydraulic hose, it may be necessary to use three wrenches to prevent twist; one on the connector body, one on the nut, and one on the body of the hose tting.
Metric Face Seal And O-Ring Stud End Fitting Torque Chart Standard Pressures
Face Seal Fittings (Standard Pressure)
A Tolerance is +15%, minus 20% of mean tightening torque unless otherwise speci ed.
B The straight hex wrench sizes listed apply to connectors only and may not be the same as the corresponding plug of the same thread size.
C These torques were established using steel plated connectors in aluminum and brass.
Metric Face Seal and O-Ring Stud End Fitting Torque Chart High
Face Seal Fittings (High Pressure)
A Tolerance is +15%, minus 20% of mean tightening torque unless otherwise speci ed.
B The straight hex wrench sizes listed apply to connectors only and may not be the same as the corresponding plug of the same thread size.