HOW TO IMPROVE YOUR BLADE PERFORMANCE


2 EUROPE • woodmizer.eu | AFRICA • woodmizerafrica.com | ASIA • woodmizerasia.com Understanding Blades: How To Choose a Sawmill Blade Profile Selecting Sawmill Blade Material How to Increase Sawmill Blade Life Wood-Mizer Sharpeners and Toothsetters How to Sharpen Your Own Blades Sharpening with CBN Wheels Mineral Oil for Sharpeners Sharpening Troubleshooting Best Practices for Better Blade Performance Blade Guide Roller Adjustment Links to Useful Videos 3 6 10 12 14 15 16 17 19 21 22 CONTENT
UNDERSTANDING BLADES HOW TO
CHOOSE
A SAWMILL BLADE PROFILE

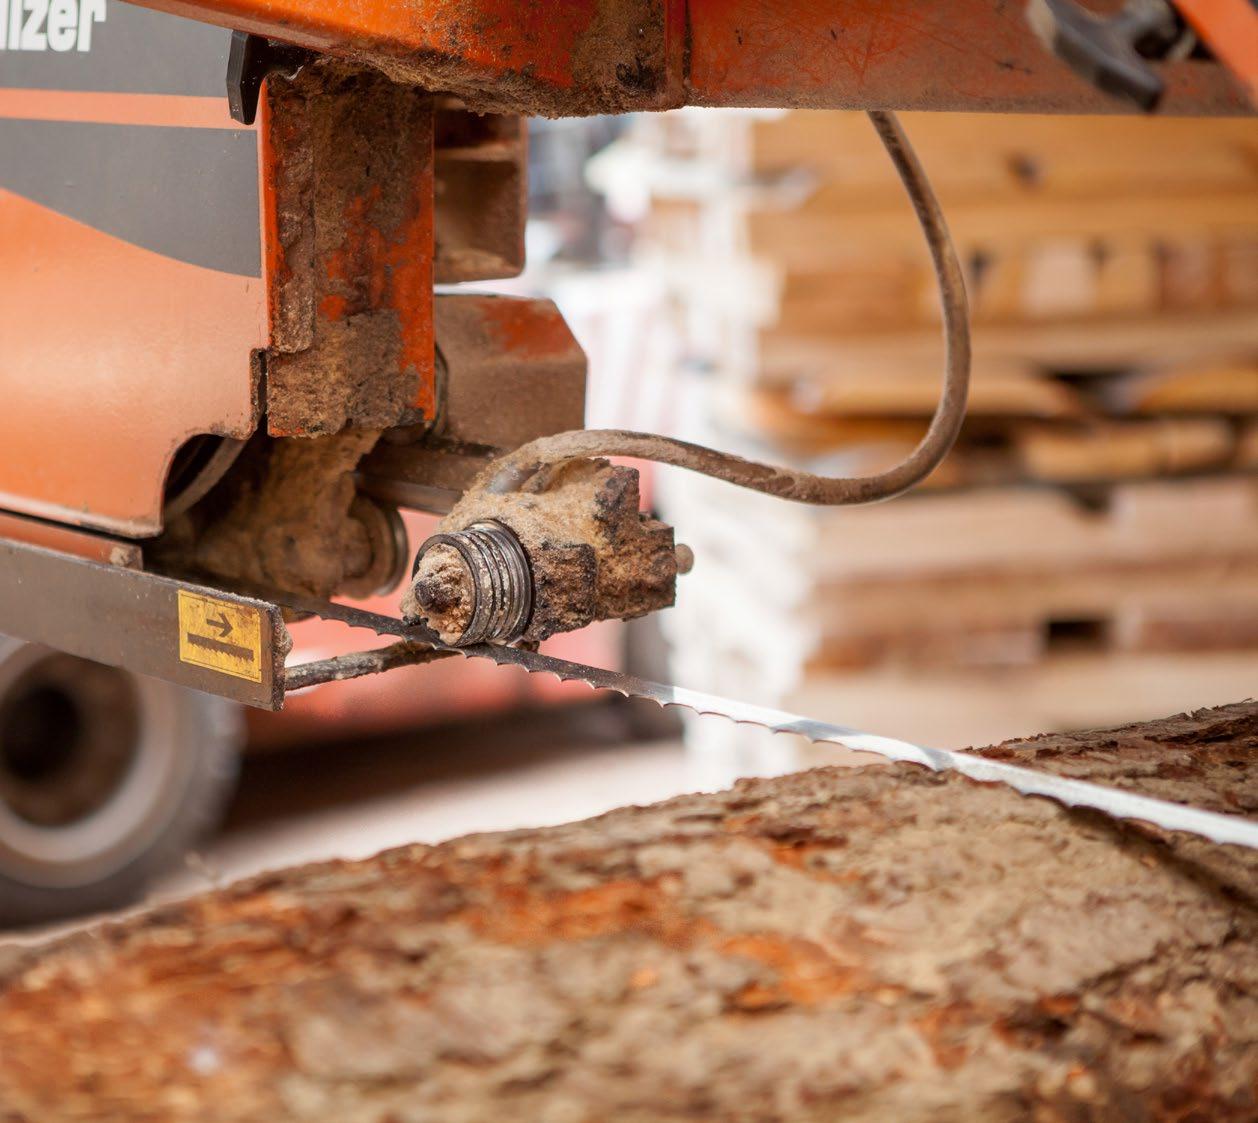
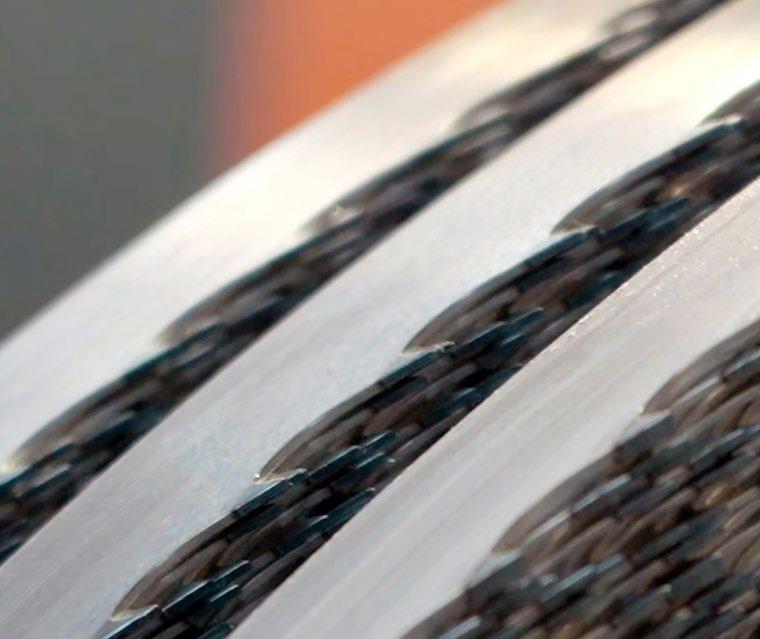
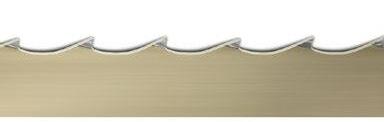
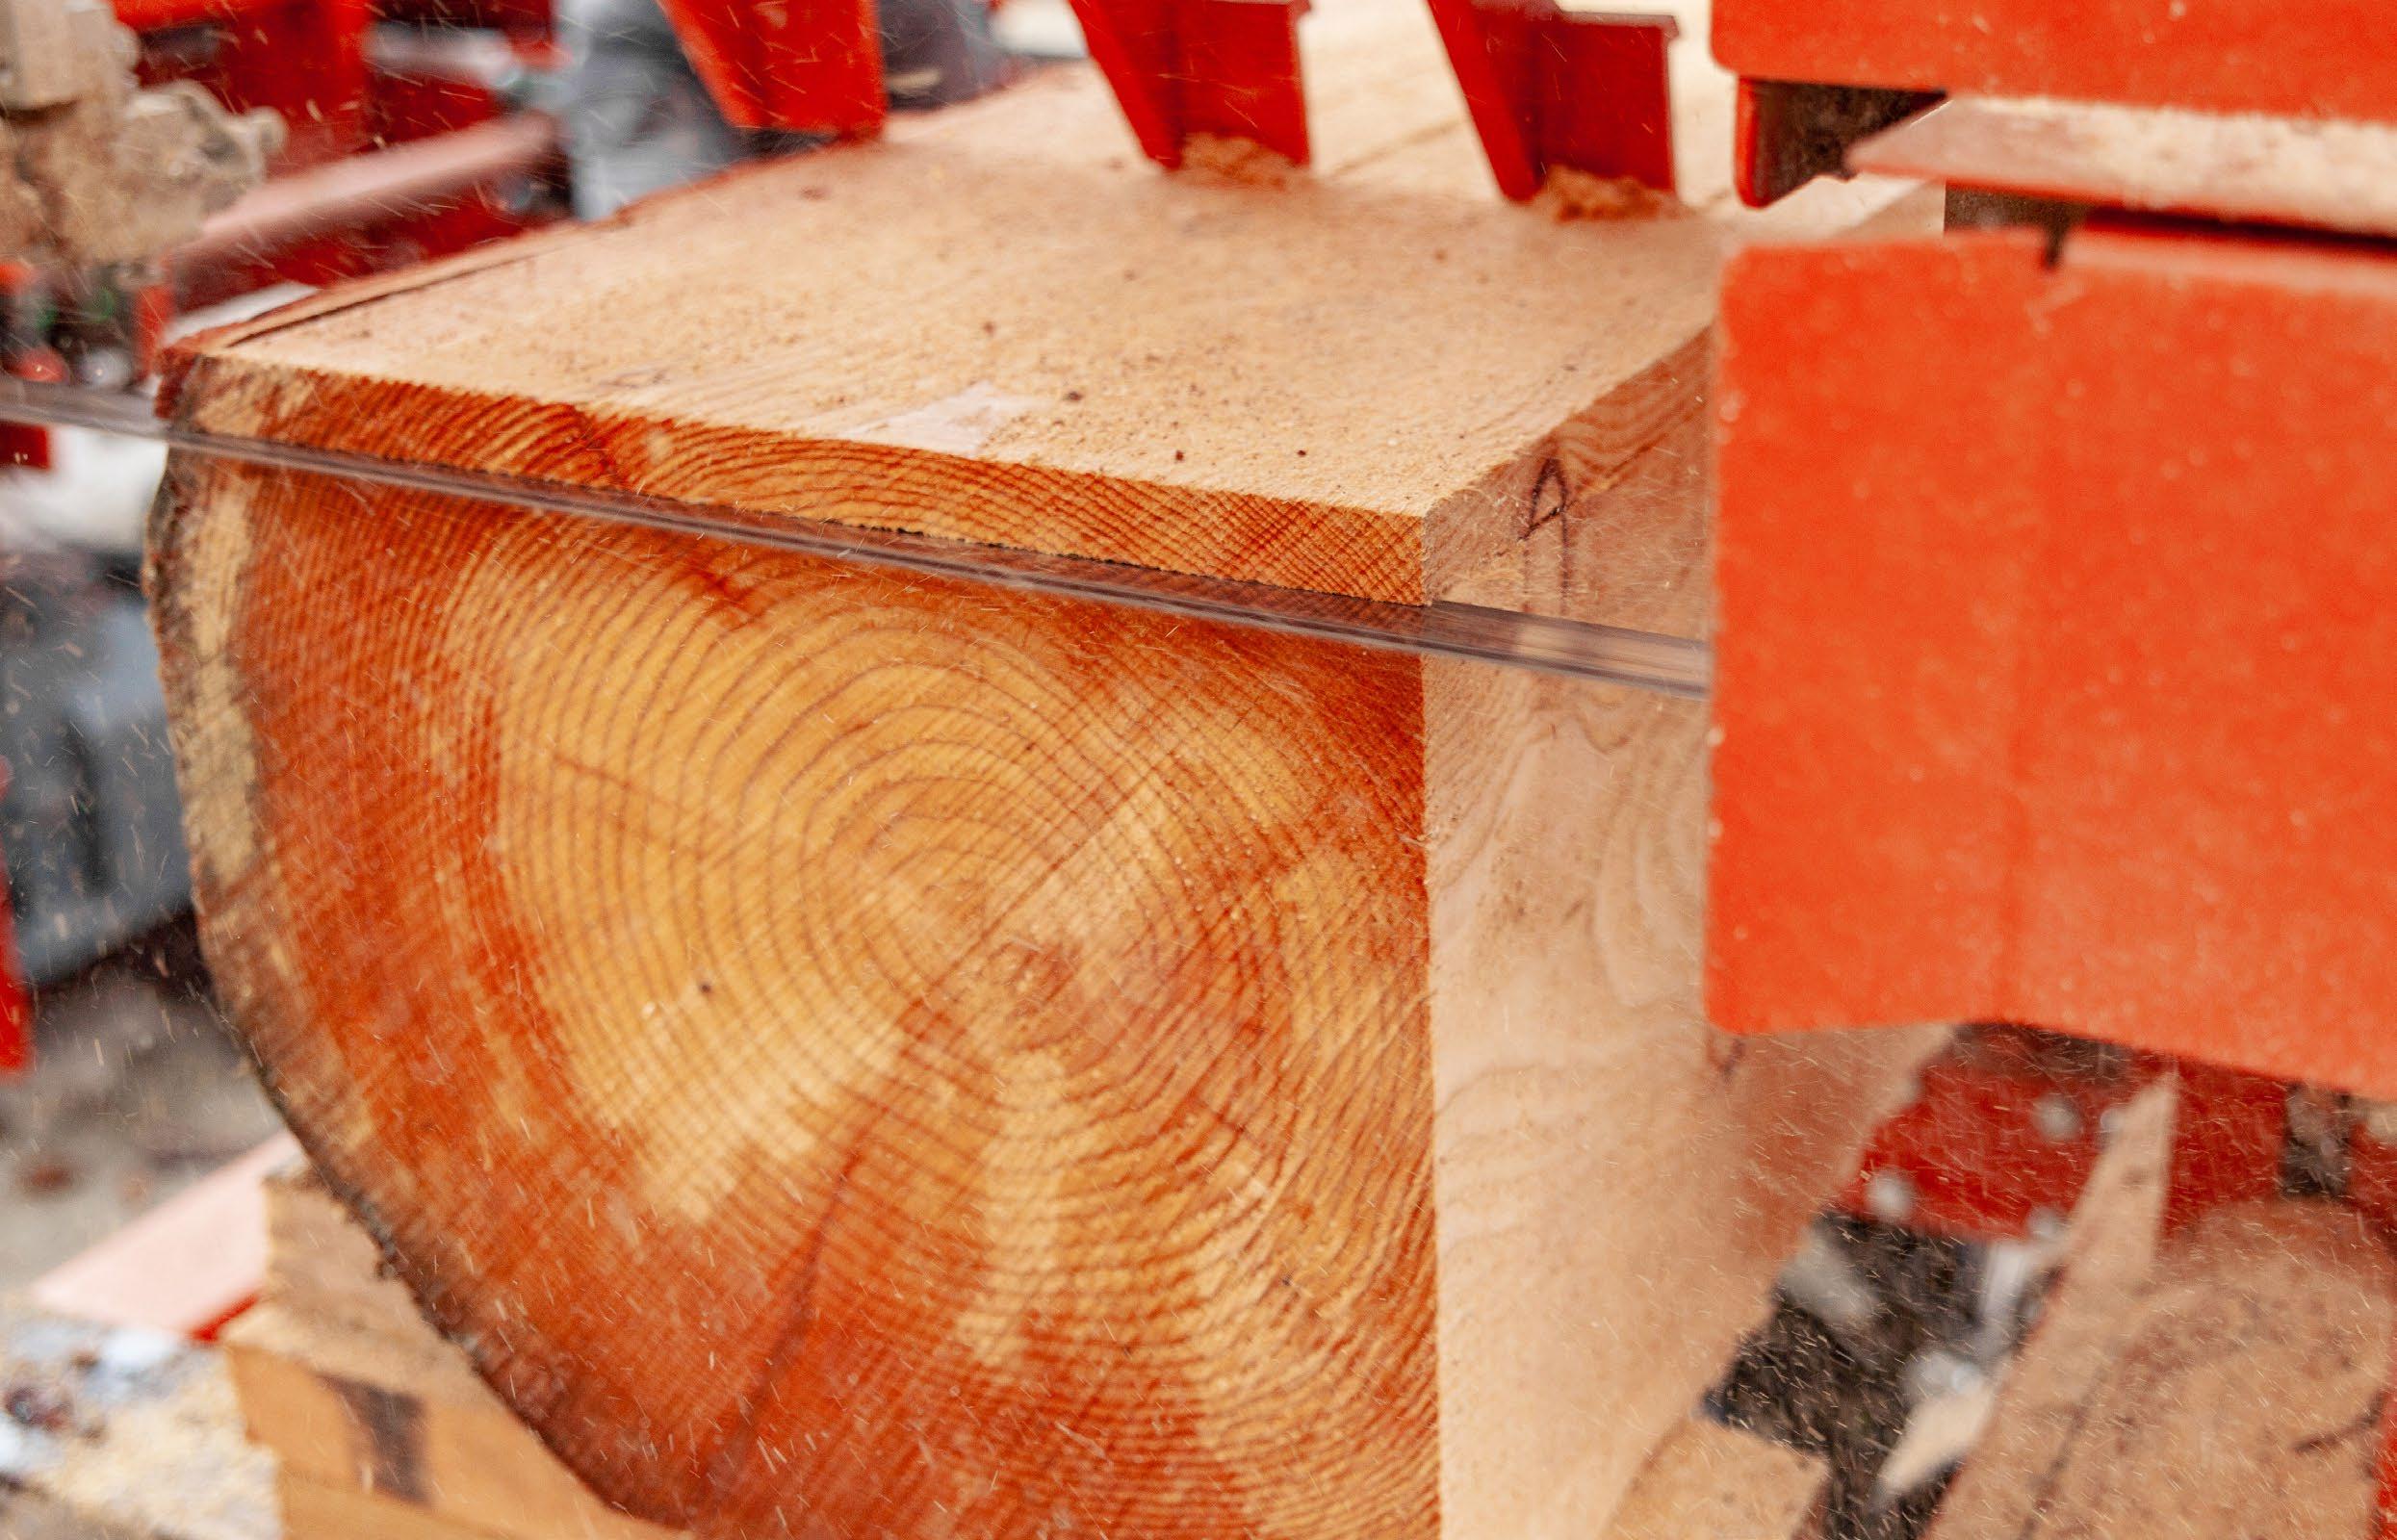
Using the best sawmill blade is key to increasing production, improving cut quality, and reducing costs for your sawmilling or resawing operation. From green softwoods to abrasive hardwoods, Wood-Mizer manufactures an industry-leading range of sawmill blades with more than 100 combinations based on profile, width, thickness, tooth spacing, and material for any type of sawing or resawing application. With a wide variety of options available, selecting the blades that best fit your operation can be complex. Here is a helpful guide to understanding different parts of a band sawmill blade and how to choose the best blade profile and material for your sawing application.
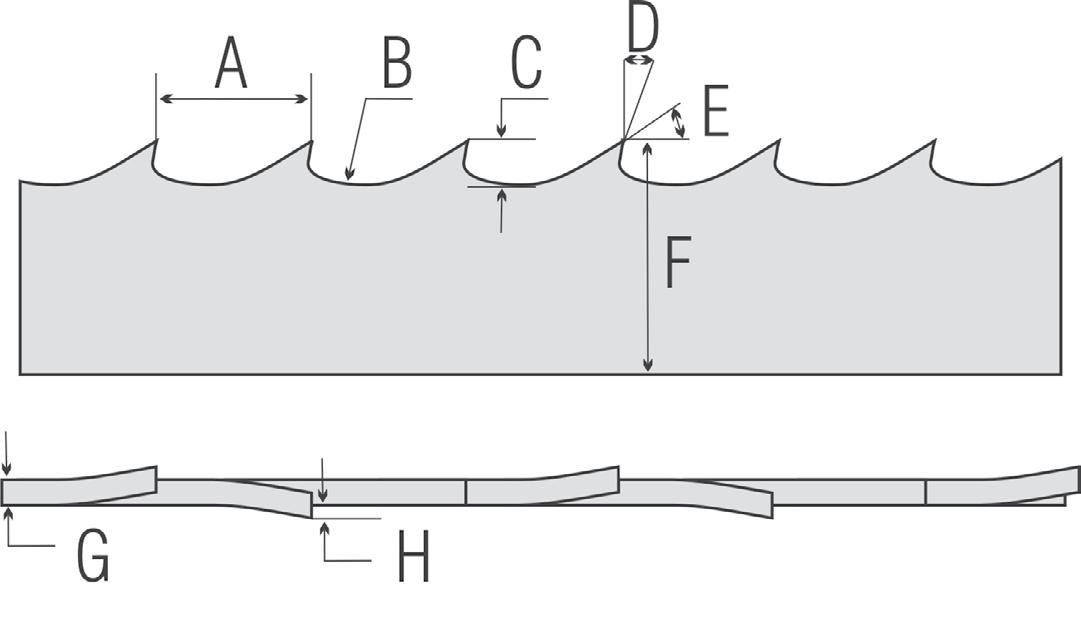
A = Tooth spacing
B = Gullet
C = Tooth height
D = Hook angle
E = Back Angle
F = Blade Width
G = Blade Thickness
H = Tooth set
3 EUROPE • woodmizer.eu | AFRICA • woodmizerafrica.com | ASIA • woodmizerasia.com
A. Tooth Spacing is the distance between each tooth from one tip to another. Shorter tooth spacing (1/2”, 5/8”, 3/4”, and 7/8” -12.7mm, 15.87mm, 19.05mm, and 22.22mm) is generally used for low horsepower sawing (18kW/24HP or less), secondary processing, and resawing, while wider tooth spacing (1” and 1-1/4” – 25.4mm and 31.75mm) is ideal for high production, high power (18.5kW/25HP or more) operations.
B. Gullet is the area between teeth that captures and removes sawdust while providing strength in the tooth. The tooth height must be tall enough to allow the gullet to carry out sawdust from the cut.
C. Tooth Height is the distance from the lowest point of the gullet to the highest tip of the tooth. Taller teeth (7° and Turbo 7° hook angle) provide more performance in higher horsepower (18.4kW/25HP or more) with increased sawdust removal. Shorter teeth (9° and 10° hook angle) are better for lower horsepower (18kW/24HP or less), small log diameter sawing, resawing, and secondary processing.
D. Hook Angle is the number of degrees that the tooth face leans forward of 90 degrees. The hook angle should be chosen based on the type of wood you are sawing.
ġ Turbo 747 Sawmill Blades - Only available from Wood-Mizer, this profile is compatible with all horsepower levels and features a deeper capacity gullet for increased sawdust removal, extreme 47° back angle for faster sawing speeds, and sharp penetrating points for increased sawing accuracy.
ġ 9° Sawmill Blades - Ideal blade for lower horsepower (18kW/24HP or less) sawing frozen wood, hardwood, and small diameter logs.
ġ 10° Sawmill Blades - Very popular all-purpose blade for all horsepower levels sawing mixed hardwoods such as red oak, cherry, walnut, soft maple, and poplar.
ġ 7° Sawmill Blades - Solid, all-around profile with a good gullet capacity for higher horsepower (18.4kW/25HP or more) sawing in hardwoods.
ġ Turbo 7° Sawmill Blades - Only available from Wood-Mizer, this high performing profile with an aggressive 39° back angle is engineered specifically for extreme and exotic hardwoods when sawing with higher horsepower (18.4kW/25HP or more) equipment.
ġ Vortex™ Sawmill Blades - Only available from Wood-Mizer, this unique dust-removal profile has more gullet capacity to remove sawdust from the board.
F. Blade Width is the distance between the tip and base of the blade. Wider blades (1-1/2” to 2” – 38mm to 50mm) are designed for higher horsepower (18.4kW/25HP or more) sawmills, provide a faster feed rate, and are able to be resharpened more. Narrow blades (1-1/4” to 1-1/2” – 32mm to 38mm) are for lower horsepower sawmills (18kW/24HP or less) and more difficult sawing.
4 EUROPE • woodmizer.eu | AFRICA • woodmizerafrica.com | ASIA • woodmizerasia.com
G. Blade Thickness is the thickness of the blade. Thicker blades (.045”, .050”, .055” -1.14mm, 1.27mm, 1.4mm) provide faster feed rates and better cutting performance in difficult sawing conditions such as knotty, frozen, dry or extremely hard material, but requires higher horsepower (18.4kW/25HP or more). Thinner blades (.035”, .038”, .042” -0.9mm, 1mm, 1.07mm) provide longer flex life with lower horsepower sawmills (18kW/24HP or less) where production or speed is not a primary factor.
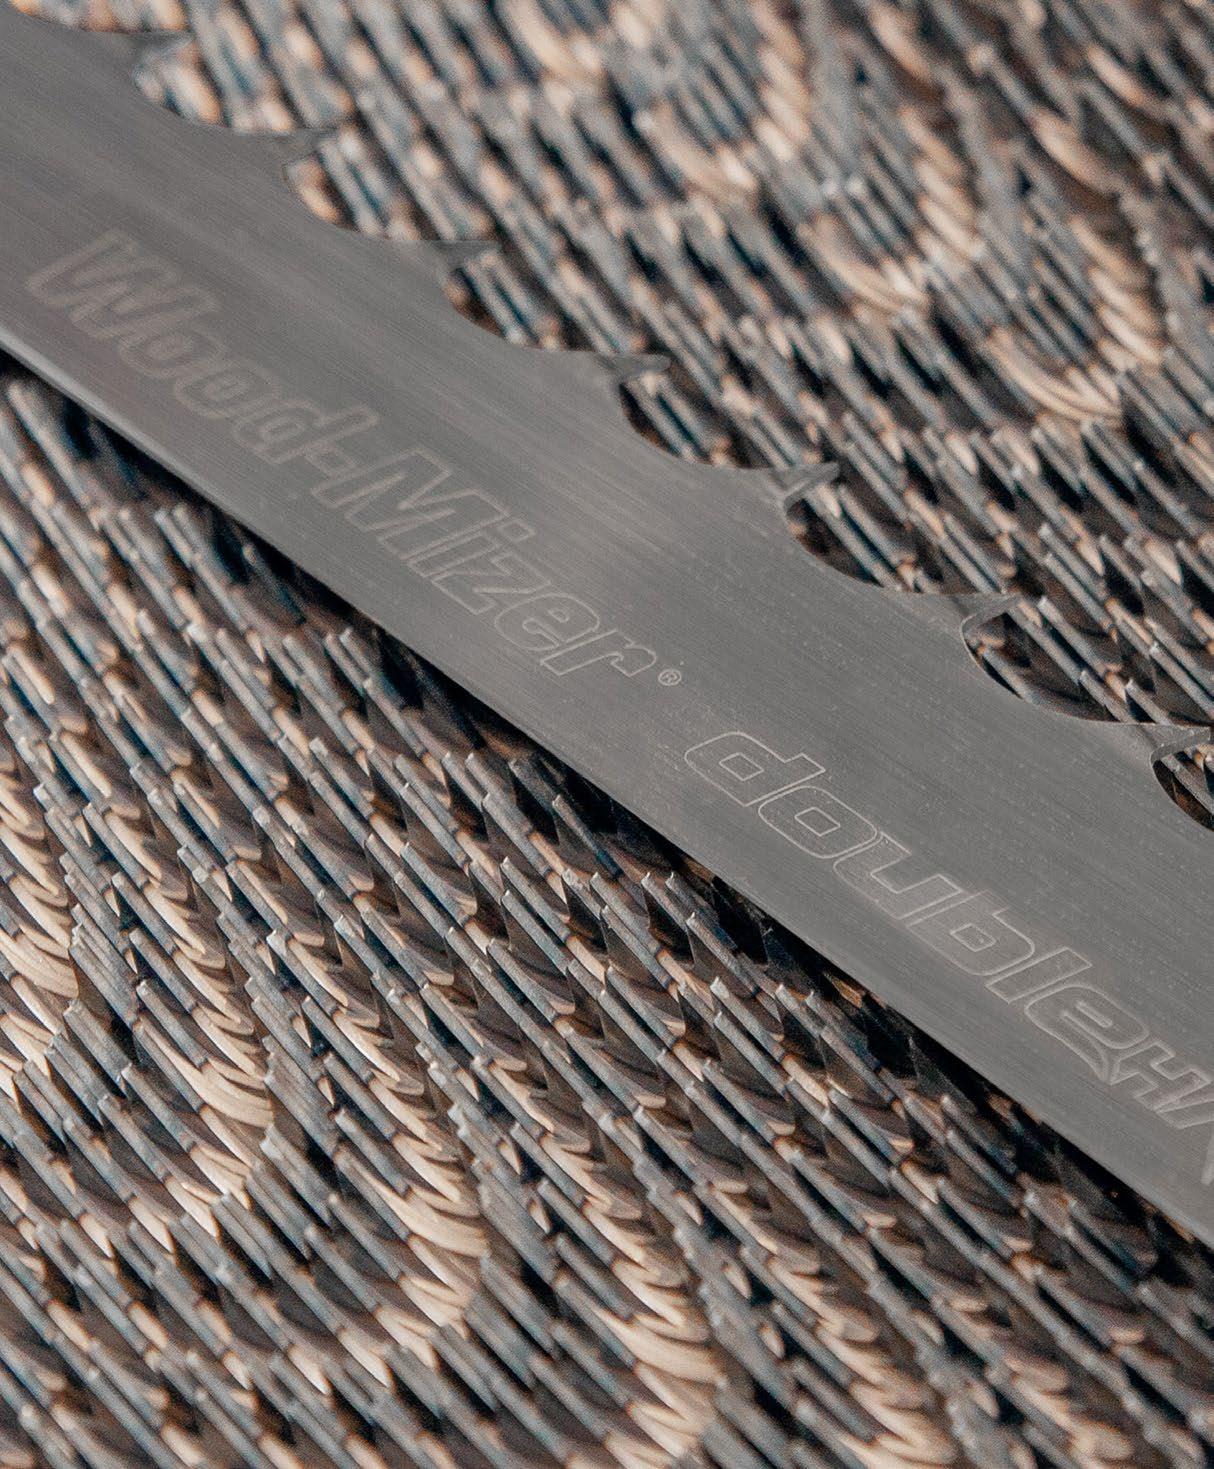
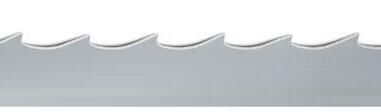
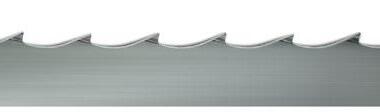
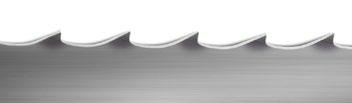
Wood-Mizer Tooth Profiles
Wood-Mizer produces blades with several tooth profiles to achieve the best results in the sawmilling of different wood types.
H. Tooth Set is the distance the tooth is bent beyond the body or raker tooth of the blade. Tooth set clears a path in the wood for the body of the blade which is measured by kerf or the total amount of wood removed by the blade with each pass. Wood-Mizer thin kerf blades remove less than 2.5mm which produces about 20% more boards per log than circle mills or chainsaws.
ġ 7/34, 7/39 and 7/47 These tooth profiles are recommended for hardwoods and works best with engines over 18.4kW/25HP.
ġ 9/29 This profile is designed to cut frozen, partly frozen, or hardwoods with high density, like acacia, oak and hornbeam, and ash.
ġ 10/30 This is Wood-Mizer’s most popular and versatile tooth profile. The blades cut equally well softwoods, medium hardwoods, and hardwoods, for example, birch, beech, maple, linden, pine, and poplar.
EUROPE • woodmizer.eu | AFRICA • woodmizerafrica.com
SELECTING SAWMILL BLADE MATERIAL
In addition to the profile, blade material is another consideration when selecting the best sawmill blade for your operation. Wood-Mizer offers several blade materials based on alloy, hardness, and more.


6 EUROPE • woodmizer.eu | AFRICA • woodmizerafrica.com | ASIA • woodmizerasia.com
BANDSAW BLADES
INDUSTRIAL BANDSAW BLADES
BiMETAL is made of two kinds of steel: alloy steel for the carrier material and High Speed Steel for the tooth tip. In the manufacturing process, the tooth tip in the form of a wire is merged with the carrier by laser welding, and in the later stages it’s shaped to the right profile. Generally used for primary breakdown sawing in portable or industrial sawmill operations, BiMETAL blades hold a sharpened edge up to three times longer than carbon blades and can be resharpened multiple times with a CBN grinding wheel. BiMETAL sawmill blades offer a longer sawing sharp life than most carbon and high-alloy blades and are engineered for production sawing environments.
ġ Maintained with CBN grinding technology
MaxFLEX is a premium quality all-purpose blade for sawing and resawing environments where ultimate flex life is necessary. With “premium high-alloy” steel for maximum flexibility and sawing life, MaxFLEX blades are primarily used in portable and industrial sawmill operations. Still, you can also use them in resawing applications.
ġ Maintained with CBN grinding technology
ġ Material hardness resembles DoubleHARD

With hundreds of combinations based on profile and material, every Wood-Mizer sawmill blade tooth is precisely set by computer-controlled equipment and completely profile ground tip to tip using super abrasive grinding technology to ensure the highest quality blade performance. Made in Europe, all Wood-Mizer blades are quality checked for performance throughout more than 100 tests and inspections from the selection of raw materials to the final grind. Compatible with multiple sawmill brands and models, you can count on Wood-Mizer sawmill and resaw blades for unmatched quality, accuracy, and performance across the board.
7 EUROPE • woodmizer.eu | AFRICA • woodmizerafrica.com | ASIA • woodmizerasia.com
INDUSTRIAL BANDSAW BLADES STELLITE® BANDSAW BLADES BANDSAW BLADES
INDUSTRIAL BANDSAW BLADES STELLITE® BANDSAW BLADES BANDSAW BLADES
DoubleHARD’s original blade material is manufactured from high-alloy steel and is designed for portable and industrial sawmill equipment. With the combination of harder high-alloy steel and induction hardened teeth, DoubleHARD blades deliver twice the toughness and twice the sharp life compared to standard carbon blades and can be resharpened several times with a CBN grinding wheel. DoubleHARD sawmill blades are durable all-purpose blades for sawing softwoods, hardwoods, knotty woods, and frozen woods.
ġ Harder than “carbon steel”
ġ Tough, non-chip material
ġ Durable blade even with multiple resharpenings
SilverTIP blades are manufactured from spring carbon steel to secure high flexibility and durability. They can be used on both portable and industrial sawmills and are also suitable for horizontal resaws.Carbon is the most common steel used in narrow-band sawing and can be resharpened with a CBN grinding wheel, but typically not as often as a blade made with harder high-alloy steel like DoubleHARD blades. SilverTIP sawmill blades are ideal for economical sawing, primary and secondary breakdown as well as for high volume sawing environments.
ġ Softer than “high-alloy steel”
8 EUROPE • woodmizer.eu | AFRICA • woodmizerafrica.com | ASIA • woodmizerasia.com
INDUSTRIAL BANDSAW BLADES
STELLITE® BANDSAW BLADES BANDSAW BLADES
Wood-Mizer produces sawmill blades of customized length on request.
Wood-Mizer introduced the StartCUT series as the cheapest blades for sawmills and resaws in the offer. StartCUT blades are made from spring carbon steel with induction hardened teeth that are set and sharpened. For those sawmillers who prioritize the price, the StartCUT is the right choice as an inexpensive blade from the world-known manufacturer.


VORTEX BLADE PROFILE


Wood-Mizer developed a unique tooth profile called Vortex®. Vortex is a new generation of specialized blades that can cut the wood and simultaneously remove the sawdust from the cut resulting in a clear timber surface important for high production pallet factories. The cleaning of pallet boards from the sawdust is a separate operation that is often fulfilled manually. With the Vortex blade, this cleaning operation can be reduced, facilitated, or even eliminated from the process, resulting in decreased operational costs.
9 EUROPE • woodmizer.eu | AFRICA • woodmizerafrica.com | ASIA • woodmizerasia.com
HOW TO INCREASE SAWMILL BLADE LIFE
Eliminate downtime and keep sawing with these 10 helpful tips to increase your sawmill blade life expectancy.
1. SHARPEN YOUR BLADES
Use Wood-Mizer’s ReSharp® blade sharpening service or your own blade maintenance equipment to ensure your bandsaw blades maintain maximum precision and performance.
2. PAY ATTENTION TO DETAIL
When installing a new sawmill blade, make a few cuts at a moderate speed to “break in” the blade. Also, minimize skim cuts when only one side of the set tooth is sawing.
3. MAINTAIN DRIVE BELT TENSION
Keep drive belts tight to transmit higher horsepower to the sawmill blade, especially with new belts that need tightened more frequently.
4. UNDERSTAND DIFFERENT WOOD SPECIES AND MOISTURE CONTENT
Trees vary in density, which requires different cutting techniques and feed rates. Wood density change as logs dry which makes sawing more difficult.
10 EUROPE • woodmizer.eu | AFRICA • woodmizerafrica.com | ASIA • woodmizerasia.com
5. LUBRICATE YOUR BLADES
Lubricating the sawmill blade can lead to higher sawing performance, reduced pitch build up, longer life between blade sharpenings, and overall blade life.
6. CLEAN BEFORE YOU CUT
Dirt, rocks, sand, and other foreign material that may be in the log will wear the teeth considerably faster. A debarker can help with this.
7. MEASURE BLADE TENSION
Periodically check hydraulic tensioners, air bags, and springs, because proper tension is critical for maximum blade performance and cutting speeds.

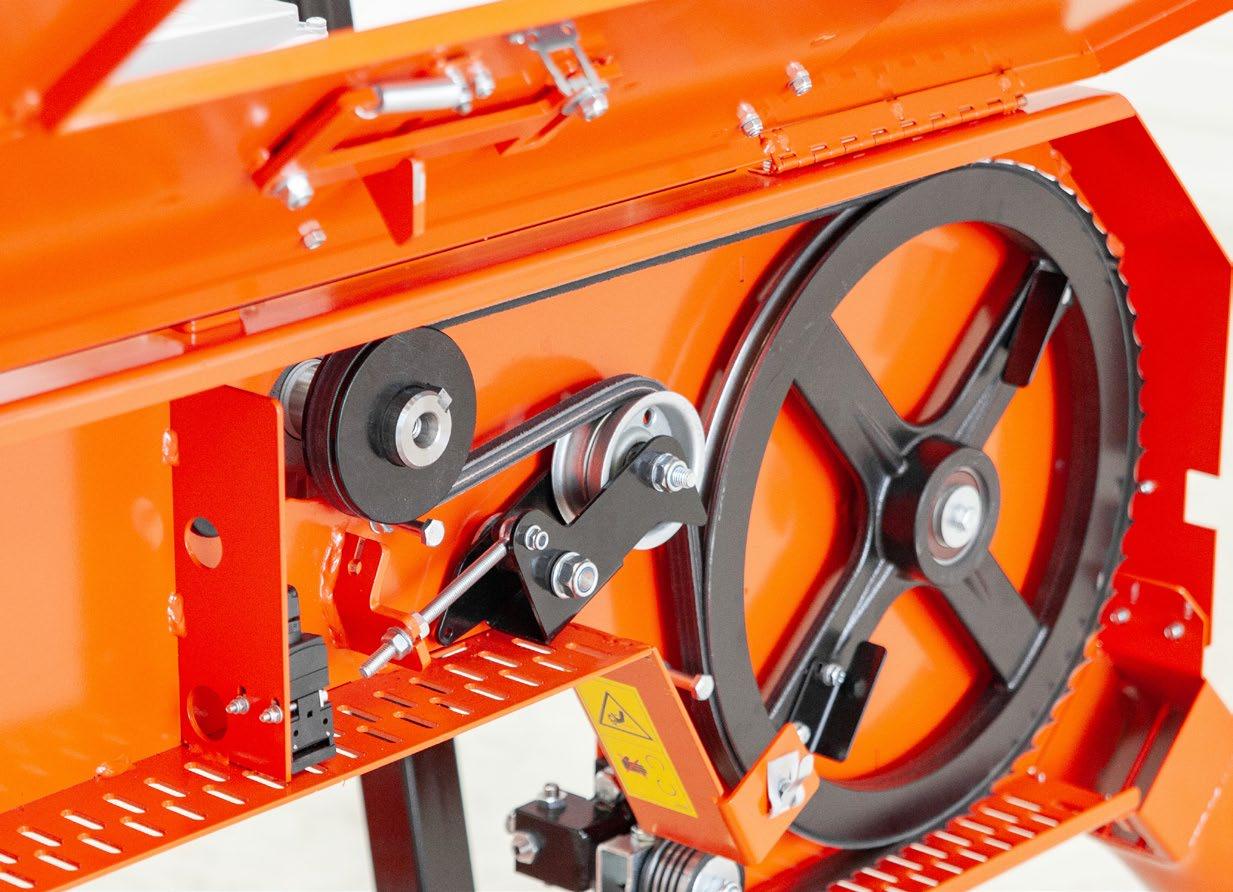
8. EXAMINE BLADE WHEEL BELTS
The blade wheel belts must be in good condition to reach peak performance because worn belts can lead to blade tracking problems. Swapping drive side and idle side can extend belt life.
9. INCREASE FEED RATE
Feed rates should be as fast as possible while still maintaining a straight cut because cutting at slower speeds reduces overall bandsaw blade life.
10. EXAMINE BLADE GUIDE ALIGNMENT
If the blade guides are tipped upward or downward, they will cause the blade to cut in the same direction. Keep rollers tight and make sure the blade is not continuously contacting the back guide or roller flange.
11 EUROPE • woodmizer.eu | AFRICA • woodmizerafrica.com | ASIA • woodmizerasia.com
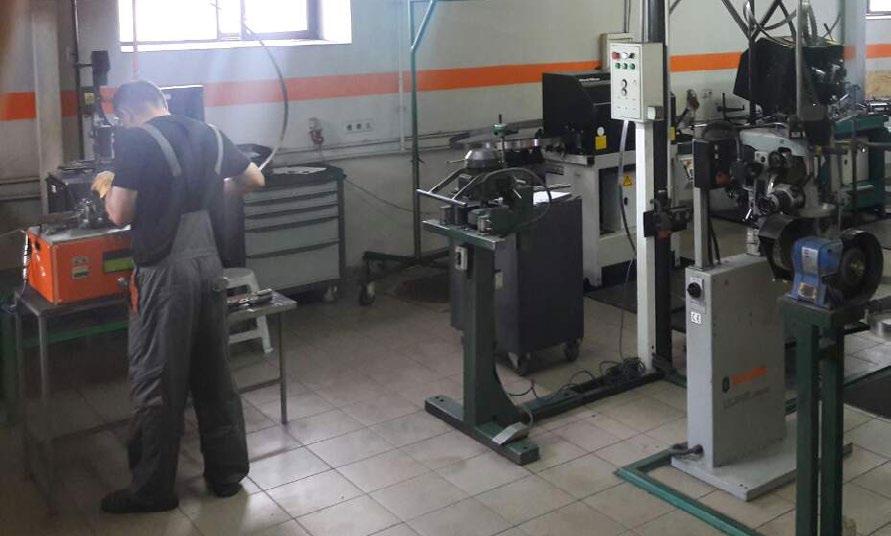
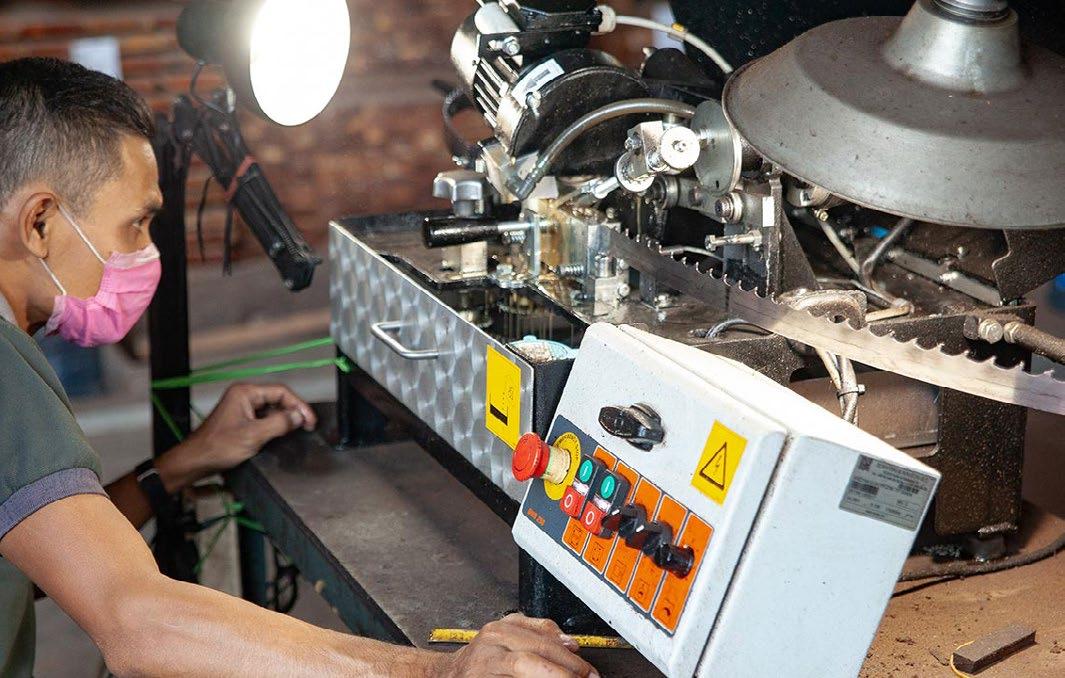
Wood-Mizer SHARPENERS & TOOTHSETTERS
The proper care of blades will ensure they stay sharp longer and can be sharpened multiple times. Wood-Mizer recommends to allow your blades up to one day to rest before they are placed back on the sawmill. This allows the metal to relax, and generally provides longer life.
Sharpening your own blades
Wood-Mizer supplies several blade sharpeners that are scaled toward different budgets and requirements so that you can confidently sharpen blades yourself. All Wood-Mizer sharpeners use the highest quality CBN grinding wheels that sharpen the full gullet each time, and come ready to sharpen.
12 EUROPE • woodmizer.eu | AFRICA • woodmizerafrica.com | ASIA • woodmizerasia.com
SHARPENERS
The BMS250 is ideal for the sawyer looking to invest in a high quality, automatic sharpener. It features an auto-shutoff, and has a heavy-duty hood to enclose the blade during sharpening that includes an exhaust vent. The BMS250 uses 127mm grinding wheels, which come in various profiles. A scraper deburrs each blade automatically.


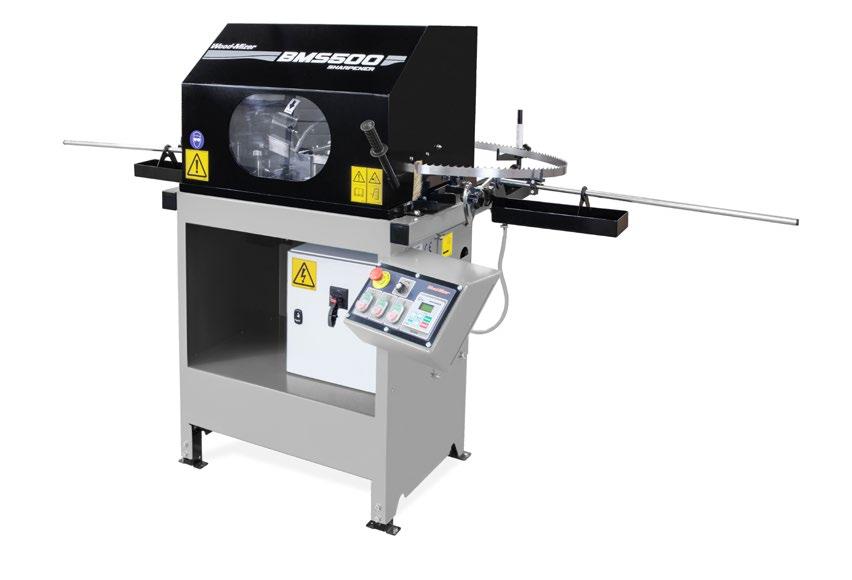
The BMS500 is designed for industrial blade sharpening. The 203mm CBN grinding wheels provide a higher quality grind at higher speeds, increasing efficiency. The user-friendly control station includes a tooth counter display, variable grinding speed and can be quickly configured to stop after a custom number of teeth. A scraper deburrs each blade automatically.
TOOTHSETTERS
The BMT100 allows you to affordably maintain consistent tooth set on your blade. Operated by a hand crank, the BMT100 is a simple setter that sets all teeth consistently.

The BMT150 is an economical manuallyoperated dual toothsetter that sets teeth on both sides of the blade at the same time.
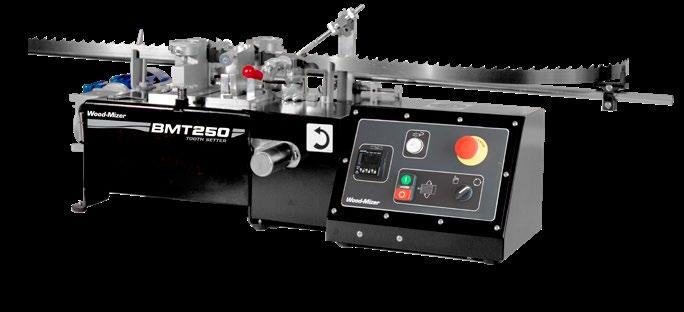
The BMT200 or BMT250 is an ideal dual toothsetter that quickly sets blade teeth with a manual or automatic configuration.
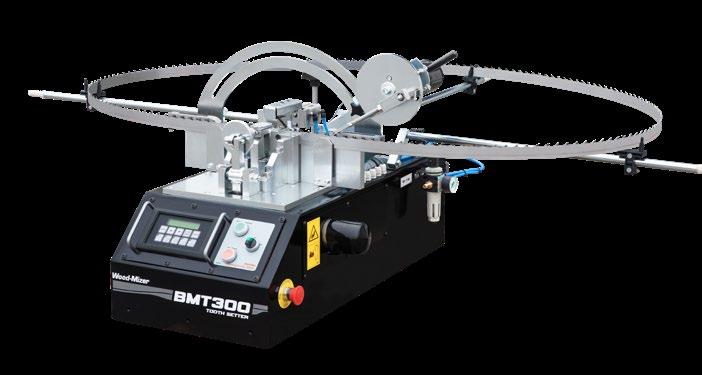
The computerized pneumatic BMT300 toothsetter is designed for industrial tooth setting.
Although maintaining your own blades can provide faster turnaround, Wood-Mizer’s ReSharp is a very popular service, returning blades to factory conditions by washing, grinding, and setting on the same equipment used to manufacture them initially. ReSharp service is affordable and allows you to spend more time sawing.
13 EUROPE • woodmizer.eu | AFRICA • woodmizerafrica.com | ASIA • woodmizerasia.com
HOW TO SHARPEN YOUR OWN BLADES
With Wood-Mizer’s line of blade sharpening and setting equipment, you can keep your own blades in good condition yourself. Here are some tips to get started.
Step 1: Blade cleaning
Before removing the dulled blade from the sawmill, run the blade for 15 seconds, flooding it with lubrication to remove as much sap as possible. If this is insufficient to clean the blade, clean it with a wire brush.
Step 2: Sharpening
Grinding sharpens the tooth again and squares up each tooth face with the body of the blade. Wood-Mizer recommends only using CBN full profile blade sharpening. If you are sharpening with a standard grinding wheel, check that the full tooth profile is being evenly ground, and adjust the wheel profile or sharpener cam as needed. Full profile grinding is important, as cracks will form if an area is missed. Two sharpening cycles for each blade results in the best performance, and grinding should not be done too hard.
Step 3: Removing metal burrs
De-burring removes the small bits of extra metal left over from the grinding process. Wood-Mizer’s BMS250 and BMS500 do this automatically, but for older sharpeners, it may be necessary to do it manually by scraping the inside of the blade with a wooden block. It is most important to remove the grinding burr from the top of the tooth, for accurate setting.
Step 4: Setting the teeth
Restoring set after sharpening is very important for ensuring continued blade performance. The set point should not be too low or too high, only the top 1/3 of the tooth should be set.
Setting your own blades
The pattern and amount of tooth set is very important for quality sawing performance. The offset teeth clear a path for the blade to pass smoothly through the wood. More set is required in fibrous softwoods than in hardwoods. Frozen wood requires a smaller kerf.
Too much set results in inefficient cutting with poor surface quality. Too little set results in too much sawdust that is unable to escape the cut, which heats up the blade. Generally, sawdust should be slightly warm and chip-like.
14 EUROPE • woodmizer.eu | AFRICA • woodmizerafrica.com | ASIA • woodmizerasia.com
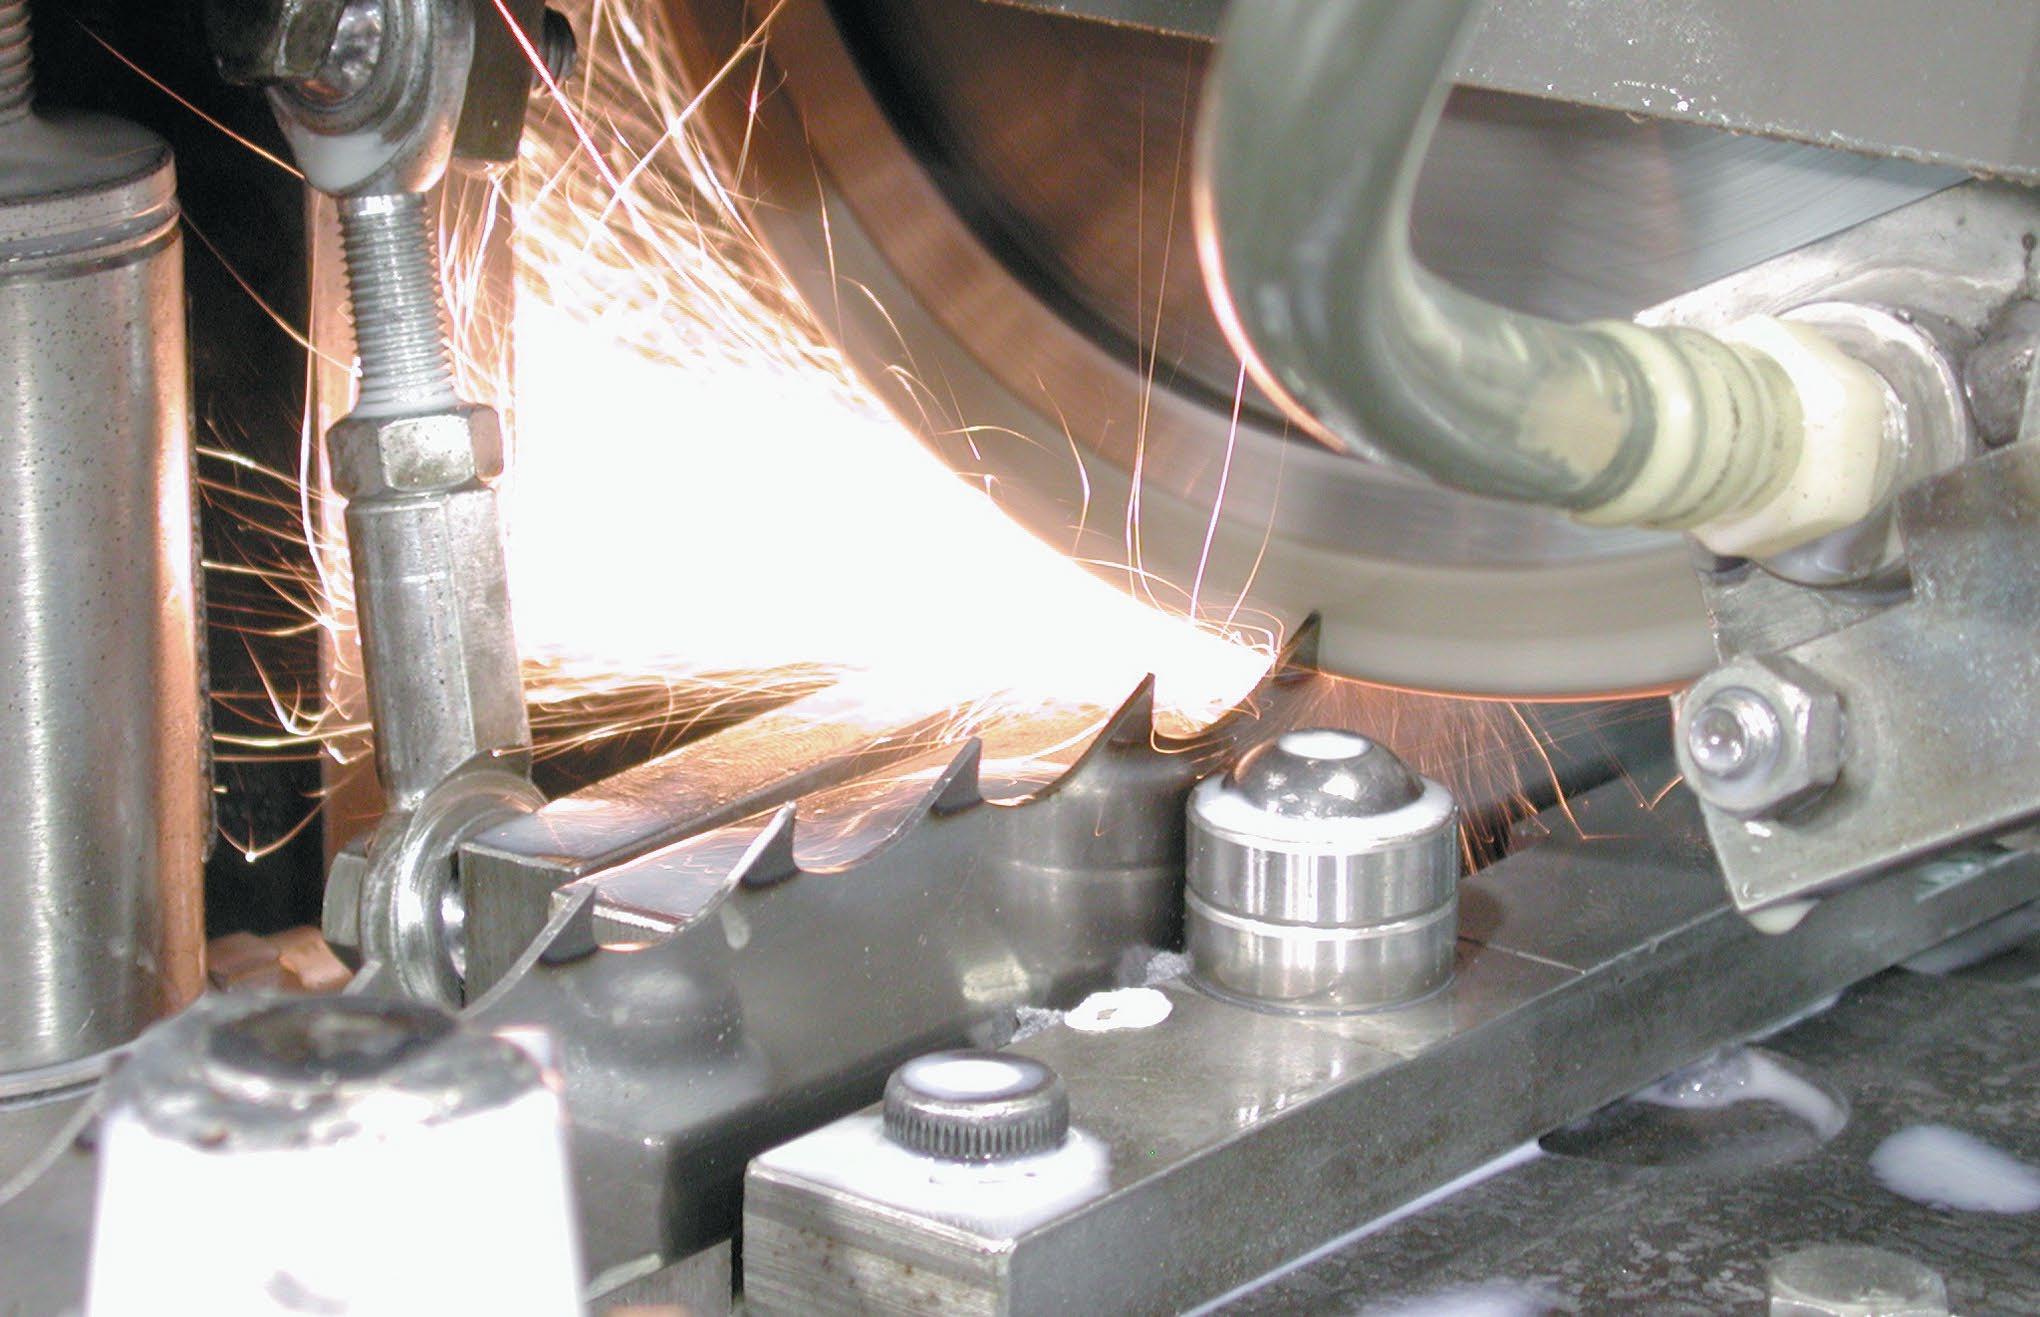
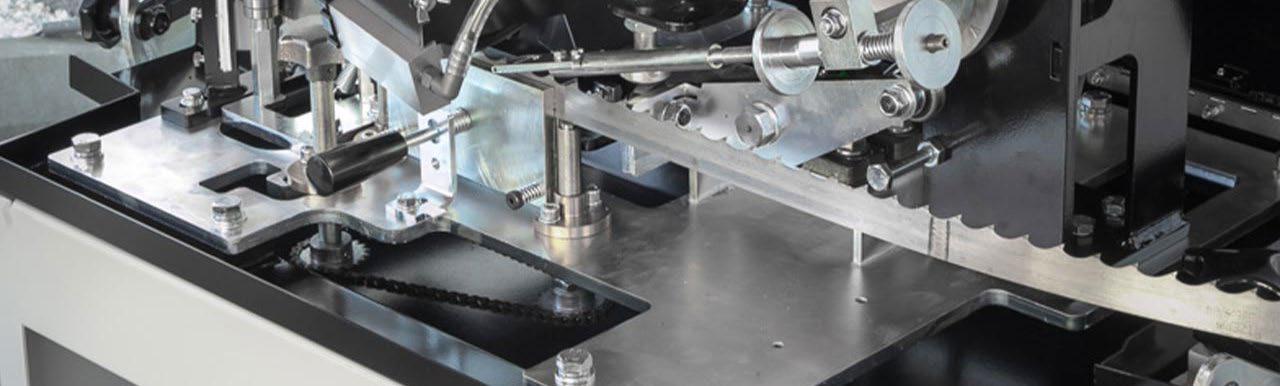
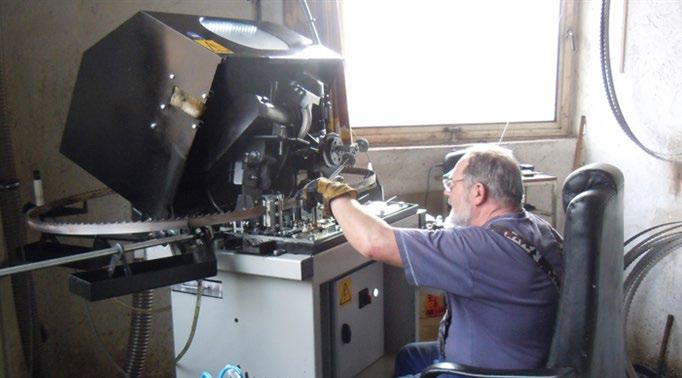
SHARPENING WITH CBN WHEELS
How to Sharpen Blades with CBN Grinding Wheels
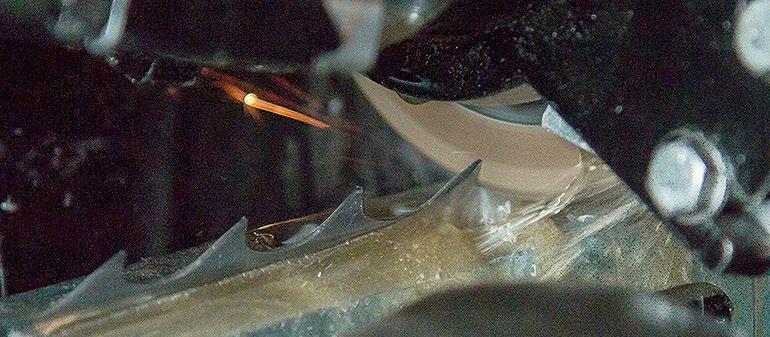
1. Always use grinding wheels with the profile matching the sharpened saw blade profile.
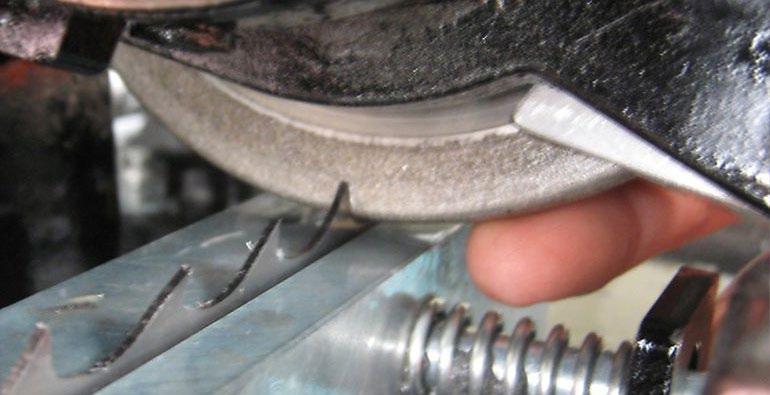
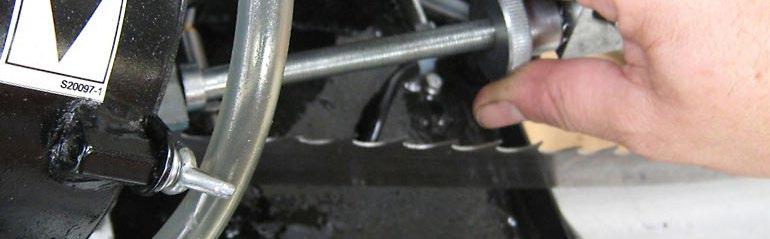
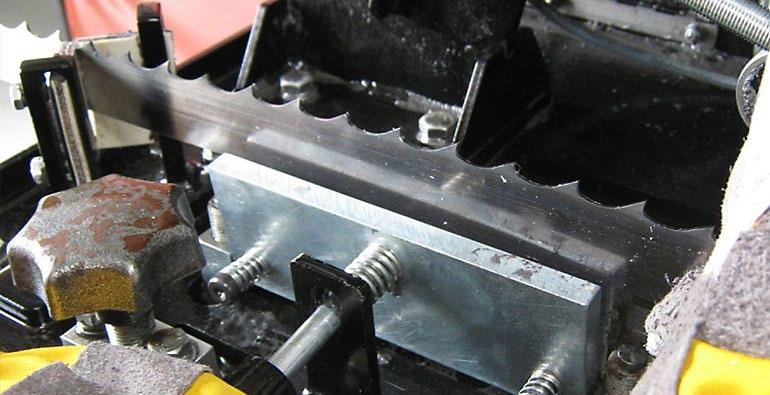
2. When you install the blade into the sharpener, make sure that the clamp is clean and the supporting arms are correctly adjusted. (Image 1)
3. Make sure that the pusher is in the right position, so that it would push the tooth which is going to be sharpened. (Image 2)
4. The correct length adjustment of the pusher is very important because otherwise, it will quickly damage the grinding wheel. (Image 3)
Adjust the grinding depth so that in the lowest position of the head you could turn the grinding wheel softly with your finger while still sensing a slight resistance, and the grinding wheel could fill out the entire tooth profile. (Image 4)
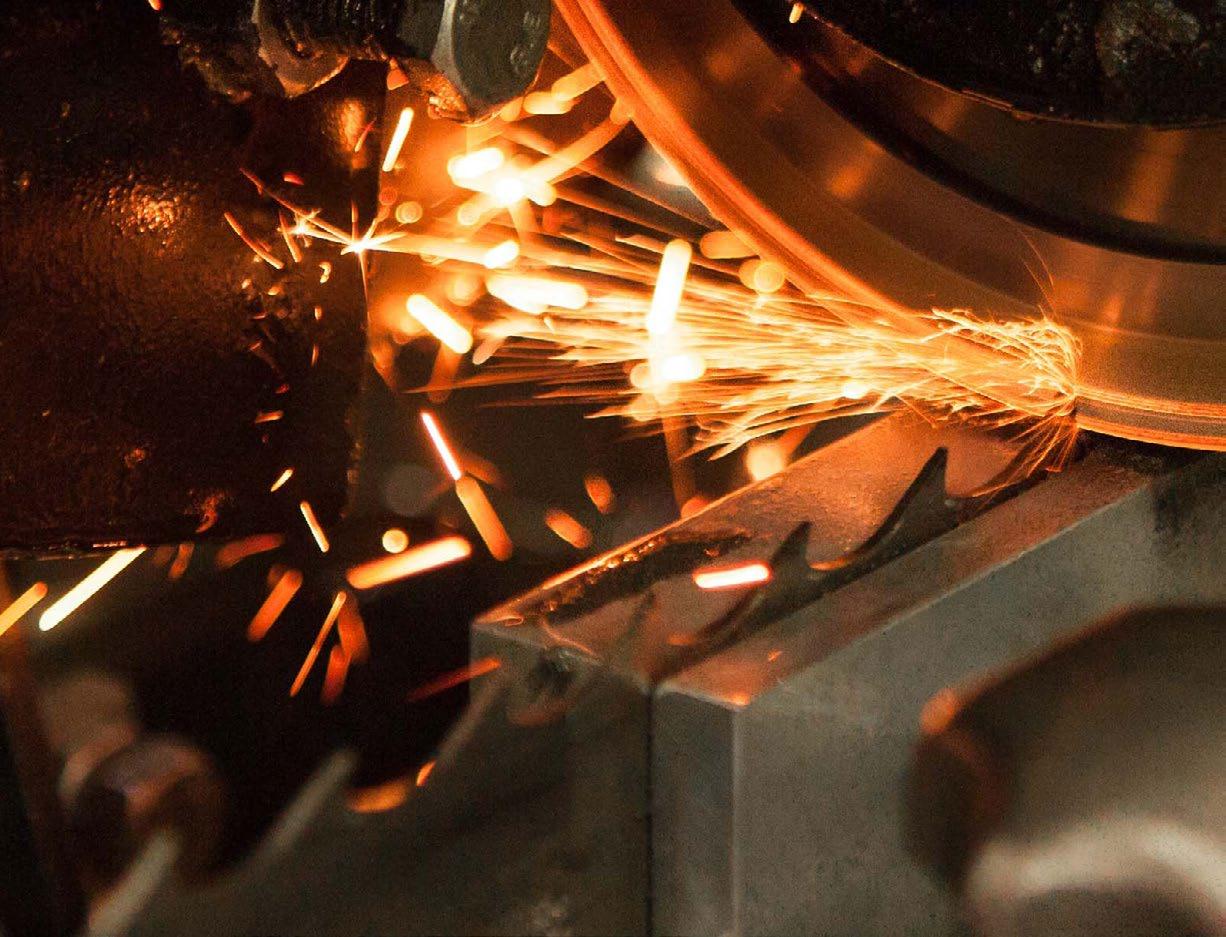
5. Start the motor and check if the sparks are visible on the full blade profile. If not, correct the pusher position.
Based on Wood-Mizer experience, the layer of removed metal should not be thicker than 0,1 – 0,15mm during one cycle. (Image 5)
6. Wood-Mizer recommends always doing a minimum of 2 cycles of the sharpening.
ATTENTION:
Remember about regular cleaning of the sharpener and its oil nozzle. Clean oil and the correct cleaning of the grinding wheel will guarantee effective grinding process without any burn-outs.
15 EUROPE • woodmizer.eu | AFRICA • woodmizerafrica.com | ASIA • woodmizerasia.com
1 2 3 4 5
MINERAL OIL FOR YOUR SHARPENING EQUIPMENT
Clean mineral oil extends the life of your CBN grinding wheel. Using the wrong kind of oil can damage your CBN wheel by clogging up its fine surface. Once clogged, it may not be cleaned. As a consequence, the CBN wheel begins to leave burn marks on the blade and will not sharpen accurately.
Before sharpening Wood-Mizer recommends:
ġ check your CBN grinding wheel regularly - it should be clean
ġ make sure that the oil dispensing nozzle above the wheel and blade clamp are clean
ġ use Wood-Mizer mineral oil for sharpener (part number 083559-1).
Why exactly mineral oil?
Mineral oil for sharpeners is more fluid than other synthetic oils for engines or hydraulics. This helps to clean the CBN wheel from metal dust build up. Also if there is too much dust in your sharpener it may impact your resharp quality by blocking the nozzle, oil pump and blade clamp.

Order Mineral grinding oil from your local Wood-Mizer representative.
16 EUROPE • woodmizer.eu | AFRICA • woodmizerafrica.com | ASIA • woodmizerasia.com
SHARPENING TROUBLESHOOTING
There are typical mistakes in blade sharpening and setting.
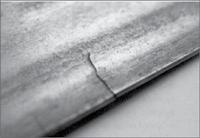
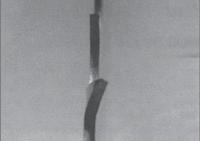
1. Such cracks happen as a result of incorrect blade roller adjustment. The blade’s back continually rubs against the roller flange and case-hardens the blade’s back, which results in the blade cracking from the back.
2. In this case, the blade becomes blunt very quickly. The cause is grinding too hard and overheating the gullet.
17 EUROPE • woodmizer.eu | AFRICA • woodmizerafrica.com | ASIA • woodmizerasia.com
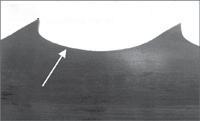
3. You can see that CBN grinding wheel didn’t sharpen the full tooth profile because the sharpener head’s angle is wrong. If you do not use a CBN wheel but the standard grinding wheel, you need to check the wheel profile. Another possible reason for this problem is that the sharpener cam is worn and needs replacing. Cracks start at the point where the grinding wheel misses the gullet.
3a. In this case, the blade is cracking in the place indicated in the picture. The reason is that the sharpener head has been set incorrectly.
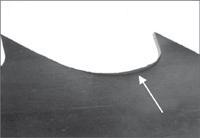
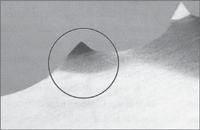
4. This is a low hook angle. The blade rattles violently during operation, which leads to vibration of the saw head. In this case, cracks appear in the place indicated by the circle.
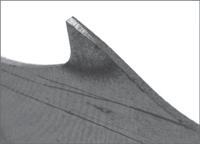
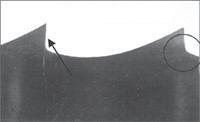
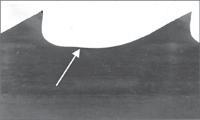

4a. If the tooth height is too small, the blade produces “wavy” cutting because it can’t remove all sawdust from the cut. The sawdust will be fine and powdery.
5. The teeth are sharpened incorrectly because the sharpener head is not perpendicular to the clamp. The blade will get blunt very quickly.
6. The teeth are set too much. The cutting edges of the teeth are too far out from the blade’s body and will become blunt very quickly. The head will also be jerky while cutting.
7. The setter point is incorrectly adjusted for the tooth height, resulting in an incorrect bend point on the tooth and poor cutting.
18 EUROPE • woodmizer.eu | AFRICA • woodmizerafrica.com | ASIA • woodmizerasia.com
BEST PRACTICES FOR BETTER BLADE PERFORMANCE
Sawmilling with Wood-Mizer Blades will result in straight, consistent lumber; however, there are some factors that can result in poor performance. Regular maintenance, general knowledge of proper usage, and attention while cutting will help avoid blade breakage and poor quality cutting.
Dirty logs
Sawing dirty logs will quickly dull the blade and lead to poor cutting. Always clean the wood with a wire brush or use the Debarker option on the sawmill.
Sawing speed
Always enter the cut slowly and smoothly, and then speed up as necessary. Sawing feed rates should be as fast as possible while maintaining straight cuts. Understand how tree density relates to cutting speed. Softwoods are inconsistent and require careful speed monitoring. Hardwood density is usually more consistent and allows steadier speeds.
Keep blades clean
Be attentive to the accumulation of pitch on the blade during sawmilling. Use ample lubrication, and adding a small amount of liquid soap to the water will help keep the blade clean. After sawing, always release the blade tension.
19 EUROPE • woodmizer.eu | AFRICA • woodmizerafrica.com | ASIA • woodmizerasia.com
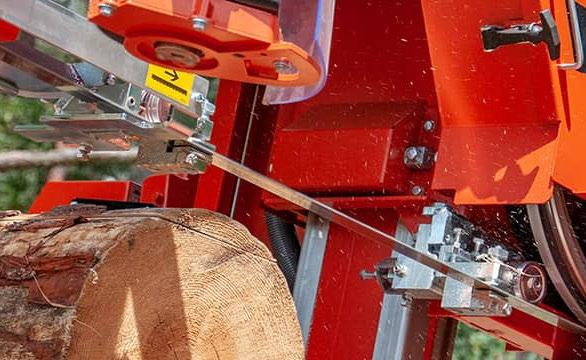
Alignment and parts to check
The proper alignment and condition of several sawmill components should be checked regularly, according to the procedures detailed in the sawmill manual.
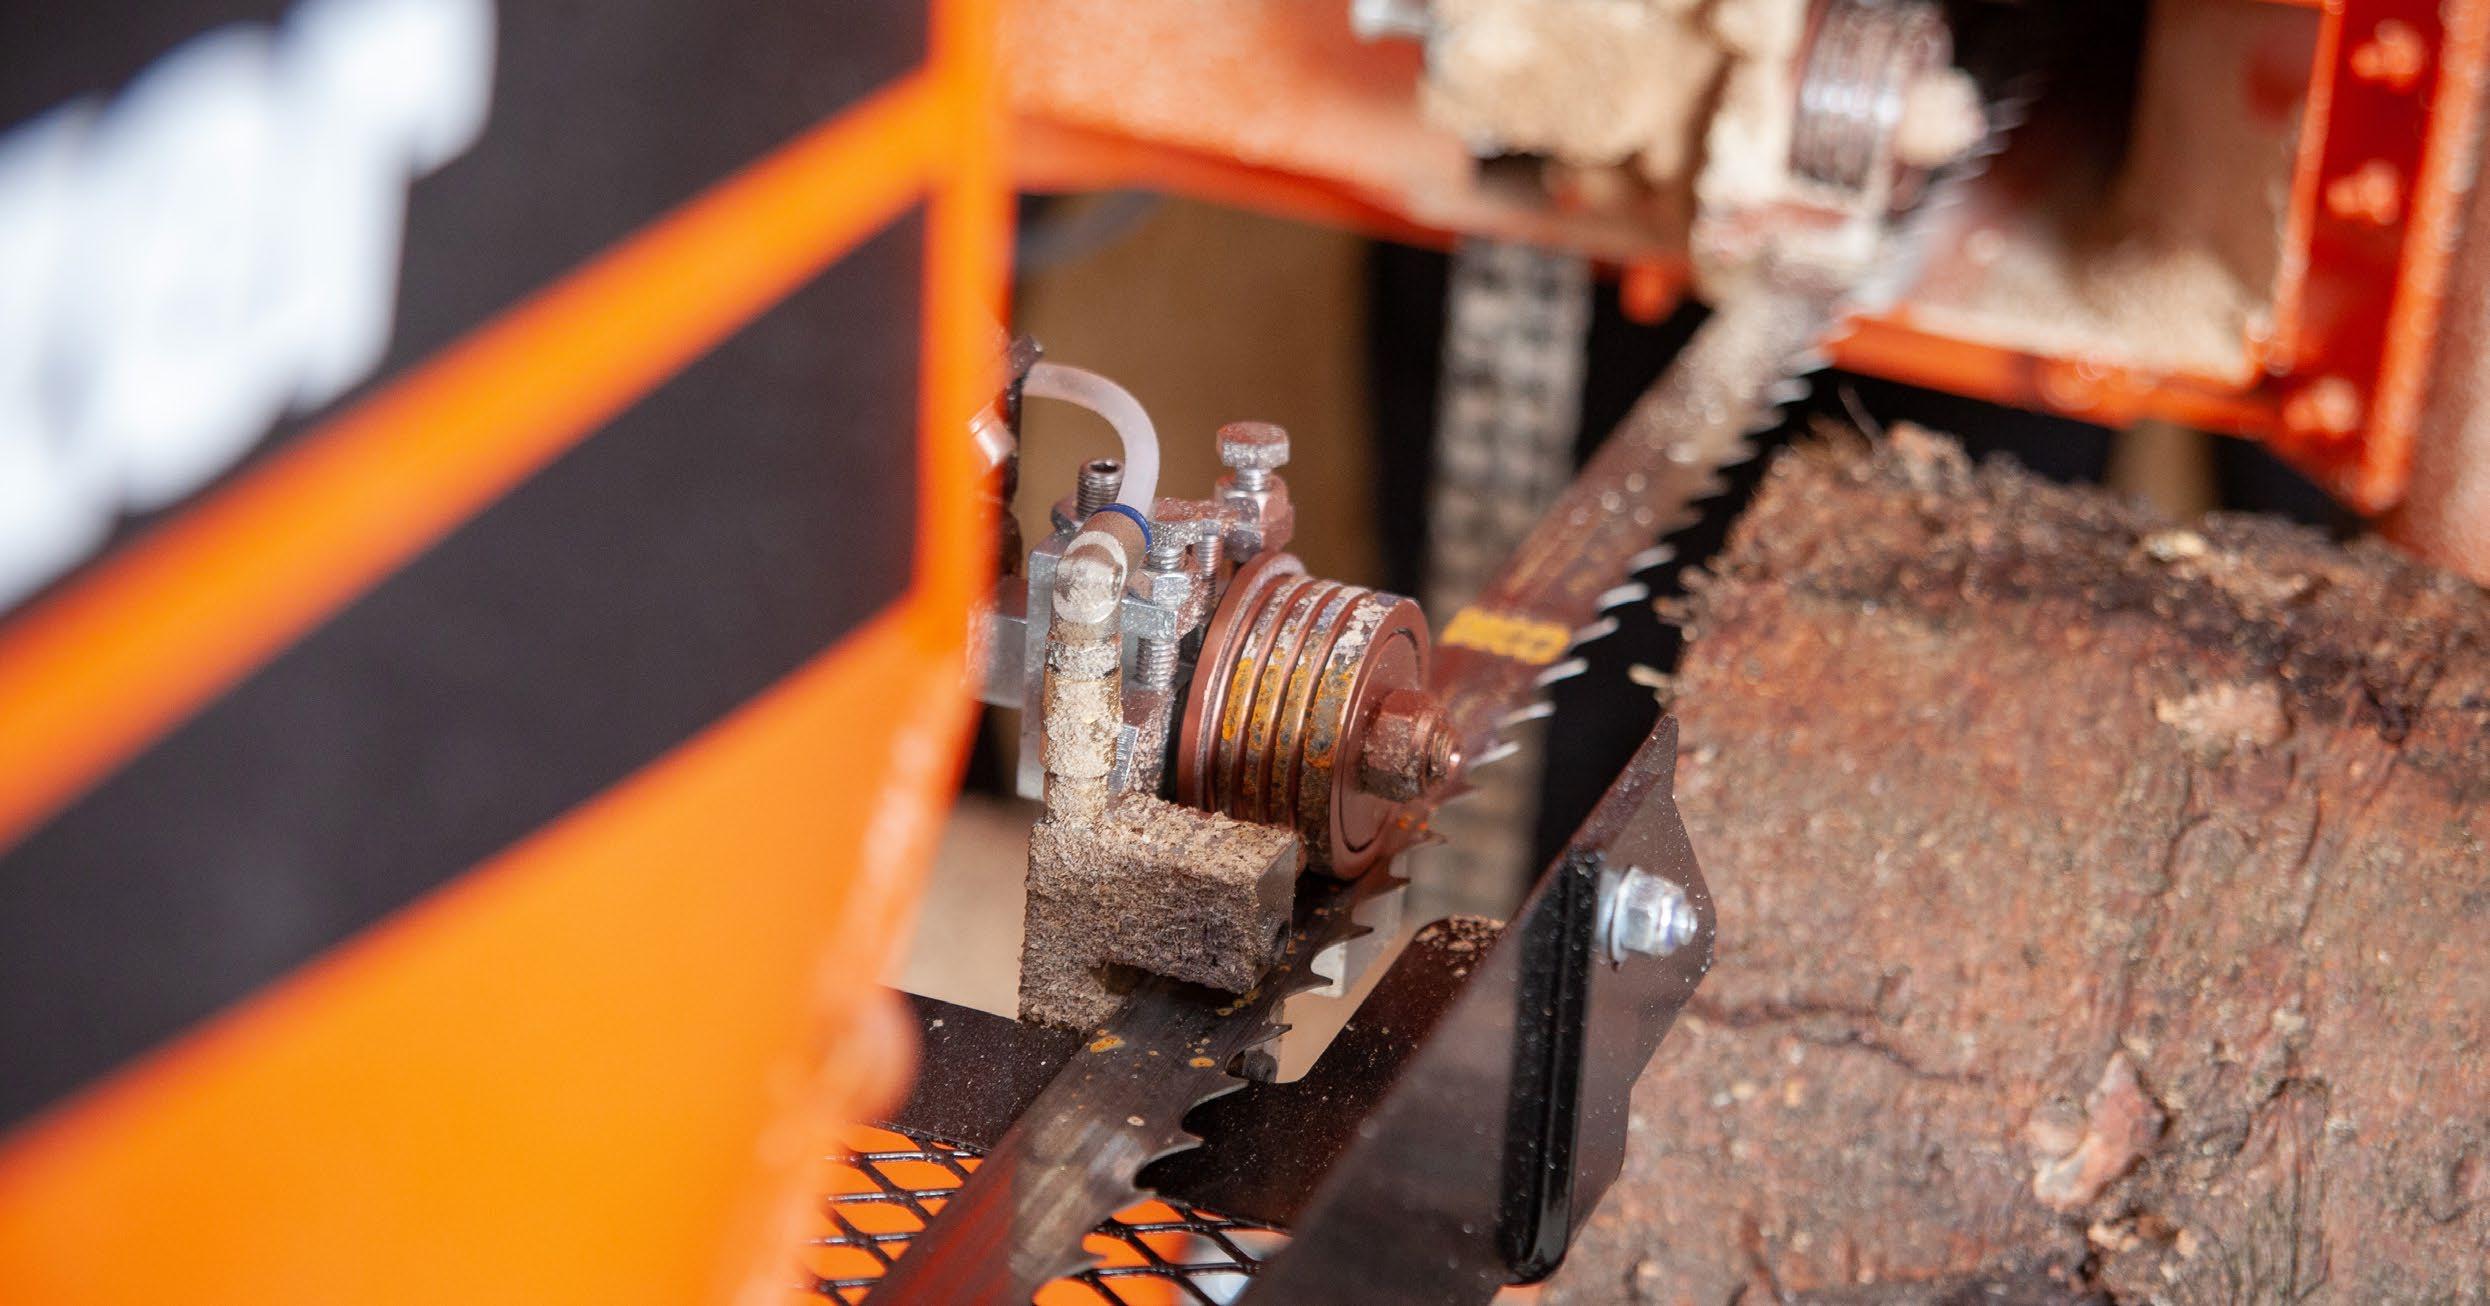
ġ Blade guide rollers should roll freely, should not have flat areas. The clearance between the back of the blade and the back of the roller should not exceed 4mm, neither should it be rubbing together, which will result in cracks along the back of the blade. Over time, rollers can wear and become tapered, which will result in wavy cutting, and they should be replaced.
ġ Blade wheel belts should be without defects and of uniform thickness. To ensure that both belts wear evenly, it is recommended to switch the belts from the drive side to the idle side, and from the idle side to the drive side regularly (once a week, or more often when running multiple shifts).
ġ Sawmill alignment should be confirmed on a regular basis.
ġ Blade drive wheel alignment checks should be also performed from time to time.
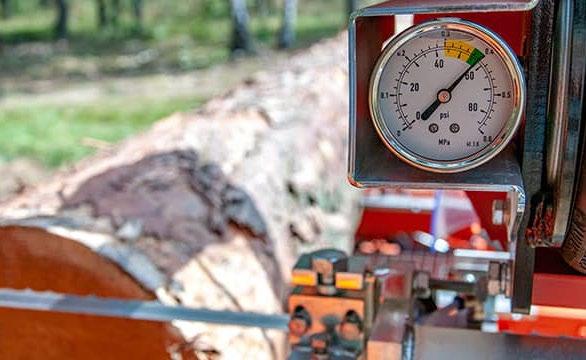
ġ Improper blade tension, or a faulty tension system will result in unreliable cutting. Ensure that the blade tension matches the manual’s recommendation.
20 EUROPE • woodmizer.eu | AFRICA • woodmizerafrica.com | ASIA • woodmizerasia.com
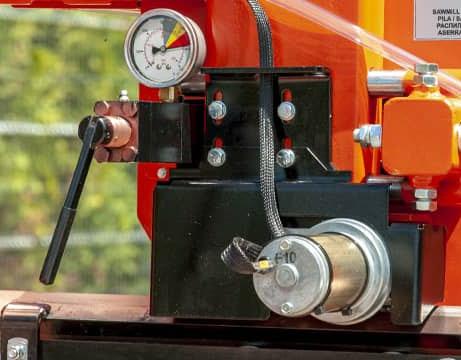
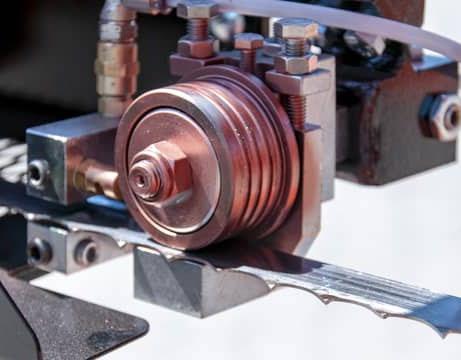
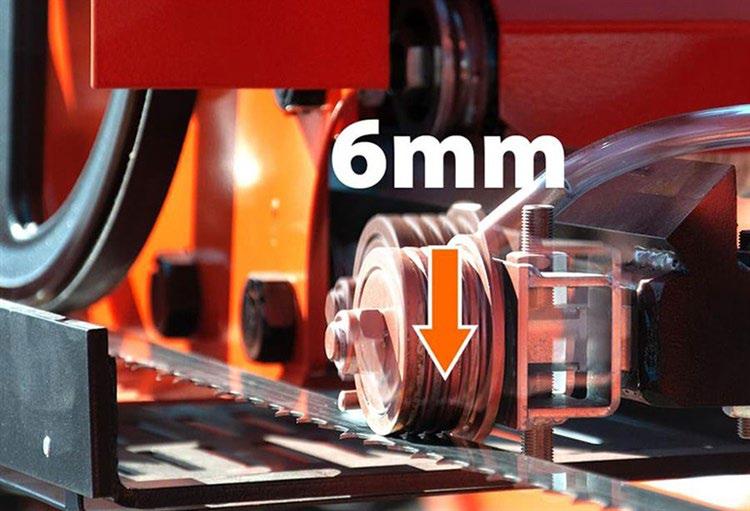
BLADE GUIDE ROLLERS ADJUSTMENT
Blade guide rollers add extra precision and stability to the sawmill blade while cutting. They also control blade position relative to the sawmill bed. To check if your blade guide rollers are set correctly use a special ruler that was supplied with your sawmill.
Rollers should create some tension and press the blade downwards 6mm. To set your blade guide rollers follow these steps:
1. Loosen your rollers so that they don’t press on the blade.
2. Adjust the blade tension how it describes in sawmill manual. Measure the distance from the sawmill bed to the blade (for example, it is 250mm).
3. While your blade is tensioned, set your rollers so that they press the blade 6mm downwards (In this example the distance between the bed and blade should be 244mm).
4. Make sure that after setting your rollers the back of the blade doesn’t touch the edge of the roller – there should be at least a 4mm gap.
21 EUROPE • woodmizer.eu | AFRICA • woodmizerafrica.com | ASIA • woodmizerasia.com
LINKS TO USEFUL VIDEOS
ġ How To – Basics of Wood-Mizer Blade Sharpening
ġ Wood-Mizer LIVE online presentation: How to choose a blade sharpener. Comparing features of Wood-Mizer’s BMS600HS, BMS500HS, and BMS250AS bandsaw blade sharpeners. How to prepare a sharpener for operation? How to operate the blade sharpener? How to choose a grinding wheel?

ġ Wood-Mizer LIVE online presentation: How to choose a tooth setter. Comparing features of Wood-Mizer’s BMT300AS, BMT250AS-P, BMT200, BMT150, BMT100 blade toothsetters. How to prepare the toothsetter for operation? How to make the blade tooth setting?
ġ Wood-Mizer LIVE online presentation: How to select a better blade for your specific cutting task?
ġ How to Work Wood-Mizer BMS250 Automatic Bandsaw Blade Sharpener
ġ How to Operate Wood-Mizer Professional BMS500 Automatic Bandsaw Blade Sharpener
ġ Wood-Mizer BMT100 Manually Operated Bandsaw Blade Toothsetter
ġ Wood-Mizer BMT150 Manually Operated Dual Toothsetter for Bandsaw Blade
ġ Wood-Mizer BMT200 Manually Operated Dual Toothsetter for Bandsaw Blade
ġ Wood-Mizer BMT200 and BMT250 Dual Tooth Setter Alignment and Calibration
© 2021 Wood-Mizer Industries Sp. z o.o. All rights reserved.
▶ LEARN MORE ▶ VIEW RECORD ▶ VIEW RECORD ▶ VIEW RECORD ▶ WATCH NOW ▶ WATCH NOW ▶ CLICK HERE ▶ CLICK HERE ▶ CLICK HERE ▶ LEARN HOW
