Hatchery Signals - English edition

Page 44

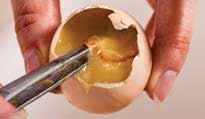
Ideal situation: warm eggs heat cold eggs

16-18

13-15

10-12

7-9

4-6

Multi-stage or single-stage

1-3

d

In multi-stage systems, the setter trays are divided over the height and width of the machine in a fixed pattern (protocol of incubator manufacturer). In a full incubator, the embryos are nine days old on average. The eggs already in the incubator heat the new eggs. The setpoint of the incubator temperature is a constant value.

There are two, basic methods of incubation: multistage and single-stage. Technological developments, such as automation and climate control have driven upscaling of hatcheries. This prompted a transition from multi-stage incubation to single-stage incubation, which is now the standard practice. In a multi-stage setter, fresh eggs are set at different times, usually at three-day intervals, and fixed climate settings are used. Because the embryos are at different development stages, average settings are assumed. Eggs in a more advanced stage of development heat up newly set eggs and, the other way around, the developed eggs are cooled by the newly set eggs. The advantage of this system is optimal flexibility, but there are never optimal conditions for all the different ages of embryos. There is also a higher risk of contamination, because new eggs are loaded into the setter each time. This carries the risk of cross-contamination between batches. It is also difficult to clean the incubator because it is not emptied each time. But a multi-stage incubator still has to be cleaned and disinfected - preferably every six weeks. In the meantime, noticeable soiling should be removed each time new eggs are set. In a multi-stage hatchery, the eggs are pre-warmed in the setter room (25-27°C/77-81°F) for at least 12 hours. Better controlled pre-warming in the setter is an advantage with single-stage. With a single-stage system, all the eggs are loaded in the setter at the same time and the climate settings are adjusted during the process, based on the development stage of the embryo. This results in better quality day-old chicks. To maintain the embryo temperature at 37.8° (100°F), the set temperature must be slightly higher to start with and slightly lower later on, once the embryos start to produce heat themselves. An advantage of a single-stage system is greater hygiene as the incubator can be properly cleaned and disinfected when it is empty. A disadvantage is that it requires more heating, cooling and ventilation. But the results are better with single-stage, even during the later stages of the chicks’ lives.

13-15

10-12

7-9

4-6

py

16-18

rig

ht

pr ot

ec

te

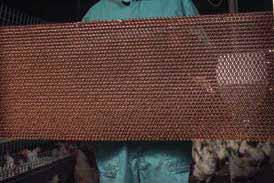
In practice: formation of hot spots and cold spots

1-3

co

In practice, the air does not flow in a uniform pattern through the trolleys. The tilted trays slow the airflow, resulting in less optimal transport of heat. Hot spots form at the top in heat producing trolleys and cold spots at the bottom of trolleys with fresh eggs.

Solution: position some trays horizontally

16-18

13-15

10-12

7-9

4-6

1-3

The solution can be to position trays of eggs at a further stage of development horizontally. This will obstruct the airflow less.

42

Ha tc he ry S i gnal s


Turn static files into dynamic content formats.

Create a flipbook

Articles inside

Navel and cloaca

1min
page 165

Feathering

1min
page 167

Selection criteria

1min
page 164

Chick yield

2min
page 157

Drying off or dehydrating?

1min
page 158

Meconium

2min
page 155

Absorption of residual yolk

2min
page 160

Working at the take-off table

1min
page 163

Infection pressure

2min
page 154

Chick temperature

1min
page 156

Pipping height and pipping line

1min
page 153

On-farm hatching

4min
pages 147-149

Signals from empty eggshells

2min
pages 151-152

Count and assess unhatched eggs

1min
page 144

10.Chick quality

1min
page 150

Pull time

2min
page 142

Variation in the hatch moment

2min
page 141

Unhatched eggs/dead in shell

1min
page 143

The hatch window

2min
page 140

External pipping

2min
page 139

9.Hatching

1min
page 134

Humidity in the hatcher

3min
page 136

Position in the egg

1min
page 137

Air temperature in the hatcher

3min
page 135

Internal pipping

1min
page 138

Hatcher baskets

1min
page 133

Breakout analysis on day 18

2min
page 131

and living embryos

3min
pages 118-119

Hygiene at transfer

1min
page 130

In-ovo sexing

4min
pages 125-127

The optimal timing

1min
page 123

Which egg has a live embryo? Infertile eggs, bangers, late mortalities,

1min
page 117

In-ovo vaccination

2min
page 122

8.Transfer

1min
page 116

Transfer

3min
pages 128-129

Heat distribution in the incubator

2min
page 108

Day 4 to 11: regulate based on RH

1min
page 107

Egg turning during setting

2min
page 109

Candling

5min
pages 114-115

Constantly improved measurement

1min
page 113

Monitor turning

2min
page 111

Monitoring setter conditions

1min
page 112

First few days: ventilation inlets closed

3min
page 106

Humidification during setting

2min
page 105

Climate conditions during setting

2min
page 103

7.Setting

1min
page 96

Disinfectants for eggs

2min
page 95

Preparing the incubator

2min
page 100

Setting eggs

2min
page 101

Do not mix

2min
page 97

After disinfection

2min
page 94

Disinfecting eggs

2min
page 92

Dry (fumigation) and wet disinfection

1min
page 93

Storage duration

2min
page 88

Climate conditions during storage

1min
page 87

Turning during storage

1min
page 90

SPIDES

2min
page 91

Longer storage

2min
page 89

Storage at the hatchery

2min
page 86

Climate during transport

2min
page 82

Jolts and vibrations

1min
page 83

Condensation point = dew point

2min
page 79

Egg transport and logistics

1min
page 84

Inspection of incoming eggs

1min
page 85

6.Egg transport and storage

1min
page 78

Disinfection of the hatchery

2min
page 77

Cleaning

3min
pages 75-76

Biosecurity measures

2min
page 70

Personnel and hygiene

4min
pages 71-74

Process steps in the hatchery

2min
page 65

Routing at the hatchery

2min
pages 67-68

Biosecurity zones at the hatchery

1min
page 66

Clean floors and walls

2min
page 69

5.Biosecurity

1min
page 64

Track and trace

1min
page 63

Hairline cracks

1min
page 54

Size and uniformity

2min
page 53

How should you deal with floor eggs?

6min
pages 57-59

Unsuitable for hatching

1min
page 52

Dirty eggs

3min
pages 55-56

Storage at the breeder farm

2min
page 60

Humidity during storage

2min
page 61

Store eggs pointed end down

2min
page 62

Purpose of ventilation

3min
page 41

Grading and on-farm traying

1min
page 50

Hatching egg quality

2min
page 51

4.Egg handling and quality

1min
page 46

Cooling at the breeder farm

1min
page 49

Multi-stage or single-stage

2min
page 44

Minor differences, major implications

2min
page 45

Water cooling

1min
page 42

Weight loss and machine settings

3min
page 39

Carbon dioxide

3min
page 37

Temperature settings

3min
page 34

Incubation temperature

2min
page 33

Ventilation

2min
page 36

Eggshell temperature is key

2min
page 32

The importance of uniformity

2min
page 29

Gas exchange of the embryo

2min
page 28

Heat and temperature

2min
page 27

Development of an embryo

3min
pages 22-23

The environment of the egg

2min
page 26

2.The incubation process

1min
page 20

From natural brooding to artificial incubation

3min
pages 24-25

Critical batches, locations and moments

5min
pages 17-19

1.Introduction

1min
page 6

Information exchange

4min
pages 13-14

The signals concept

4min
pages 15-16

How the chain works

1min
page 8

Incubation is interaction

2min
page 9

Key link

1min
page 7

Each incubator is different

2min
page 10

Hatchery management

2min
page 11
Issuu converts static files into: digital portfolios, online yearbooks, online catalogs, digital photo albums and more. Sign up and create your flipbook.
Hatchery Signals - English edition by Roodbont Publishers - Issuu