12 minute read
BLOCK OF THE MONTH


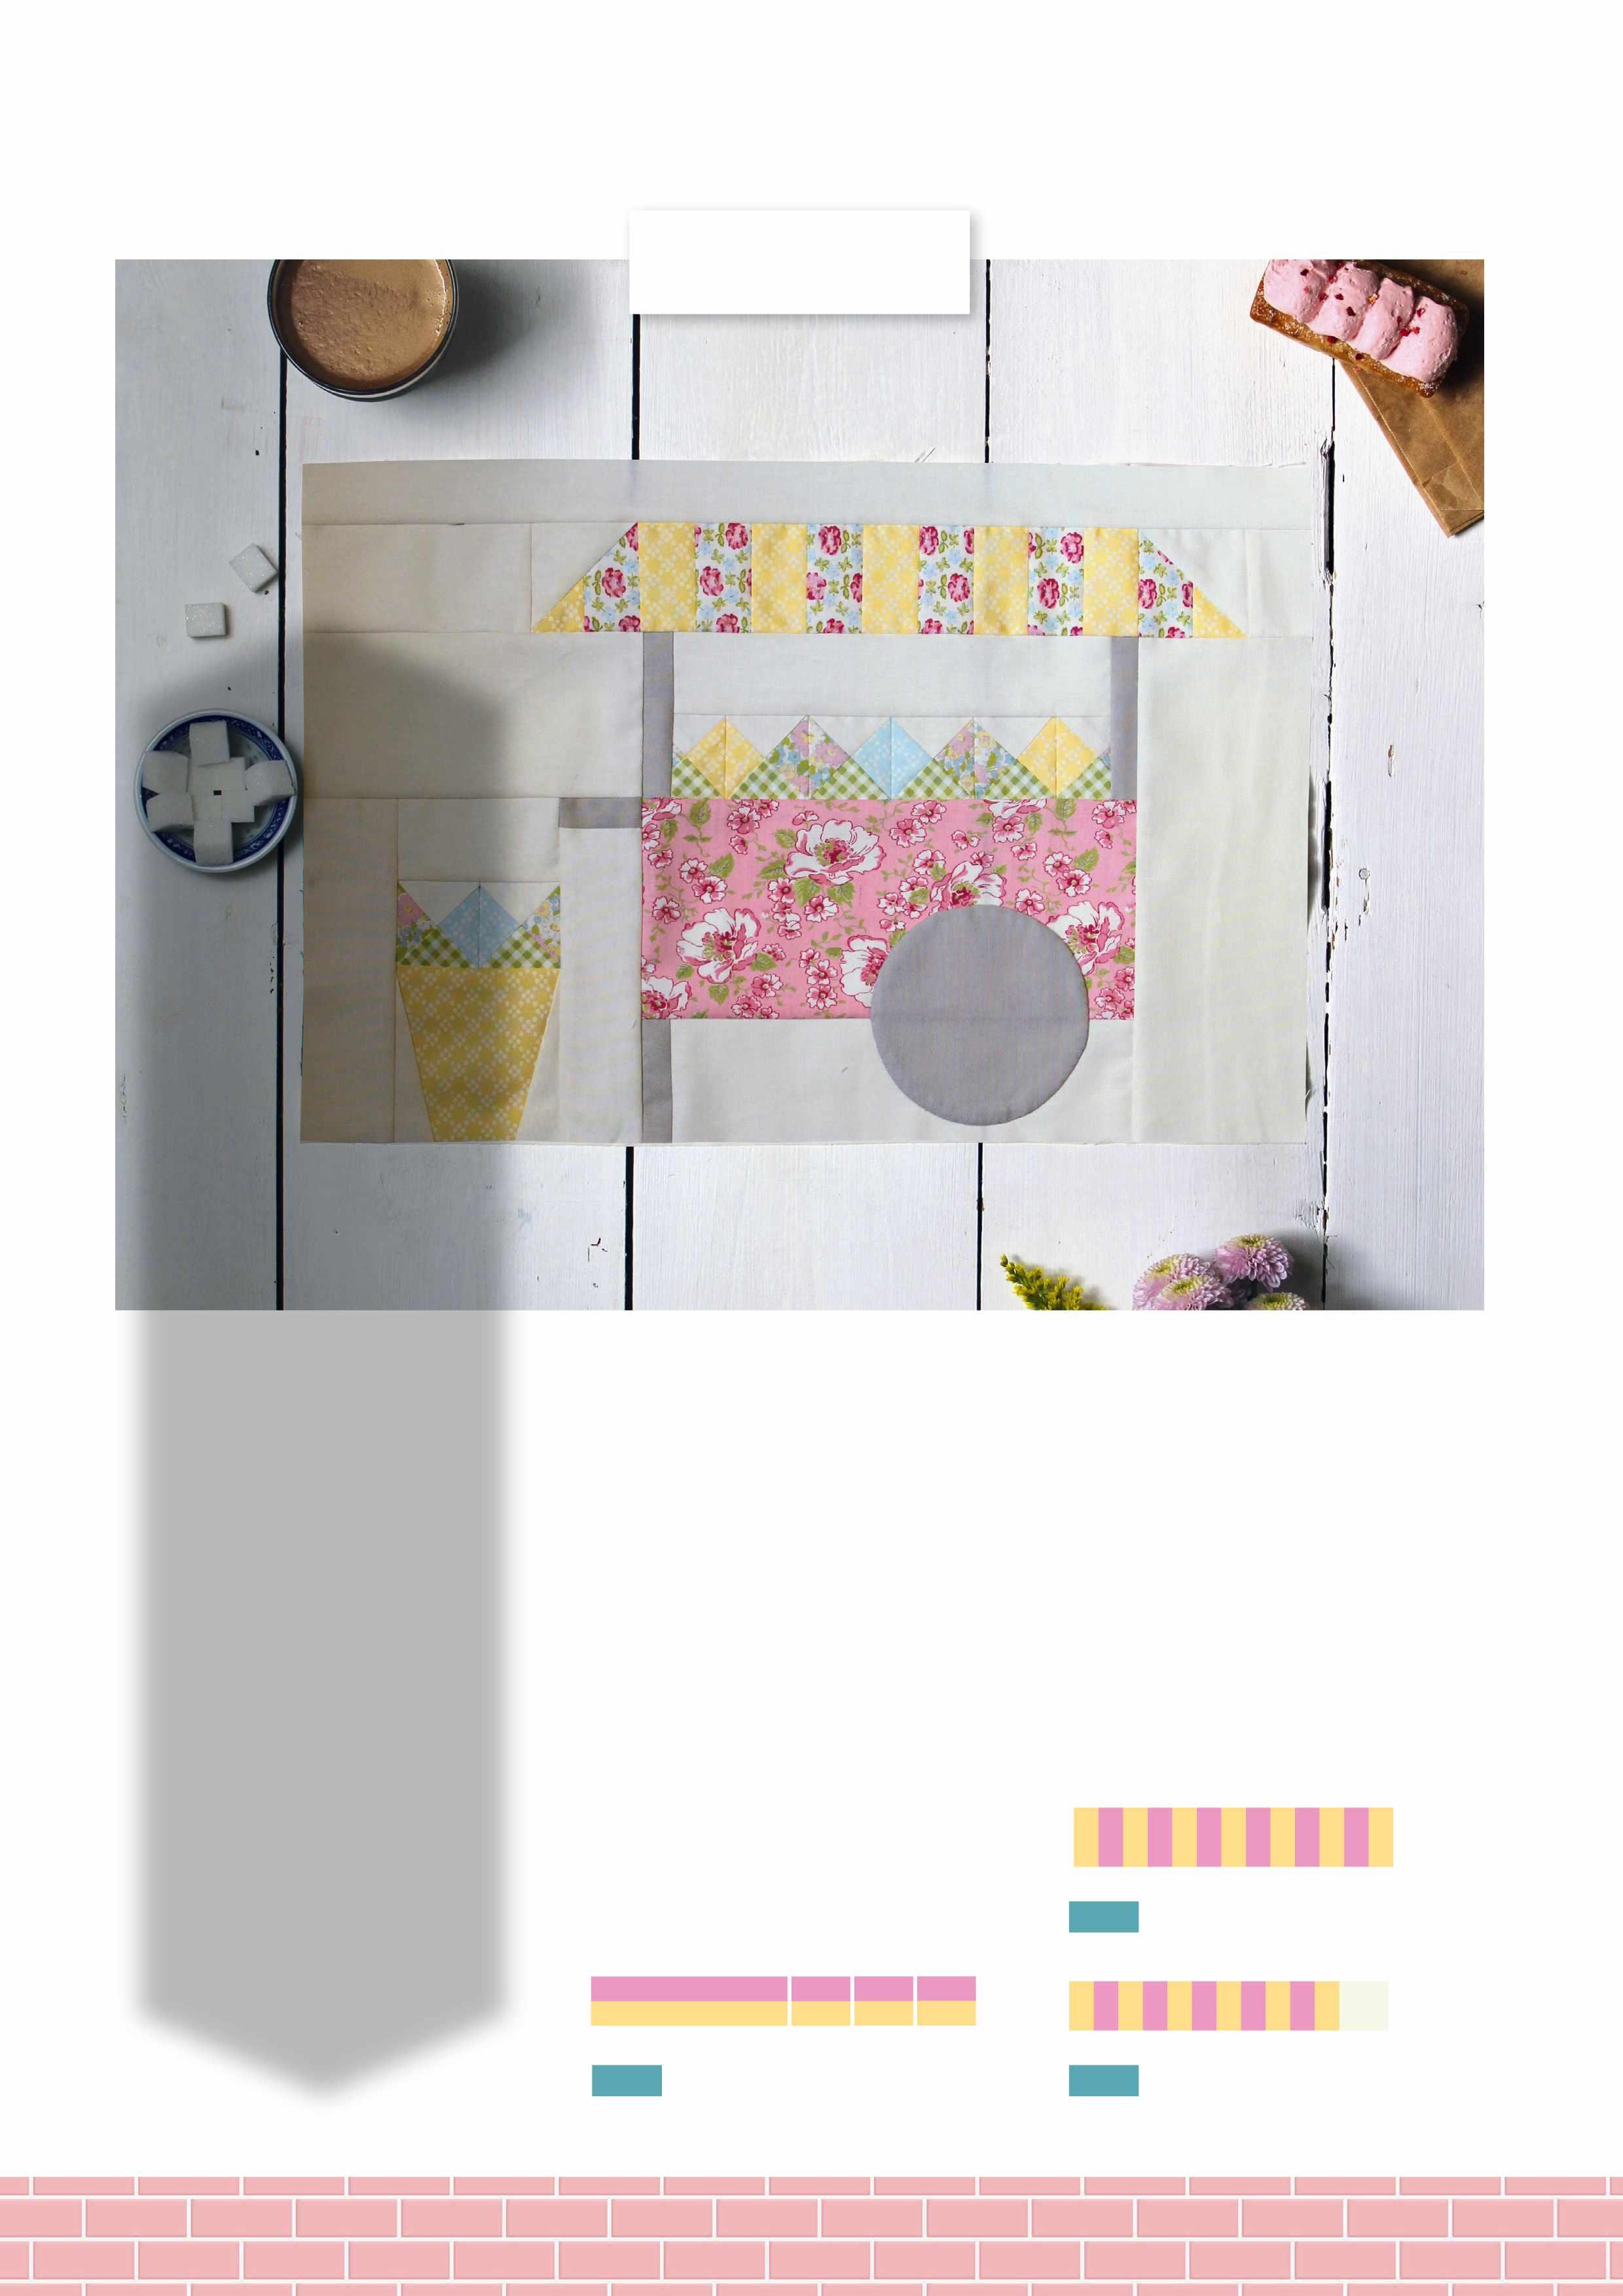
Flower Stall
You will need
n Various prints (flowers) – Eight (8) pairs of 2in squares n Green print fabric – One (1) 2in x 21in strip n Pink print fabric (cart) – One (1) 4½in x 9½in piece n Taupe fabric (wheels) – One (1) 4½in x 21in strip n Contrast pink print (awning) – One (1) 1½in x 21in strip n Yellow print (awning) – One (1) 1½in x 21in strip n Contrast yellow fabric (florist’s bucket) – One (1) 3½in square n Ivor y fabric ( background) – One (1) fat quarter n Fabric Glue (optional) n One (1) 4in circle template n Florist bucket template
Finished size
n 12½in x 18½in
Notes
n HST = half-square triangle. n QST = quarter-square triangle. n R ST = right side(s) together. n Cutting is listed under each unit heading. Set aside any scraps for future blocks.
Making the awning
1To make the awning, cut the following: n One (1) 1½in x 19in strip and one (1) 1½in x 3in piece of yellow print. n One (1) 1½in x 19in contrast pink print strip. n One (1) 2½in x 4½in piece, two (2) 2½in squares, one (1) 1½in x 18½in piece and one (1) 1½in x 2½in piece of background.
2First make a strip set – join the 1½in x 19in yellow print strip to the 1½in x 19in contrast pink print strip, pressing the seam open. Trim the end and cut six (6) 3in sections (Fig 1). 3Rotate and join the sections together, alternating the yellow with the print, then join the 1½in x 3in yellow print piece to the end, again pressing the seams open.
4Trim the awning unit to 2½in wide (Fig 2). Mark a diagonal line on the back of two (2) 2½in background squares and pin one (1) to each end of the awning, RST, taking care with the placement. Stitch on the line, flip ‘open’ and press – to snowball
Fig 2
Fig 1
Fig 3 Make 1
the corner – trimming away the back pieces (Fig 3). Repeat at the other end of the awning. Your awning should measure 2½in x 13½in. Make one (1).
5Join the 1½in x 2½in piece of background to the right end of the awning, the 2½in x 4½in background piece to the left end and finally the 1½in x 18½in piece to the top, always pressing towards the background fabric.
Making the f lowers
6To make each flower unit, along with two (2) pairs of 2in flower print squares, you will need to cut: n Two (2) 2in green print squares. n Two (2) 2in background.
7To create a flower unit, first make a HST. Mark a diagonal line on the back of a 2in green print square and pin, RST, to a 2in flower print square. Stitch on the line before trimming ¼in away from the seam and pressing your HST open, including the seam (Fig 4). Make two (2), each with one (1) flower print from each pair.
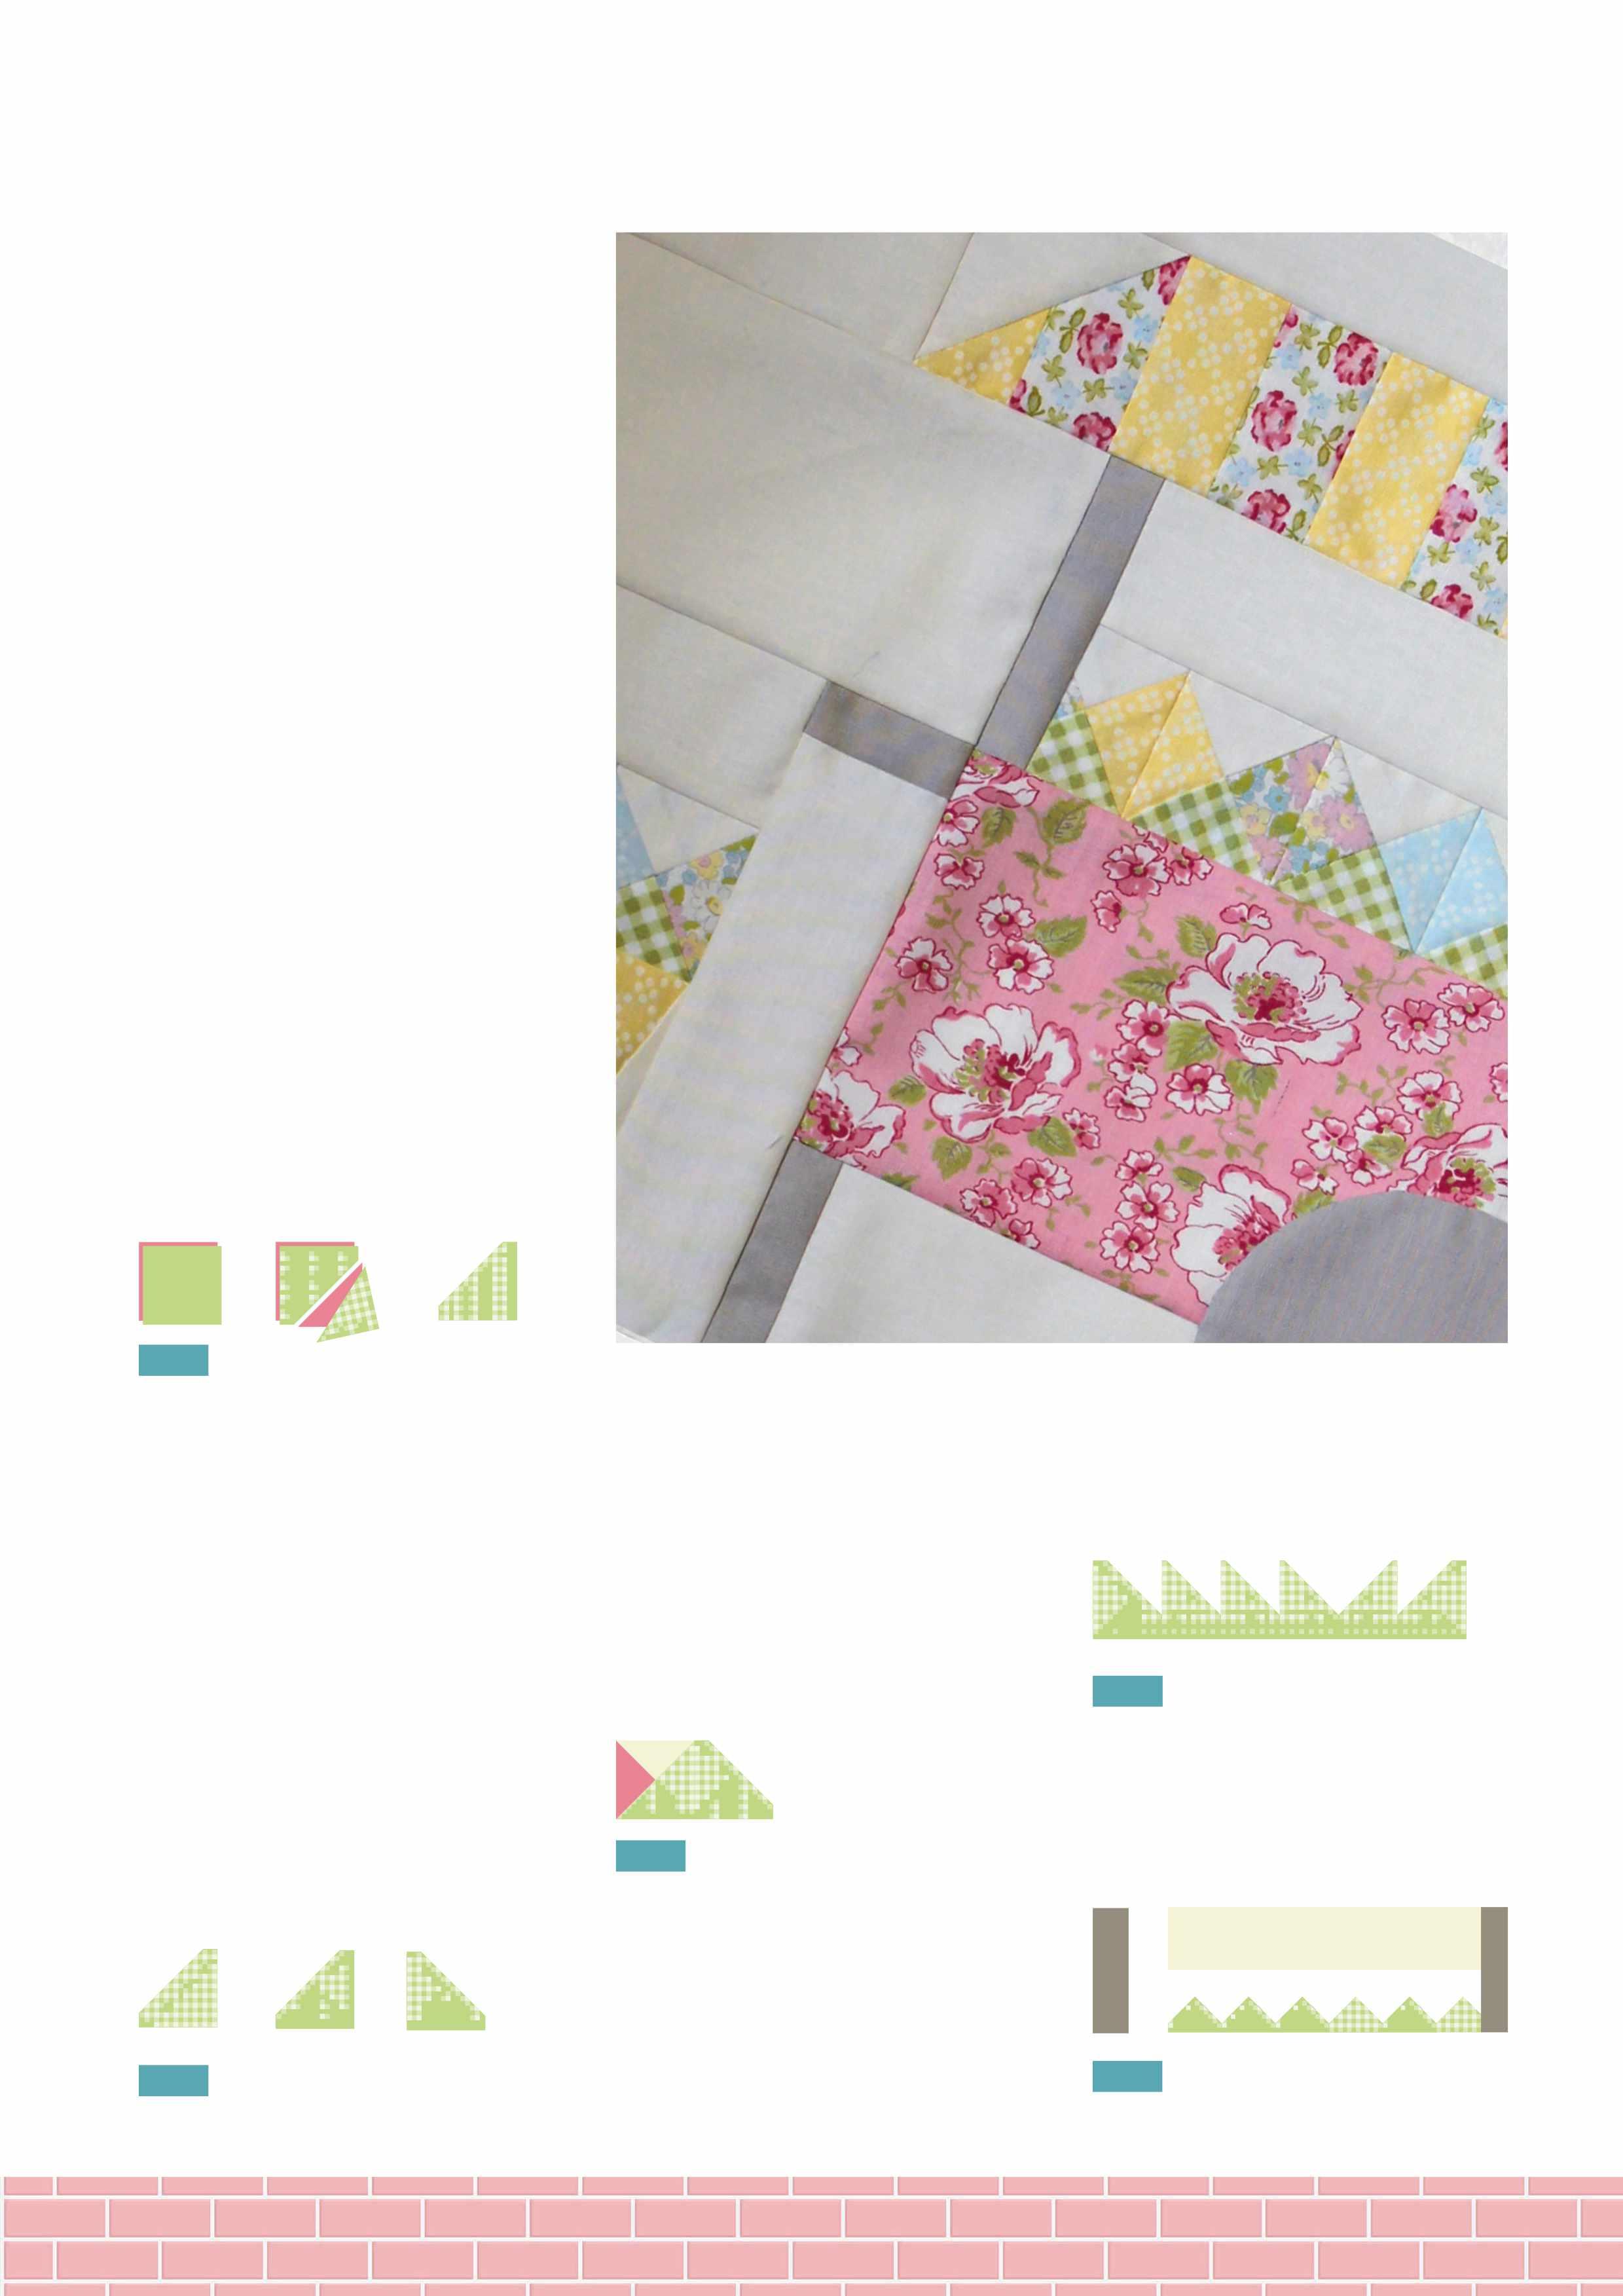
Fig 4 Make 2
8Repeat step 7 with a 2in print square and a 2in background square, again, each with one (1) flower print from each pair. Make two (2).
9Pair together one (1) HST of green/print with one (1) HST of background/print. Mark a diagonal line on the back of one (1) of the HSTs at right-angles to the seam and pin – RST – to the other HST, making sure to alternate the green print and the background, check placement. Again, stitch on the marked line and press to make a QST (Fig 5). Do not
Fig 5
trim at this point just in case you have to press open the other way. Repeat with the remaining pair of HSTs, but this time press open the other way to make a mirror image QST. Now you can trim away the back layers! Join the QSTs together to make a flower unit, checking the placement (Fig 6), pressing the seam open. Make four (4) various flower units.
Fig 6 Make 4
Making the cart
10For the cart, cut the following (you will also need the prepared circle template): n One (1) 4½in diameter circle, two (2) 1in x 3½in pieces and one
(1) 1in x 2½in piece of taupe fabric. n One (1) 3½in x 9½in, one (1) 2½in x 9in and one (1) 2in x 8½in piece of background.
8½in
Fig 7
11To make the top of the cart, join three (3) flower units together, pressing the seams open, then trim to 8½in wide (Fig 7).
Fig 8
12Join the 2in x 8½in background piece to the top, pressing away from the flowers, then join 1in x 3½in taupe piece to each side. Again, press away from the flowers (Fig 8).
13Next, make the leg of the cart by joining the 1in x 2½in taupe piece to the left side of the 2½in x 9in background piece, pressing towards the leg. Sew this to the bottom of the 4½in x 9½in pink print piece, taking care with the placement (the leg should be on the left).
14Join the flowers to the top, pressing towards the cart, before joining the 3½in x 9½in background piece to the right-hand side, pressing towards the background.
15 Next, we are going to make the wheel – cut a 4in diameter circle from card or template plastic. Using needle and thread, make a line of running stitch around the edge of a 4½in diameter taupe circle – about ⅛in from the edge – and gather over the template (Fig 9). Press gently and then allow to cool before removing the template. Make one (1).

4in diameter template
Fig 9 Make 1
Making the f lorist’s bucket
16To make the bucket, cut the following: n One (1) 1in x 2in piece of taupe solid. n Two (2) 2in x 4in pieces, one (1) 3½in x 6½in piece, one (1) 2in x 6½in piece, one (1) 2in x 6in piece and one (1) 2in x 3½in background piece.
17To make the cart handle, join the 1in x 2in taupe piece to the 19Using the template, mark a placement line on the 3½in yellow print square, as shown in Fig 11A.
20 Position a side piece on the placement line – RST – and stitch a ¼in away before flipping ‘open’ and pressing (Fig 11B). Place and stitch the second side and, again, press ‘open’.
top of the 2in x 6in background piece, pressing towards the taupe.
18 To create the bucket, first prepare side pieces by placing the pair of 2in x 4in background pieces RST and – offsetting the
Fig 11B
diagonal by ¾in from one (1) corner on the shorter side – trim, discarding the smaller portion, giving you one (1) pair of mirror-image pieces (Fig 10). 21Turn the bucket to the wrong side and trim to size, using the yellow print square as your guide. ¾in ¾in ¾in You can also trim down the excess background fabric if preferred.
22Next, join the remaining flower unit to the bucket, before adding the 2in x 3½in background piece to the top, pressing away from the flowers.
Fig 10
Fig 11A
23Join the handle unit to the right of the flower bucket and the 2in x 6½in background piece to the left, again pressing away from the bucket. Finally add the 3½in x 6½in background piece to the top.
Assembling the block
24Mark a generous ¼in seam allowance along the bottom of the block and glue-baste or pin the wheel to the cart before hand or machine appliquéing in place.
25Join the florist’s bucket to the left side of the cart, pressing away from the cart, then join the awning, pressing towards the awing. Your block should measure 12½in x 18½in.
Meet the designer
Nicola Dodd has been quilting since 2010 after chancing upon a quilting website and becoming hooked. Having designed all her working life – as an architect and as a garden designer – the temptation to start designing quilts was irresistible and she established her pattern company, CakeStand Quilts, in 2015. A regular Today’s Quilter contributor, Nicola now has a successful blog, where she enjoys sharing tutorials, and is a regular contributor to the Moda Bakeshop. www.cakestandquilts.com cakestandquilts @nicolajdodd
Ice Cream Stand
You will need
n Various prints (ice creams) – Four (4) 2in squares n Dark blue print fabric (cart) – One (1) 4½in x 9½in piece n Taupe fabric (wheels) – One (1) 4½in x 21in strip n Blue print fabric (awning) – One (1) 1½in x 21in strip n Yellow print fabric (awning) – One (1) 1½in x 21in strip n Raspberry fabric (tricycle frame) – One (1) ¾in x 21in strip n Fussy-cut scrap (hubcap) – One (1) 1½in diameter circle n Ivory fabric (background) – One (1) fat quarter n 3/8in bias tape maker n Spray starch and glue baste (optional) n One (1) 4in circle template n One (1) 1in circle

Finished size
n 12½in x 18½in
Notes
n HST = half-square triangle. n RST = right side(s) together. n Nicola used a fabric glue to help baste her appliqué. n Cutting is listed under each unit heading. Set aside any scraps for future blocks.
Making the awning
1To make the awning, cut the following: n One (1) 1½in x 19in strip and one (1) 1½in x 3in piece of yellow print. n One (1) 1½in x 19in blue print strip. n One (1) 2½in x 4½in piece, two (2) 2½in squares, one (1) 1½in x 18½in piece and one (1) 1½in x 2½in piece of background fabric.
2First make a strip set – join the 1½in x 19in yellow print strip to the 1½in x 19in blue print strip, pressing the seam open. Trim the end and cut six (6) 3in sections (Fig 1). 3 Rotate and join the sections together, alternating the yellow with the blue print, then join the 1½in x 3in yellow print piece to the end, again pressing the seams open.
4Trim the awning unit to 2½in wide (Fig 2). Mark a diagonal line on the back of two (2) 2½in background squares and pin one (1), RST, to each end of the awning, taking care with
Fig 2
Fig 1 Fig 3
Make 1
the placement. Stitch on the line, flip ‘open’ and press – to snowball the corner – trimming away the back pieces (Fig 3). Repeat at the other end of the awning. Your awning should measure 2½in x 13½in. Make one (1).
5Join the 1½in x 2½in piece of background fabric to the left end of the awning, the 2½in x 4½in background piece to the right end and finally the 1½in x 18½in piece to the top, always pressing towards the background fabric.
Making the ice creams
6To make each ice cream, along with one (1) 2in print square, you will need to cut two (2) 2in background squares.
7To create an ice cream, first make a HST – mark a diagonal line on the back of a 2in print square and pin, RST, to a 2in background square. Stitch on the line before trimming ¼in away from the seam and pressing your HST open as before, including the seam.
8Repeat this process with the HST from step 7 and the second 2in background square. Take care with the placement, the seam should be across the first seam (Fig 4). Press the seam open. Make four (4) ice cream units.

Fig 4
Make 4
Making the cart
9For the cart, cut the following (you will also need the prepared circle templates): n Two (2) 4½in diameter circles and two (2) 1in x 3½in pieces of taupe. n One (1) 3½in x 9½in, one (1) 2½in x 9½in, one (1) 2in x 6½in piece and two (2) 1½in x 3½in pieces of background.
10 Join the four (4) ice cream units together, pressing seams open, then join the 2in x 6½in piece to the top, pressing away from the ice cream, to make the top of the cart (Fig 5).
11Join a 1½in x 3½in background piece to each side, then the 1in x 3½in taupe pieces, again pressing away from the ice cream (Fig 6).
12 Join the 4½in x 9½in dark blue print piece to make the bottom of the cart, pressing away from the ice cream. Then add the 2½in x 9½in background piece to the bottom of the cart before joining the 3½in x 9½in background piece to the left-hand side, pressing towards the background.
13Next, we are going to make the wheels – cut a 4in diameter circle from card or template plastic. Using needle and thread, make a line of running stitch around the edge of a 4½in diameter taupe circle – about ⅛in from the edge – and gather over the template (Fig 7). Press gently and then allow to cool before removing the template. Make two (2). fussy-cut circle and 1in card template. Make one (1).
15To create the tricycle frame – prepare the ¾in x 21in strip of raspberry with spray starch, if you are using it, and allow it to dry. Make a piece of bias tape using the ⅜in bias tape maker, following the manufacturer’s instructions. From the length, cut one (1) 4in piece, two (2) 2½in pieces and two (2) 2in pieces. Turn a small seam allowance at each end of a 2in piece to make the saddle and at one end of the remaining 2in piece to make the handle and press.
Fig 5
Fig 6
4in diameter template
Fig 7
Make 2
14To make the hub cap, repeat step 13 with the 1½in diameter
Assembling the block
16 To assemble the block, you will need to cut a 6½in x 9½in piece of background.
17To assemble the block, first mark a generous ¼in seam allowance on the lower right-hand corner of the 6½in x 9½in background piece and position the wheel as in Fig 8. Lay out the bias tape pieces, tucking raw ends in where necessary and then add the hubcap. Place the cart alongside to check the position of the handle and the frame (Fig 8), they should be in line with the blue cart piece.
Fig 8
18Glue-baste or pin in place before hand or machine appliquéing to secure.
19Appliqué the remaining wheel to the cart in the same way.
20 Join the tricycle frame to the side of the cart, pressing away from the tricycle, then join the awning, pressing towards the awing. Your block should measure 12½in x 18½in.


