10 minute read
MAKER’S GUIDE


Fearless Quil ti n g Never d read seei ng t hose words “qu i lt as desi red” aga i n w it h top t ips for bei ng fea rless i n you r qu i lt i ng!
Have you ever looked at a quilt, specifically the quilting, and were blown away? Did you look and look and look and wonder to yourself, how did they do that? Then, have you sat down, or stood in front of your quilting machine and felt inadequate… blank… inept, or just totally stumped? I bet the answer for most everyone is ‘Yep, been there, felt that!’ Well, that is why I developed my Fearless Quilting class. I wanted other quilters to feel the same joy I do when I sit or stand in front of my quilting machine. I want quilters to feel the same accomplishment when they finish quilting a piece as they do when they finish making the top.
So, let’s dive in. I am going to share with you the steps I take in producing a high-quality quilted piece of art. Normally this is done in a classroom setting, and I walk you through the steps one at a time, so I hope you are in your quilt space ready to follow along.
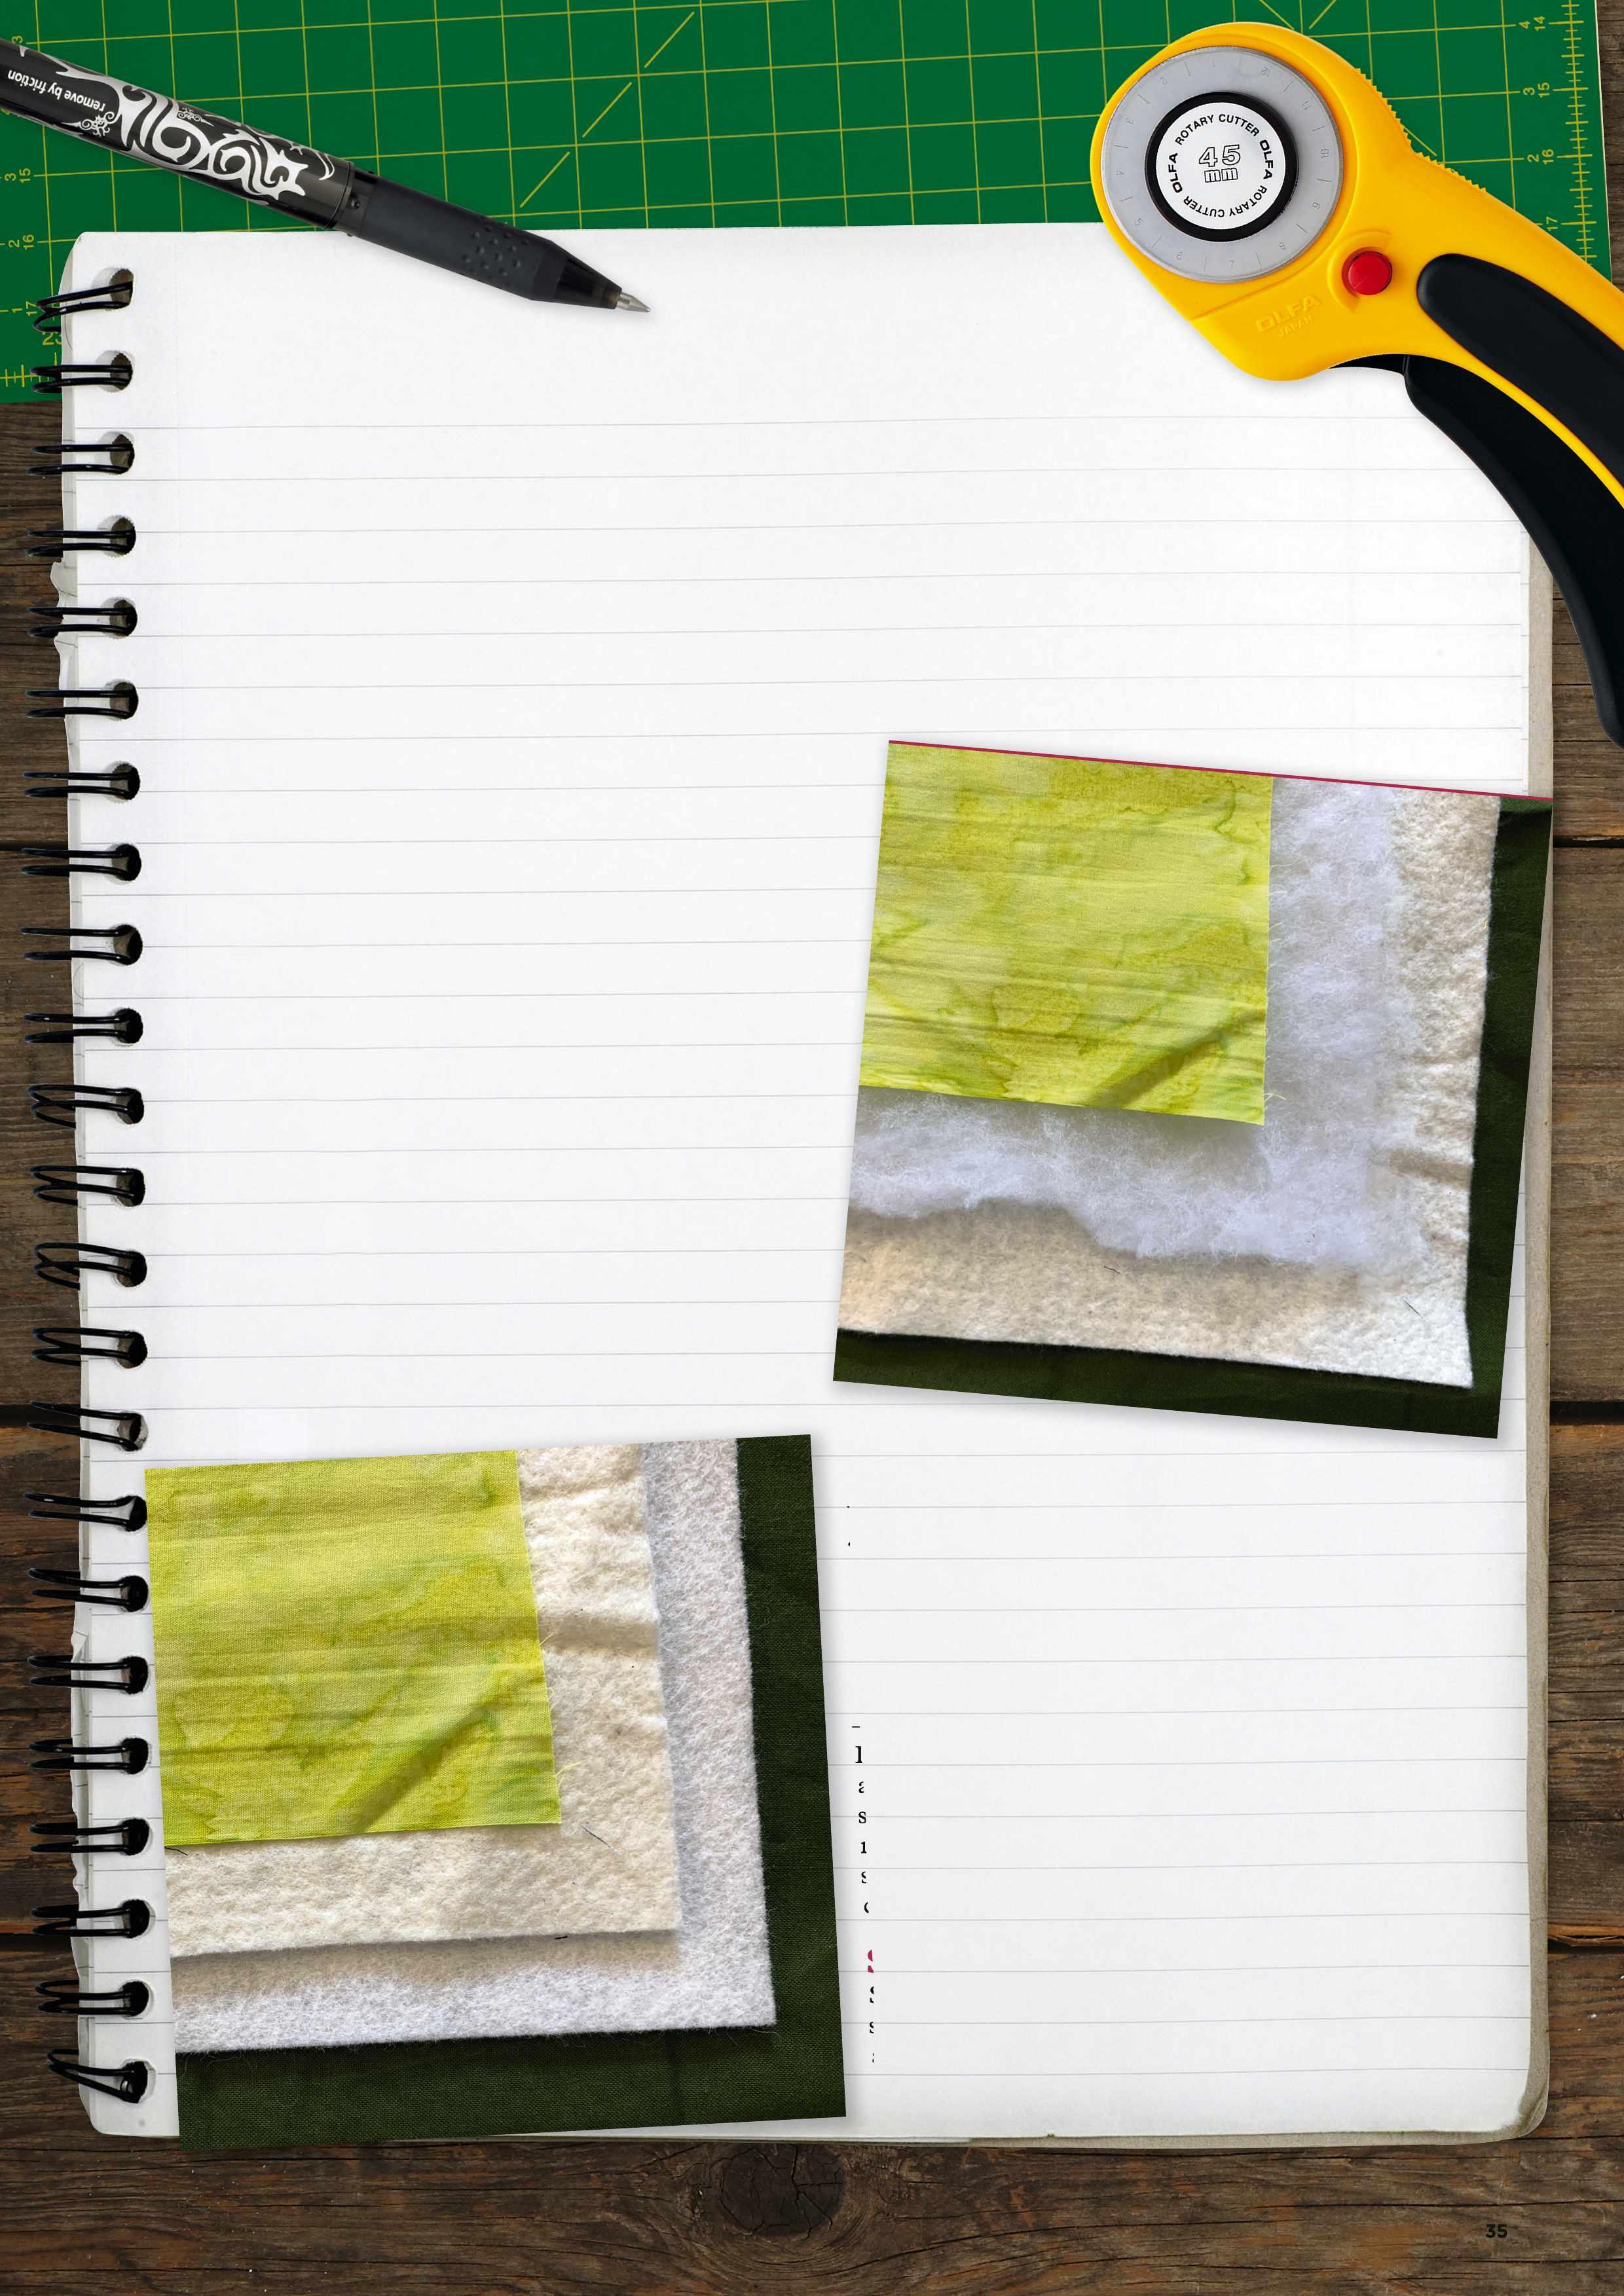
Add a layer of wool batting to show quilts. Because it doesn’t have the same memory as cotton it won’t have as many fold lines when displayed
Add a layer of wool/rayon blend felt to hangings
Step 1: Tackling the boring stuff !
You have probably heard this before, but make sure all your seams are secure. There should be no holes, otherwise your presser foot can rip a hole in the top. Next, make sure your seams are closed all the way, from beginning to end, and your seams are all pressed flat. Lastly, make sure there aren’t any ripples in your top. There are two tricks I use to handle any extra fullness – one is to mist the entire top so the fibres relax. Then, I steam press, making sure I lay my seams down again and that they are all fully open from the front. The second trick, if the first doesn’t take in all the fullness, is to starch the heck out of the top. You will be surprised at how much fullness these two steps together can alleviate.
Step 2: Sandwiching your quilt
Sandwiching your quilt properly is a very important step. Prepare your backing, so that it is 6in larger all around than the top of your quilt. It should be
Practise quilting designs first on paper by doodling
about 1ft longer and wider than your quilt top. Layer the backing (wrong side up), your batting (right side up… yes most battings have a right/wrong side – check the manufacturer’s instructions to find the right side) and your quilt top (right side up). Whatever layering/ basting technique you use – and they differ whether you are quilting on a domestic or a longarm – make sure the three layers are tight, with no wrinkles. Once the quilt is sandwiched, make sure you check it frequently during the quilting process, especially if you are quilting on a domestic sewing machine. I do have one confession; there are times I use four layers in my quilt sandwich. Whether you are making a show quilt or a wall-hanging for your home, office or a gift, this is important. Here are two methods for great looking quilting: 1) Wall-hangings – on top of your backing, before you layer your cotton batting, add a layer of wool/rayon blend felt. This provides for a heavier finished quilt, which will hang perfectly flat against the wall. Also, the layer of felt behind the cotton batting provides for a nice foundation for your quilting, which allows the texture to really stand out. 2) Show quilts – on top of your cotton batting, add a layer of wool batting, before adding your top. Wool will also add great texture for your quilting but, more important for show quilts, it doesn’t have the same memory as cotton, so quilts that have been folded in shipping, judging or waiting to be hung at the show, won’t have those annoying fold lines. I only use three layers for bed quilts.

Step 3: Choosing your needle and thread
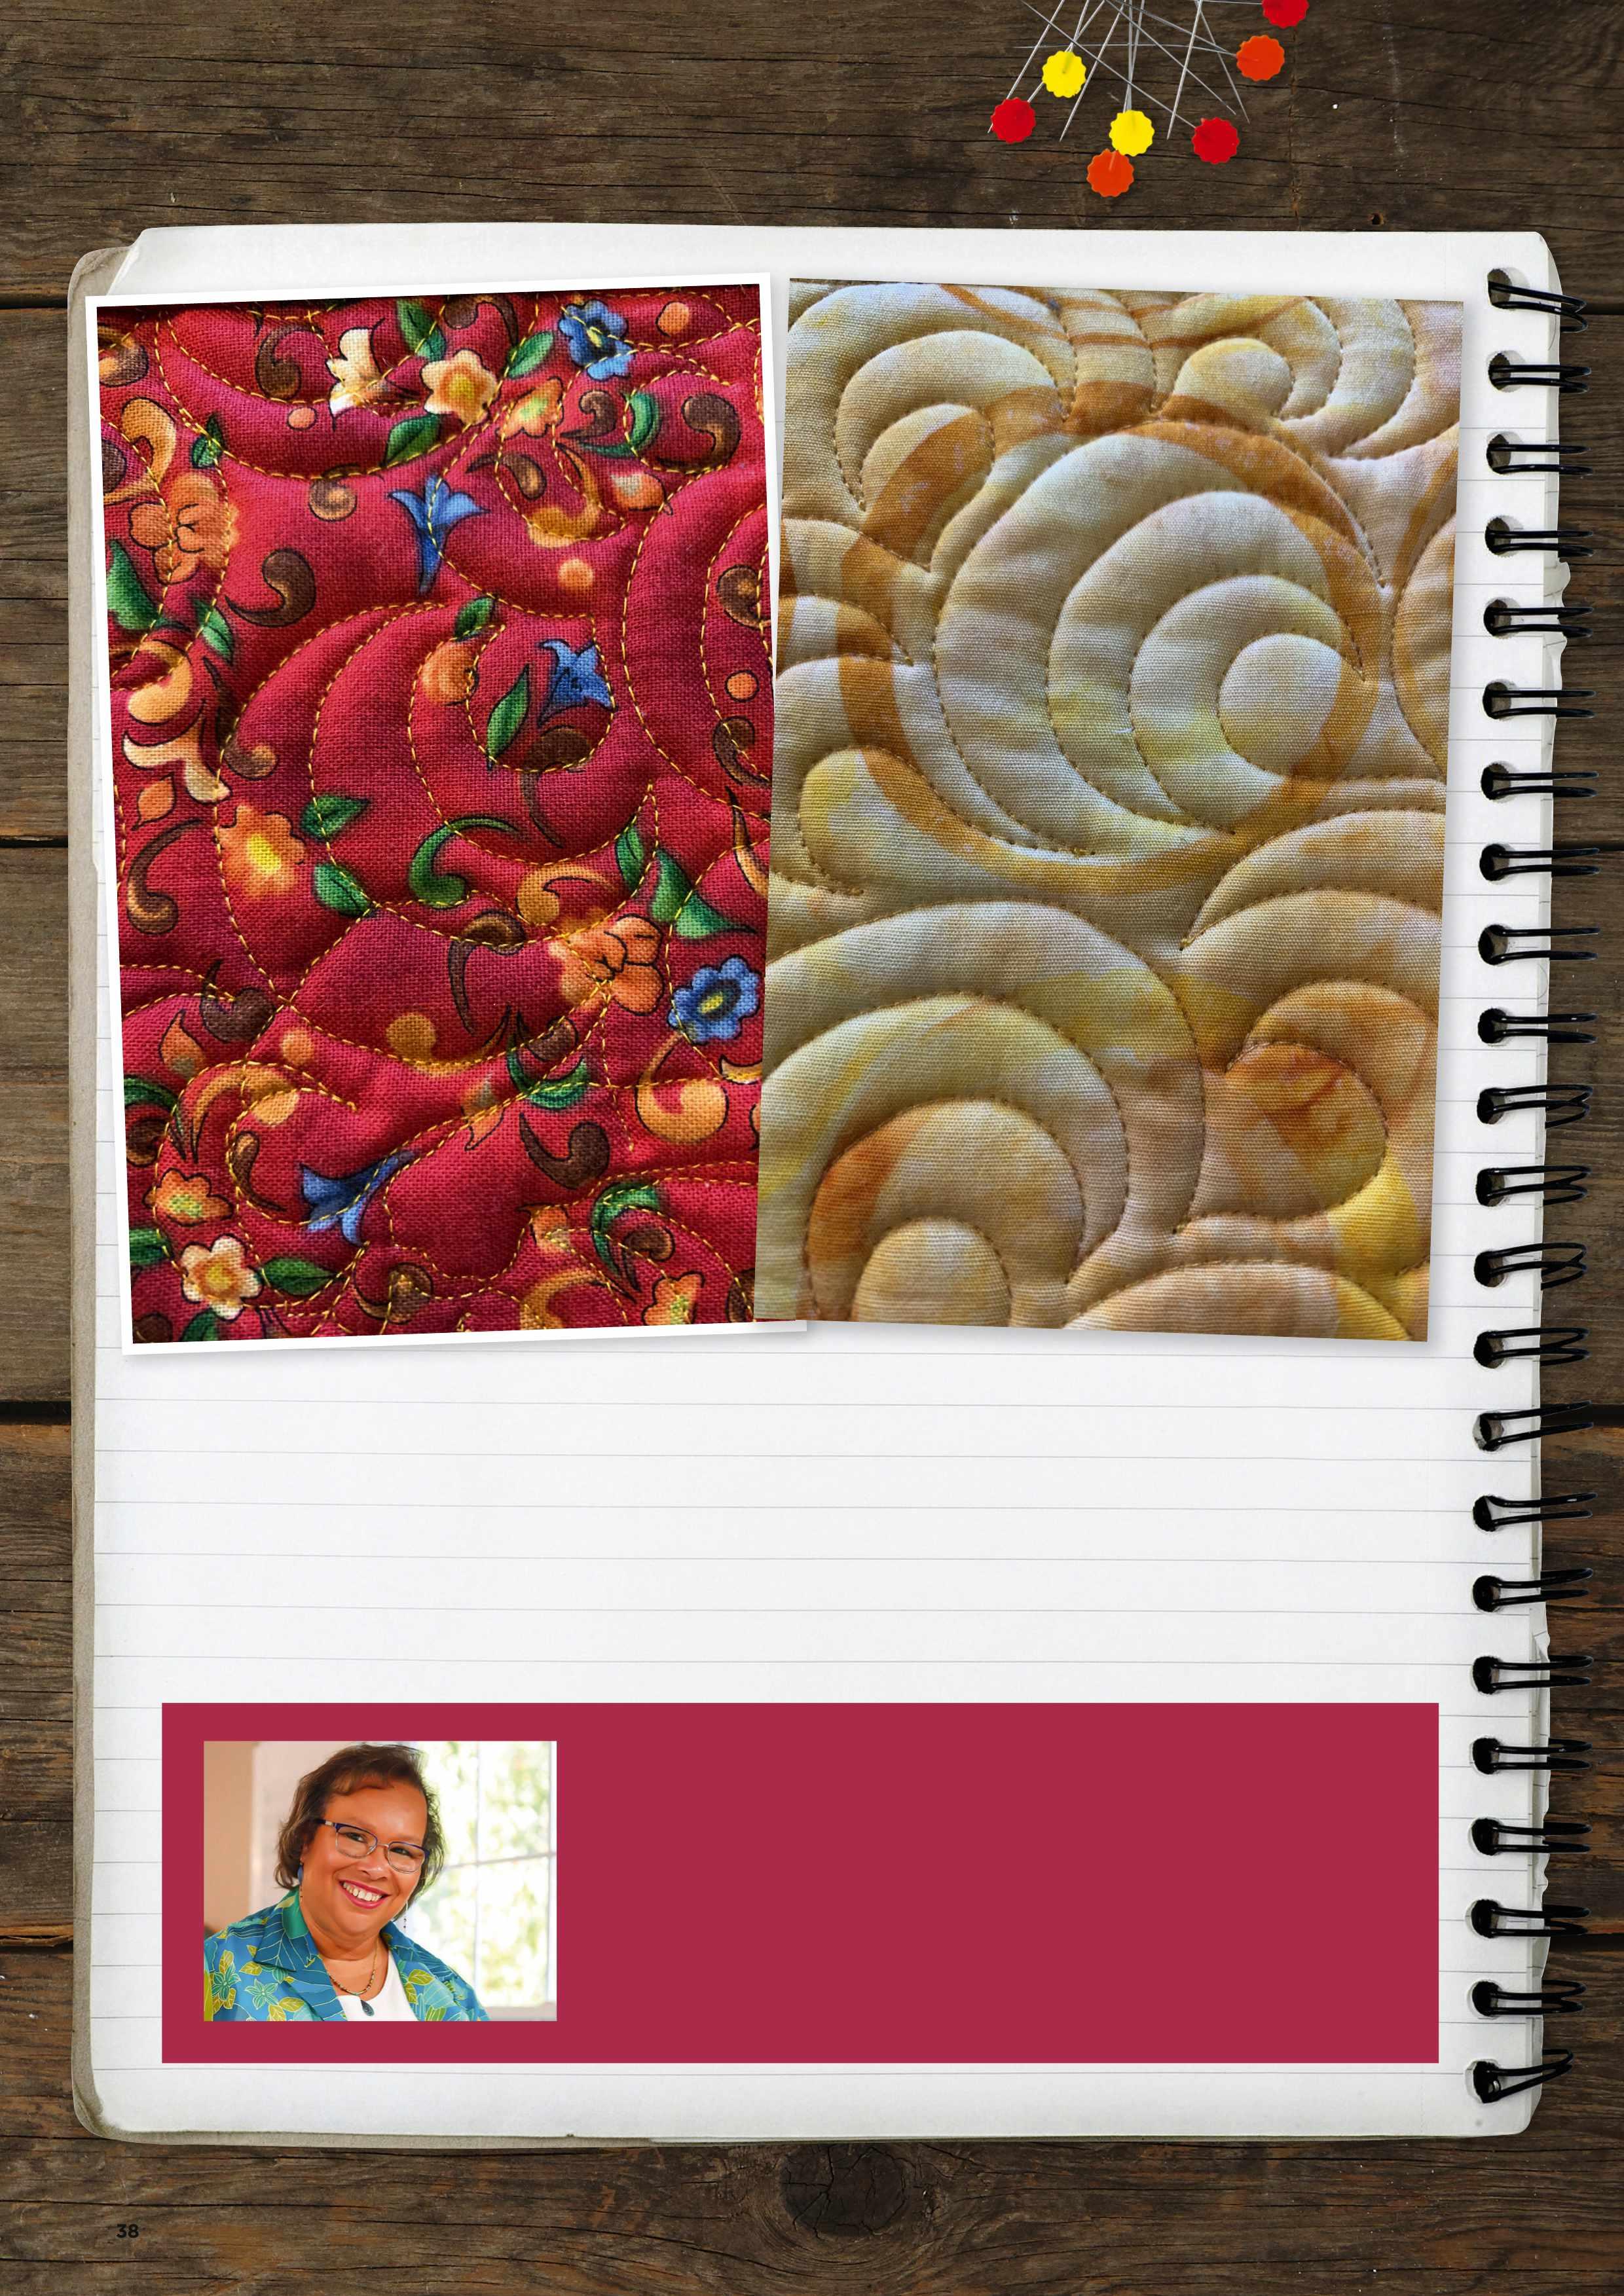
Or should I say your thread and needle? If you answered yes, you’re correct. Proper needle selection depends on the type of thread you use. The most common quilting threads are 40wt and 50wt. A common combination is a 40wt thread with a 90/14 size needle, or a 50wt thread with a 80/12 needle. Deciding on the weight of the thread will depend on the look you want. A thinner thread will sink into your fabric, while a heavier thread will sit on top.
Step 4: Fearless Quilting!
Here is where the fun begins, and I’m going to start at the beginning. Unless you plan to quilt all straight lines, I suggest you pick up a pencil and grab some paper. That’s right, it’s time to doodle. Come on, you didn’t just get in a car and start driving, did you? No, you took baby steps. If you can comfortably draw the design on paper, you can do it on a machine. This is called muscle memory. Your brain will recognise what you are doing and tell your muscles how to move. It removes some of the doubt you have in your mind. So, practise, practise, practise on paper first. Don’t worry about erasing ‘mistakes’ either. I find it is better to watch your progress the more you doodle. If erase you must, just know erasing is easier than getting out a seam ripper and pulling out stitches!
Once you are comfortable with your doodles, grab a sandwiched quilt square. I like to practise on big squares, at least 40in x 40in. This gives you a chance to really get into a groove before running out of space. When choosing a design, remember that the easiest designs to start with are those that fit between your hands when quilting. Don’t start with long lines that will require you to pick up your hands to complete. Save these designs for later. Position yourself so that your arms are at a 90° angle with your machine table on a domestic machine or longarm base. Square your shoulders with the machine and work on the section directly in front of you.
Find a quilting design that fits between your hands
Don’t start off free motion quilting by attempting long lines, where you need to move your hands
At this point, don’t worry about what fabric or thread you use. In fact, in the beginning, it is best to use some cheap fabric and a contrasting thread. Why? Cheap fabric has a looser weave, so your needle isn’t fighting to find its way between the threads, and with a contrasting thread, you won’t have to squint to see where you have been, nor will you have to hunt to find any boo-boos. Yes, you will have mistakes, and that’s okay. Embrace them, this is where you learn to enhance them without having to go back and take them out. One thing to
remember is that no one will be looking this critically at your quilting again (that is unless you are entering a piece in a judged show). I am serious, as a quilter we see every imperfection, but I bet you no one will ever notice that bobble or that your swirl isn’t evenly spaced. In fact, it will look more organic, more human and less computerized. So relax! Oh yes, I do mean RELAX. Are your ears touching your shoulders? Take a deep breath and bring them down to normal position. Stitching for long periods with your shoulders at your ears will cause tension in your neck and shoulders. After you have stitched for a bit, it is time to check your tension and look

for any wrinkles on the back of your square. How do the stitches look? Your stitches should be flat with no puckers on the top or back. If you were to run your fingernail along the stitch, you shouldn’t hear or feel any popping. What you are looking for is to make sure your top and bottom thread have nestled properly within your quilt sandwich, just as they would with a regular seam. If you see any issues, adjust your machines thread tension using the same technique you would use if you were stitching a straight seam. Next, do you have any creases on your back? If so, it means that your backing wasn’t pulled tight enough when you sandwiched your quilt layers. This is just practice, so leave them, but use this as a time to learn how to fix them as well. Unstitch any puckers that can be easily unstitched. But what happens if it is something that requires hours of extra work? I stay in my fearless mode. I grab some silk or lingerie thread and using a small, hand blind stitch, I close up that crease. Remember, I don’t let anything or anyone steal my quilting joy! Please remember to take a break every 50 minutes to stretch your legs and relax your body.
Okay, now that you have the basics, how do you become fearless, and gain some confidence? Let’s go back to those doodles. This time, doodle on a piece of tracing paper, then do it again and again to gain that muscle memory. Now pin one of those pieces of tracing paper to a quilt sandwich. Place this sandwich under your needle
The back of your piece should be flat with no puckers and your stitches should be the same quality as the front
Your motif should fit easily between your two hands and the stitches should be even in length
Photography by Tami Photography, LLC
and sew, as if you are tracing that line with your pencil. This will allow you to gain some confidence quilting that motif using your machine, instead of a pencil. If you are comfortable with that motif, find another and doodle it, both on regular and tracing paper, until you are ready to transfer to the machine. I will stare at quilts, to breakdown a quilting motif until I can doodle it. Once I have conquered the first one or two I go find another. Pinterest is a great place to find interesting quilting designs! Oh, and believe it or not, these sample quilting squares are valuable! That is right, cut them into 4in squares, stitch around the edges with an overlock or zigzag stitch and bam! You have a stack of coasters for your family and friends! They are even washable Now go forth and conquer. I find it takes about 500 hours of free-motion quilting before it finally clicks and becomes effortless. So don’t beat yourself up. Go play. Remember, the joys of quilting will come when you learn to be fearless!
M E ET T H E AU T HOR
Renée Fleuranges-Valdes has been sewing and crafting her entire life, even making her own clothes as young as twelve. She didn’t start quilting until much later in life and has since put all the other crafts to the side. Renée is a contemporary fibre artist whose work can be found in galleries and museums throughout the USA. Now, all of her free time is spent either quilting, lecturing or teaching quilting. You can see Renée’s class and lecture schedule, as well as a gallery of her art, on her website at www.quiltedartistrybyrenee.com. @quiltedartistry


