HYDRALADA COMPANY LTD 702 Omahu Road Hastings, 4120 New Zealand
Hydralada Park Brake ring replacement
New brake rings wear relatively quickly when they are first fitted to form a rounded edge on the holes, and can be operated until there is virtually no metal left between the individual holes. When replacing the ring, carefully inspect the condition of the pin as well and determine the need to replace this as well. As an indicator the brake pin will last 5 wear rings.
Fig 1.
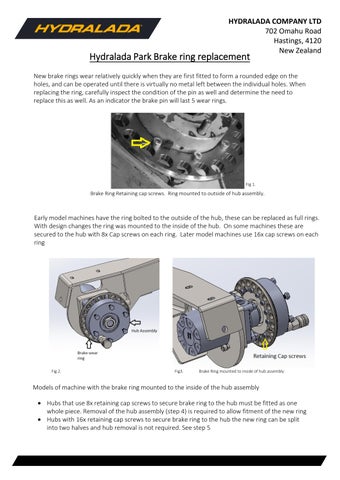
Brake Ring Retaining cap screws. Ring mounted to outside of hub assembly.
Early model machines have the ring bolted to the outside of the hub, these can be replaced as full rings. With design changes the ring was mounted to the inside of the hub. On some machines these are secured to the hub with 8x Cap screws on each ring. Later model machines use 16x cap screws on each ring
Fig 2.
Fig3.
Brake Ring mounted to inside of hub assembly
Models of machine with the brake ring mounted to the inside of the hub assembly • Hubs that use 8x retaining cap screws to secure brake ring to the hub must be fitted as one whole piece. Removal of the hub assembly (step 4) is required to allow fitment of the new ring • Hubs with 16x retaining cap screws to secure brake ring to the hub the new ring can be split into two halves and hub removal is not required. See step 5