HYDRALADA COMPANY LTD 702 Omahu Road Hastings, 4120 New Zealand HYDRALADA FREE WHEELING HUB ASSEMBLIES (FWH)
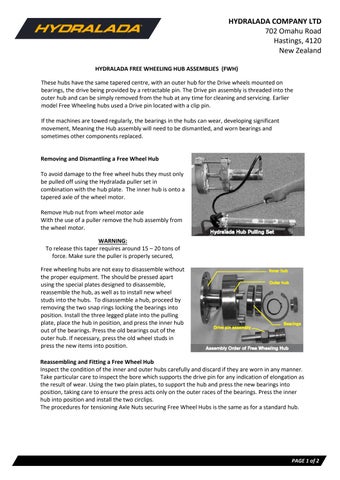
These hubs have the same tapered centre, with an outer hub for the Drive wheels mounted on bearings, the drive being provided by a retractable pin. The Drive pin assembly is threaded into the outer hub and can be simply removed from the hub at any time for cleaning and servicing. Earlier model Free Wheeling hubs used a Drive pin located with a clip pin. If the machines are towed regularly, the bearings in the hubs can wear, developing significant movement, Meaning the Hub assembly will need to be dismantled, and worn bearings and sometimes other components replaced. Removing and Dismantling a Free Wheel Hub To avoid damage to the free wheel hubs they must only be pulled off using the Hydralada puller set in combination with the hub plate. The inner hub is onto a tapered axle of the wheel motor. Remove Hub nut from wheel motor axle With the use of a puller remove the hub assembly from the wheel motor. WARNING: To release this taper requires around 15 – 20 tons of force. Make sure the puller is properly secured, Free wheeling hubs are not easy to disassemble without the proper equipment. The should be pressed apart using the special plates designed to disassemble, reassemble the hub, as well as to install new wheel studs into the hubs. To disassemble a hub, proceed by removing the two snap rings locking the bearings into position. Install the three legged plate into the pulling plate, place the hub in position, and press the inner hub out of the bearings. Press the old bearings out of the outer hub. If necessary, press the old wheel studs in press the new items into position. Reassembling and Fitting a Free Wheel Hub Inspect the condition of the inner and outer hubs carefully and discard if they are worn in any manner. Take particular care to inspect the bore which supports the drive pin for any indication of elongation as the result of wear. Using the two plain plates, to support the hub and press the new bearings into position, taking care to ensure the press acts only on the outer races of the bearings. Press the inner hub into position and install the two circlips. The procedures for tensioning Axle Nuts securing Free Wheel Hubs is the same as for a standard hub.
and stand clear of the hub assembly.
PAGE 1 of 2