6 minute read
Removal and Installation of Travel Remote Control Valve


(3)Disassembling clearance adjustment parts
Shims and washers used for clearance adjustment should be stored so that they can be reassembled in the identical conditions. (4)Disassembling linkage
The adjustment values of the rod should be kept as is whenever possible. If the adjustment value must be changed for disassembly, measure the length prior to disassembly and record it so that the same dimensions can be obtained at reassembly. (5)Disassembling tapered and fitted sections
If a tapered or fitted section that should fit tightly comes off easily, inspect that part to find out the cause so that the same problem will not occur after reassembly. (6)Disassembling bearings •When removing bearings, use a jig as shown below rather than trying to remove them by force.
(7)Disconnecting hydraulic lines •Lower the attachment to the ground and turn off the engine. •Release the air bleeder cap of the hydraulic tank. •Operate each control lever several times to release the pressure from the lines to be removed. •To disconnect a tube from another tube or a tube from a hose, grip the male end with a wrench and loosen the female nut end. •Seal the removed tube or hose ends as well as the oil ports of each removed hydraulic component with a bull plug to prevent foreign substances from entering. Seal the oil ports of the tank with a plastic bag or its equivalent. •Since hydraulic oil remains inside the tube or hose removed, drain oil into an appropriate container. If a large amount of hydraulic oil was spilled in the working area, spread absorbent materials such as sawdust over the spill. •When removing the lines from the underneath of the chassis, be careful not to spill oil on yourself. •Attach a tag with appropriate symbols or location for installation to each tube, hose and connecting location of hydraulic component lines for easy reinstallation. (8)Safety Work •Keep the disassembly area tidy and clean. •When loosening bolts or nuts, use the correct-size wrench and pull it back toward yourself.
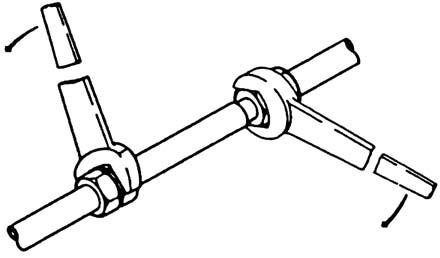
Using the wrong size wrench or loosening by pushing away from the body may cause the wrench or hands to slip leading to accident or injury. •When working with two or more people, be sure to confirm signs to be used for safety before starting work.

3.After Disassembly (1)Cleaning •Clean the disassembled parts and arrange them by each component. Be especially careful to remove sludge or dust completely from the oil holes for each part and inside the pipes. •Divide the solvent into two containers, one for removing dirt and one for finishing for efficient cleaning. When cleaning critical parts, divide the tubs further to avoid using dirty solvent. • When cleaning bearings or other high precision parts, use kerosene or neutral absolute light oil. •When cleaning large castings such as the cylinder head or block in a container, clean them in solvent of pH 10 to 12 at 50 to 70 ℃ for 5 to 10 minutes and rinse thoroughly afterwards. •When using special chemicals as cleansing agents, understand the proper usage thoroughly and be careful not to get it in your eyes or on your skin. Properly dispose of the used solvents. (2)Dust or rust prevention •Cover the cleaned parts to prevent dust from entering. Use caps for ends of hoses and tubes. •If it is assumed to take a long time before reassembling, use corrosion inhibitor.
General Cautions for Assembly
1.Precautions for Assembly (1)Installing parts •Prior to work, clean all parts and repair any damage. Dirt and dust have adverse effects on moving parts and can shorten the machine's life. Therefore, try to prevent them from entering as much as possible. •A new part coated with corrosion inhibitor must have the coating removed before reassembly. •Cleaning solvent: light oil, trichlene •Parts with matching marks must be assembled with those marks aligned correctly. •Use a press and proper tools for installing bearings, bushings, oil seals and other similar parts. Use special tools for assembling special parts as specified. •Coat the surface of press-fit parts with molybdenum disulfide grease. (2)Tightening bolts and nuts Tighten bolts and nuts right to left and up and down alternatively so that tightening force is applied evenly. •For bolts on essential areas, apply engine oil to the threaded portion so that tightening force is applied evenly without unnecessary engagement on the thread.

•For bolts and nuts in the areas that are difficult to check from outside, or for bolts and nuts in important areas, secure them using wires, cotter pins or folding washers. •Clean bolts to which Loctite has been applied (identified as bolts with white substances when removed) with light oil or Tri hlene and dry them. After that, apply two or three drops of Loctite to the threaded portion of the bolts and fasten them.

(3)Installing hydraulic lines •Clean every tube with cleaning solvents (e.g. light oil, kerosene, trichlene) and blow dry with compressed air. •Do not use liquid packing (ThreeBond). •When installing high-pressure hoses, do not allow them any torsion. In addition, do not allow any other parts to interfere with the hoses that have no protective spring. •Install them correctly, checking tags that have been attached during disassembly to each tube, hose or connecting section of hydraulic components. •When connecting the lines, if a nut on one end alone is tightened fully, the other end may not be able to be accessed. Therefore, first finger tighten nuts on both ends and tighten them fully with even torque alternately. •After completing connecting lines, run the engine at low speed and move each hydraulic component using control levers from the operator's seat to inspect and replenish oil in the hydraulic tank. If it is necessary to bleed air from the tank, loosen the air bleeding plug. (4)Inspection during assembly
Points such as end clearance, end plate, projection, joggling and backlash, which cannot be checked unless in the reassembly process, should be checked or measured before proceeding to the next step. Keep records for the important areas. (5)Assembling in clearance adjustment sections •The shims and washers used in clearance adjustment sections should be reassembled to the identical locations from which they were removed unless they were worn or damaged. •Confirm the adjustment value after reassembly. (6)Reassembling linkage
If no abnormality is found on linkages, assemble them with the rod adjustment value identical to that of pre-assembly. (7)Assembling tapered and fitted sections •Repair and clean damaged areas before reassembling. •If an area which should fit tightly goes in too easily, recheck the fit-in dimensions and correct any defect before reassembling. (8)Safety Work •Keep the assembly area, tools, and hands tidy and clean. •When tightening bolts or nuts, use the correct-size wrench and pull it back toward yourself to tighten. Using the wrong size wrench or tightening by pushing away from the body may cause the wrench or hand to slip leading to accidents or injuries. •When working with two or more people, be sure to confirm signs to be used for safety before starting work.