3 minute read
Assembly and Disassembly of Swing Reduction Gear


Engine Oil Replacement
Warning ・ Keep away from fire.
Caution ・ Be sure to stop the engine before beginning work.
Items to prepare •Wrench (19 mm) •Specialty plug (drainer plug) •Waste oil can •Rags •Cleaning fluid 1.Engine Oil Replacement [1]Open the engine hood. [2]Remove the engine oil cap (1).
[3]Put a waste oil can (2) underneath the engine oil drain port.
[4]Use a wrench (19 mm) to loosen the 2 bolts (4), and then move the under cover (3) in the direction of the arrow.
Tightening torque for installation: 68.6 ± 4.9 N•m
[5]Remove the drain plug (5).
[6]Install the drainer plug with hose (6) and screw it in.
The valve is pressed automatically and the oil is drained. [7]After draining the oil, securely install the drain plug.
2.Engine Oil Filling [1]Remove the drainer plug used for draining oil. [2]Attach the drain cock cap removed when oil was drained. [3]Fill at the feed port (2) with new engine oil. Next, wait about 15 min. for the oil to completely travel down to the oil pan, remove the oil level gauge (1), and wipe the tip of the gauge off with a rag before fully inserting the gauge again. [4]Gently pull out the oil level gauge (1). If oil is adhered to the area between the "upper limit (3)" and "lower limit (4)", this indicates the oil volume is correct (5).
3.Inspection after Engine Oil and Element Replacement [1]Oil leak inspection Start the engine. Slowly raise the rotation from idling rotation. Check the oil pan drain cock and each installation section of the oil filter for oil leaks. [2]Rechecking the engine oil volume Stop the engine and wait 10 - 20 min. to recheck the engine oil volume. If the volume is low, fill up with oil to the stipulated level. The oil level will decrease due to engine oil entering the oil filter and oil path when the engine is started. Refill with oil if the oil level is low.
Engine Oil Filter Element Replacement
Caution ・ Be sure to stop the engine before beginning work.
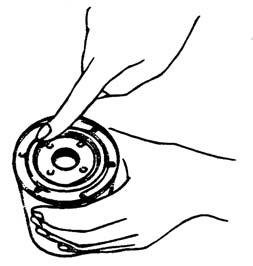
Items to prepare •Filter wrench •Rags •Cleaning fluid 1.Removal of oil filter element [1]Use a filter wrench (1) to remove the oil filter element (2).
2.Installation of Oil Filter Element
Use the following procedure to install a new cartridge. [1]Apply a thin layer of engine oil to the cartridge gasket. [2]After the cartridge is screwed in and the gasket is touching the seal surface, use the filter wrench to tighten the cartridge 1 rotation.
Fuel Filter Replacement
Warning ・ Keep away from fire. ・ After replacing the element or bleeding out the air, thoroughly wipe off any spilled diesel fuel.
Caution ・ When the fuel tank has been emptied, water drained from the fuel, the element replaced, or other such work carried out, always bleed the air. ・ Be sure to stop the engine before beginning work.
Caution ・ Do not work in any environment in which anything other than fuel will get into fuel lines. (Sites with strong wind, blowing dust, etc.) ・ Wash your hands before work. Do not use gloves. ・ Do not open the packaging for the filter kit until you start the installation work. ・ Do not reuse any fuel remaining within the cover. ・ For persistent dirt within the cover, wipe it off with a clean rag, then clean with clean diesel fuel. ・ Do not use parts cleaner. It could affect the cover. ・ Do not touch the inside of the element. ・ After the replacement work, wipe off any spilled fuel and check for any leaks after starting the engine.
Items to prepare •Wrench (10 mm) •Filter wrench •Waste oil can •Rags •Cleaning fluid 1.Filter Replacement (1)Main filter When replacing the fuel filter, always bleed the air. [1]Tighten the fuel line (1) stop valve (2).
[2]Use a wrench (10 mm) to loosen the air bleed plug (3).
Tightening torque for assembly: 8 - 12 N•m
[3]Loosen the cap (4) at thom and drain out any remaining fuel. * Put a waste oil case (5) underneath.
Tightening torque for assembly: 1.5 - 2.5 N•m
[4]Remove the filter cover (6) with the specialty filter wrench.
[5]Remove the element (7) and replace it.

