4 minute read
Route Transfer
from Raymond 3010 Center Rider Pallet Truck & 3020 Tow Tractor Route Management Manual 1134254B - PDF DOW
It is common to use multiple automated trucks in a single facility. To save overall truck training time, you can trai n all of the required routes on one automated truck. After training, building, and verifying the routes on the truck, you can transfer, or copy, all of the routes to other automated trucks in your fleet that share the same configuration (fork length, operator compartment size, and so forth). It is recommende d that every route is verified on each new truck wh en route transfer is used.
NOTE: Route Transfer is availa ble for trucks with th e same wheelbase (fork length and operator compartment) only.
NOTE: Named Routes do not transfer during the route transfer process.
Designating a Truck as an Exporter/ Importer
The first step in transferring routes be tween trucks is to designate each truck as either an Exporter or Importer. To check if the truck has already been designated as an Exporter or Importer, do the following.
1.Log in and navigate to the “Training and Service” screen.
2.Select “3. Service.” The “Service” screen will be displayed.
3.Select “4. Transfer Routes.” The “Route Transfer” screen will be displayed.
If there are only 2 or 3 options di splayed, the truck has already been designated. If the Route Transfer screen displays 4 options (1. Import Routes, 2. Export Routes, 3. Export Routes For Upgrade, 4. Show Transfer Status) as shown in Figure61 then the truck has not yet been designated as either an Exporter or Importer.
If routes will be trained on this truck with the intent of transferring them to other trucks, the truck will be an Expo rter. If this truc k will have routes transferred into it, then it is an Im porter. Follow these steps to designate a truck as either an Exporter or an Impo rter. These steps can also be used to change a trucks designation if it has already been designated one or the other.
1.Log in and Navigate to th e “Route Transfer” Screen.
2.Select the option labeled “4. Show Transfer Status.”
3.Select the appropriate designation for the truck, either “1. Exporter” or “2. Importer.”
4.Depending on your selection, the truck will now be designated as an Exporter or Importer and the corr esponding Route Transfer menu will display.
A truck’s route transfer designation w ill determine what options are displayed on the Route Transfer Screen. Once a truck has been designated as an Exporter, a screen displaying 3 options (1. Export Routes, 2. Export Routes For Upgrade, 3. Show Transfer Status) will be displa yed. A truck designated as an Importer will display a Route Tran sfer screen with 2 options (1. Import Routes, 2. Show Transfer Status). A truck’s designation can be changed at any time.

Exporting Routes
1.Train, build, and verify the required routes on a truck for the facility.
2.Log in and navigate to the “Training and Service” screen.
3.Select “3. Service.” The “Service” screen is displayed.
4.Select “4. Transfer Routes.” The “Route Transfer” screen will be displayed. If the “Route Transfer” screen appears as shown in Figure61 , see "Designating a Truck as an Exporter/ Importer" on page102, otherwise continue on to step 5.
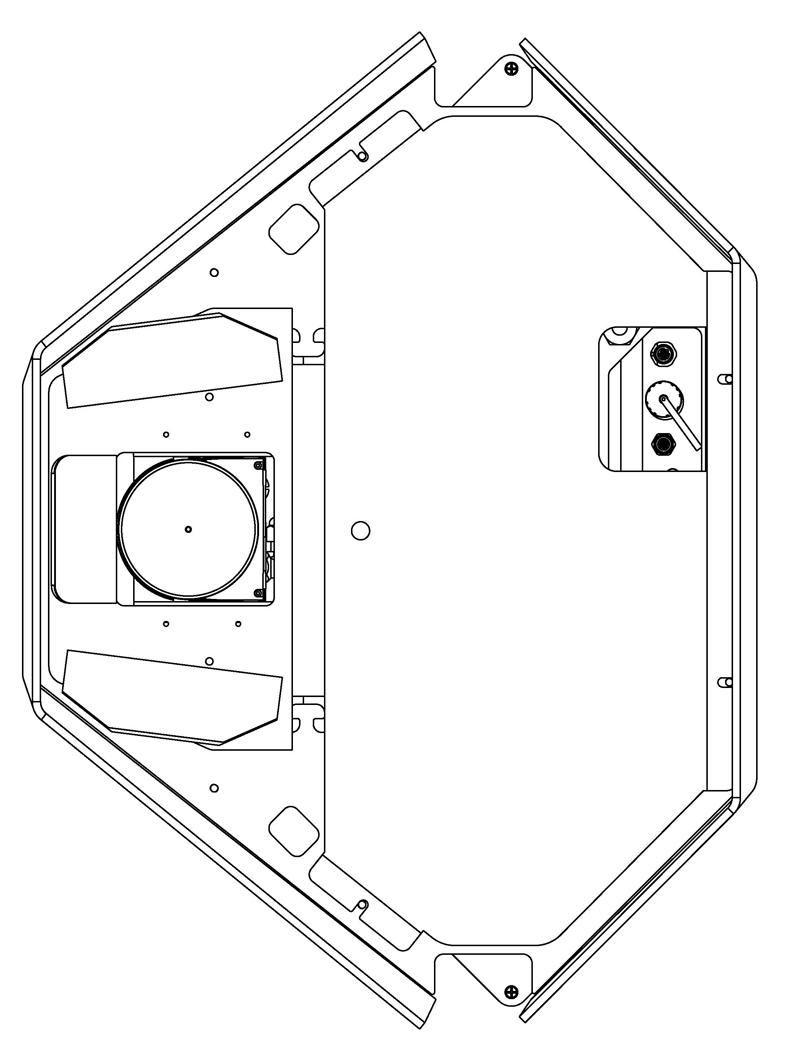
5.If the truck has a USB access cutout , remove the screw-on cap over the USB port. If the truck does not have the USB access cutout, remove the four screws and the cover on the bottom side of the arch top plate. See Figure62 .
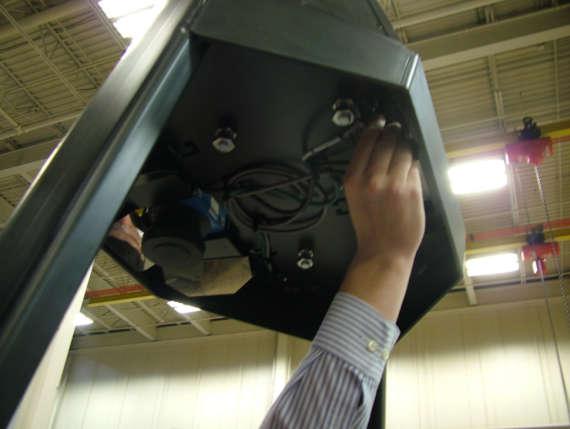
6.Insert a USB storage device into the USB port on the VGU. See Figure63 .

7.Select “1. Export Routes.” The “Exporting Routes” screen will be displayed. When the export proce ss is complete, the “Route Export Done” screen will be displayed.
8.Select the Option Key below “OK” to acknowledge the operation.
9.Wait 20 seconds, then remove the USB storage device. Reinstall the screw-on USB port cap or reinstall the cover and four screws.
The USB storage device now contains all of the routes from the trained truck. It can be used to import these routes to one or more other trucks.

Importing Routes
Prior to importing routes on any automated truck:
•inspect the truck thoroughly
•make sure all cameras are clean
•perform a straight line test
•calibrate the light curtain
1.Navigate to the “Route Transfer” screen by repeating steps 2-4 of “Exporting Routes ”. If the “Route Transfer” screen appears as shown in Figure61 , see "Designating a Truck as an Exporter/ Importer" on page102, otherwise continue on to step 2.
2.If the truck has a USB access cutout , remove the screw-on cap over the USB port. If the truck does not have the USB access cutout, remove the four screws and the cover on the bottom side of the arch top plate. See Figure62 .
3.Insert a USB storage device into the USB port on the VGU. See Figure63 .
4.Select “1. Import Routes.” The “Importing Routes” screen will be displayed. When the import process is complete, the “Route Import Done” screen will be displayed.
5.Select the Option Key below “OK” to acknowledge the operation.
6.Wait 20 seconds, then remove the USB storage device. Reinstall the screw-on USB port cap or reinstall the cover and four screws.
The truck now contains all of the routes from the USB storage device. Verify the imported routes. Retrain, on the individual truck, any segments that do not operate as intended on the facility route map. See "Verifying Routes" on page98.
NOTE: It is recommended that every route is verified on each new truck when route transfer is used.
Backup and Restore
It is recommended that you make a copy of the routes that are stored on the truck’s hard drive. After you have trained, built, and verified your routes, you may choose to backup the routes. A backup copy of the routes is necessary in order to restore routes.
Backing Up Routes
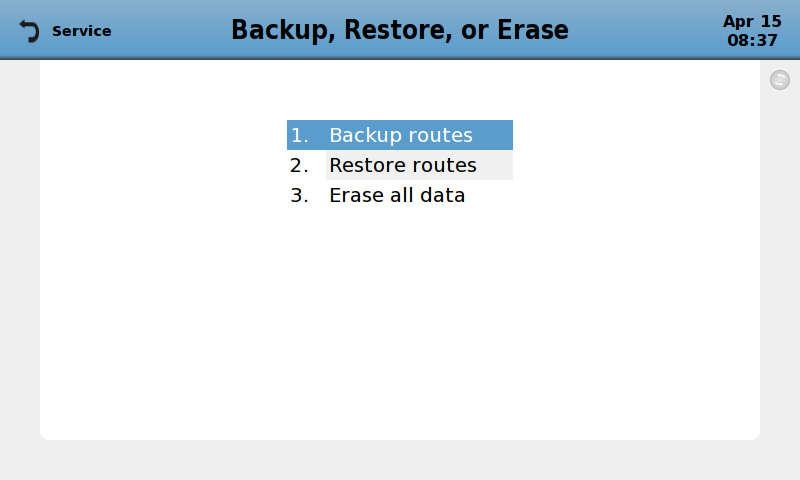
1.Navigate to the “Service” screen and select “2. Backup, Restore, or Erase.” The “Backup, Restore, or Erase” screen is displayed, as shown in Figure64 .

2.If the truck has a USB access cutout, remove the screw-on cap over the USB port. If the truck does not have the USB access cutout, remove the four screws and the cover on the bottom side of the arch top plate. See Figure62 on page104
3.Insert a USB storage device into the USB port on the VGU. See Figure63 on page105
4.Select “1. Backup.” The route information will be copied to the USB storage device. While the information is being copied, the “Backup Routes” screen is displayed.


