3 minute read
Route Management Manual
from Raymond 3010 Center Rider Pallet Truck & 3020 Tow Tractor Route Management Manual 1134254B - PDF DOW
Training Routes
Start Training a New Route
Using the facility route map, select the start and end stations for the route you will be training. Note the location s of all intermediate stations and behaviors along the route that will be trained. Manually position and orient the truck at the Station you wish to begin your route. Apply a Station Marker in line with the truck feature you have selected (see "Station Markers" on page56).
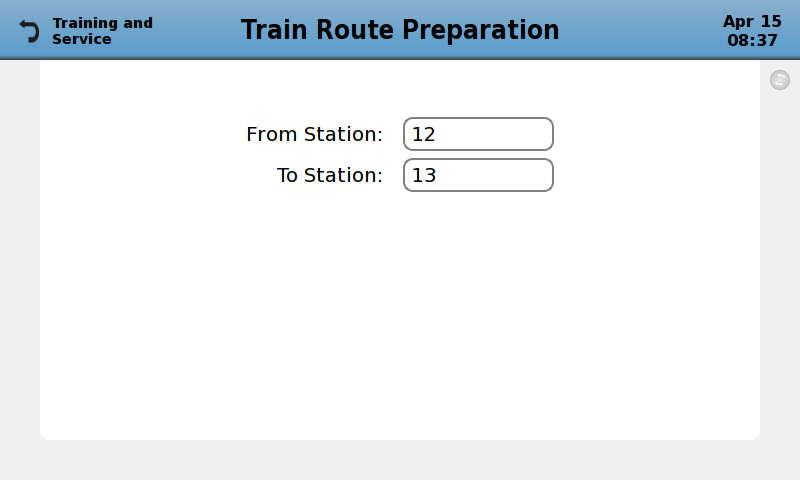
1.From the “Training and Service” screen, select “1. Train New Route”. The “Train Route Preparation” screen is displayed, as shown in Figure37. Figure 37.”Train Route Preparation” screen, displayed on the GOI.
2.Enter the Station ID for your current location in the “From Station:” field; press the Enter Key. Enter the Station ID of the location you intend to finish training the route in the “To Station:” field; press the Enter Key.
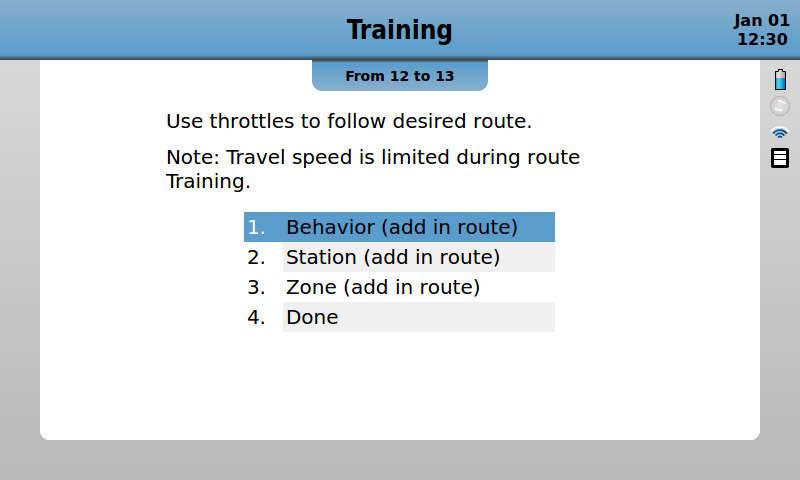
3.The “Training” screen is displayed, as shown in Figure38 . Manually operate the truck along the planned ro ute, adding Behaviors (including Drop-Offs), Stations, and Zones (for example: Slow Travel, Intersections, Ramps, or Uneven Floor Areas), where appropriate, as described in the following sections. Do not allow the tr uck’s Stop Field to cross over any object in the area of the truck.
Training Routes
Adding Behaviors
To add a Behavior while training a route:
1.Stop the truck at the location you want the truck to perform the Behavior. Select “1. Behavior (add in route)” from the “Training” screen. The “Add Behavior” screen is displayed, as shown in Figure39.
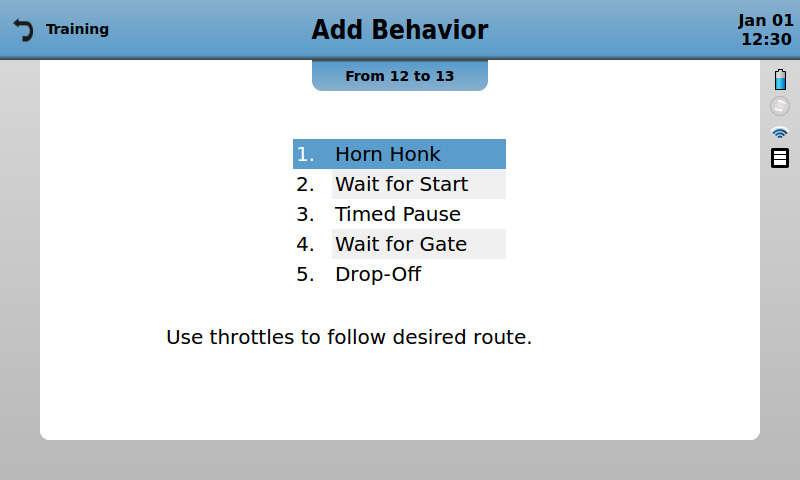
Figure 39.“Add Behavior” Screen
2.Select the desired Behavior, and enter required information as needed. The “Add Behavior” screen is displayed once again.
3.Add more Behaviors as needed, then press the Back key to return to the “Training” screen.
4.Continue training the route.
5.Repeat steps 1-4 to add more Behaviors as needed.
See "Automatic Mode Programmable Behaviors" on page18 for more information about Behaviors.
If adding a Drop-Off Behavior for pallet trucks, make sure to train the truck straight forward 13 feet so that the fo rks completely clear a dropped-off load. If adding Drop-Off Behavior for a tow tractor, make sure to train the truck straight forward far enough so the hitch latch clears the cart coupling.
Training Routes
Adding Stations
To add a Station while training a route:
1.Make sure the truck is oriented for straight travel, then stop the truck at the desired location for a Station. Select “2. Station (add in route)” from the “Training” screen.
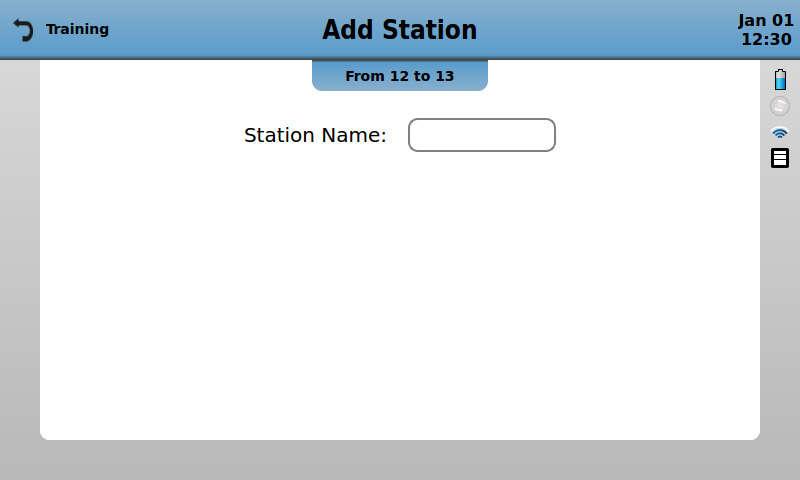
2.The “Add Station” screen is displayed, as shown in Figure40 . Enter the Station ID in the “Station Name” field.
3.The “Training” screen is displayed once again. Mark the Station location in the facility – see "Stations" on page56 for more information about Stations and Station Markers.
4.Continue training the route.
5.Repeat steps 1-4 to add more Stations as needed.
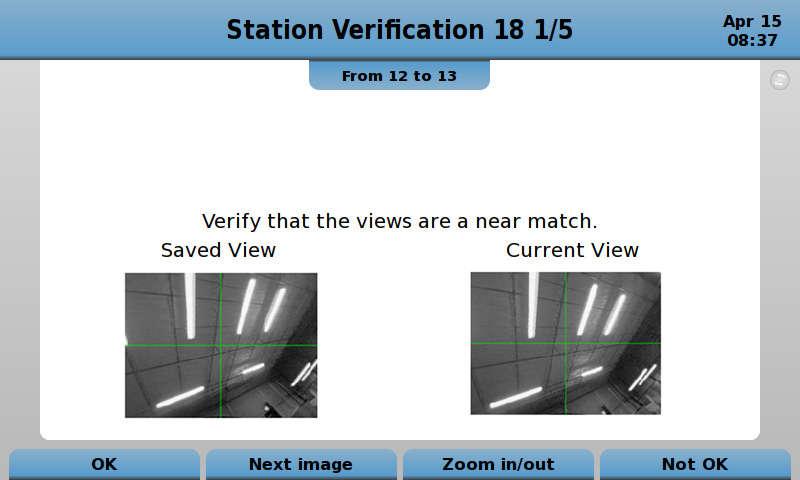
If you enter a Station ID that exists al ready (either within the route currently being trained or any other route stored in the truck), the “Station Verification” screen is displayed, as shown in Figure41 . Two images are displayed: a saved view from one camera, previously stored in the truck’s memory, and a current view from the same camera. If you have aligned the truck at the same Station Marker in the same orientat ion that the Station was previously identified, the images will be (nearly) identical – select the Option Key below
Route Management Manual
Training Routes
“OK”. Optionally, you may view more images by selecting the Option Key below “Next Image”, and/or use the Opti on Key below “Zoom in/out” to zoom in/out. If you have repeated a Station ID in error, select the Option Key below “Not OK” and enter a different Station ID.
Station verification may be required at any Station along a route, including Start Stations and End Stations.
NOTE: If the images are not nearly identical, then the truck is not in the same position and orientation as the original station. If the stations are merged like this, the truck may travel slowly through the station.
Adding Zones
The addition of Zones allows the behavior of the automated truck to be altered for a predefined portion of a route. Zones identify areas of slow travel, intersections, ramps, or areas with uneven floors.
1.Make sure the truck is oriented for straight travel, then stop the truck at the desired location for the start poin t of the Zone. Select “3. Zone (add in route)” from the “Training” screen.
2.The “Add Zone” screen is displayed, as shown in Figure42 . Enter the type of zone to be trained.
NOTE: The length of the zone is defined during training as the vehicle travels along the route.
3.Behaviors or secondary zones may be added within a Zone. To add a behavior or secondary (nested) zone within a zone: a.Press the “Back Arrow” key to return to the “Training” menu. b.Select “1. Behavior (add in route)” to add a behavior within the zone or “3. Zone (add in route)” to add a secondary (nested) zone within the zone (for example: to add a slow zone inside an intersection zone).
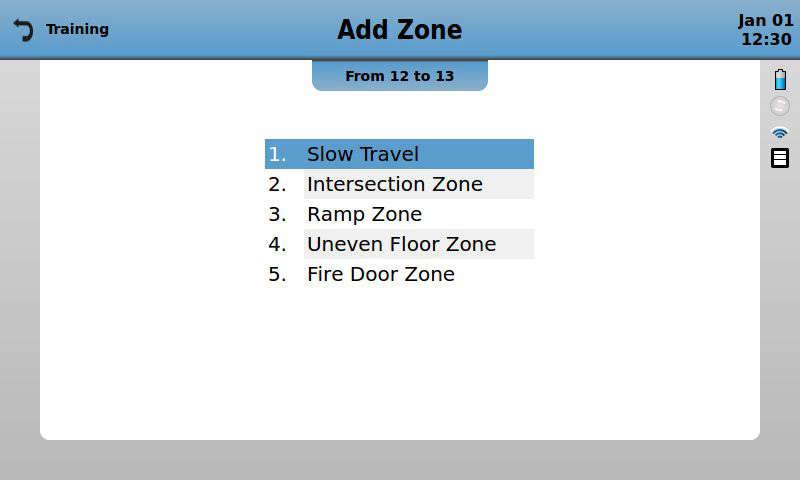
4.To end a zone, re-enter the “Add Zone” menu. The option to exit the zone currently in training will be sh own in the menu. For example: Intersection Zone will be replac ed by End Intersection Zone.


