4 minute read
Route Management Manual
from Raymond 3010 Center Rider Pallet Truck & 3020 Tow Tractor Route Management Manual 1134254B - PDF DOW
Accessing Training and Service Features
•Enter Key: Accepts the current selection and advances you to the next screen.
•Backspace Key: Removes the last character entered when entering characters in a field.
•Screen: Displays information regarding the automated truck system.
•Start Button: Starts automatic movement of the automated truck when prompted.
See your Operator Manual’s “Automated Truck Operation” section for the correct “Start-Up Procedure”.
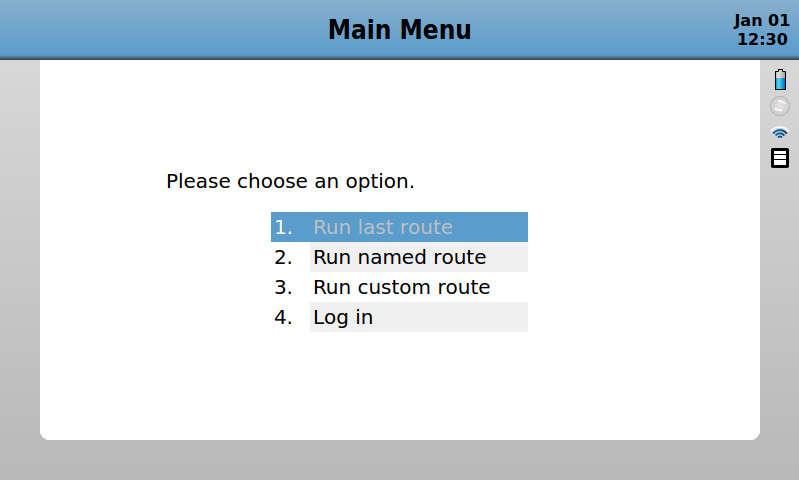
The “Main Menu” screen is displayed, as shown in Figure33 . Select “4. Log In” and press the Enter Key.
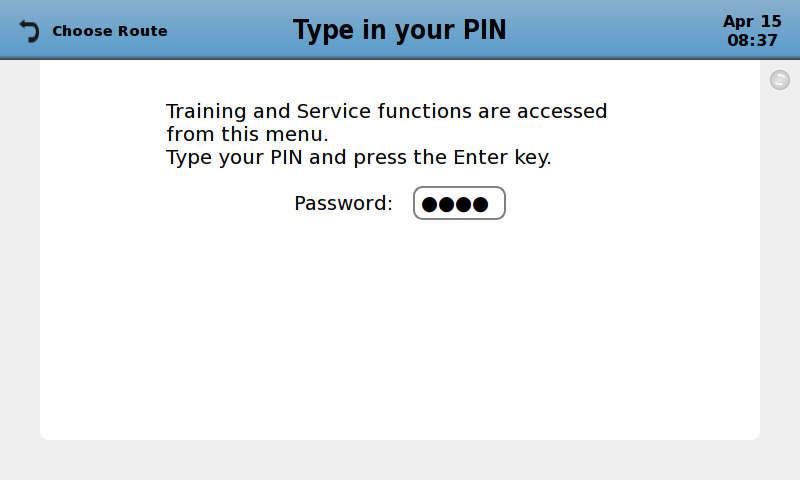
The “Type in your PIN” screen is displayed, as shown in Figure34 . Enter your 4-digit PIN in the appropriate field and press the Enter Key.
NOTE: The factory default PIN is 1234. Changing to a new PIN is highly recommended. Make sure to record the electronic key code and keep it in a secure location. Only su pervisors or trained route manager should have the password. Refer to the Maintenance Manual for instructions on how to change your password. Your local authorized
1134254B, Revised: 30 Sep 2016 65
Route Management Manual
Accessing Training and Service Features
Raymond Sales and Service Center can instruct you if you need help in using and changing your password.
Figure 34.“Type in your PIN” screen, displayed on the GOI.

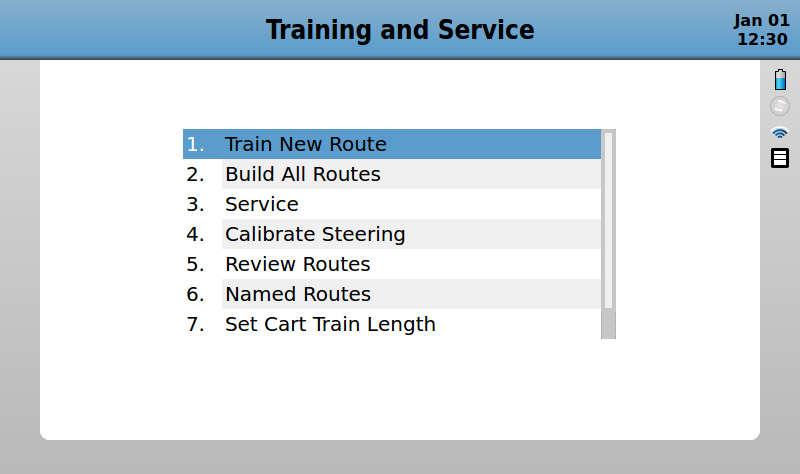
Once successfully logged-in, the “Trainin g and Service” screen is displayed, as shown in Figure35 .

Training Routes
Prior to training any new route:
•inspect the truck thoroughly
•make sure all cameras are clean
•perform a straight line test
•calibrate the light curtain
•load the truck with the largest dimensio nal load it is anticipated to carry or pull on the route.
NOTE: The load may be the largest dimensional feature if it is larger than the pallet or cart.
Additionally for the Model 3020, that load should include the maximum number and specific type (s) of carts that the truck will pull. It may be necessary to verify routes several tim es if various sized carts are used. This allows the trainer to verify appropriate clearances of the truck and load, and will verify/identify Hazardous Zones and Restricted Areas that may be created. See "Hazardous Zones and Rest ricted Areas" on page43 .
Properly document planned routes (with dimensional details , behaviors, and zones) before training. See "Facility Route Map" on page45 for more details.
Route Training Tips
The following statements are not rules, but tips intended to help improve the quality and effectiveness of route training. They may or may not apply to your application.
•Identify and complete any required fa cility changes prior to training the truck on affected routes.
•Use similar loads and pallets th at the automated truck will be transporting when verifying routes . This will help determine if the Raymond Courier will have any issues exiting the pallet and leaving the load in the correct location.
•Moving at a slower speed can increase the effectiveness of route training, particularly in low-light ar eas. However, training a route at slower speeds will consume more memo ry and reduce the total distance that can be trained.
•When starting a new route, wait 5 s econds prior to beginning to travel. This allows the system to collect more images of the Start Station, which will reduce startup errors.
Training Routes
•Prior to training a route segment, familiarize yourself with the intended travel path from start to end, ta king note of all locations where Behaviors, Stations, Drop-Offs, Zones, and Ramps will be programmed.
•Do not stop and turn the steering handle when training the Raymond Courier. When training a turn, ma ke sure to smoothly turn the Raymond Courier while traveling. Stopping and turning the steering handle while training may cause impr oper building of the route, and the truck may not be able to drive the route in Automatic Mode.
•Train routes with enough straight-t ravel after a Drop-Off for the forks to fully exit the load they were carrying. To reduce the chance of dragging a pallet, do not turn sharply for at least 13 feet after the fork tips clear the pallet. Make sure there is 24 feet clear in front of the Raymond Courier so the Slow Zone is not activated during a pallet drop. Make sure to include these dimensions on the facility route map.
•Do not Drop Pallets in tight turns. After a tight turn, drive straight until both the load wheels and drive tire are in line with the direction of travel before programming a drop behavior.
•When motion sensing lights are used. turn all lights in the building on when training, if possible. If not, ma ke sure the lights are on in the aisle to be trained and each adjacent aisle.
•When operating in automatic mode, leave the first light in each aisle the truck will travel through on at all ti mes. A dark aisle makes it difficult for the truck to identify features and can cause the Raymond Courier to issue an error code.
•It is recommended to use a Laser Traini ng Tool to aid in training routes. The Laser Training Tool can be attach ed to the truck and used to project lines on the floor. This is helpful for keeping the truck a set-distance away from obstructions during route training. Setting the lasers to the Stop-Field dimensions, Hazardous Zone dimensions, and so forth may be useful. For more information on the use and how to purchase this tool, please contact your local authorized Raymond Sales and Service Center.
•In areas of tight clearance (for exam ple the corner of a rack where the automated truck will turn), draw a line on the floor with a non-permanent device, like chalk, that represents the distance required to prevent generation of a Hazardous Zone (see page43). When training the Raymond Courier on a route, the chalk line may be used as a guideline – make sure to verify di stances from obstructions after training.


