6 minute read
Route Management Manual The Truck
from Raymond 3010 Center Rider Pallet Truck & 3020 Tow Tractor Route Management Manual 1134254B - PDF DOW
Auto Unhitch (Model 3020 only)
The Auto Unhitch feature allows cart delivery locations to be programmed as a Drop-off behavior along the route. Each drop-off point is given an ID during the route training process. When the ro ute is run, the truck stops at the assigned position, opens the hitch, drives forward a short distance (leaving the cart at the location), and then closes the hitch. Truck software uses two feedback sensors to monitor whether th e hitch is open or closed. An error code appears if the hitch is in the wrong position or does not respond correctly when requested.
90° Turns – Model 3010
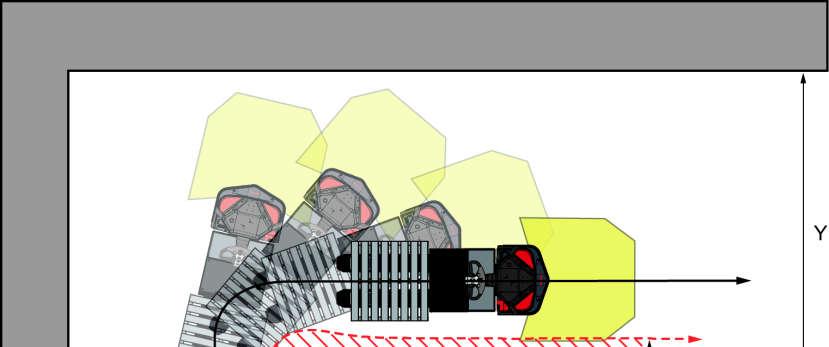
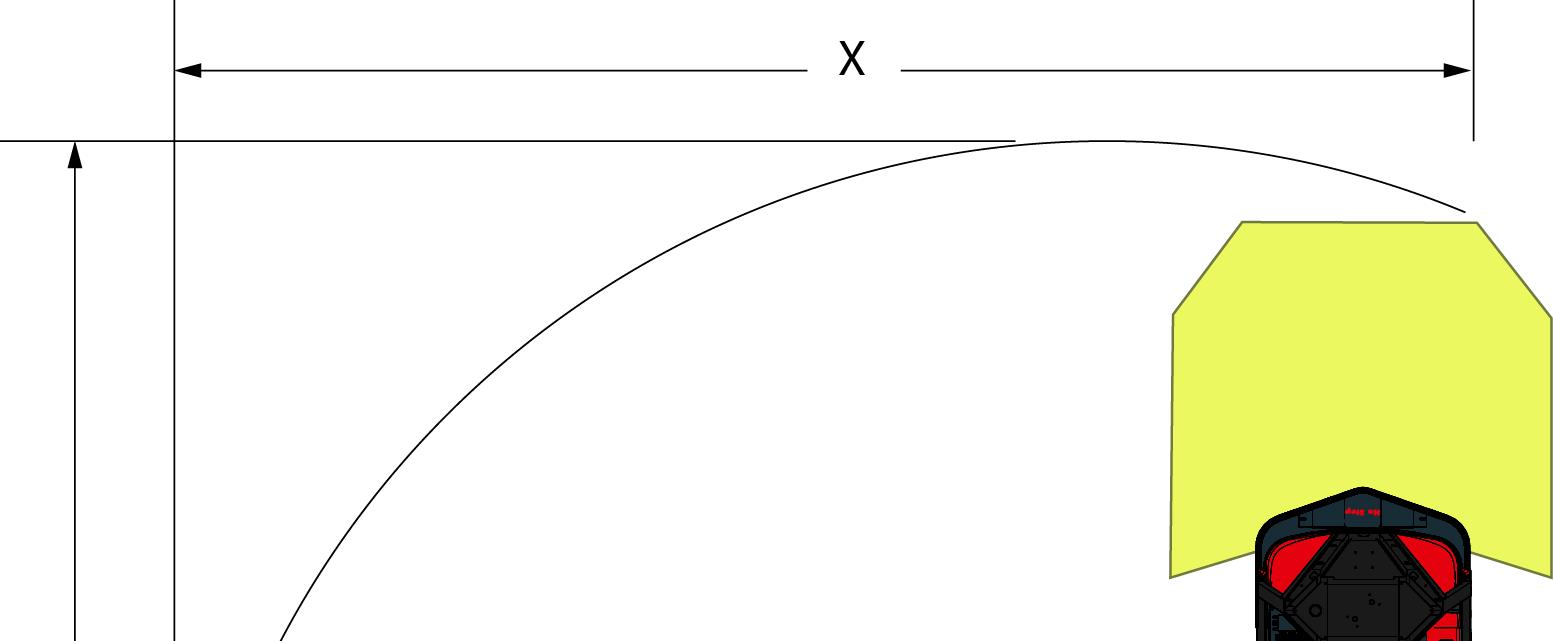
When navigating a model 3010 through a 90° turn, the truck, forks, load, and the Stop Field must all clear any fixed objects. A Model 3010 completing a 90° turn with no Hazardous Zone restriction is shown in Figure14.
NOTE: The truck travels slowly through the turn.
Figure 14.Model 3010 completing a 90° turn with 26” clearance and stop field identified.
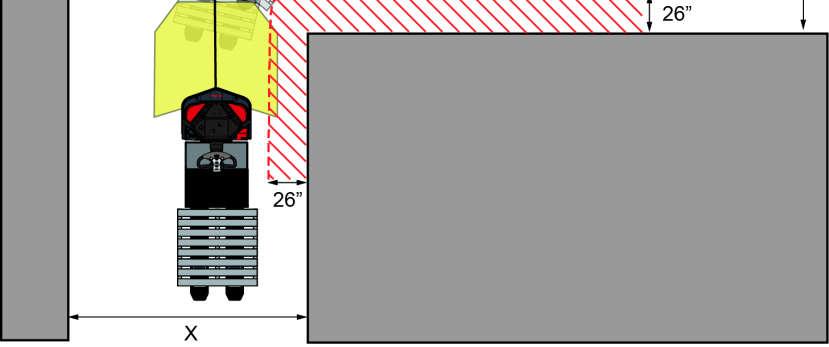
Training may be aided by the use of lasers to dynamically identify the stop field location while turning. Chalking a 26 inch radius from the corner may be helpful during training.
NOTE: Maintain a minimum of 26 inches on the inside corner of turns to prevent Hazardous Zones.
Figure15 shows Minimum Aisle Width (MAW) recommendations for a 90 degree turn based on fork length (for a model 3010 equipped with a 23 inch operator compartment only). If an ai sle width combination falls above the corresponding shaded area, then th e automated truck will have a high success rate for navigating the turn. Aisle width combinations that fall below the corresponding shaded area are not typically obtainable or recommended for automated travel. If an aisle width combination falls within the corresponding shaded area, the turn sh ould be further analyzed using an alternate method. Two suggested methods are:


•using CAD software
•testing the turn using an automated truck
Figure 15.Recommended Minimum Aisle Width fo r 90° Turns (Model 3010 with 23” Operator Compartment and 40” Load Width only)
180° Turns (U-turns) – Model 3010
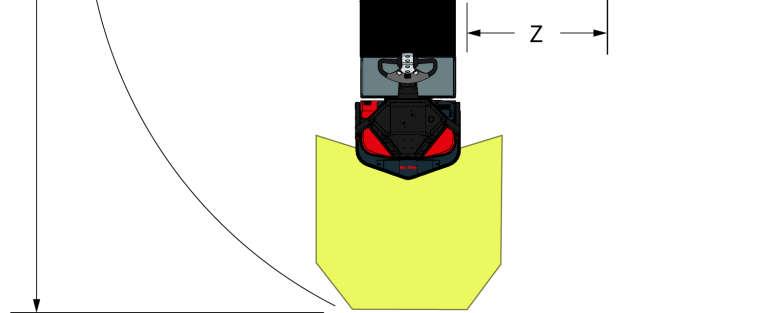
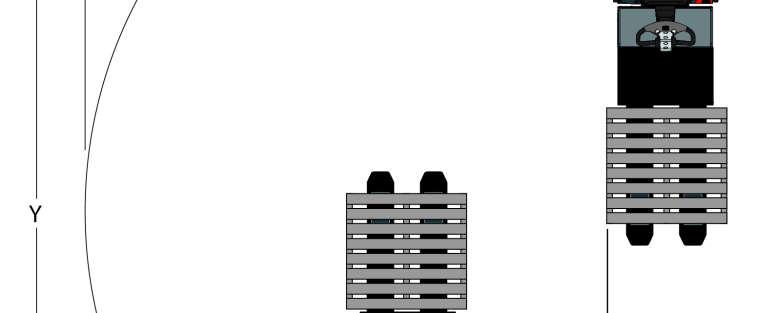
When navigating a model 3010 through a 180° turn, the truck, forks, load, and the Stop Field must all clear an y fixed objects. A sample 180° turn (U-turn) is shown in Figure16 with a Model 3010. Table6 shows spacing requirements based on fork length an d operator compartment sizes for the Model 3010 to complete a full U-turn within an aisle. Adding 6 inches of clearance to each MAW is recommended. Note that the Slow Field extends beyond the boundaries.
90° and 180° Turns (U-Turns) – Model 3020
There are a wide variety of carts that a user may select for its particular material handling need. The particular cart selected will determine the 90° and 180° (U-turn) MAW requirements fo r the Model 3020. The cart variances that affect the turning me trics include, but are not limited to: length and width, length of the steering tongue, lo cation of cart or truck pivot point, wheel base, and number of steering axle s. The number and type of carts (with dimensionally largest load) planned for use with the tow tractor need to be tested on the planned route(s) in all scenarios to make sure that there is sufficient aisle clearance. After traini ng and verification, the truck may follow routes only with the same number or fewer and type of carts trained and tested. Due to the unknown quantity and value of variables in towing applications, this manual cannot provide 90° and 180° (U-turn) MAW values for the Model 3020. A detailed CAD layout program is recommended to determine feasibility of tow tractor applications.
Warning: Do not send the truck to follow any route in automatic mode with larger loads, more carts, or different types of carts than the route was trained with.
Facility
Assessing the Existing Facility Layout
Before you begin planning routes, ther e are a few steps you should take to assess the facility:
•Complete a site survey
•Obtain or create an accurately di mensioned layout or map of your current facility layout. This layout should include:
•Direction of travel
•Speed limits
•Aisle dimensions (may vary from aisle to aisle)
•Locations of any barricades or other permanent fixtures (for example: columns)
•Pedestrian aisles and other areas with frequent pedestrian traffic (include all dimensions)
•Existing Hazardous Zones or Restricted Areas (see page43 )
•Doorways and door opening directions (including Fire Doors)
•Exits
•Stairways
•Support Columns
•Fire doors
•Loading areas
•Ramps, with grade (%)
•Existing load drop zones
•Existing loading areas
•Locations of objects typically in travel areas (for example: overhanging loads and dumpsters)
•Battery changing/charging areas
•Develop a plan for the truck. Determine the truck’s function(s) within the facility.
Facility
•Understand the present flow of mate rial and which part of the process will be automated.
•Understand the truck functions, capabilities, and dimensional characteristics. See "The Truck" on page12.
Determine the best routes for the truck based on each of these factors. You may need to modify the fa cility layout in order to allow the automated truck to perform the desired function(s).
Other Truck Traffic
Automated and non-automated truck tra ffic exists throughout the facility. Vehicles with different sizes, speeds, and activities are moving around at any given time. It is critical to understa nd those activities and workflows when planning automated truck routes and Behaviors. When training routes, comply with facility Rules of the Road, with attention to existing floor markings, signs, speed limits, and so forth, and consider routes that integrate well with the current workflow.
Pedestrian Traffic
Pedestrian traffic may exist throughout the facility. Pedestrians are all people within the facility that may be expose d to an automated truck. Pedestrians may include personnel who are familiar with automated trucks, or personnel who are not familiar with automated trucks , such as visitors to the facility.
All pedestrians require training that details proper conduct when exposed to automated trucks. If possible, select routes that minimize interactions between the automated truck and pedestrians.
If the facility has marked pedestrian walkways, it is recommended to not train the truck to travel within those walkways. When possible, avoid training routes that are near or must cross mark ed pedestrian aisles. If the automated truck must enter marked pedestrian aisles, consider adjusting the walkway or rerouting the walkway to a different location. Additional signage or floor markings may be beneficial. If the automated truck must cross a pedestrian walkway along its route, it is recomm ended to include a trained Timed Pause Behavior and a Horn Honk Behavior prior to crossing the walkway. See page76 for more details about automated truck Behaviors.
Care should be taken to identify a ll Hazardous Zones and Restricted Areas generated while trai ning routes (see page43 ). Remember, Hazardous Zones and Restricted Areas are identified for the benefit of pedestrians.
Lighting
The automated trucks require facility lighting to operate. Changes in facility lighting may affect the operation of the truck in automatic mode.
NOTE: During truck operation and training, it is important to have suitable lighting both in front of and behind the automated truck’s route.
There are many conditions that may acco unt for the variations in a facility’s lighting. The list below identifies some examples of lighting conditions that could affect the truck’s operation:
•Ambient lighting
•Motion activated lighting
•Schedule controlled lighting
•Skylights
•Windows
•Glass walls
•Lighting less than 50 lux (requires further evaluation)
If the automated truck encounters a situation where insufficient lighting is detected, the truck automatically stops and displays a message on the GOI that there is not enough light for the automated truck to travel.
Below are the basic steps for assessin g the facility’s lighting conditions:
1.Turn on all facility lights where the automated truck will be operating. Then train the truck al ong all planned routes.
2.Verify the truck will complete all routes successfully in all facility lighting conditions applicable to the automated truck’s route.
3.If successful, the fac ilities lighting method(s) is acceptable, but should be monitored. If lighting problems exist, consider adjusting the lighting conditions along the auto mated truck’s route(s).
Routes on Ramps
Use special care when training routes on ramps. The automated truck travels tractor-first only, as shown in Figure17 (Model 3010) or Figure18 (Model3020); therefore, the truck route must be trained to travel tractor-first. Take care to make sure that trucks fo llowing routes that include ramps only transport loads that will be stable under this condition. Do not angle or turn the truck while operatin g on a ramp. You must train a Ramp function for proper automated travel. See page80 for details on training a Ramp function in a route. Do not train Timed Pause or Wait for Start Behaviors on ramps.


