9 minute read
Controls

from Mahindra Tractor‘8000’ Series 8090 8100 4WD CABIN TIER-4 FINAL Operator's Manual - PDF DOWNLOAD

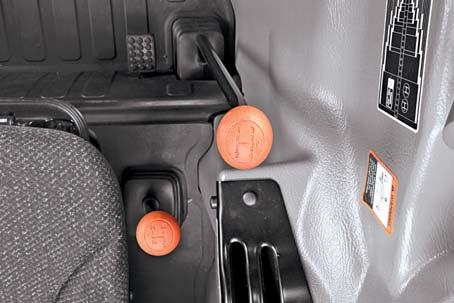
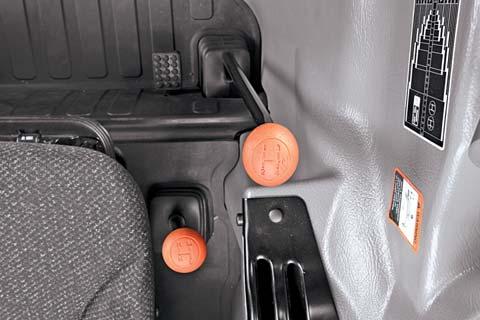
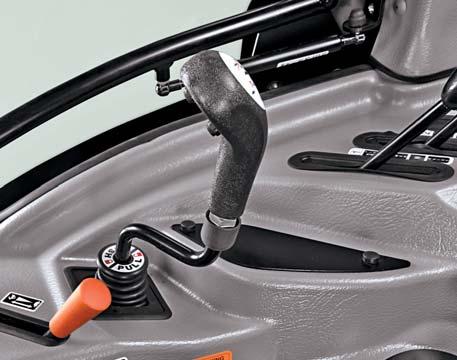
Range Shift Lever
This lever is located on RH side of operator’s seat. This lever has four positions as follows:
1.High– for High speed range
2.Medium– for Intermediate speed range
3.Low– for Low speed range
4.Neutral
This lever enables 3 different speed options for every Speed Gear selection. The lever can be engaged as follows.
1.Depress Clutch pedal and stop tractor motion completely.
2.Choose H, M or L speed range to match work application.
3.Release clutch pedal gradually. Refer chart for road speed of tractor in different positions.
Speed Shift Lever
This lever is located on R.H side of operator’s seat. This lever has five positions.
This lever enables 4 different speed options within a particular “Range Gear” selection. The road speed increases in higher gears.
1.Depress Clutch pedal completely.
2.Choose any one gear from 1 to 4 to match work application.
3.Release clutch pedal gradually. The gears can be shifted on-the-go. Refer chart for road speed of tractor in different positions.
Opening the Hood
The hood is hinged at the rear side and opens away from the operator as follows,
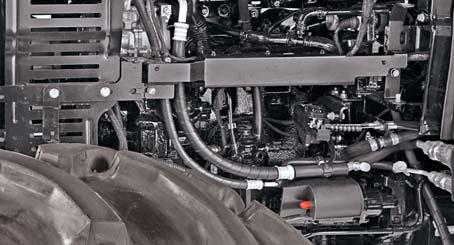
1.Pull the lever (A). The hood will unlock.
2.Lift the hood upwards by hand. Two gas springs (B) provided inside will assist in minimizing the effort for lifting and arresting the hood at specified angle.
Closing the Hood
Pull the bonnet strap (C) to access the Handle (D). Hold the handle to lower the hood. Press the hood downwards until it locks.
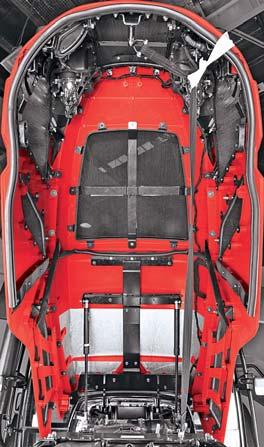
Opening the Side Panels
1.Open the hood.
2.Remove the wing nuts (E) to free the side panel.
3.Lift the panel gently out of the locating pins (F).
Closing the Side Panels
1.Locate the bottom holes in panel around the locating pins (F).

2.Gently press the panel against tractor.
3.Lock the panel with the wing nuts (E).


Joystick Lever
Joystick lever alongwith the loader valve cables is provided with the tractor. This lever controls the use of a front-end loader if fitted. This acts as one handle lever and lift-retract, dump-rollback smoothly.
1. To raise the front end loader: pull the lever to lift position.
2. To lower the front end loader: push the lever to retract position.
3. To rollback the bucket: pull the lever to rollback position.
4. To dump the bucket: push the lever to dump position.
To raise the front end loader
To lower the front end loader
To rollback the bucket
To dump the bucket
Safety Implement for Joystick lever
This simple Safety locking system can lock the joy stick by pushing the button and unlocked by pulling.
NOTE: The Joystick control and valve can also be used for other applications if a front end loader is not fitted.
For additional details refer the loader manual.
Hydraulic fluid escaping under pressure can have enough force to penetrate the skin. Hydraulic fluid may also infect a minor cut or opening in the skin. If injured by escaping fluid. See a doctor at once. Serious infection or reaction can result if medical treatment is not given immediately. Make sure all connections are tight and that hoses and lines are in good condition before applying pressure to the system. Release all pressure before disconnecting the lines or performing other work on the hydraulic system. To find a leak under pressure use a small piece of cardboard or wood. Never use hands.
Controls
Keys
Your Mahindra Tractor comes with five keys (Three for cabin door lock and two for tractor).
Cabin keys are only for locking and unlocking the cabin doors. It cannot be used for tractor ignition. We advise you to keep one set of these keys at a safe place for emergency use (but not in the tractor cabin).
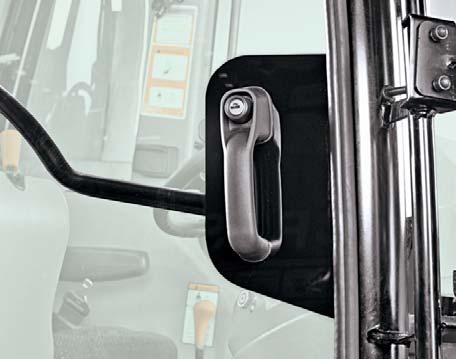
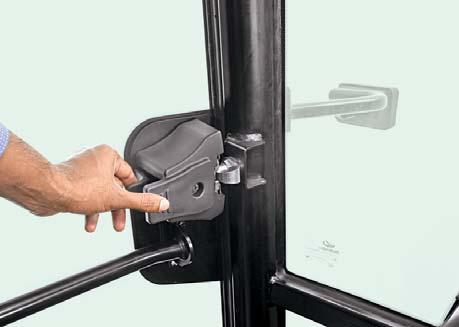
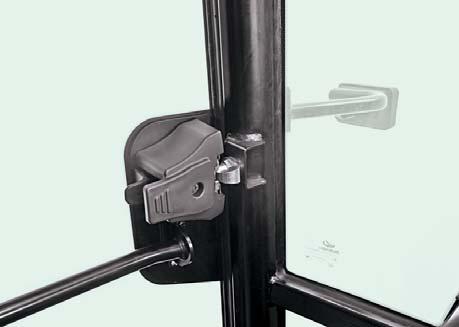
Opening the Doors from outside
Unlock the door using the keys provided. Press the inner knob and pull the grab handle lever.
Do not leave the ignition key in your tractor. Never leave children and pet animals unattended in the tractor cabin.
Opening the Doors from inside cab
Press the door latch lever and push the door outside.
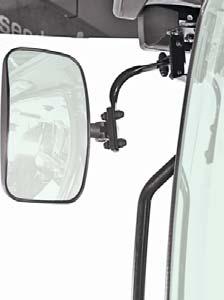
Rear View Mirrors
External Rear View Mirrors
For adjusting the mirror, push it or slightly twist it in the desired direction until you can clearly see the road behind.
Mirror folding
Mirror can be folded flat, where it is needed, against the vehicle when pushed towards it.
Internal Rear View Mirror
Adjust the internal rear view mirror, in the day position, by slightly turning or twisting it until you see the road behind clearly through the rear glass.
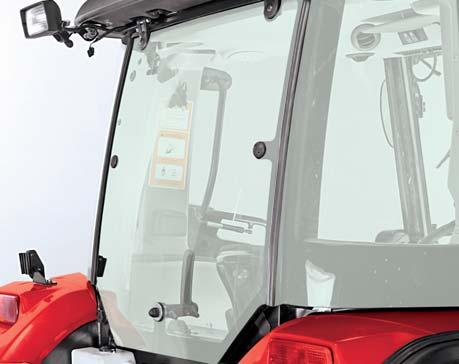
Rear Window
Rear window (A) provides a large exit path if cab door is blocked in an emergency situation.
Rear window can be opened from inside ONLY. To open rear window, turn handle (B) upward and slowly push the window away from the operator.

Objects in the mirror look smaller and appear further away than they actually are. Do not overestimate the distance of the objects seen in the mirror.
Do not adjust the mirror while the vehicle is moving. If doing so may cause the driver to mishandle the vehicle and may result in loss of vehicle control.
Do not drive the vehicle with the outside rear view mirrors folded backward. Always adjust the outside mirror to the driver's convenient position before driving the vehicle.
Windshield Wiper / Washer System Controls
These switches are used to clean the front and rear windows. These switches are located inside the cabin top left side viewing from operator’s seat. These switches functions can be activated with the ignition key at the ignition position.
Windshield Wiper and Washer System has three Switches:
A.Front Windshield Wiper Switch
B.Washer Switch for Front Windshield
C.Rear Windshield Wiper cum Washer Switch (Optional)
A.Front Windshield Wiper Switch
Press this switch to operate the front windshield wiper. This switch has three positions. i.e. Off, Slow and High.
B.Washer Switch for Front Windshield
Press this switch to sprinkle water for the front windshield.
C. Rear Windshield Wiper cum Washer Switch (Optional)
This Switch has three Positions :
Position 1:Off
Position 2:Press switch to operate the rear window wiper.
Position 3:Further pressing the switch to sprinkle water for rear windshield.
Do not operate the wipers when the windshield is dry. It may scratch the glass. In freezing or very hot conditions, ensure that the blades are not frozen or stuck to the glass. In winter, remove any snow or ice from around the arms and blades, including the wiped area of the glass.
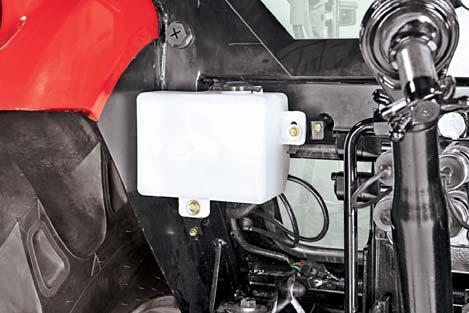
Adding Suitable Anti-freeze Solution to Water in Reservoir

Using windshield washer in freezing temperatures could be dangerous. The washer fluid could freeze on the windshield and may block your vision which will result in an accident.
Add a suitable anti-freeze solution to water in reservoir (A) from fill neck (B) to prevent damage to the system if temperature drops below freezing point.
Washer switch for front and rear wiper are spring back type. Do not press the switch ON for more than 30 seconds.
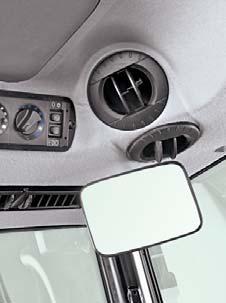
Heater and Air-Conditioning Controls

Heater and air conditioning controls located on inner roof of cabin. (In front of the operator's seat) and controls are as follows:
A.Blower / Electric Fan Speed Control Regulator
B.Heater Regulator
C.Cooling Regulator
D.AC ON/OFF Switch
E.Fresh / Recirculation Air Selector Switch
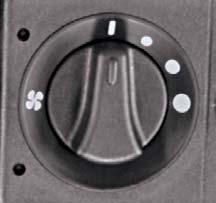
A.Blower Speed Control Regulator
Blower speed can be regulated by turning the blower speed control regulator (A) as per the positions shown:
I Off
• Slow
• Medium
• Fast
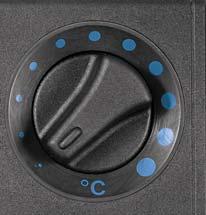
B.Heater Regulator
Heating is infinitely variable by means of the heater regulator (B). To increase heating, turn regulator clockwise. Always keep the AC ON / OFF switch in OFF position while operating heater regulator switch. In heating mode, taking air flow directly on body or face is not safe and operator may feel suffocated.
C.Cooling Regulator
Regulate the cooling by means of the cooling regulator (C). The cooling is increased by turning the regulator clockwise. Always keep the heater regulator in OFF position while operating cooling regulator.
D.AC ON/OFF Switch
This has two positions: a. ON – When pressed ON compressor operates. b. OFF – Compressor stop when pressed OFF.
E.Fresh / Recirculation Air Selector Switch
This switch is used to select fresh air from outside or recirculating within the cabin.
To change the air intake mode, (Fresh or Recirculation mode) press the switch.
c.Fresh Air Mode d.Recirculation Air Mode
Fresh Air Mode
With the FRESH air mode selected, the air enters the vehicle through the filter from outside and is cooled / heated according to the function selected. Fresh air mode is preferable when HVAC is in heating mode.
Recirculation Air Mode
With the RECIRCULATION air mode selected, the air from within the compartment will be drawn through the filter and is cooled / heated according to the function selected. Also some amount of outside fresh air will enter the system to avoid suffocation of operator.
CAB Worklight Switches
The worklights can be switched ON and OFF using these cabin worklight switches as shown here. These switches located inside the cabin rear upholstery, right side viewing from operator’s seat. These switches functions can be activated with the ignition key at the ignition position.
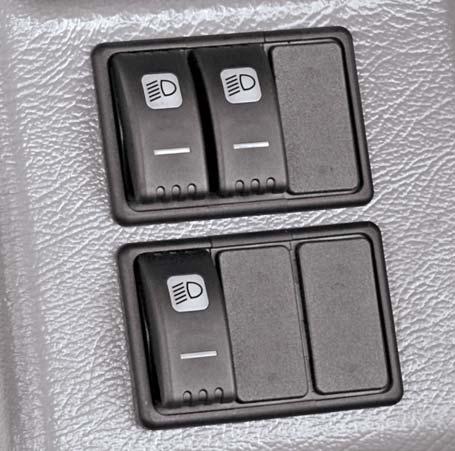
A.Front Roof Corner Worklights Switch
B.Rear Roof Worklights Switch
C.Front Roof Central Worklights Switch
D.Beacon Light Switch (Optional)
A.Front Roof Corner Worklights Switch
It (A) operates the front roof working lamps when pressed.
B.Rear Roof Worklights Switch
It (B) operates the rear roof working lamps when pressed.
C.Front Roof Central Worklights Switch
Additional front worklights are attached to the cab frame. Switch (C) operates these additional work lights when pressed. These work lights can be used when front attachments are installed.
D.Beacon Light Switch
(Optional Fitment for Front & Rear)
The beacon light should be used as recommended by local laws (e.g. when driving extremely slowly and when tractor width is excessive). This switch (D) is for switching the beacon light ON and OFF. Beacon is an optional fitment.
It is advisable to use fresh air mode for 5-10 minutes after starting the A/C System. Air conditioning system will be activated when blower switch, cooling regulator switch and AC ON / OFF switch are in ON position.
Cabin Interior Lights
Cabin interior lights consists of welcome lamp and cabin lamp or dome lamp.
A.Welcome Lamp
This light is fitted on the LH side of the front console. This light guides during entering or exit from the vehicle. The light will glow once you open the LH door ONLY. After closing the LH door the light will get OFF.
NOTE: Keep LH door always closed.
B.Cabin Lamp / Dome Lamp
This light is fitted inside cabin LH side of the headliner. This light has three positions are as follows:
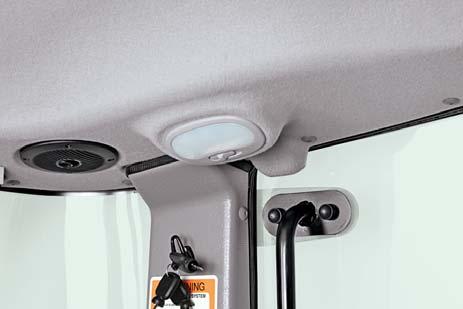
1. OFF : Switch to this position to turn the light OFF.
2. Centre : In this position light will glow when LH side door is opened. This light goes OFF when LH door is closed.
3. ON : Switch to this position to keep the light ON always.
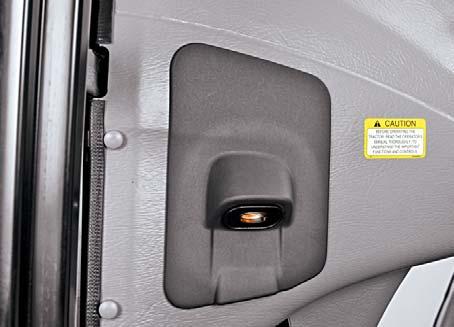
Power Socket Unit
This Tractor is equipped with power socket unit, located at the right console. It consists of:
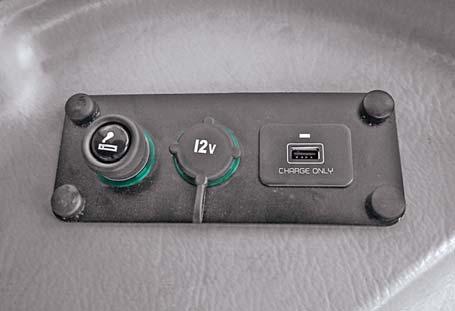
A.Cigarette Lighter Socket
B.3-Terminal Power Socket
C.USB Power Socket
Cigarette Lighter
Press the lighter (A) in to heat it up. When the element reaches the required temperature, the element will partially eject and disconnect the power supply to the element. The lighter can then be withdrawn immediately for use. If the engine is off, the ignition key must be in the ON position for the lighter to operate.
3-Terminal Power Socket
3-Terminal Power Outlet Socket (B) is used to connect electrical equipment such as mobile charger, display units etc. To operate put the ignition key in ON position even though engine is in OFF condition.
USB Power Socket
A USB power socket port (C) is provided for charging USB enabled devices.
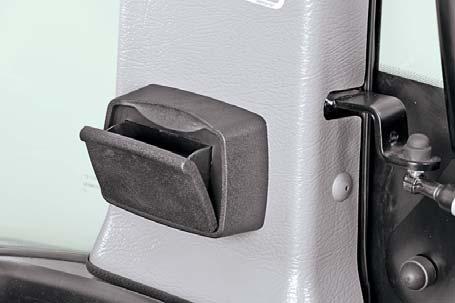
Ashtray
Ashtray is located inside the cabin LH side of the operator’s seat on rear upholstery. Ashtray is provided for disposing ash and cigarette butts.
To use, open the flap of ashtray.
To empty, press down and take it out.
To fit it back, just press the ashtray gently on its location. Keep the ashtray clean by emptying them regularly.
Controls
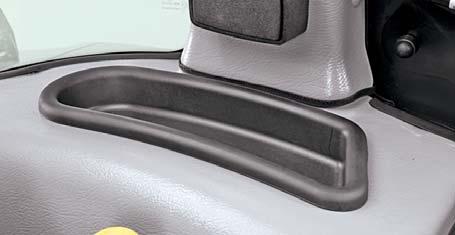
Glove Tray
A small utility glove tray is located on the left console.
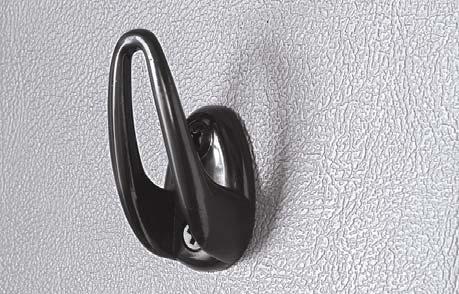
Coat Hook
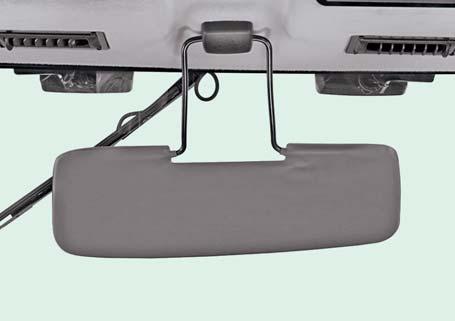
Sun-visor
A sun-visor is located at front on inner roof. It can be adjusted as per the need and convenience of operator.
Audio System (A)
Audio system installation provision is given for cab tractors. Dealer installed audio system is available for your tractors with cab. See your Mahindra dealer for more information and installation of an aftermarket audio system.
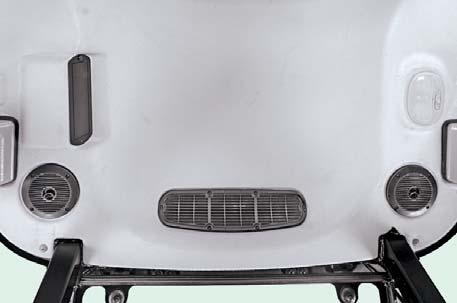
Speakers (B)
Cabin is equipped with 2 speakers which can be used along with the audio system if installed.
PTO Speed Selection
Two speeds viz. 540 rpm and 1000 rpm are provided for the PTO. These speeds can be achieved by reversing the PTO shaft.
The PTO shaft consists of 6 splines on one end and 21 splines at the other end. This shaft can be detached after removing the circlip (A) and can be refitted from either end.
1.Shaft fitment with 6 splines pointing towards the implement gives you an output of 540 rpm at PTO.
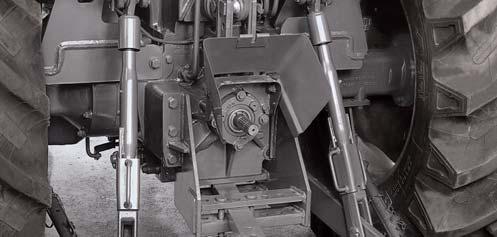
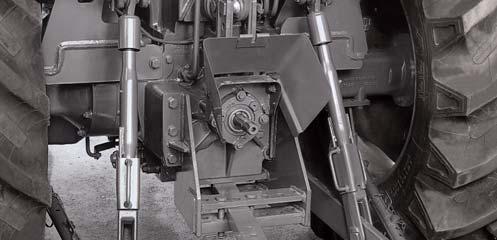
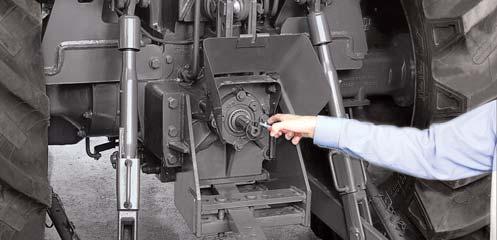
2.Shaft fitment with 21 splines pointing towards the implement gives you an output of 1000 rpm at PTO. Always lock the shaft with circlip (A) after closing the speedmode.
3.Factory fitment is 540 PTO only.
Firmly apply the parking brakes, place all gearshift levers in neutral and block all four wheels before operating any stationary PTO equipment.

Do not approach or work on the PTO shaft or equipment while the PTO is in motion. Shut-off engine and the PTO and wait for all movement to stop before working on the PTO or equipment.


