1 minute read
Hydraulics


15.REMOVE, INSPECT AND INSTALL HYDRAULIC LIFT ARMS, ROCKSHAFT, ROCKER ARM, SEAL

1.Remove Hydraulic Lift Unit as per the guided procedure as given in point no.11.
2.Remove position and draft control linkages levers by loosening lock clips and washers.
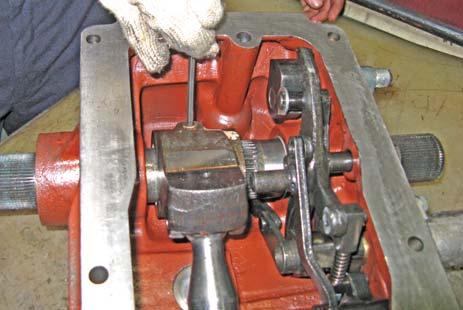
3.Rotate lift arms to access and remove setscrew (A) in crank (B).
4.Remove snap ring (C) and arm (D) from opposite side of control levers on hydraulic.
NOTE: Index parts to hydraulic with a punch mark before disassembly, to aid in correct alignment of these parts during assembly. Slightly tap lift arms to take out.
Hydraulics
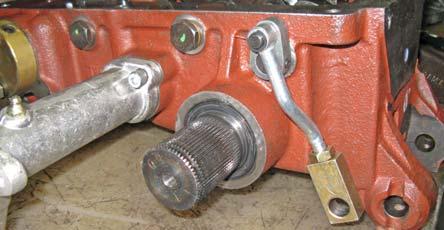
5.Remove shaft (E) from crank and housing.
6.Remove cylinder from lift unit by loosening setscrews.
7.Remove crank and link assembly from control levers linkages. Remove spring pin (F) and link (G) from crank (H).
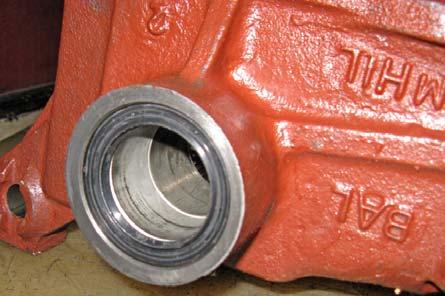
8.Remove seal (I) and bushing (J) from both side of the housing.
NOTE: Bushings are a press fit into housing. Remove using a bearing, bushing and seal driver set.
9.Clean and inspect all parts for wear or damage. Replace as necessary.
10.Install bushing without bushing flush with outer edge of inner bore, using a bearing, bushing and seal driver set.
11.Apply clean transmission / hydraulic oil to all internal parts.
12.Install link to crank with spring pin.
13.Install crank assembly into housing and connect to feedback linkages with lock washer.
14.Install shaft through housing and crank, aligning indexing marks from disassembly.

15.Clean threads of setscrew with cure primer.
16.Apply thread sealant to setscrews, install into crank and tighten.
Always use new seals. Old or damaged seals will leak.
17.Install new seals around shaft.
18.Install washers and arms on shaft, aligning indexing marks from disassembly.
19.Install snap rings.
20.Install hydraulic lift unit.


