1 minute read
Connecting Rods, Pistons & Cylinder Sleeves


4.ASSEMBLY :
a)Push the piston pin into boss of the piston.
b)Position the connecting rod inside the piston and align the bushing with the piston pin. During the assembly of the piston and the connecting rod, ensure that the combustion cavity in the piston is towards the F. I. Pump side.
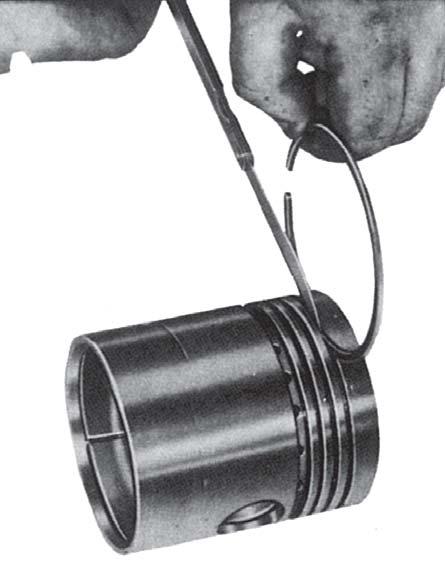
c)Before installing sleeve, check that the counterbore at the top and sealing ring groove at the bottom are clean and free from foreign material. All sleeves should enter crankcase bores full depth and should free to rotate by hand. (without sealing ring) d)Push the piston pin into the other boss and install the circlips on both sides of the piston securely. The piston pin can be pushed with slight hand pressure. e)Using piston ring expander fit the rings to the piston starting the bottom ring and working up.
NOTE: The cylinder head gasket forms the upper cylinder sleeve seal, and excessive sleeve standout will result in coolant leakage. To test lower sealing rings for proper installation, fill crankcase water jacket with cold water and check for leaks near bottom of sleeves.
NOTE: Multi-piece oil control rings should be fitted to the top oil control groove. The expander (1-8) must be installed first, followed by the two flat rings (2-8) either side of the expander. The gaps in the flat rings must be at 180 0 to each other.
Piston Rings
Check piston ring gap using a feeler gauge.
NOTE: To check piston ring gap the ring must be placed squarely in a new cylinder sleeve (Fig. 7). Replace piston ring as a set only.
Piston Clearance to Cylinder Sleeve
Check the piston clearance in the sleeves using a 0.10 mm (0.004 inch) ribbon gauge 12 mm (0.005 inch) wide with a tension scale Fig.10 in the following manner; a)Position the ribbon in the cylinder bore so that it extends the entire length of the piston, 90 degrees from the piston pin location. b)Invert the piston and install it in the bore so that the end of the piston is about 38 mm (1.5 inch) below the top of the cylinder block and the piston pin is parallel to the crankshaft axis. c)Hold the piston and slowly pull the scale in a straight line with the ribbon, noting the pull required to remove the feeler ribbon. Do not bend or kink the ribbon gauge.


