
11 minute read
2.2.2 STARTING THE ENGINE WITH AUXILIARY STARTER SWITCH CAUTION

• To start the engine with the auxiliary starter switch, make sure that the main starter switich is in ON position.
• Do not keep the starter turned for more than 5 seconds. Doing so will accelerate the battery discharge.
Wait for about 1 minute before attempting to start the engine again if it did not start.
•Even in normal temperature, pull the choke knob before starting the engine, as a rule.
• Verify that the fuel lever of the water separator pot is at the vertical position (open) before starting the engine.
•Make sure that the engine emergency stop switch is in OFF position. The engine does not start when it is "ON".
• Verify that the main switch on the remote control receiver is at the OFF position.
1. Insert the key into the main starter switch and turn the key to the ON position.
2. Pull the choke knob toward you.
3. Move forward to the Crane Operation Unit.
4. Turn the acceleration lever toward left to operate the engine at medium speed (lever stroke about midway)

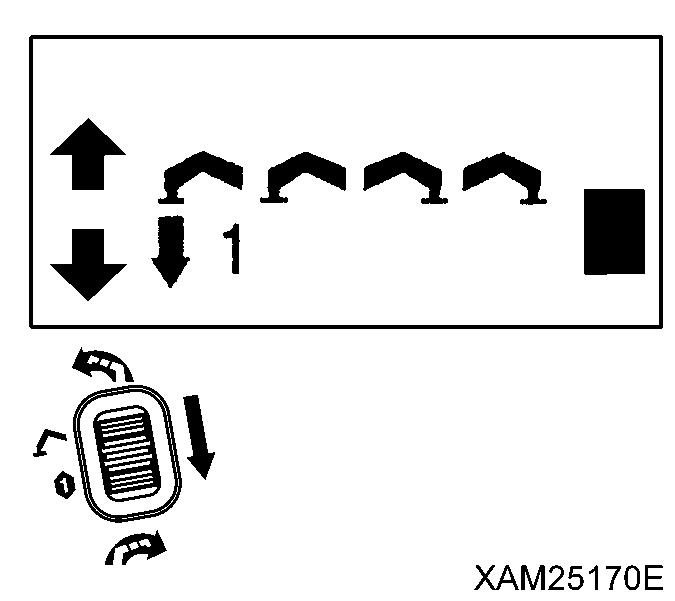
5. Push up the auxiliary starter switch to the “START” position (upward)


6. Release your finger from the auxiliary starter switch once the engine has started.
The auxiliary starter switch will automatically return to the NEUTRAL position.
7. Move back to the Travelling Operation Unit.
8. Push the choke knob forward to return the original position.

2.2.3 STARTING THE ENGINE WITH RECOIL STARTER CAUTION
• The purpose of the Recoil starter is only for an emergency where the electrical system breaks down; e.g. the the starter does not work or the battery is discharged. Avoid using it when any abnormality is not perceived.
• To start the engine with the recoil starter, make sure that the main starter switich is in ON position.
•Even in normal temperature, pull the choke knob before starting the engine, as a rule.
• Verify that the fuel lever of the water separator pot is at the vertical position (open) before starting the engine.
•Make sure that the engine emergency stop switch is in OFF position. The engine does not start when it is "ON".
• Verify that the main switch on the remote control receiver is at the OFF position.
1. Push the acceleration lever forward to operate the engine at medium speed (lever stroke about midway)

2. Insert the key into the main starter switch and turn the key to the ON position.
3. Pull the choke knob toward you.
4. Pull the recoil starter knob (1) slowly toward you until you feel it becomes heavier to pull (where the starter claw fits), then draw the knob (1) quickly from that position.
5. When the engine starts, return the recoil starter knob (1) slowly to the original position.
6. Push the choke knob forward to return the original position.

2.3 OPERATIONS AND CHECKS AFTER STARTING THE ENGINE
Never refuel (gasoline) while the engine is in operation. Always stop the engine when refueling.
• If any abnormal condition takes place during the warm-up operation, immediately press the engine emergency stop switch to stop the engine for emergency. Then, turn the starter switch to the OFF position. The power to the electrical system will be shut off.
• Always perform the warm-up operation. The sufficient warm-up operation is necessary particularly when it is cold.
Insufficient warm-up operation will slow down the movement response of the travelling system or crane system to the operation levers, resulting in serious accidents.
• Always check the operation of the crane after warm-up operation. Be careful not to let the hook block interfere or collide with the boom.
• If you find any abnormality during the crane operation check, immediately press the engine emergency stop switch at the crane operating side to stop the engine for emergency. Then, turn the starter switch at the travelling operating side to the OFF position. The power to the electrical system will be shut off. After stopping the machine immediately for emergency and repair. Using the system in abnormal condition can result in serious accidents.

Caution
• The appropriate temperature of the hydraulic oil is 50 to 80 °C. Even when operating at low temperature by necessity, increase the temperature of the hydraulic oil to about 20 °C
• Do not idle away suddenly until the warm-up operation is done.
• When the engine has started, check if the “battery charge lamp” went off. If this is any abnormality, repair.
• Where the operation in low revolution of the engine prolongs too much, that may cause in-sufficient lubrication of the engine cylinder head and may result a breakdown. When it is required to operate the engine in low revolution, the engine should be idled for around 5 minutes per day.
Perform the warm-up operation as follows once the engine has started.
1. Pull the acceleration lever toward you. Keep the engine idling and continue the operation with no load for about 5 minutes.

2. Check if there is any abnormality with the engine exhaust gas color, noise, and vibration. If there is any abnormality, repair.
3. Pull up the lock lever (6) before pressing the whole lever stand (7) down to the "Crane Operation Position", then release the lock lever (6).
4. See “Operation 2.13 Outrigger Set Up Operation” and set the outriggers.
5. Refer to "Operation 2.15 Operations before Crane Operations" and slacken the wire rope which fixes the hook block (10) to release it from the hook holder (9), according to the procedure for it.

6. Turn the acceleration lever toward left to operate the engine at medium speed (lever stroke about midway)


7. Operate the boom derricking lever (4) slowly forward/backward and move the derricking cylinder up/down until it reaches the stroke end. Check if there is any abnormality with the operation. If there is any abnormality, repair.
8. Operate the boom telescoping lever (2) slowly forward/ backward to extend/retract the boom until it reaches the stroke end. Check if there is any abnormality with the operation. If there is any abnormality, repair.
9. Operate the winch lever (3) slowly forward/backward to check if the hook block is smoothly raised/lowered. Also check if the hook block immediately stops and the winch drum does not wind into a mess when the winch lever returns to the NEUTRAL position. If there is any abnormality, repair.
10. Operate the slewing lever (1) slowly forward/backward to check if the crane smoothly slews clockwise and counter clockwise for 360 degrees or more. Also check if the crane stops immediately when the slewing lever returns to the NEUTRAL position.

If there is any abnormality, repair.

2.4 BREAKING-IN MACHINE
Perform breaking-in for the period of about the first 250 hours (hours displayed on the service meter).
The life of the machine shortens if overloaded operations or tasks are performed before the various sections of the machine are used (run in) to the operation
While this machine is shipped after thorough adjustment and inspection, forcing the machine from the beginning will quickly degrade the functions of engine and crane, shortening their life.
Perform the breaking-in for the first “250 hours” (time displayed on the service meter).
Pay attention particularly to the following during the breaking-in period.
• Be sure to perform the warm-up operation and avoid idling away after the engine has started.
See “Operation 2.3 Operations and Checks after Starting the Engine”
• Avoid overloaded operation or tasks with high-speed operation
• Avoid sudden starting, sudden acceleration, unnecessary sudden stop or sudden steering
• When the breaking-in period reaches “25 hours”, do not fail to change the engine oil.
See “Maintenance 8.2 [1] Replacement Engine Lubricating Oil”.
The metal powder produced inside the engine through breaking-in increases in the engine oil and it deteriorates the oil, shortening the engine life.
2.5 MACHINE TRAVELLING POSITION
• When moving this machine self-propelled, take the “Travelling position” with which the boom, hook block, and outriggers are stowed.
• Travelling or travelling with a load hoisted with the boom extended is essentially prohibited. This will overturn the machine, causing serious injury accidents.
• Do not use this machine for any other purpose other than as detailed in this manual. Do not carrying the load on the machine.

• Follow the local laws and regulations if driving the machine on public roads.
Take the travelling position shown on the right when moving the machine.
1. See “Operation 2.22 Crane Stowing Operation” to stow the crane. Stow the hook block in the specified position.
2. See “Operation 2.23 Outrigger Stowing Operation” to stow the outriggers.
2.6 STARTING MOVING THE MACHINE
• Do not allow anyone around the machine.
• Clear away all the obstacles on the travelling path. Check for projections and grooves on the travelling path especially when going backward. Fix the travelling path.
• Check the safety around the machine and honk the horn before starting to move the machine.
• This machine is designed that the person who operates it should move along with it, when the machine starts travelling. Set the engine speed to low and operate the left and right travelling levers slowly at the same time. Check the travelling speed of the machine. Do not make a sudden start especially when you are going backward. You can cause serious accidents.

• The front of the machine will be the out of view. Be extremely careful when moving forward.
• If you cannot verify the safety because the driving direction is out of view, stop driving and check if it is safe in the travelling direction. Use a guide person if necessary depending on the work site situation.,
• The whole lever stand (7) can be folded. To start travelling, pull up the lock lever (6) before erecting the entire lever stand (7) forward to the "Travelling Control Position", then fit the lock lever (6) into the guide groove.


[PREPARATION BEFORE STARTING MOVING] [1] MOVING FORWARD
Operate the left and right travelling levers at the same time.
• Push the left and right travelling levers slowly forward to move forward.
[2] MOVING BACKWARD
Operate the left and right travelling levers at the same time
• Pull the left and right travelling levers slowly toward you to move backward.
2.7 CHANGING MACHINE TRAVELLING MODE
• Choose the appropriate travelling speed for the ground and road surface conditions while driving the machine. You can operate the travelling levers or choose “high-speed travelling mode” or “low-speed travelling mode” with the operation position of the travelling high-speed switch to change the travelling speed.

• Always set the travelling high-speed switch to the “OFF” (low speed) when driving on a slope. Driving on the slope in the high-speed travelling mode may cause overrun on the downward slope.
• Be sure to stop the machine before changing the travelling speed mode.
[1] CHANGING TRAVELLING SPEED MODE
Operate the travelling high-speed switch on the top of the travelling stand
• Push up the travelling high-speed switch to the ON (high speed) position (forward) The machine will be in the “high-speed travelling mode”.
• Push down the travelling high-speed switch to the OFF (low speed) position (toward you) The machine will be in the “low-speed travelling mode”.
2.8 CHANGING DIRECTION OF THE MACHINE
• Sudden steering or unnecessary spin turns at high speed not only damages the rubber track and hydraulic devices, but also may result in a collision with other objects. Stop the machine, then adjust the engine speed to low speed before performing the spin turns.
• Do not change the path on the slope. The machine may slip to the side. Be especially careful on the soft ground and clay soil.
Caution
• When the path of the machine is changed, it may show serious rolling due to resonating. In such an event where rolling is amplified, reduce the travel levers functions (stroke) or release them to the NEUTRAL positiion.
• You may find difficulty in changing the direction of the machine in its high-speed travelling mode. In such event turn OFF the travelling high speed switch and change to low-speed travelling mode.
[1] CHANGING THE MACHINE DIRECTION WHEN STOPPED

• LEFT TURN
Operate the right travelling lever.
Tilt the travelling lever forward to turn to the left in the forward direction. Tilt the travelling lever toward you to turn to the left in the backward direction.
• RIGHT TURN
Operate the left travelling lever.
Tilt the left travelling lever forward to turn to the right in the forward direction. Tilt the left travelling lever toward you to turn to the right in the backward direction.
[2] SPIN TURNS
• LEFT SPIN TURN
Tilt the right travelling lever forward while tilting the left travelling lever toward you to rotate the left and right rubber tracks in the opposite direction for left spin turn.
• RIGHT SPIN TURN
Tilt the left travelling lever forward while tilting the right travelling lever toward you to rotate the left and right rubber tracks in the opposite direction for right spin turn.
[3] CHANGING DIRECTION WHILE MOVING FORWARD/BACKWARD
• LEFT TURN WHILE MOVING FORWARD
While tilting the right travelling lever forward, return only the left travelling lever to the NEUTRAL position.
• LEFT TURN WHILE MOVING BACKWARD
While tilting the right travelling lever toward you, return only the left travelling lever to the NEUTRAL position.
• RIGHT TURN WHILE MOVING FORWARD
While tilting the left travelling lever forward, return only the right travelling lever to the NEUTRAL position.
• RIGHT TURN WHILE MOVING BACKWARD
While tilting the left travelling lever toward you, return only the right travelling lever to the NEUTRAL position.
2.9 STOPPING/PARKING THE MACHINE
• Avoid sudden stops and try to stop with a safety margin whenever possible.
• Choose a leveled and solid location for parking the machine.
If you park on the slope by necessity, provide some blocks so that the machine will not move.
• Careless contact with the travelling lever(s) during the engine operation may result in sudden movement of the machine, leading to serious accidents.


• Stop the engine and always remove the key for the starter switch. Take the key with you when you leave the machine.
Operate the left and right travelling levers to the NEUTRAL position at the same time.

This automatically brakes the machine and the machine stops.

2.10 STOPPING THE ENGINE CAUTION
• Stopping the engine before it sufficiently cools down may shorten the life of engine units. Do not stop the engine suddenly except for emergency.
• When the engine is overheated, do not stop the engine suddenly. Change the engine speed to low speed, and gradually cool down the engine before stopping the engine.
• Verify that the main switch at the remote controller control box unit is at the OFF position.
1. Pull the acceleration lever toward you fully and change the engine speed to low idling. Continue the no-load operation for about 5 minutes.
2. Turn the main starter switch key to the OFF position. The engine stops

3. Remove the main starter switch key.
2.11 INSPECTION AFTER STOPPING THE ENGINE
1. Visibly check for oil leakage, fuel leakage, and water leakage, and check around the crawlers, crane, and exterior of the machine. If you find any leakage or abnormality, fix the problem.
2. Top of the fuel tank.
3. Dead leaves and papers around the engine will cause fire. Remove the dead leaves and papers.
4. Clean off mud on the crawlers and outriggers.
2.12 CAUTIONS WHILE DRIVING
Not observing these cautions while driving will result in serious accidents.
[1] CAUTIONS WHILE DRIVING
• When travelling, stow hook and outrigger, and make sure the surrounding area is safe
• When stowing outriggers, insert each of the position pins completely into lock.
• Driving over obstacles not only causes the overturning of the machine, but also gives an impact to the machine (especially around crawlers), causing breakage. Avoid or remove the obstacles so as not to travel over them whenever possible.
If you have to travel over obstacles by necessity, be sure to take the “Travelling position” to lower the centre of gravity, and reduce the travelling speed as much as possible so that the machine will go over the obstacles at the centre of the crawlers.

Notes
See “Operation 2.5 Machine Travelling Position” for the travelling position of the machine.

[2] ALLOWABLE WATER DEPTH
If using this machine in water make sure of the depth of water under the centre of the idler (1) so that the muffler beneath the machine body doesn’t go under water


