3 minute read
INTRODUCTION


OPERATION OF MACKPOWER™ MARINE ENGINES
Engine Operating Instructions
PREPARATIONS FOR STARTING THE ENGINE THE FIRST TIME
When preparing to start a new engine or an engine which has been in storage, perform all of the operations listed below. Failure to follow these instructions may result in serious engine damage.
Before going below deck, always remove loose items of clothing or jewelry that could get caught in a moving part of the engine and cause personal injury. Safety glasses and hearing protection must also be worn.
Cooling System Checks
1.Make sure all the drain cocks in the cooling system are installed (drain cocks are often removed for shipping) and are tightly closed.
2.Open the petcock near the top of the turbocharger (if used).
3.Remove the heat exchanger pressure control cap and fill with ethylene glycol-base antifreeze solution in the required concentration. Keep the coolant level at the bottom of the filler neck to allow for expansion of the coolant. For more detailed coolant recommendations, refer to Coolant Recommendations.
4.After filling the cooling system, close all petcocks. Fill the coolant recovery bottle to the “Full Cold” mark. Entrapped air must be purged after filling the cooling system.
5.Check sea water strainers and remove any accumulations of seaweed or debris. Strainers act as filters between the intake thru-hull fittings and raw water pump and are easily fouled. Make sure all thru-hull valves, other valves in the cooling system and raw water sea lines are open.
The following check (No. 6) is not required for a brand new engine.
6.Remove the cover from the raw water pump. Visually inspect the impeller for signs of damage or broken vanes. Replace the impeller if damaged. Reinstall the cover with a new gasket.
Failure to install a new gasket and tighten cover bolts securely can result in pump leakage at startup.
7.Prime the raw water pump by closing the raw water seacock and removing the hose or plug in the pump outlet. Pour at least a pint of water into the pump. Reinstall the plug or hose and reopen seacock.
The impeller depends on liquid pumped for lubrication. DO NOT RUN DRY for more than 30 seconds. Lack of liquid will burn the impeller.
Lubrication System Checks (New Engine)
If the engine is brand new, the oil filters should already be pre-filled. If not, fill the full flow oil filters with proper oil and reinstall. With the boat in calm water and properly loaded, fill the crankcase with 28 quarts of recommended engine oil. Check the oil level on the dipstick. The oil level should be below the full mark. Measure how far below the full mark the oil level is. Using a tubing cutter, cut that amount from the top of the dipstick guide. Recheck oil level to ensure it is now at the full mark.
If the oil level is above the full mark, the dipstick markings will need to be ground off and the dipstick remarked.
It is important that this procedure be done with exactly 28 quarts of oil in the pan. Check that the pan is empty before starting the procedure.
The lubricating oil film on the rotating parts and bearings of a new engine, or one which has been in storage for six months or more, may be insufficient when engine is started for the first time. Insufficient lubrication at start-up can cause serious damage to engine components.
To ensure an immediate flow of oil to all bearing surfaces at initial engine start-up, the engine can be charged with a commercially available pressure prelubricator*. The oil should be the same weight and recommended viscosity as used in the crankcase. After prelubricating, add additional oil to bring the level to the proper mark on the dipstick.
*If a pre-luber is not used, refer to FINAL PREPARATION AND OPERATIONAL CHECK in the Repair Instructions section.
Make sure the marine gear is filled to the proper level with the fluid recommended by the gear manufacturer.
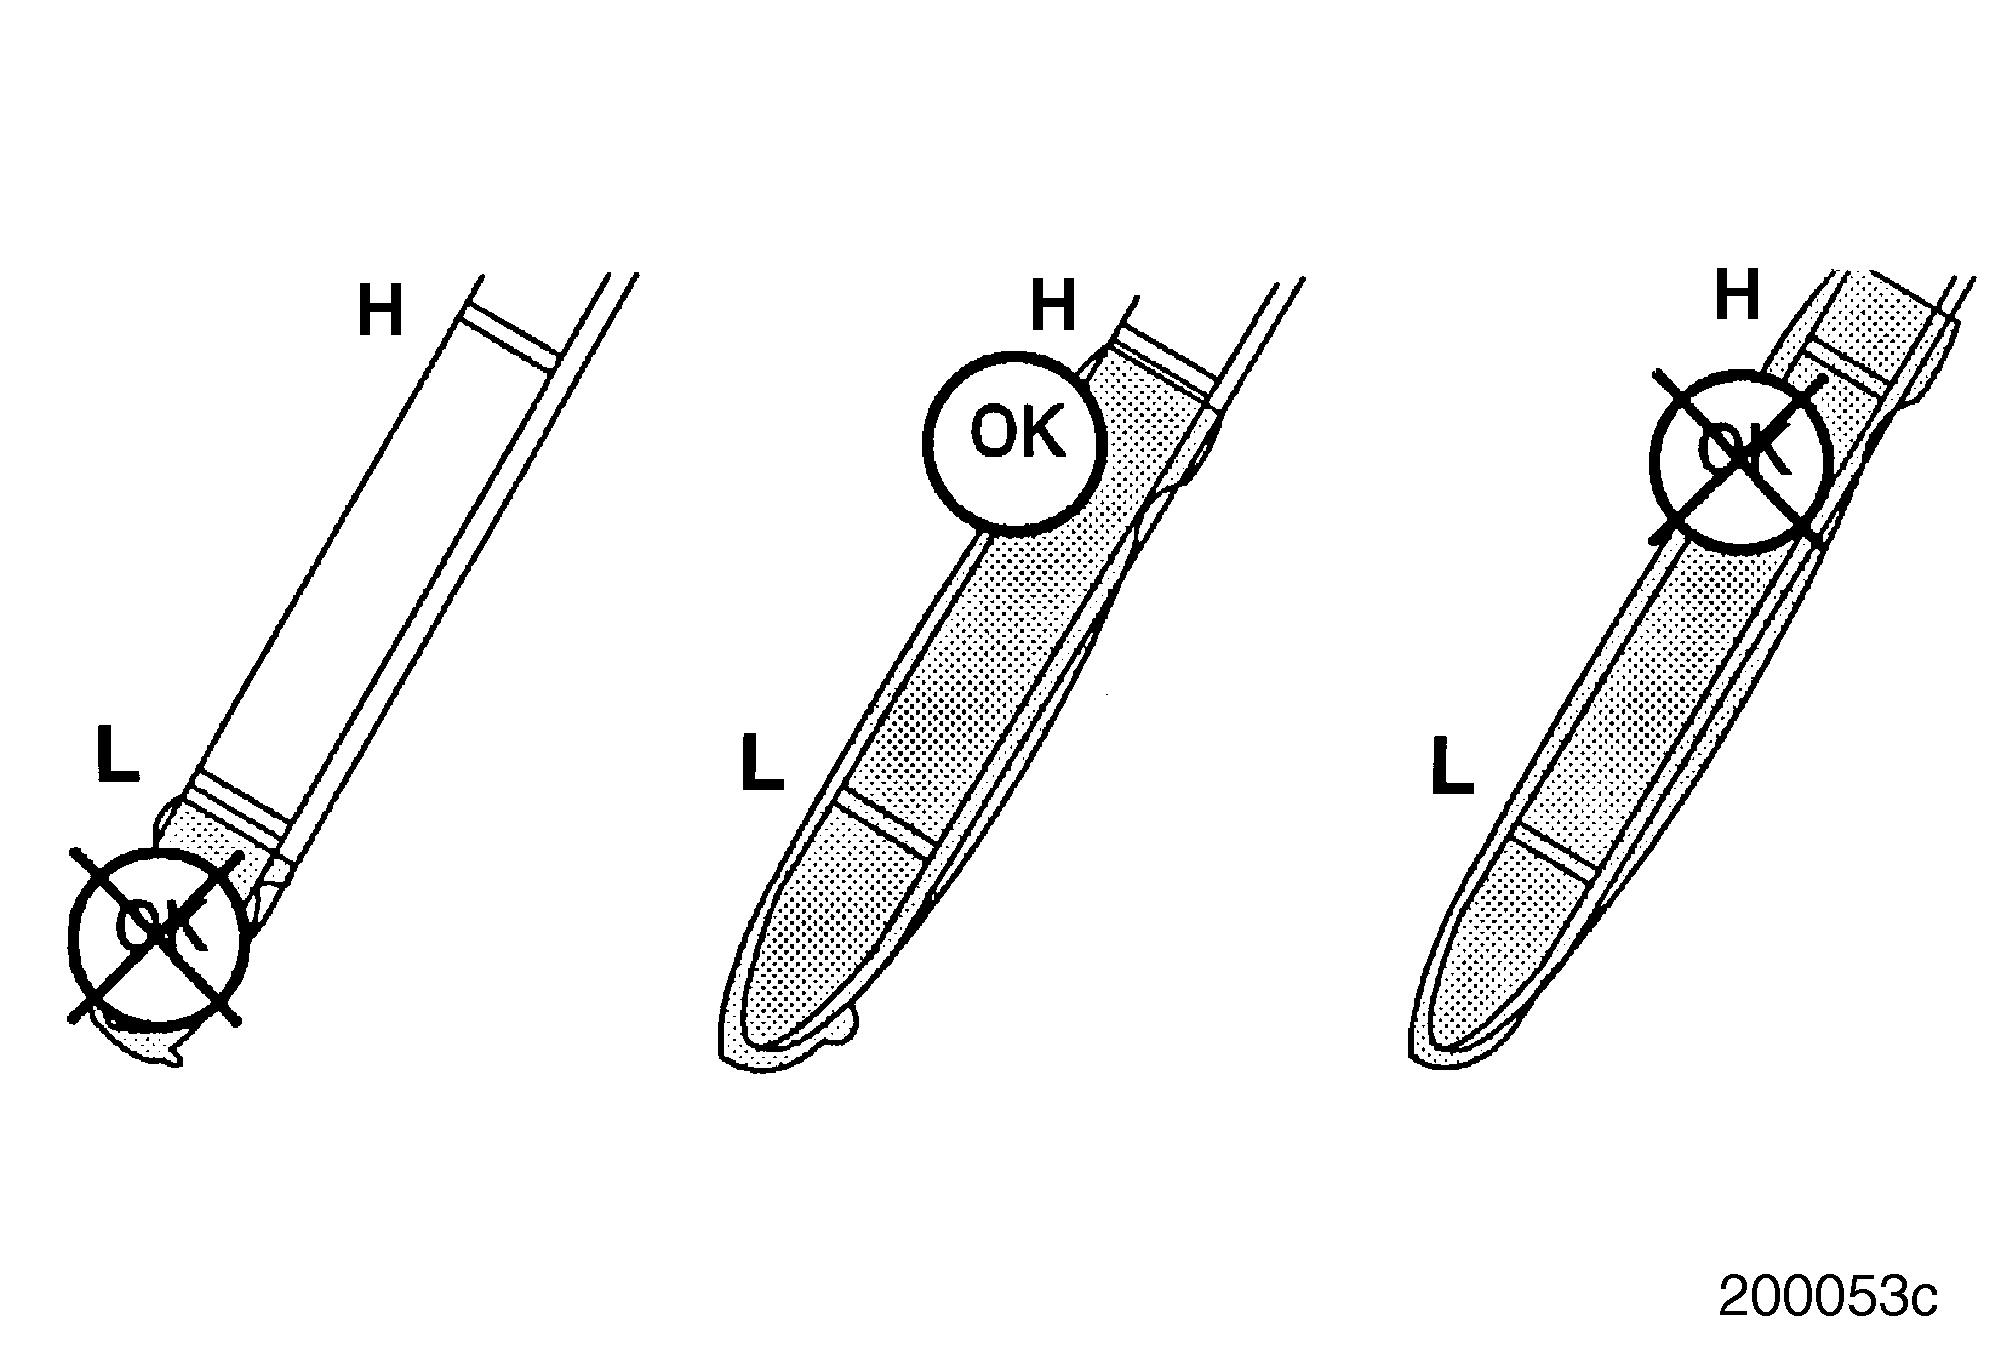
Engine Oil Level Check
As the operator of this vessel, it is important for you to perform the daily inspections necessary to keep your boat in good shape. Maintaining the proper oil level in your engine crankcase cannot be overemphasized.
Before checking the oil, remember these important points: r Measurement of the oil level must be taken on calm seas and with the bilge evacuated. r If the engine has been running, allow about 15 minutes after shutdown for oil to drain down to the oil pan. r The level must be close to the FULL line (at least between the ADD and FULL lines) on the dipstick, but must NOT exceed the FULL line (refer to Figure 1).
Cooling System Checks
Do not remove the pressure control cap from the heat exchanger or attempt to drain the coolant until the engine has cooled. Use EXTREME caution when removing the cap. The sudden release of pressure from a heated cooling system can result in a loss of coolant and possible personal injury (scalding) from the hot liquid.
Check the coolant level daily and maintain it near the bottom of the filler neck on the heat exchanger tanks. On some installations, this is done by checking an overflow bottle. Add coolant as necessary, but do not overfull.
Make a daily visual check for cooling system leaks. Look for an accumulation of coolant when the engine is running and when it is stopped.
The inhibitors in antifreeze solutions should be replenished with a non-chromate corrosion inhibitor supplement when indicated by testing the coolant. Engine coolant should be tested at 150-hour intervals or annually, whichever comes first.


