1 minute read
Prior Preparation Procedure.................................................................. 7/36


Swing Unit
Swing Unit Swing Unit SH800 PageNo. 1 /10 First Edition :03/2006
Advertisement
Reduction Gears Maintenance Assembling Instructions
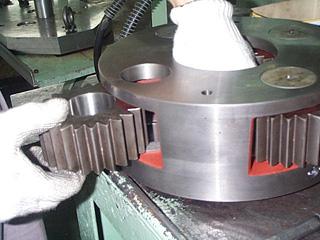
1.Assembling Case Subassembly (1) Assembling the carrier No. 1 subassembly
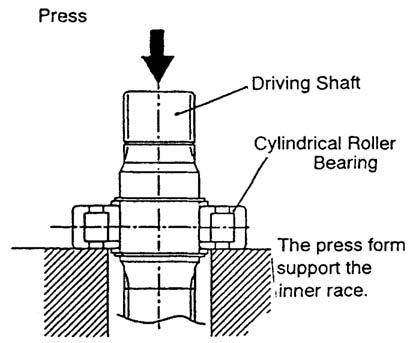
Since those parts are to be crimped, they cannot be reassembled. Careful assembly is essential. [1] Insert planetary gear No. 1 (28) and side plate No. 1 (30) (one plate) sequentially into planetary pin No. 1 (29) (Photo 1). [2] Place planetary carrier No. 1 (27) on the jig with the inner tooth gear counterbore facing up. [3] Press fit planetary pin No. 1 (29) so the notch on the flange section faces the circumference of outer side of planetary carrier No. 1 (27) (Photo 2). The engagement of side plate No. 1 (30) must be closely monitored here. Leave the subassembly for 5 to 6 seconds with the press fitting force applied, then release the pressure and remove from jig. Never use a hammer to hit into the subassembly. This will result in damage because it galls the planetary carrier bore and reduces the holding strength of a pin. [4] Turn over the carrier No. 1 subassembly (Photo 3). Crimp in the following steps: Rotate the planetary gear No. 1 (28) manually to check there is no rotational irregularity or engagement.
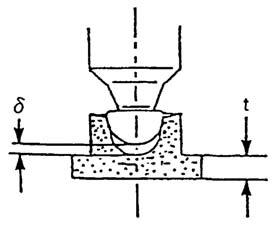
[5] Crimp by opening the end of planetary pin No. 1 (29) with crimping jig (Photo 4) (Photo 5).
Crimping may produce string-like chips. Eliminate all if this happens. [6] Rotate planetary gear No. 1 (28) manually to check again that there is no engagement or rotational irregularity. If found, reassemble using new parts (Photo 6).
Repeat steps [1] through [6] above on other 3 locations to finish the procedure.
Photo 1 Photo 2 Photo 3


Photo 4 Photo 5 Photo 6