2 minute read
REMOVE AND INSTALL ENGINE FRONT OIL SEAL


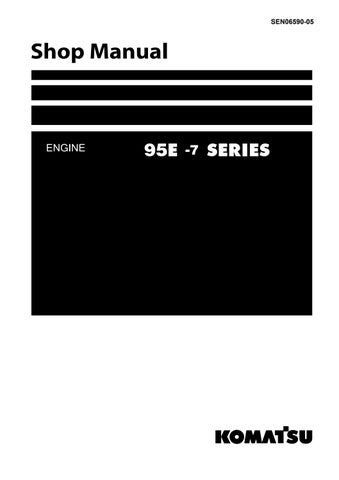
Crankshaft pulley assembly
4. Remove the bolt (3), and remove the plate (4) and crank pulley assembly (5).
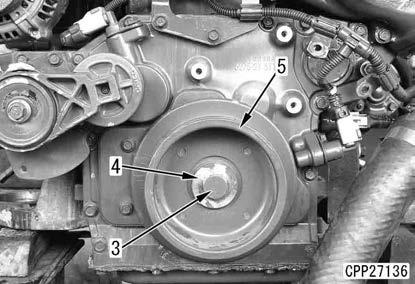
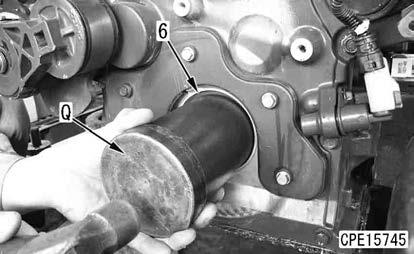
Front oil seal
5. Remove the front oil seal (6).
Method For Installing Engine Front Oil Seal
1. Install the front oil seal (6) by using the push tool (Q) and hammer
NOTICE
Check that the end surface, corner and the lip sliding surface of the crankshaft are free from a flaw, burr, fin, rust, and etc. before installing the front oil seal.
2. After press fitting the front oil seal, fill the clearance between the seal lips with approximately 2 cc of grease.
2 Front oil seal (6): Grease (G2-LI)
Crankshaft pulley assembly
3. Install the crankshaft pulley assembly (5) and plate (4) with the bolt (3).
3 Bolt (3): 343 to 402 Nm {35 to 41 kgfm}
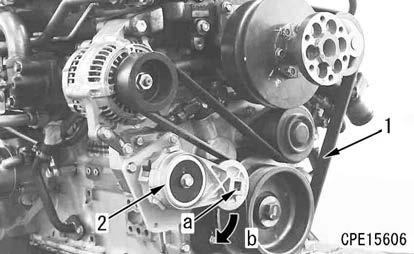
Idler pulley assembly
4. Install the idler pulley assembly (2) with the bolt (1).
Fan belt k Install the wrench to the part (a) of the auto-tensioner (2) securely, and then rotate it. (The spring of the auto-tensioner (2) is strong. If the wrench is loosely installed and rotated, it can accidentally come off and this is extremely dangerous.) k After installing the fan belt (1), slowly and carefully restore the auto-tensioner (2). k Be careful not to get your fingers caught between the pulley and fan belt (1) during work.
5. Insert a wrench in the part (a) (width across flats: 12.7 mm) of the auto-tensioner assembly (2), and install the fan belt (1) while rotating it in the direction of the arrow (b).

Remove And Install Engine Rear Oil Seal
Tools to be used when removing and installing the engine rear oil seal
Method For Removing Engine Rear Oil Seal
Flywheel assembly
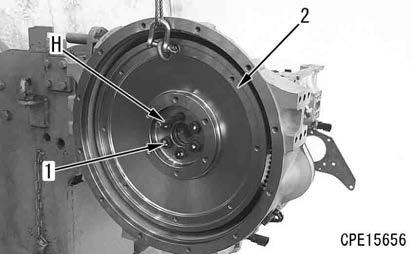
1. Remove the top bolt (1 piece) out of the bolts (1) (6 pieces), and install the guide bolt (H).
2. Remove the remaining bolts (1) (5 pieces).
3. Sling the flywheel assembly (2), and remove it.
4 Flywheel assembly (2):

40 kg k Since the faucet joint part of the flywheel is shallow, the guide bolt may fall off suddenly. Be careful not to bring it into contact with you.
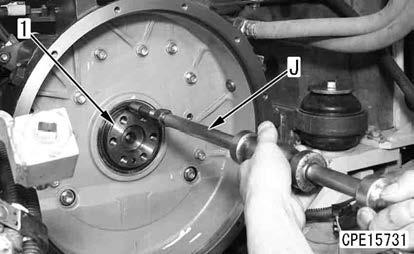
Rear oil seal
4. Screw in the slide hammer (J), etc. to the metallic ring of the rear oil seal (1), and pull out the rear oil seal by using the impact of the slide hammer.
REMARK
•Drive in the seal lightly before pulling out the seal to separate it from the housing for easy removal.
•Remove it evenly so that the oil seal does not tilt.
NOTICE
Do not use a drill, etc. since metal chips may enter the engine.
Method For Installing Engine Rear Oil Seal
1. By using the plate (P) and hammer, press fit the rear oil seal (1) into the rear wheel housing (2) according to the dimension (a).
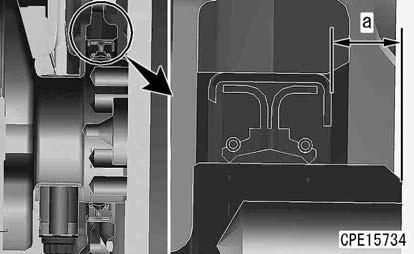
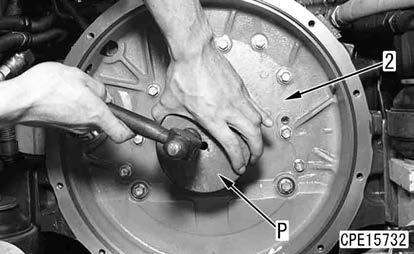
(a): 10 mm
NOTICE
Check that the end surface, corner and the lip sliding surface of the crankshaft are free from a flaw, burr, fin, rust, and etc. before installing the rear oil seal.
2. After press fitting the rear oil seal (1), fill the space between the oil seal lips with approximately 3 cc of grease.
2 Rear oil seal (1): Grease (G2-LI)
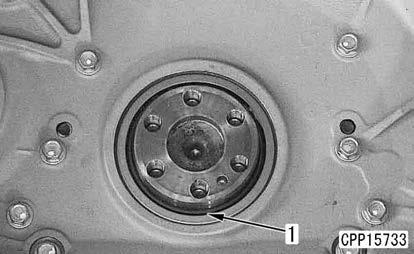
Flywheel
3. Install the guide bolt (H).
4. Install the flywheel (2) with the bolt (1).
REMARK
•Tighten the bolt (1) in the tightening order shown in the drawing.
•Tighten the bolt (1) twice in the tightening order to the following tightening torque. Bolt (1):
3 1st time:
58.8 to 117.7 Nm {6.0 to 12.0 kgfm}
3 2nd time:
186.3 to 196.1 Nm {19.0 to 20.0 kgfm}
• 2 Threaded portion of the bolt (1): Engine oil
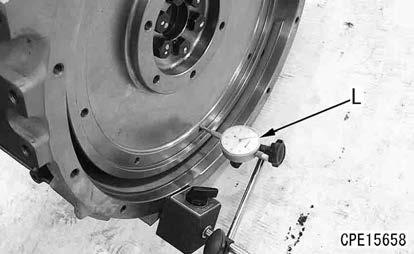
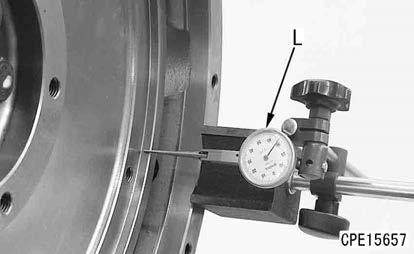
5. Measure the radial runout and facial runout of the flywheel (2) by using the dial gauge (L).
REMARK
•Rotate the crankshaft to measure the radial runout and facial runout.
•If it is out of standard value, take actions by referring to “MAINTENANCE STANDARD”.
•Measurement of radial runout
Standard value: Max. 0.30 mm
•Measurement of facial runout
Standard value: Max. 0.35 mm