19 minute read
CHAPTER 13 TROUBLESHOOTING
NOTE: NOTE: This Troubleshooting guide presents problems, causes and suggested remedies beyond the extent of loose, worn or missing parts and it was developed with the understanding that the machine is in otherwise good operating condition. Refer to the index at the back of this manual for Chapter and Topic page references. For additional assistance, BE SURE to contact your local GEHL dealer.
Blower
Problem Cause Remedy
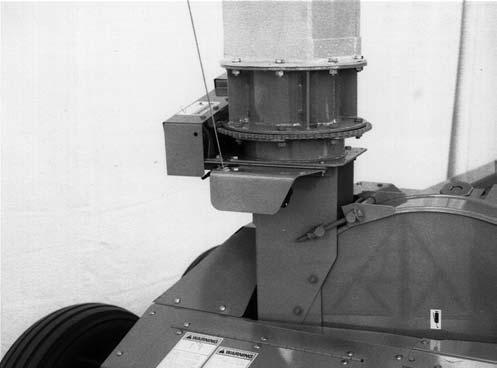
Forage is NOT being blown adequately or Deflector is plugging.
Operating too far below rated PTO speed.
Check that Speed Monitor is plugged-in. Check that all electrical Plugs are connected or, if the Speed Monitor is NOT functioning, have the unit checked per the electrical troubleshooting information provided to the dealer.
Blower Rimsheet and/or Deflector is gummed up. Remove gum and dirt by either scraping it out or by running very wet forage or freshly cut crop through it; consult with your dealer for information on a Water Tank system.
Blower Paddles are NOT set out to the Rimsheet. Adjust Paddles; refer to Adjustments chapter.
Blower Belt slipping. Check Belt for wear and/or oil contamination and check for proper Idler alignment.
Deflector Liner is worn through. Replace Liner.
Deflector Horizontal Extension is interfering. Correct the Extension mounting, as required; refer to the Set-up & Assembly chapter.
Cap is being tipped down too far. Operate the Cap in a higher position.
Blower Belt is coming off. PTO is being engaged at too high an RPM. Always engage the PTO at tractor idle.
Blower Fan is obstructed. Check the Fan to see if it turns freely.
Belt Idler is tipped and/or NOT in line. Position Idler perpendicular and in-line with Belt.
Blower Fan Blades are striking Blower Sidesheets.
Locking Collars on Blower Bearings are loose.
Center the Fan and tighten the Bearing Lock Collars.
Blower Arms are bent. Replace Arms.
Rimsheet is loose. Tighten Rimsheet Take-up after cleaning and greasing the Rimsheet grooves.
Bolts in Sidesheets are loose. Tighten Bolts.
Cutting Cylinder
Problem Cause Remedy
Crop will NOT feed into Cutting Cylinder.
Knives are too dull.
Sharpen the Knives and readjust their positions, as required.
Upper Rear Feed Roll is packed between the flutes. Clean out thematerial between the Roller Flutes.
Smooth Feed Roll Scraper is NOT against the Feed Roll.
Clean out the area between the Roll and the Scraper and lower the Scraper.
Knives wearing-out rapidly.
Soil or sand being picked up by the mounted Attachment.
Operate the Attachment higher off the ground.
Shear Bar is NOT set-up to Knives. Correct the Shear Bar setting per details in the Adjustments chapter.
Stems are too long. Knives are NOT sharp. Sharpen the Knives and readjust their positions, as required.
Shear Bar is NOT sharp. Remove and rotate or replace the Shear Bar.
Shear Bar is NOT straight and/or set up to the Knives.
Check if Shear Bar is straight and correctly set it up to the Knives.
NOT enough material depth into the Feed Rolls to hold stems. Increase the ground speed or windrow size and/or reduce the Length-of-Cut.
Length-of-Cut is too long. Reduce the Length-of-Cut; see Adjustments chapter.
Stem Guides NOT correctly set to the Knives. Set the Guides from 1/32 to 1/16″ (0.8 to 1.6 mm) from the Knives.
Long cobs in corn silage when Crop Processor is not used.
Knives are NOT sharp. Sharpen the Knives and readjust their positions, as required.
Shear Bar is NOT sharp. Remove and rotate or replace the Shear Bar.
Shear Bar is NOT straight and/or set-up to the Knives.
Check if Shear Bar is straight and correctly set it up to the Knives.
NOT enough material depth into the Feed Rolls to hold stems. Increase the ground speed and/or reduce the Length-of-Cut.
Tractor RPM is dropping too low. Reduce the ground travel speed to keep the RPM up to the PTO speed.
Knives are striking the Cylinder Sidesheet Tie and/or Shear Bar when Knives are moved out.
Knives are moved-out too far. Reset the Knives with the Setup Rod.
Shear Bar is NOT moved fully forward. Clean out the material from in front of Shear Bar before it is moved forward.
Deflector Problem Cause Remedy
Deflector turns hard. Deflector Flange is dry. Properly grease Deflector Flange. Cap moves hard. Cap Pivot Spacers are binding. Oil the Pulleys and Pivot Spacer holes. Forage wedged between Cap and Deflector. Remove material buildup.
Deflector turns hard with a Horizontal Extension installed.
Cap Motor or Deflector Gearmotor operates slowly.
Deflector is tipped in relation to the Blower Outlet.
Binding in a joint.
Voltage too low.
Adjust the Tripod and/or Deflector Clamp Bracket to eliminate the binding.
Lubricate all joints and check for incorrect joint alignment.
Check for corrosion in the Plug connections. Clean the Plugs and, if problem is NOT corrected by this, contact your local Gehl dealer.
20 Ampere Circuit Breaker opens when Cap and Deflector Switches are operated simultaneously.
Entire electrical control is dead and does NOT function.
The Control Box is wired such that the Circuit Breaker will trip if the Cap and Deflector Switches are operated at the same time.
Operate only one Switch at a time.
Circuit Breaker has tripped-out on the Control Box. Reset the main Breaker.
Plug together terminations or wires have separated.
Chain Drives
Check the wiring and the Plugs.
Drive Chains are jumping.
Chain Tension Idler is NOT correctly positioned. Correctly align and/or adjust tension per information in Adjustments chapter.
Sprockets or Chains are worn excessively.
Lubricate Chains or replace them, as required.
Drive Chains are NOT releasing from Sprocket and are noisy.
Chains are lacking lubrication and/or are worn excessively. Lubricate Chains or replace them, as required.
FEED ROLLS & ATTACHMENT CONTROLS – ALL HARVESTER MODELS
PROBLEM CAUSE REMEDY
Feed Roll Drive overloads frequently.
Smooth Feed Roll Scraper packed with forage or raised above the Feed Roll.
Remove the Scraper, clean it and the Feed Roll and reposition the Scraper against the Feed Roll.
A Bearing has failed. Replace the Bearing. Material is being pulled down between the lower Front and Rear Feed Rolls.
Remove the burrs and straighten the teeth of the Roll. If cutting straw, reduce the ground travel speed.
FEED ROLLS & ATTACHMENT CONTROLS – ALL HARVESTER MODELS only (Cont.)
PROBLEM CAUSE REMEDY
Feed Roll Drive overloads frequently (cont.).
Feed Roll interference with the Attachment.
Harvester Wheel Spindles are positioning the unit too high for the Hay Attachment, when installed.
Feed Rolls are running at maximum capacity.
Upper Rear Feed Roll is packed with material.
Check the Throatsheets clearance. If necessary, lower the maximum “up” position of the Lift Rollers.
Adjust the Spindles to lower the Harvester to the lowest position.
Reduce the ground travel speed and/or increase the Length-of-Cut.
Remove or otherwise clean-out the material between the Roller Flutes.
Slugs are entering the Feed Rolls. Force the slug through by operating back and forth between the “Forward” and “Reverse” operation of the Shifter Transmission Control Switch.
Feed Rolls will run Forward but NOT in Reverse.
A Plug or wire is loose or corroded. Check wiring and Plug connections; repair as necessary.
The Control Box Toggle Switches are NOT set in their proper positions.
Refer to the procedure for proper Switch operation in the beginning of the Operation chapter. If still NOT working, contact your Gehl dealer.
Reverse Solenoid shifts but the Clutch does NOT engage in the “Reverse” position.
Circuit Breaker does NOT remain set.
A Plug or wire is loose or corroded. Check wiring and Plug connections; repair as necessary.
Transmission Switch is misadjusted or otherwise malfunctioning. Contact your Gehl dealer.
Proper contact is NOT being made between the Control Box and the tractor battery.
Check that White wire is correctly and properly connected to the battery (–) post and the Red wire is correctly and properly connected to the battery (+) post.
FEED ROLLS & ATTACHMENT CONTROLS – TORQUE SENSOR PROTECTED MODELS only
PROBLEM CAUSE REMEDY
Electric Clutch does NOT engage when Mode Switch is set to “AUTOMATIC” and the Selector Switch is moved to the “Forward” position.
Low Speed.
PTO must be operating over 670 RPM before moving switch to “Forward.”
FEED ROLLS & ATTACHMENT CONTROLS – TORQUE SENSOR PROTECTED MODELS only PROBLEM CAUSE REMEDY
Electric Clutch does NOT engage when Mode Switch is set to “AUTOMATIC” and the Selector Switch is moved to the “Forward” position (cont.).
An improperly low voltage exists at the Electric Clutch.
On Torque Sensor models ONLY: Check that the Mode and Selector Switches are properly set. If they are, check that there is NO less than 10-1/2 volts at the Electric Clutch wire Connecting Screw. Speed Monitor MUST be unplugged to check voltage. If the voltage is “0”, set the Toggle Switch to the “MANUAL” position and check for a voltage reading. If there is a voltage present, then the Selector Switch or the Control Box Relay is malfunctioning. Contact your Gehl dealer.
The Torque Sensor does NOT open the Electric Clutch but instead ratchets when overloaded.
The Feed Rolls and Attachment are stopping under a very light load right after they start to operate.
Circuit Breaker is tripped, a wire is broken, or a Plug or a connection has separated.
Correct wiring and/or reset Breaker. Check all Plugs and connections in the Main Wiring Harness and Clutch wires. Clutch Coil is open. Have the total circuit checked-out by your dealer.
Keyswitch is “OFF.”
Open contacts within the Brush Holder.
Turn on Keyswitch.
Have the total circuit checked-out by your dealer.
The Mode Switch is in the “MANUAL” position. Change the Switch setting to “Automatic.”
Wiring to the Torque Sensor contacts are loose or disconnected.
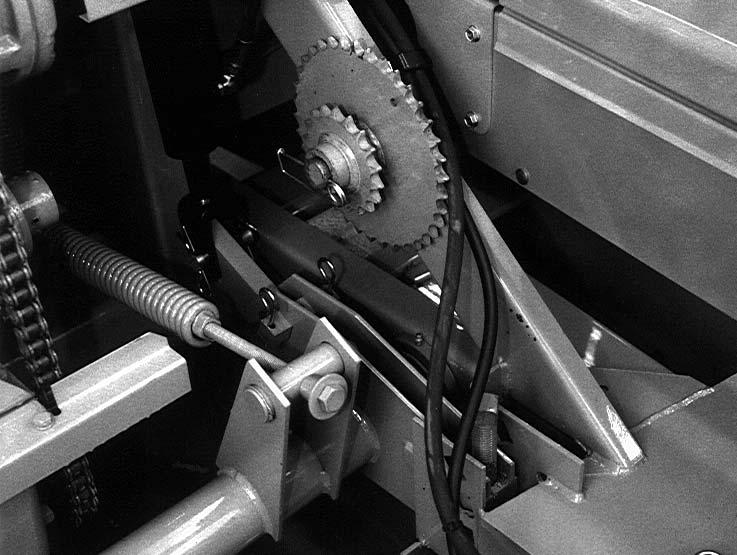
Torque Sensor Switch contacts are set farther than 0.060″ (1.5 mm) from face of Sprocket.
Sprocket or Contact Points are coated with a material which does NOT conduct electricity.
Re-secure wire or check Plug connections.
Readjust the contact gap per details in the Adjustments chapter.
Clean the Sprocket and Contact Points with a safety solvent.
The insulation on the Torque Sensor wires is damaged or broken. Tape the damaged insulation and cover any bare wire(s).
Torque Sensor Switch Contacts are set closer than 0.036″ (0.9 mm) from face of Sprocket.
Torque Sensor Sprocket is wobbling excessively.
Switch Contacts are touching the Sprocket Bolt Lock Strip.
Readjust the Contact gap per details in the Adjustments chapter.
Sprocket is loosely secured or otherwise deformed. Tighten the Sprocket or replace it.
Make sure that the Torque Sensor Switch does NOT make contact with anything which is grounded to the machine.
FEED ROLLS & ATTACHMENT CONTROLS – TORQUE SENSOR PROTECTED MODELS only (Cont.) PROBLEM CAUSE REMEDY
The “AUTOMATIC” portion of the Control Box circuit is NOT functioning.
Faulty components exist inside the Control Box.
Contact dealer for a complete circuit troubleshooting test. In the mean time, Mode Switch can be set to “MANUAL” and careful harvesting can be carried out. BE SURE to avoid overfeeding the Harvester, since the reverse capability of the unit is temporarily deactivated in manual mode.
The Feed Rolls and Attachment are stopping and the Horn
PTO speed dropped below 670 RPM.
Decrease the ground travel speed or windrow size and/or increase the length of cut. is sounding. Check Speed Monitor operation.
Field Operation
High horsepower required. Knives are NOT sharp. Sharpen the Knives per details in Service chapter.
Shear Bar is worn excessively. Rotate Shear Bar to the second sharp edge, or replace the Shear Bar. Then, resharpen Knives.
Shear Bar is NOT set up to Knives. Correctly adjust Shear Bar to Knives. Blower is gummed up. Remove the gum and dirt by either scraping it out or by running very wet forage or freshly cut crop through it or obtain, install and use an accessory Water Tank system.
Length-of–Cut is too short for the power available.
Crop Processor Rolls set too close together.
Increase the Length-of-Cut.
Use largest gap between Rolls that still cracks the kernels.
Harvester is sidetracking.
Wagon Hitchplate is positioned too far to the right.
Row Crop Attachment Shoes are dragging or plowing.
Harvester is sidetracking. (Cont.)
Row Crop stubble is too long.
Move the Hitchplate to the left.
Raise the Downstop position on the Harvester Lift to keep Shoes off the ground.
Tires are sinking into the soil. Obtain and install Flotation Tire Axles.
Tires are sliding sideways with Single Wheel Axles.
Harvester is being operated with the Tongue too far to the left.
Harvester and/or wagon tires are running on top of the row.
Obtain and use Tandem Axles.
Move the Tongue closer to the row.
Reposition the Tires and Wagon Hitchplate to move between rows; see details in Adjustments chapter.
Tires are running on the rows. Reposition the Tires per details in the Adjustments chapter.
FIELD OPERATION (continued)
PROBLEM CAUSE REMEDY
Row Crop stubble is too long (cont).
Harvester Downstop position is set too high. Adjust the Downstop position per details in the Adjustments chapter.
Harvester Frame is set too high. Lower the Frame by moving the Wheel Spindles up.
Knife Sharpener
PROBLEM CAUSE REMEDY
Knife width uneven. Sharpener is grinding more on one side of Knife than other.
Level Sharpener Carriage to Cylinder per instructions in Service chapter.
Knives not set to Adjustment Rod properly. Readjust Knives.
Uneven Stone Speed. Pull Stone across Cylinder at even speed.
Sharpener pulls hard. Dirt accumulation on Rails. Clean Rails.
Clearance on Rear Rail not properly set. Set Slide Block to attain 0.010 inch (0.25 mm) clearance.
Stone breaks. Stone not held tight in Sharpener. Install per instructions in Service chapter. Advance rate of Stone too high. Reduce advance rate.
Improper Cylinder RPM. Operate tractor PTO at or above 900 RPM.
Sharpener Stone does not advance.
Ratchet Pawl not properly positioned. Adjust Pawl per instructions in the Service chapter. Adjusting Screw threads rusty or damaged. Repair or replace threaded components.
Rotating torque of Adjusting Screw too high. Remove Shims as necessary to attain a rotating torque range of 50 to 120 in lb (5.7 to 14 Nm).
Sharpener Carriage not traveling far enough. Clear obstructions on Rails or right side Mounting Brackets.
Sharpener Stone advances too easily.
Rotating torque of Adjusting Screw too low. Add Shims as necessary to attain a rotating torque range of 50 to 120 in lb (5.7 to 14 Nm).
Lift System
Attachment lift height is NOT correct. Attachment is raising too high or dropping too low.
Adjust the the Lift Height Cam per details in the Adjustments chapter.
Row Attachment lowers too far. Adjust the Downstop properly. Attachment will NOT lower. Check for Transport Pin interference. Too much tension exists on Lift Spring.
Metal Stop
NOTE: The Speed Monitor MUST be disconnected to do all Metal Stop System tests.
Problem Cause Remedy
Nothing happens when Harvester Control Box Switches, for the Feed Rolls, are moved.
Keyswitch is OFF. Turn Keyswitch ON.
Mode Switch is OFF or in “MANUAL” position.
Turn Mode Switch to “AUTO” and leave it in the “AUTO” position.
Circuit Breakers are open. The power wire MUST be connected to the “POS” and the White wire MUST be connected to the “NEG” battery connections. The tractor MUST have a negative ground system. Check all Plugs for corrosion problem or contact your Gehl dealer for additional help.
Buzzer comes on & Light flashes when Mode Switch is in “AUTO” and Feed Roll Selector is moved to “Forward.”
Metal Stop system is NOT on. Reset system by shifting Feed Rolls into reverse. Harvester Light will go off when system is reset.
Stop Pawl is stuck in Ratchet Wheel. Engage PTO with tractor running at idle. Reset system by shifting Feed Rolls into reverse until Rolls move. Harvester Light will go off when system is reset.
Fuse is blown. Check Fuse in Amplifier Box. Replace with a 1 ampere type AGC Fuse only. Do NOT use Slow-blow type Fuses.
Stop Pawl can NOT travel freely on Pivot.
Disconnect Spring and let it hang from Pawl. Pawl should move easily with the touch of a finger. If it does NOT, clean Pivot Shaft and Pawl bore. Pack Pawl bore with lithium grease. Coat Pivot Shaft with lithium grease. Reassemble and check for freedom of movement.
Buzzer comes on & Light flashes when PTO is engaged. (Mode Switch is in “AUTO” position and Feed Roll Selector Switch is in “Forward” position.) Stop Pawl Solenoid is NOT retracted.
Open wire to Pawl Solenoid. Check for corroded or loose connections at Pawl Solenoid.
METAL STOP (continued)
NOTE: The Speed Monitor MUST be disconnected to do all Metal Stop System tests.
Problem Cause Remedy
Buzzer comes on & Light flashes when Mode Switch is in “AUTO” position and Feed Roll Selector Switch is moved to the “Forward” position (continued).
Low voltage at the Pawl Solenoid. Manually hold the Stop Pawl away from the Ratchet Wheel. Set the Control Box Mode Switch to “AUTO”. Shift into reverse to reset. If Harvester flashing Light goes off, but everything else works, the voltage is too low for the Pawl Solenoid to retract. The voltage across the Pawl Solenoid terminals on the Harvester MUST be NO less than 7.5 volts. A lower voltage could be caused by one of the following:
1.Low battery voltage.
2.The Power Cable is connected through the tractor wiring harness rather than directly to the battery or starter.
3.Corrosion in any of the Plugs between the battery and the Pawl Solenoid. Contact your Gehl dealer for a complete system checkout.
Shorted Pull Coil in Pawl Solenoid. Disconnect wire #19 from Solenoid. Shift into reverse. If Harvester Light goes off, everything else works except Pawl Solenoid. If none of the preceding steps correct the problem, contact your local Gehl dealer.
Declutch Circuit is grounded outside Amplifier Box.
Unplug Amplifier Box Harness. Move Mode Switch to “AUTO” and Feed Roll Selector Switch to “Forward.” If this makes the Control Box Buzzer come on, the problem is NOT in the Metal Stop system.
Declutch Circuit is grounded inside Amplifier Box.
Harvester Light does NOT come on when Mode Switch is moved from OFF to AUTO.
Unplug Amplifier Box Harness. Move Mode Switch to “AUTO” and Feed Roll Selector Switch to “Forward”. If Control Box Buzzer stays off, the problem is in the Amplifier Box. Contact dealer for complete system checkout.
Faulty Bulb. Checkout Bulb for open filament. When replacing Bulb, obtain locally and use a #1156 turn signal bulb.
Corrosion in Bulb Socket. Remove corrosion. Flasher stuck open inside Light Box. Check for open Flasher. Replace Flasher, if defective.
Open wire or corrosion at Terminals. Repair wire or clean Terminals.
METAL STOP (continued)
NOTE: The Speed Monitor MUST be disconnected to do all Metal Stop System tests.
Problem Cause Remedy
Harvester Light does NOT come on when Mode Switch is moved from AUTO to OFF.
Harvester Light comes on but does NOT flash when Mode Switch is moved to AUTO.
Harvester Light does NOT go off when shifting into Reverse when Stop Pawl Solenoid is in “Retracted” position.
Metal Detector does NOT reset. Amber Light comes back on after releasing “Hold for Reverse” Switch.
Poor ground connection.
Thoroughly clean off paint or corrosion at Lamp mounting screws. Clean off any paint or corrosion at the threads of the Light Box mounting studs. Contact your Gehl dealer for checkout of Light Box components.
Flasher is stuck closed. Replace Flasher in Light Box.
Open Ground wire from Light Box Relay.
Thoroughly clean off any paint or corrosion at the threads of the Light Box mounting studs
Foreign material and/or water on Terminals on right side of Amplifier Box.
Harvester Frame is NOT grounded to negative post of the battery used with the Control Box.
Thoroughly clean and dry Terminals. Make sure Terminal Cover is installed.
If Control Box is connected to a tractor battery, that tractor’s drawbar MUST be attached to, and supporting the weight of, the Harvester’s Tongue.
If the Control Box is connected to a separate (or independent) battery, a battery jumper cable MUST be connected between the Harvester’s Frame and the negative post of of that battery. Do NOT connect anything to the positive battery post except the Red Wire from Control Box.
Metal is NOT being detected during testing (after Metal Stop system is turned on).
Test object does NOT contain iron. Use steel or iron test object.
Buzzer does NOT come on during testing. Stop Pawl moves and Harvester Light flashes.
Test object is being moved too slowly.
Broken wire in Detector Shielded Cable or faulty Detector.
Feed Roll Selector Switch is NOT in “Forward” position.
Move the test object past the top of the Lower Front Feed Roll rapidly. Move object in the same direction that the crop moves (NOT sideways).
Inspect Cable for breaks. Repair Cable following instructions in Service chapter. If system still does NOT operate, contact your Gehl for complete system checkout procedures.
Move Feed Roll Selector to “Forward” position to do this test. Buzzer does NOT operate in “Neutral” or “Reverse.”
METAL STOP (continued)
NOTE: The Speed Monitor MUST be disconnected to do all Metal Stop System tests.
Problem Cause Remedy
Metal Stop System false alarms when Harvester is NOT running.
Power wire momentarily opens. Reset system. Wiggle wire and Plugs to find a loose connection in wire #9, between Control Box in tractor and Amplifier Box on Harvester. Repair the wire or Plug connections.
Ground wire momentarily opens. Unhook tractor from Harvester and drive away a short distance (6 to 12″ {300 to 600 mm}). Disconnect everything between Harvester and tractor except the electrical Harness. Reset the system. If it does NOT reset, there is an open in the “GND” wire between the Amplifier Box and the negative (–) post of the battery. Search for the break in the wire and repair it. If the system resets, wiggle the Harness and Plugs containing wire “GND.” Do this from the Amplifier Box to the negative (–) post on the battery. When the system trips, you have wiggled the portion of the Harness that has a break in it. Repair the break.
Two-way radio interference. System may be tripped by a transmitting radio depending on the distance and strength of the signal.
Loose or incorrect connection of Shielded Cable to Amplifier Box.
Open Cable to Detector.
Check connections marked “Black” and “Clear” at the right end of the Amplifier Box. The Cable should be on the correct screws and be tightly secured.
Inspect Cable for breaks. Repair Cable following instructions in Service chapter.
Metal Stop system false alarms when Harvester is running without crop in it.
Metal Stop System false alarms when Harvester is running with or without crop in it.
Steel foreign object wrapped around or wedged into Feed Rolls.
Inspect Feed Rolls and remove steel foreign object. Check everything listed with Problem “Metal Stop system false alarms with Harvester NOT running”.
Metal filings on Feed Rolls from sharpening Knives.
Loose electrical Plugs going into or coming out of Control Box.
Wash filings off Feed Rolls with water.
Secure Wire Harnesses so that they do NOT pull away from Control Box.
Loose wire on Stop Pawl Solenoid. Check wires and tighten Screws at Stop Pawl Solenoid.
Loose Brushholder on Electric Clutch.
Check inner half to see if it is loose at end of Clutch Shaft. Carefully, re-tighten against end of Clutch Shaft. Check outer Brushholder Housing to see if it is loose on its Bearing. If loose, replace Brushholder.
METAL STOP (continued)
NOTE: The Speed Monitor MUST be disconnected to do all Metal Stop System tests.
Problem Cause Remedy
Metal Stop System false alarms when Harvester is running with or without crop in it (cont.).
The Metal Stop System is receiving false signals.
To determine if Metal Stop is receiving false signals, proceed as follows:
1.Disconnect the 5-way Metal Detector Plug, inside Feed Roll Drive Frame. Tape over the ends of both Plugs.
2.Disable the Stop Pawl by connecting the Pawl Spring to the rear. If problem NO longer exists, then problem is in the Metal Stop System, which MUST be handled by your Gehl dealer.
False alarms cause by Rear Feed Rolls.
Incorrect Upper Rear or Lower Rear Feed Rolls.
The demagnetized Upper Rear and Lower Rear (Smooth) Feed Rolls have a letter “D” stamped on both ends of their Shafts. If there is NO letter “D” on the ends of the Shaft, replace the Feed Roll(s). NOTE: This marking does NOT appear on the Upper Front or Lower Front Feed Rolls.
False alarms caused by Lower Front Feed Roll.
Worn or loose components in Lower Front Feed Roll.
Make sure that the Harvester is stopped and the tractor engine is off. Disconnect the Chain that drives the Lower Front Feed Roll. Reset the system. Spin the Lower Front Feed Roll. It should turn freely without any noise. If the system trips, contact your Gehl dealer for repair on the Lower Front Feed Roll.
Bent Drive Shaft or Roll at Lower Front Feed Roll.
Incorrect repair welds on Lower Front or Upper Front Feed Rolls.
Visible flexing of the Feed Roll Sidesheets while the Feed Rolls are running indicates excessive Shaft runout on the Lower Front Feed Roll. Contact your Gehl dealer for checking the Lower Front Feed Roll.
Almost all welding electrodes (including many stainless steel electrodes) contain too much iron. Welds that contain iron will trip the Detector. Repair welds should be done by a qualified welder under dealer direction.
Badly damaged/deformed Feed Roll. Replace Feed Roll.
Main Drive Shear Bolts are failing.
Pto Drive
Tractor PTO is being engaged at too fast an engine speed.
Engage the PTO at a slower engine speed.
Shear Bolts are too loose. Tightly secure with Lock Nuts. Incorrect Shear Bolts. Replace with correct Shear Bolts.
Main Drive Shaft vibrating excessively.
Transmission Shaft is bent. Straighten the Shaft to within 0.015″ (0.38 mm) or replace Shaft.
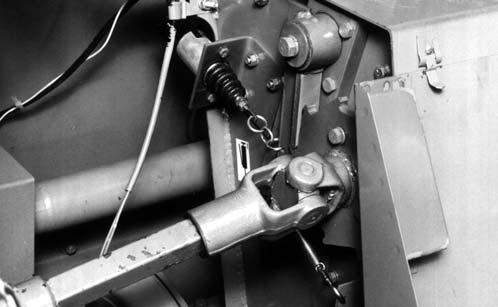
Telescoping Drive Spline, attaching to tractor PTO shaft, is worn. Replace the splined Yoke.
Entire Drive Line timing is out of phase.
Correct timing so that 1st, 4th & 6th Yokes are in phase; see Drive Line Alignment detail drawing in Preparing for Field Operation chapter.
Tubular Drive Line is bent. Tubular Drive Line MUST be straight or it must be replaced. See your Gehl Dealer for assistance.
Universal Joint is noisy.
Tractor drawbar hitchpin hole NOT correct distance from end of PTO.
Correctly adjust tractor drawbar and install drawbar extension if necessary; see Preparing for Field Operation chapter.
Tractor drawbar is NOT correctly centered. Move drawbar in-line with PTO shaft.
Tractor drawbar free to swing from side to side.
Fasten drawbar to keep side to side movement to an absolute minimum.
Undersized hitchpin. Use 1″ diameter Hitchpin (customer supplied), or equivalent.
Bent Pedestal (Front Bearing Stand). Replace Pedestal. BE SURE that the tractor three-point hitch arms do NOT come in contact with PTO Pedestal. Joint Bearings are worn excessively. Replace the Cross and Bearing.
Auger
Auger is plugged with forage.
Blower is Plugged. Clean out Blower and Auger.
Auger is gummed with crop material. Remove gum by scraping it out or by running very wet forage or freshly cut crop through Harvester.
Crop Processor
Problem Cause Remedy
High horsepower required.
Rolls set too close together. Open Rolls as far as possible and still process the corn kernels.
Length of cut is too short. Use longest length of cut that produces desired particle size.
Crop particles too small. Rolls set too close together. Open Rolls as far as possible and still process the corn kernels.
Length of cut is too short. Use longest length of cut that produces desired particle size.
Crop particles too large. Rolls set too far apart. Move Rolls closer together.
Length of cut too long. Use shorter length of cut.
Belts slip when engaging tractor PTO.
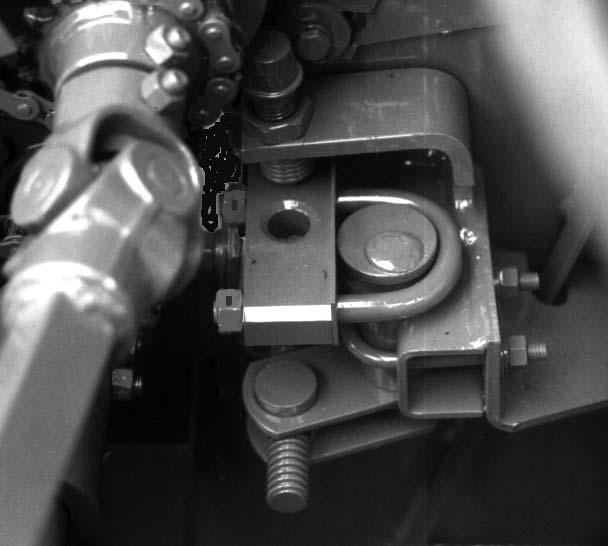
Belt tension not applied. Make sure Belt Idler Spring is properly adjusted. Adjust Spring to its correct length per information in Adjustments chapter.
Spring is not correctly set due to belt wear (including break–in).
Adjust Spring to its correct length per information in Adjustments chapter.
Forage pinched between Rolls. Clean out forage. It only takes a very small amount of forage to prevent the Rolls from starting. ALWAYS let Harvester completely clean out before stopping PTO.
Forage frozen to Processor Rolls and Housing.
Thaw out Processor Rolls. Completely clean out forage from Processor before parking machine in freezing weather.
Processor Rolls are getting chipped teeth or teeth are rounding quickly.
Operating with row crop too close to ground, picking up soil and stones.
Lift row crop higher from ground and use Down Stop to maintain this height.
Harvesting hay. Remove Crop Processor to harvest hay. Running an iron object through Rolls when Metal Detector is disconnected.
Have Metal Detector repaired and operating.
Rolls touching each other. Adjust Roll Stops to attain minimum Roll clearance of 0.020 inch (0.5 mm).


