1 minute read
TAC monitor for conveyor speed sensor ............. 5


TAC monitor for conveyor speed sensor
To replace the conveyor speed sensor TAC monitor:
1. Disconnect power from the machine following all applicable lockout/tagout regulations.
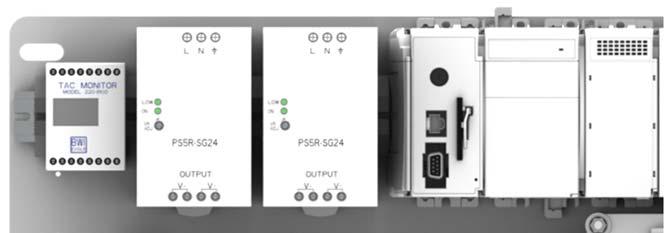
2. Open the control panel enclosure and locate the existing TAC monitor, mounted on the front side of the swing panel (Fig. 75).
Fig. 75: TAC monitor location (typical)
TAC monitor
3. Disconnect the existing monitor and remove.
4. Mount the new monitor on the swing panel. Connect the wires as shown in Table 4.
Table 4: Terminal connections
Terminal Connection Front
1 No connection 2 No connection 3 4-20mA Output - Positive (+) 4 4-20mA Output - Common (1) 5 No connection 6 No connection 7 Sensor Input (+) 8 Sensor Input Common (-)
5. Restore power to the machine.
Terminal Connection Back 9 No connection 10 No connection 11 No connection 12 No connection 13 No connection 14 No connection 15 AC Input (N) 16 AC Input (H)
Setup and display indicators
When power is applied to the TAC monitor, the display will should show the following:
000 RPM - displays the actual value from the remote speed sensor. If “Line Open” is displayed, check the 4-20mA line. The maximum line resistance is 0-500 ohm.
10-XXXX RPM - displays the current speed range of the TAC monitor (10 to XXXX RPM). The display should read 10-100 RPM. If the correct range is not selected, chose the correct range as follows:
1. Press and hold the “SET” button for approximately 4 seconds. The display should now show models from 100 RPM top range to 6000
RPM top range.
2. Using the arrow key, highlight the 100 RPM top range model from the list.
3. With the 100 RPM top range model selected, press and hold the
“SET” button for approximately 4 seconds. The display will now change back to normal operation with eh new RPM range shown on the bottom of the screen.
Note: If a selection is not made with approximately 10 seconds, the display will return to normal operation and will keep the existing model speed range.


