Drive System/Brake System GENERAL INFORMATION
The die-cast aluminum housings have been assembled with thread-rolling screws (trilobular). When assembling with these screws, start the screws carefully into the housing; then use the following torque values: Size
New Housing Reassembled Housing 8-9.5 ft-lb 6.5-9 ft-lb (10.9-12.9 N-m) (8.8-12.2 N-m) M8 (Torx T-40 Recess) 25-31 ft-lb 21-25 ft-lb (34-42.2 N-m) (28.6-34 N-m) M10 (Torx T-50 Recess) 37-45.5 ft-lb 31-38 ft-lb (50.3-61.7 N-m) (42.2-51.7 N-m) M6 (Torx T-30 Recess)
XR329
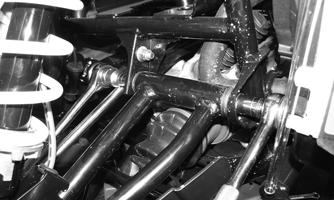
3. Remove the cap screws and lock nuts securing the A-Arm brace to the frame. Discard the lock nuts. Remove the A-Arm brace.
SPECIAL TOOLS
A number of special tools must be available to the technician when performing service procedures in this section. NOTE: When indicated for use, each special tool
will be identified by its specific name, as shown in the chart below, and capitalized. Description Backlash Measuring Tool (24-Spline Axle)
p/n 0544-010
Backlash Measuring Tool (27-Spline Axle)
0544-011
CV Boot Clamp Tool
0444-120
Hub Retaining Wrench
0444-270
Internal Hex Socket
0444-104
Pinion Gear/Shaft Removal Tool
0444-127
Gear Case Seal Installer Tool
0444-224
NOTE: Special tools are available from the Service
Department.
XR330A
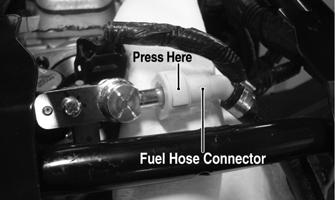
4. Remove the two cap screws and nuts securing the front differential to the frame. Account for the washers and their location. 5. Disconnect the actuator from the main harness. 6. Using a T-30 Torx wrench, remove the mounting cap screw from the driveshaft side of the actuator.
Front Drive Actuator/Differential Lock NOTE: The actuator is only serviceable as an assembly. NOTE: The actuator will operate only when the ignition switch is in the ON position.
The front drive actuator is located on the side of the front drive input housing. With the engine stopped and the ignition switch in the ON position, a momentary “whirring” sound can be heard each time the drive select switch is shifted or the differential lock is activated. If no sound is heard, see Electrical System. If the actuator runs constantly or makes squealing or grinding sounds, the actuator must be replaced. REMOVING
1. Lift the vehicle and support with jack stands; then remove both front wheels. 2. Remove both upper A-arm cap screws and lock nuts. Discard the lock nuts. 116
XR331
7. Lift the differential up to gain access to the cap screw on the suspension side. Remove the cap screw.