4 minute read
1.12 Wipers and washer


NOTE When too low level liquid-sti device washing rear window and corrector disabled. «Coolant level check».
Too little fluid in the engine cooling system.
NOTE In case of interruption of power supply stored in the memory warning messages are displayed alternately, after the power is restored.
NOTICE Since clear review necessary for Security movement regularly check efficiency Wiper and mouthtotal employment washing headlights. it is recommended replace Brushes stekloochisti-ers not less than times in year. When Pollution glasses before turning wipers or device Automatic Control wipers with sensor rain first vospol-syama device washing degree of count to prevent brushes wear wipers. Not switch wipers or device Automatic governance wipers with sensor-com rain at icy Stackcrystals, so as may damaged schet-ki or system management. Recommended separate primerzChiyah wipers with through defrosting spray. Contaminated Brushes empty soft-Coy cloth with application Detergent th and antifreeze funds. Care wipers
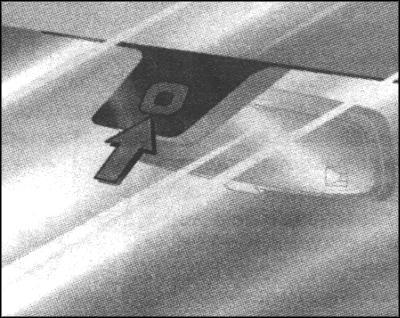
Fig. 1.105. Window Sensor rain
In order to ensure trouble-free operation of rain sensor, window sensor must be clean from dust, dirt and ice, so periodically switch the device washing windows or remove ice from the window of the sensor. Vehicles with rain sensor has a window above the sensor on the windshield (Figure 1.105).
Job wipers
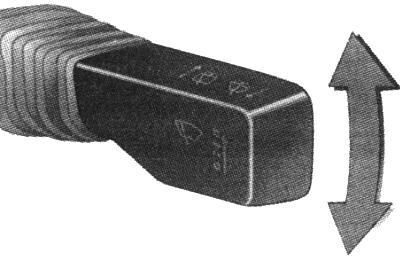
To activate the wipers move the lever up slightly (Fig. 1.106).
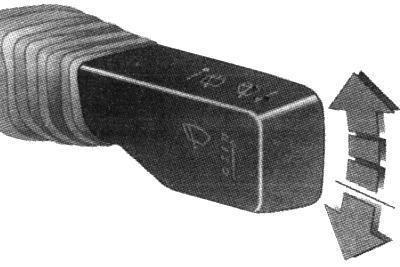
Fig. 1.106. Mode include wipers
The lever always returns to its original position to switch the lever to the next higher or lower stage, slightly move it up or down. To enable a single lever, slide down from the position
Adjustable range of wiper
To adjust the cleanup interval in the range from 2 to 15 with a turn on the ignition, move the lever out of the situation down, wait a while and move the lever in the position of the periodic inclusion. The installed length of the interval treatment remain stored in memory until the next change or until the ignition is turned off. After turning on the ignition and the installation of the lever, the interval inclusion is set for 4 with.
Device Automatic Control wipers with sensor rain
To activate this mode, slide the lever up slightly, then enable automatic management of cleaning with rain sensor. In this mode, rain sensor determines the amount of water on the glass and automatically adjusts the speed of the wipers.
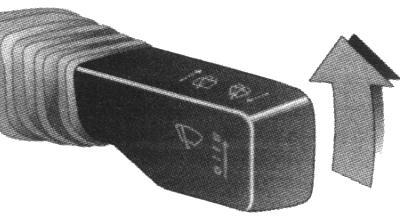
Fig. 1.108. Mode inclusion automatic-agency Management wipers with sensor rain
To turn off the regime pull the lever down.
Inclusion flushing device glasses and corrector
To activate this mode, pull the lever for him. Wipers included several cycles of treatment. At low speed One-time cleaning.
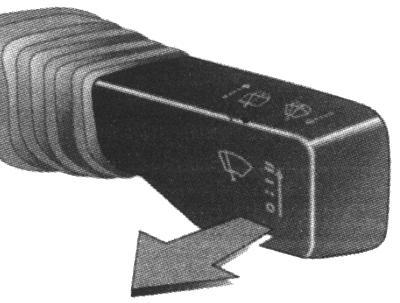
Fig. 1.109. Mode inclusion flushing device glasses and corrector
Cleaning device works when the headlights illuminated. The washing liquid is sprayed on the lights, after which the device is flush headlights off at 2 min.
NOTE On cars with sensor rain should monitor for clean windows sensor. Inclusion wiper and washers rear glass
To activate the wipers push the lever forward (Fig. 1.110).
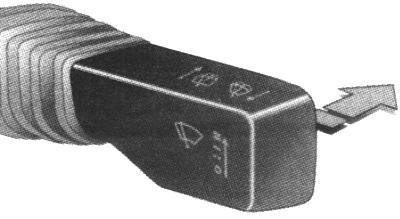
Fig. 1.110. Inclusion work stekloochi-stitelya rear glass
Rear window wiper works in periodic mode. Rear window wiper is automatically enabled when working wipers and going backwards. To activate the windshield of the slide lever forward and hold.
Care for front wipers
Before you replace or clean the brushes front windshield, within 4 seconds after the ignition is turned off, without removing the key, slide down the windshield wiper lever. Release the lever when the windshield wipers will take a vertical position (Fig. 1.111).
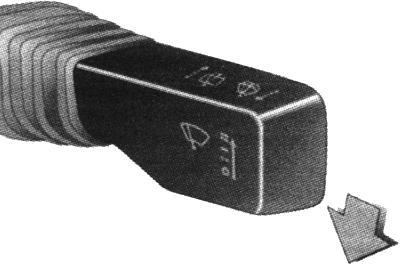
Fig. 1.111. Setup Wiper in vertical position
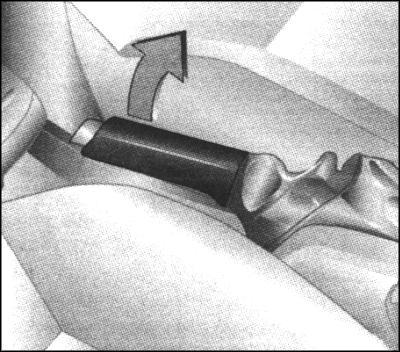
To remove the brushes lift the wiper arm, rotate the brush at 90 to the lever and remove it.
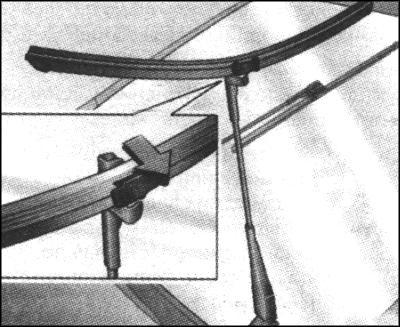
Fig. 1.112. Withdrawal Brushes anterior stack loochistitelya
To remove the brush, lift the rear wiper arm wiper. Disconnect and remove the brush, as shown in Figure 1.113.
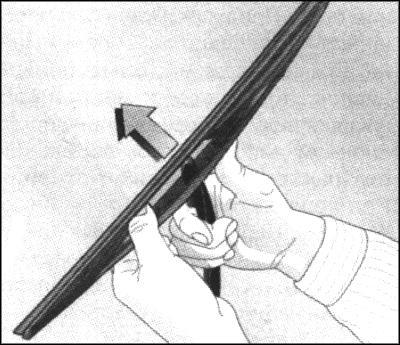
Fig. 1.113. Removing the rear wiper brushes
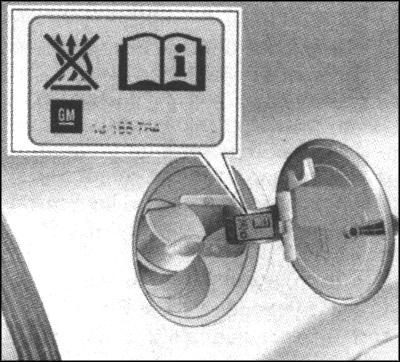
Fig. 1.114. Hatch and cover filler Gore-than half Fuel tank
When replacing only install brand cap, which was released by Opel for the model of the car. Motor vehicles with diesel engines installed a special cover of the fuel tank.
Filling Vehicle Fuel
Before dressing sure to turn off the engine and, if necessary, additional heaters with combustion chambers (indicated on the sticker on the cover fuel filler).
NOTICE In dealing with fuel is not permitted near open flame or spark formation. Do not smoke. This applies also to the places where fuel availability is noticeable only by its characteristic odor. If you smell fuel in the cabin should immediately remove the cause of its appearance.
Filling hole is situated to the right side of the car behind. Filling hatch simultaneously with the doors unlocked. Open the filling hatch by turning the filler cap of the fuel tank, remove it and hang it on the filling hatch.
NOTE The fuel tank has a fill limiter which prevents overfilling of the tank.
To implement the correct filling must be able to handle the nozzle. Insert the nozzle to stop and turn it on. After the automatic shutdown is performed to re-dosed refueling prior to the nominal capacity of the fuel tank. Nozzle, however, remains stuck until it stops. To close the fuel filler lid, set it in place and rotate, overcoming resistance to tangible clicking striker. Close the filling hatch.
Parking Brake