EXPERT ADVICE
2
3
Prop I Up! Irenea Aristigueta is a chef, food photographer, and founder of Florida Bakers Club based in Tampa, FL. Chef Irenea shares her knowledge of food photography with bakers and treat makers to help them showcase their brand with confidence. She graduated from culinary school in 2010 at the top of her class from the Art Institute of Fort Lauderdale. Like many of you, her first love is baking, but her passion is photography.
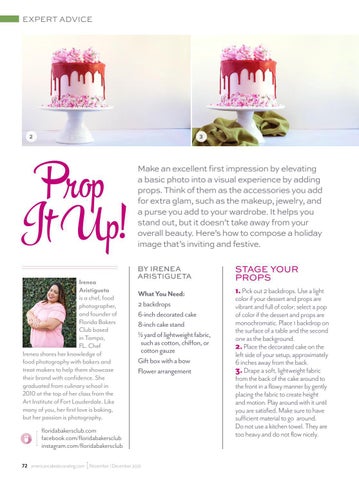
Make an excellent first impression by elevating a basic photo into a visual experience by adding props. Think of them as the accessories you add for extra glam, such as the makeup, jewelry, and a purse you add to your wardrobe. It helps you stand out, but it doesn’t take away from your overall beauty. Here’s how to compose a holiday image that’s inviting and festive. BY IRENEA ARISTIGUETA
What You Need: 2 backdrops 6-inch decorated cake 8-inch cake stand ½ yard of lightweight fabric, such as cotton, chiffon, or cotton gauze Gift box with a bow Flower arrangement
floridabakersclub.com facebook.com/floridabakersclub instagram.com/floridabakersclub 72 americancakedecorating.com November | December 2021
STAGE YOUR PROPS 1. Pick out 2 backdrops. Use a light
color if your dessert and props are vibrant and full of color; select a pop of color if the dessert and props are monochromatic. Place 1 backdrop on the surface of a table and the second one as the background. 2. Place the decorated cake on the left side of your setup, approximately 6 inches away from the back. 3. Drape a soft, lightweight fabric from the back of the cake around to the front in a flowy manner by gently placing the fabric to create height and motion. Play around with it until you are satisfied. Make sure to have sufficient material to go around. Do not use a kitchen towel. They are too heavy and do not flow nicely.


