7 minute read
CHRISTMAS CACTUS


BY TAMMY VARELA
Celebrating Christmas in the desert heat? Make it more festive with this creative cactus! Using fondant and isomalt, bring this prickly ittle character to life, complete with his own Santa hat and string of lights.
LEVEL:
COMPONENTS
Edibles:
Three or four 4-inch round cakes Buttercream Fondant: white, pink, red, black, and pale green (Satin Ice) Edible gel food coloring: peach, ivory, terra cotta, forest green, and red (AmeriColor) Clear isomalt (Simi Cakes) Petal dust: terra cotta, lime green, white, black, neon pink, and yellow (The Sugar Art) Dilution solution Piping gel Alcohol Airbrush colors: red, yellow, and blue (AmeriColor) Oreo cookies
Equipment:
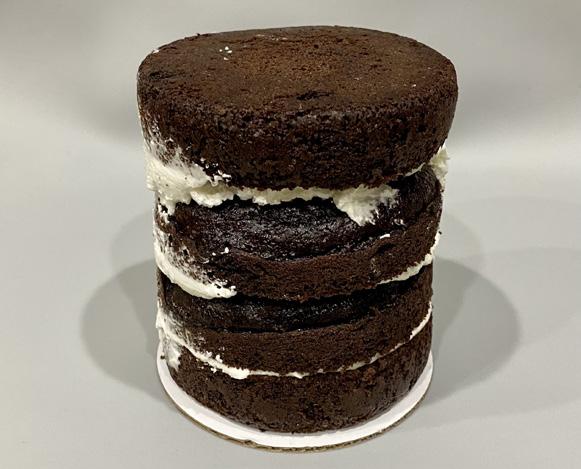
3-inch round cookie cutter Knife Cardboard Rolling pin Fondant smoother Large paintbrush Silicone mat (Simi Cakes) Heat lamp Sugar pump (Simi Cakes) Blowtorch Fan Scissors Wood dowel Flower mold (Simi Cakes) Ball tool Foam mat Silicone bowls Extruding tool Tweezers Holly leaf mold (Katy Sue) Food processor Spoon 1. Stack the 4-inch cakes with buttercream. Refrigerate for a couple of hours. 2. Take a 3-inch cookie cutter and press to make a mark on the cake. Then, take a knife and carve the cake at an angle.
Be sure to use the mark as a guide. The top will be the smallest size, while the bottom should still be at about 4 inches. Then, crumb-coat the cake and place back in the fridge for 15 to 20 minutes. 3. Take a piece of cardboard and use the cookie cutter to draw a circle and cut it out. This will be used for the base of the cake.
4. Turn the cake upside down.
Then, finish coating the cake with buttercream. Be sure it’s completely smooth before placing back it in the fridge for about 30 minutes. 5. Color fondant by using a mix of peach, ivory, and terra cotta
Tammy
Varela, from Cumming, GA, is a selftaught awardwinning cake and sugar artist with a bachelor’s in fine arts. She’s a master at combining sugar and cake to make fun edible art. Tammy is also making her TV debut on Food Network’s Holiday Wars Season 3.
artisticcakedesigns.com facebook.com/artisticcakedesigns instagram.com/artisticcakedesigns1
SHAPE THE TERRA-COTTA POT

gel food colors. Roll out the fondant into a long 6-inch strip. Then, wrap fondant around the cake and smooth.
6. Layer a coating of terra cotta petal dust using a large paintbrush. Be sure some areas have a generous coating and others have a light dusting to create texture.
1
Cactus spines are made from pulled black isomalt.
2
3


4

5

6

CREATE THE CACTUS
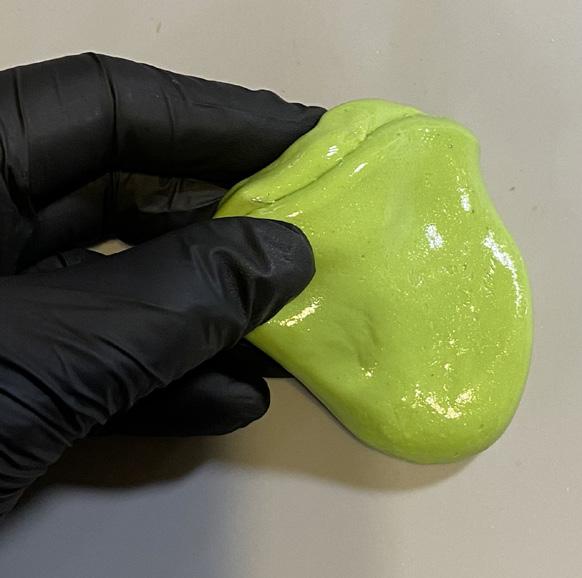
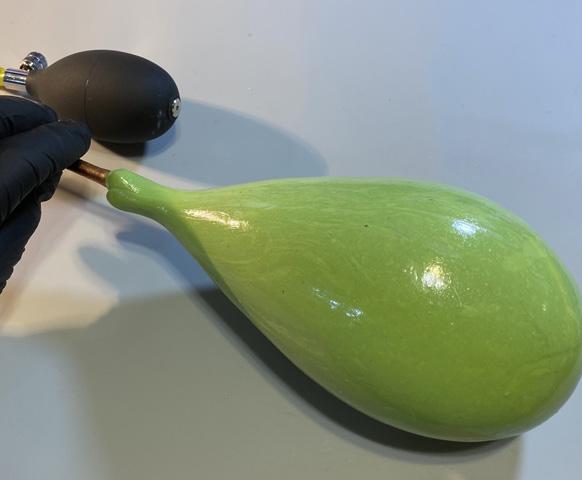
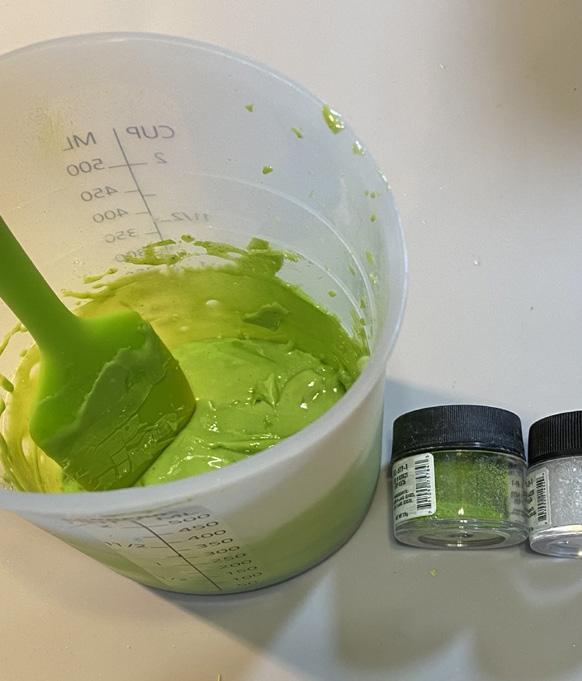
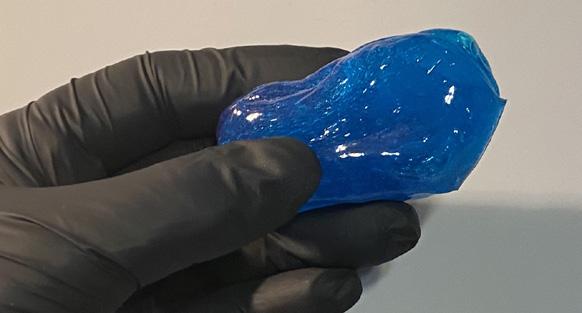
1. Take about 6 ounces of clear isomalt and heat it until it bubbles. Once the bubbles have settled, add some lime green and white petal dust to it. Bring back to a bubble and then let it sit to settle again. 2. Pour the isomalt onto a thin silicone mat and fold it back and forth until it’s thick. It should be able to come off the mat easily in a ball. Then, stretch and pull the isomalt in one direction for 5 to 10 times. Then, place it under a heat lamp until it’s ready to be used.
3. To make the body, cut off a large chunk of the isomalt. Heat the tip of your sugar pump with your blowtorch.
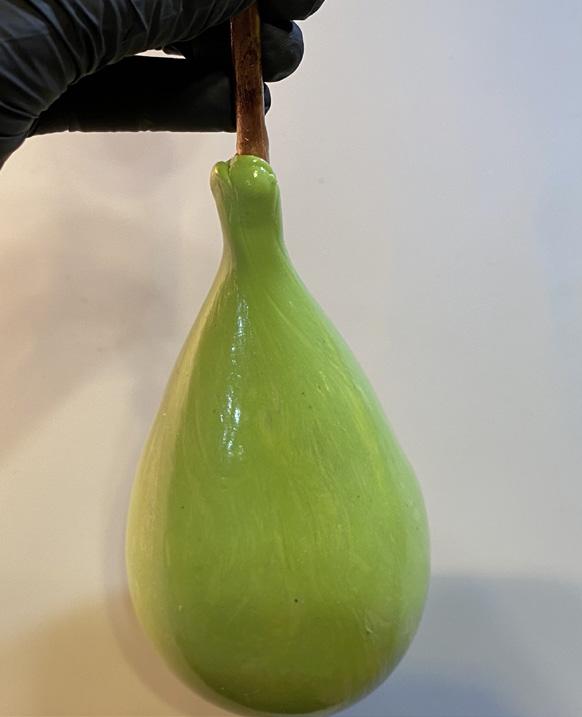
Then, put the isomalt chunk on the tip. Pull some of the chunk down over the sides of the tip and be sure to pinch all the sides. Then, slowly pump one at a time while constantly keeping the chunk moving until the desired pear shape and size is acquired. 4. Cool the isomalt completely by placing it near a fan. Be sure to rotate it so every section gets completely cool.
Blowtorch an area to cut it off, wait about 15 seconds for the heat to absorb, then carefully cut the isomalt with your scissors. Then, use the excess isomalt to attach a wood dowel. This will stabilize the cactus in your cake. 5. Repeat Steps 3 and 4 to form both arms. Then, attach them on either side of the main body using liquid isomalt to adhere them.
6. Paint the face. For the eyes and mouth, use black petal dust mixed with dilution solution. For the cheeks, use a little neon pink petal dust and use your fingertips to apply.
The oils from your fingers will make the dust adhere to the isomalt.
1 2
3
4a
4b

6


FORM THE HAT AND FLOWERS
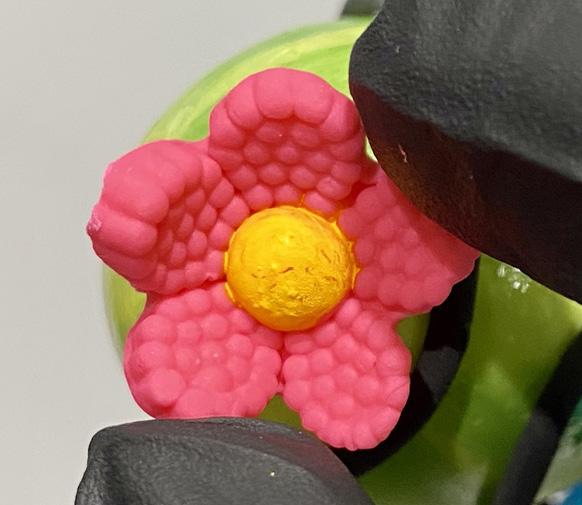
1. Place a small amount of pink fondant in the flower mold and press lightly along the sides of it with a ball tool.
Gently pull the fondant out.
Let it dry on a foam mat.
Repeat to create a second flower.
2. For the hat, take a golf ball–size amount of red fondant and roll in your hands to make a cone shape. Take the tip of the cone and bend it.
3. Place the red fondant on top of the blown isomalt cactus.
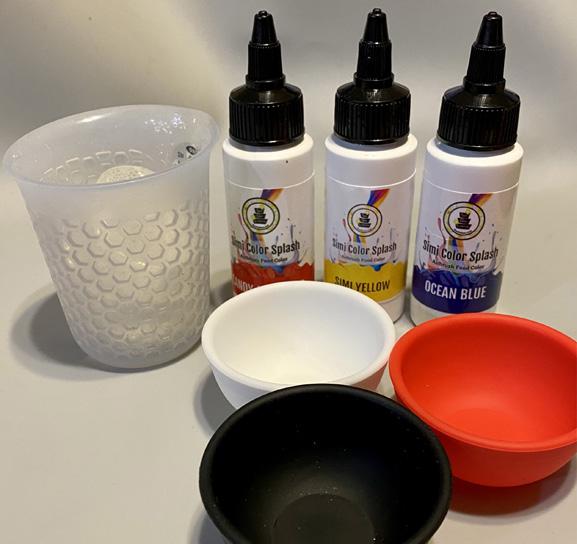
Adhere using piping gel. 4. Take white fondant and roll it out to a long log. This doesn’t have to be perfectly even or smooth since it’s the bottom of the hat. Adhere with piping gel. 5. When the flowers are dry, paint the inner circle with yellow petal dust mixed with alcohol. Then, adhere the flower to the cactus with piping gel. 1. Melt clear isomalt to approximately 300˚F. Divide it into 3 different silicone bowls.
Color 1 bowl red, 1 bowl yellow, and 1 bowl blue using airbrush colors.
2. Pour each color separately onto a thin silicone mat and use the pulling technique.
Once each color is pulled, place them under a heat lamp until ready to use.

1 2
3
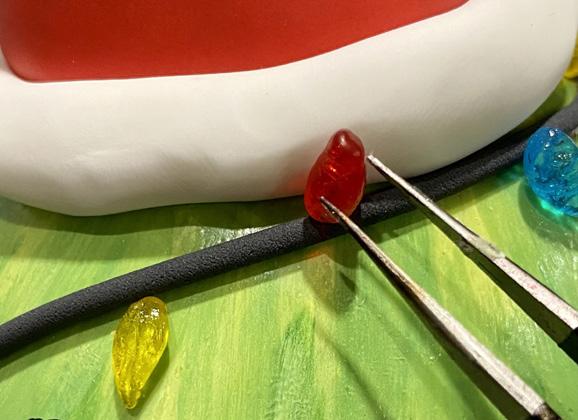
3. To make the lights, cut a small slice of the isomalt. Then, cut that slice in half. Try to make each piece the same size. 4. Use an extruding tool to make a long strand of black fondant for the string lights. Adhere them to the cactus with piping gel. 5. Take each isomalt light bulb and adhere them using piping gel. It’s easier to place them using tweezers.
4 1
2
5
STRING THE LIGHTS
3
4
5


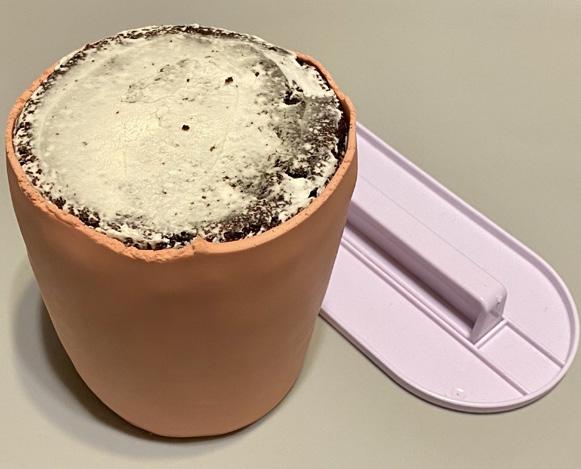
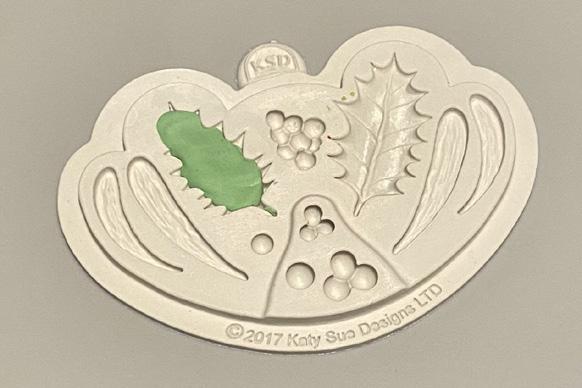
MAKE THE HOLLY LEAVES AND BERRIES COMPLETE WITH POTTING SOIL
1. Press a small amount of pale green fondant into the holly leaf mold. Press red fondant into the berry part. Make about 3 or 4 leaves and 1 clump of berries. 2. Take the leaves and place them on a foam pad to dry at room temperature for 24 hours.
3. Paint the leaves with a mix of forest green gel food coloring and alcohol. Do the same with berries using red gel food coloring. Let them air-dry.
Then, attach the leaves to the pot using a small amount of fondant and piping gel. 1. Separate the cream filling from some Oreo cookies and discard them. Place the cookies into a food processor and grind into a powder. 2. Use a spoon to scoop cookie crumbs onto the top of the cake. Coat generously. ACD

1
2
3 2
Tag us in Your Photos!
FOR A CHANCE TO BE FEATURED ON OUR INSTAGRAM FEED