
3 minute read
CAKE TOP FORWARD


TOP Cake FORWARD
BY DELANEY HUTHSING
Delaney’s Instagram is where the hashtag #caketopforward was first used. She had the idea to flip a cake on its side, where the cake top was facing forward. Hence, the beginning of this technique and its viral hashtag.
LEVEL:
COMPONENTS
Edibles:
2-layer cake Buttercream
Equipment:
Offset spatula 2 cake boards Stencil Sharp knife
Delaney Huthsing
is the cake designer behind Delaney’s Desserts in Santa Barbara, CA. She started caking in 2019 when her husband bought them a cake-decorating class at a local cake supply shop as something fun to do together. She has since developed her own style, which she considers to be modern, minimalist, and elegant. She decorates all her cakes with buttercream and finds joy in trying new things with this medium. As much as she enjoys cake decorating, she actually works a nine-to-five at Direct Relief, a nonprofit in Santa Barbara, where she lives with her husband and baby. Her favorite cakes to make are wedding and event cakes, which she works on in the evenings after she’s home from work and her little one goes to sleep.
delaneysdesserts.com instagram.com/delaneysdesserts tiktok.com/delaneysdesserts COAT THE CAKE

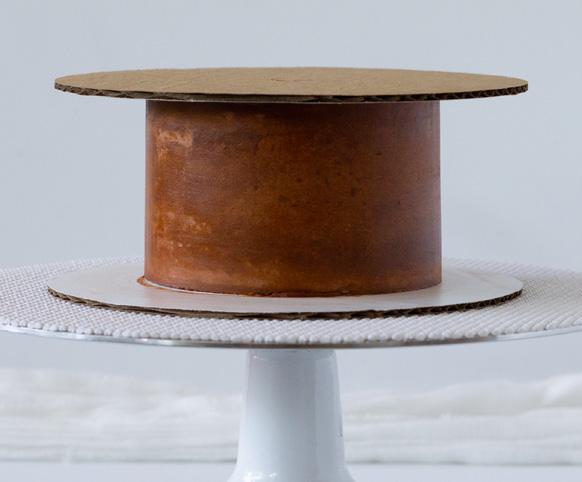
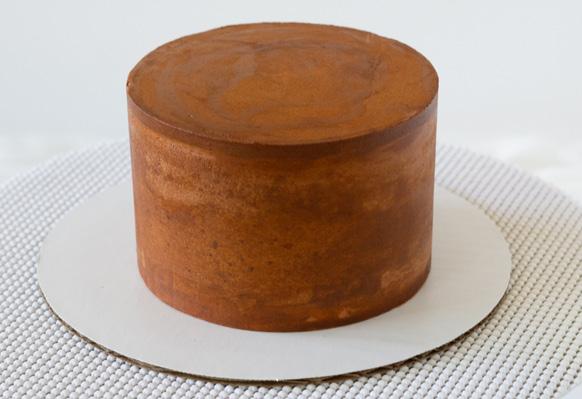
1. Using 2 cake layers, fill and crumb-coat your cake as you normally would and chill for 5 minutes in the refrigerator. 2. Cover the crumb coat using the buttercream color of your choosing, focusing on creating a smooth top and edges. Chill your cake in the freezer for 10 minutes.
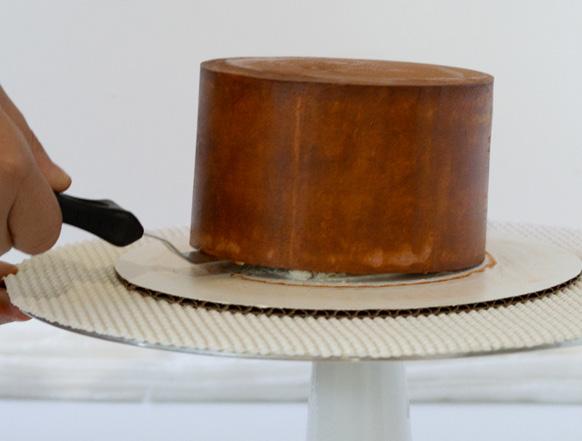
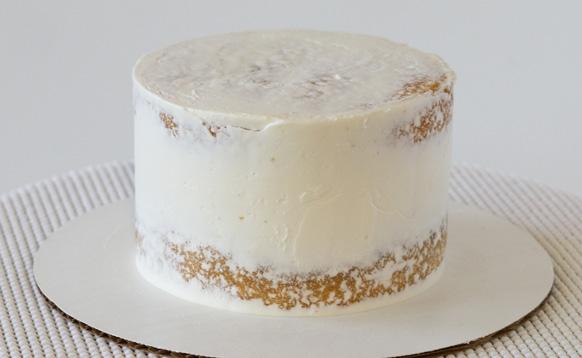
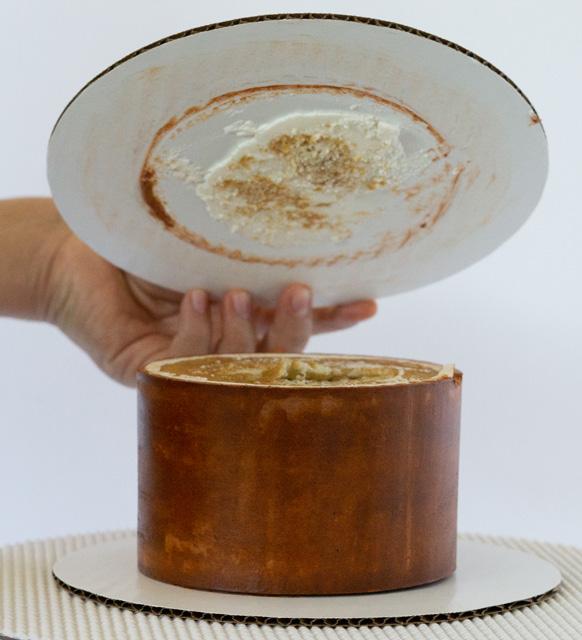
3. Run your spatula along the edge of your cake and the cake board, preventing any chunks from being removed. 4. Place a cake board on top of your cake. Pick up the cake and flip it over so that the bottom is now on the top. 5. Carefully remove the cake board from the top of the cake, exposing the unfrosted cake.
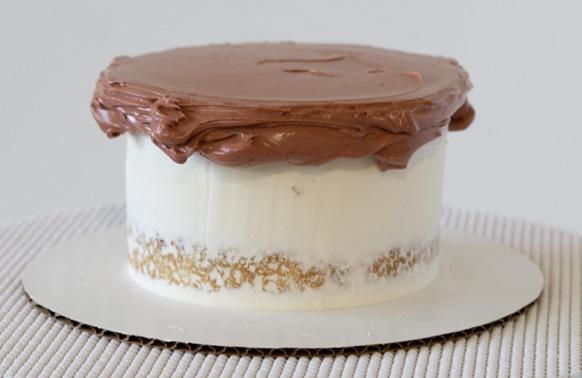
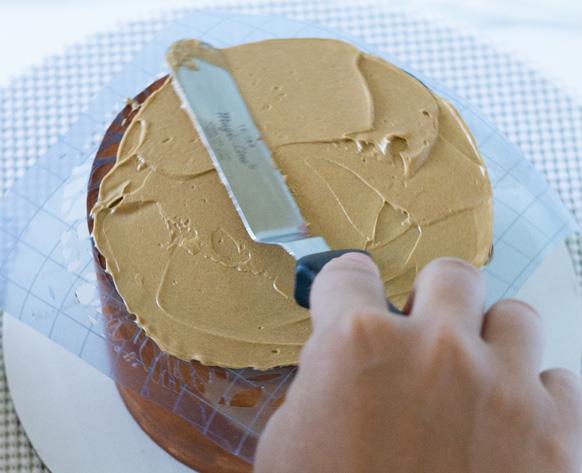
6. Cover the new top of the cake with buttercream, creating a smooth finish and sharp edges, as this will be the front of your cake at the end of the process.
WHAT YOU NEED
1
Tip: YOU CAN USE CAKES AS SMALL AS 4 INCHES AND AS LARGE AS 10 INCHES.
Tip: YOU CAN ALSO USE GANACHE, FONDANT, AND WHIPPED CREAM FOR THIS TECHNIQUE.
3
4a
4b

2 5
6
DECORATE THE CAKE
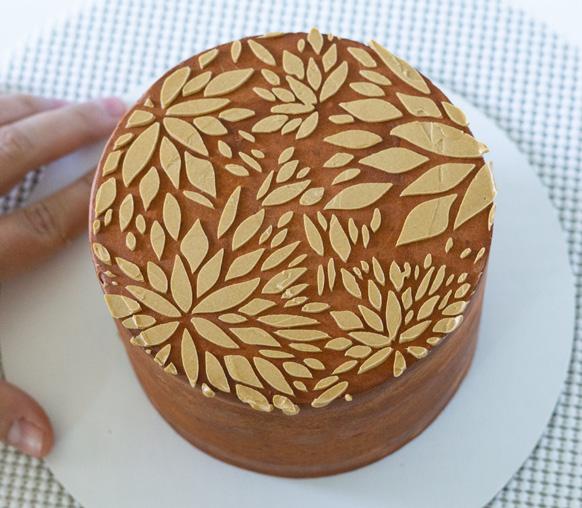
1. While the cake top is still facing up like a normal cake, lay a stencil on the top. 2. Spread a thin layer of buttercream over the stencil.
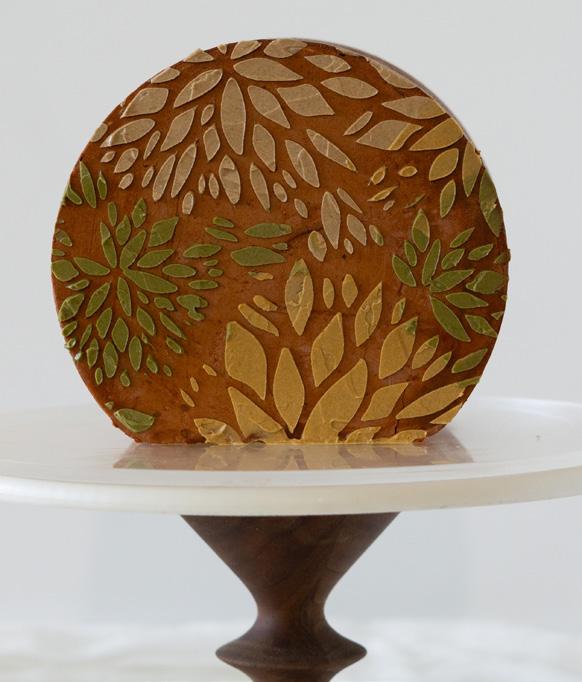
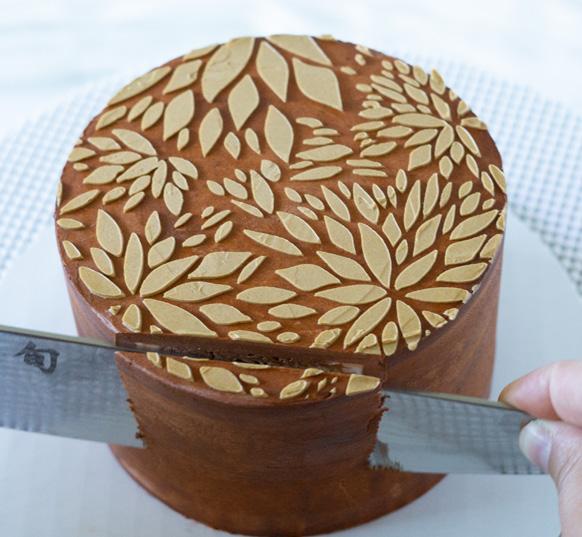
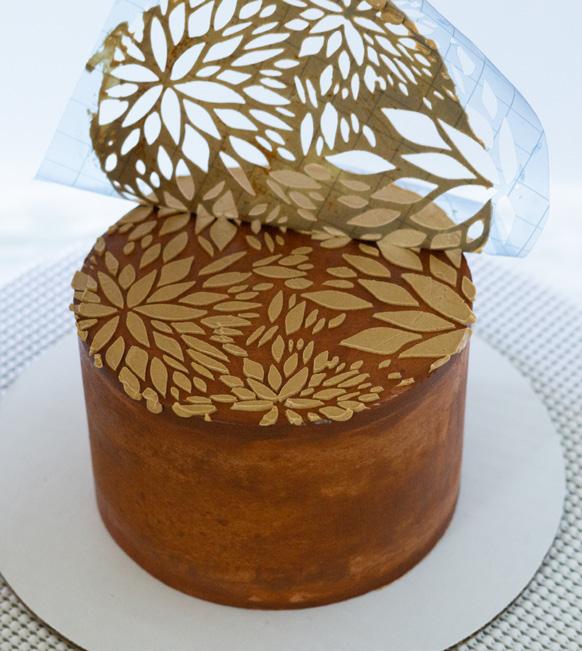
3. Remove the stencil. Chill the cake in the freezer for 5 to 10 minutes, or until firm. 1. Using a sharp knife, cut off a very thin piece of the cake, being careful to hold the knife straight so that the cake will stand level. This step is where some people can go wrong and cut off too large of a piece, taking away from the circular shape of the cake. 2. Using the cake board you want to stage your cake on, press the cake board onto the cut side of the cake and gently tip the board forward, standing the cake up onto the cake board. Using an offset spatula, move the cake to the center of your cake board. 3. Once the cake is standing up, you can continue to add additional decorations, even decorating the back in a different way if you choose!
This is also a great time to add flowers or other decorative elements. Keep the cake refrigerated until about an hour before serving. ACD

1


2
3a 3b
FINISH THE LOOK
1 2
3a
3b
Tip: CUT THIS CAKE BY SIMPLY SLICING INTO IT WHILE STANDING OR TIP IT DOWN TO SLICE AS YOU WOULD ANY OTHER CAKE.


