
6 minute read
SUGAR CHRISTMAS ROSES


SUGAR BY GIOVANNA SMITH
Roses
Helleborus niger is more commonly called the Christmas rose because it blooms in the winter. Learn how to create this classic and elegant gum-paste flower with matching buds and leaves. Giovanna Smith is a multifaceted artist who is continuously pushing the envelope in all areas of her business, keeping her designs and classes fresh and modern. At an early age, Giovanna began her artistic endeavors in Peru under the tutelage of her parents. In 2000, she graduated from the International Culinary Schools at the Art Institutes in Tampa, specializing in the baking and pastry program. Giovanna began Sugar Art Studio as a wholesale distributor of cutters and started teaching private classes in 2011. Her daughter Brenda joined the business in 2012. While taking classes, students see firsthand Giovanna’s unique techniques revealed in sugar flowers, chocolate art, pastries, cake sculpting, and designing. sugarartstudio.com facebook.com/gioscollectionbysas instagram.com/sugarartstudio
CHRISTMAS LEVEL:
COMPONENTS
Edibles:
Gum paste: light yellow and green Petal dust: raspberry, kiwi, lime, magnolia, pink, orchid green, forest green, brick, and wine Edible glue
Equipment:
Floral wire: 22, 24, 26, and 28 gauge Fine scissors Paintbrushes White flower stamens Rolling pin Multipurpose small cutter Dresden tool Razor blade Celboard Helleborus petal cutter and veiner set Ball tool Small egg former Floral tape Helleborus bud molds Helleborus leaf cutter and veiner set
WHAT YOU NEED


CREATE THE FLOWER’S CENTER
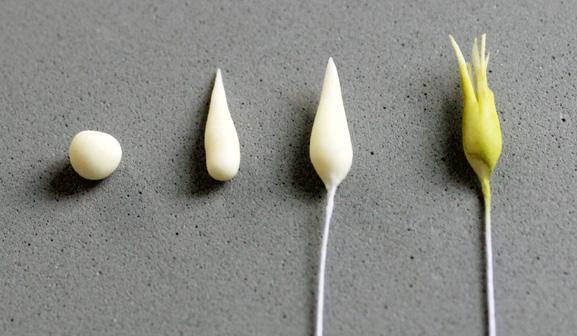
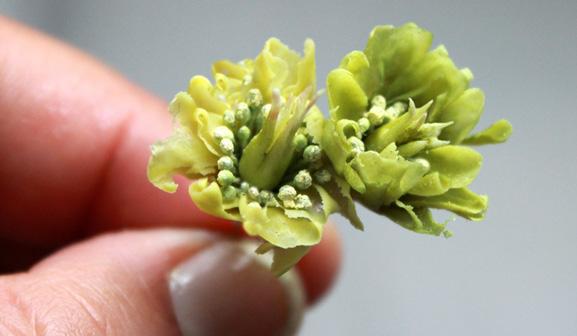
1. Roll a small ball of light yellow gum paste about ¼ inch wide and then shape it into a teardrop about ¾ inch long.
Insert a moistened 28-gauge floral wire halfway into the base of the teardrop, slightly squeezing the base and twisting it around the wire. With fine scissors, snip the tip in half and then in half again to create 4 tips. Brush with raspberry petal dust on the tips and kiwi petal dust on the bottom.

2. Take a small flower stamen bunch, cut it in half, and then brush it with lime petal dust.
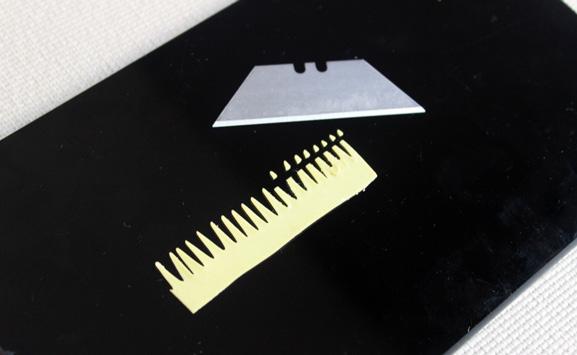
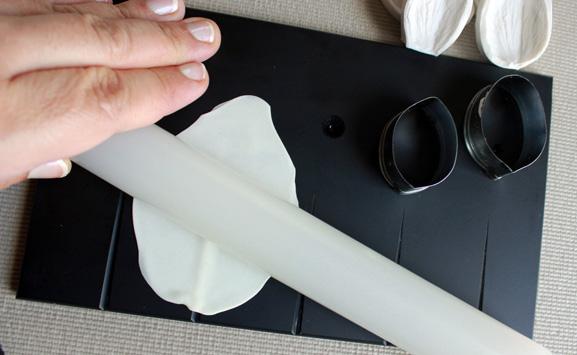
With edible glue on your fingers, touch the stamen tips and dip them into magnolia petal dust to re-create pollen. 3. Insert the wire of the carpel through center of the stamens. 4. Roll out a thin piece of green gum paste and place it on top of the multipurpose cutter. Roll over the gum paste with a rolling pin to make the imprint on the cutter.
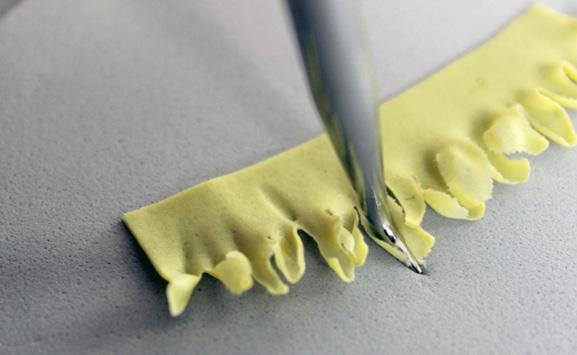
5. Use a razor blade to cut off the tips. 6. Use a Dresden tool to open each tip, moving side to side.
Then, place the tip of the tool on the top part of the petal and go all the way down with pressure so it will cup each petal. 7. Brush the bottom part of the piece with edible glue and wrap it around the center. 8. Brush the tips with lime petal dust and let dry.
1
2
3
4a

4b

5
6

7
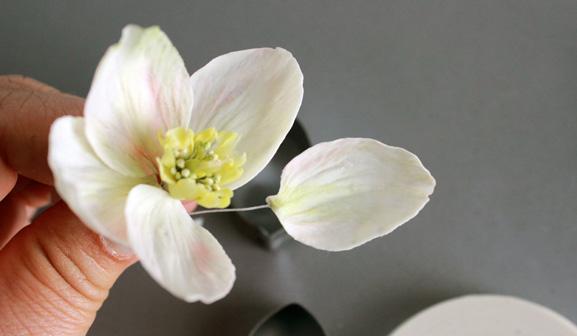
ruffle the top of the petal. 5. Place the petal into the petal veiner and press down. 6. Repeat the process to make 5 petals—2 small and 3 large.
Place the petals into the former and let dry. 7. Brush magnolia petal dust at the center of the petal and add pink accents. Mix orchid and forest green petal dust and then brush the center front, center back, and around the petal. 8. Take 2 of the small petals and place them around the center.
Tape them together with floral tape. 9. Place the 3 larger petals around the center and tape them together with floral tape.

4
5
6
7

1a
8
ASSEMBLE THE FLOWER
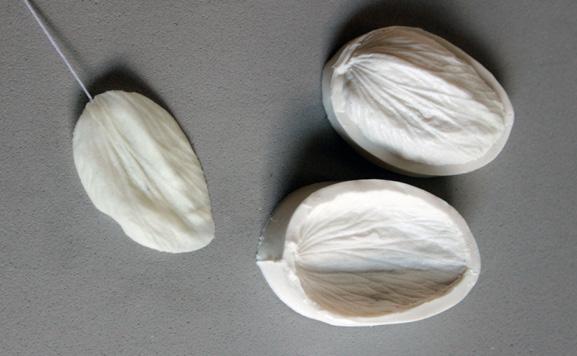
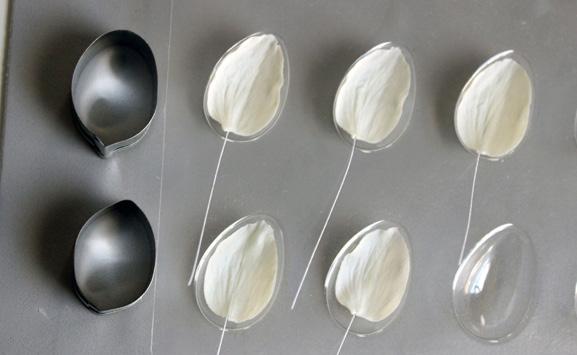
1. Roll a small piece of light yellow gum paste into an oblong shape and roll it out onto a Celboard. Cut out a petal with the petal cutter with a ridge halfway into the petal. 2. Insert a moistened 28-gauge floral wire 1 inch into the petal. 3. Soften the edges with a ball tool.


1b
2
3 8
9
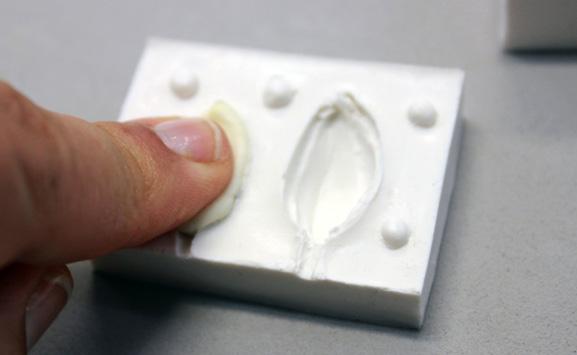
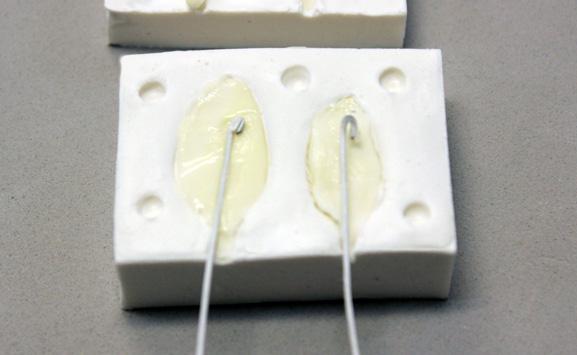
MOLD THE FLOWER BUDS
1. Press some light yellow gum paste into the bud molds until the surface of the mold is full and flat.
2. Form a hook about 1/8 inch at the end of a piece of 24-gauge floral wire, about 3½ inches long. Brush the top of each bud half with edible


glue and place the wire at the top of the bud. 3. Press the parts of the mold together to form the full bud. 4. Open the mold and take the pieces out. Slightly squeeze the base and twist the gum paste around the wire to secure it.

5. Brush the bud with raspberry petal dust at the bottom and add some accents with forest green and lime. 6. Wrap the base with floral tape.
1
2 6
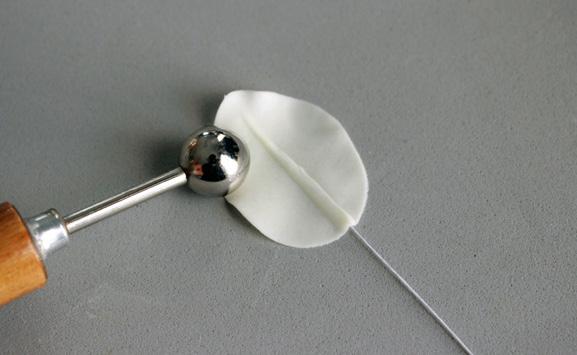
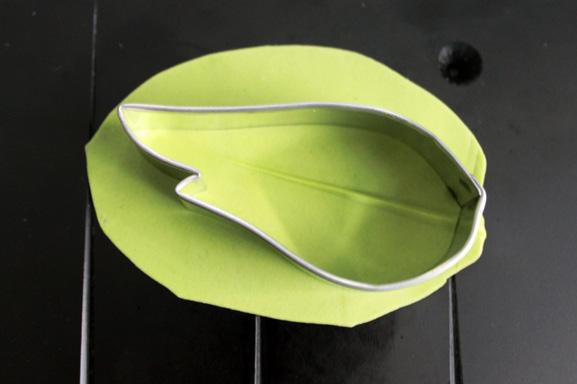
CREATE THE LEAVES
1. Roll a small piece of green gum paste into an oblong shape and roll it out onto the
Celboard. Cut out a leaf with the leaf cutter with a ridge halfway into the leaf. 2. Insert a moistened 26-gauge floral wire 1 inch into the leaf.
3. Soften and frill the edges with the ball tool.
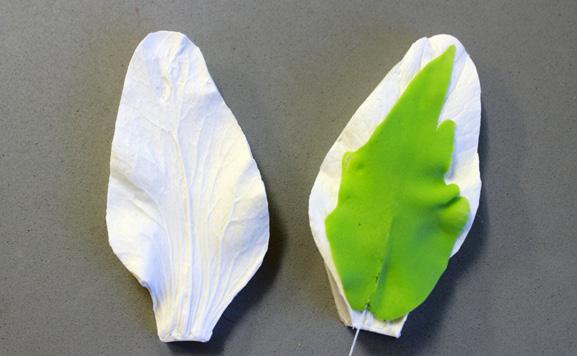
4. Press the leaf with the silicone veiner.
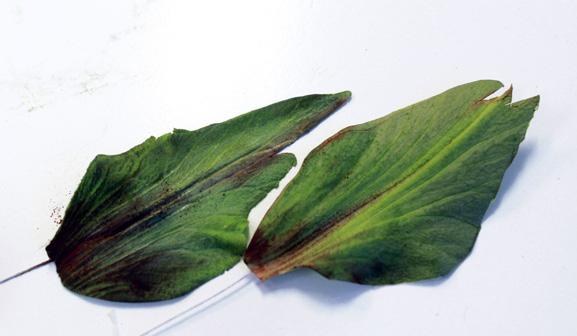
5. Brush the leaf with kiwi petal dust, then brush the edges with forest green. Mix brick and wine together and then brush it on at the bottom part of the leaf. ACD 1. Form a stem using a 22-gauge wire, about 10 inches long.
Tape 2 small leaves around a bud. Leave a 2-inch gap and tape another sent of bud and leaves. Repeat the process but combine flowers and leaves.
Then dust the stem with a mixture of wine and brick petal dust. ACD

3 1a 3a

3b
4
5
ASSEMBLE THE ARRANGEMENT

4
1b


5 2 1


