
H5

HANDY RECORDER EQUIPMENT GUIDE


The XY Microphone
The XY mic included with the can be swapped according to your need with another input capsule.This has two crossing directional mics.
Features
• Shock mount structure minimizes external vibration noise

• Mic can handle sound pressure input of up to 140 dBSPL, allowing it to capture sounds that previous recorders could not
• Three-dimensional sound with natural depth and width
NOTE:
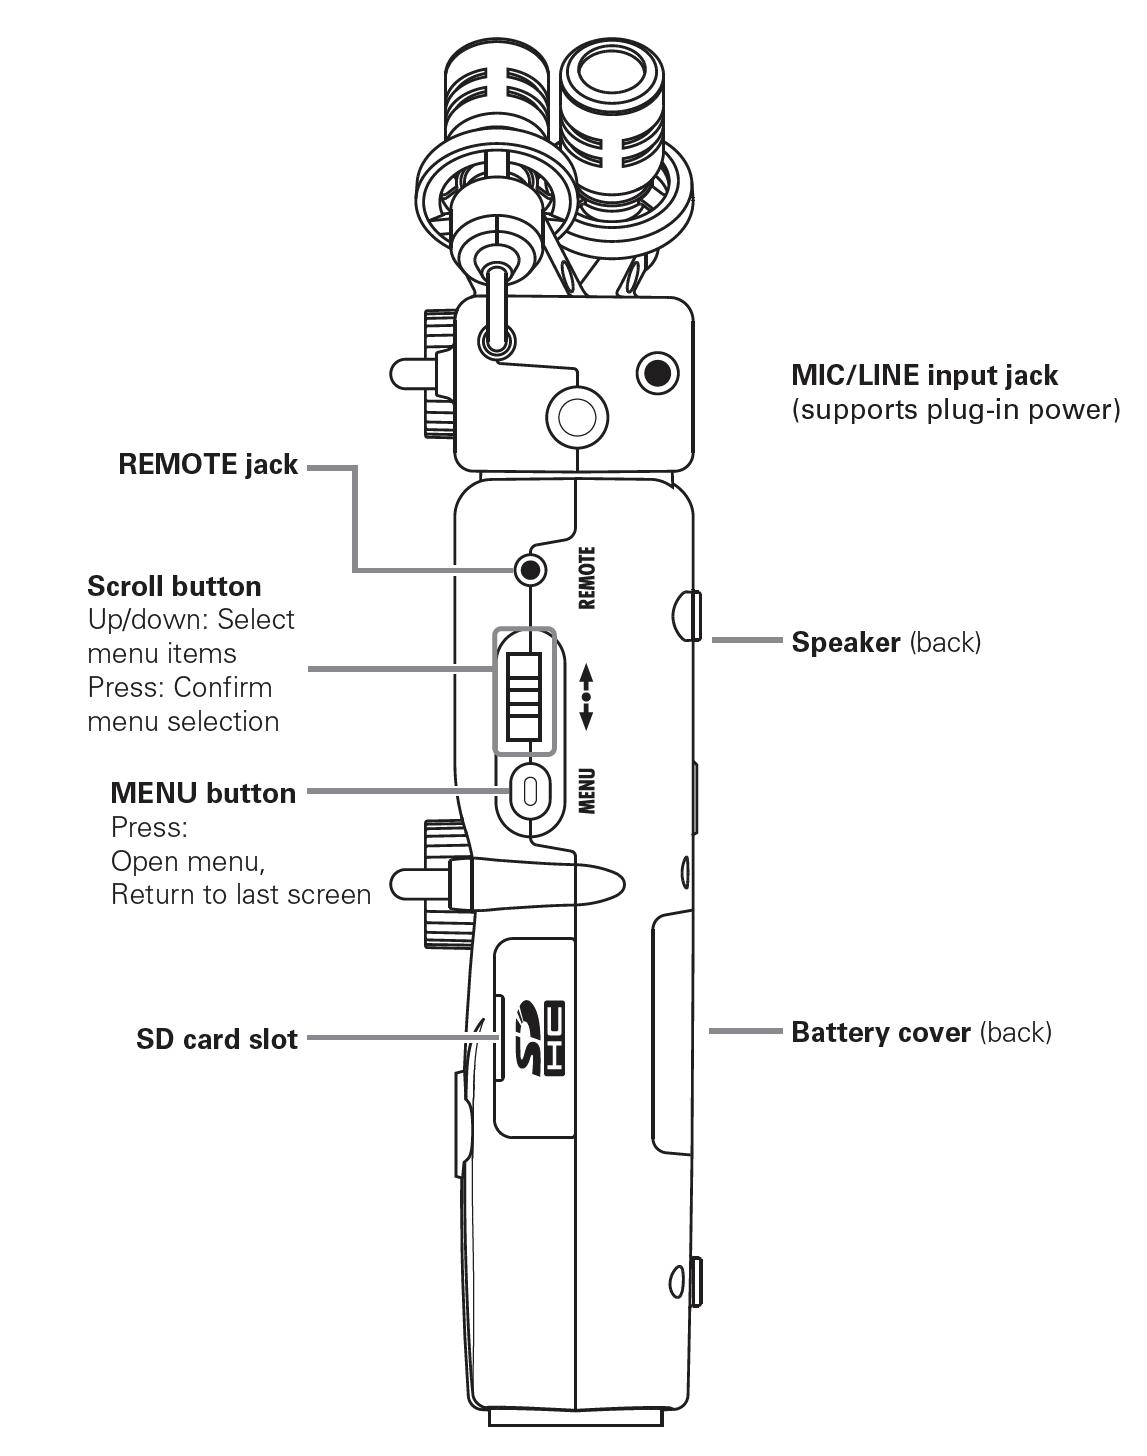
The XY mic has a MIC/LINE input jack that can be used to connect an external mic or line-level device. This jack can also provide plug-in power to mics that use it.
Connecting the Mic to the main unit
While pressing the buttons on the sides of the mic, connect it to the main unit, inserting it completely.


Disconnecting the Mic from the main unit
While pressing the buttons on the sides of the mic, gently pull it away from the main unit.
CAUTION
• When disconnecting a mic, do not use too much force
• Doing so could damage the mic or the main unit
• Recording will stop if a mic is removed during recording
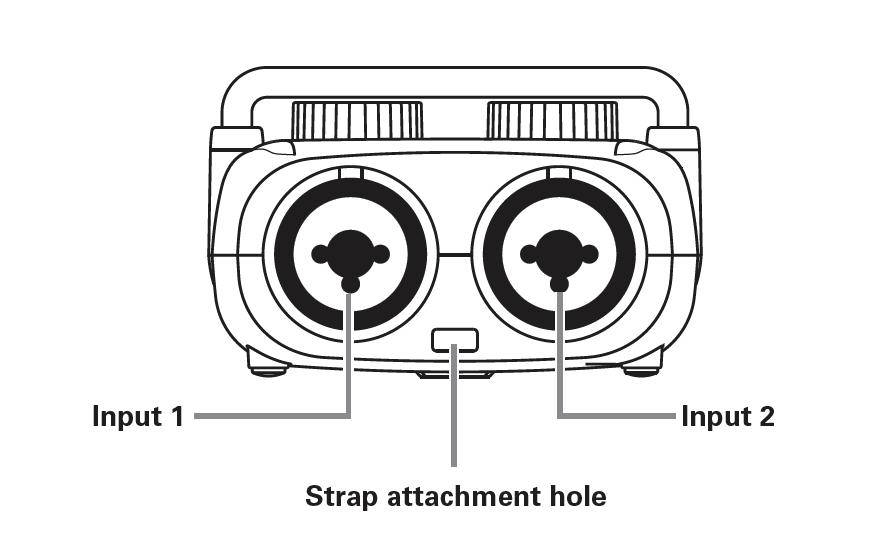
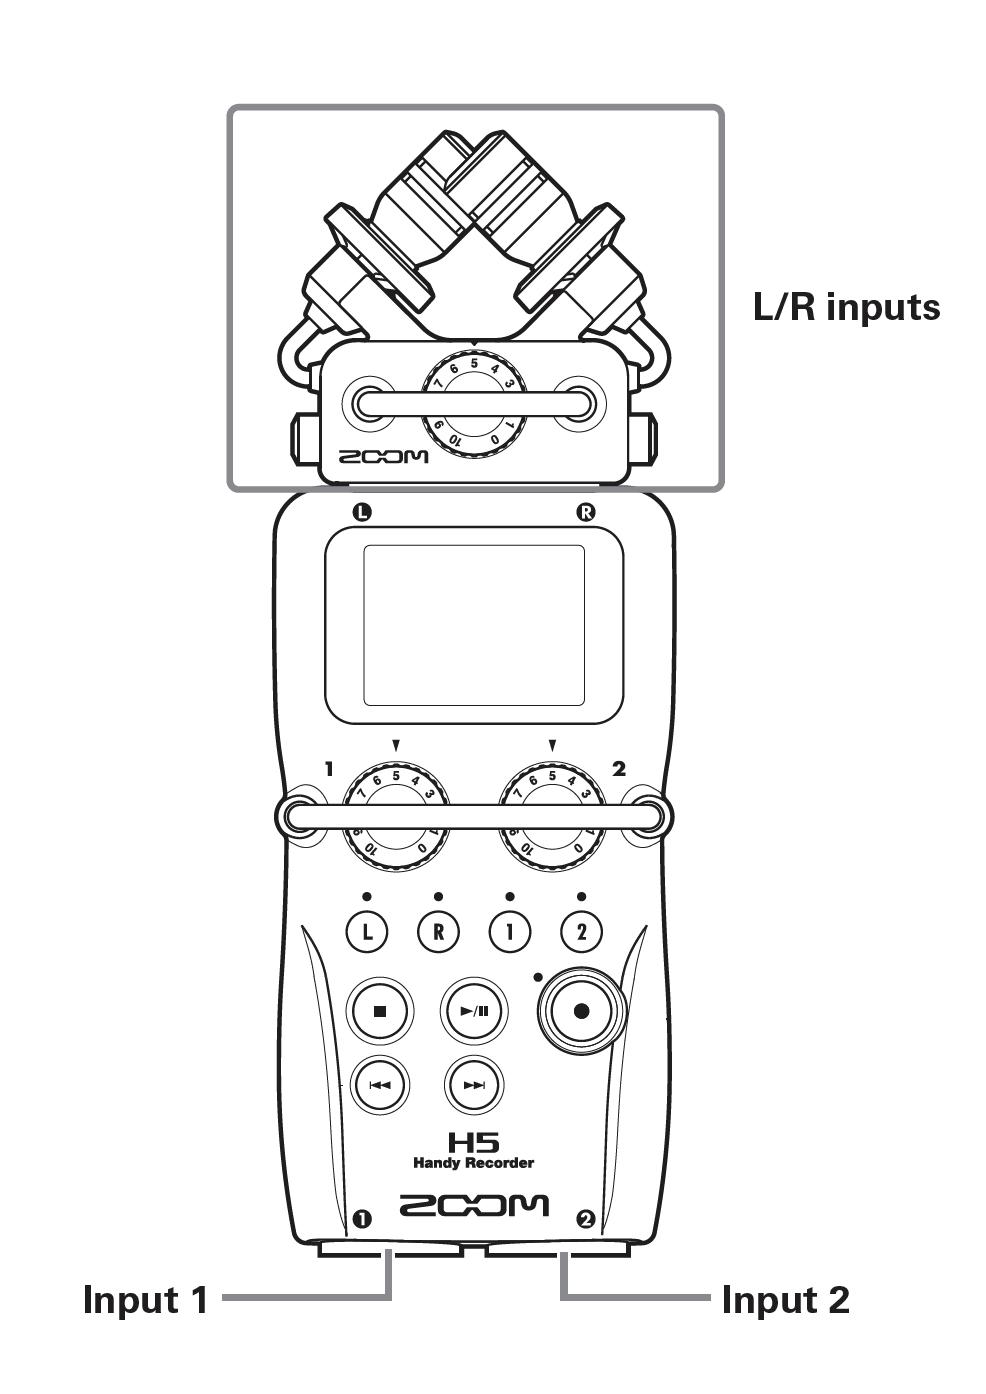
Connecting mics/other devices to Inputs 1 & 2
In addition to the L/R inputs from the XY mic, the also has Inputs 1 & 2. These can be used together to record up to 4 tracks at the same time. You can connect mics, instruments and other devices to Inputs 1 & 2.
Connecting instruments and other devices
Connect keyboards and mixers directly to the Input 1 & 2 TRS jacks.
NOTE: Direct input of passive guitars and basses is not supported. Connect these instruments through a mixer or effects device.
Turn the PAD function ON when connecting a mixer or other device with a standard output level of +4dB
Connecting mics
Connect dynamic mics and condenser mics to the Input 1 & 2 XLR jacks

Supplying power
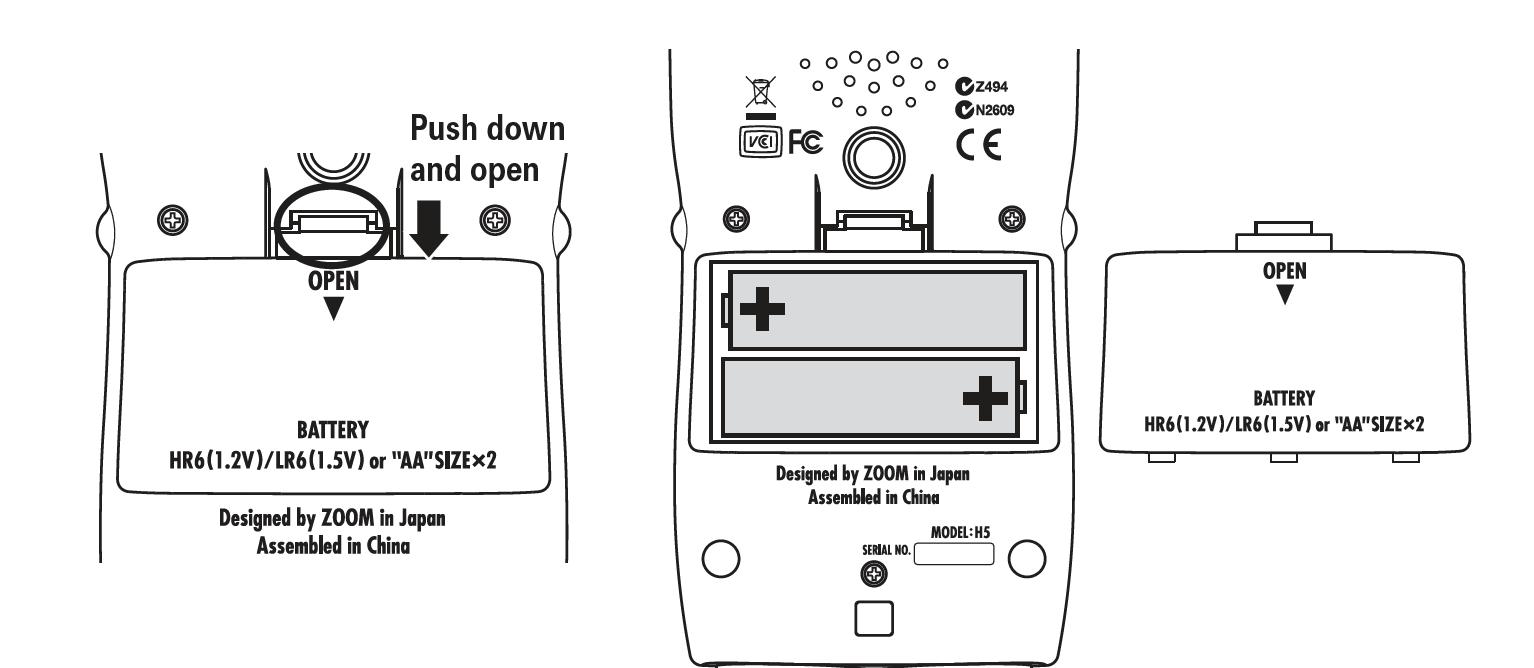
Using batteries
1. Turn the power off and then remove the battery cover
2. Install the batteries
3. Replace the battery cover
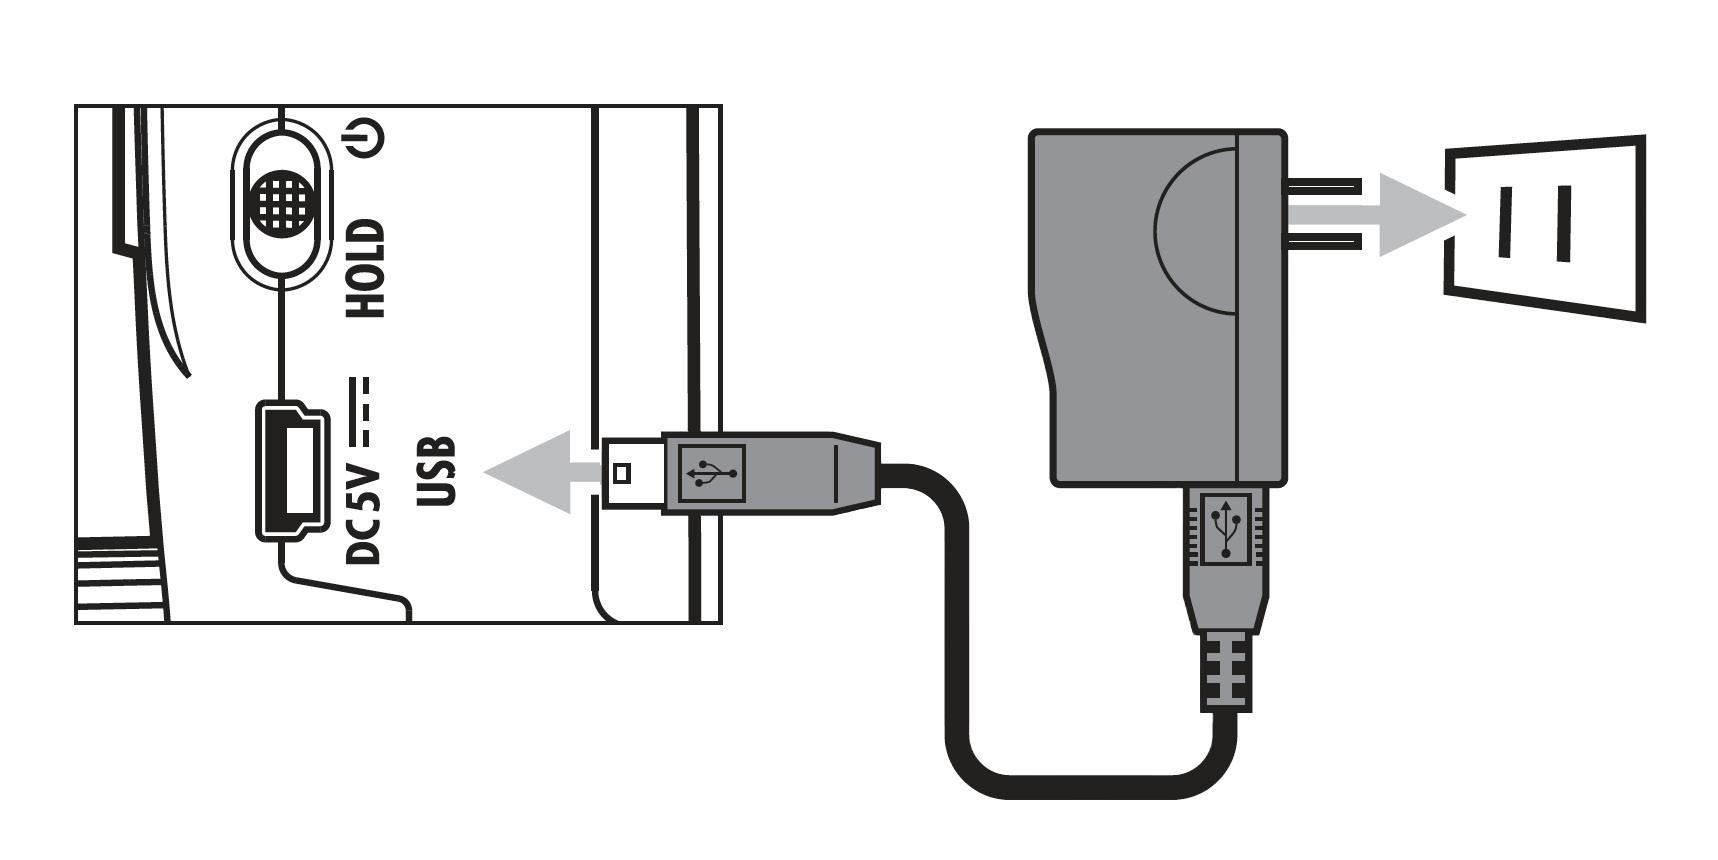
Using an AC adapter
1. Connect a USB cable to the USB port
2. Connect the USB cable to a power block adapter
3. Plug the adapter into an outlet
TURNING THE POWER ON AND OFF
Turning the Power On
Slide the Power/Hold switch to the right
• hold the switch until the LED screen of the device turns on and displays the “Now Loading...” message
Turning the Power Off
Slide the Power/Hold switch to the right

• hold the switch until the LED screen of the device displays the “Goodby See You!” message

NOTE:
• If “No SD Card!” appears on the display, confirm that the SD card is inserted properly
• If “Card Protected!” appears on the display, the SD card write-protection is enabled

• Slide the lock switch on the SD card to disable write-protection
• If “Invalid SD Card!” appears on the display, the card is not correctly formatted.
• Format the card or use a different card
Loading an SD Card
1. Turn the power off.
2. then open the SD card slot cover. Insert the SD card into the slot
3. Turn the power back on to proceed to the next step

Ejecting an SD Card
Push the card further into the slot and then pull it out.

NOTE:
• Always turn the power off before inserting or removing an SD card. Inserting or removing a card while the power is on could result in data loss

• When inserting an SD card, be sure to insert the correct end with the top side up as shown.

• If an SD card is not loaded, recording and playback are not possible

Follow these procedures to format an SD card for use with the Zoom H5 Handy Recorder:


Recording Process
NOTE:
When using the MULTI FILE MODE, recording and playback data is handled in units called projects. When using the STEREO FILE mode, data is handled in file units.

Recording follows the process shown below:
Connect the XY mic
• Connect mics, instruments and other equipment to INPUTS 1 & 2
Power up Device
Prepare to Record
• Set the recording mode
• MULTI FILE mode or STEREO FILE mode
• Select the recording tracks
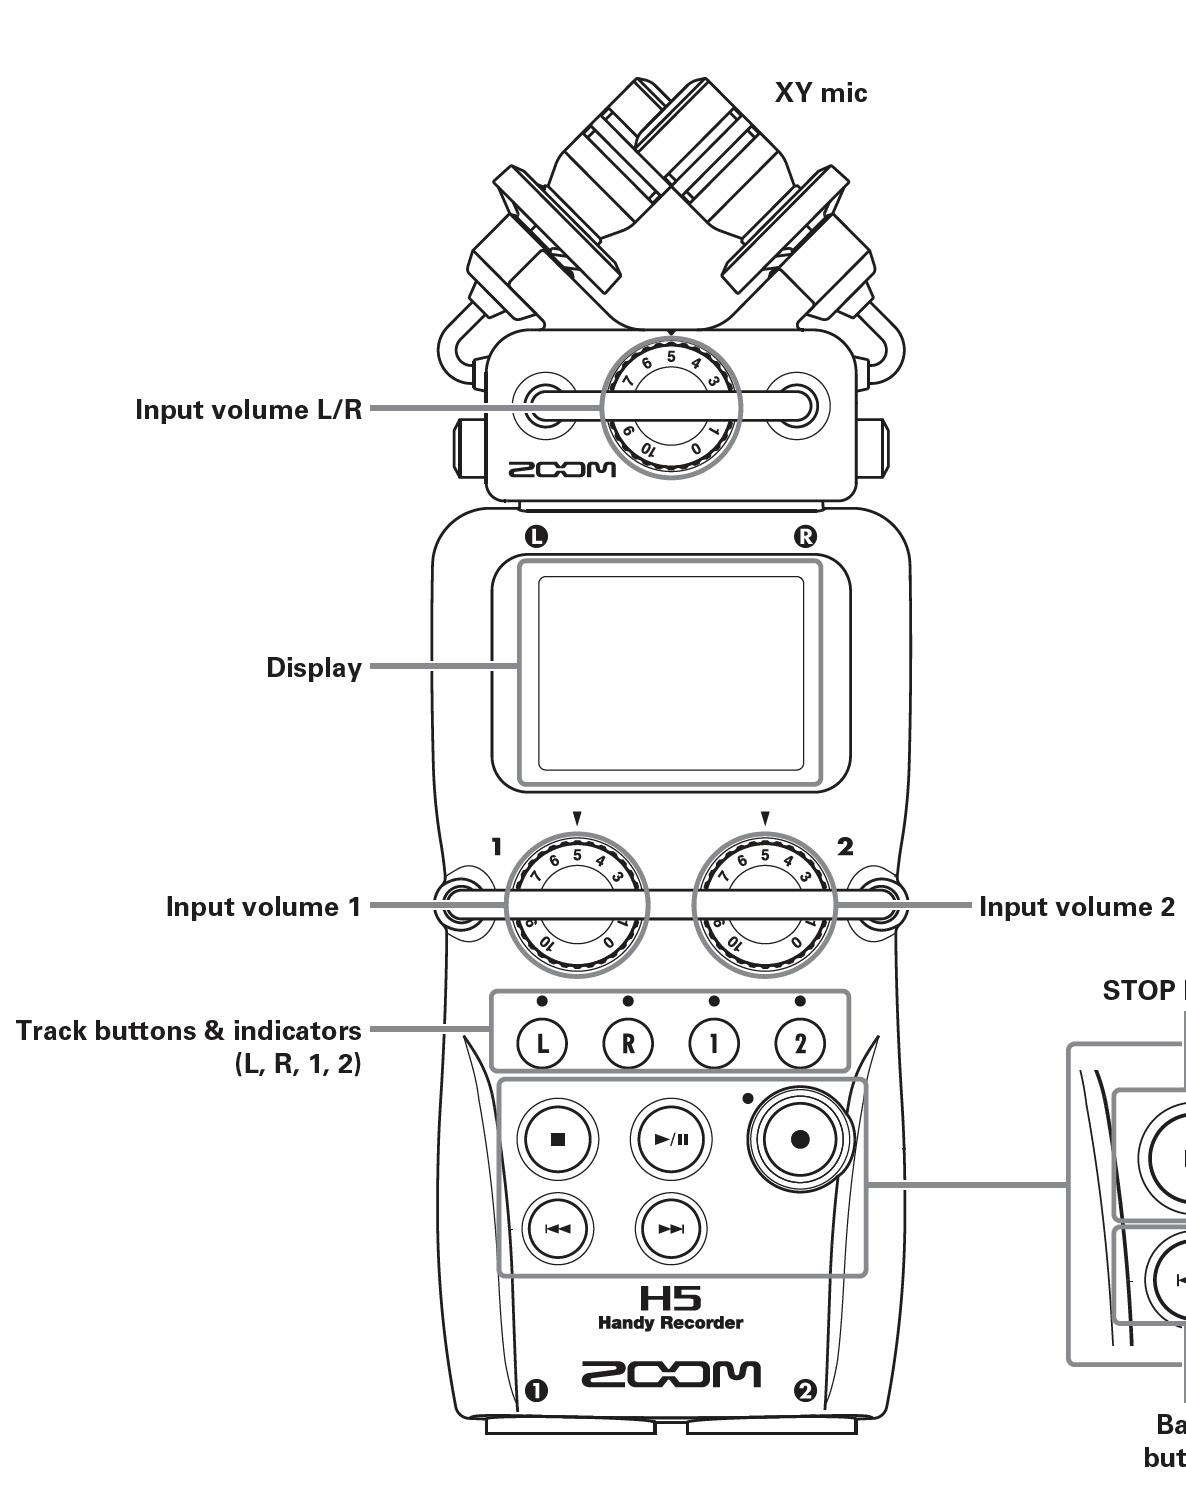
• Use the track buttons to select tracks. When the selected track indicator lights red, the input signal can be monitored
• In MULTI FILE mode, you can also press both INPUT 1 and 2 track buttons at the same time to use them as a stereo track (stereo link)

• Adjust input levels

• For each input, use the Input Volume Control
• Adjust them so that the level meter stays near −12 dB when the loudest sound is input
Conduct a test recording
• Press reord on the device
• Have your talent talk to each other in their normal speaking voice
• if only one talent, have them read something prepared in their normal speaking voice
• stop recording
Playback and check recording
• Using the device Transport Controls, play back the recording to ensure there were no issues:
• overdriven audio - clipping distortion
• excessive use of words such as “like”, “so”, or “umm”, etc.
• Pops
• Using the device Transport Controls, stop playback
Overdub and Edit
• You can also, for example, overdub, mix down to a stereo file or check project/file information
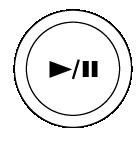
TRANSPORT CONTROLS

Selecting the recording mode
Press the Menu button


Use the Scroll button to select REC MODE, and then press the Scroll button

Use the Scroll button to select the recording mode (Multifile, Stereo File) and then press the Scroll button
Basic playback

After you conduct a test recording, play it back to see if your levels are good, and check for any technical issues that may have occured.
The following steps show you how to play back your test recording in Stereo Mode:
NOTE:
• The longer you press and hold or , the faster searching backward/forward becomes
• If there is a problem with the selected project /file, “Invalid Project!” or “Invalid File!” will appear on the LCD display
• If there is not even one project /file that can be played,“No Project!” or “No File!” will appear on the display

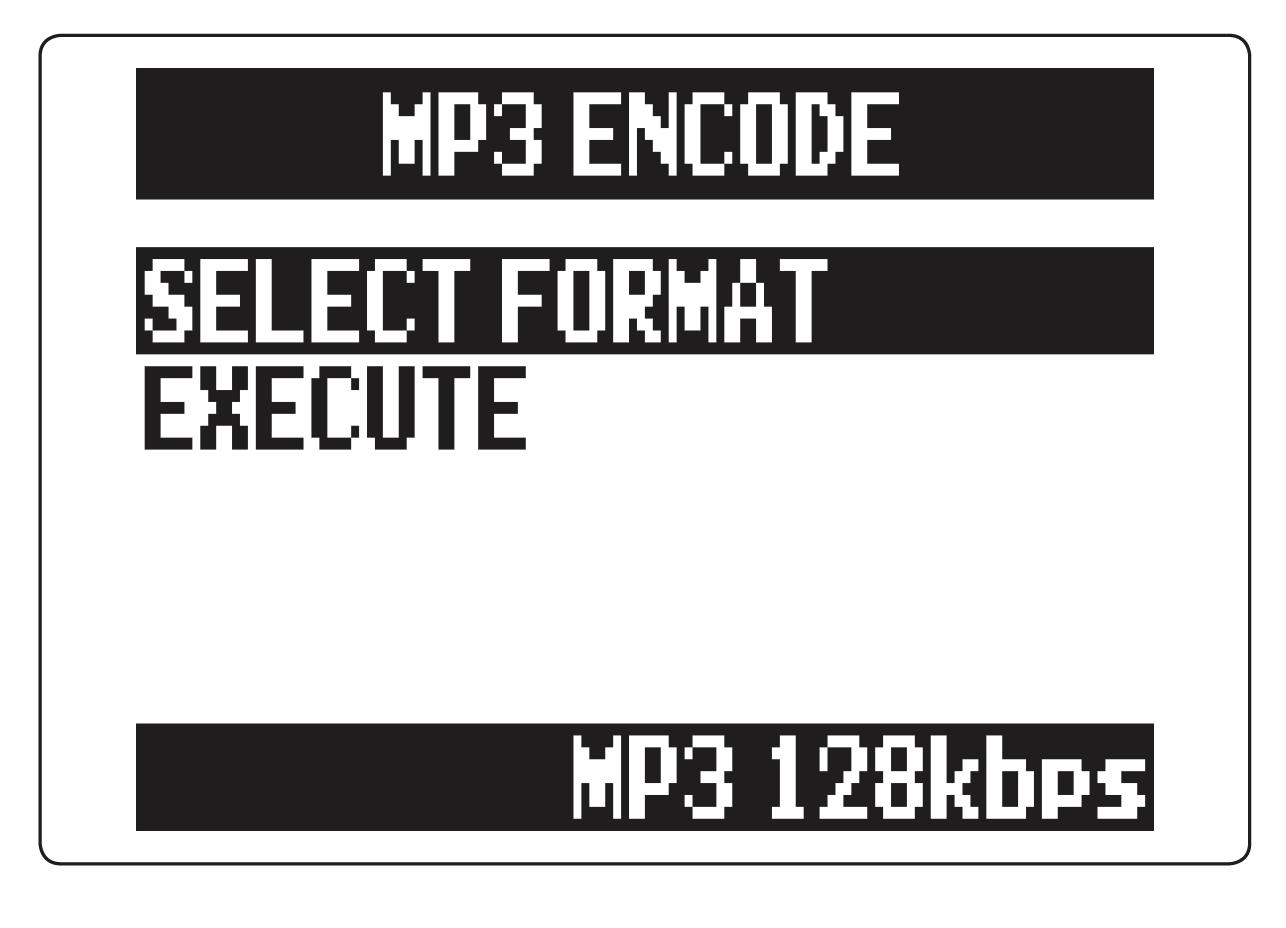
Converting WAV files to MP3 files

In the event that you would need to convert your recording from a WAV file format to an MP3 file format, the following steps will take you through that process: Press the Menu button
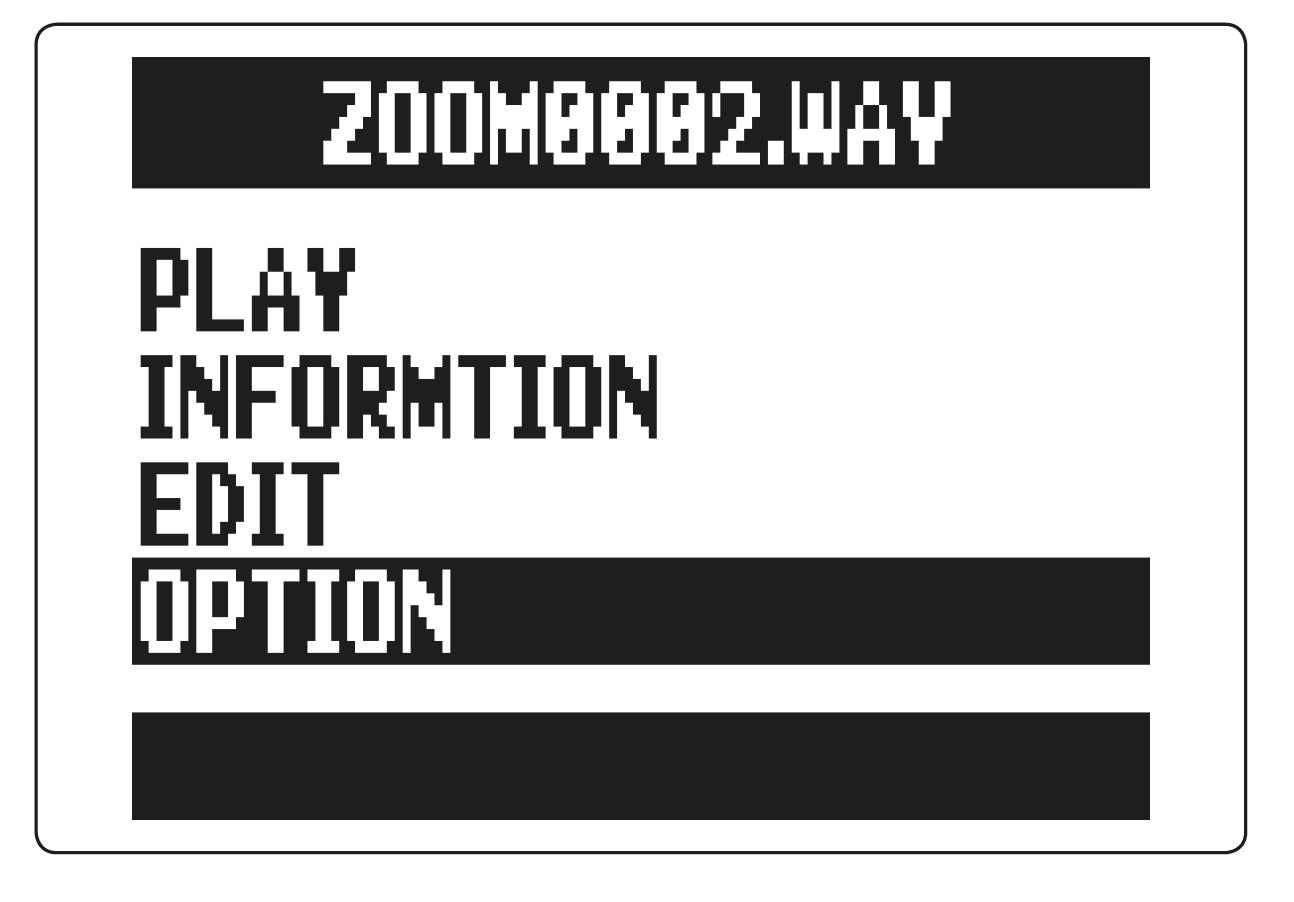

Use the Scroll button to select “File List” Press the Scroll button
Use the Scroll button to select a file Press the Scroll button


Use the Scroll button to select “Option” Press the Scroll button
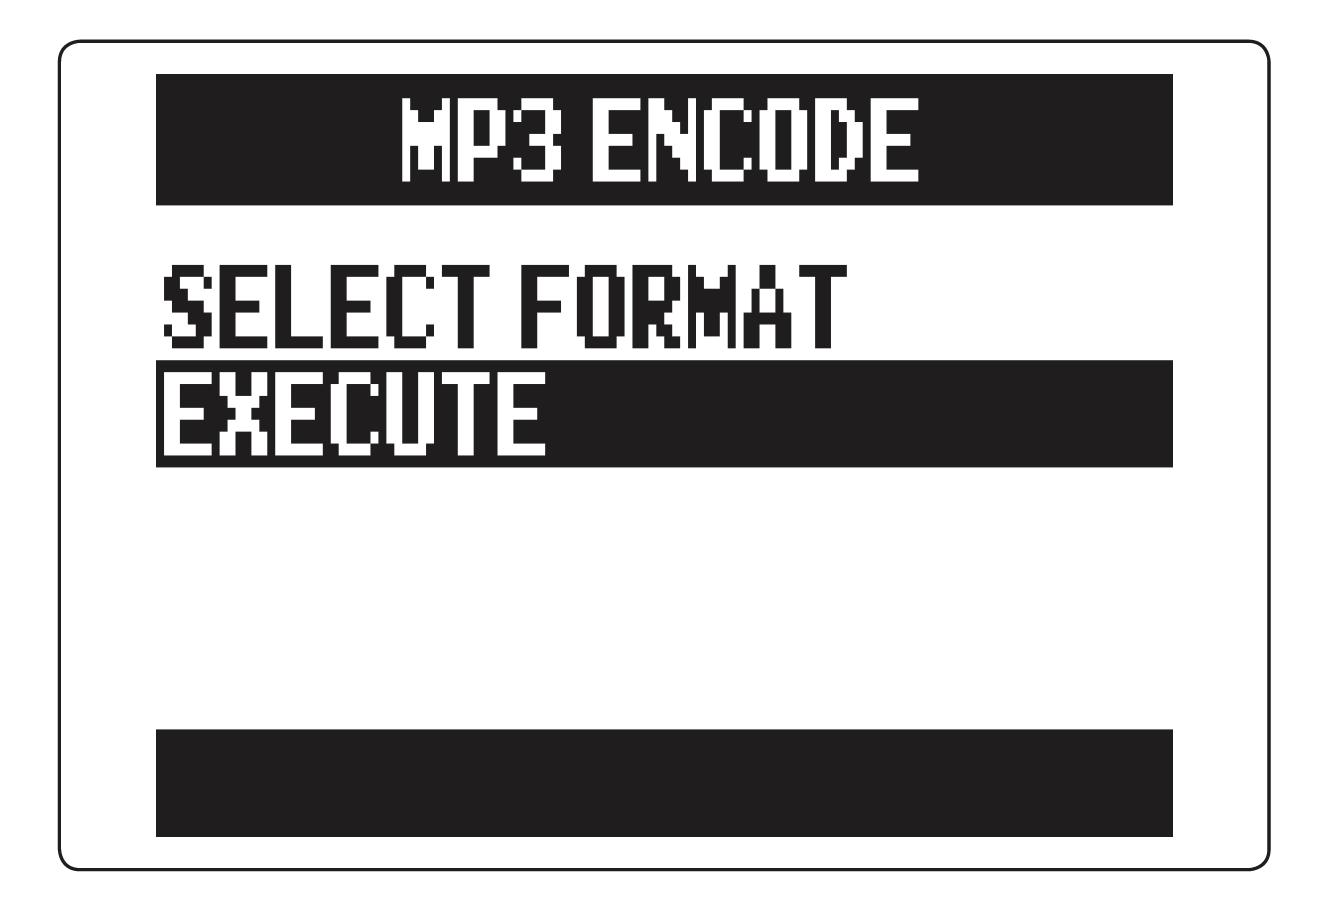
Use the Scroll button to select “MP3 Encode”
Press the Scroll button
To change the format used for encoding, use the Scroll button to select “Select Format”

Press the Scroll button
Use the Scroll button to select the format
Press the Scroll button
Use the Scroll button to select “Execute”
Press the Scroll button
NOTE:
• If the SD card does not have enough open space, the screen shown in step 6 will reappear
• The new encoded file will be created in the same folder
• If the name of the encoded file would be the same as an existing file, the file name change screen will appear
• Change the name before encoding
Normalizing
If the volume of a project recorded using WAV format is too low, you can increase the overall levels of files.
The following steps will allow you to normalize your files (Stereo File Mode):


Press the Menu button


Use the Scroll button to select “PROJECT/FILE LIST”
Press the Scroll button
Use the Scroll button to select the project /file to normalize
Press the Scroll button
Use the Scroll button to select “EDIT”
Press the Scroll button
Use the Scroll button to select “NORMALIZE”

Press the Scroll button
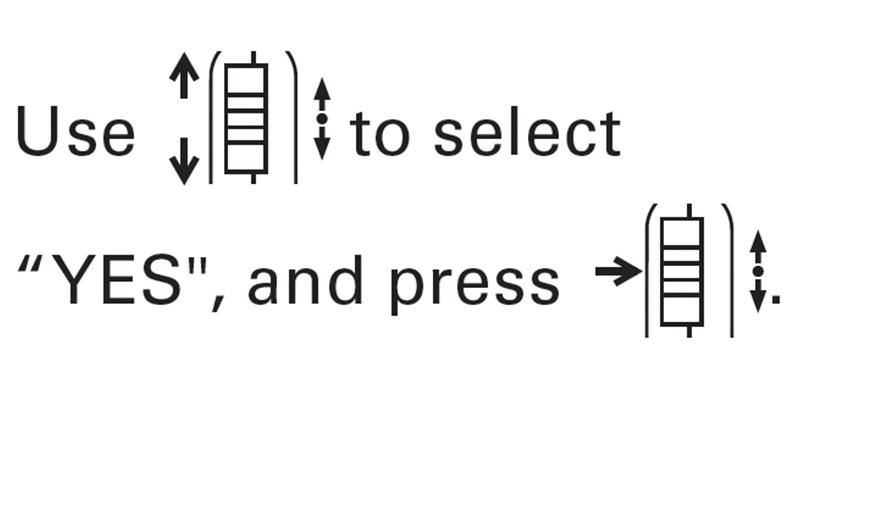
Use the Scroll button to select “YES”
Press the Scroll button
NOTE:
When normalized, the level of the entire file will be increased by the same amount so that the peak level is 0dBFS.

Trimming project beginnings and ends
You can delete (trim) unnecessary beginnings and endings of recorded projects. To do so, you will set the beginning and ending points of the part to be kept.
Here’s how (Stereo File Mode):
Press the Menu button


Use the Scroll button to select “Project/File List”

Press the Scroll button
Use the Scroll button to select the Project/File to trim
Press the Scroll button
Use the Scroll button to select EDIT
Press the Scroll button
Use the Scroll button to select TRIM
Press the Scroll button
Use the Scroll button to select the starting point icon
Press the Scroll button
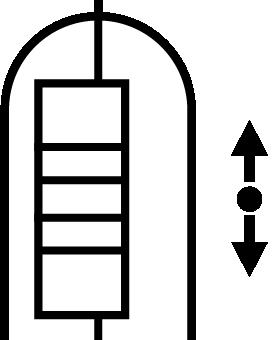
Use the back and forward buttons to determine the starting point of your edit

Use the Scroll button to select the ending point icon. Repeat step 7 to set the ending point of your edit


Press the Record button
Use the Scroll button to select YES
Press the Scroll button

Data exchange with computers (card reader)
By connecting with a computer, you can check and copy data on the SD card.


Press the Menu button
Use the Scroll button to select “USB”
Press the Scroll button
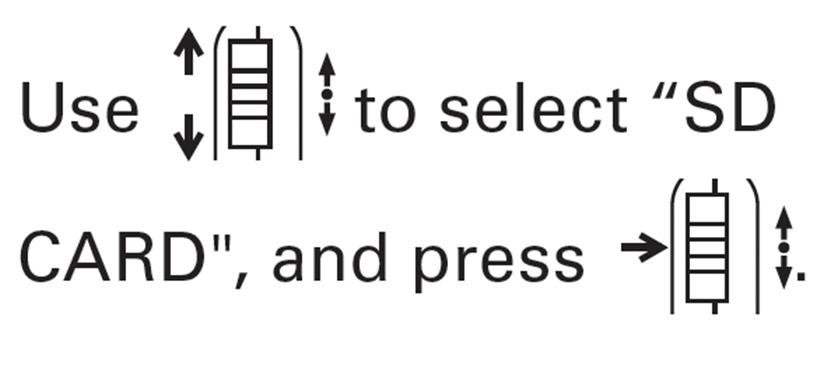
Use the Scroll button to select “SD CARD READER”
Press the Scroll button
Connect the Zoom H5 to the computer using a USB cable
Follow the disconnection procedures for the computer before disconnecting the USB cable.

Windows:
Use “Safely Remove Hardware” to select the Zoom H5
Mac:
Drag-and-drop the Zoom H5 icon into the trash
Disconnect the cable from the computer
Press the Menu button
NOTE:
• Always follow these procedures before disconnecting the USB cable
NOTE:
• If you want to power the using the computer’s USB bus, connect the cable while the recorder is off and then turn it on

• The following operating systems are supported.
• Windows Vista or later
• Mac OS X 10.6 or later
Setting the recording format
Select the format according to the desired audio quality and file size.
Press the Menu button
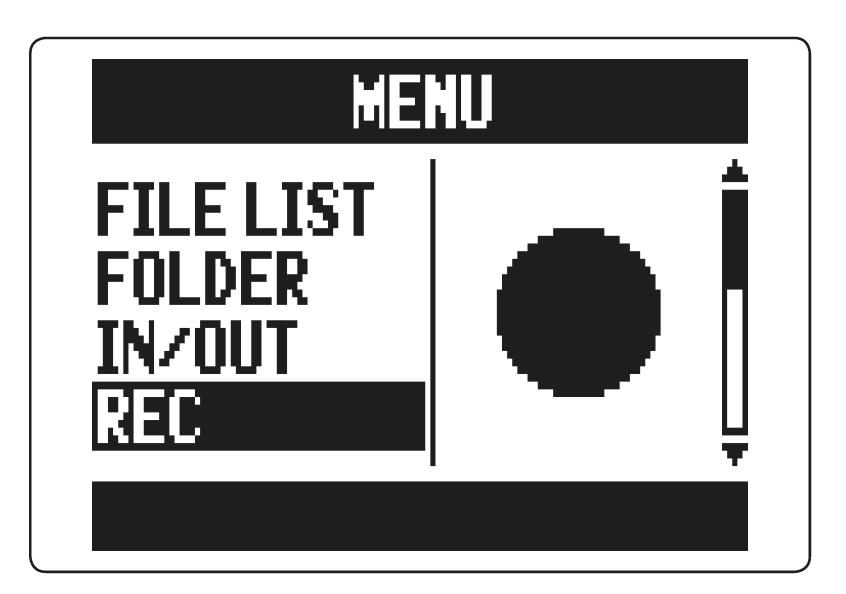
Use the Scroll button to select “REC” Press the Scroll button
Use the Scroll button to select “REC FORMAT”
Press the Scroll button
Use the Scroll button to select recording format
Press the Scroll button
NOTE:
• Use the WAV format for recording high-quality audio.
• MP3 format reduces file size through compression, but this also reduces the audio quality
• Use this format if you need to conserve space or store many recordings on an SD card

• When using the backup recording function in STEREO FILE mode, some formats cannot be selected

Reducing noise (low cut filter)
Use the low-cut filter to reduce wind noise and vocal pops, for example.
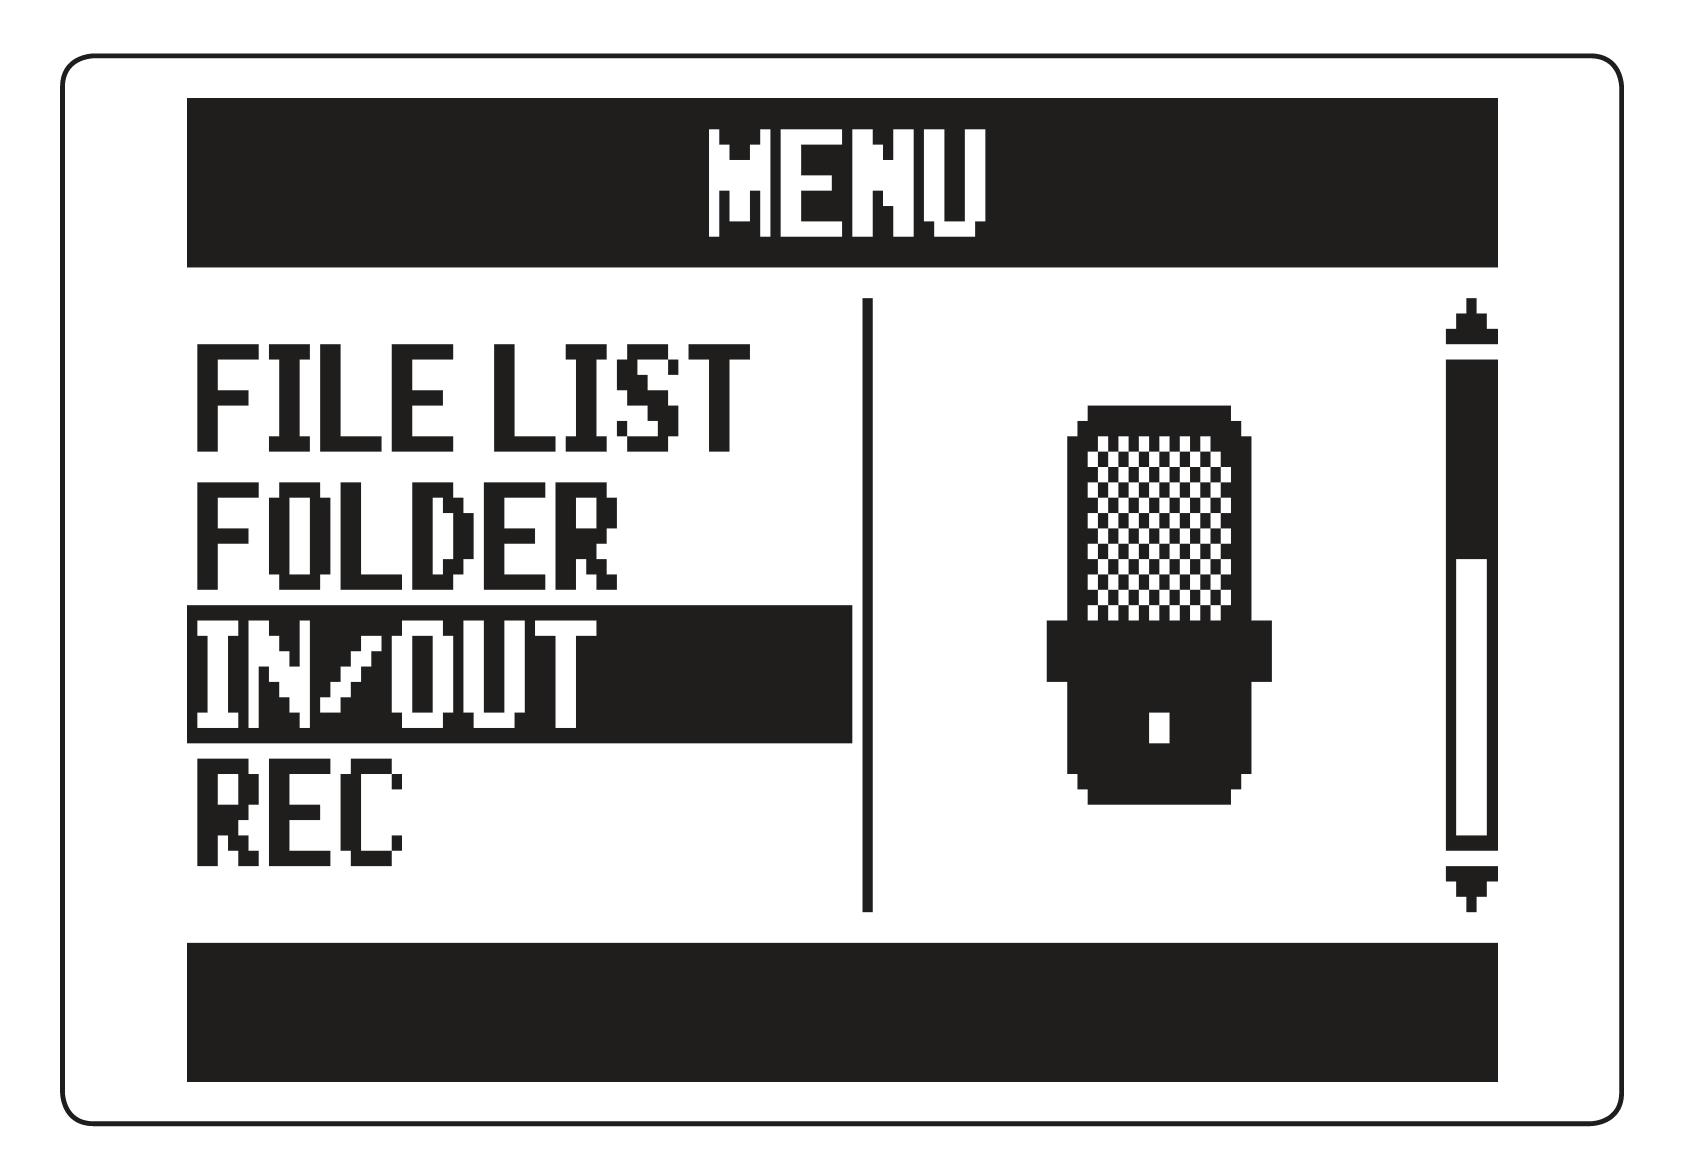
Press the Menu button

Use the Scroll button to select “IN/OUT” Press the Scroll button
Use the Scroll button to select “LO CUT”
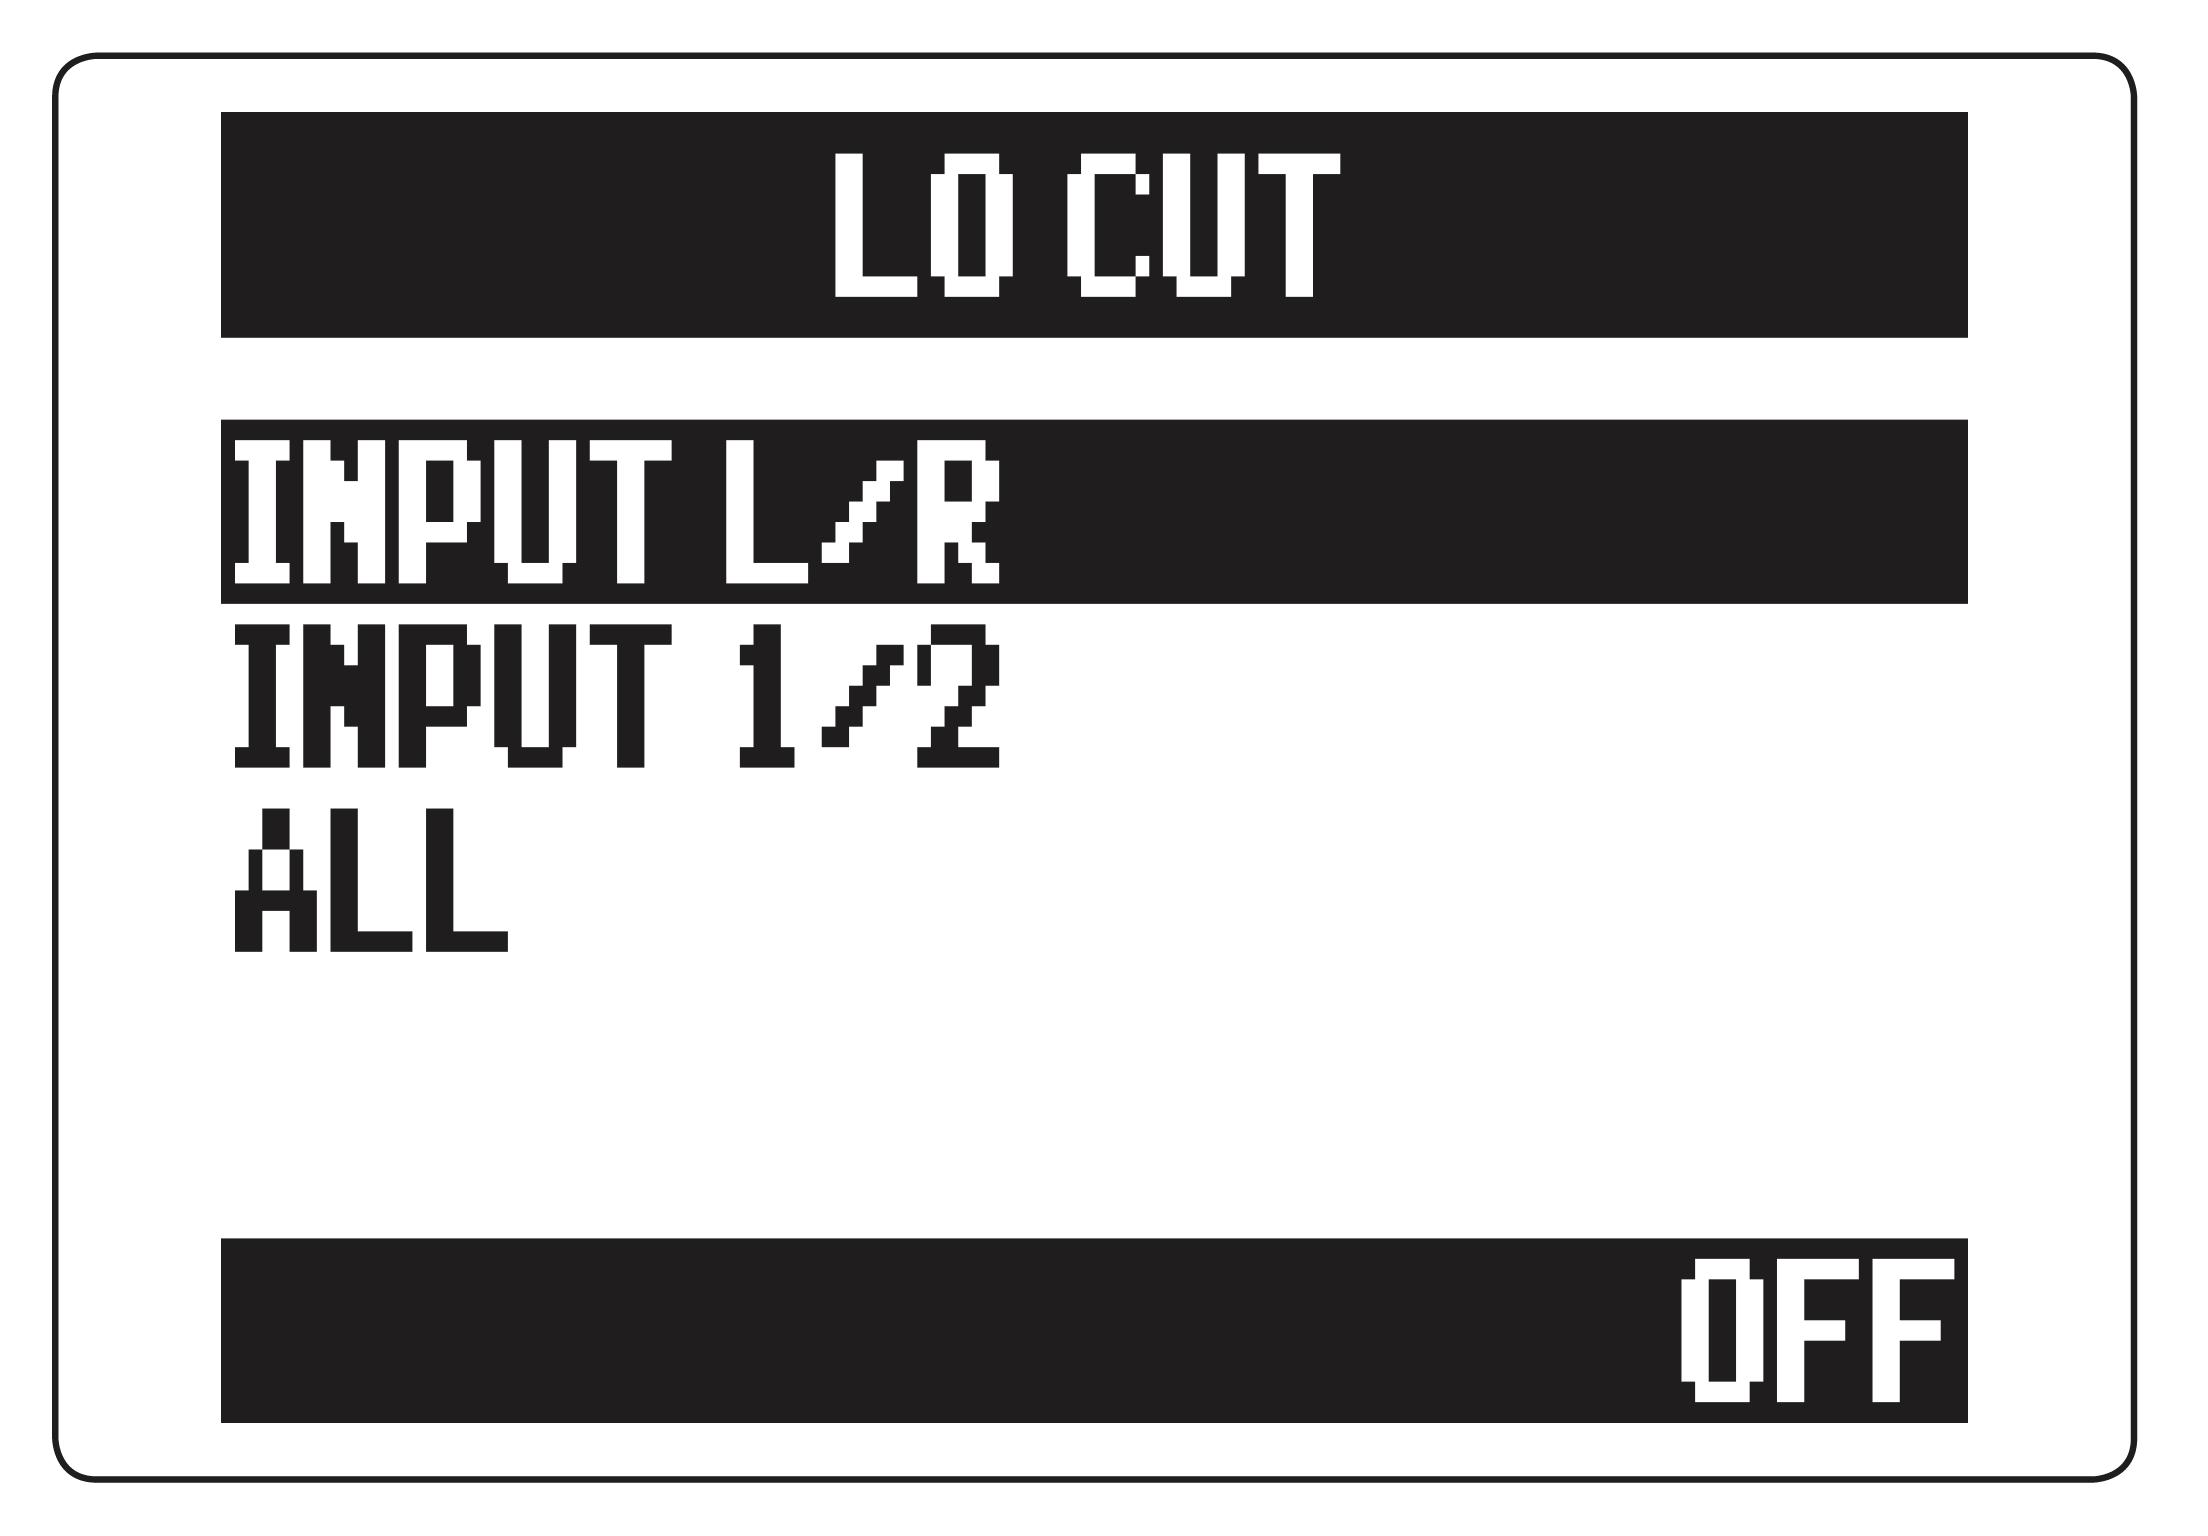
Press the Scroll button
Use the Scroll button to select the track to use it on Press the Scroll button
TIP:
Set this to ALL to use the low-cut filter on all inputs at once.
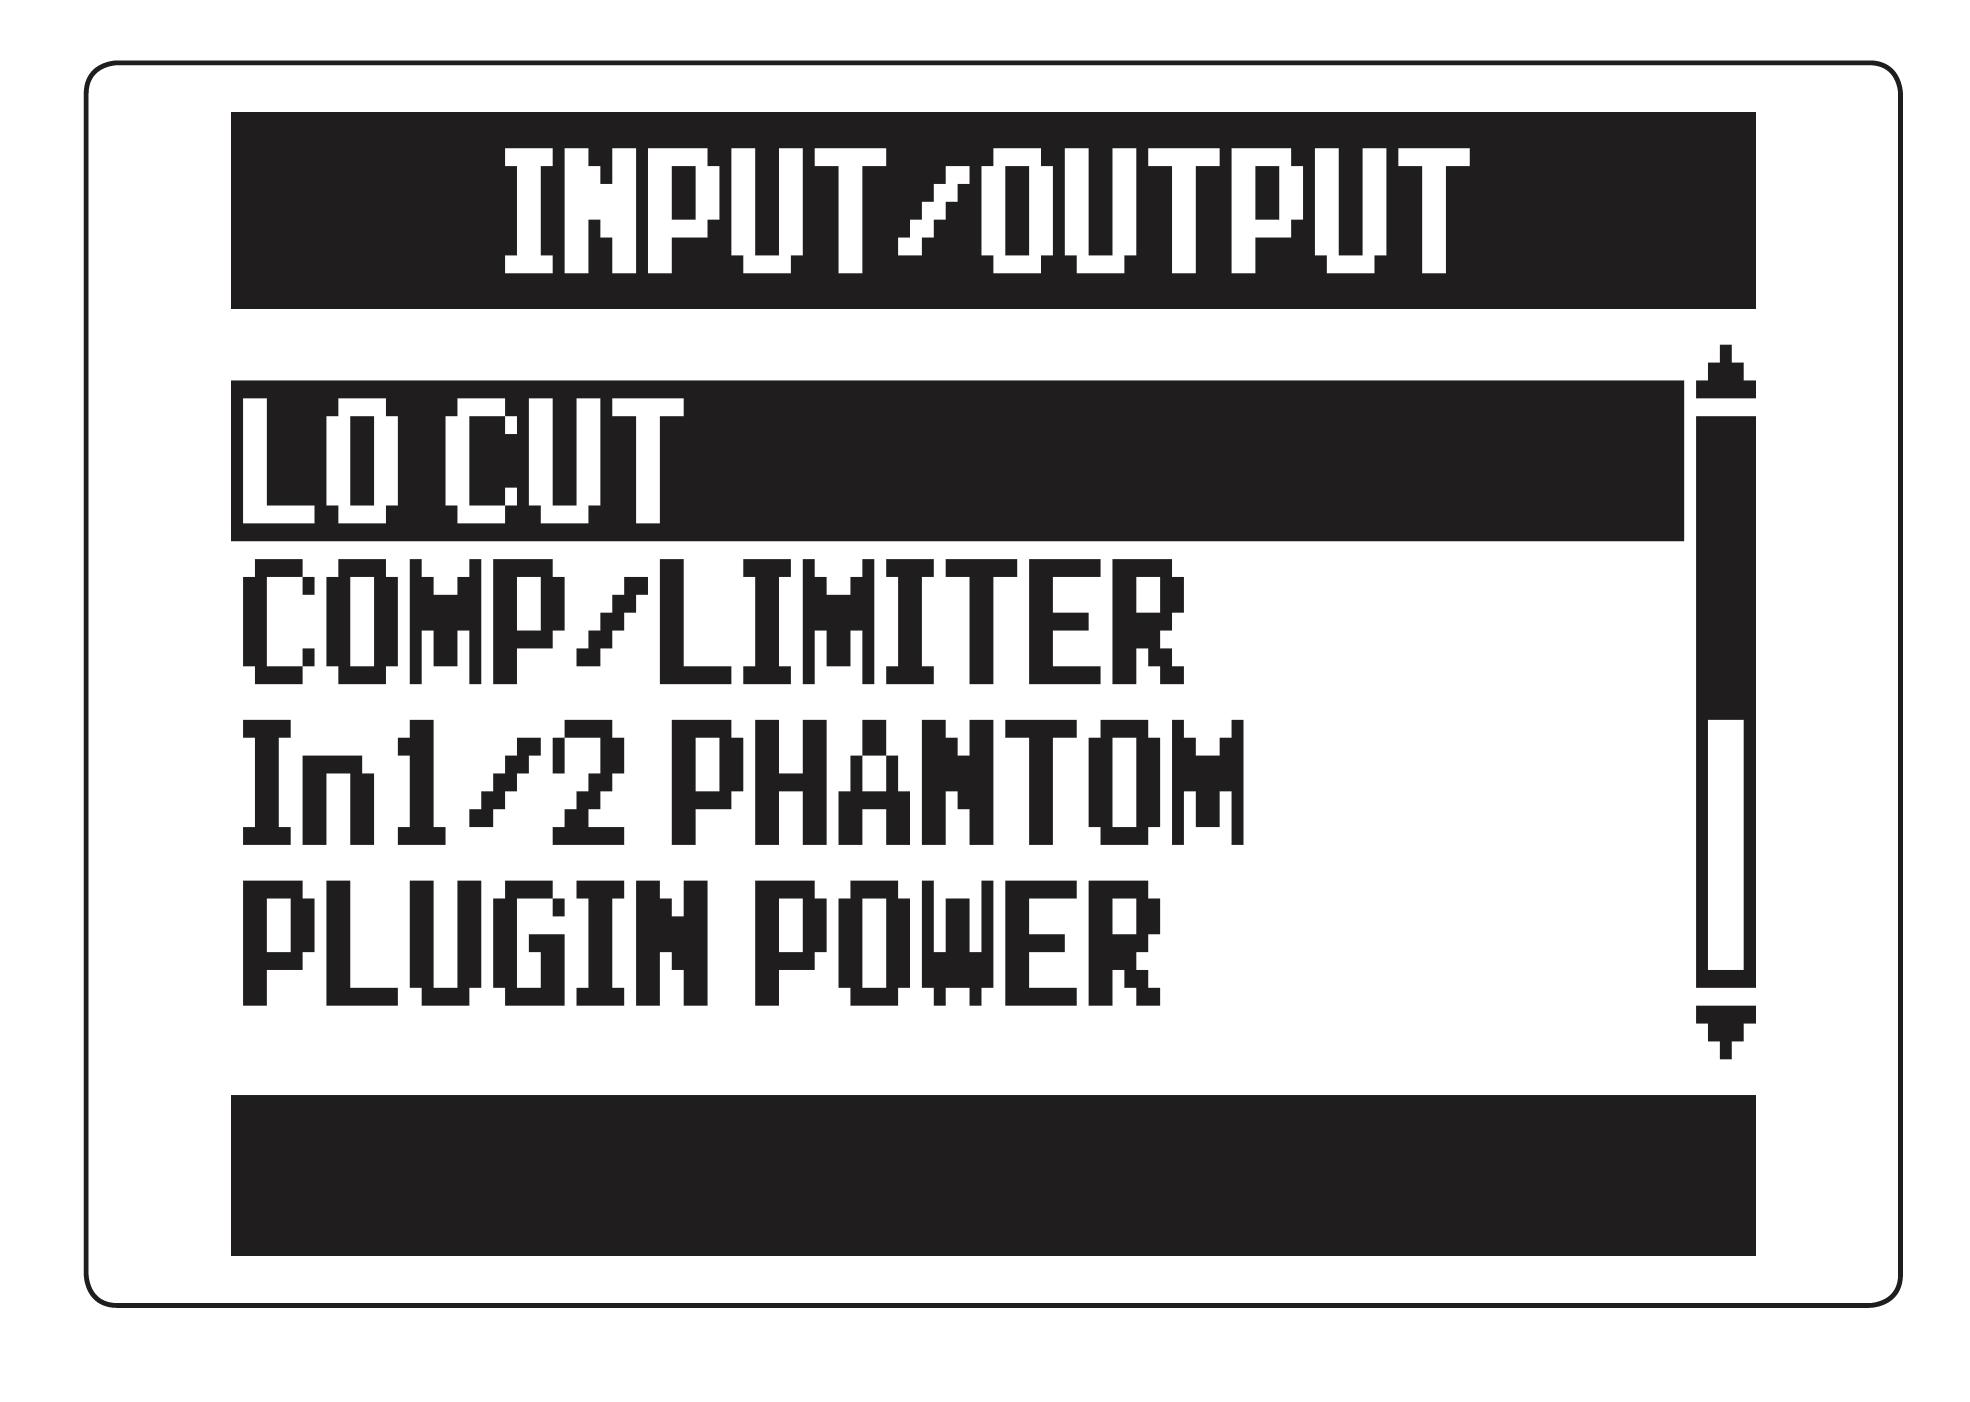
Use the Scroll button to select cutoff frequency

Press the Scroll button
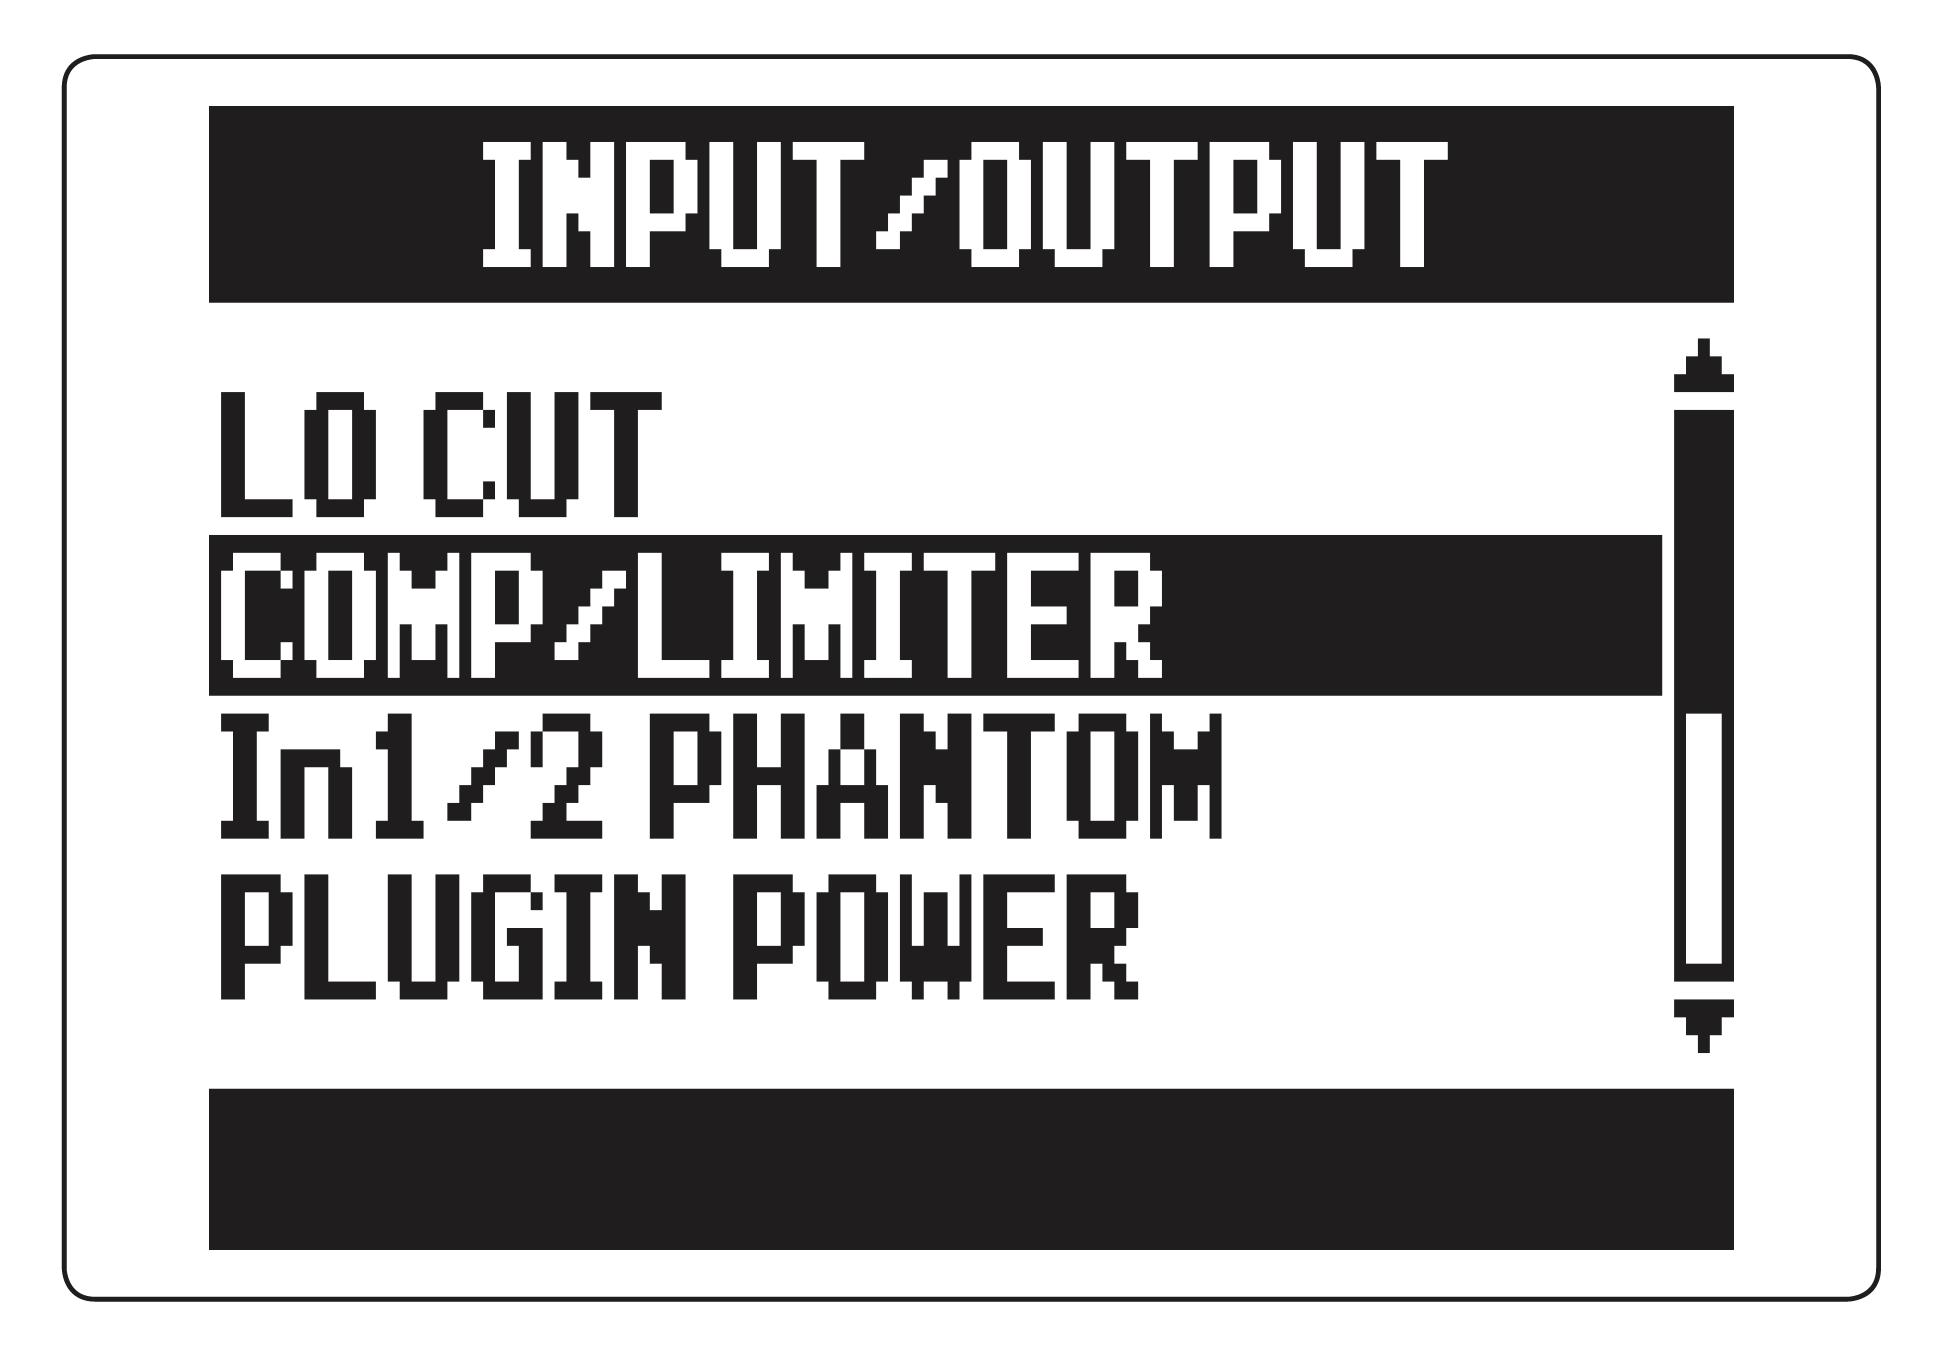
Adjusting the input level (compressor/limiter)

The Zoom H5 can automatically raise low-level input signals and lower high-level input signals.
Press the Menu button

Use the Scroll button to select “IN/OUT”
Press the Scroll button
Use the Scroll button to select “COMP/LIMITER”
Press the Scroll button
Use the Scroll button to select the input to adjust Press the Scroll button
TIP: Select ALL to use this on all the inputs at once.
Use the Scroll button to select the COMP/LIMITER type

Press the Scroll button

Reducing the input signal level
When connecting a mixer with a standard output level or +4dB, for example, you can set this unit to reduce the input signal level −20 dB. Here’s how:
Press the Menu button
Use the Scroll button to select “IN/OUT”
Press the Scroll button
Use the Scroll button to select “In1/2 PAD (−20dB)”
Press the Scroll button
Use the Scroll button to select the input
Press the Scroll button
TIP: Select ALL to use the pad on both inputs.


Use the Scroll button to select “ON”
Press the Scroll button
Formatting SD cards


Follow these procedures to format an SD card for use with the Zoom H5 Handy Recorder:
Press the Menu button
Use the Scroll button to select “SD CARD”
Press the Scroll button
Use the Scroll button to select “FORMAT”
Press the Scroll button
Use the Scroll button to select “YES”
Press the Scroll button
NOTE:
• If you use an SD card that has been formatted by a computer or that you have purchased, you must format it using the before use
• Be aware that all data previously saved on the SD card will be deleted when it is formatted

Troubleshooting
If you think that the Zoom H5 Handy Recorder is not operating properly, please check the following first:
Recording/playback trouble
• There is no sound or output is very quiet
• Check the connections to your monitoring system and its volume setting
• Confirm that the volume of the is not too low
The sound from a connected device or mic cannot be heard or is very quiet
• If you are using the included XY mic, confirm that the mic orientation is suitable
• Check the input level setting
• If connecting a CD player or other device to an input jack, try raising the output level of that device
• Check the input signal monitoring setting
• Check the plug-in power setting
• Check the PAD function setting
Recording is not possible
• Confirm that a track button is lit red
• Confirm that the SD card has open space
• Confirm that an SD card is loaded correctly in the card slot.
• If “Card Protected” Appears, the SD Card write-protection is on, slide the lock switch to turn write-protection off
• If “Hold” appears on the display, the hold function is enabled, disable the hold function
• If you think that the is not operating properly, please check the following first
The recorded sound cannot be heard or is very quiet
• Confirm that the volume levels of the L/R and 1/2 tracks are not turned down
• Confirm that the track buttons are lit green during playback
Not recognized by a computer when connected by USB
• Check that the OS of the computer is compatible
• An operation mode must be selected on the to allow a
• computer to recognize it