MARCEL HADID’S PORTFOLIO
EDUCATION
University of Toronto | 2019 - 2023
B.Arch
• Learnt softwares such as Rhino, AutoCAD, Adobe Creative Suite to create arch. projects.
• Learnt about the history of theory of architecture and urban planning
George Brown College | Jan. 2024 - Aug. 2024
Architectural Technician
• Learnt how to create working drawing
• Learnt CAD Drafting
• Learnt how to Navigate the OBC
• Learnt the Fundamentals of Building Science
• Learnt about the construction process
WORK
EXPERIENCE
CGS Architects Inc. | Sept. 2023 - Dec. 2023
Architectural Assistant
• Worked with the principal architect to develop a design into working drawings
• Helped create construction documents
• Conducted Site Visits
• Participated in meetings with clients and constractors
COMPUTER SKILLS
• AutoCAD
• SkecthUp
• Rhino
• Illustrator
• Photoshop
• Revit (Basics)
• D5 Render
• InDesign OTHER SKILLS
• Drafting
• Detailing
• Working Drawings
• OBC Navigation
• Model Making
• Construction Documents
CONTACT
INFORMATION
Tel: +1 (416) - 277 - 3386
Email: marcelh619@gmail.com
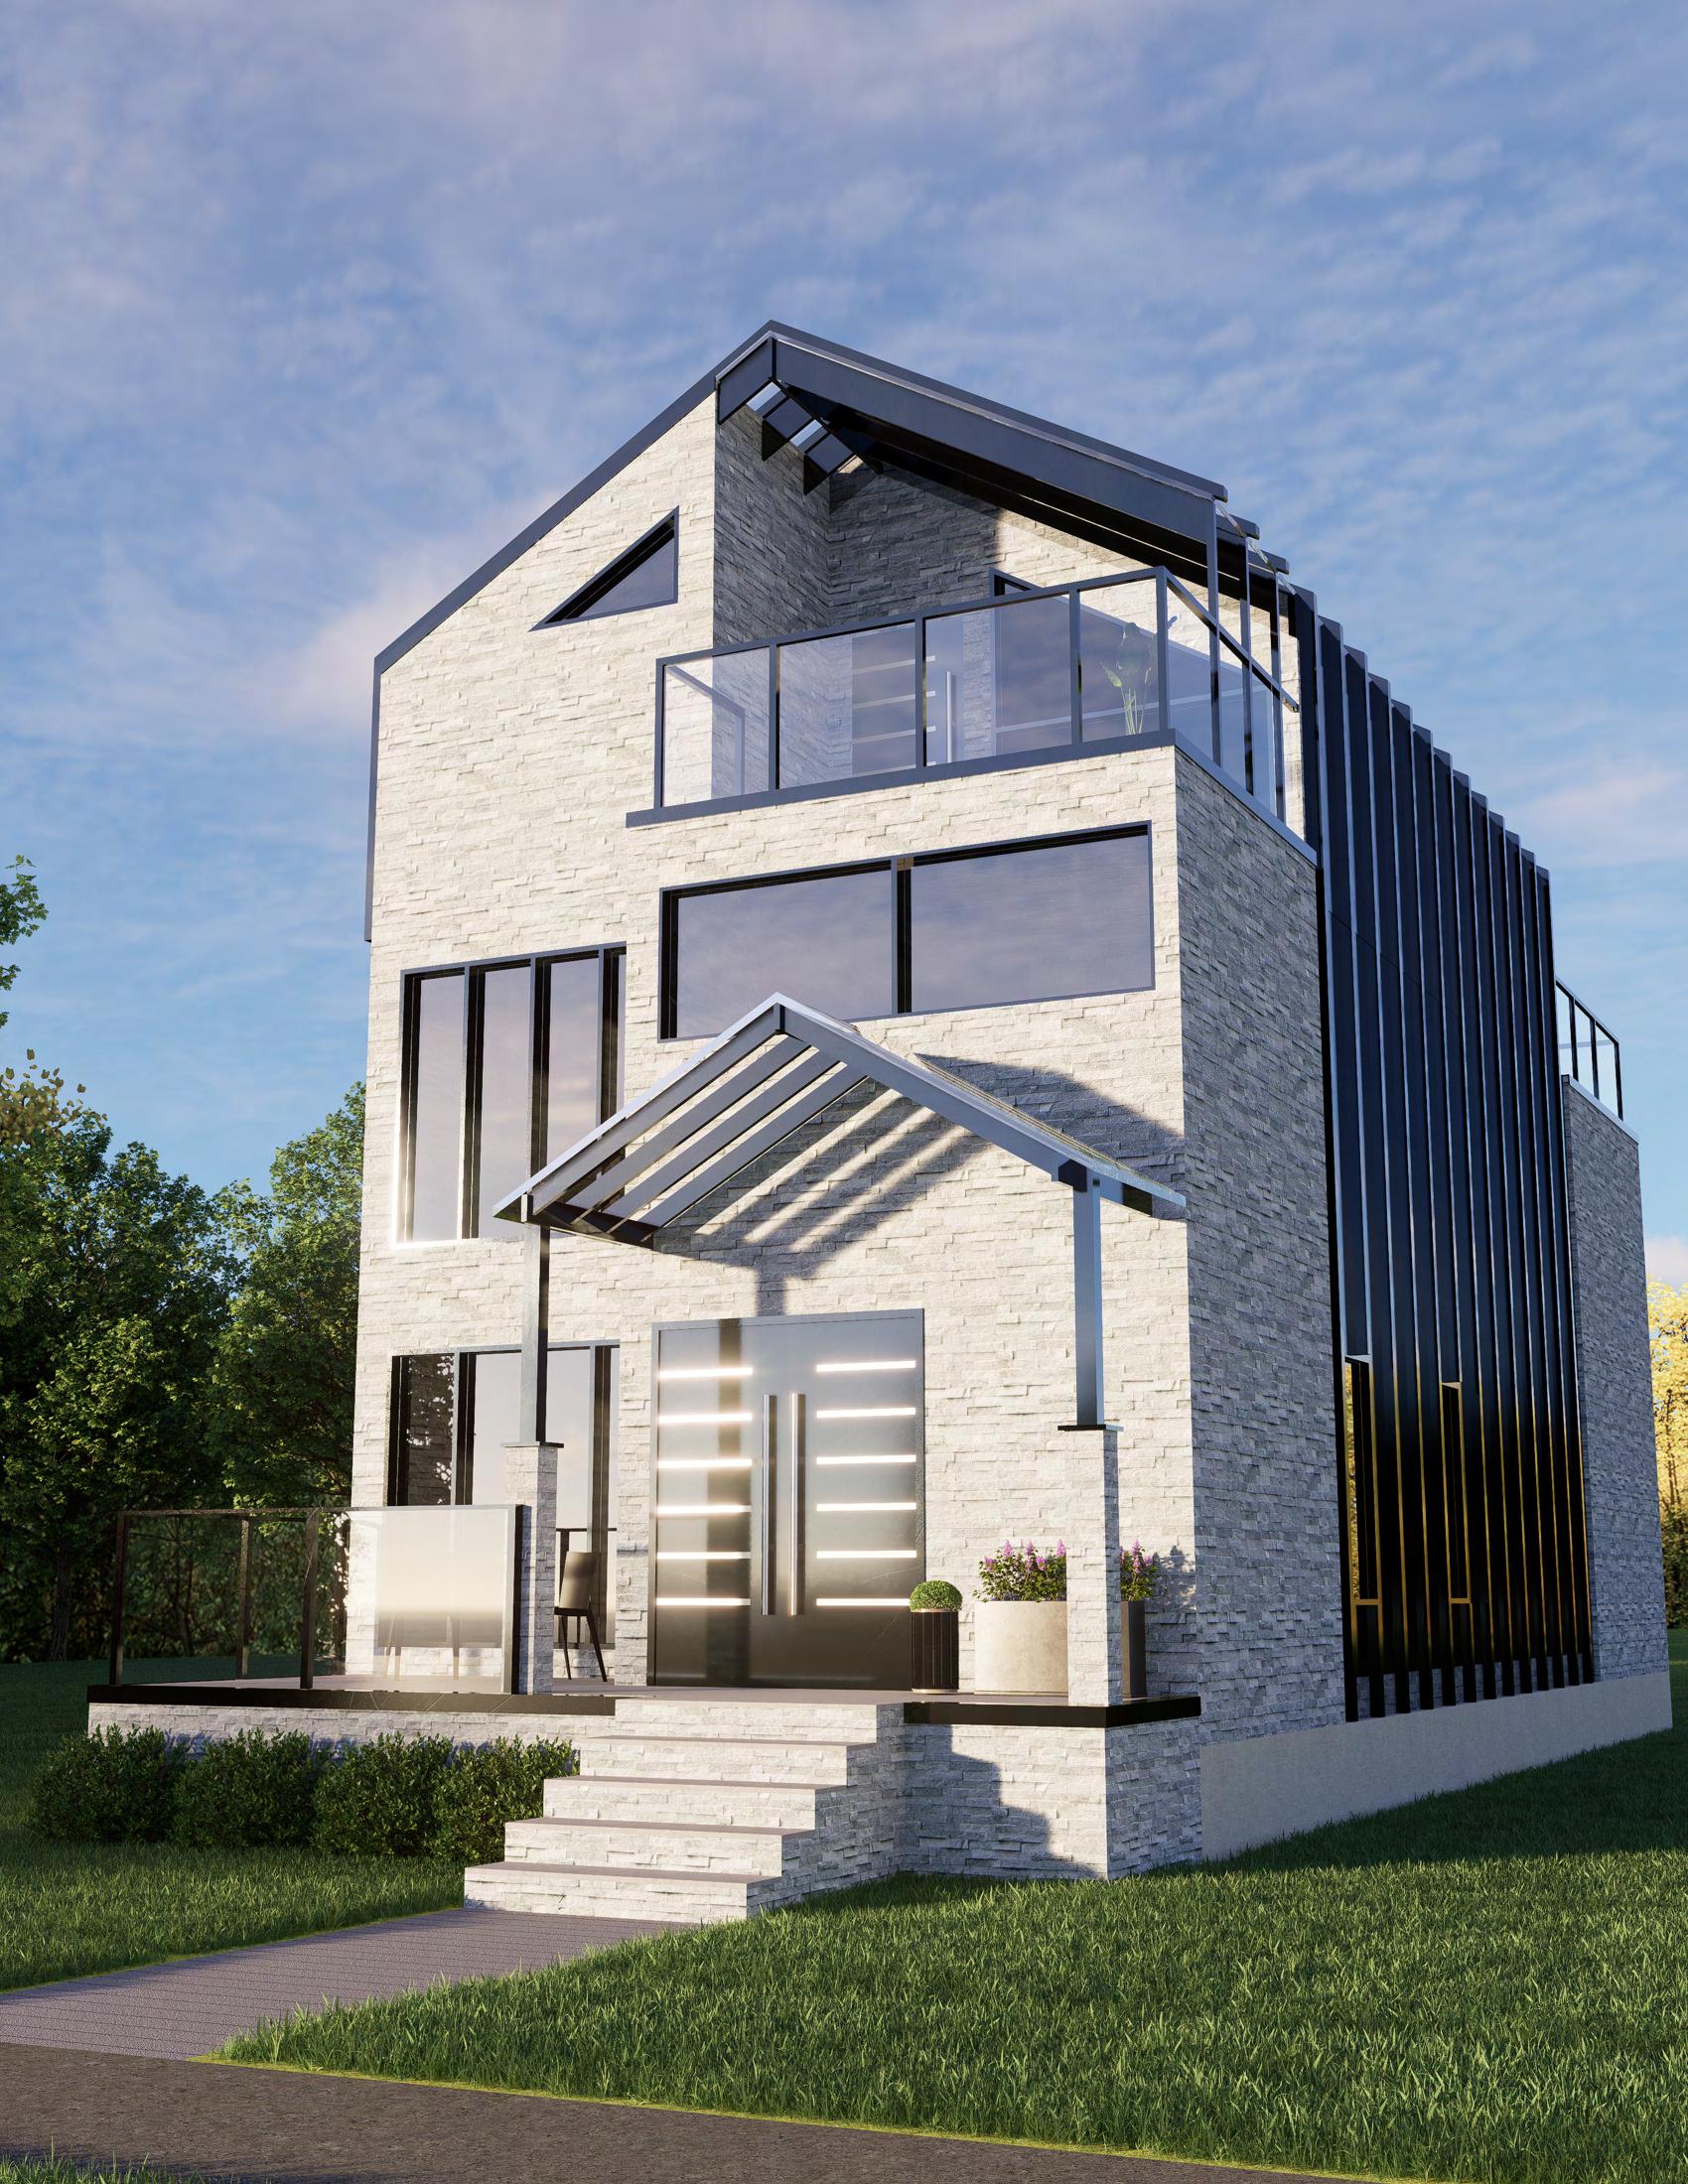
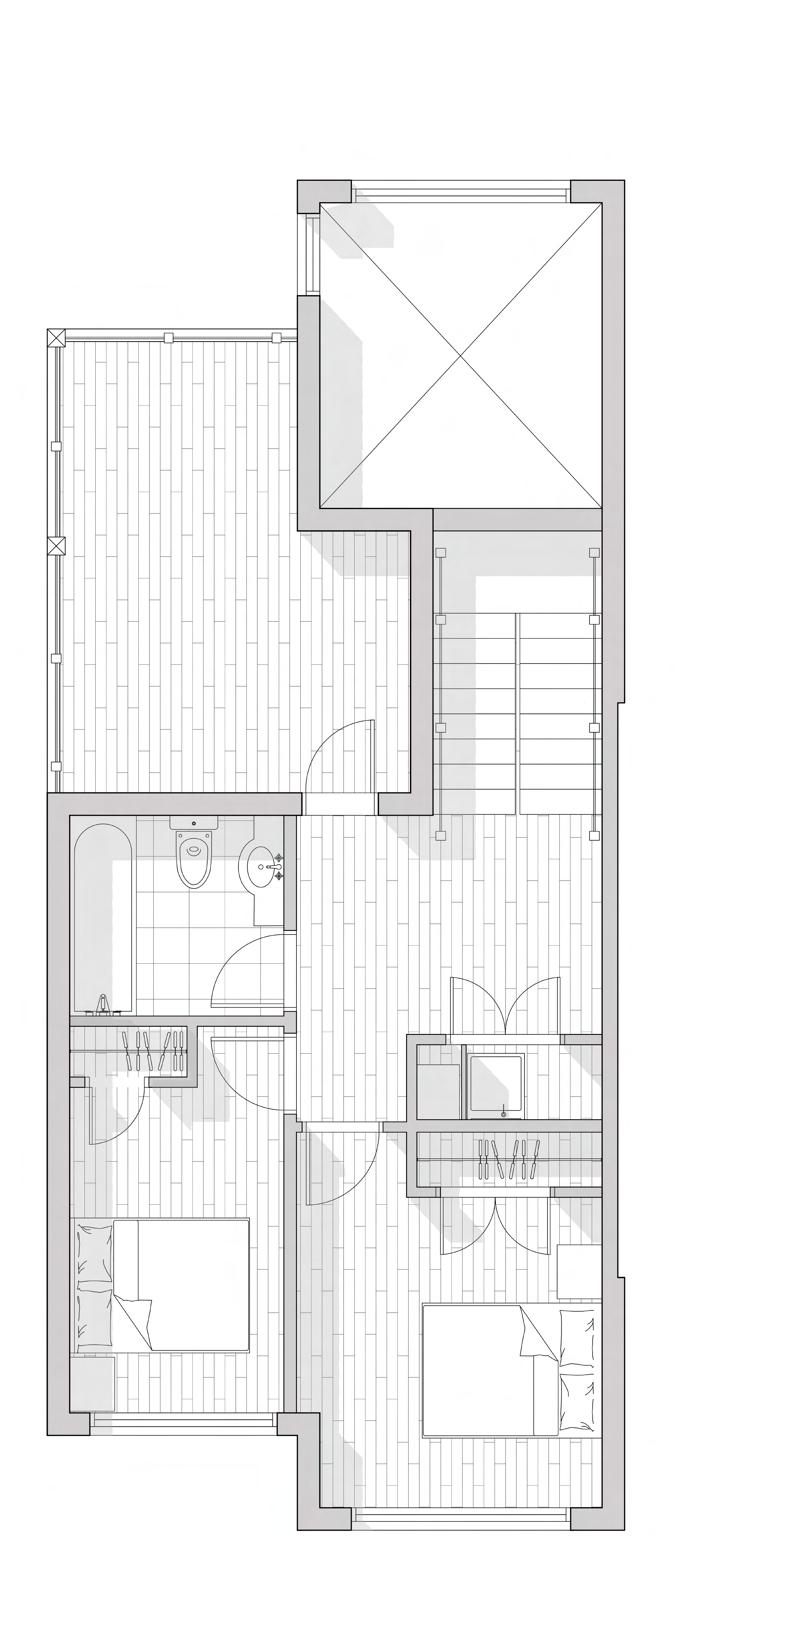
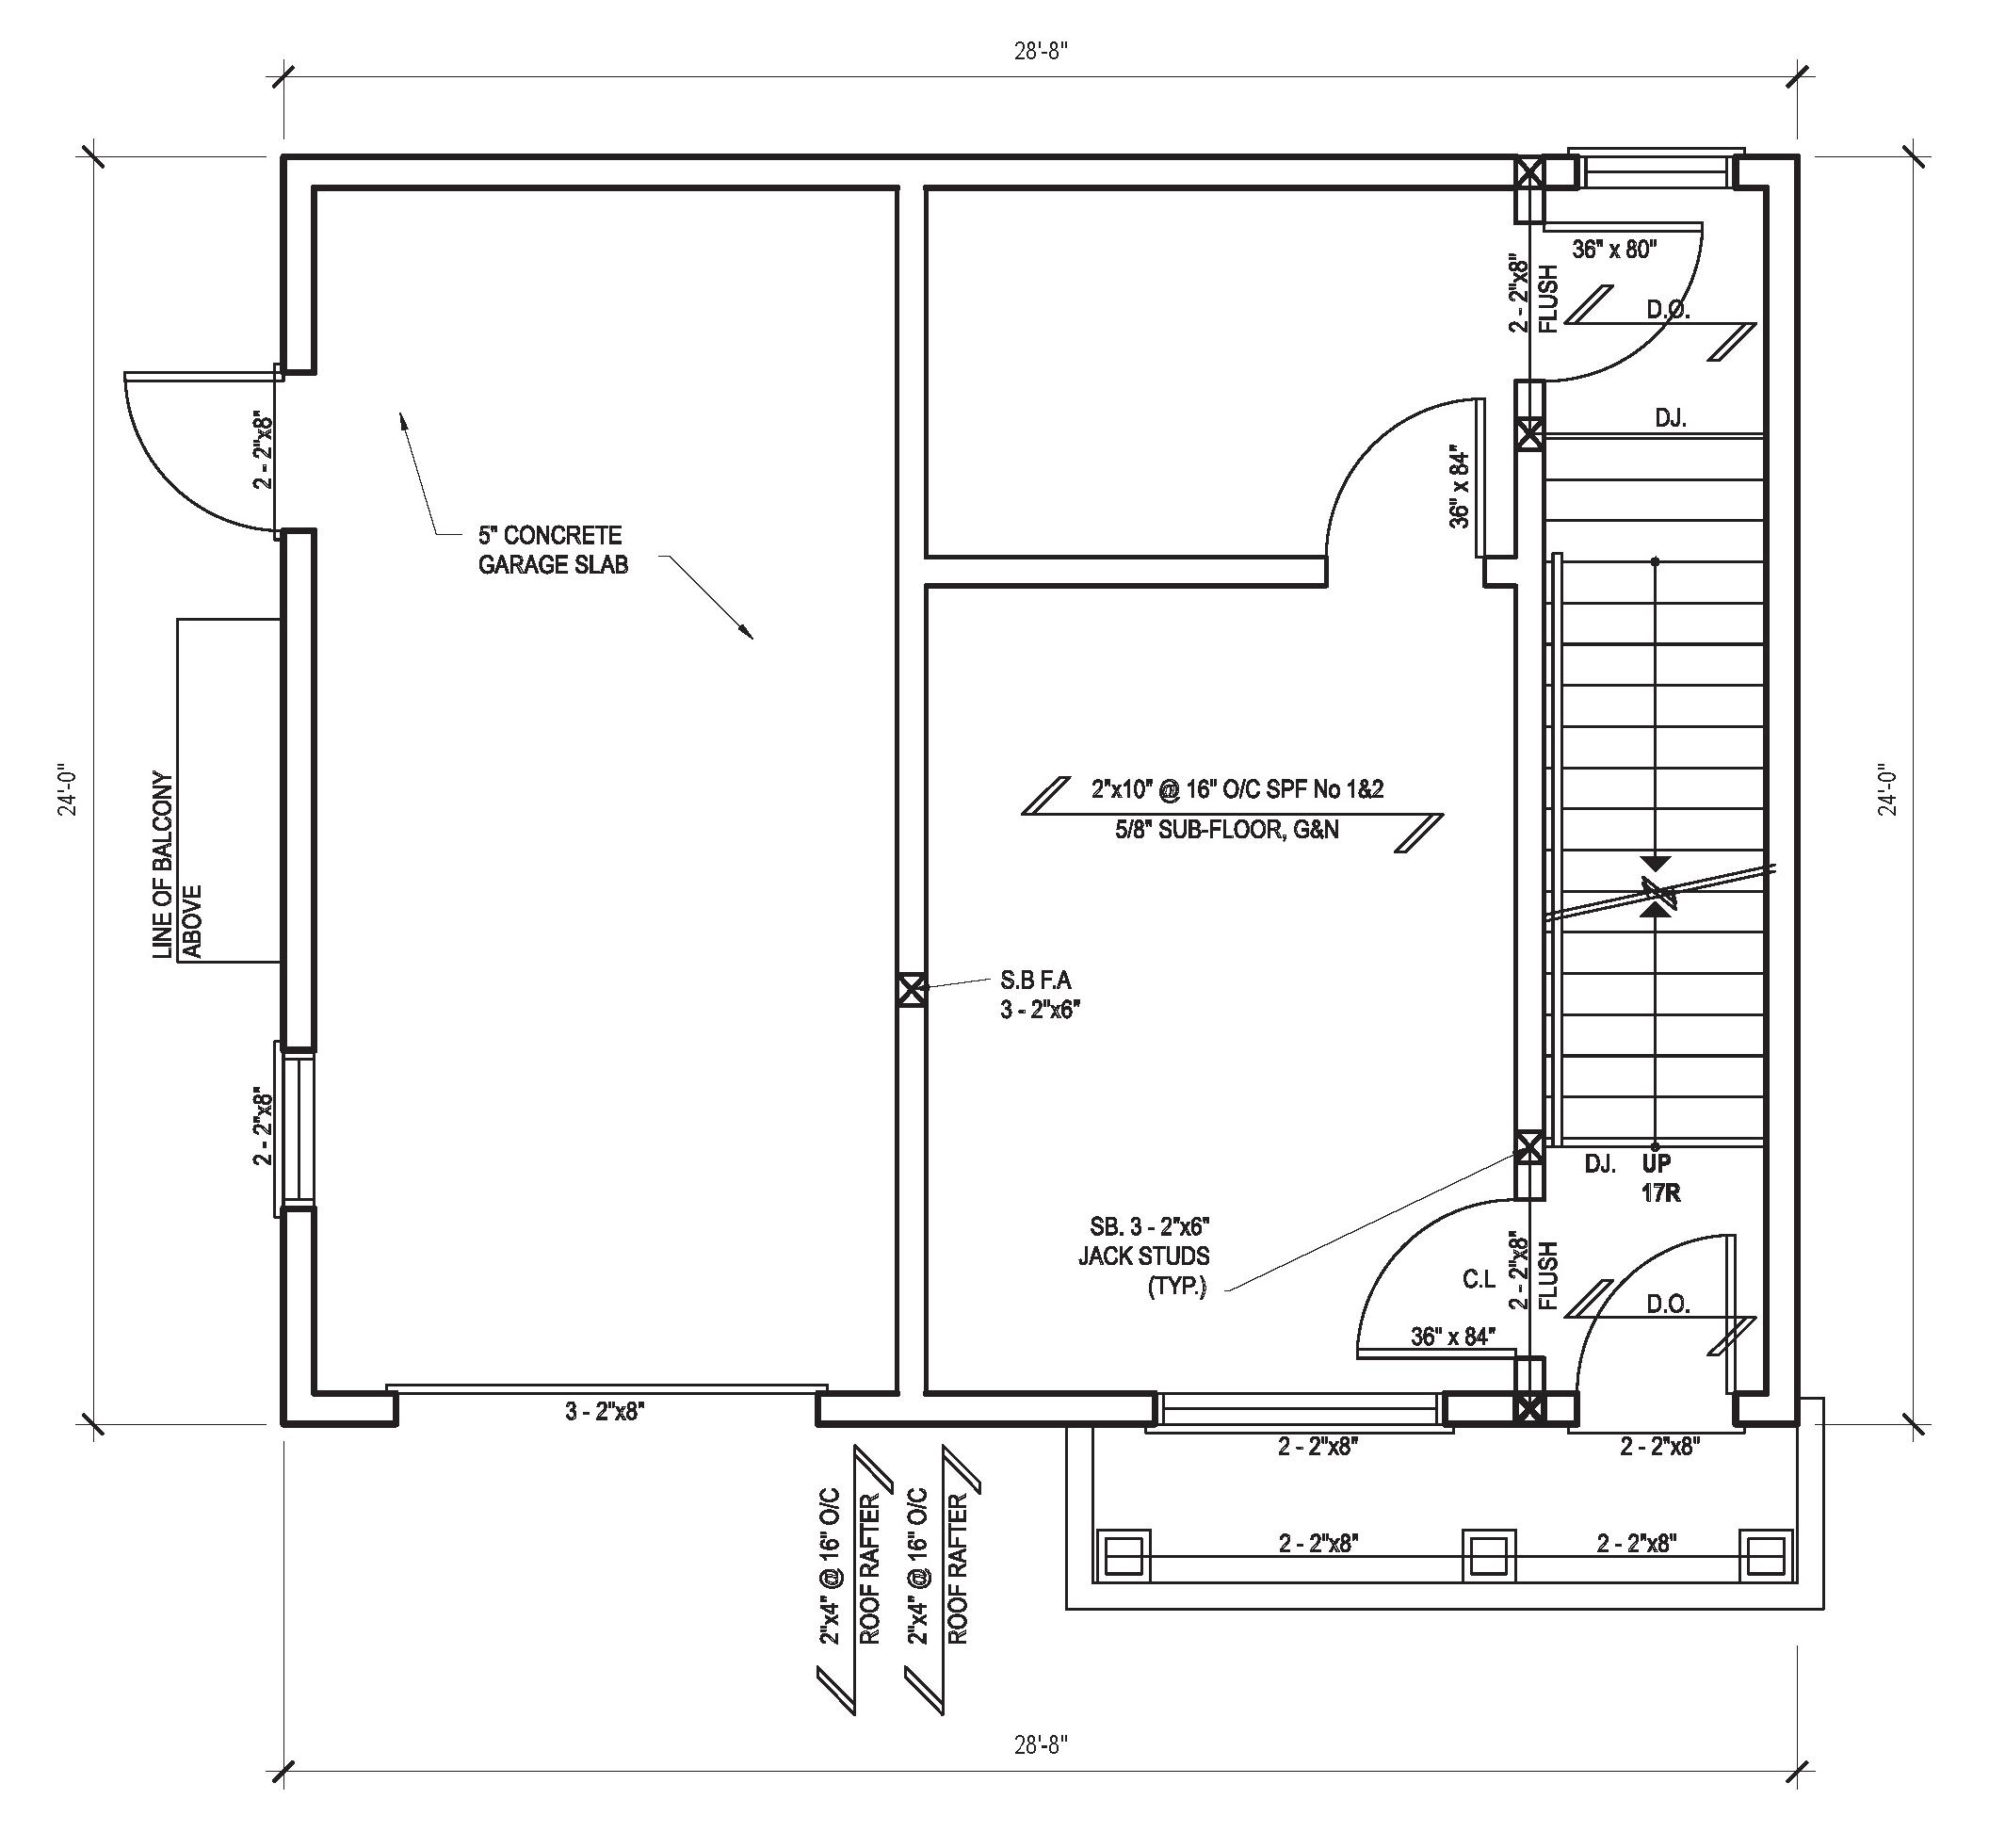
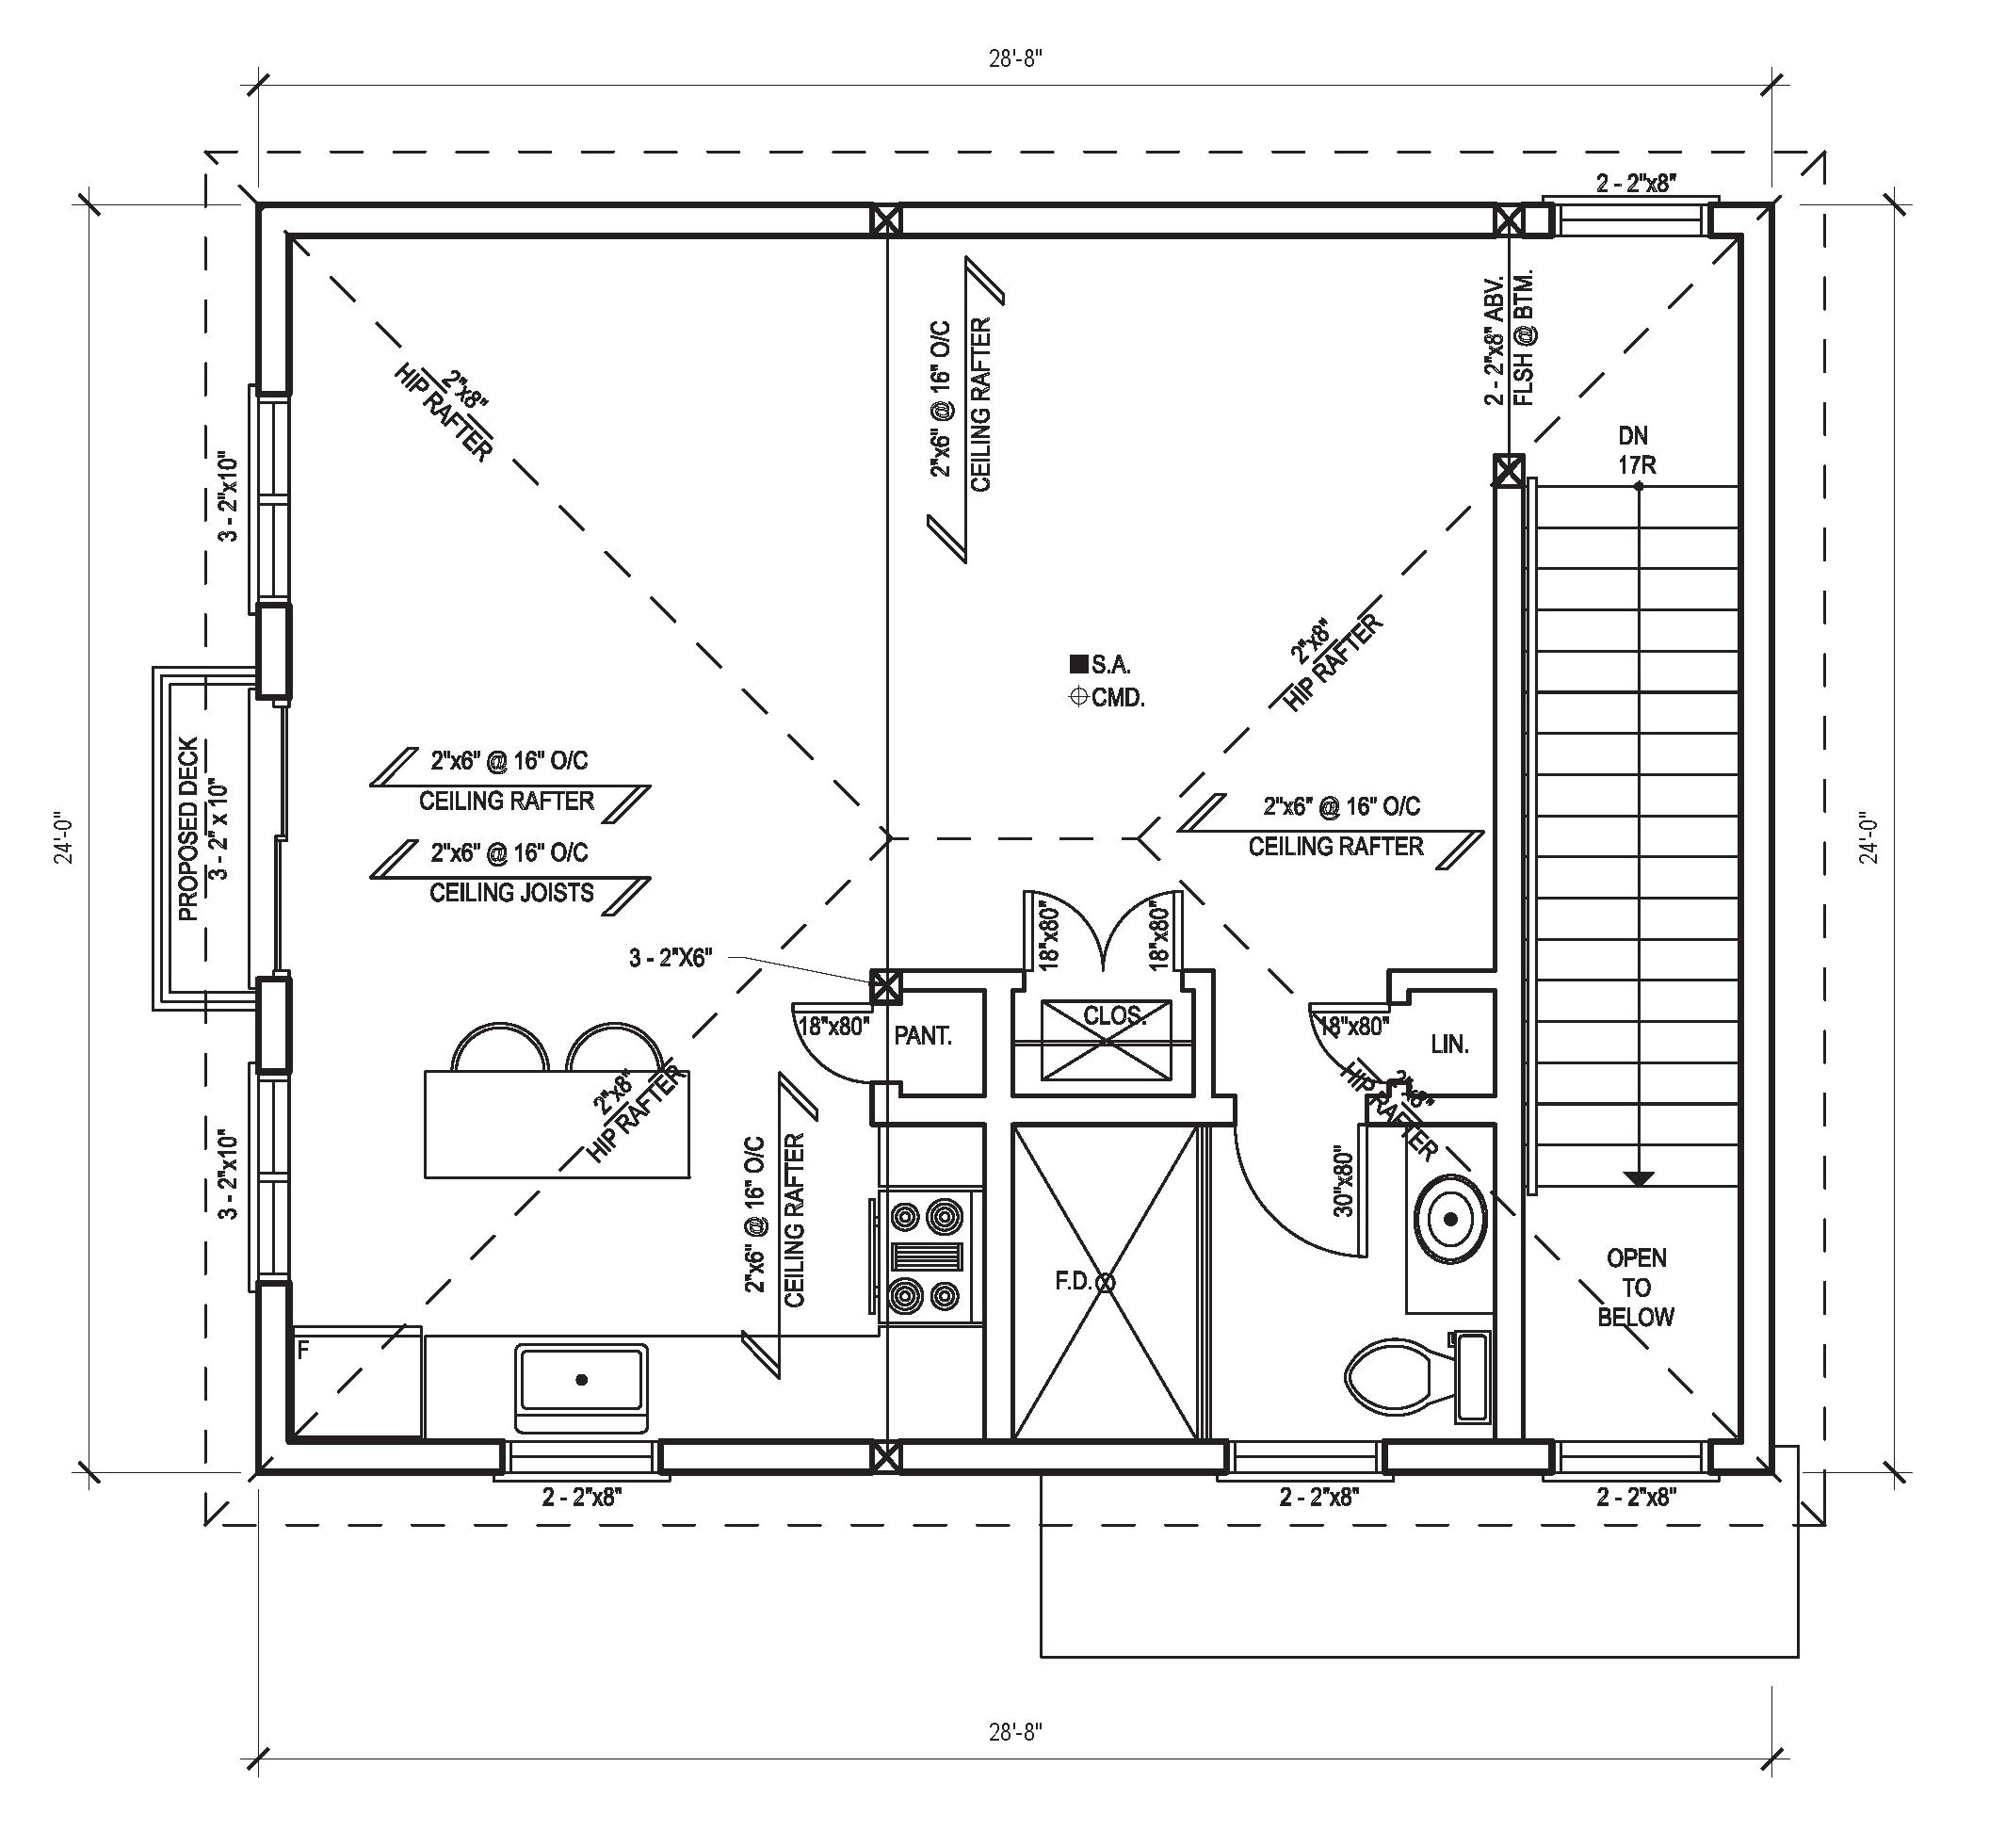
This project was done during my second semester in George Brown College. In Groups of two, we were tasked to design a house from start to finish, taking our conceptual house from bubble diagrams to working drawings. We were assigned with a site plan, a project program, and a list of by-laws that we had to follow. After many iterations, we came up with a design that includes 3 storeys, 2 terrace spaces, and a basement. We then took the design, and checked it by the building code to make sure that our design is legal. The last part was to make working drawings that include everything that would be put into permit drawings.

Basement Plan
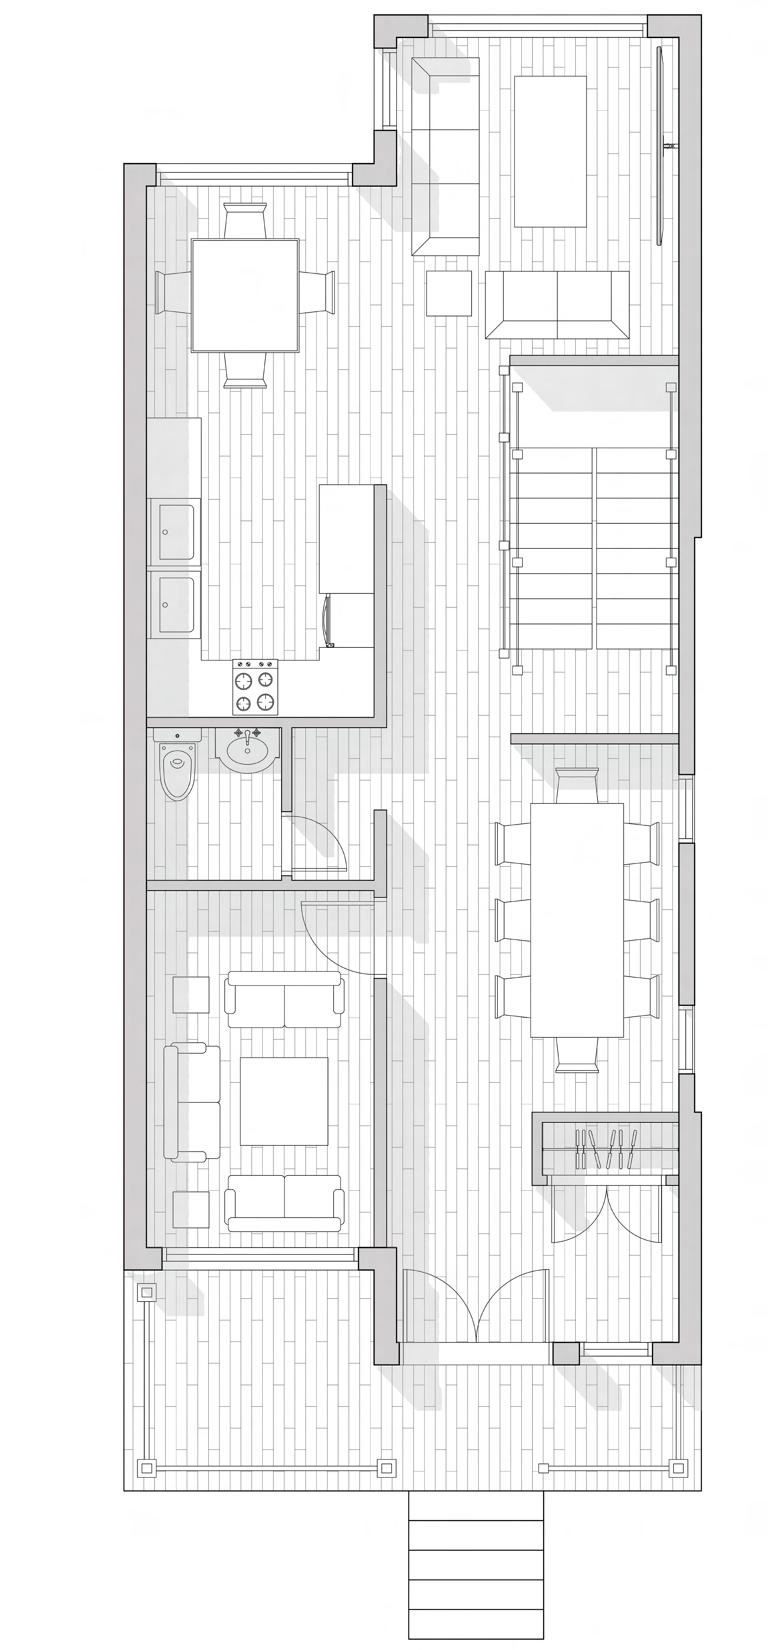
FLoor Plan

Metal Cladding W/ Batten Seams
3/8” Plywood Sheathing
1”X2” Furring Strips
3/8” Plywood Sheathing
2” Rigid Insulation
5/8” Plywood Sheathing
2”X10” Rafters
Batt Insualtion (R-50 Min.)
1/2” Gypsum Board
Metal Cladding W/ Batten Seams
2” Rigid Insulation
5/8” Plywood Sheathing
2”X6” Wood Studs
Batt Insulation (R-22)
1/2” Gypsum Board
Guardrails (Min. 42” High)
DECK BOARD
2”X8” Rafters
Blocking
8”X8” Steel Post
3” Stone Veneer
1 1/2” Air Space
1” Rigid Insulation
5/8” Plywood Sheathing
2”X6” Wood Studs
1/2” Gypsum Board
10” Poured Conc. Foundation Wall
1 1/2” Air Space
1” Rigid Insulation
5/8” Plywood Sheathing
2”X6” Wood Studs
1/2” Gypsum Board
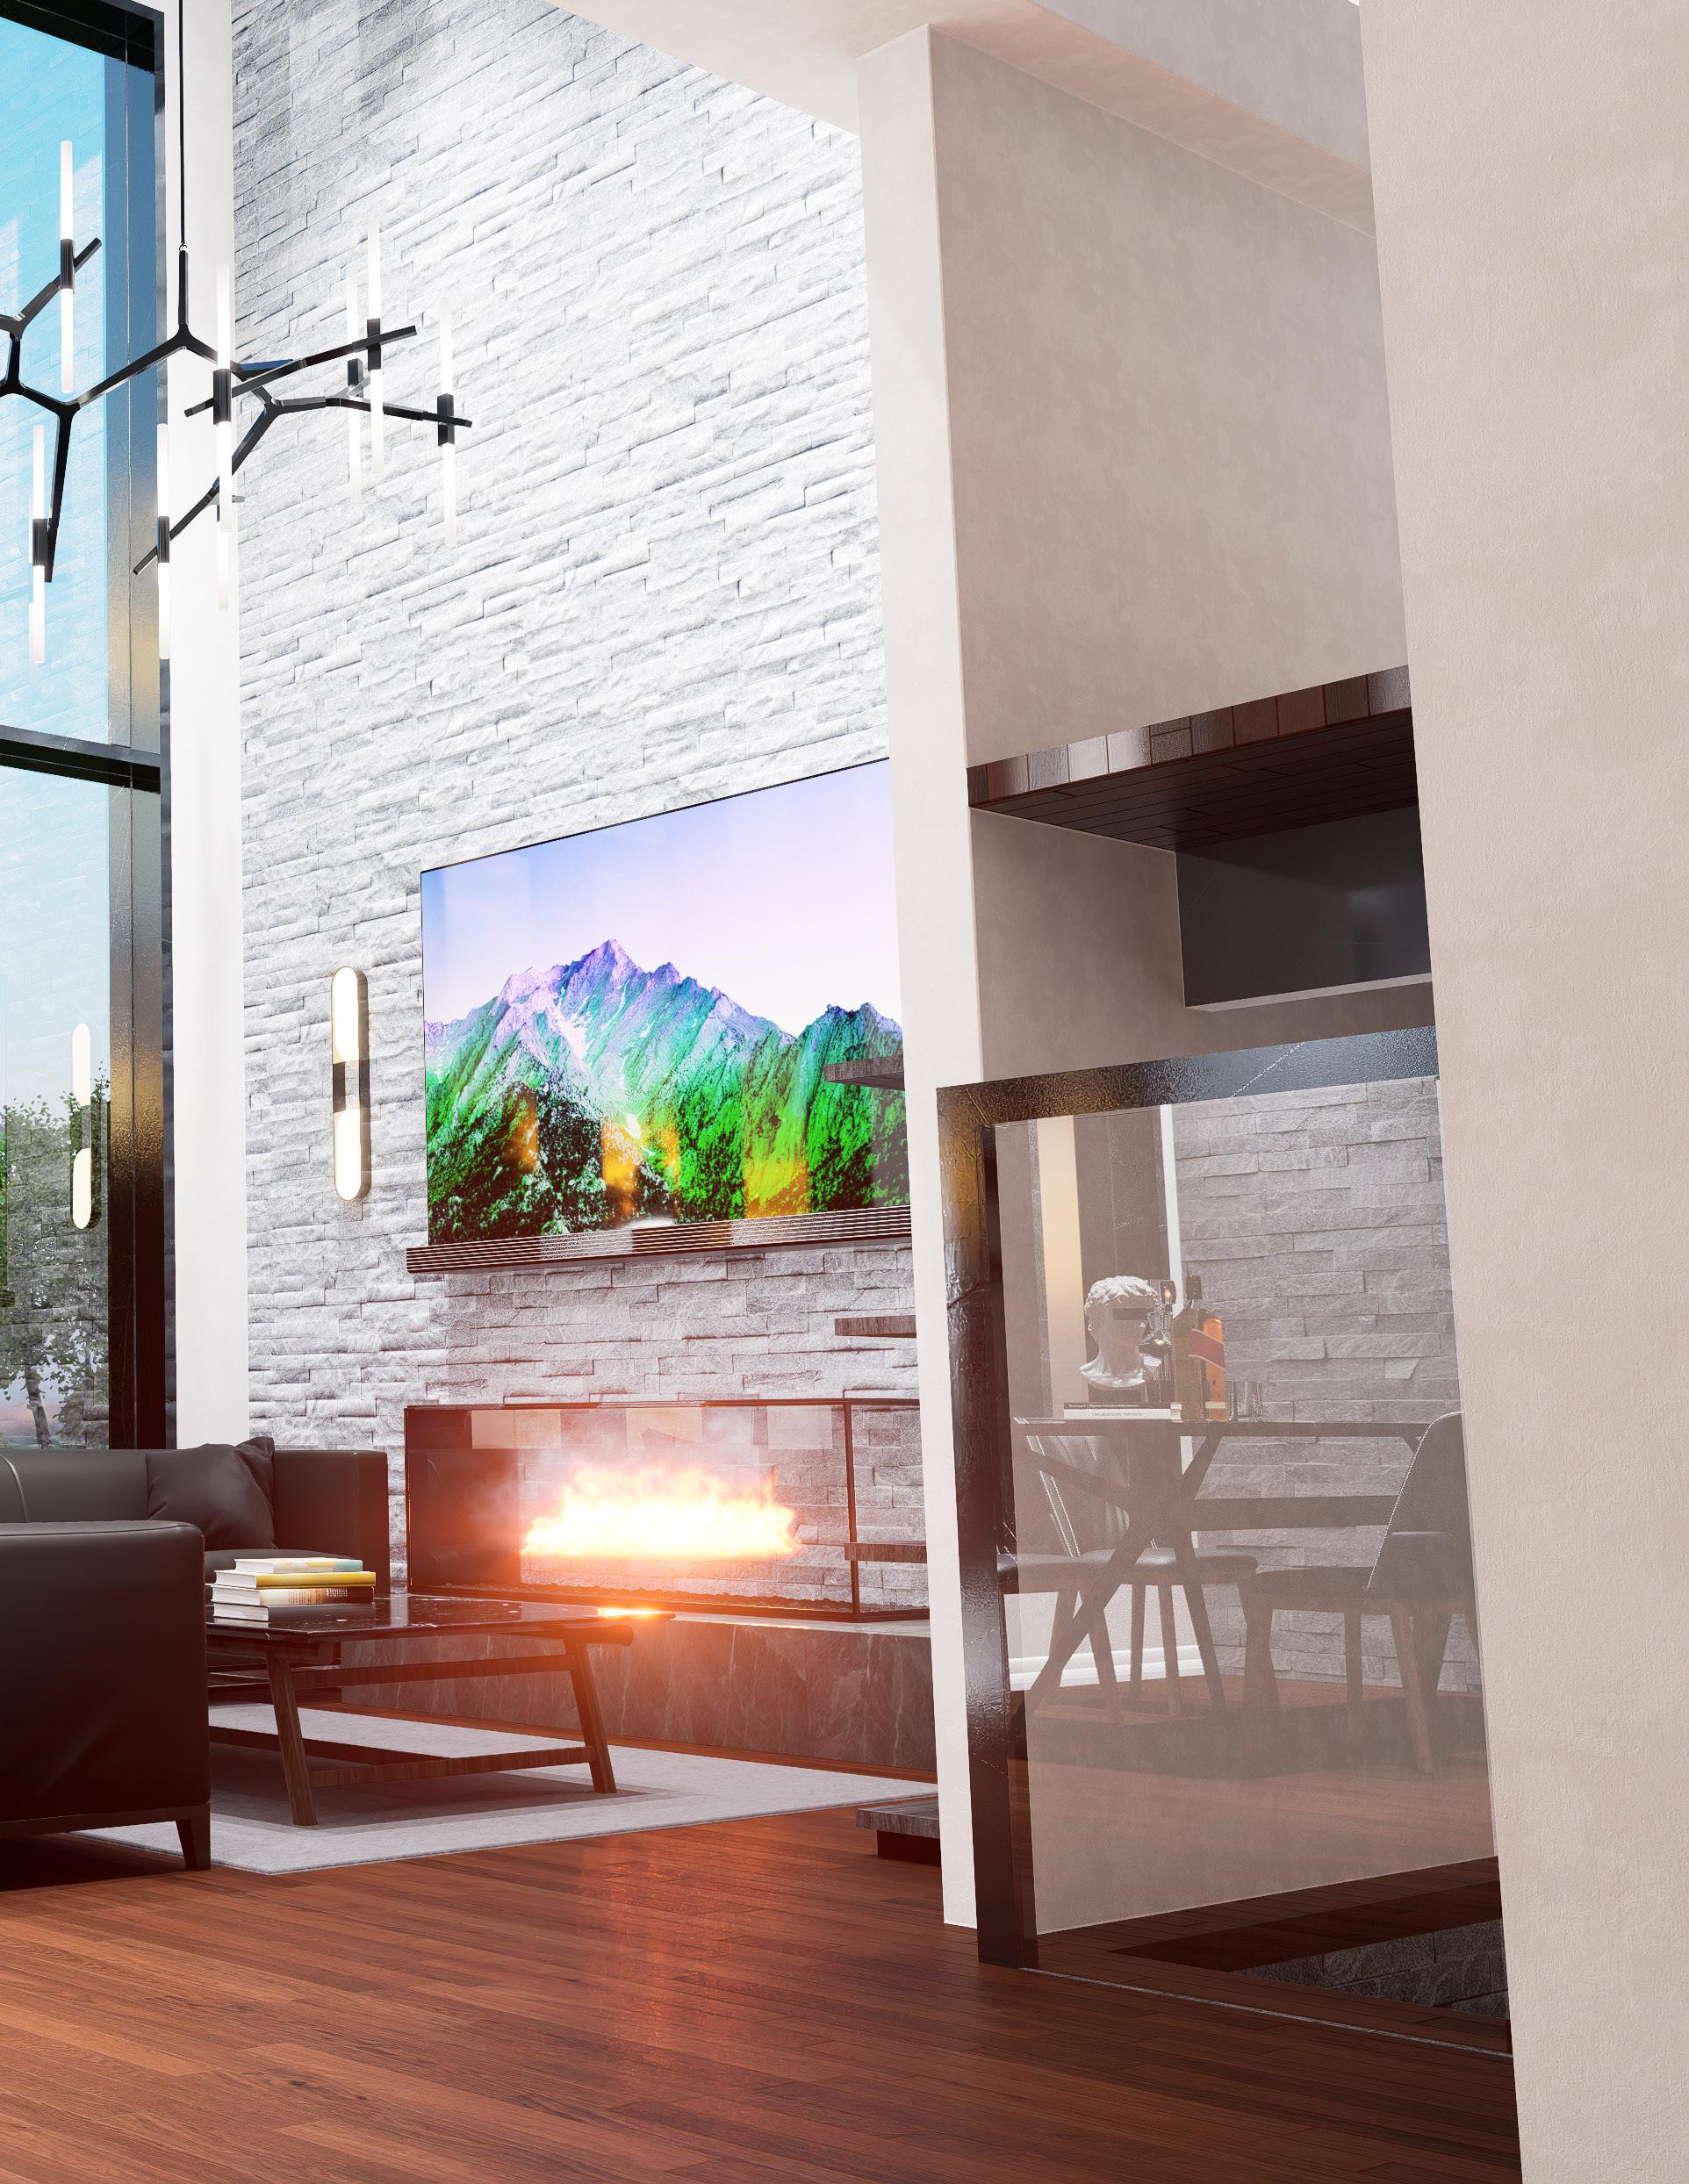
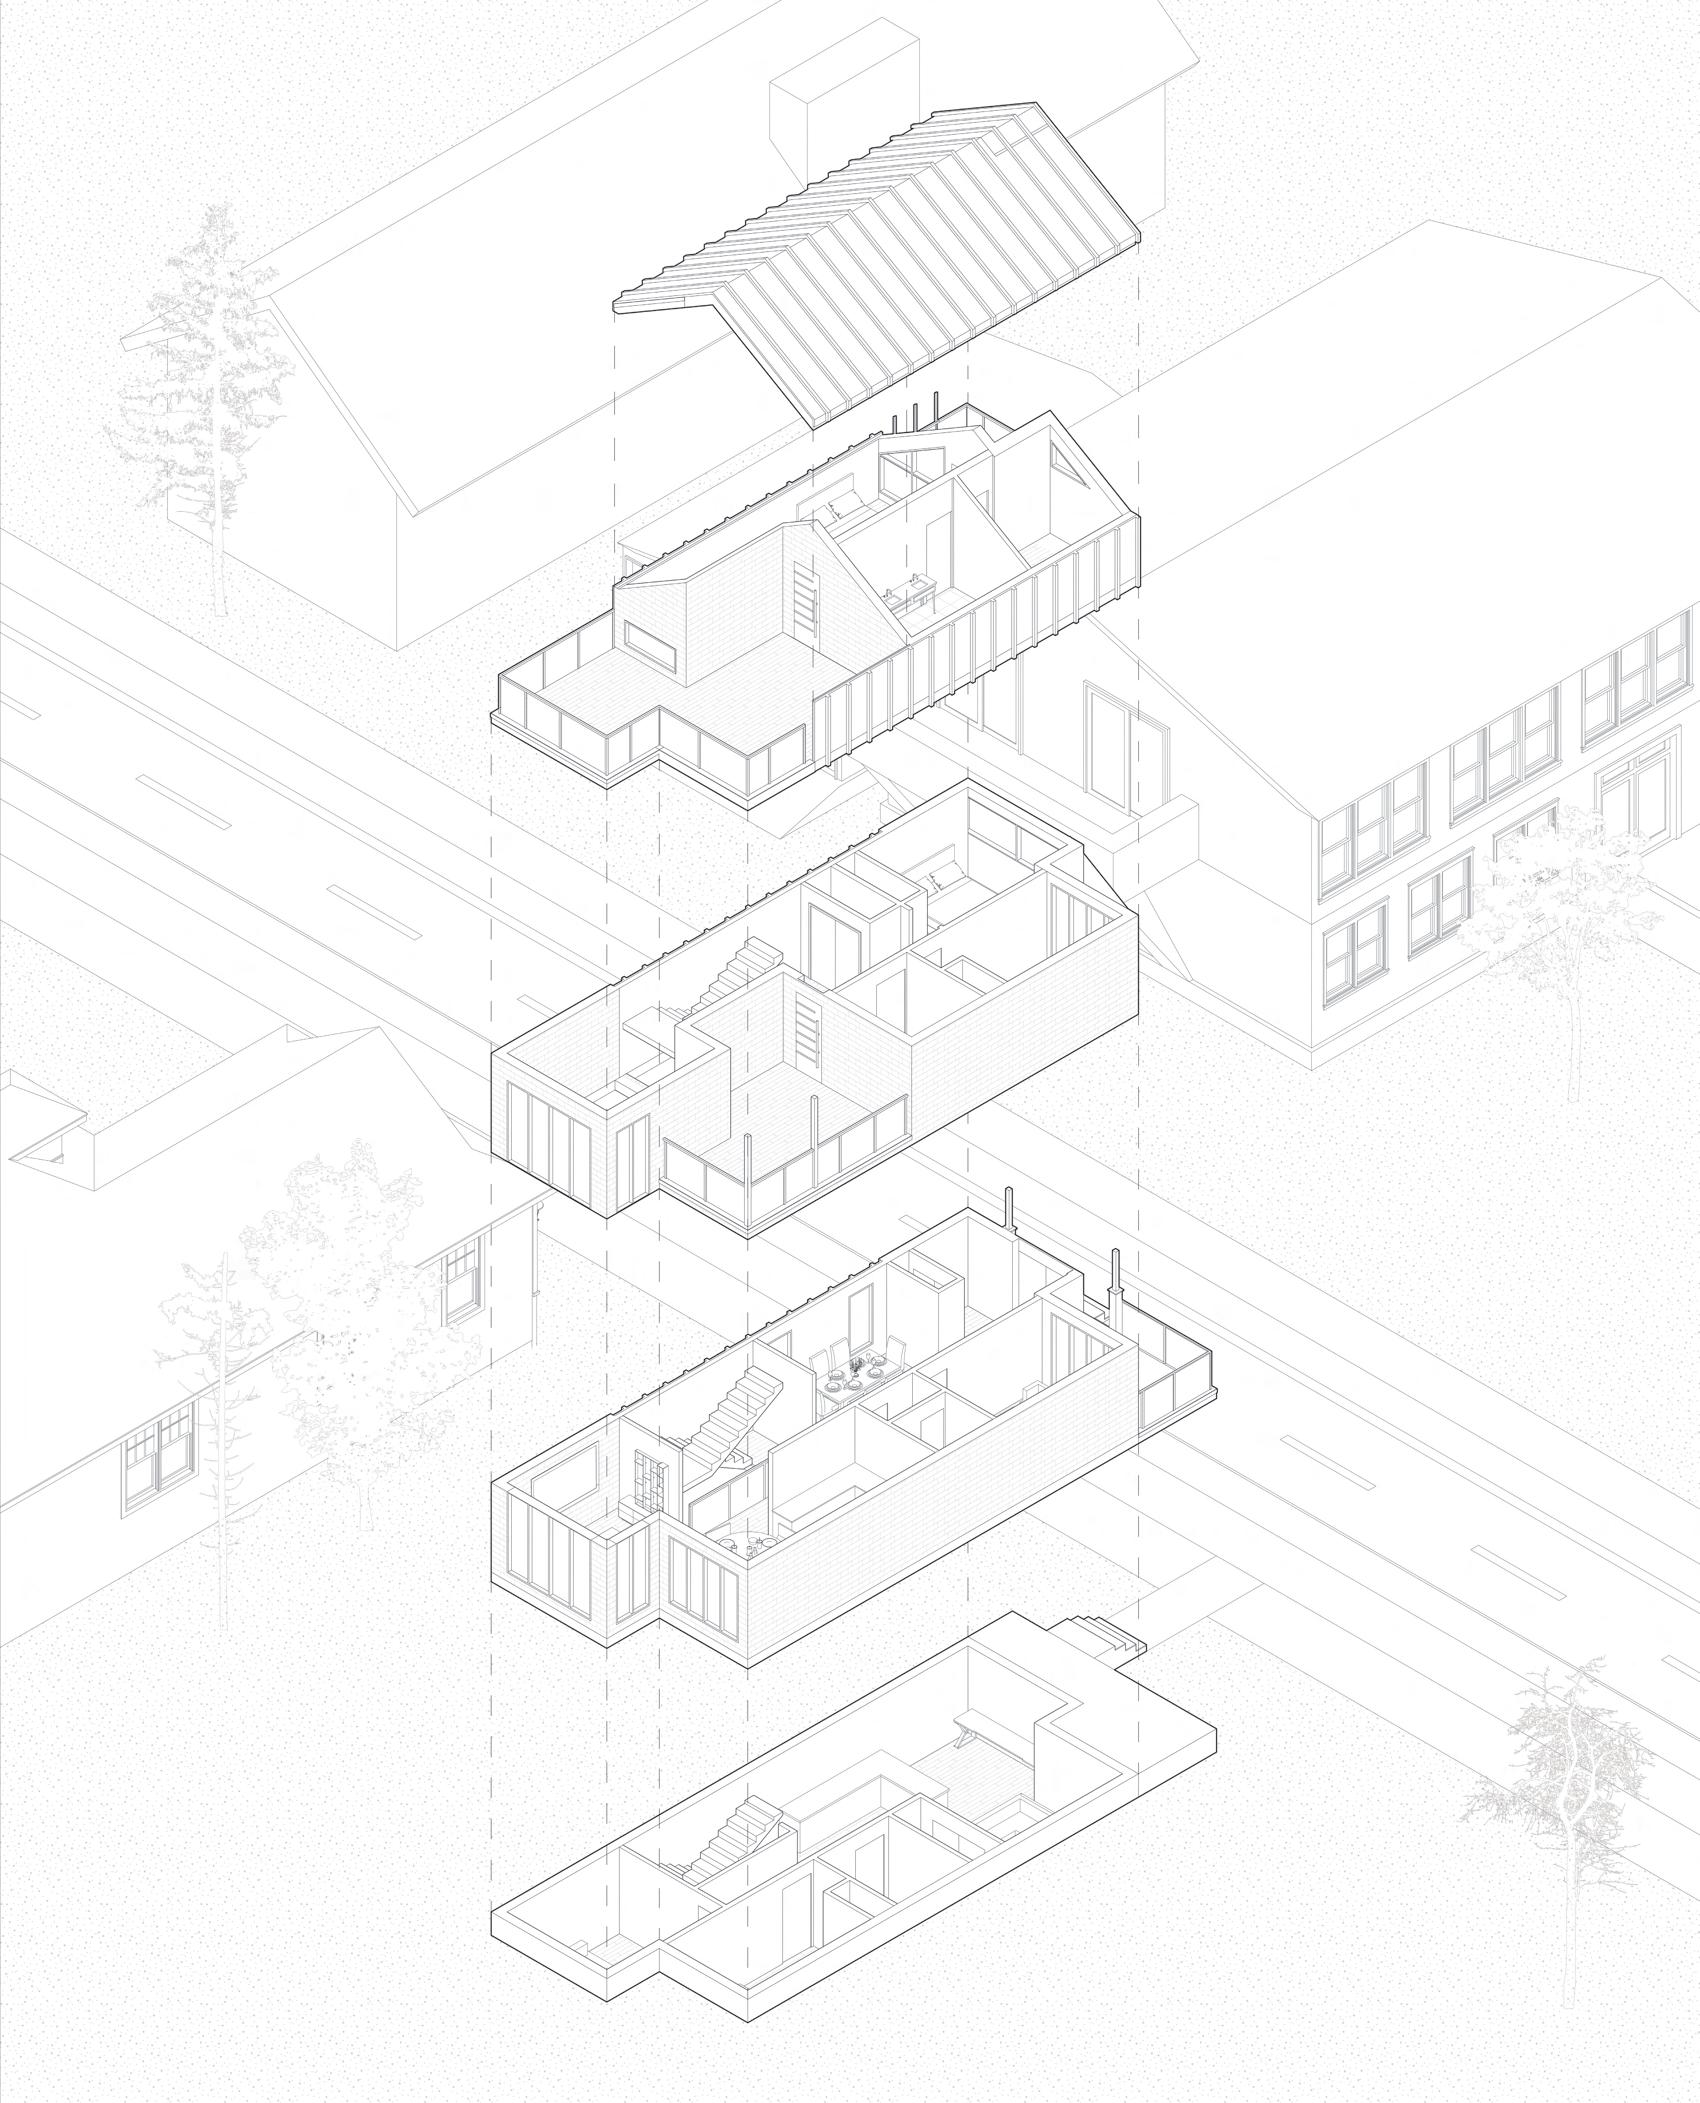
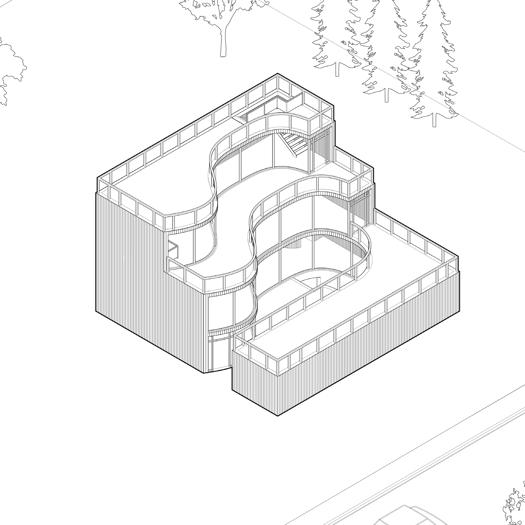
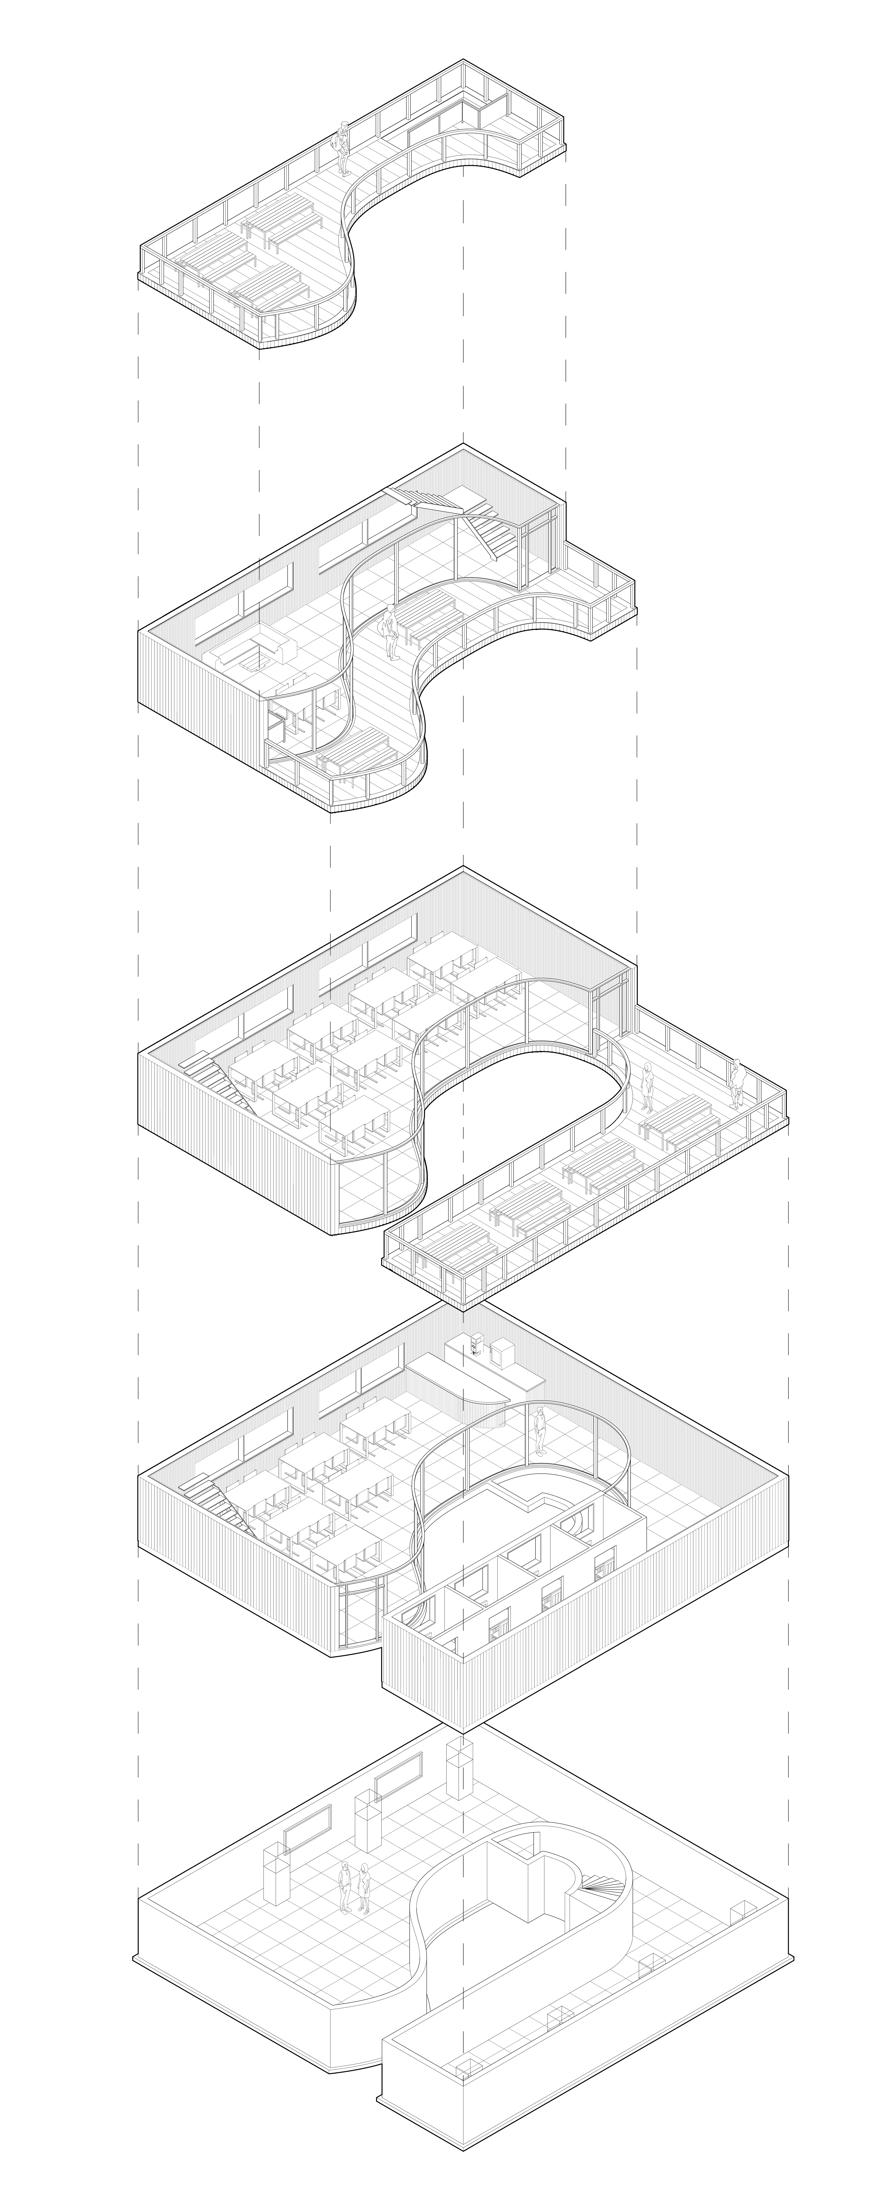
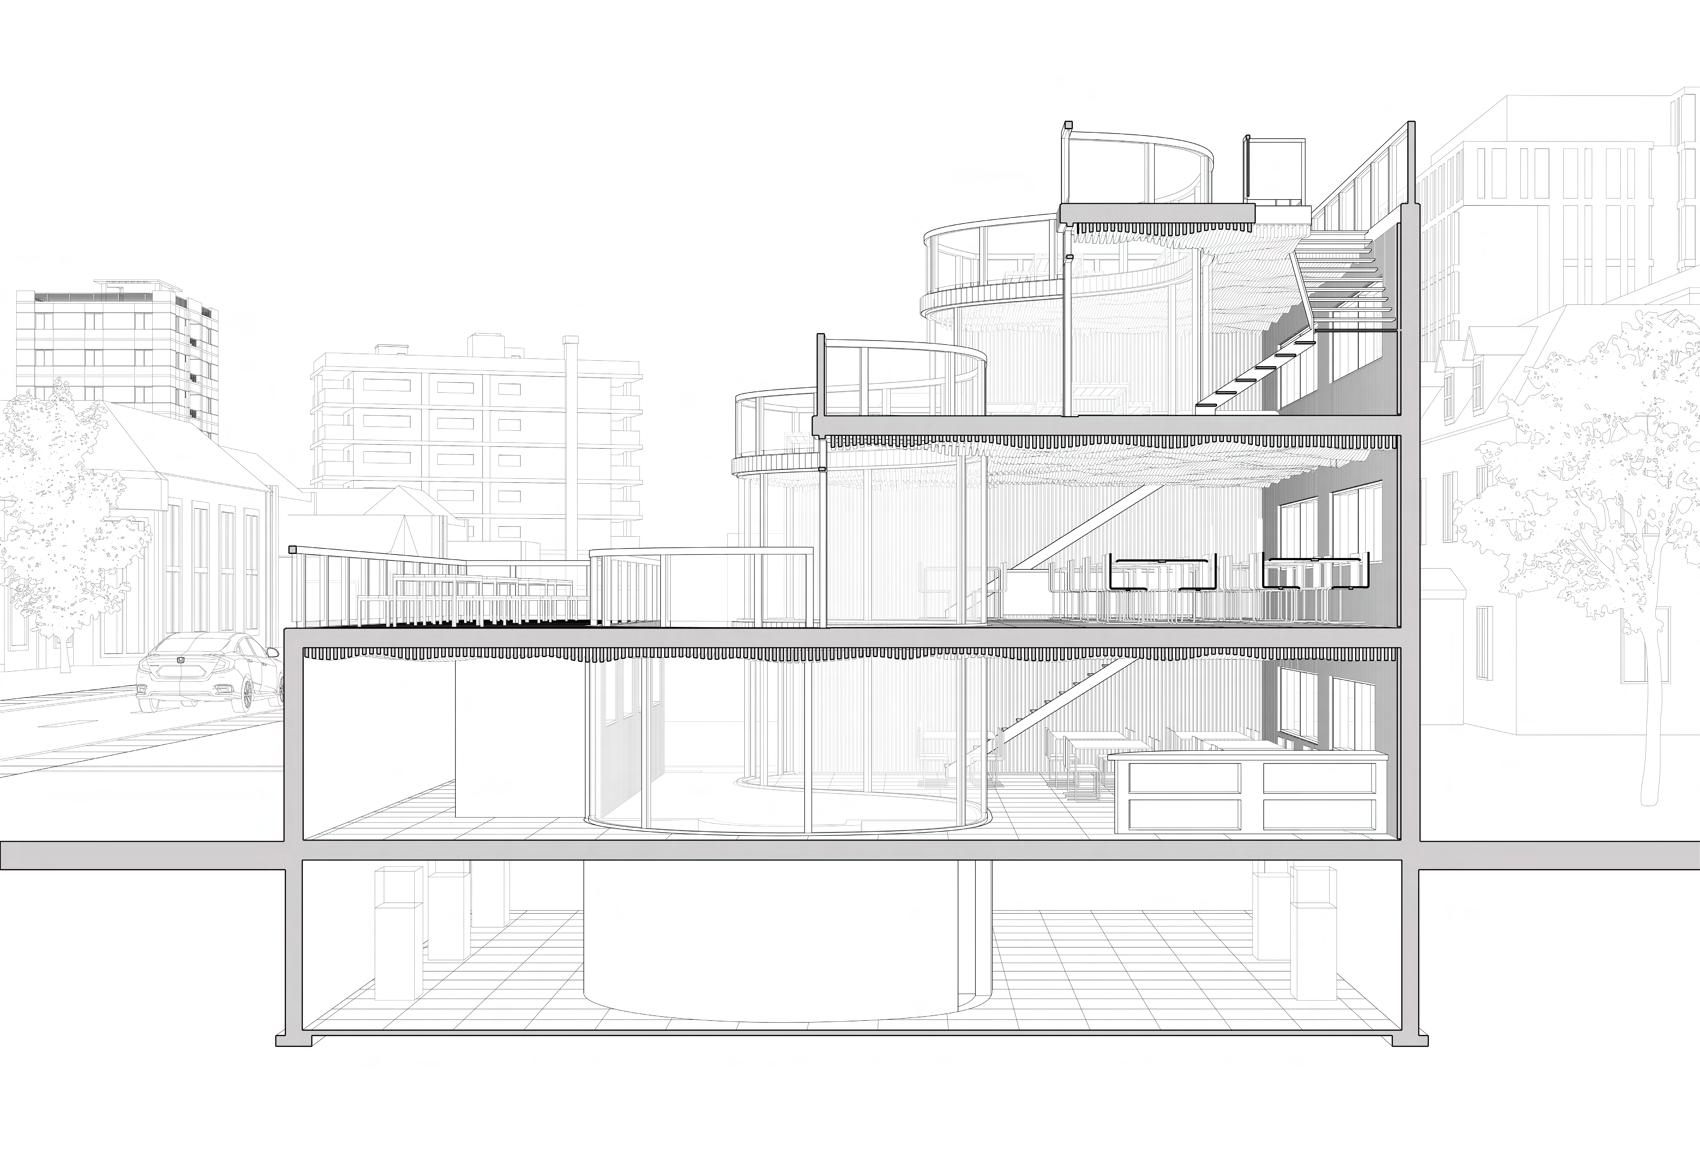
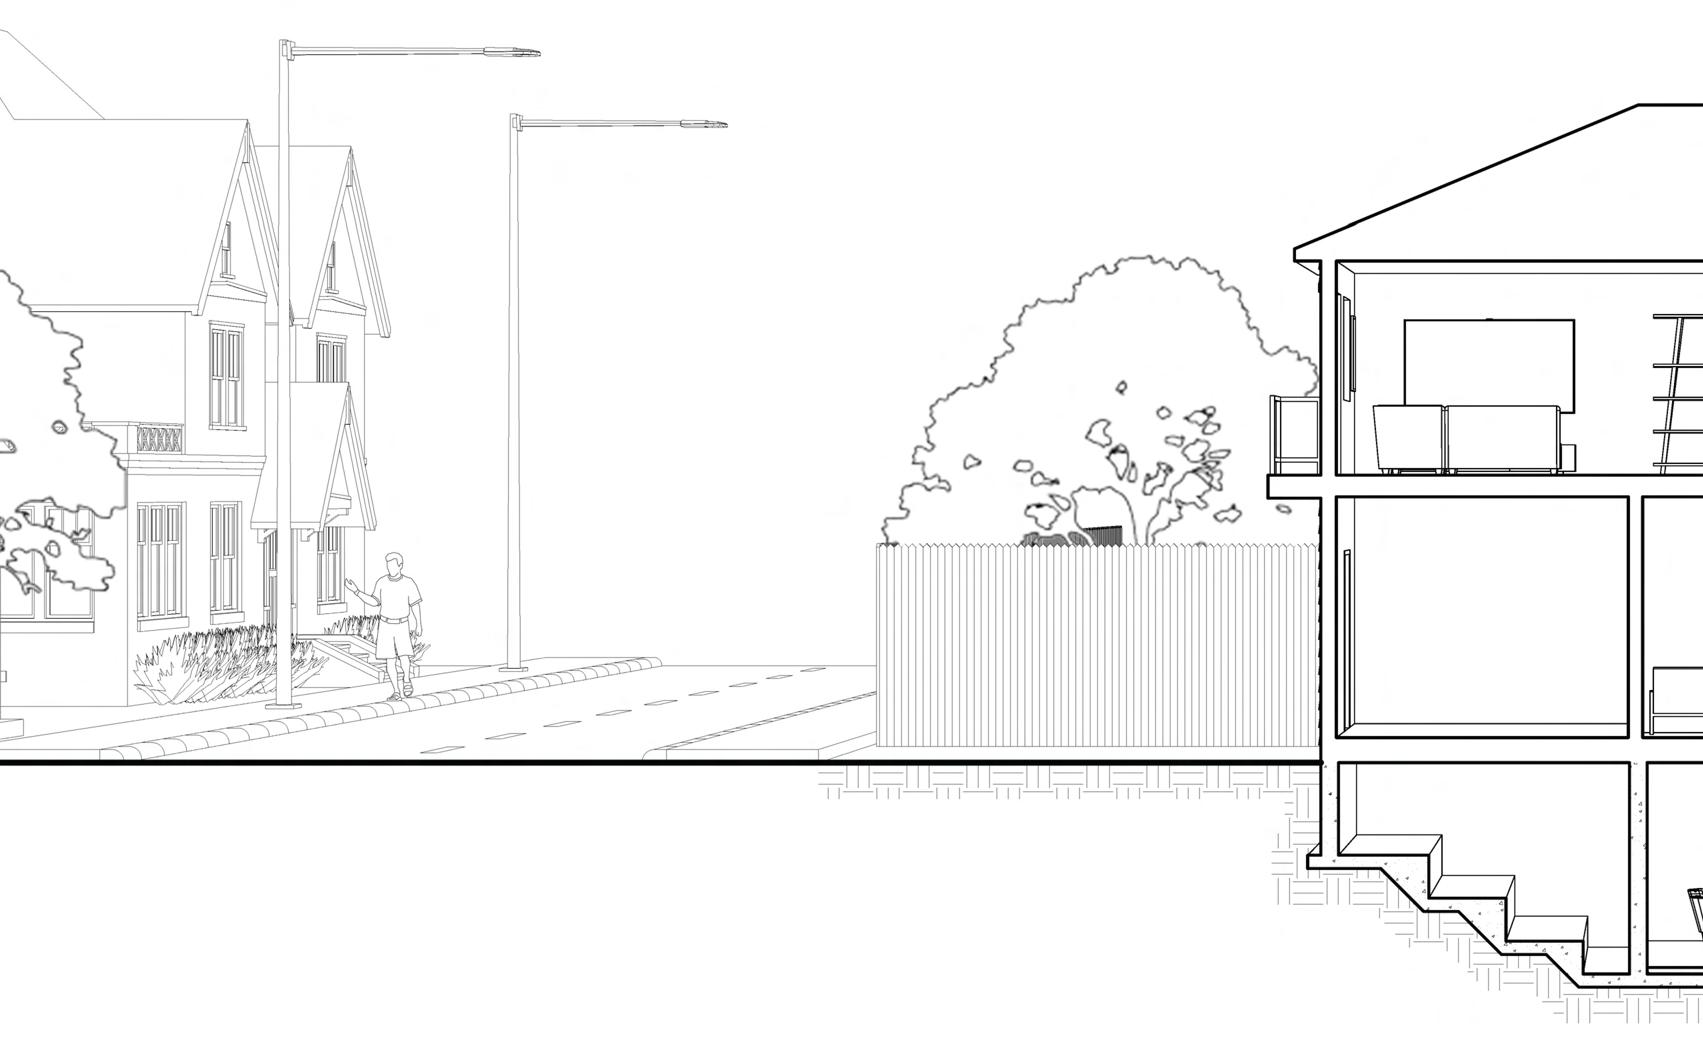
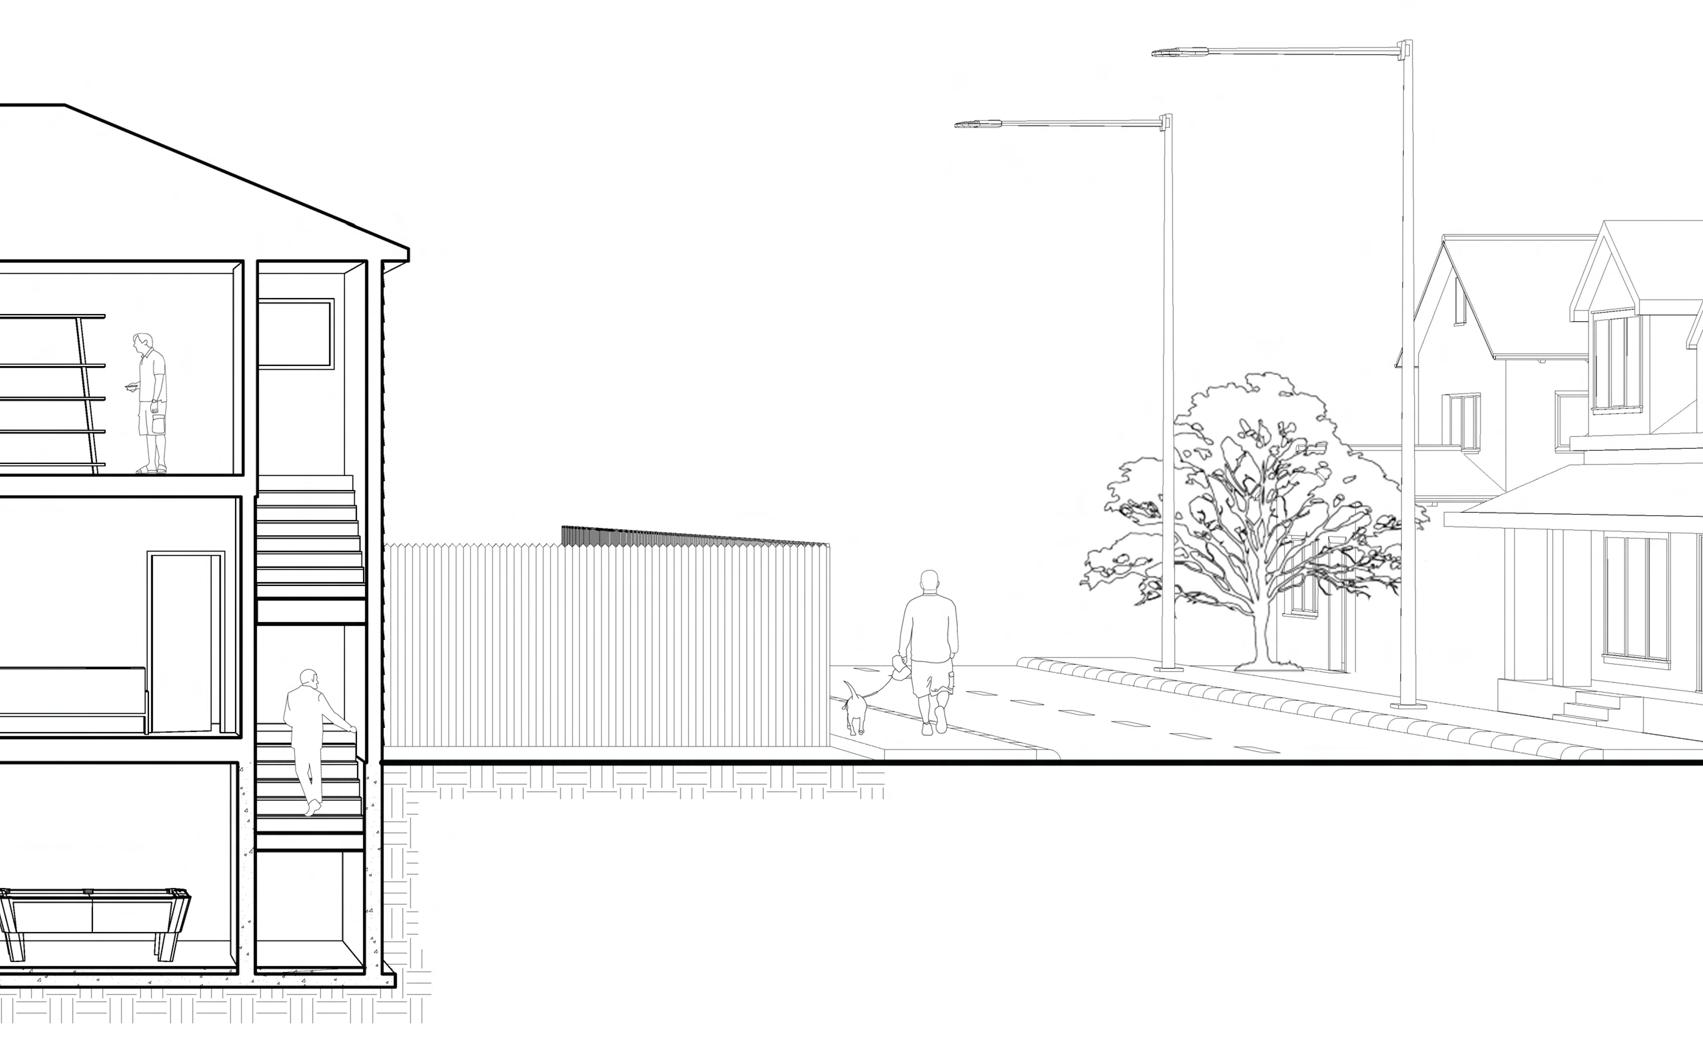
This is a project I took on during my second year in university. The prompt was to design a study center next to the Goldring Center in Toronto, Ontario. This project was meant to accomodate a plenty of studying spaces, and one extra program of choice, which I decided was going to be an exhibition space. I decided to make the space open, with terrace spaces on top of every floor to maximize space, and indoor spaces that can be used for studying in both a public setting and a private setting.
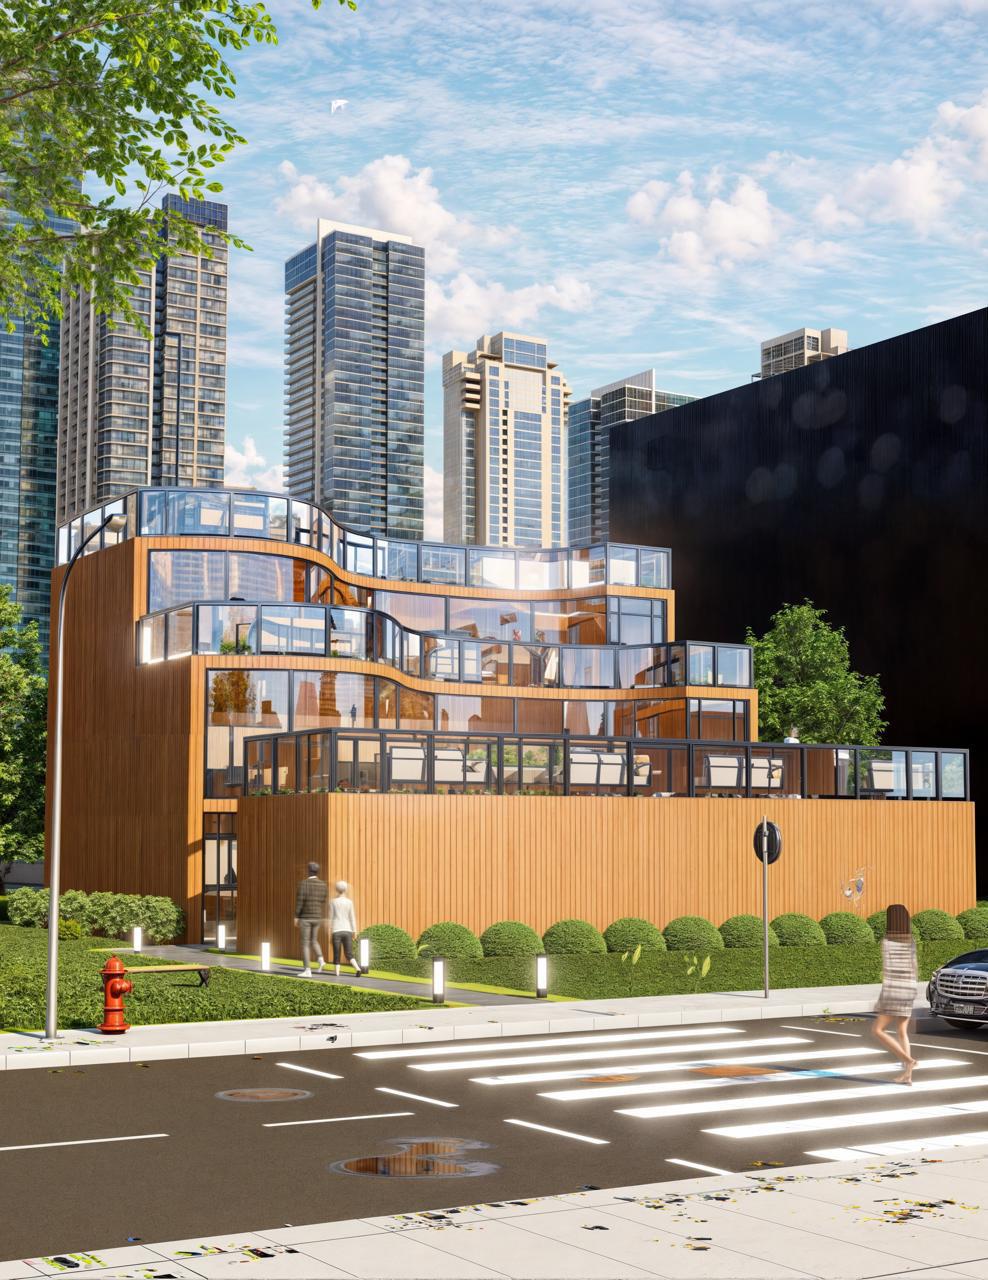
The main concepts that drove this design was transparency, and efficiency of space. Transparency was established through the use of glass walls and windows, and efficiency through the use of terrace and basement spaces. The exterior finish was selected to give a natural and modern feel to the building, countering the other buildings on campus that had a brutalistic and outdated style.
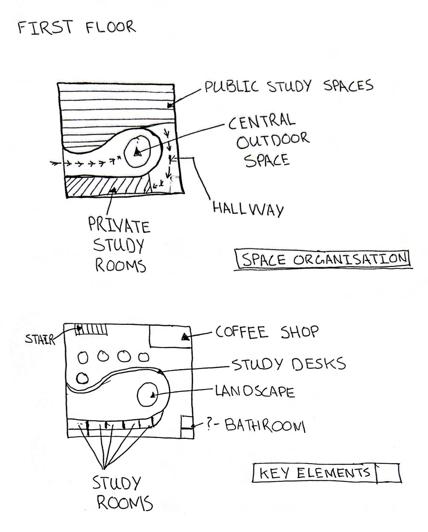
Preliminary Sketches

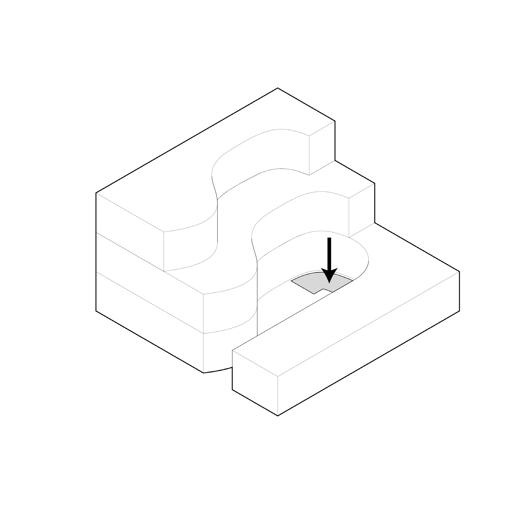
Concept Diagram


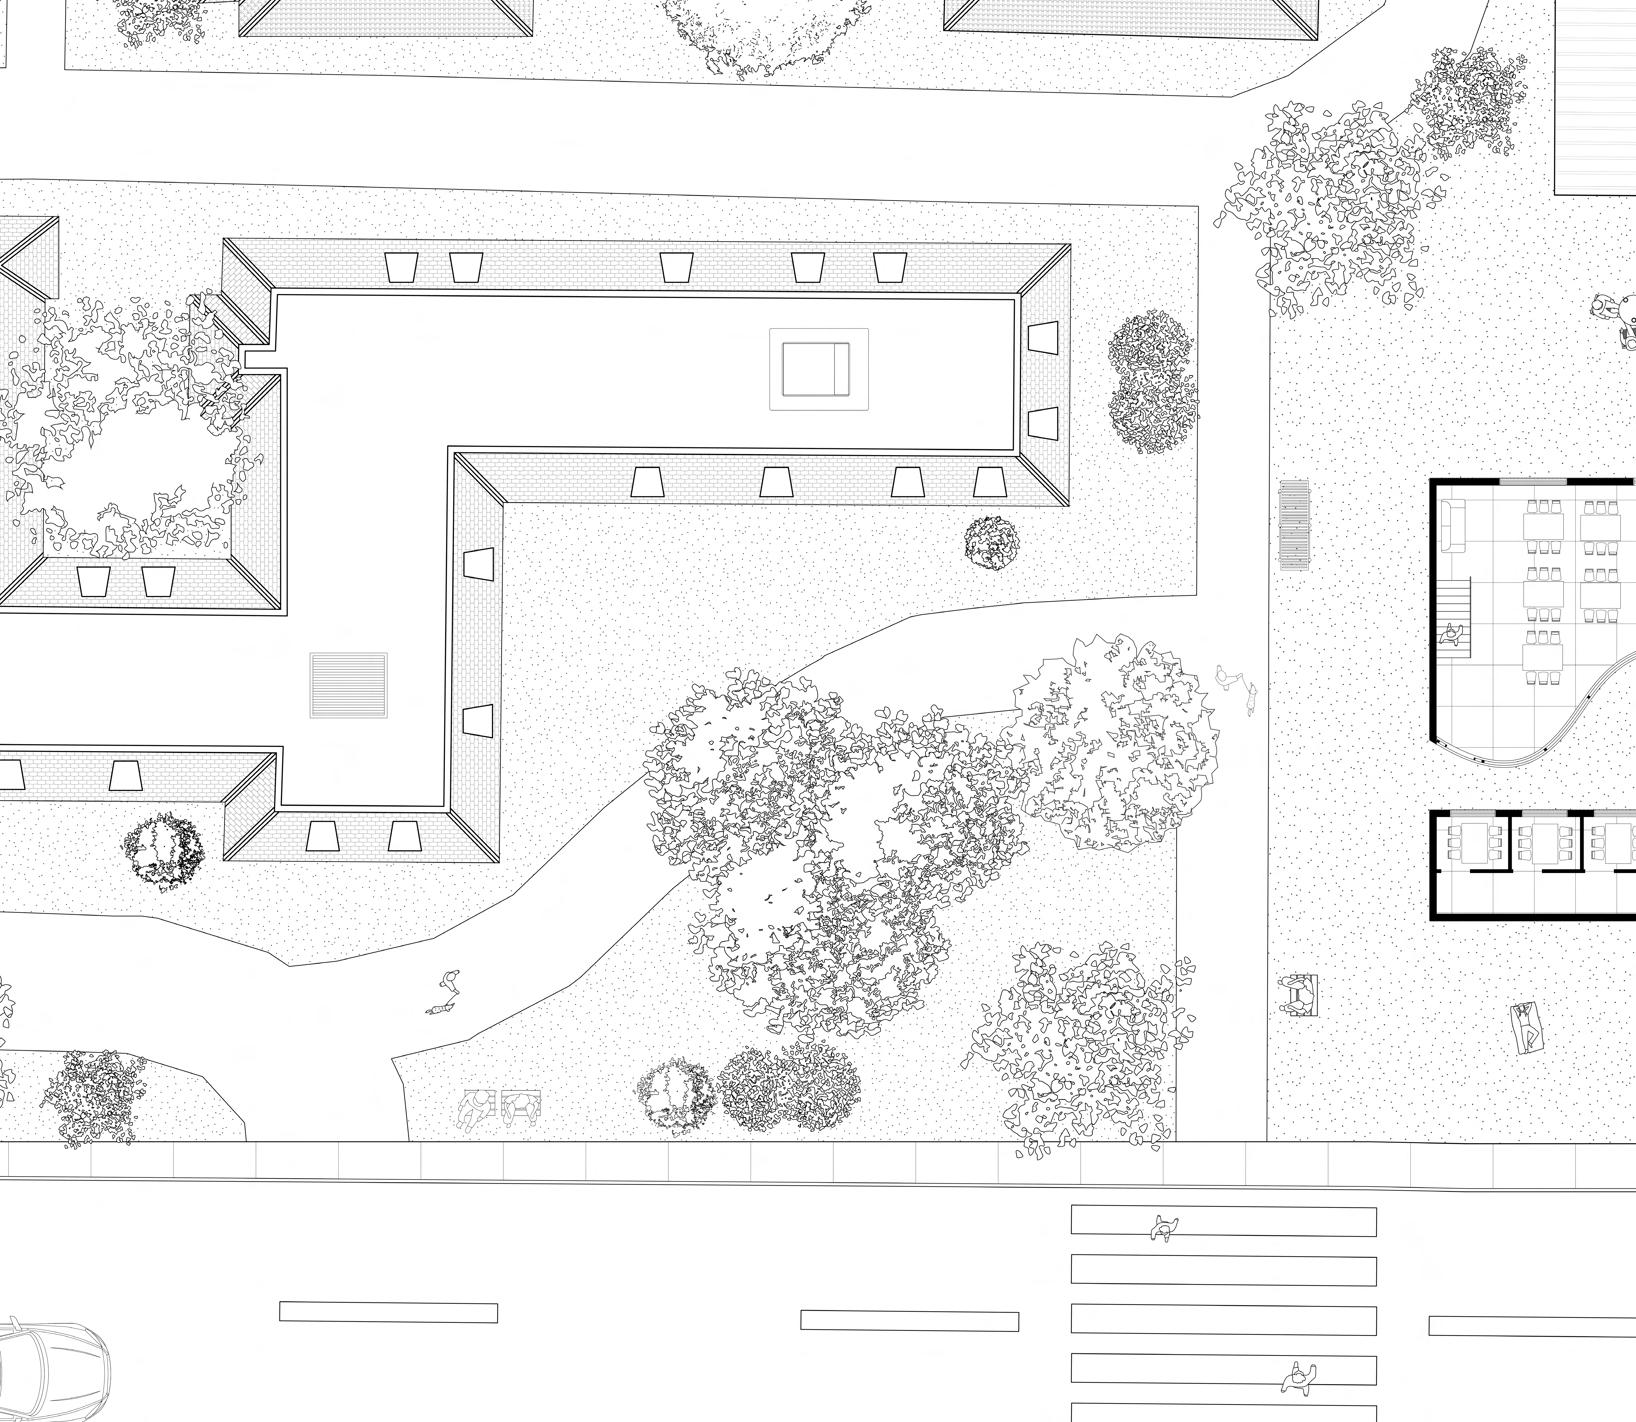
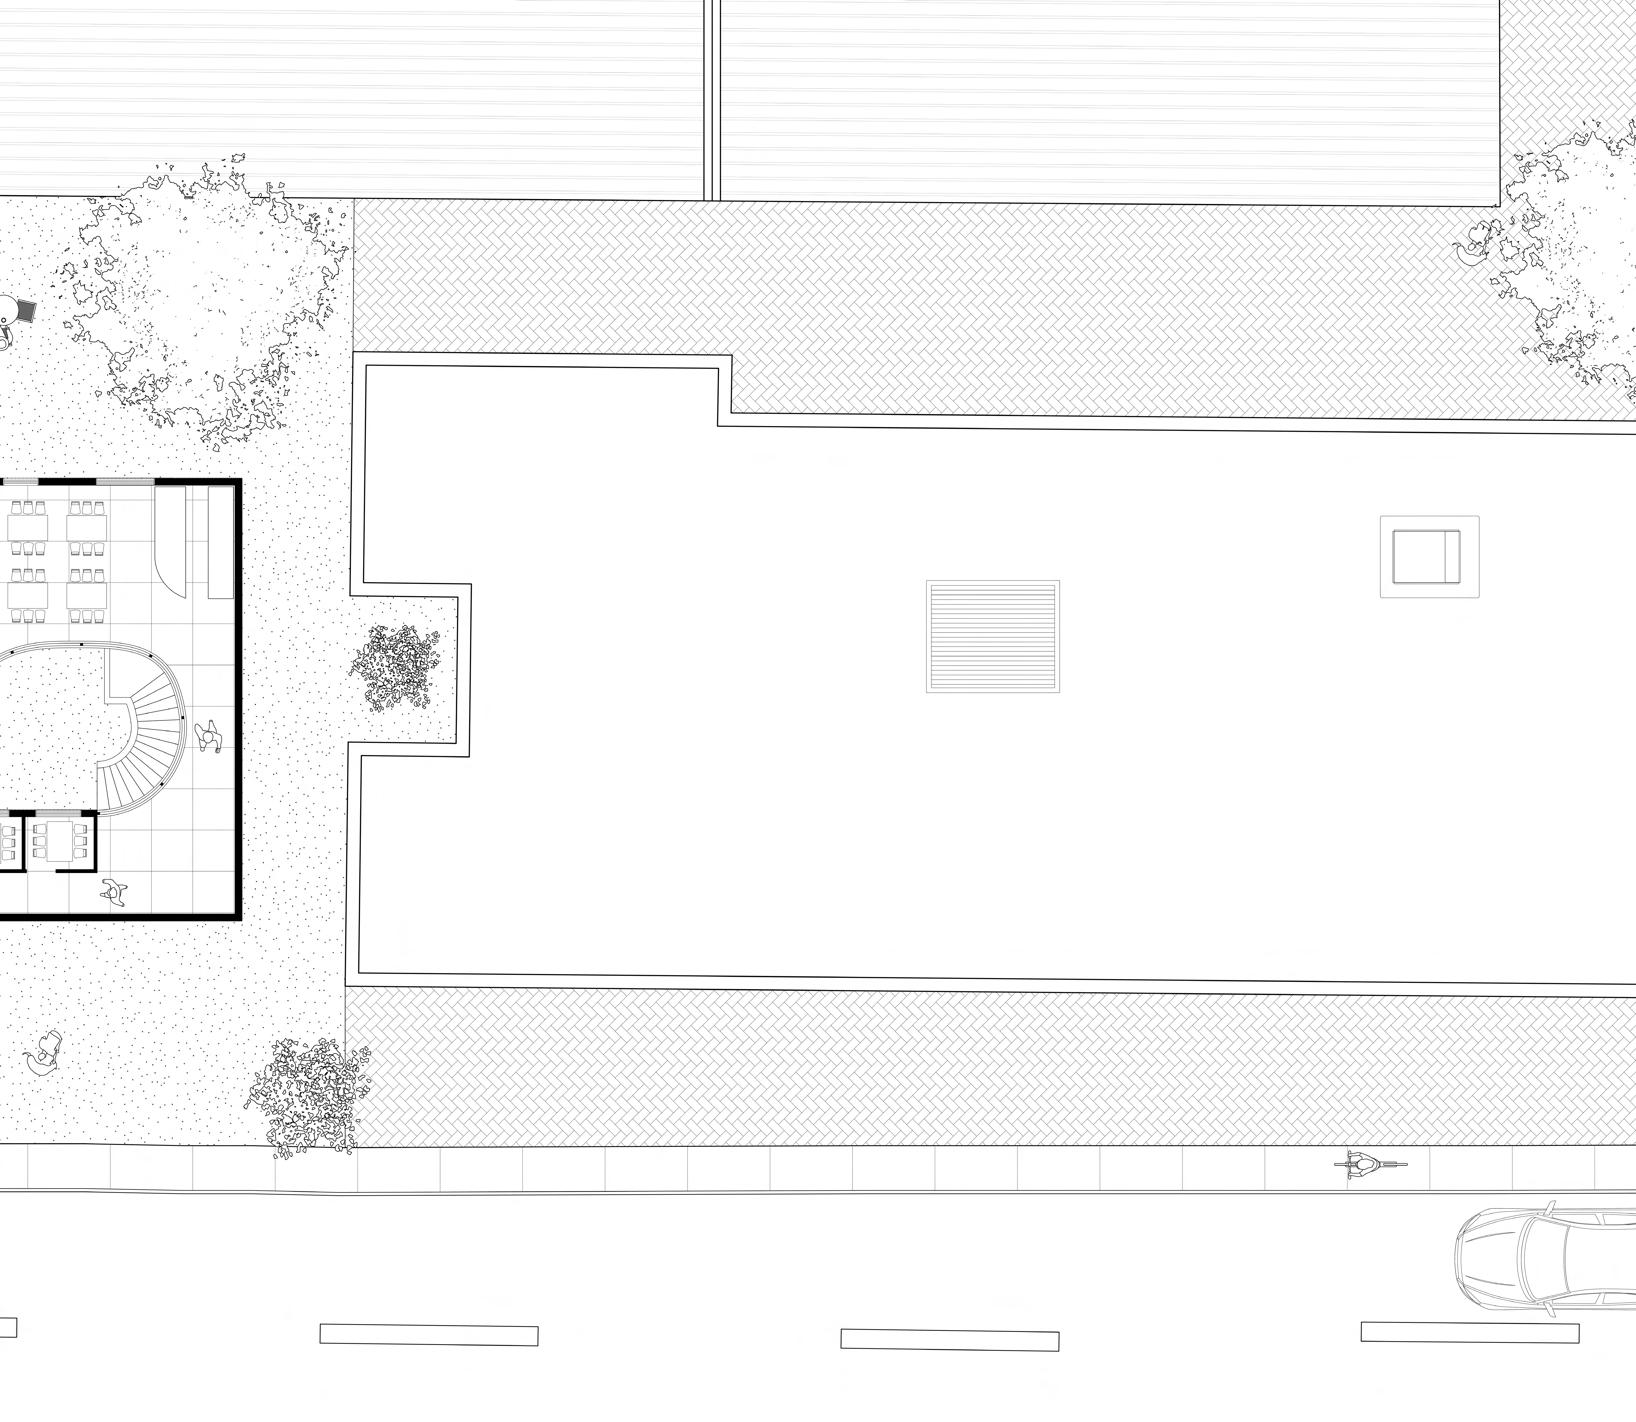
Site Plan : University of Toronto Campus
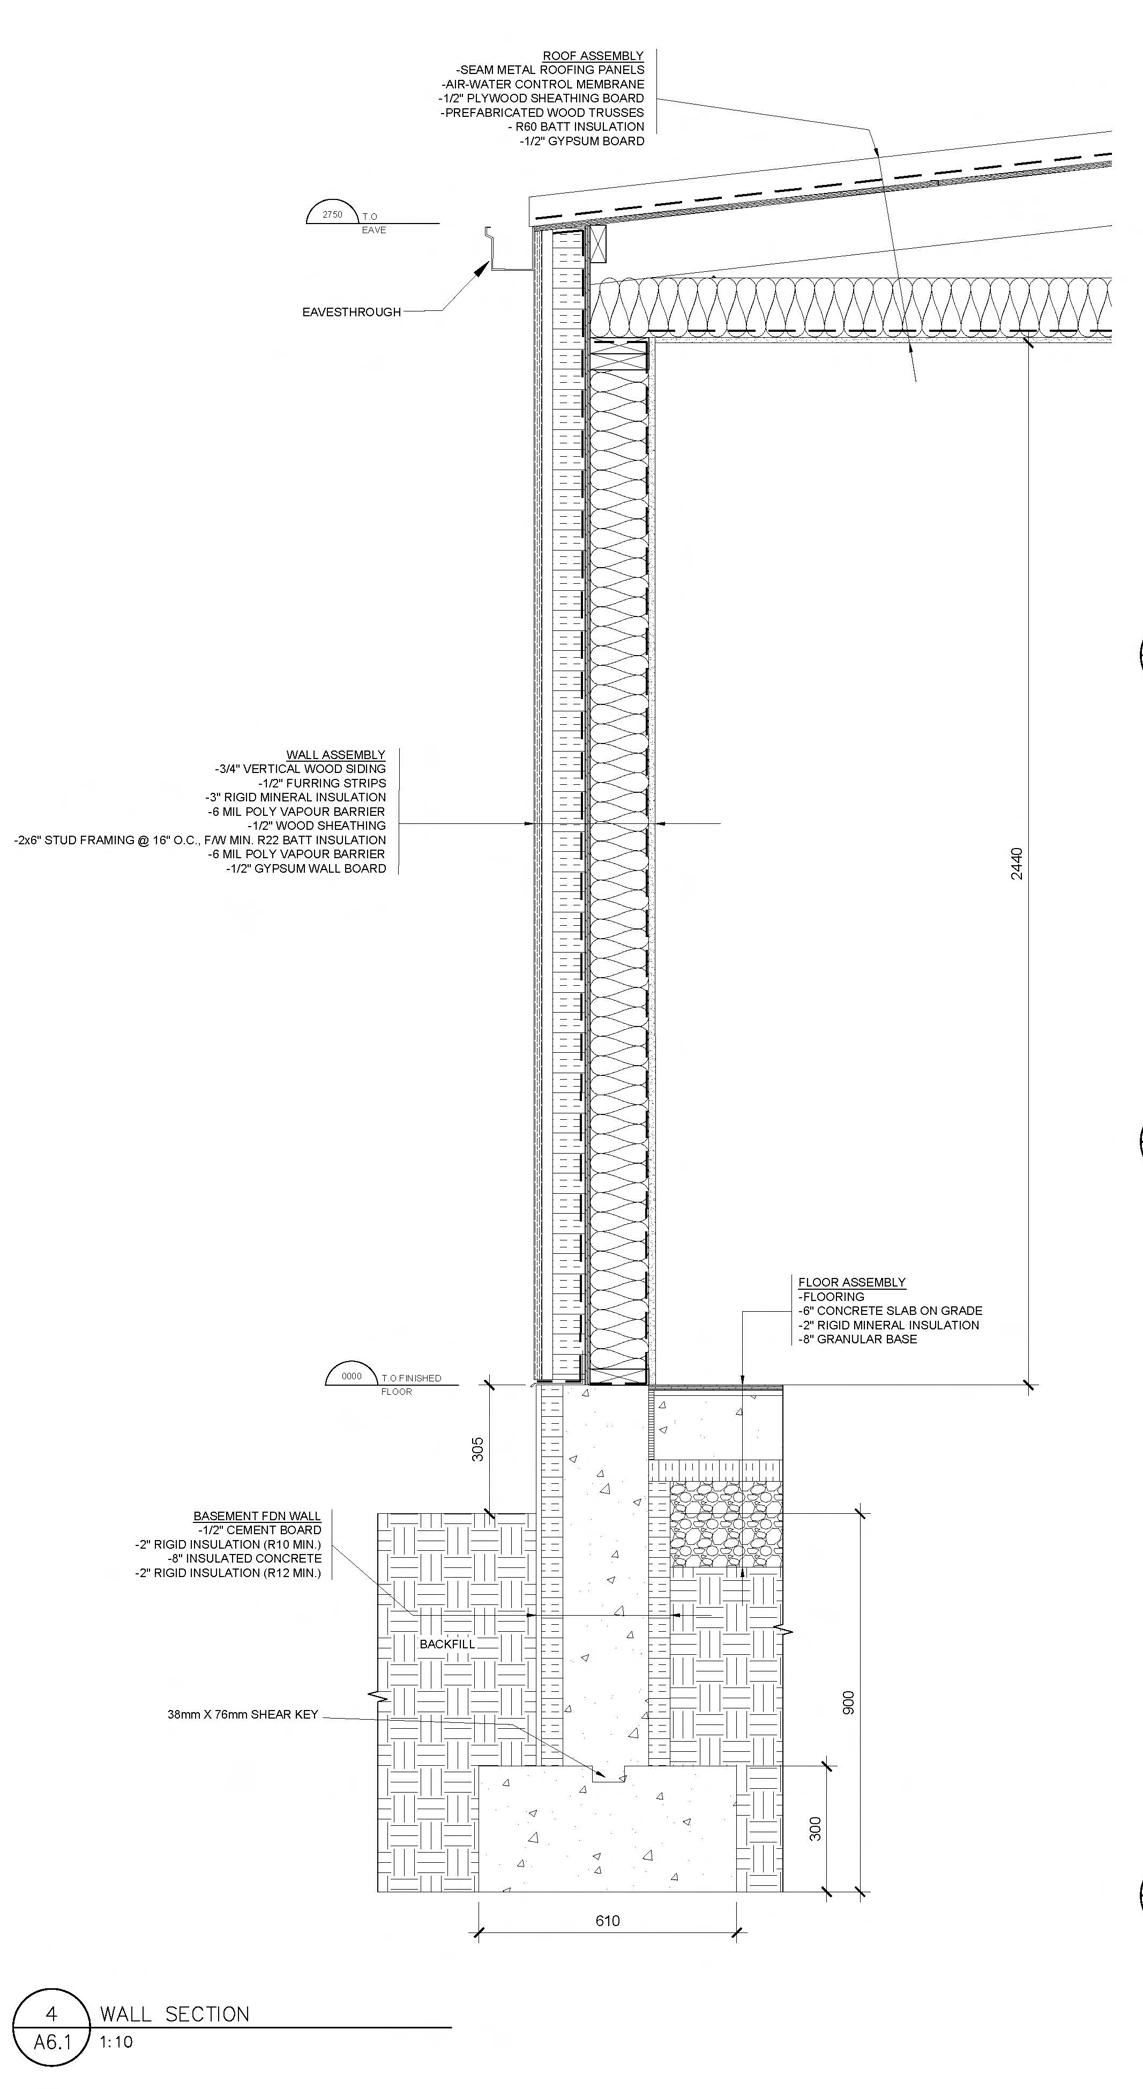
Vertical Wood Siding
3/4” Furring Strips
2” Rigid Insulation
5/8” Plywood Sheathing
2”X6” Wood Studs
1/2” Gypsum Board
1”x1” Int. Wood Siding
Parametric Ceiling Finish
1/2” Gypsum Board
2”x8” Joists
3/8” Subfloor Sheathings
Wall-Floor Connection 3D Detail

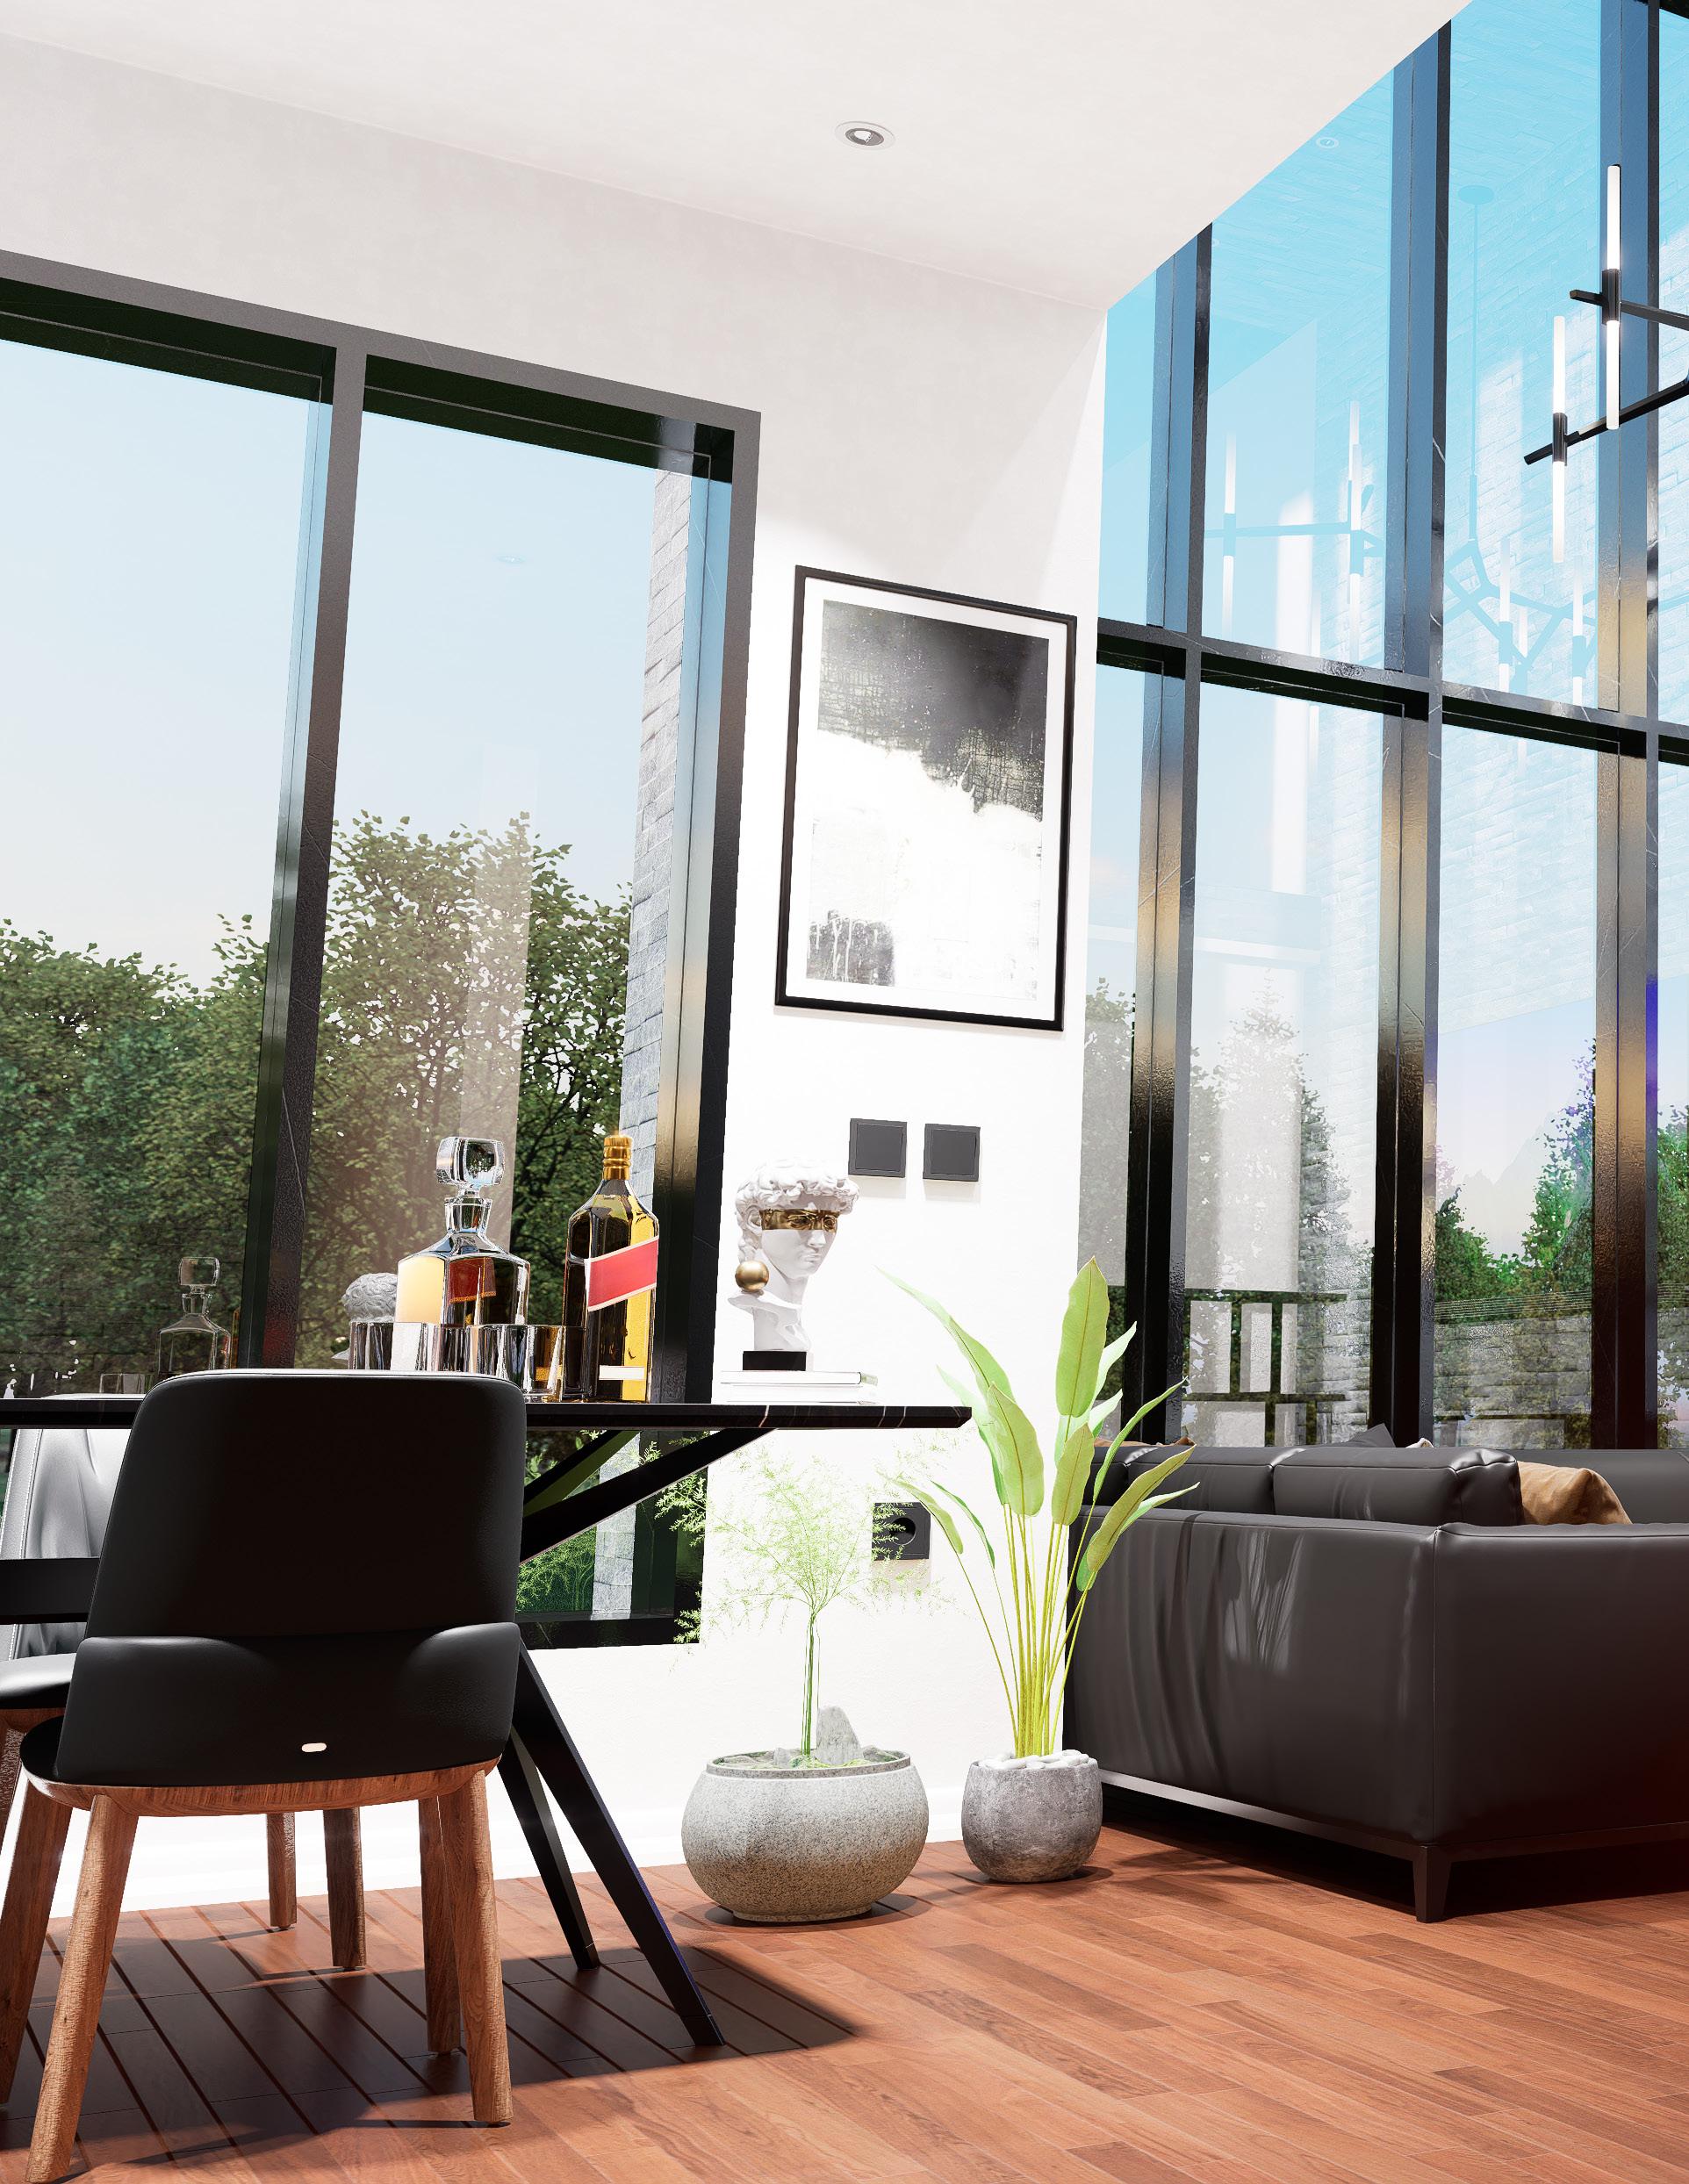
Cafe Rendering
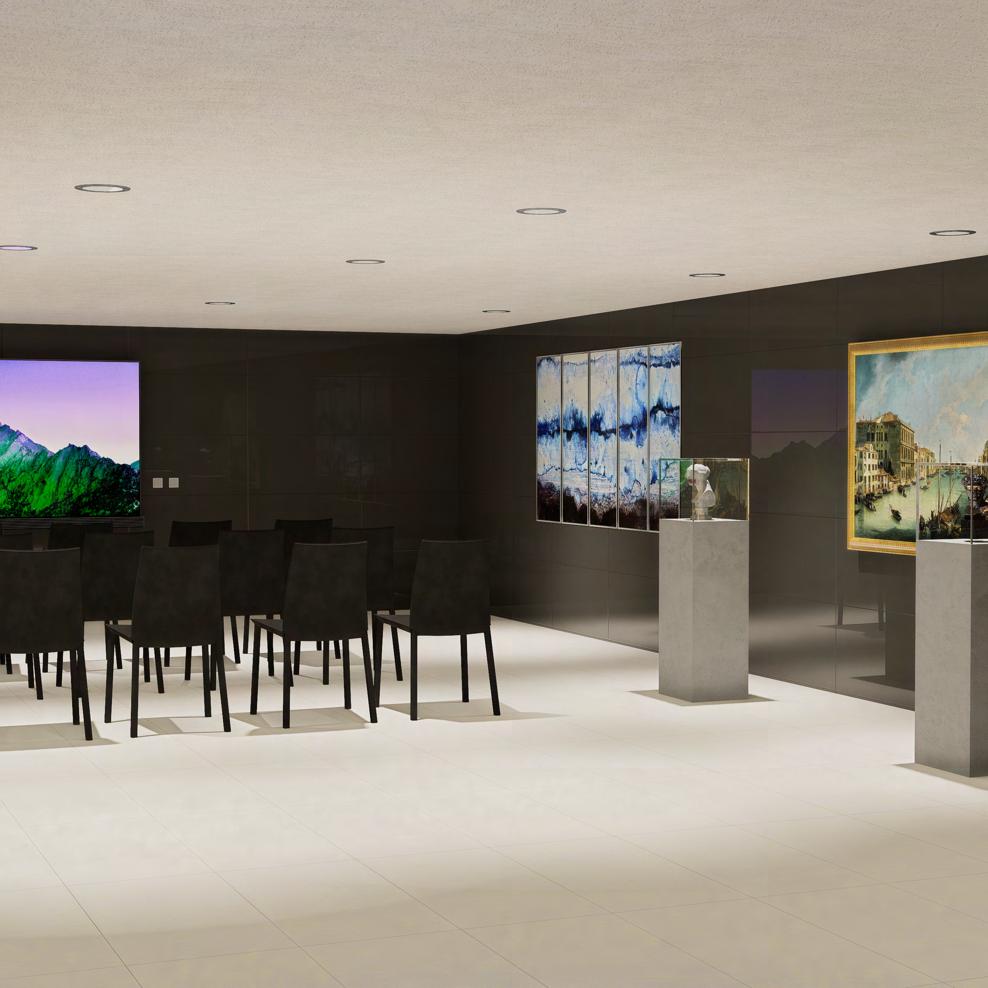
Exhibition Space
Rendering
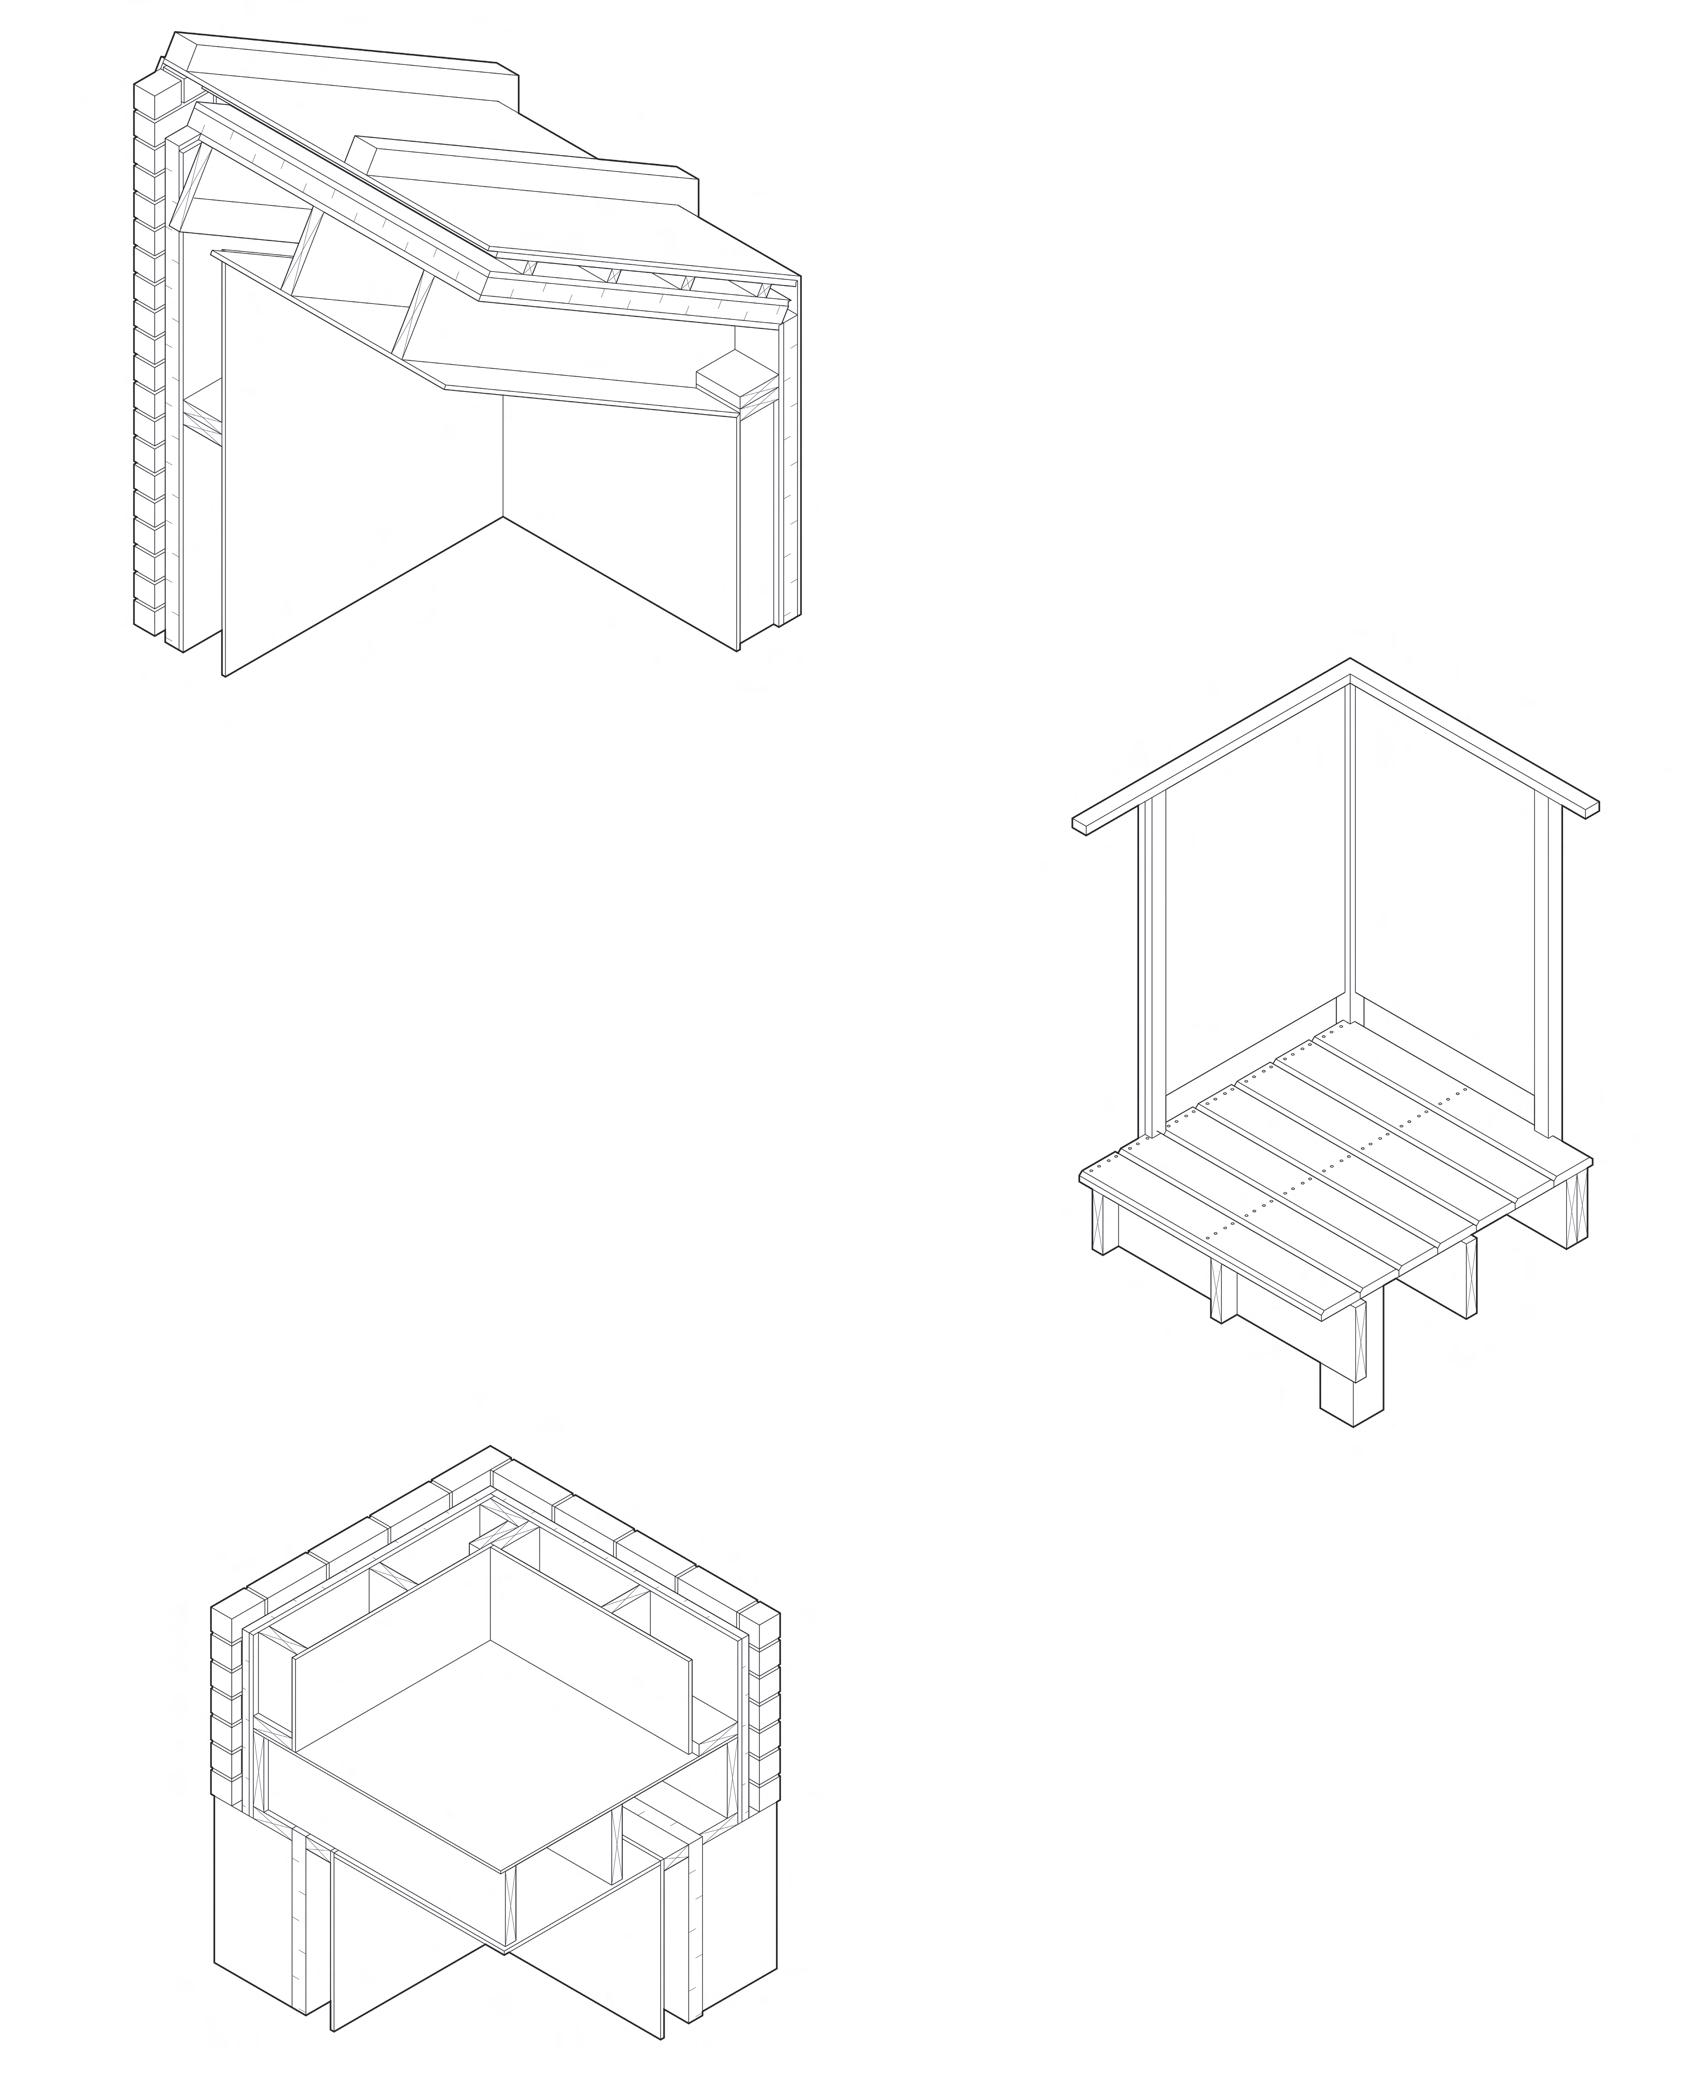
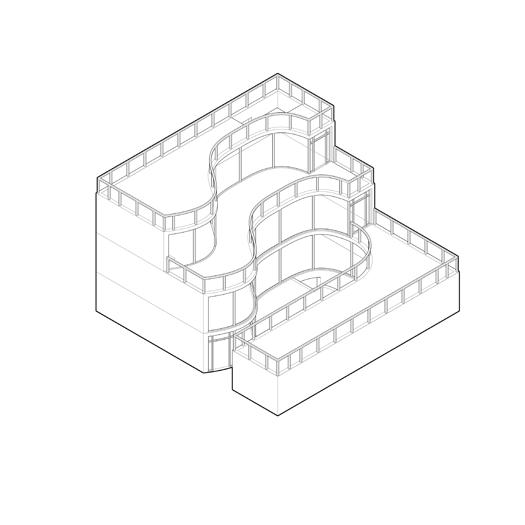
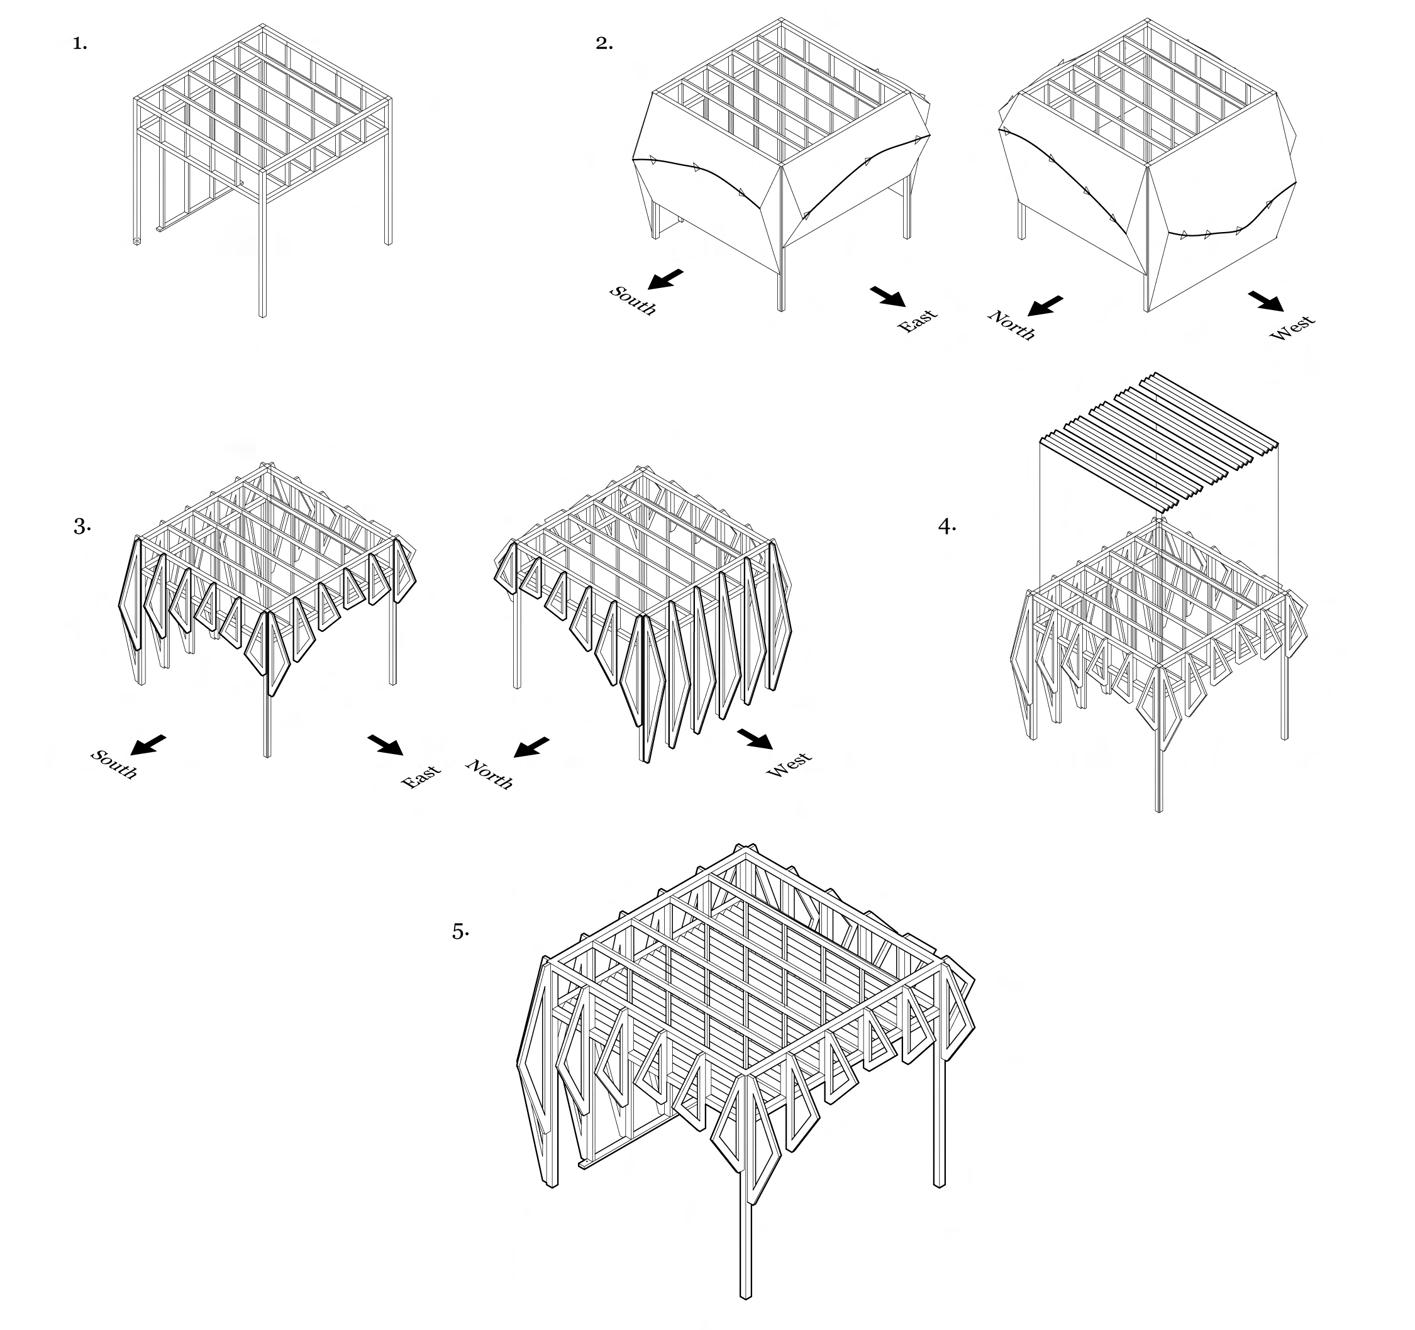
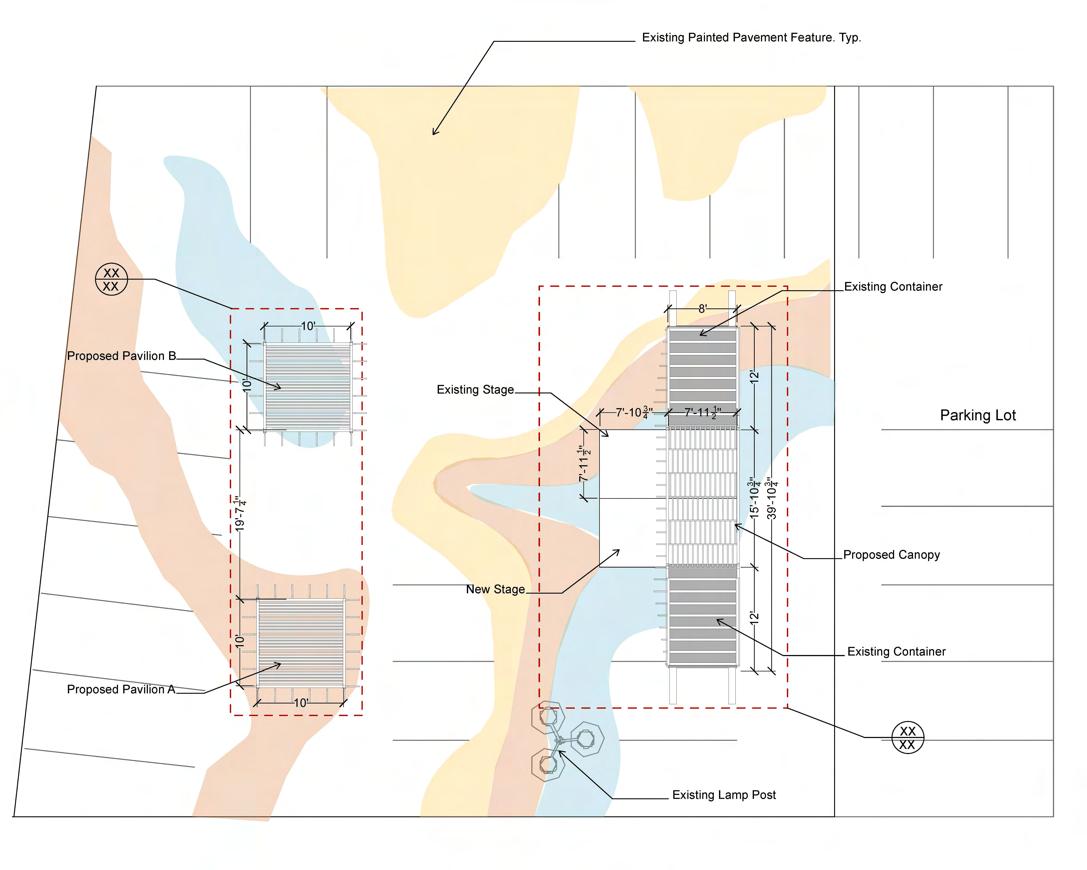
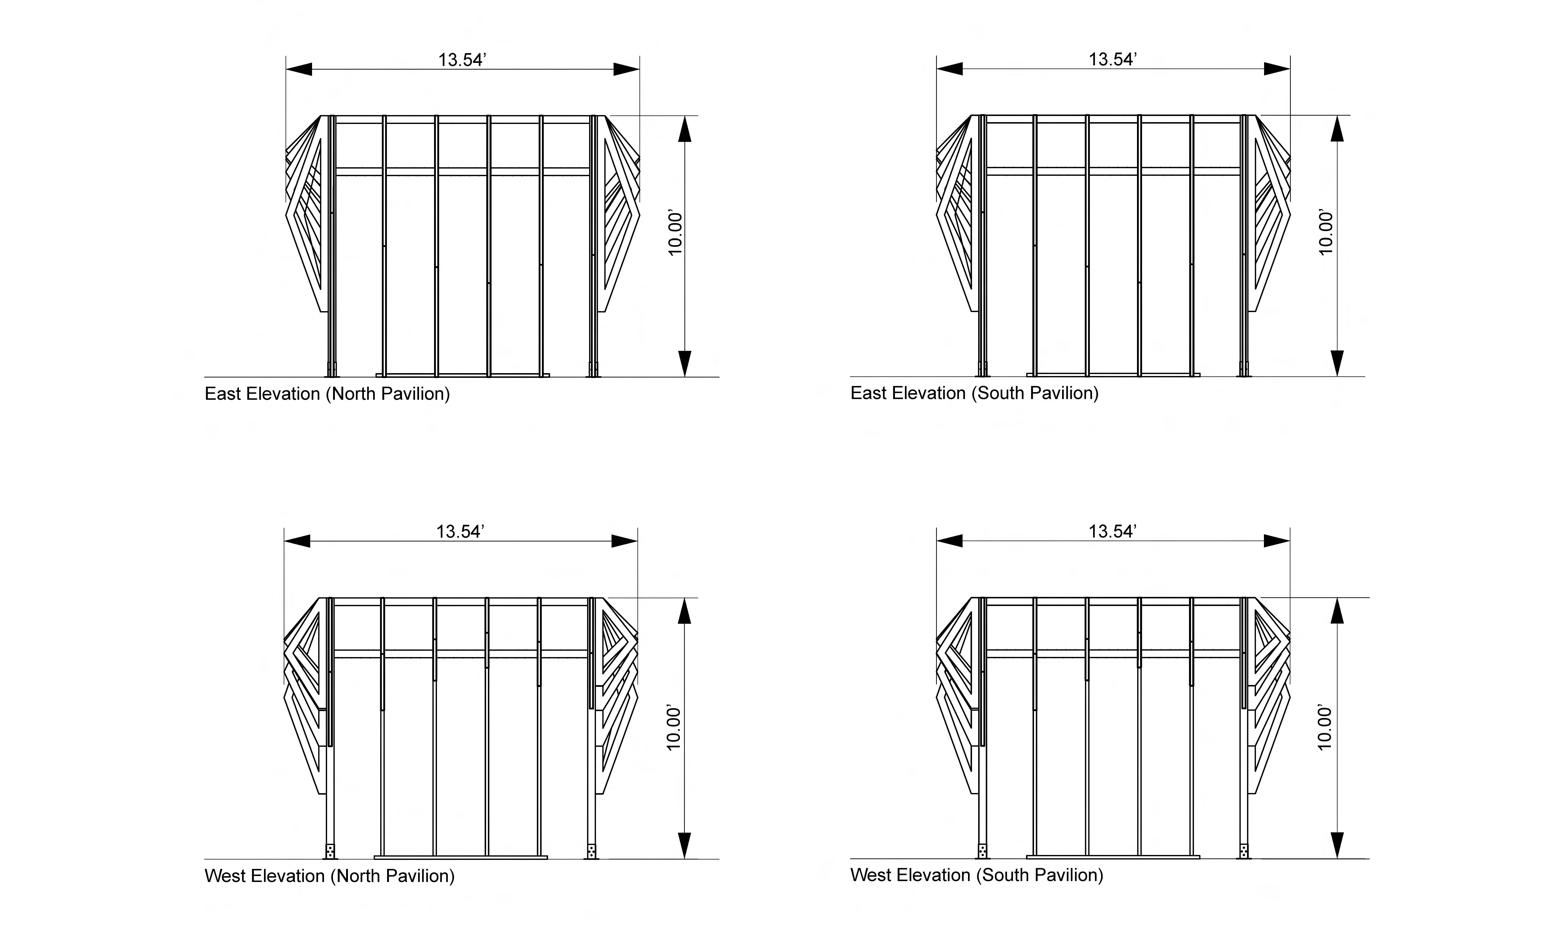
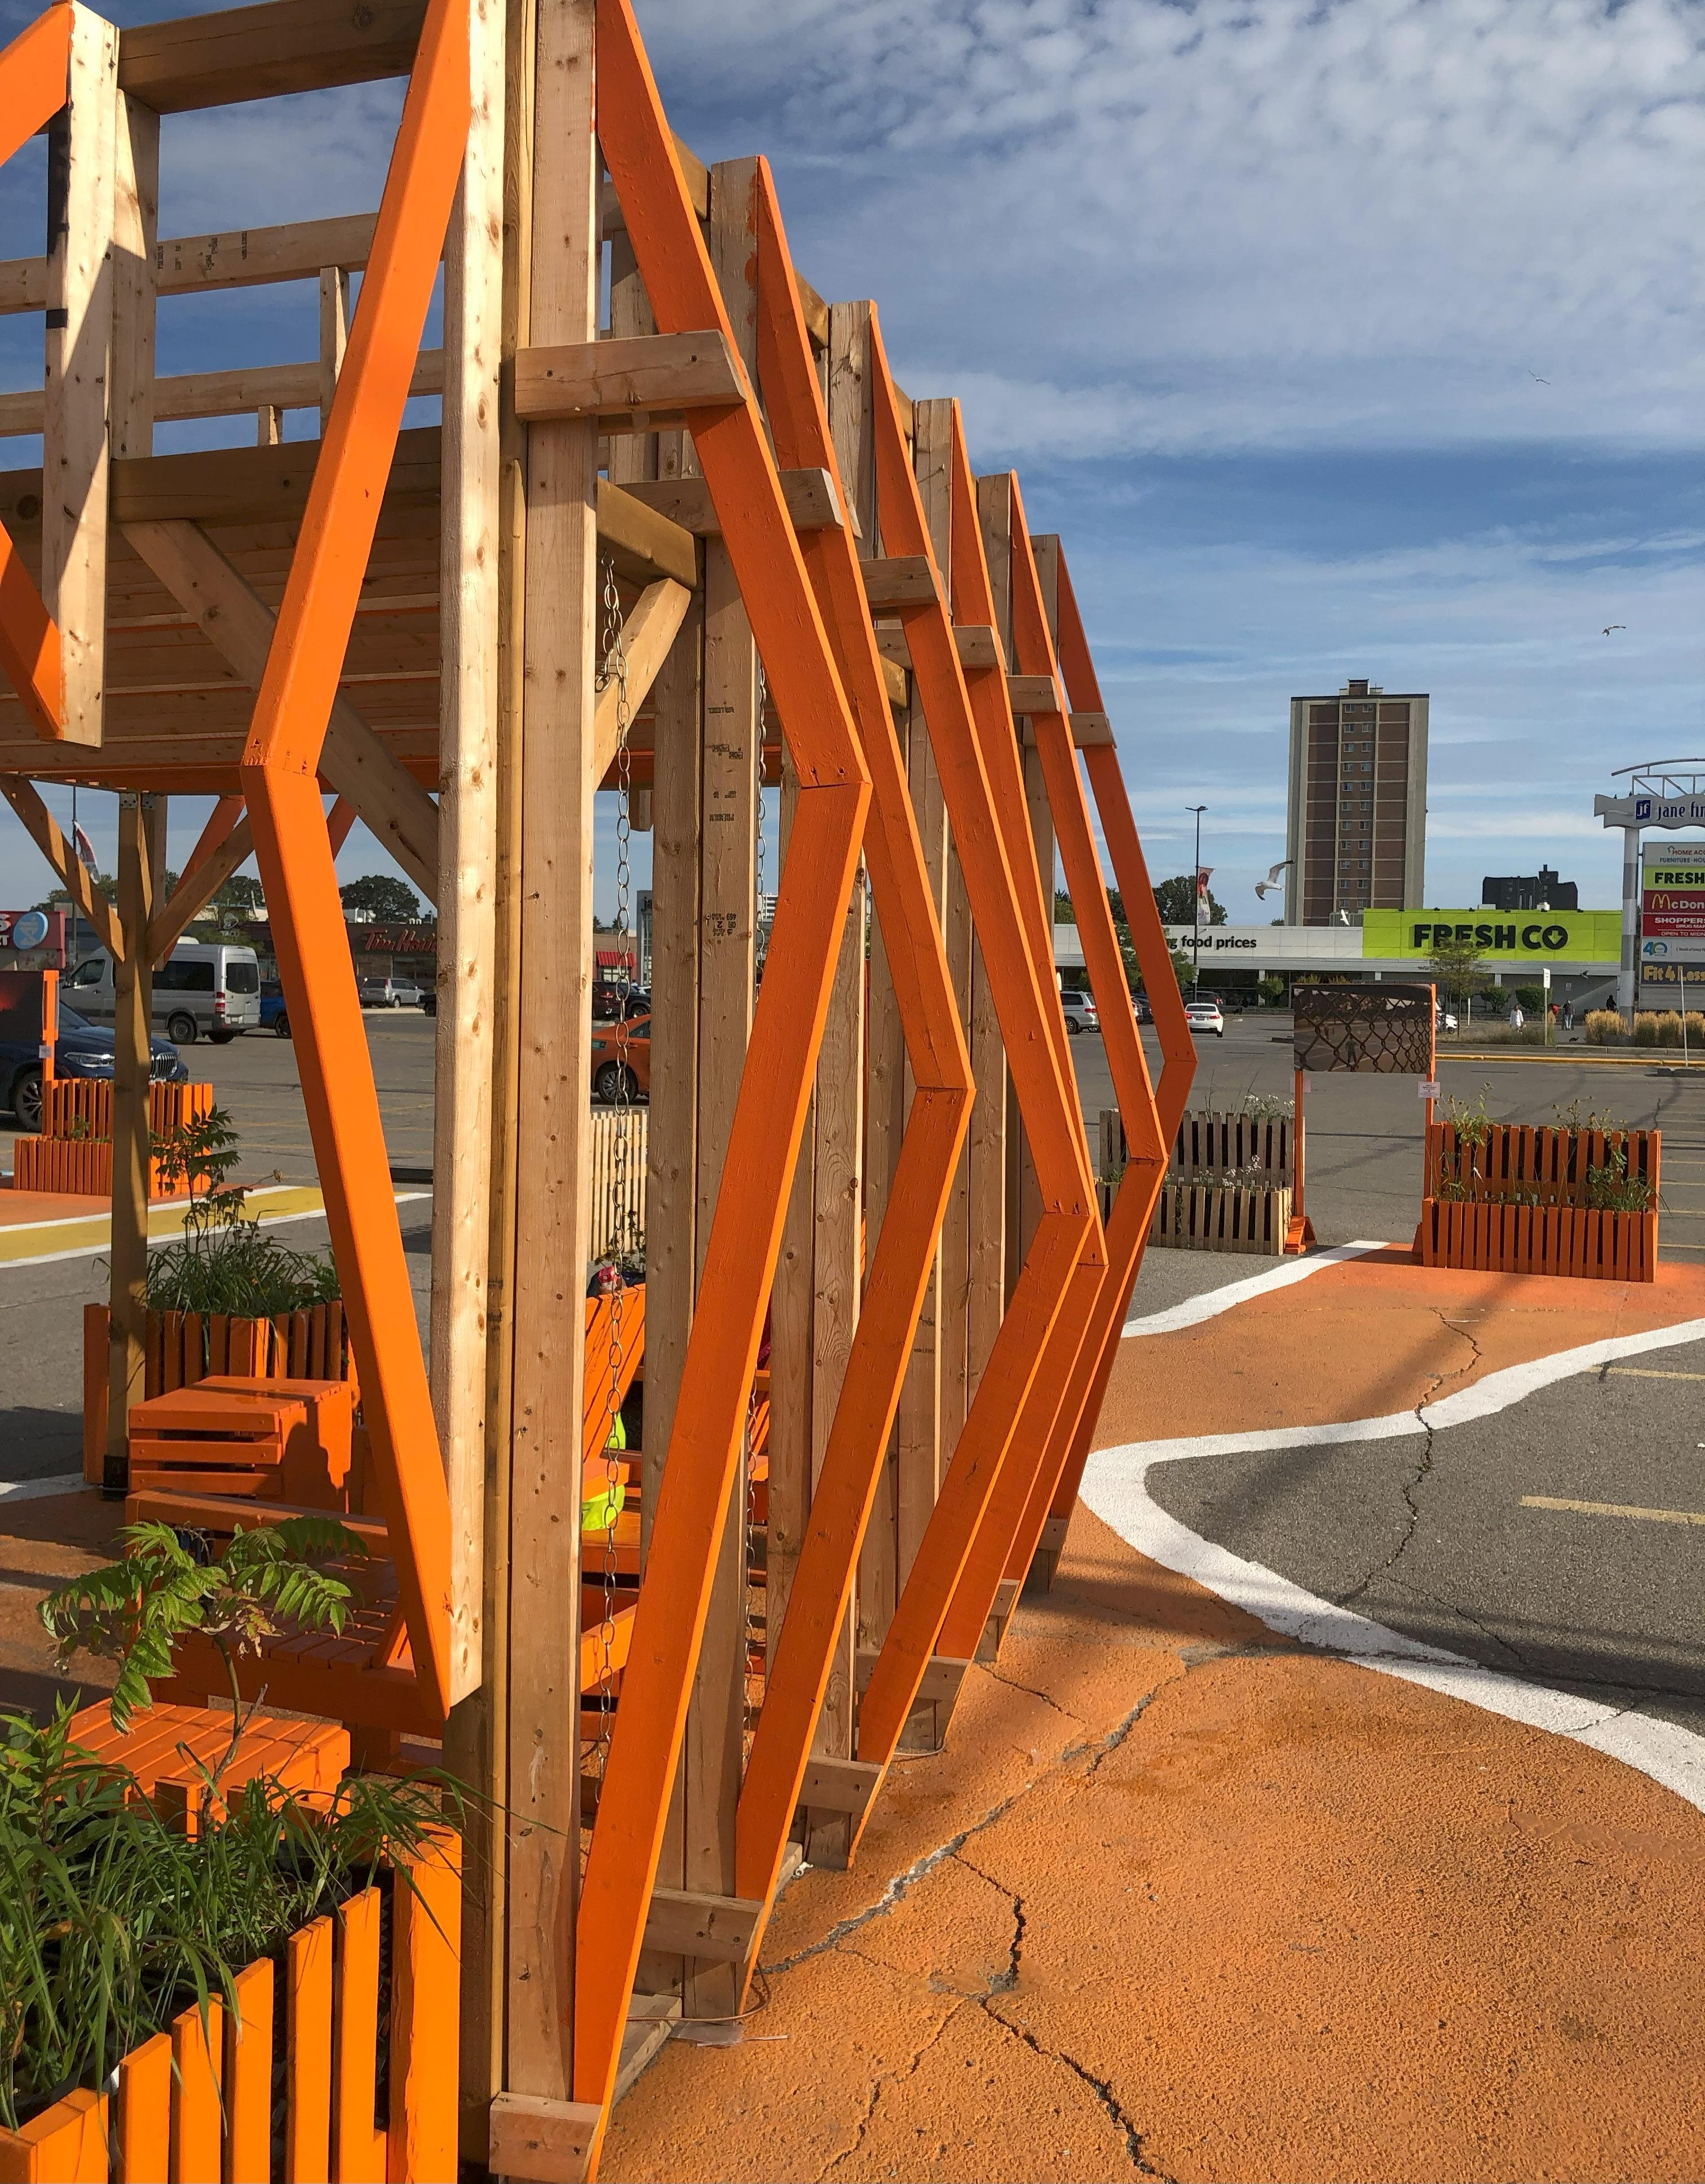
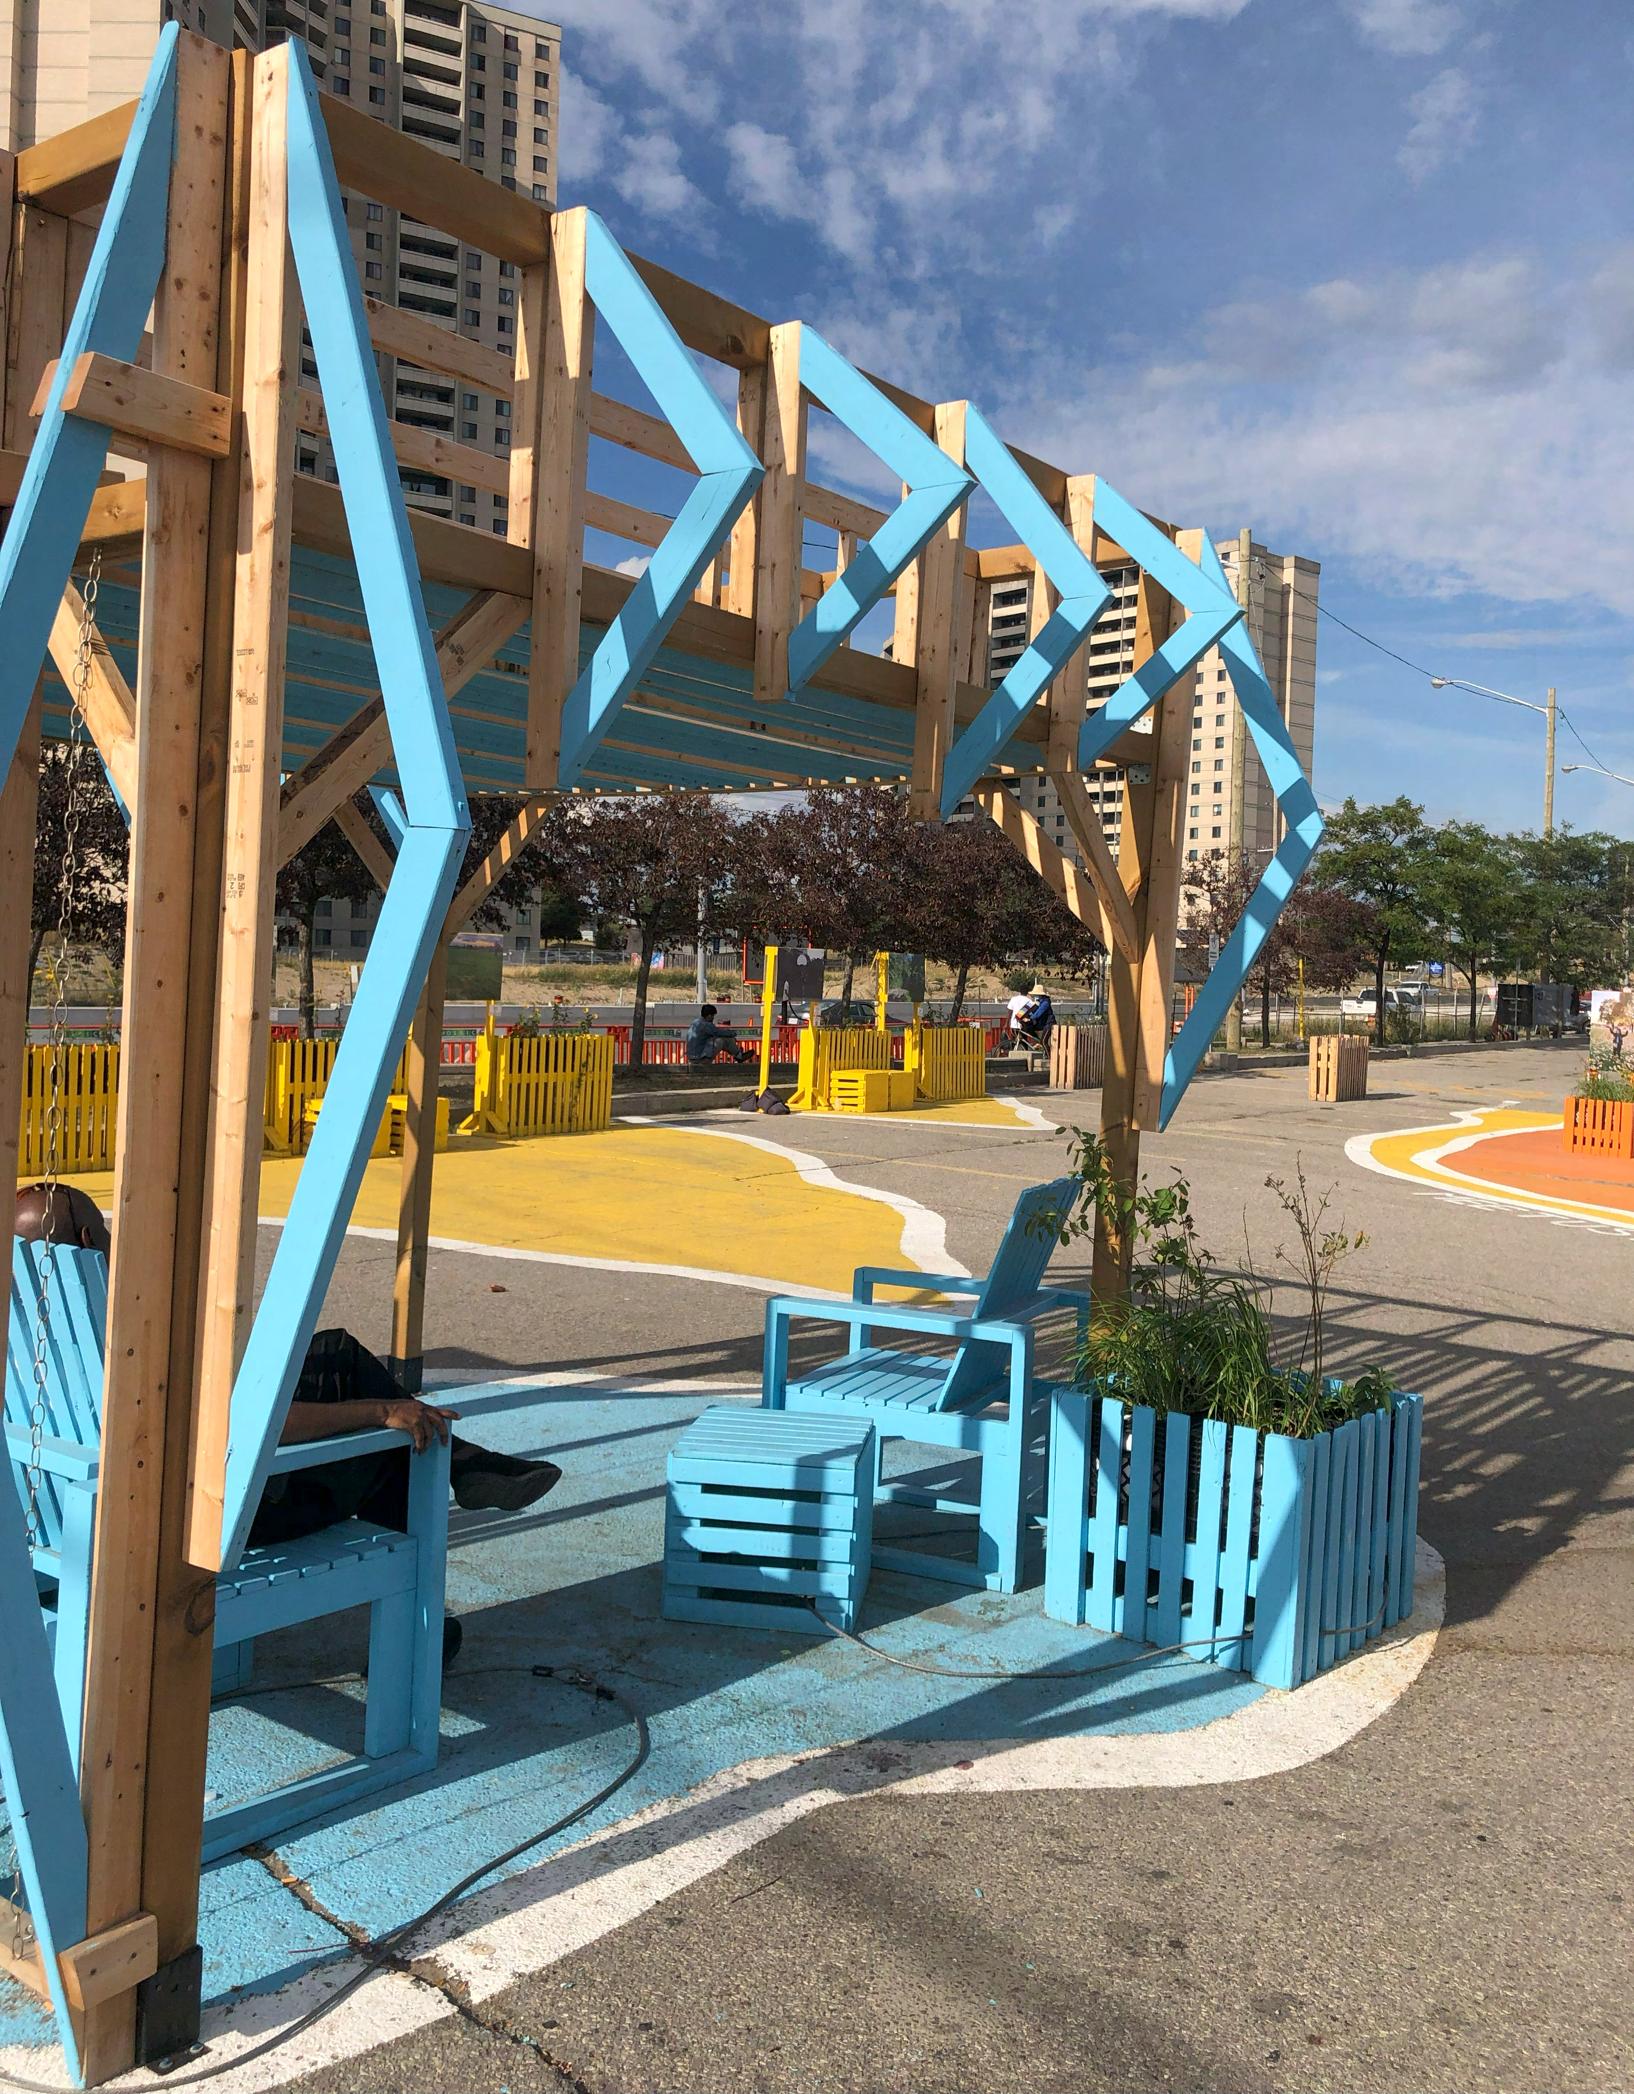
This is a class I took during the summer of my third year at university. We were tasked with designing and buillding a community space in the parking lot of Jane and Finch mall. Our class was split into two groups. One was in charge of designing and building a facade for a stage. The one I was in was in charge of doing the two pavillions in the image on the right. The group I was in had 6 people including myself.
This project enhanced my teamworking skills, and introduced me to the skill of wood-working and the methods in which things are built with wood.
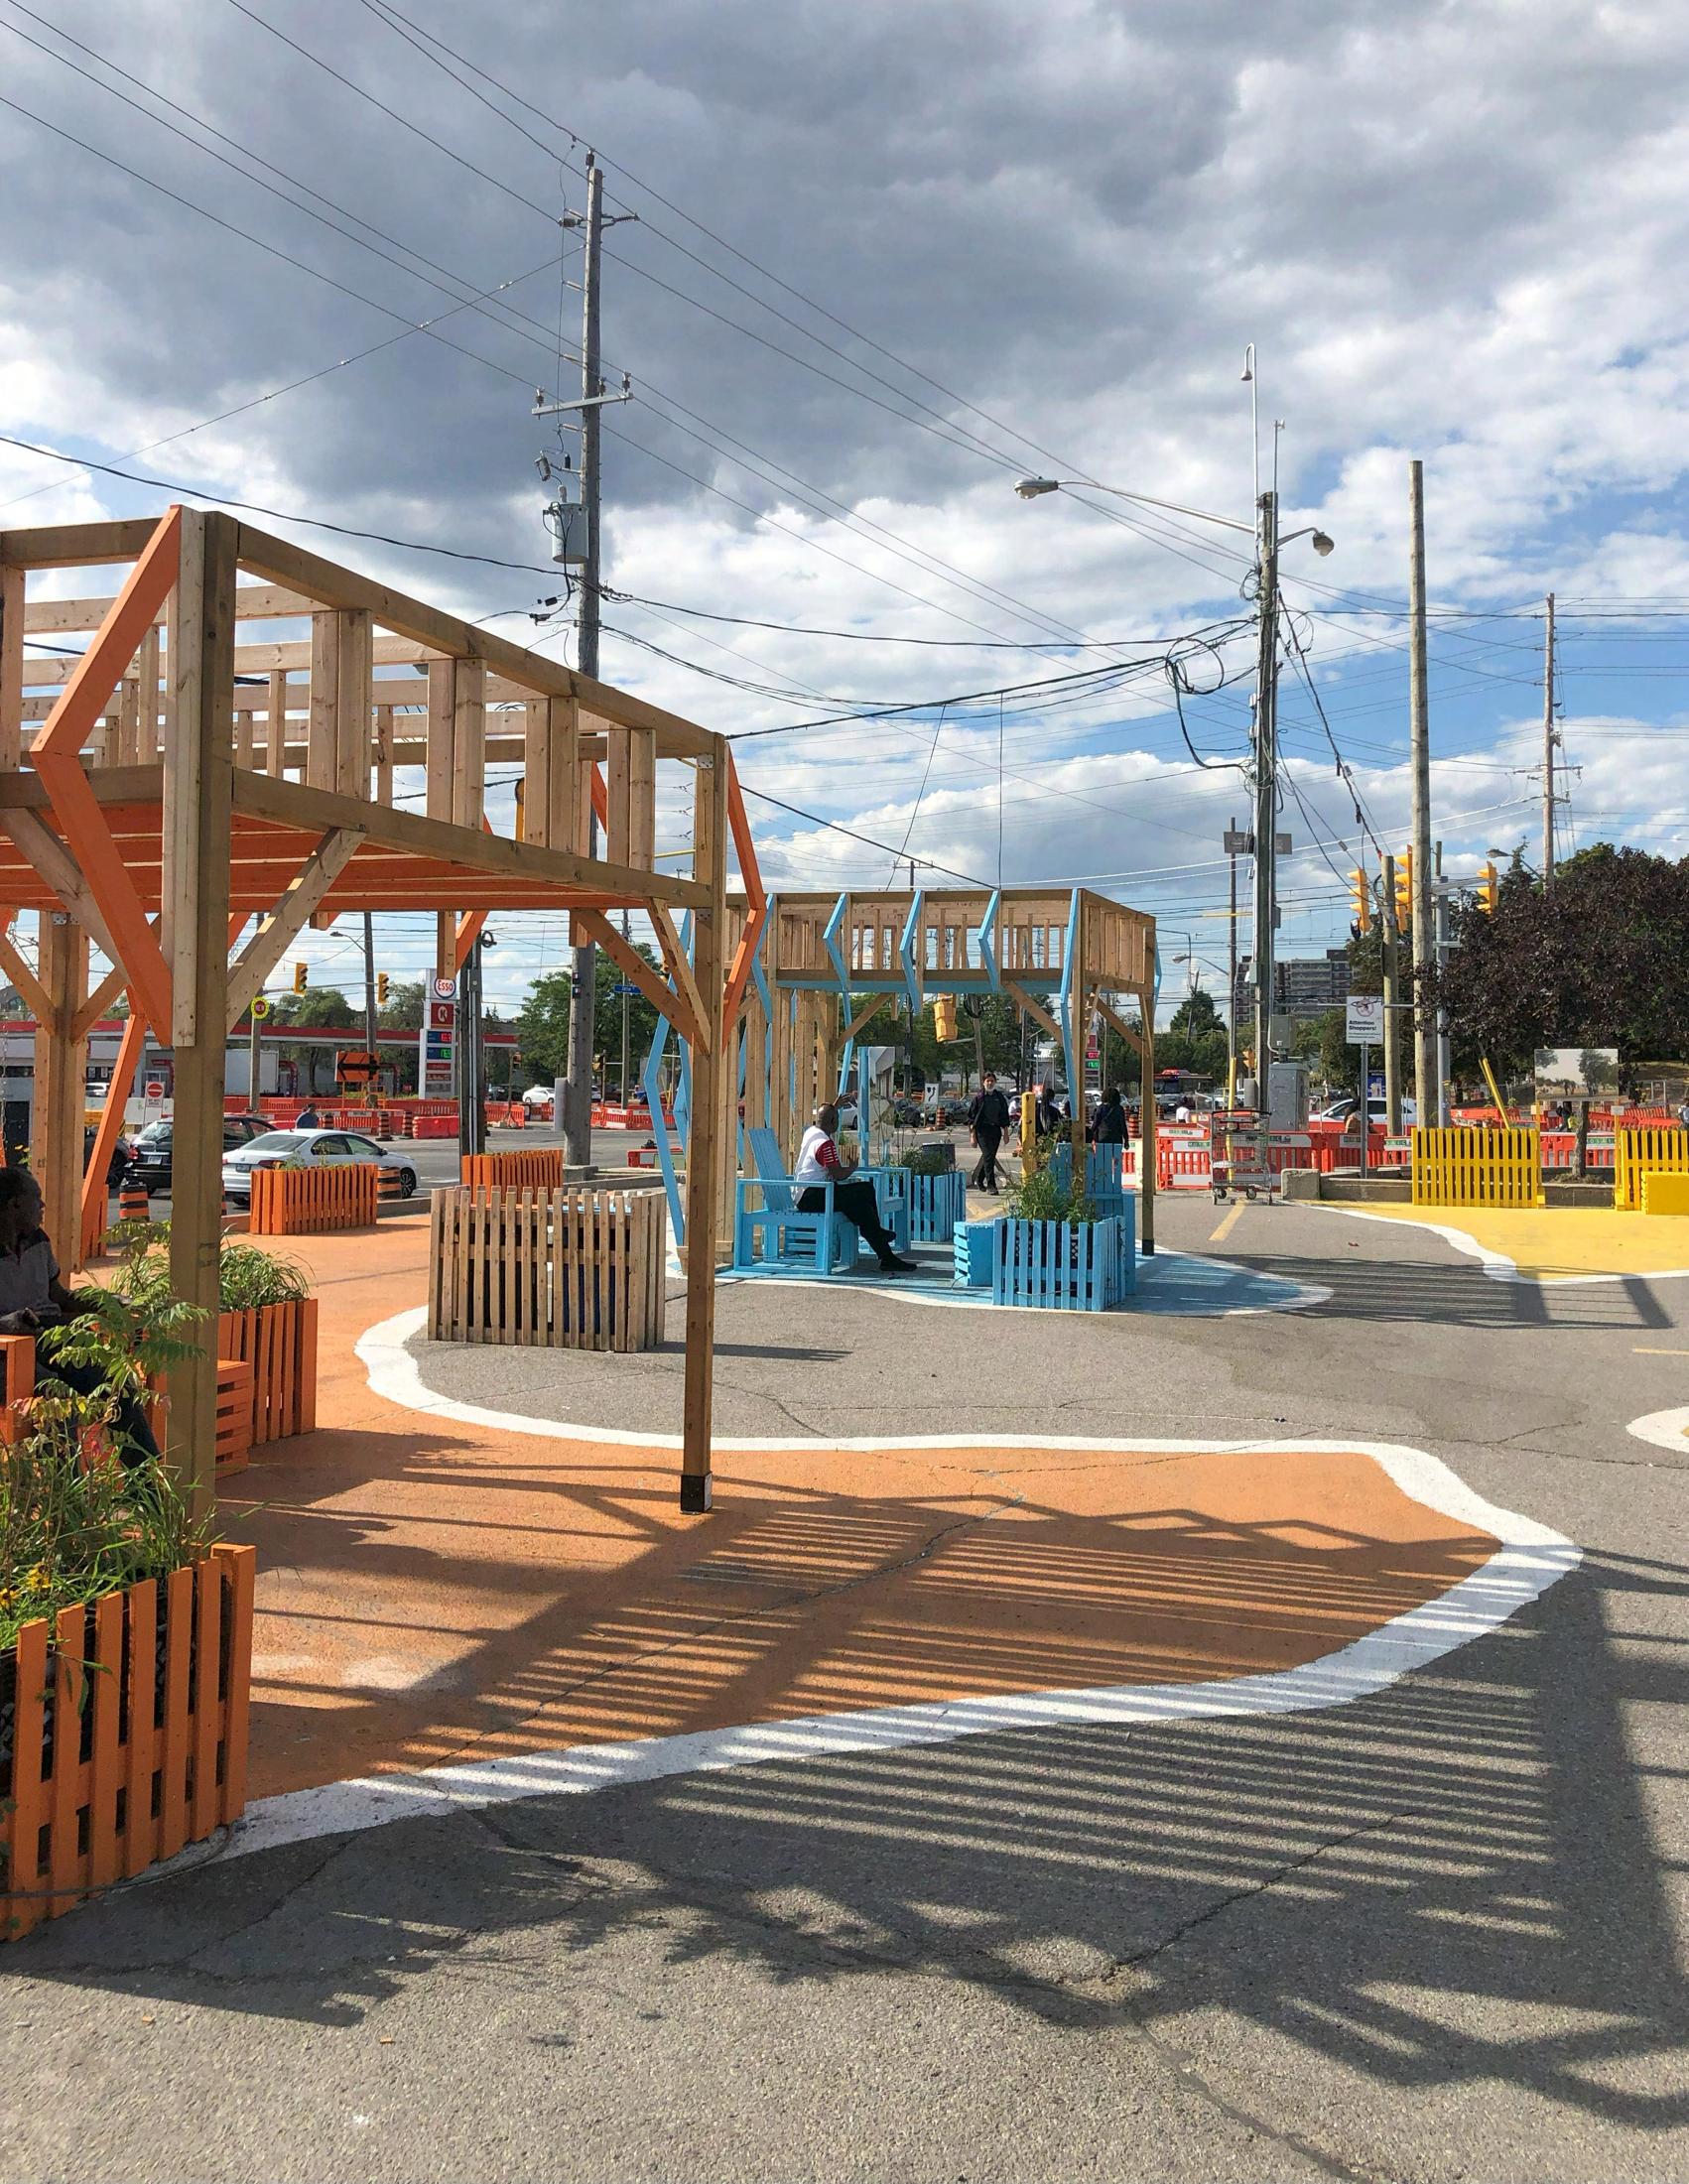
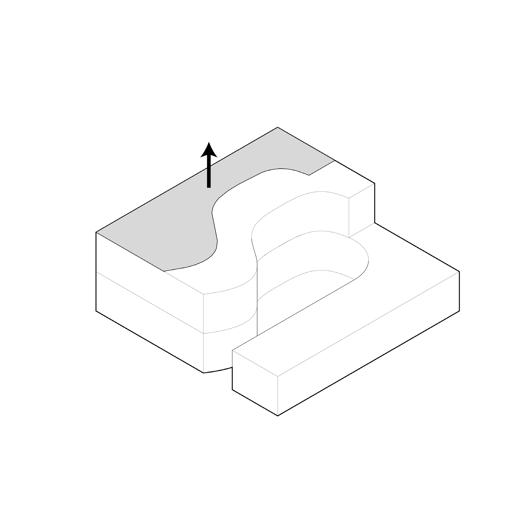
For this design, our group decided to go for a simple wavy pattern around the perimeter of our pavillion. This was in coordination with the other groups design for the main stage. Our design had to take everything into consideration: budget, structural stability, shading, aesthetic, and constructability. That is why we used simple structural elements such as as wooden posts and 2X4 joists.
After brainstorming for a few days, we then went on to make working drawings so that we could cut the wood into the required framing members.
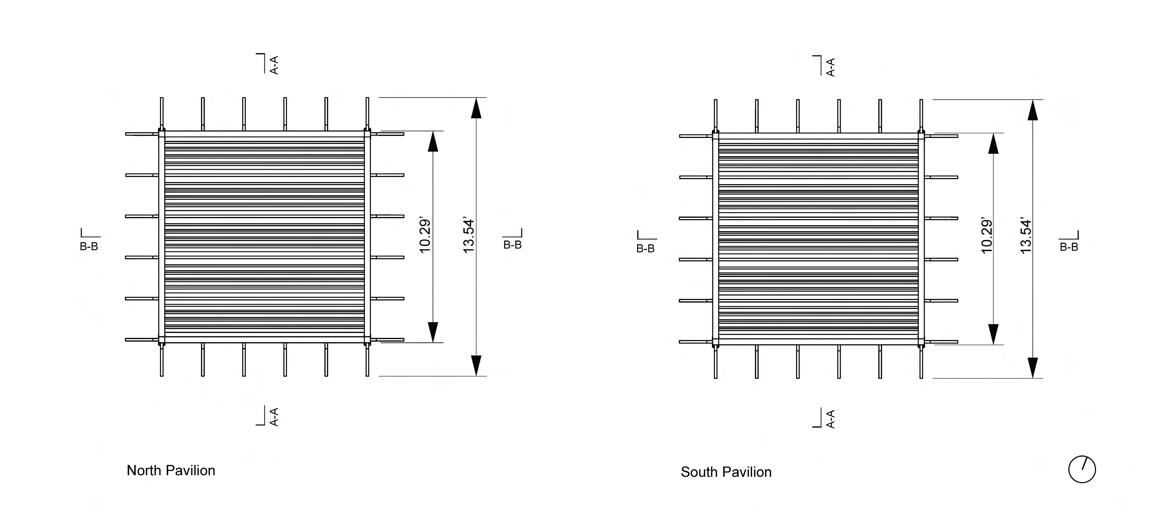
I worked on or contributed to all of the following drawings. The working drawings are the original.
Concept Diagram
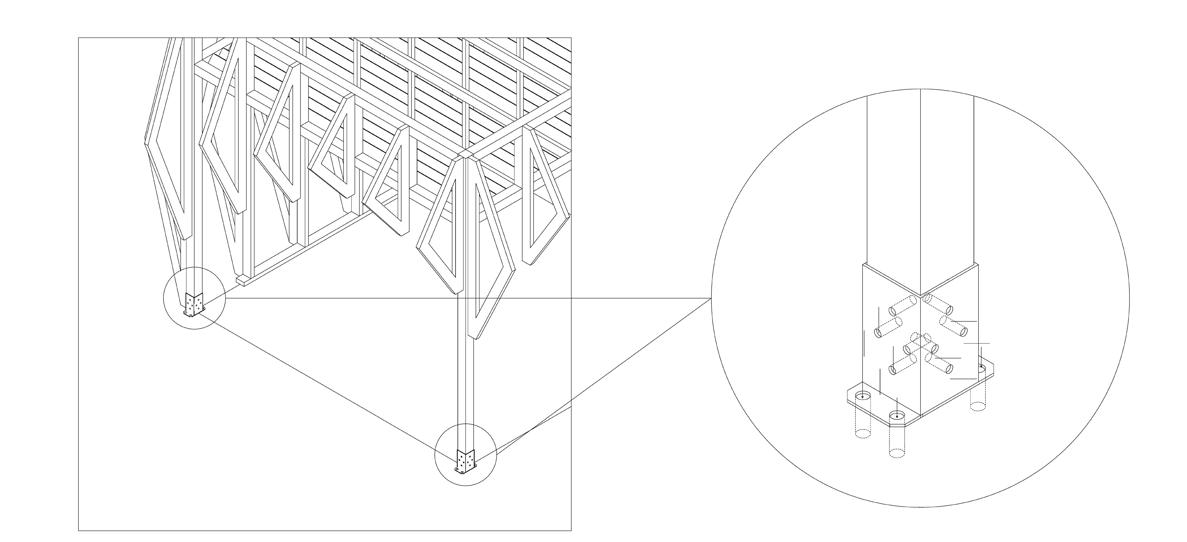
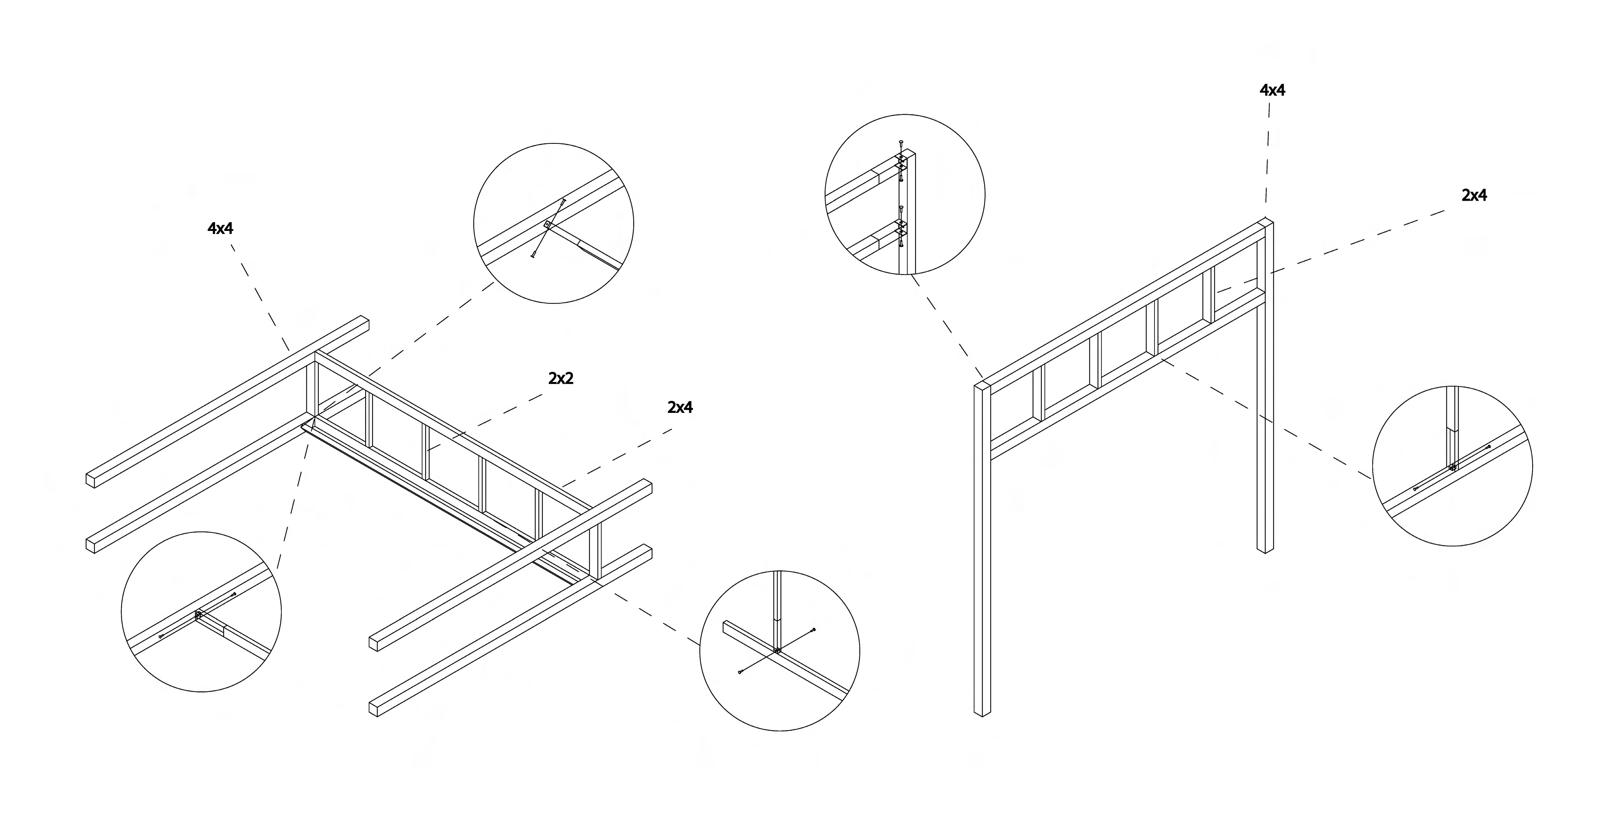
Frame Assembly Detail
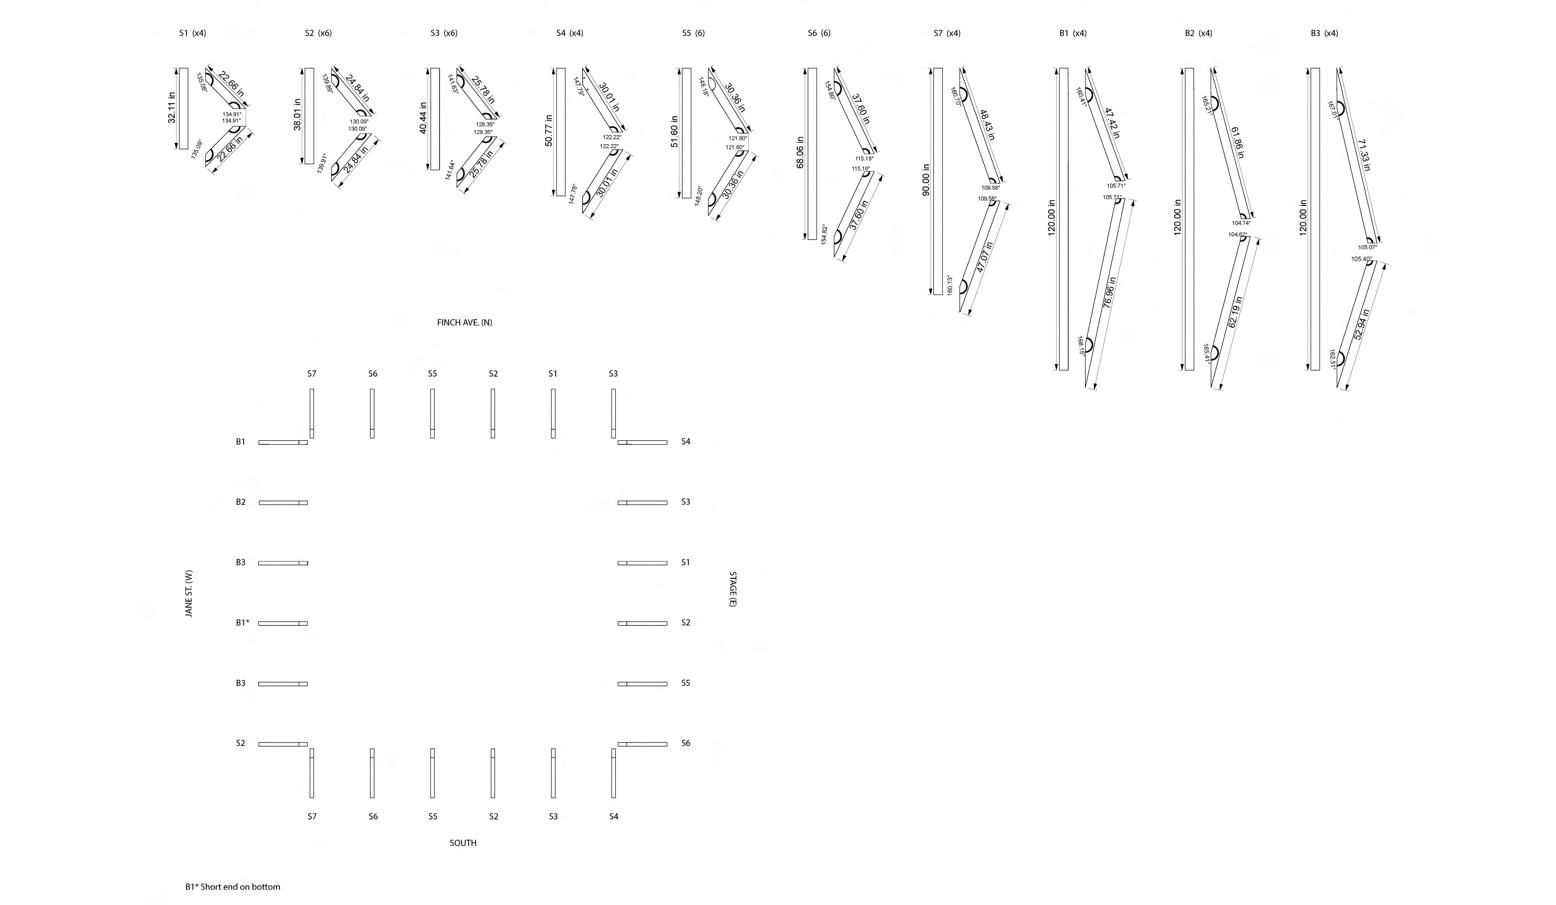
Schedule
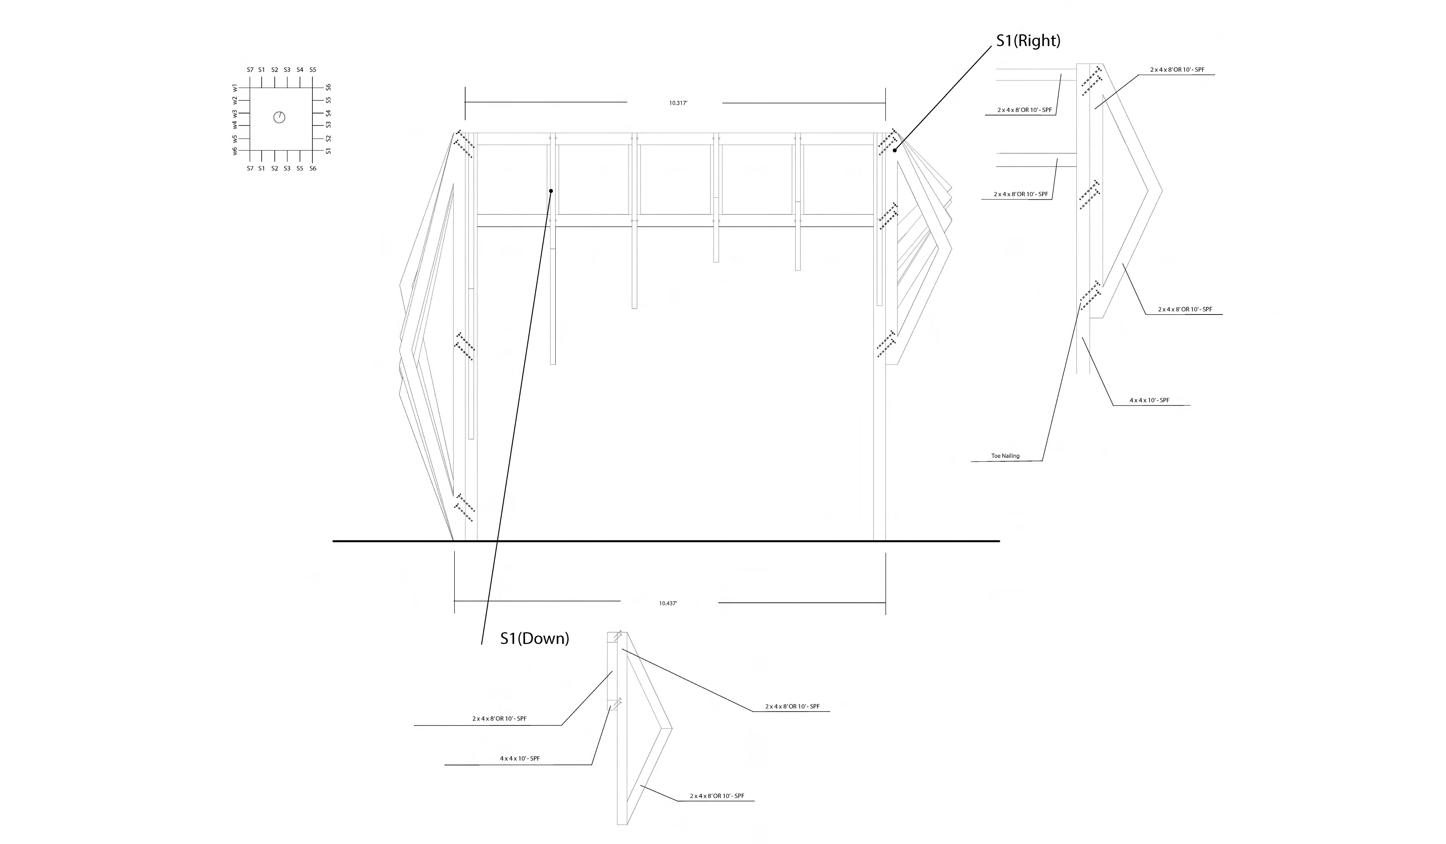
to Frame Detail
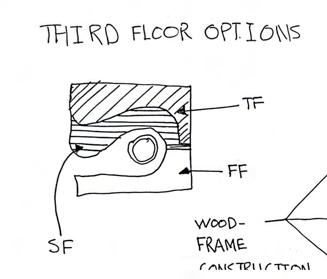
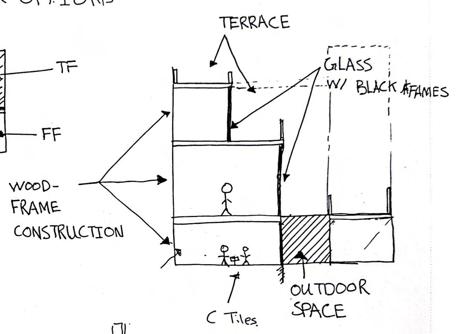
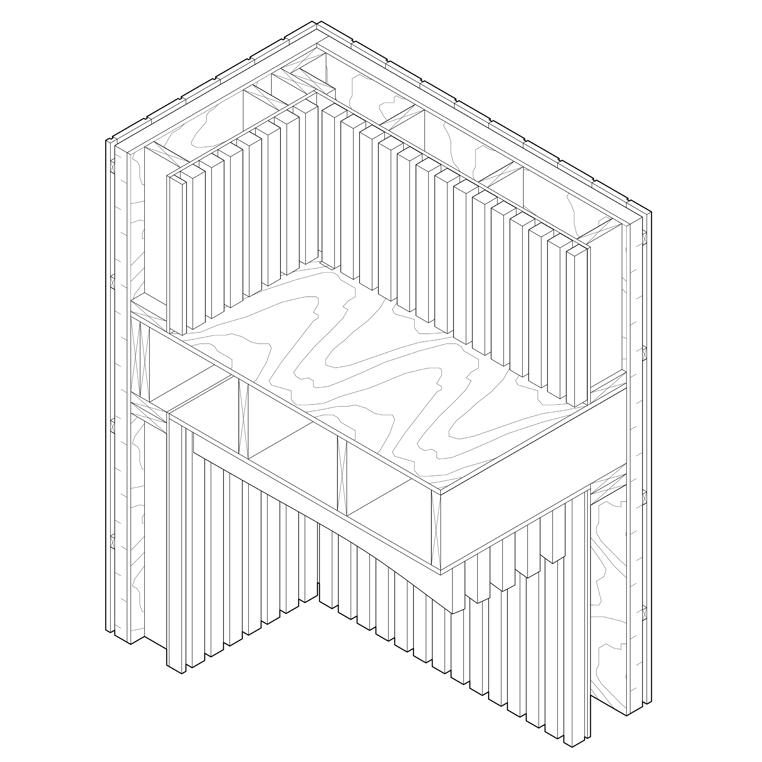
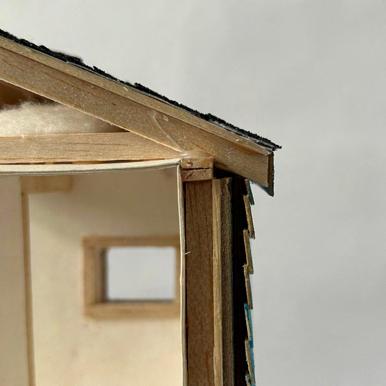
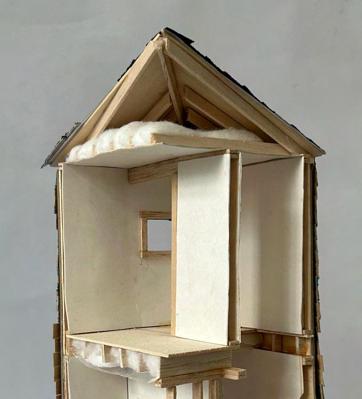
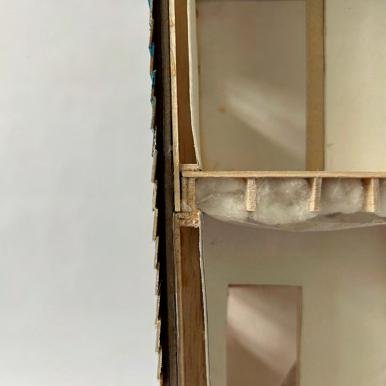
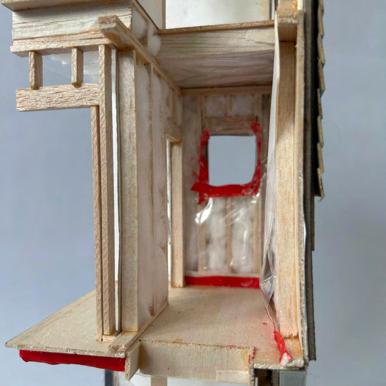
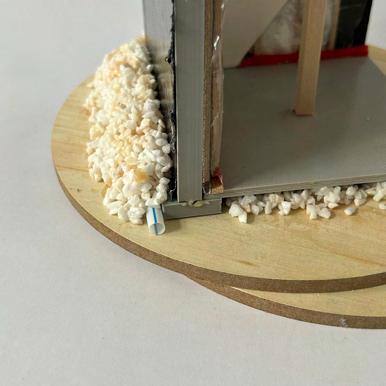
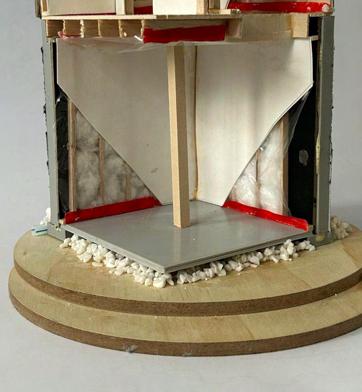
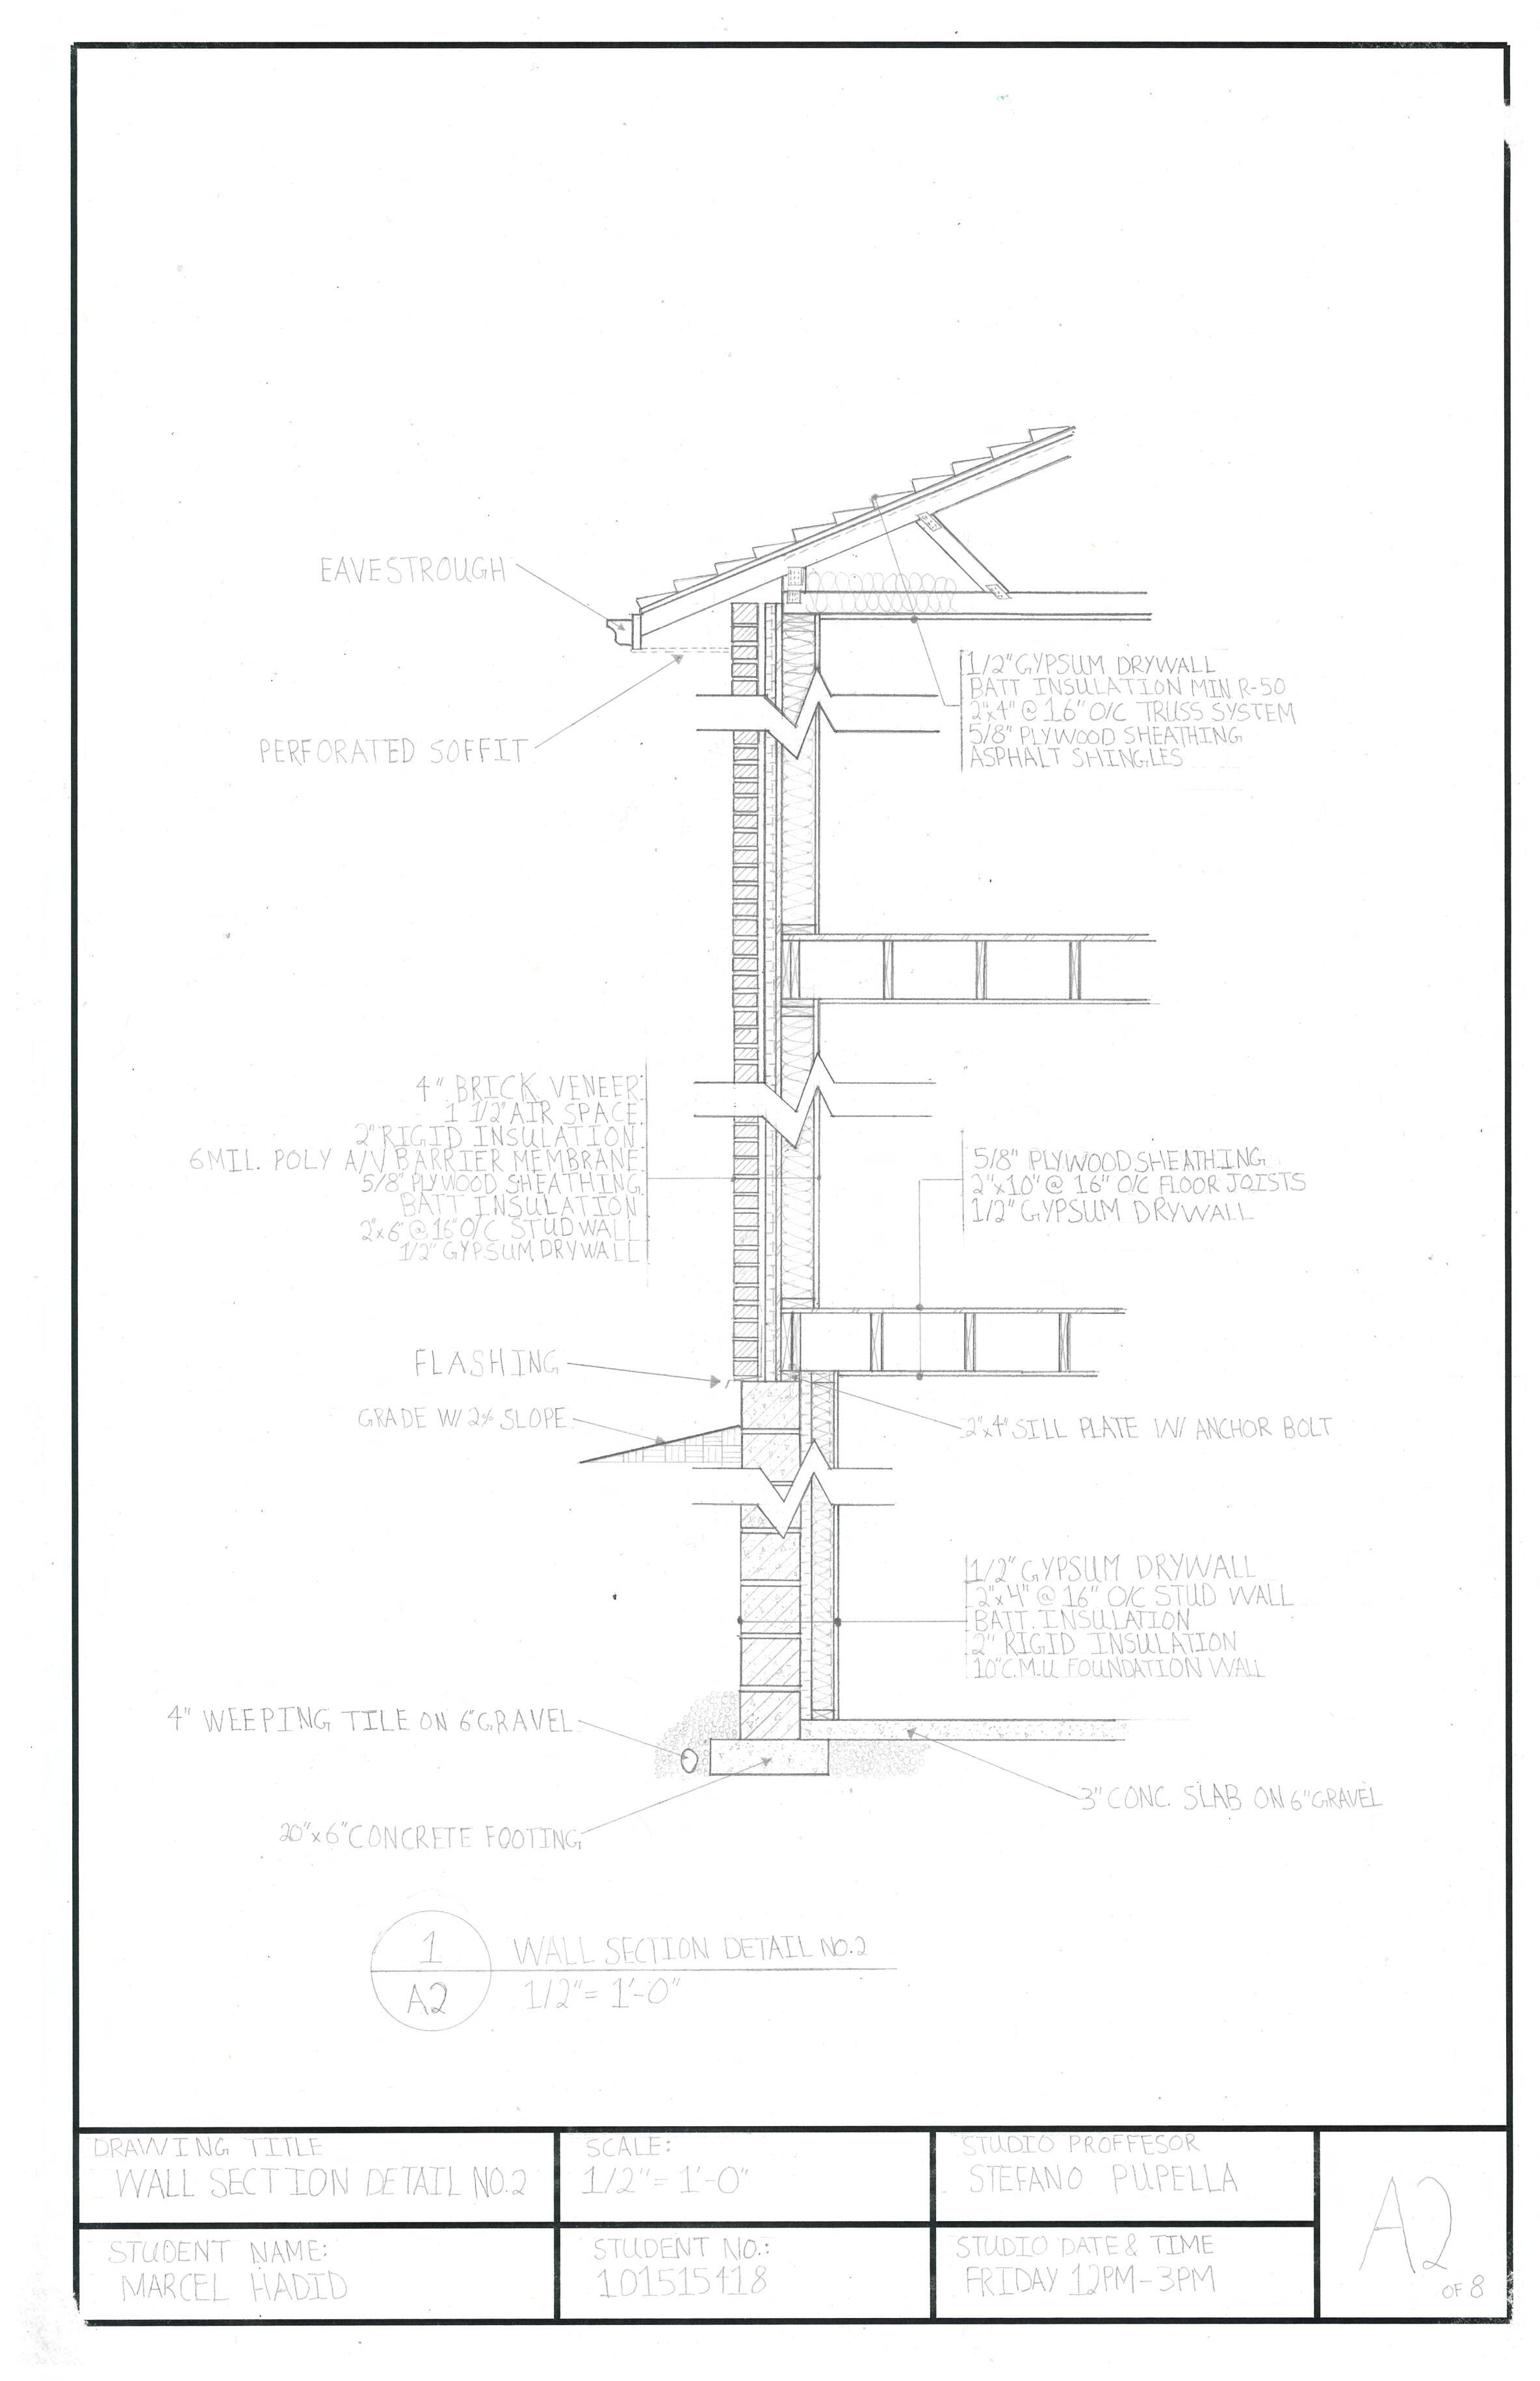
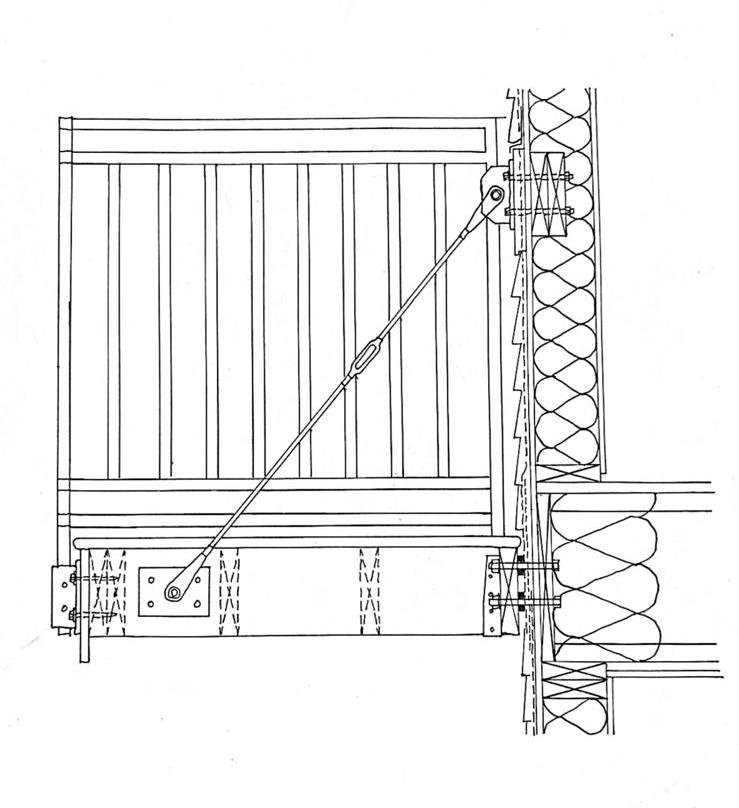
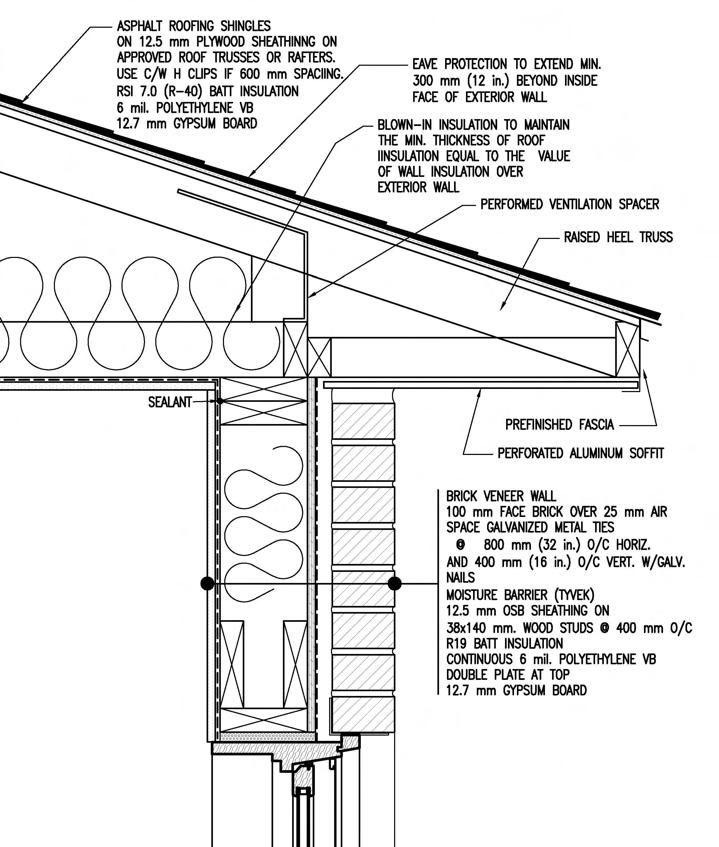
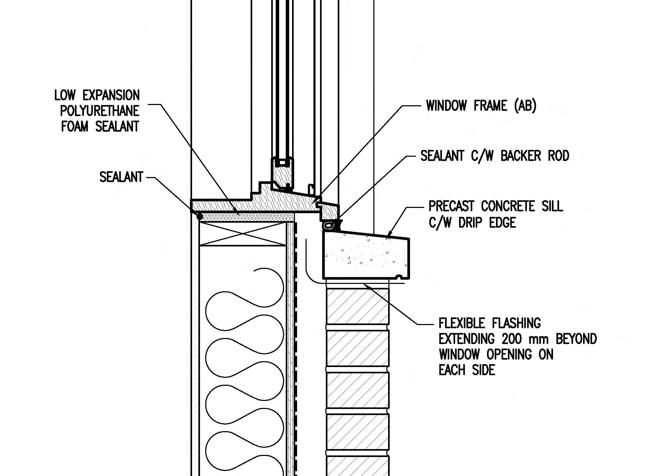
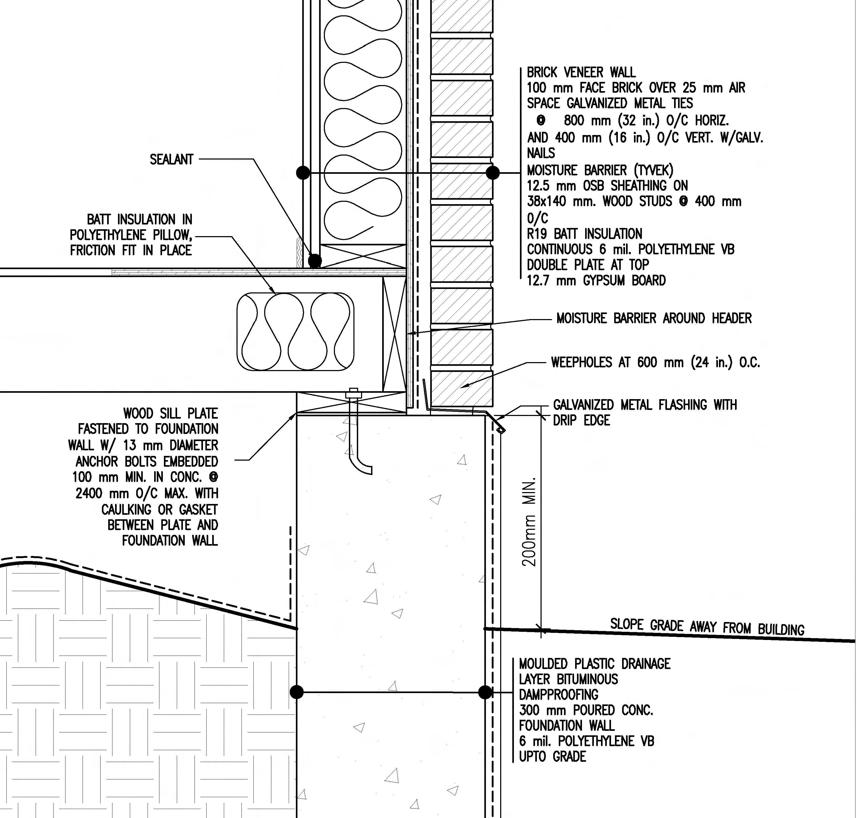
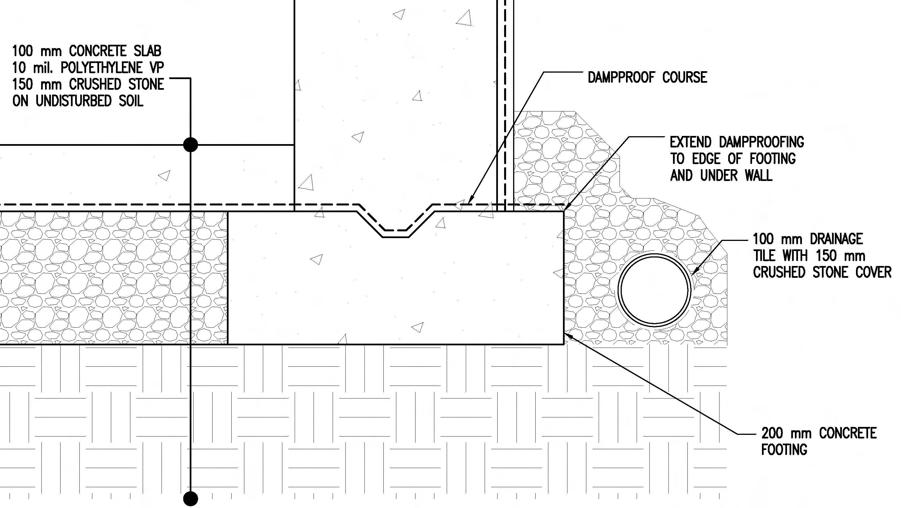
This is a small project I did in my first semester at George Brown. The main aim of this project was to teach us about the fundamentals of wood-frame construction. We were tasked with creating wall sections, recreating working drawings on AutoCAD, and making a model of a corner of the house. The model was made in a group of two. This enhanced my teamworking skills, as my partner and I took on the difficult task to create a 1:50 scale model of a house.

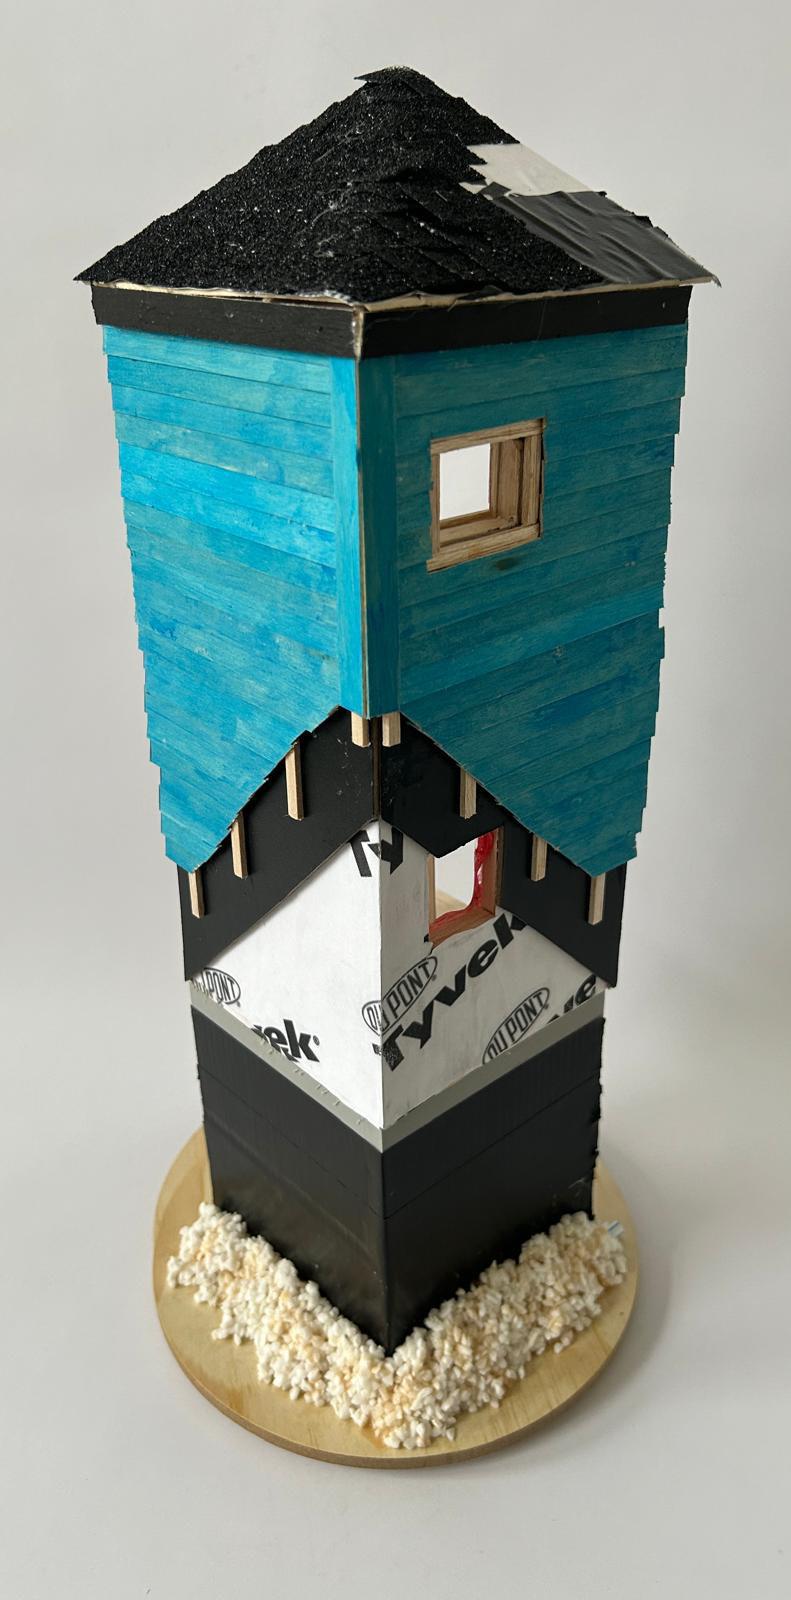
Corner Section 1:50
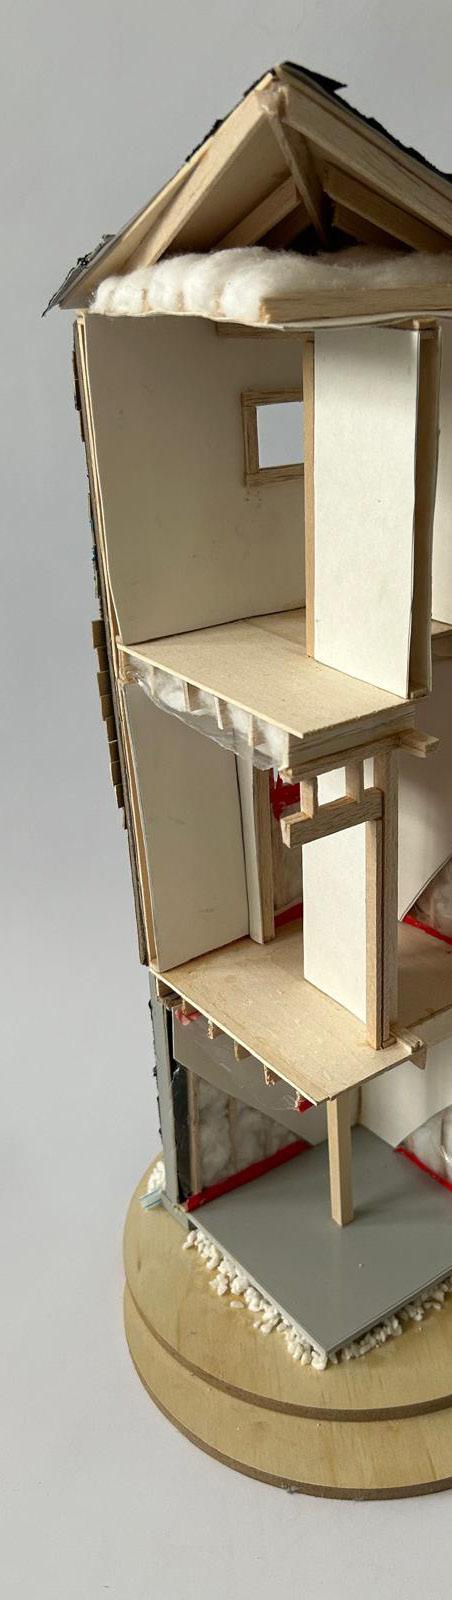

This model was the final assignment for this project. We were given only the foundation wall to start with, and had to build the rest of the house through other materials we found. We had to make sure that all the connections/details are well shown, including the roof detail, window lintel detail, foundation walll to first floor connection, wall assembly, and so on and so forth.
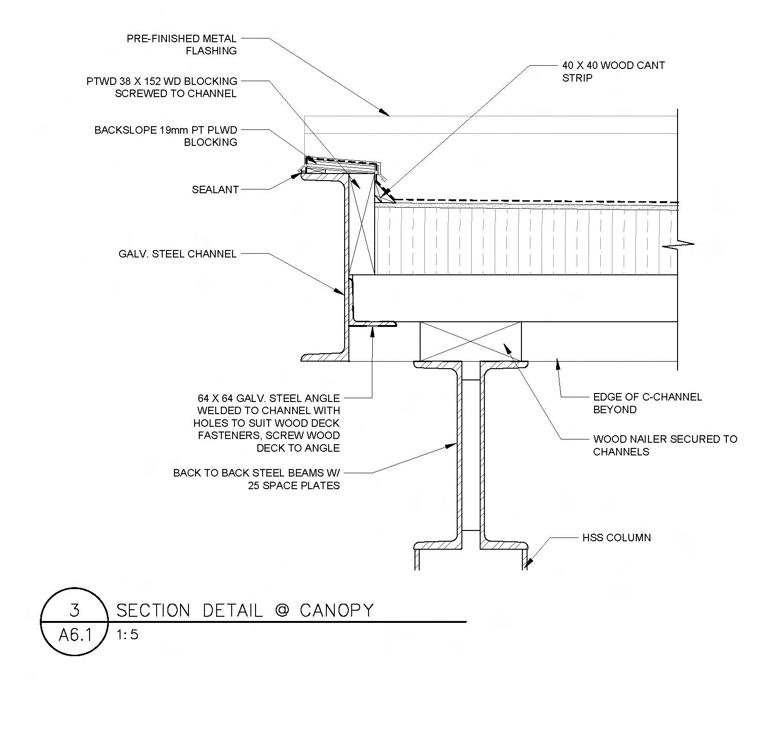
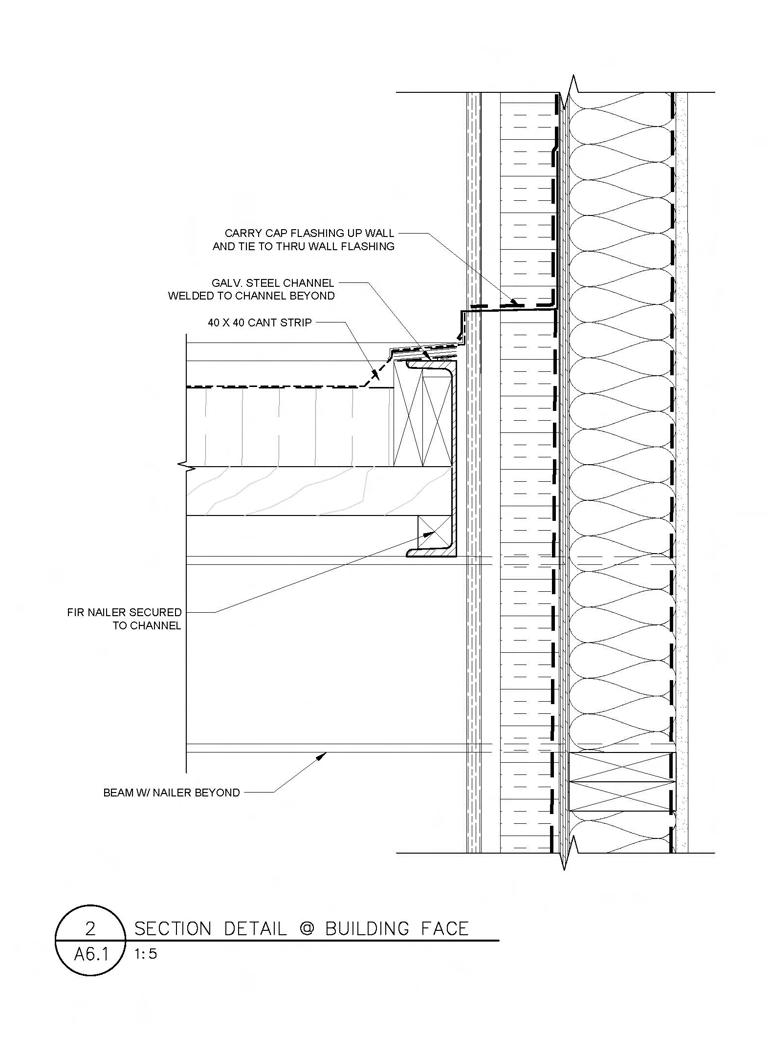
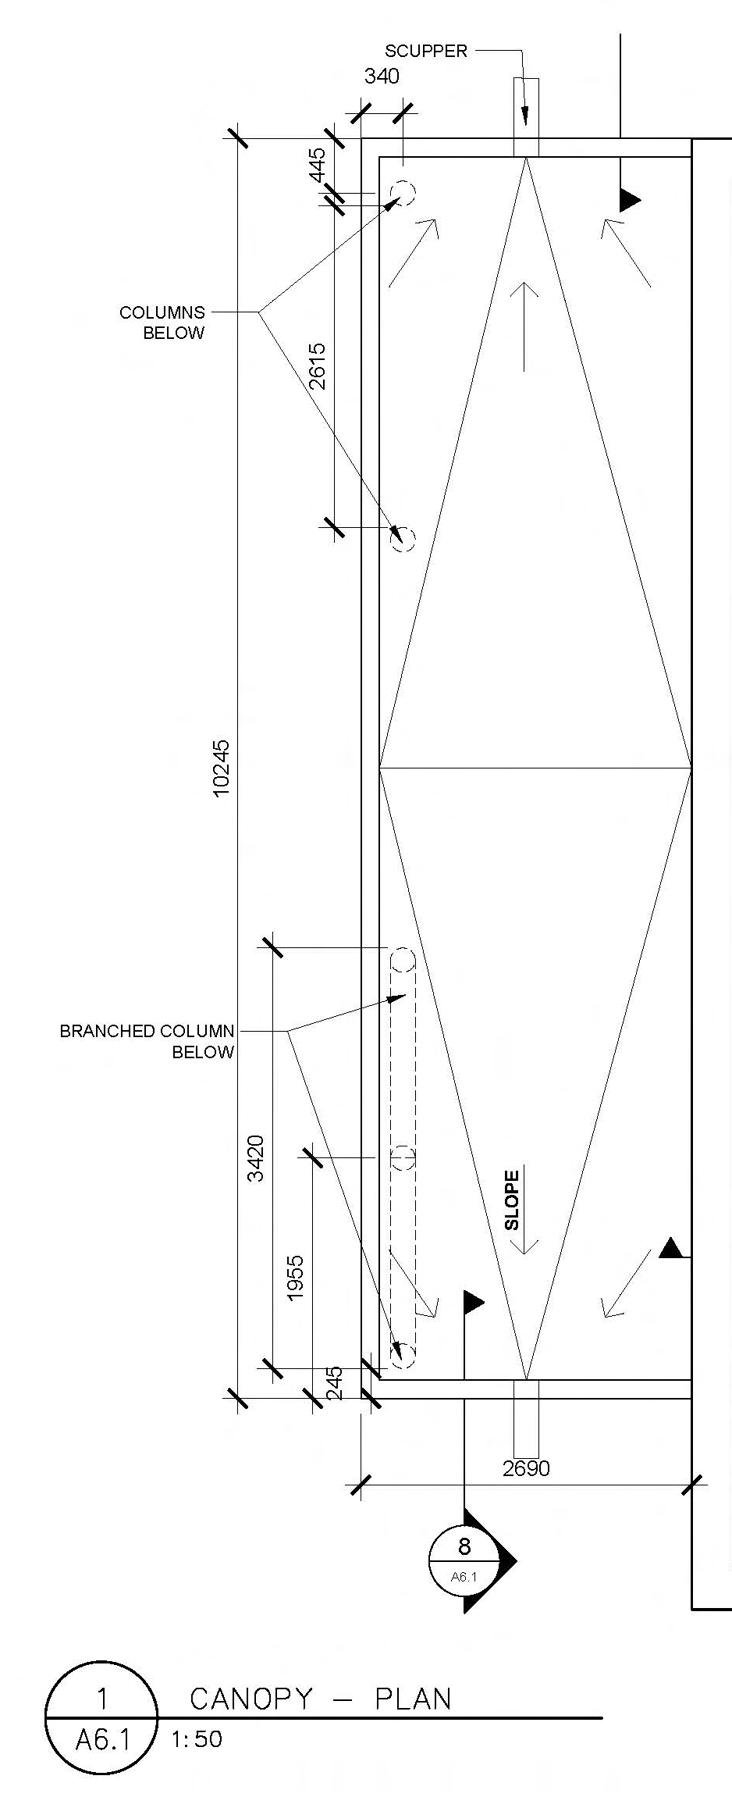
Community Project/ Winter 2023
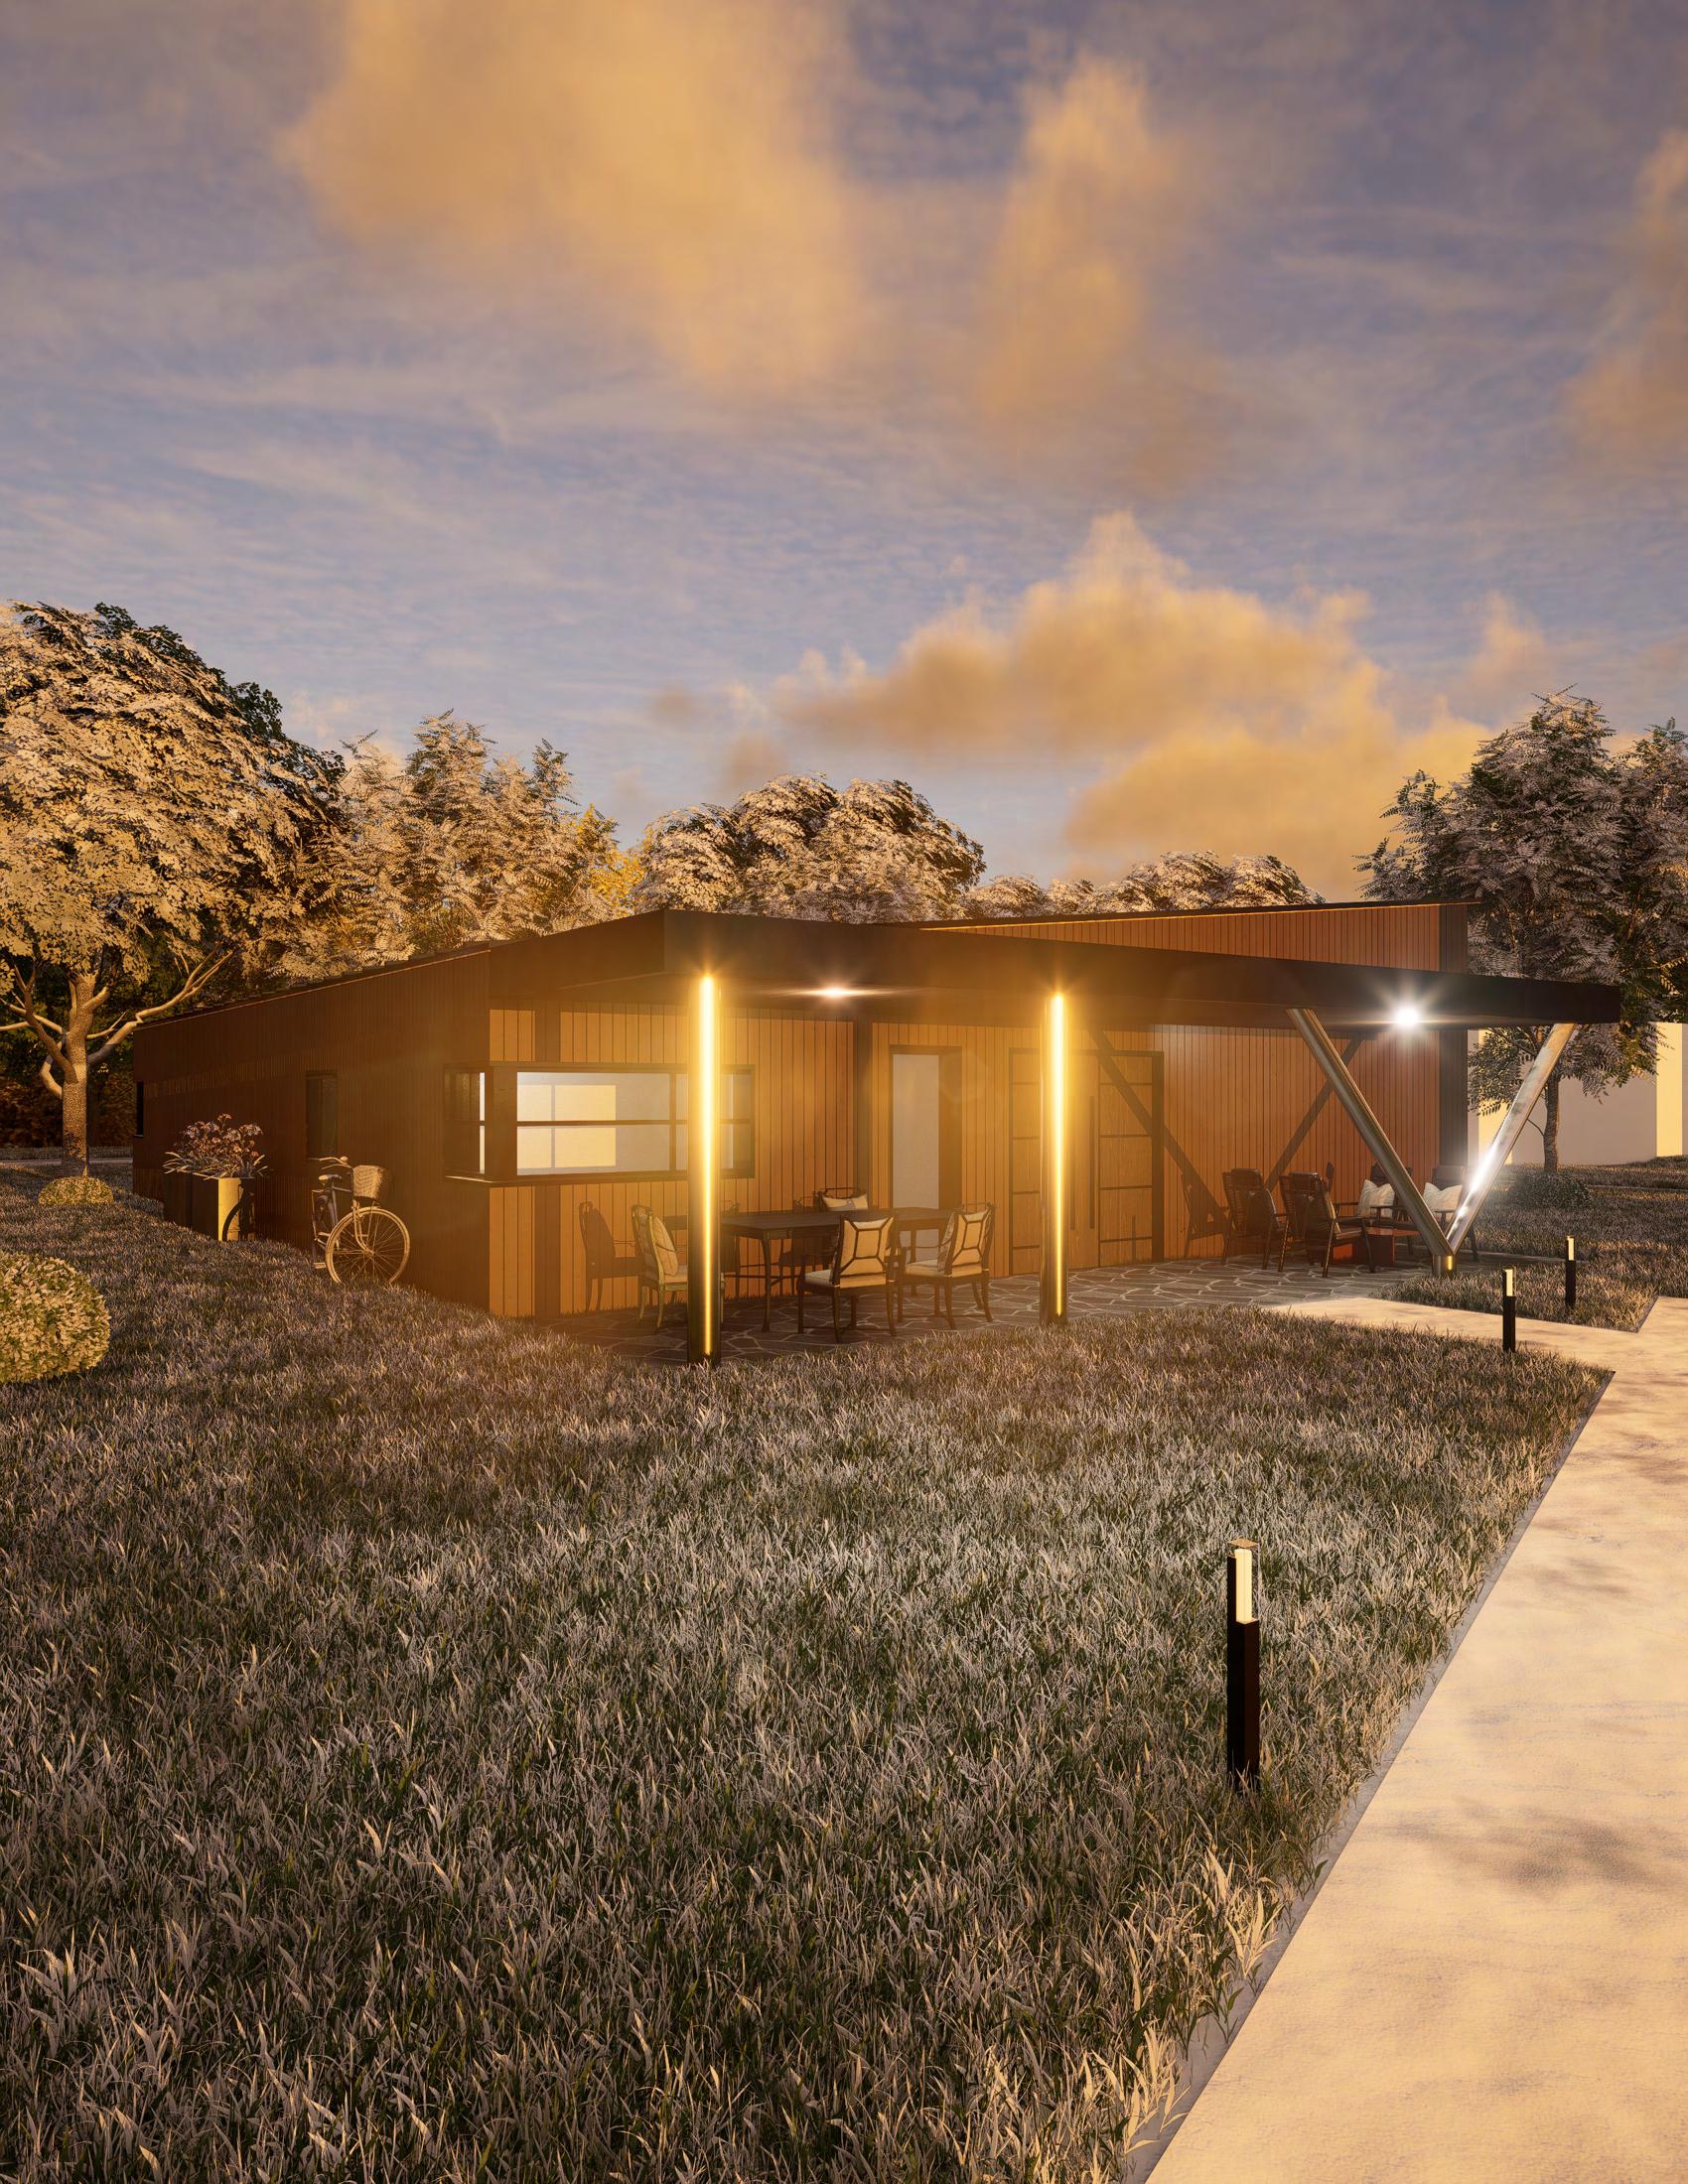
This is a small community project I worked on during my time at CGS Arch. It is a building in St. Thomas city, meant to host events for the community members. The main designer was the principal architect of the firm, and I folllowed his instructions to complete the working drawings.
KITCHEN
ROLLUP SHUTTER
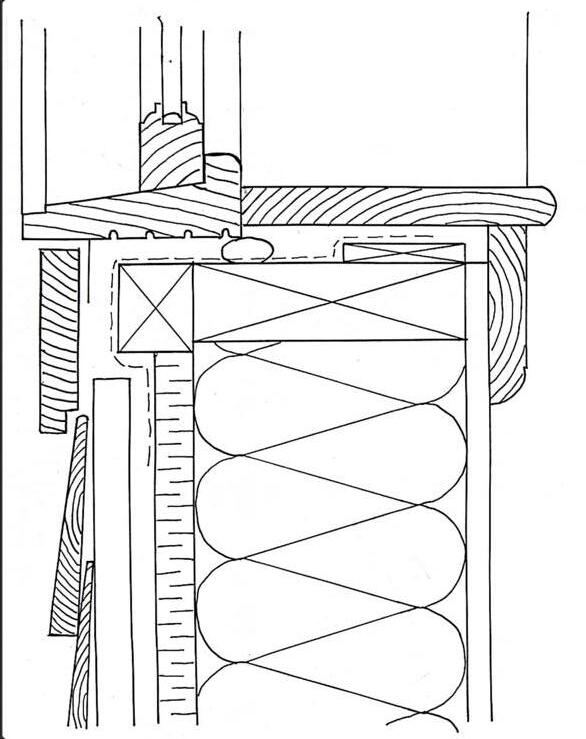
Hand-Traced details.
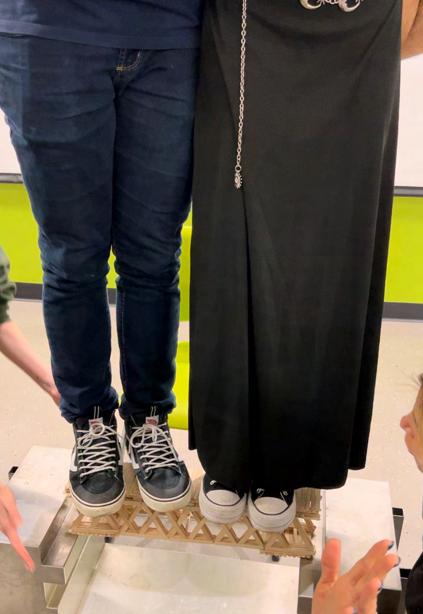
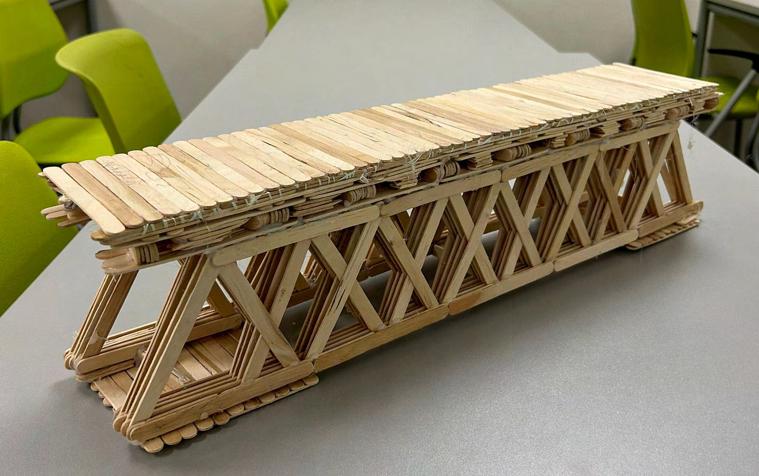
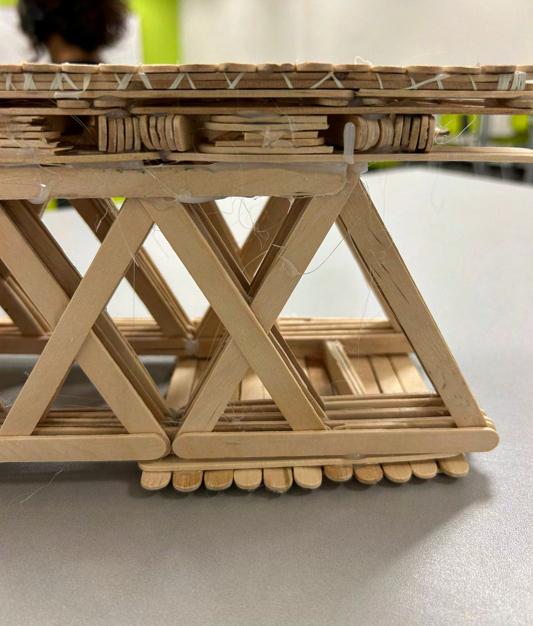
Popsicle Bridge. In a group of 4, my tem and I made a popsicle bridge that was able to carry a load of 145Kg. This was done to deepen our understanding of structural systems.
CAD drafted details.
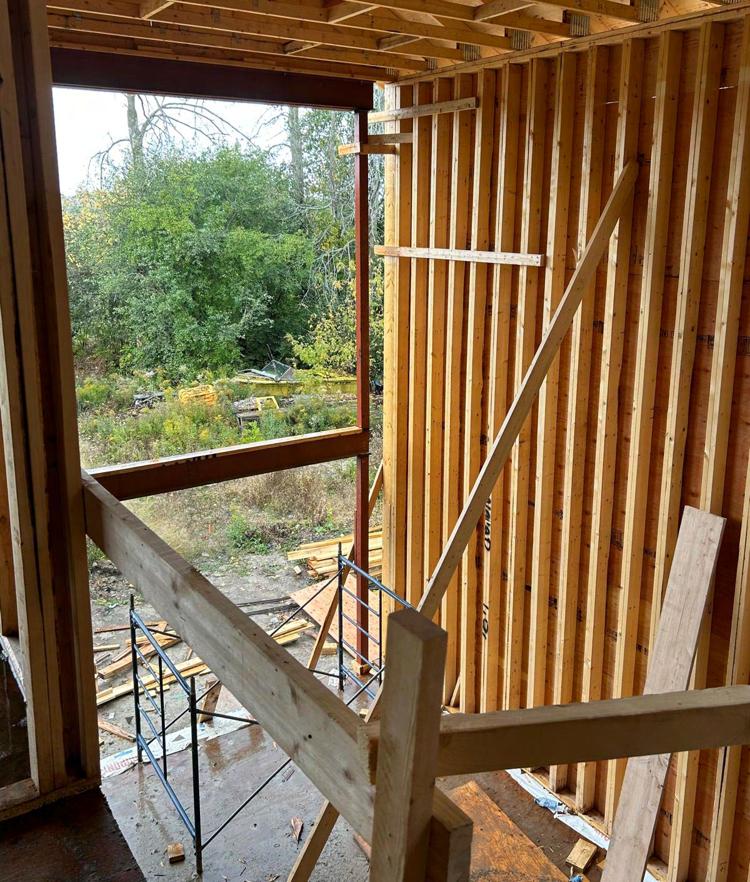
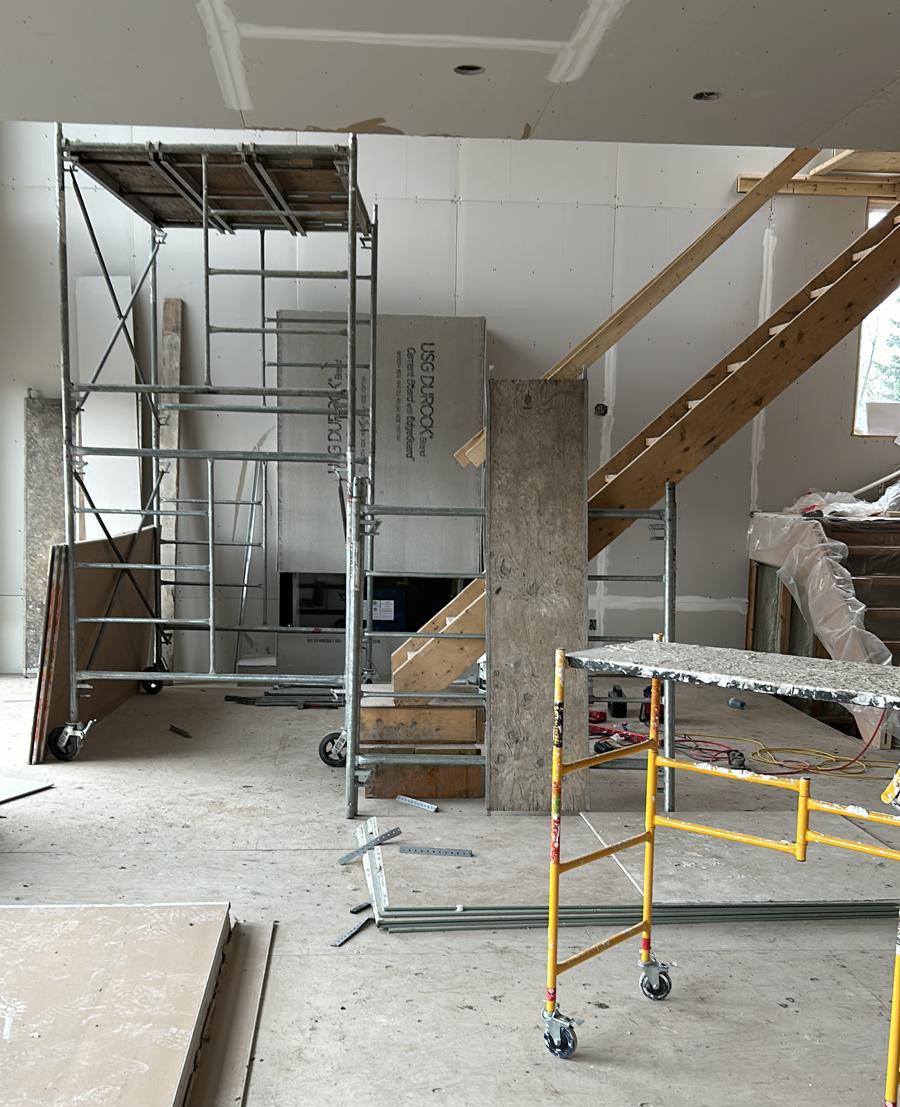
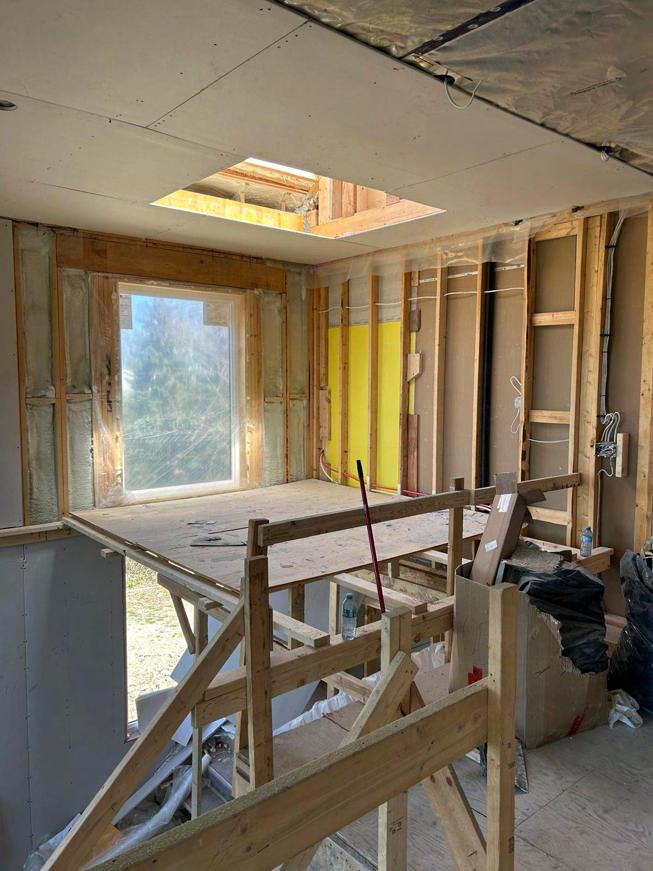
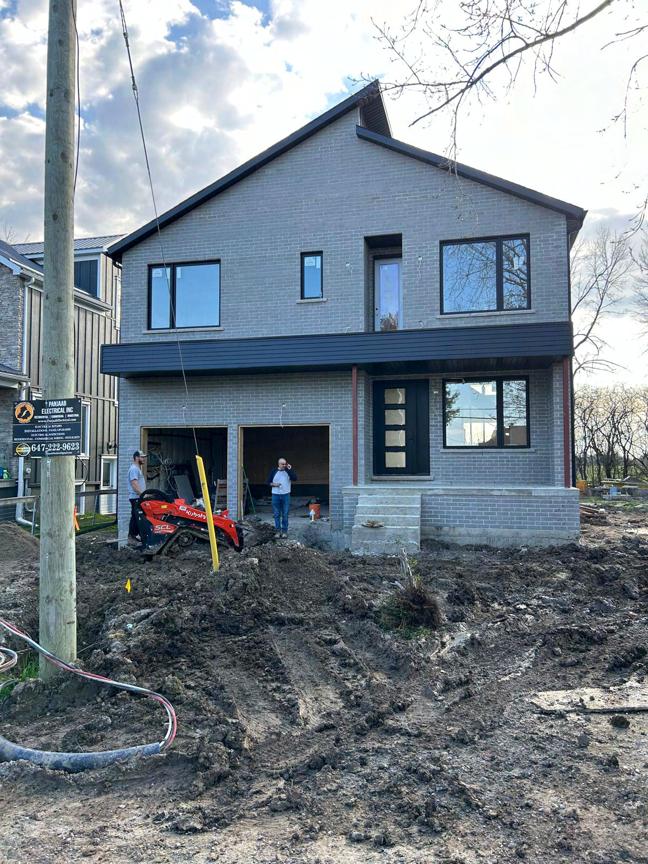
These are some images from my family member’s constuction site. They are building their own home, and I was there during the construction phase to watch all the processes of how a building gets built. I learnt a lot about the process of dealing with contractors and sub-contractors, permits, budgets, time expections, and a lot of the other realities of building a house.