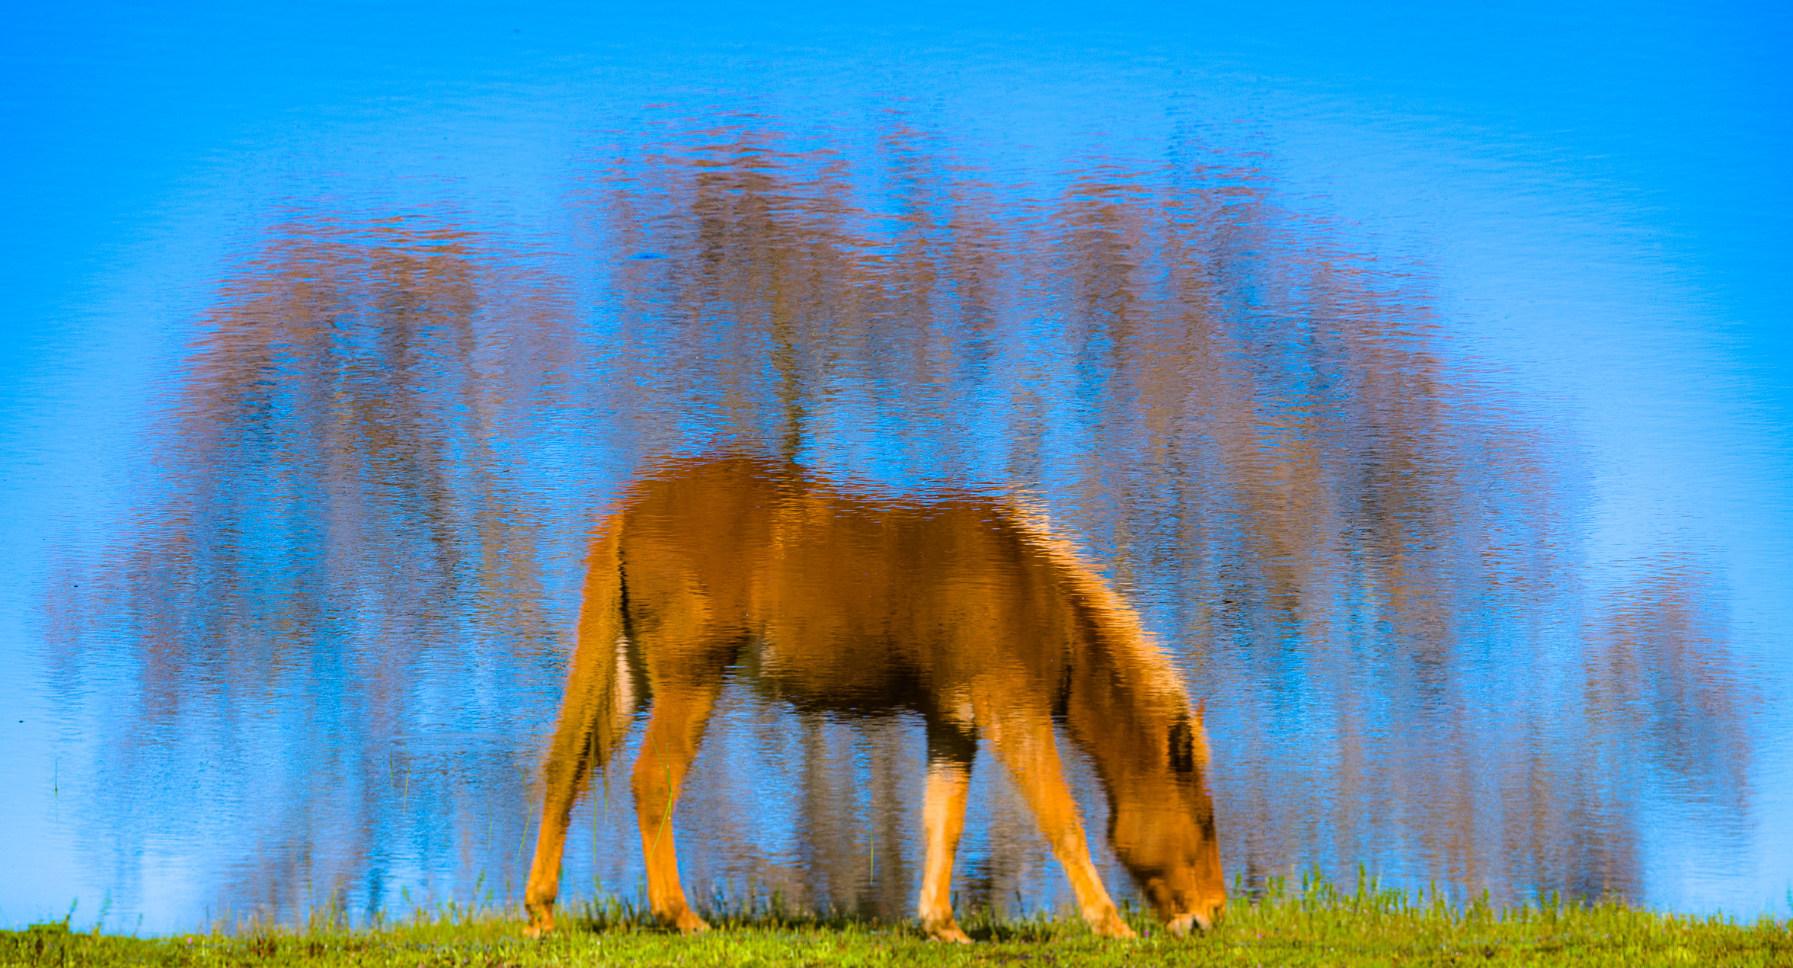
Focal Points

March/April 2023 Mongolian
Chair
Programs
Treasurer
Membership
Editor
Communications
Meetup
Outings
Outings
March/April 2023 Mongolian
Chair
Programs
Treasurer
Membership
Editor
Communications
Meetup
Outings
Outings
Joe Doherty
Susan Manley
Ed Ogawa
Joan Schipper
Joe Doherty
Velda Ruddock
Ed Ogawa
Joan Schipper
Joan Schipper
Alison Boyle
joedohertyphotography@gmail.com
SSNManley@yahoo.com
Ed5ogawa@angeles.sierraclub.org
JoanSchipper@ix.netcom.com
joedohertyphotography@gmail.com
vruddock.sccc@gmail.com
Ed5ogawa@angeles.sierraclub.org
JoanSchipper@ix.netcom.com
JoanSchipper@ix.netcom.com
AlisoniBoyle@icloud.com
Focal Points Magazine is a publication of the Sierra Club Camera Committee, Angeles Chapter. The Camera Committee is an activity group within the Angeles Chapter, which we support through the medium of photography. Our membership is not just from Southern California but is increasingly international.
Our goal is to show the natural beauty of our world, as well as areas of conservation concerns and social justice. We do this through sharing and promoting our photography and by helping and inspiring our members through presentations, demonstration, discussion, and outings.
We have members across the United States and overseas. For information about membership and/or to contribute to the magazine, please contact the editors or the membership chair listed above. Membership dues are $15 per year, and checks (payable to SCCC) can be mailed to: SCCC-Joan Schipper, 6100 Cashio Street, Los Angeles, CA 90035.
The magazine is published every other month. A call for submissions will be made one-month in advance via email, although submissions and proposals are welcome at any time. Member photographs should be resized to 3300 pixels, at a high export quality. They should also be jpg, in the sRGB color space.
Cover articles and features should be between 1000-2500 words, with 4-10 accompanying photographs. Reviews of shows, workshops, books, etc., should be between 500-1500 words.
Copyright: All photographs and writings in this magazine are owned by the photographers and writers who created them. They hold the copyrights and control all rights of reproduction and use. If you desire to license one, or to have a print made, contact the editor at joedohertyphotography@gmail.com, who will pass on your request, or see the author’s contact information in the Contributors section at the back of this issue.
https://angeles.sierraclub.org/camera_committee
https://www.instagram.com/sccameracommittee/
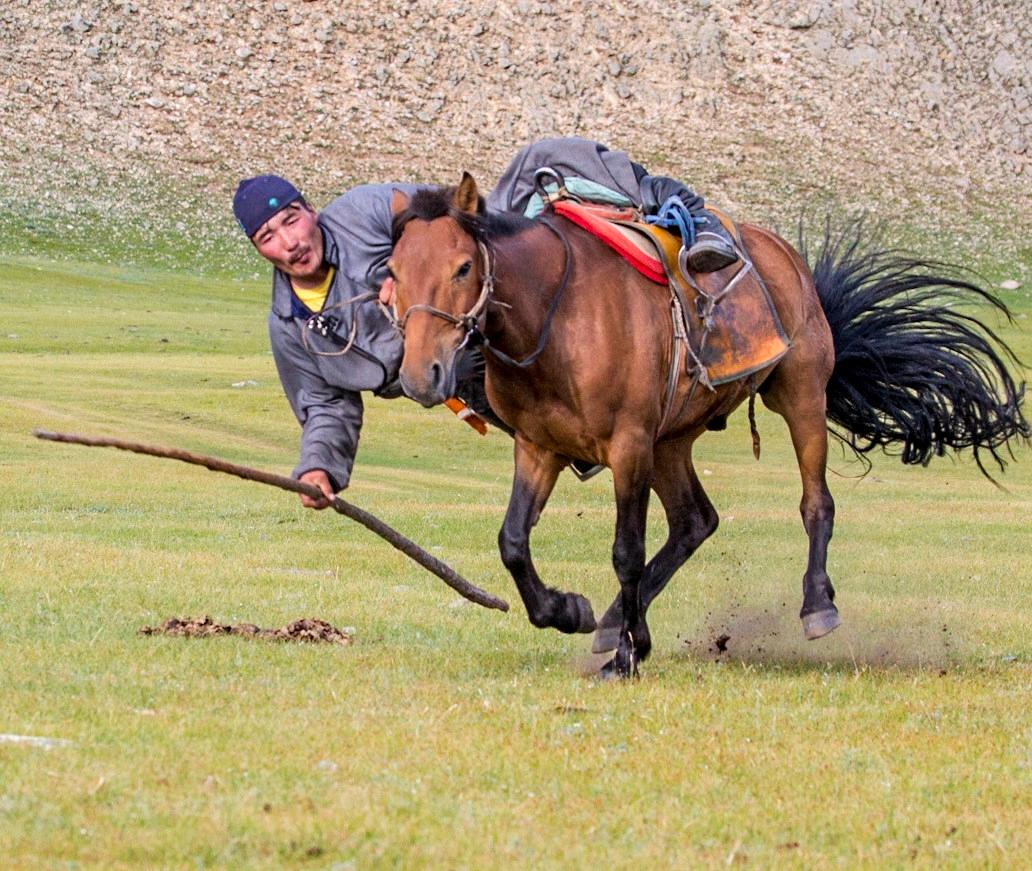
4 Mongolian Adventures. An invitation to ride horses across the Mongolian Steppe became a one-man photography workshop. Charlie Hyman explains the challenges of photography on this unique trip.
By Charlie Hyman
COLUMNS 12 How-To: Preparing for an Exhibition By
Joe Doherty
How I Did It: Los Angeles at Dusk By
John Fisanotti
Trip Report: Death Valley By
Paul Reinstein
Since retiring and re-dedicating myself to photography full-time I’ve discovered that it’s not as difficult to make friends in adulthood as I’d always believed. Velda and I have met and become close to many photographers and their partners over the last eight years. Some are old folks like us, others are mid-career professionals, and a few are doing excellent work yet still figuring out the legal and business side of things. What we all share is the joy of doing and sharing our work, and the almost complete absence of competition between us.
This issue’s cover story, “Mongolia Adventure,” is written by one such friend. We knew Charlie Hyman at a distance through our joint membership in the Dodrill Photo Workshop Group on Facebook. We finally met in 2016 during a workshop at Lake Tahoe, and have shared stories, advice, and photographs ever since. He recently joined the Sierra Club Camera Committee, and this is his first contribution to Focal Points Magazine. I hope you enjoy it.
This is the second issue of Focal Points Magazine with my name at the top of the
masthead. It would be impossible to do this alone, and I’m so grateful that Velda has taken an active (if behind the scenes) role in putting it together. She communicates with authors, pitches story ideas, and proofreads everything. She also has an unerring eye for small mistakes in my layout.
I want to increase opportunities for SCCC members to do more writing. You’ll see a new column in this issue, “How I Did It.” It is the story of a single photograph, and in this issue it is written by John Fisanotti. If you have a single photo with a complicated history, please let the rest of the membership know how you did it.
We also have a “Trip Report” column, which in this issue recounts Paul Reinstein’s recent photographic sojourn to Death Valley. If you’re like me, one of the reasons you picked up a camera is to record your travels. If you’ve had a particularly interesting trip, we hope you’ll recount it for everyone else.
As a reminder, the June Zoom presentation will be a Member Show.
–Joe Doherty
April 13th at 7pm via Zoom
Register for the talk here: https://tinyurl.com/SCCCGM

I have worked for over 20 years in the finance industry, living and working in the Philippines, Australia, Hong Kong, Indonesia, Ethiopia and Dubai. I have been lucky to pursue my passion for photography in my free time. I absolutely love travel and have been fortunate to travel to 80 countries.
I am a landscape, astro, wildlife and cityscape photographer based in Dubai. I have always been fascinated by the outdoors and nature. I find that photography continues to change the way I see the world. I'll never look at clouds, water, stars or buildings the same again.
I capture extraordinary light in unique and remote locations around the world which leave myself and my viewers in a sense of awe about the world and its beauty. It might be a lighthouse at sunrise, snow-capped mountains reflecting in an alpine lake, or a city draped in fog; all of the photos have light that makes my subjects look surreal.
My photography pushes me to explore the world and experience magical moments where light, weather, and a beautiful composition comes together. My work brings the viewer to those places and causes them to want to see and experience the world.
An invitation to ride horses across the Mongolian Steppe became a one-man photography workshop. Text and Photographs by Charlie Hyman
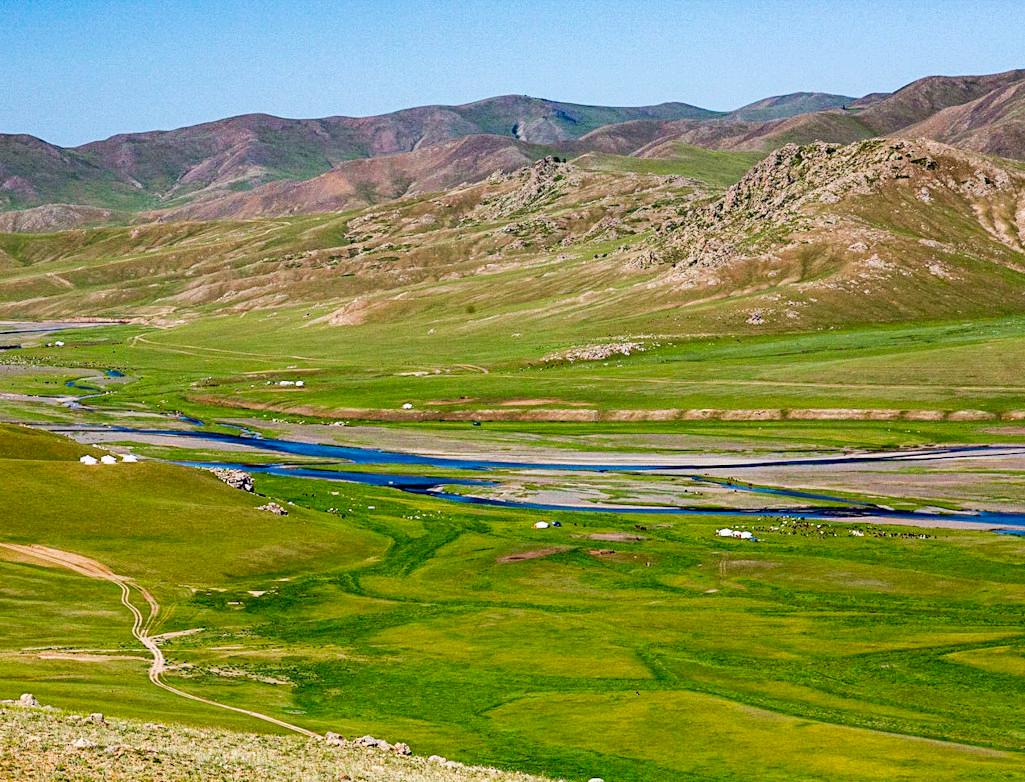
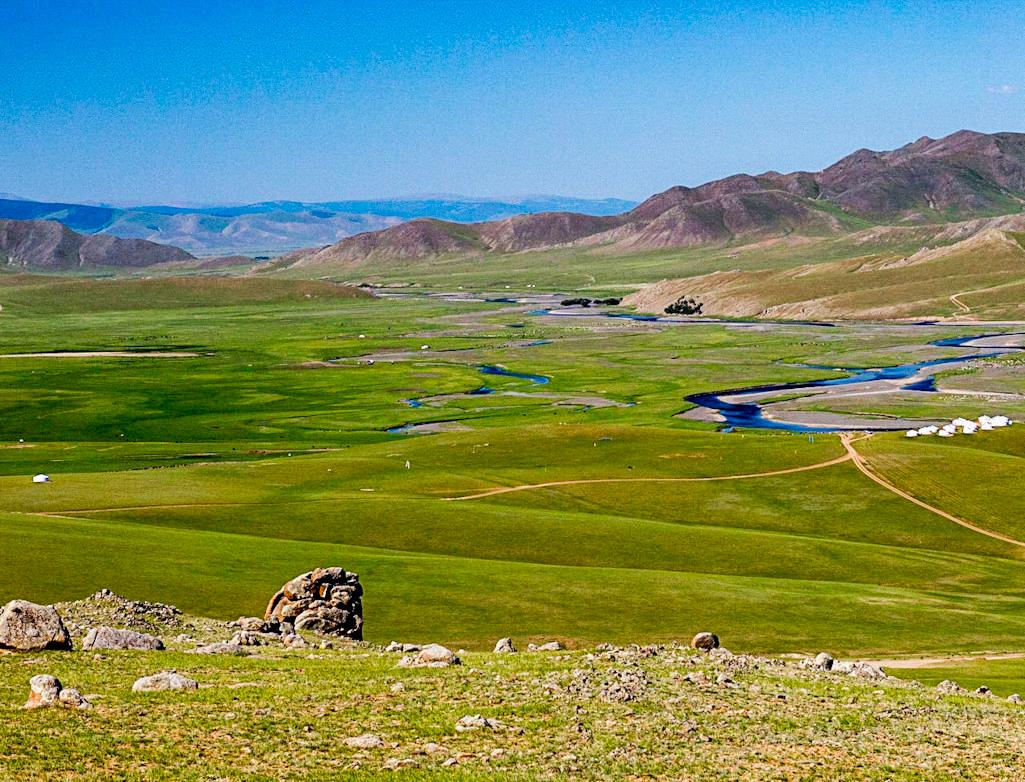
Mongolia! Located between Russia to the north and China to the south, and with a population of around 3.3 million, it is the most sparsely populated independent country on Earth. It is well known as the empire founded by Genghis Khan in 1206.
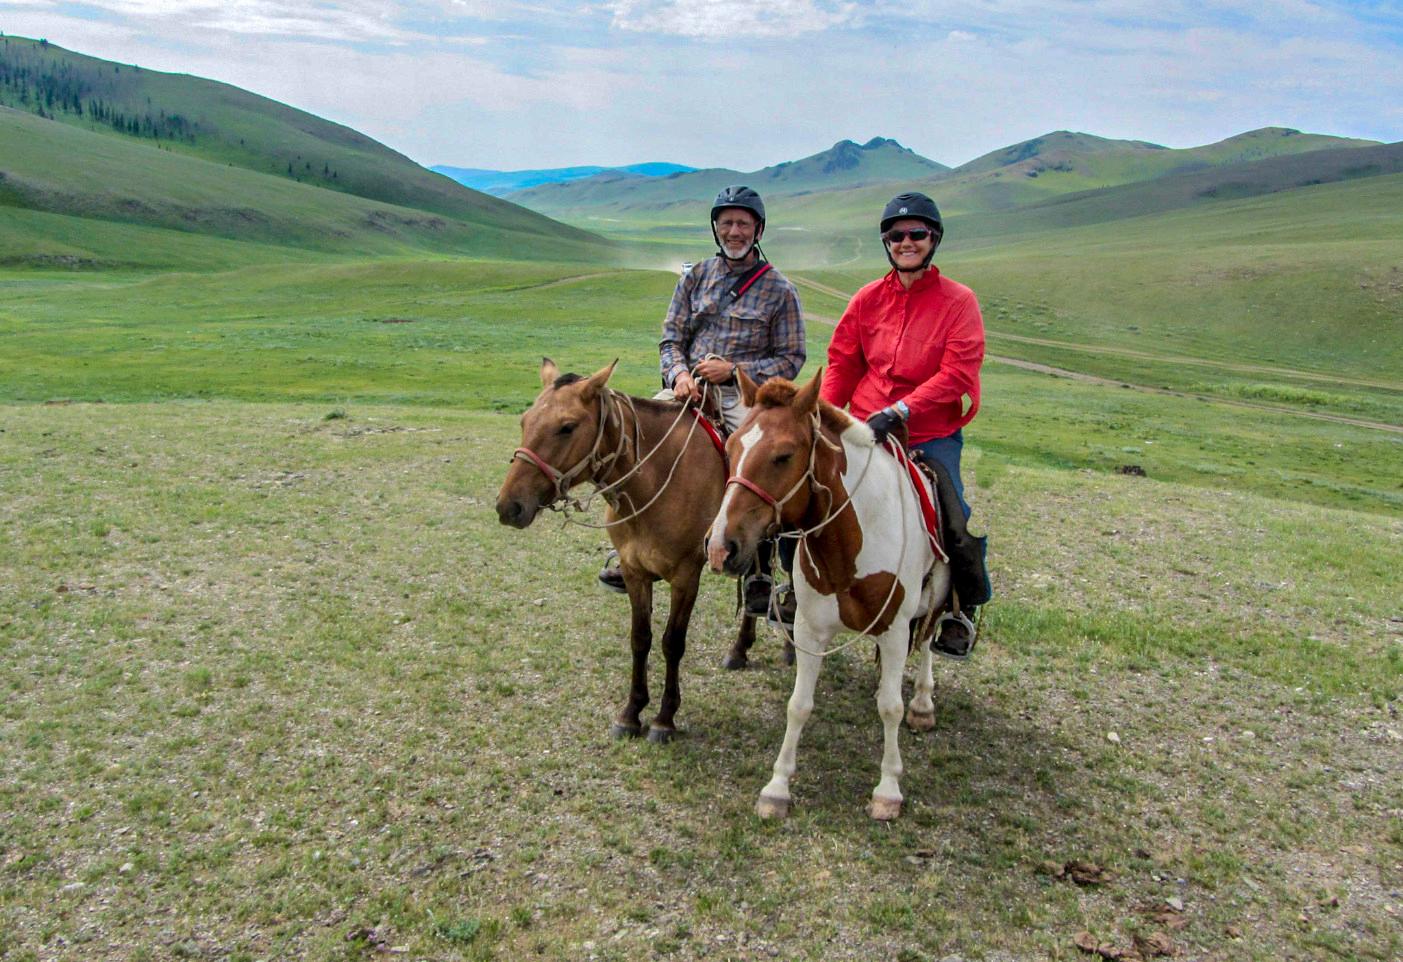
In 2017 my wife, Karen, and I were invited to join a group of equestrians for a horsetrekking adventure. For two weeks we explored the sights in the steppe in central Mongolia with our guides, staying in ger (yurt) camps, camping by horseback, attending the Naadaam Festival, and visiting Nomad families in their gers.
The third week was spent at Lapis Sky Camp where we rode for up to five hours daily and had encounters with local nomads in their gers, musical gatherings with nomadic herdsmen, yoga by the river, a demonstration by a shaman, a zither-and-horseheadfiddle concert by local school children, and an overnight rainy camping experience on horseback.
My camera gear consisted of Canon 5D mkiii and 7D bodies, Canon 24-105mm, 70200mm, 100-400mm, and Rokinon 14mm lenses. With careful packing, I was able to fit it all in and still have room for my laptop, clothing, and batteries and chargers in a Mindshift Ultralight Dual 36L bag, which I carried onboard. I also brought a Canon SX230 compact camera to use when it would not be convenient to have my big rig in hand. My tripod, a Gitzo Series I Traveler, went in my duffel bag along with an Eddie Bauer waist pack I planned to use on horseback.
Being the only photographer in the group meant that I would need to grab shots on the move. Many photos were taken while bouncing around in vehicles over the ‘roads,’ not much more than dirt tracks in the grassland on this trip. I overcame my fear of high ISO settings, and took many photos at ISO 4000 and above. This paid off, resulting in tack-sharp images with my 100-400mm lens at 400mm,
At the end of the trip I came home with over 3700 images, making it very difficult to narrow down to the few in this article.
It’s important to have your camera at the ready at all times while traveling in Mongolia to capture unplanned scenes and events. We spotted children in training for the Naadam Festival horse race as we were driving by at highway speed. I had my 24-105mm lens on the camera and set the ISO to 4000 and shutter speed to 1/5000. It required substantial cropping to get this image, but it’s a good example of being prepared for those great opportunities when they happen.
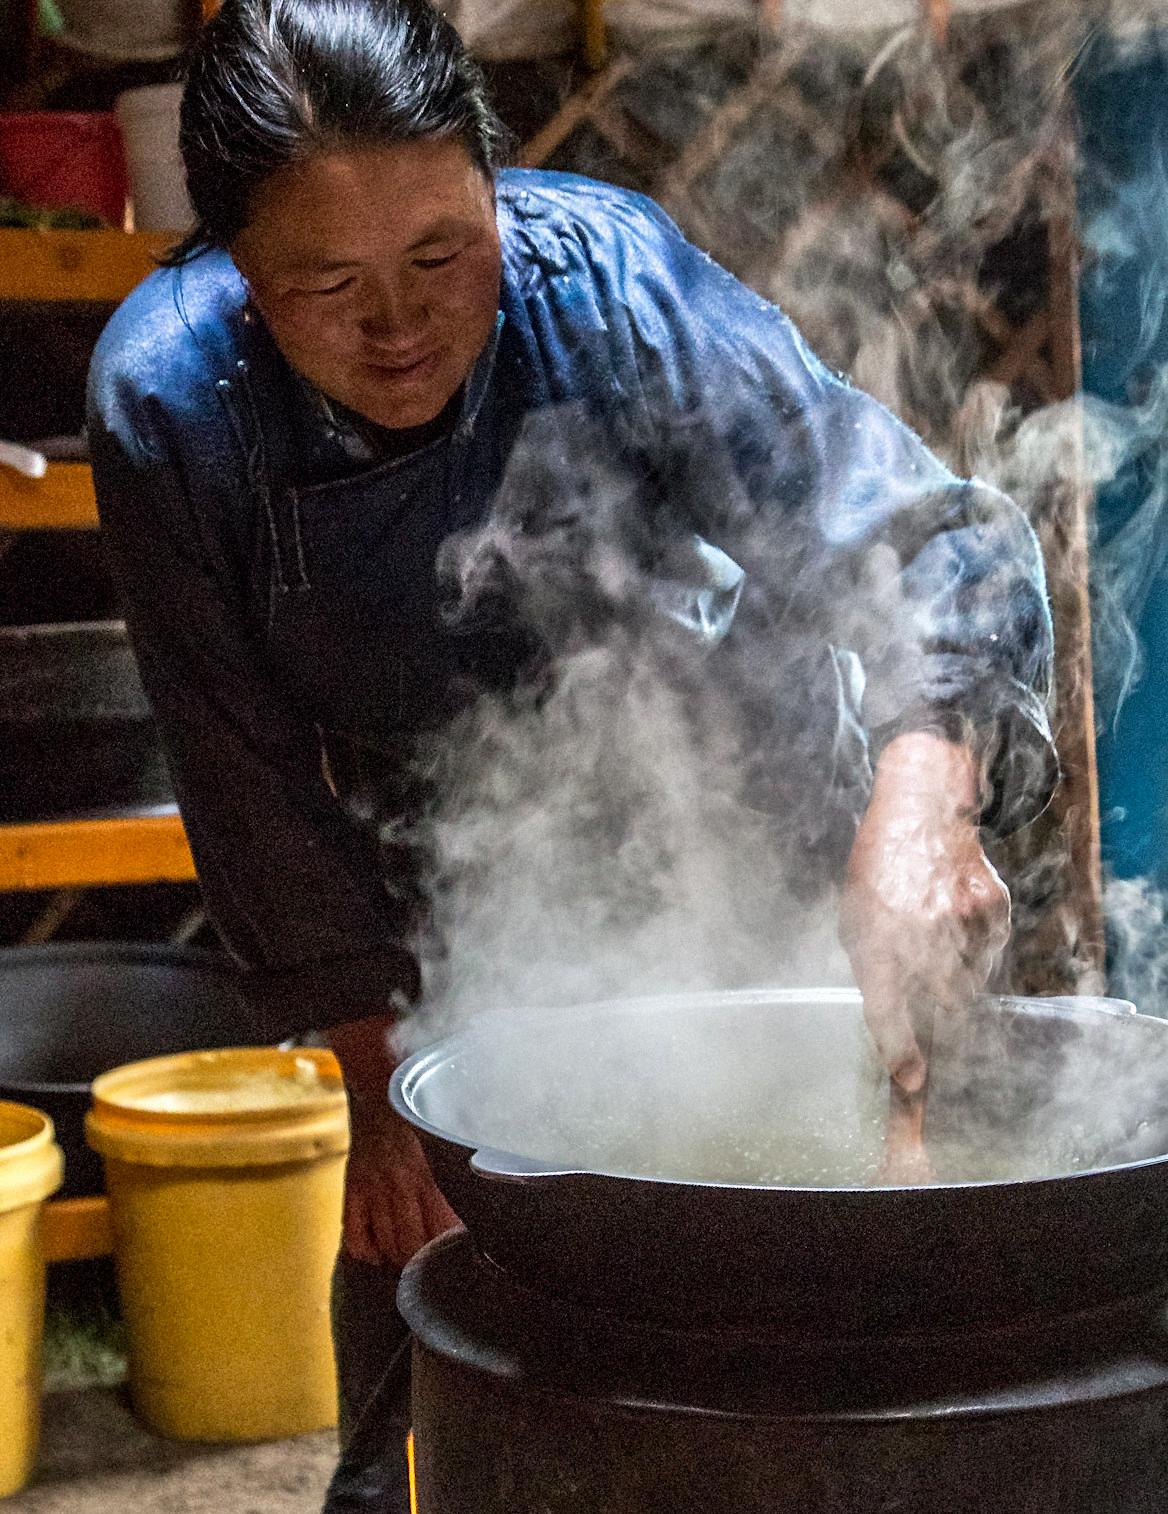
Yak milk is a staple of the Nomad diet, providing tarag (yogurt) and aaruul, a fermented sour dried cheese. At Lapis Sky Camp there was a Nomad family living nearby that provided food for the camp. I was invited to photograph the daily yak milking. The family was well accustomed to being photographed, so I had no reservations about aiming my camera. The Mongolian people are

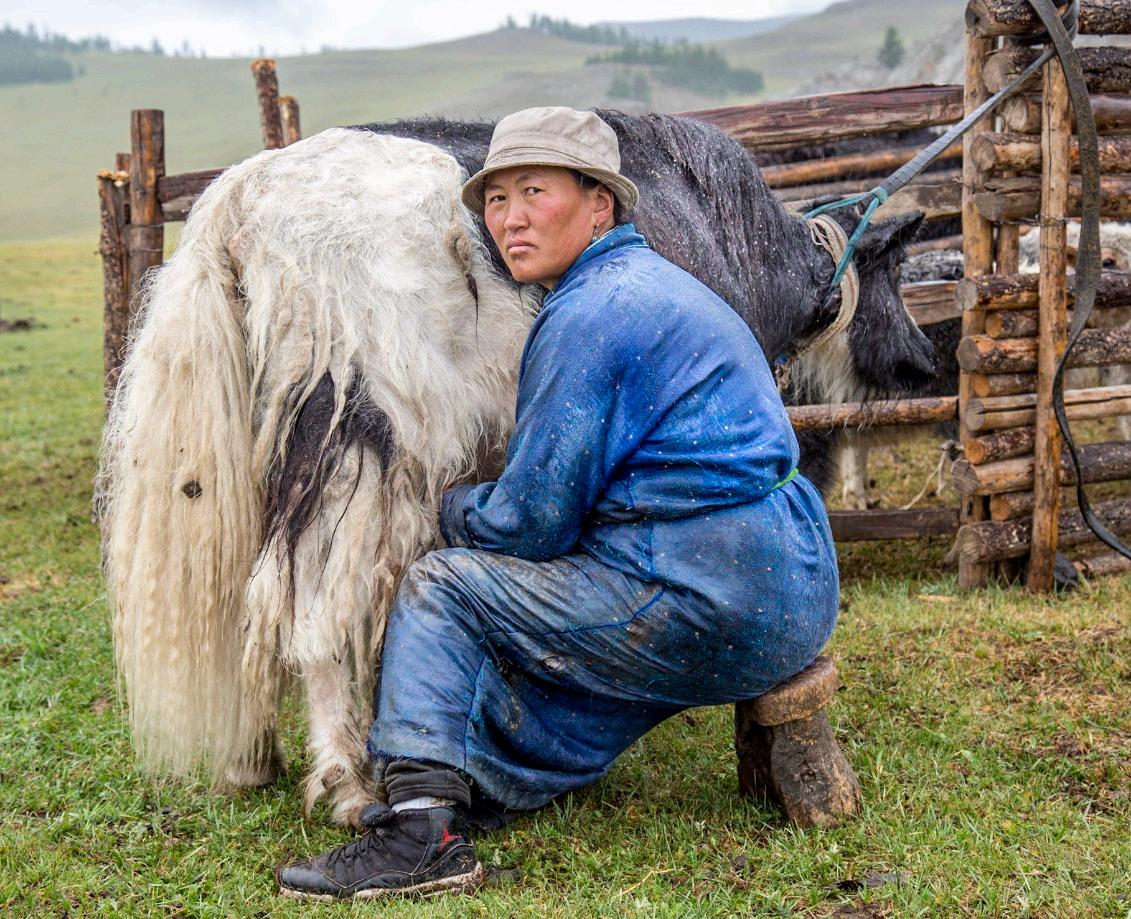
the kindest and friendliest people I’ve met, but opportunities of this kind are most likely to be arranged by guides or camp hosts. (1/320sec, f/5, ISO 1250, 50mm)
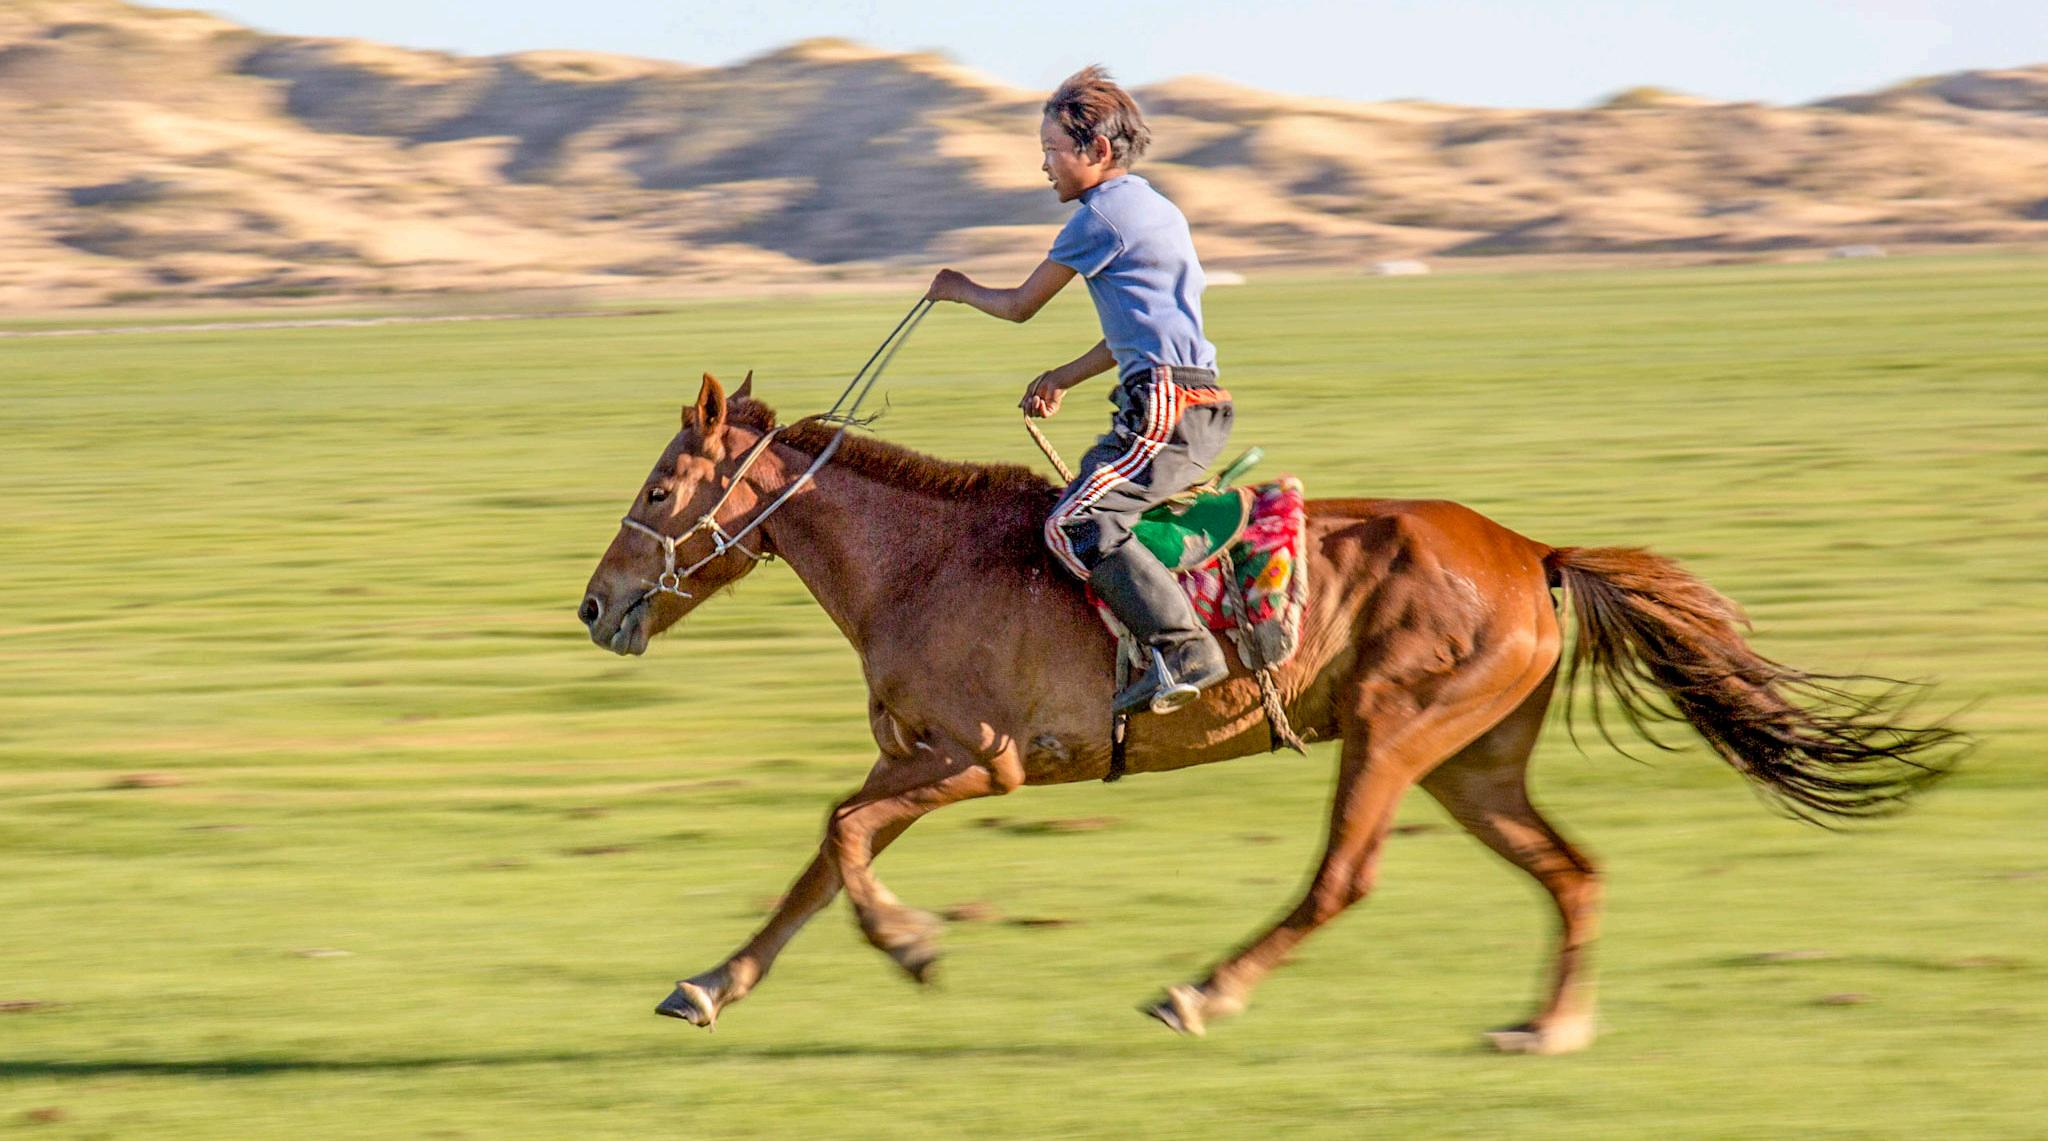
Because conventional tourism is not common in most of Mongolia, encounters with Nomad families are usually arranged by guides. The families are used to having visitors with cameras and are comfortable being photographed. I met this young boy during a visit to a Nomad family’s ger and instantly connected with him. After he posed for me, I handed him my camera and posed for him, much to his delight and mine. Mongolian kids learn how to ride horses almost as soon as they can walk, so they are extremely competent riders. I was treated to a demonstration of his galloping skill as he rode back and forth for me several times. (1/125sec, f/10, ISO 125, 96mm).

A Nomad ger camp is nestled beneath Red Rocks, an area where Buddhist relics were hidden to protect them from destruction during the Communist occupation of Mongolia. We visited the family living there and were surprised to see several dogs, which we learned are important in keeping the livestock safe from wolves. This photo was taken on horseback with my DSLR, but we were stopped on a ridge and I was able to drop the reins and take the picture. (1/60sec, f/13, ISO 100, 286mm)
Being an early-bird helps in getting photos of Nomadic herdsmen going about their daily routine of rounding up their horses for milking and for riding to check on their sheep, goat, or yak herds. They wear the traditional dhel (deel) garment, not for show, but for its practicality in the harsh climate of the steppe. Although a tripod might be helpful for dawn photography, it is more practical to hand-hold the camera to be able to adjust quickly to changing scenes. Having a long lens is invaluable for these scenes because of the great distances. Even so, thanks to large pixel-counts in modern cameras, extensive cropping is usually possible without too much loss of detail. (1/500sec, f/6.3, ISO 2500, 400mm)
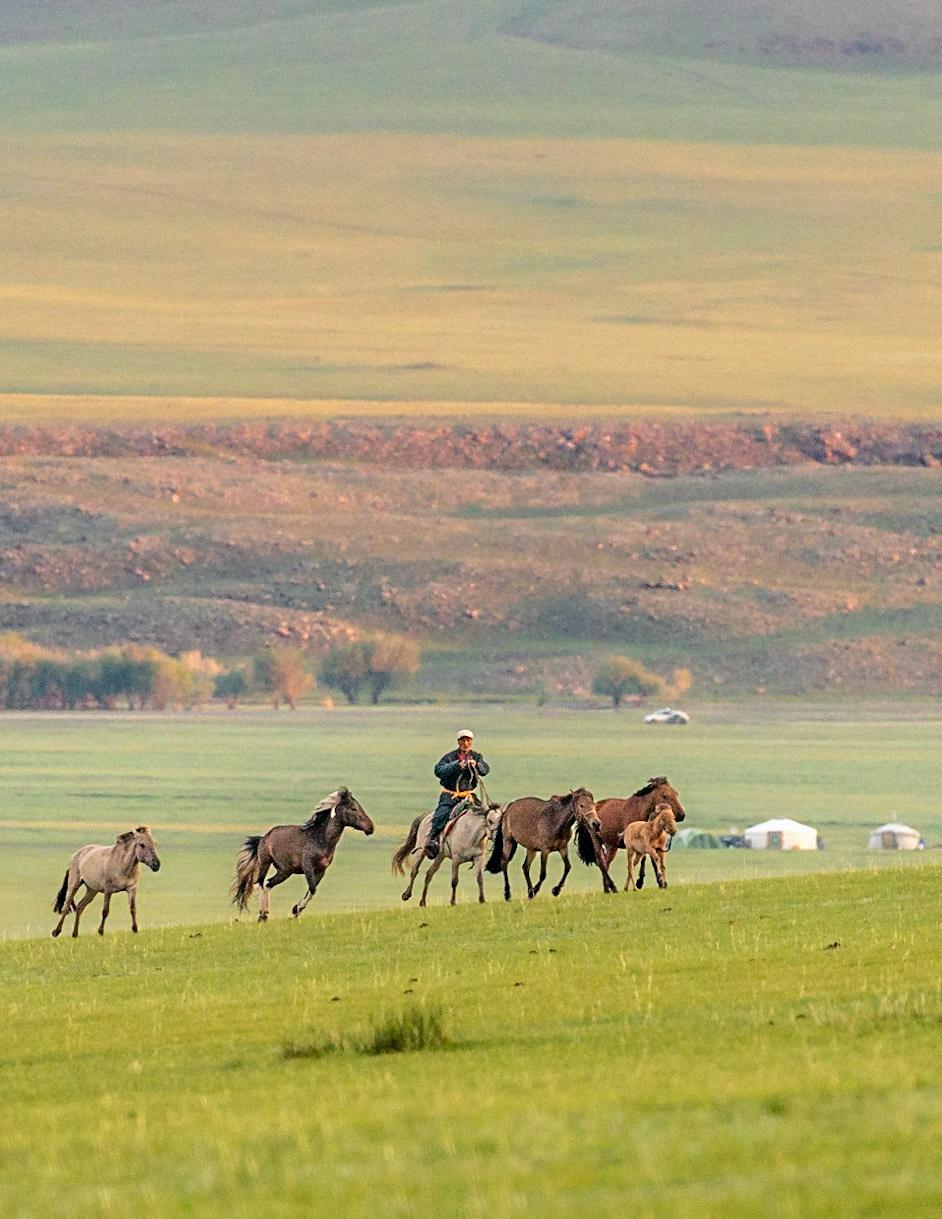
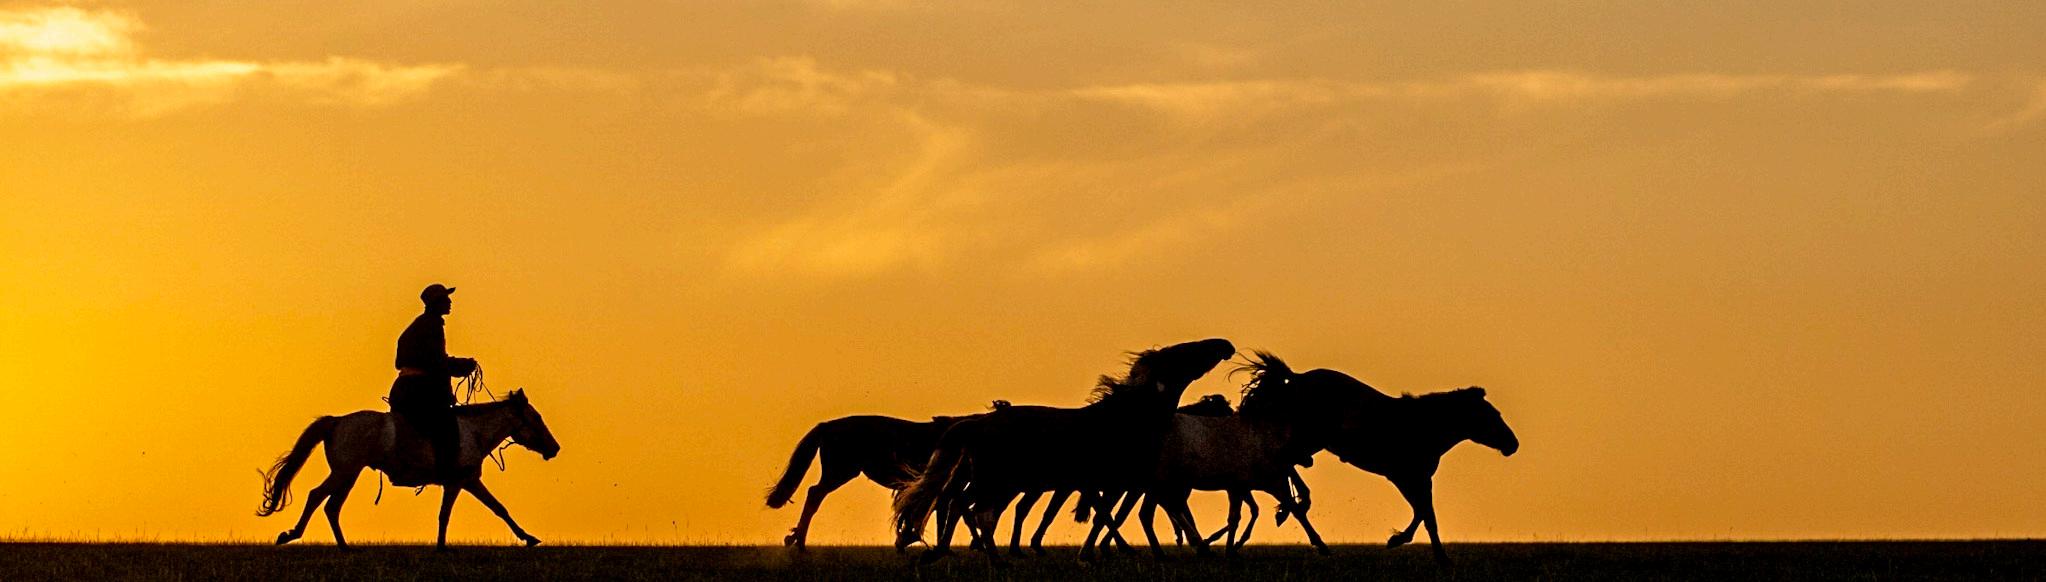
Sometimes photos of the horses and herdsmen are posed or arranged, but often opportunities present themselves serendipitously. It is important to have a camera ready to go at all times for these shots. We were camped along the Orkhon River, and at sunset the guides were taking our horses to their nighttime grazing area and just happened to ride them along the ridge behind the campground. (1/6400sec, f/6.3, ISO 4000, 200mm)
It’s difficult to fully grasp the vastness and remoteness of the steppe. Livestock free-range on the grassland, so Nomad dwellings are widely separated to ensure adequate grazing. To adapt to such dispersed and isolated living, most Nomad dwellings have solar panels, a satellite dish for phone and/or TV, a small pickup truck for hauling water, and even a motorcycle for rounding up the horses. Even a long telephoto shot almost looks wide-angle due to the scale of the landscape. (1/1250sec, f/8, ISO 2500, 248mm)

Mongolian herdsmen are expert riders and will not hesitate to demonstrate their skill for the camera. This show was put on for us at Lapis Sky Camp, where the riders picked up poles from the ground at a full gallop. I recommend using the continuous shutter feature of your camera to capture these fast-action shots.
(1/800sec, f/8, ISO 640, 100mm)
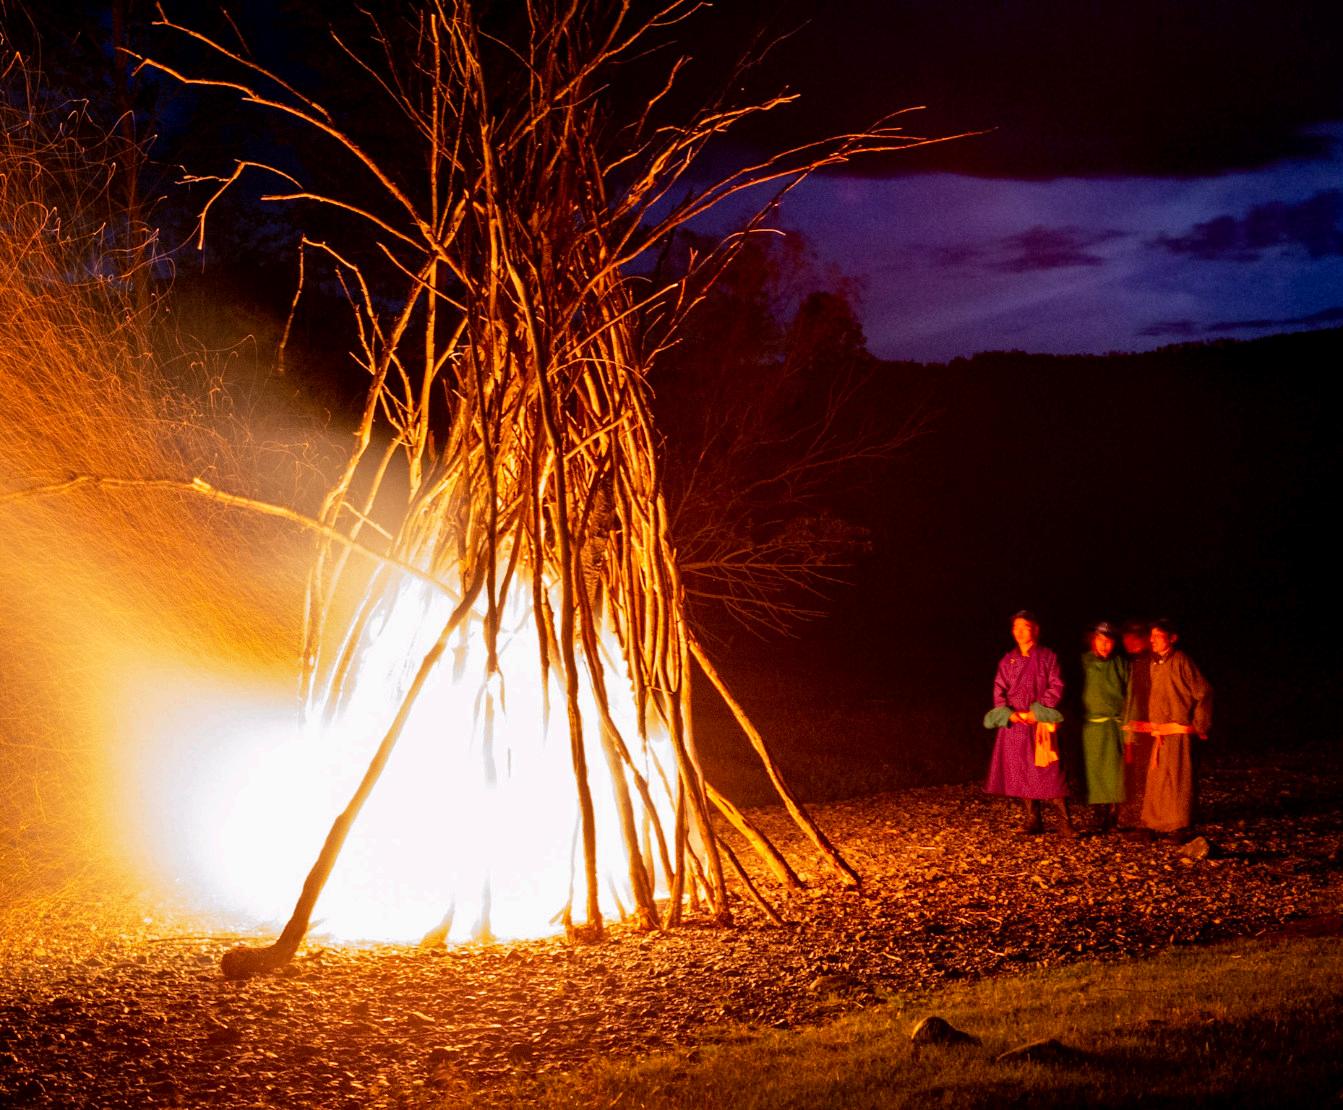
In Mongolian culture, fire is a symbol of good things, so on our last night at the camp, the hosts lit a huge bonfire as a way to bring our stay to a close and to wish us well. The entire camp staff and guests gathered around the fire and basked in its warmth.(10sec, f/13, ISO 5000, 58mm)
By Joe Doherty
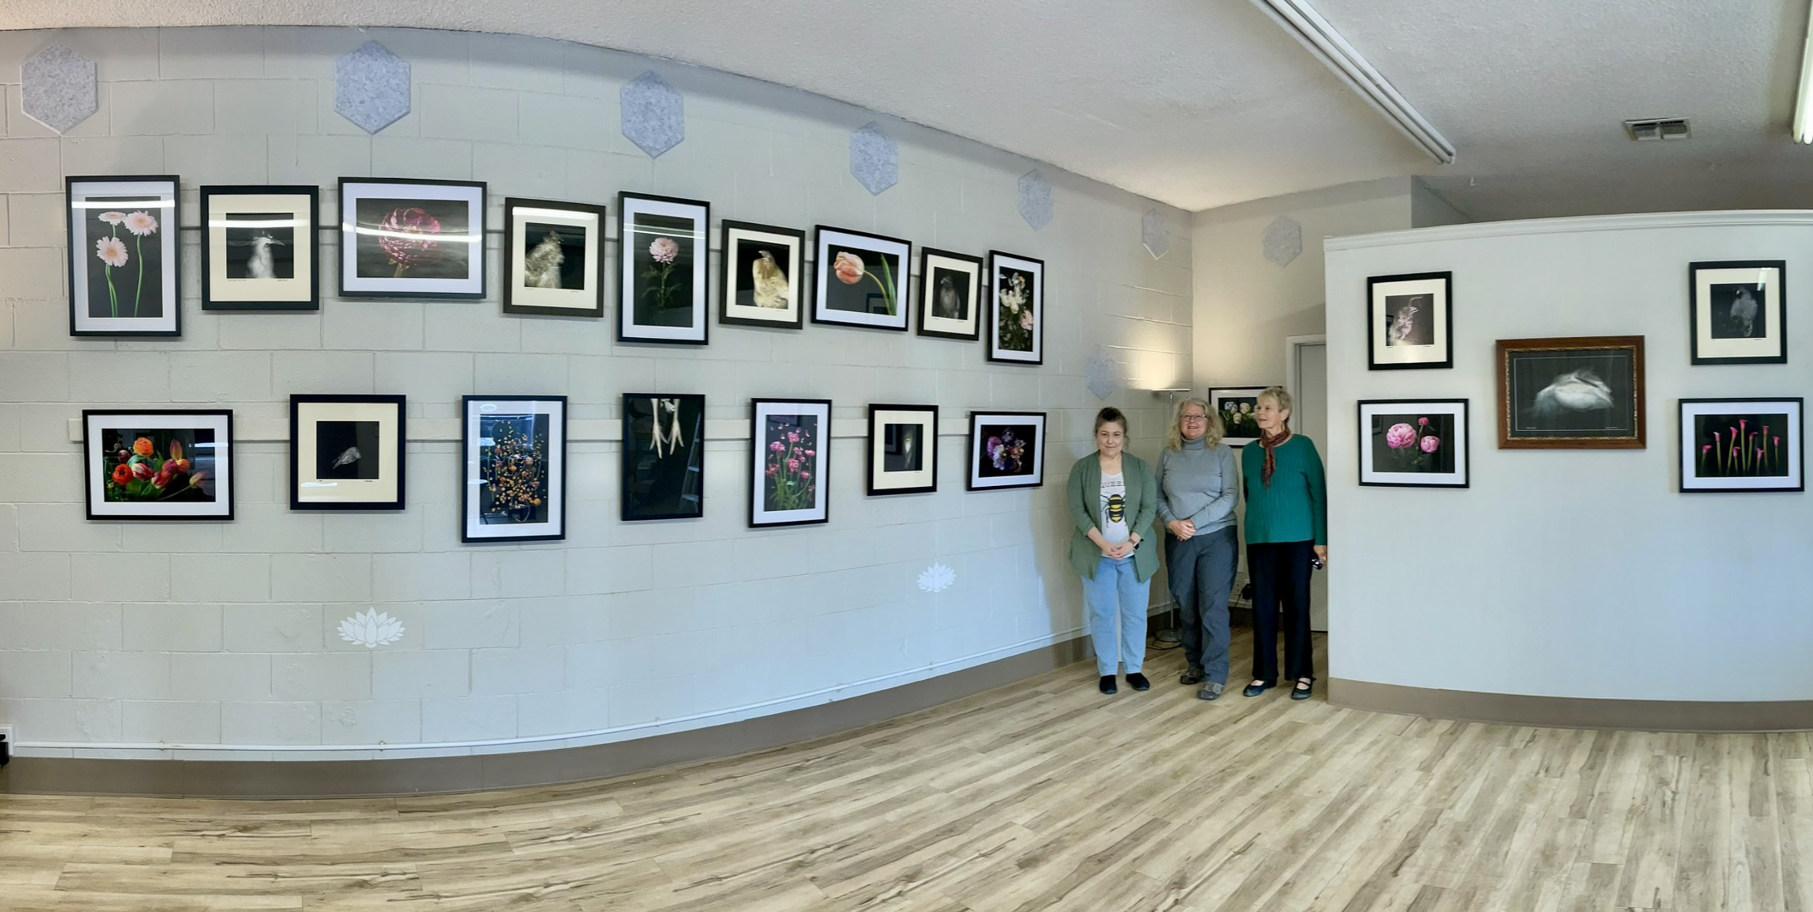
Velda and I have been very fortunate this winter. We have had our photographs accepted into several juried shows, Velda exhibited 13 photographs in a two-woman show, we are both exhibiting multiple photographs in galleries in Oakhurst and Fresno, and there is a big event coming up in May at UCLA in which we will each have eight photographs on display. Sounds ideal, doesn’t it?
It’s not ideal. When the good news rolled in we realized that we didn’t have a system to handle this volume of work: printing, framing, shipping, etc. We can’t say that we perfected a system, but we are now better able to manage the load. This column is about how we did it. Some of it is gleaned from listening to people who regularly sell at art shows, some of it from talking to other artists, and some of it is trial and error (mostly error).
It might seem natural to start this column talking about image selection and printing. We assume that you know exactly which images you’ll be showing, especially if it’s a juried group show, although maybe not. And we also assume that you have an idea what size and what aspect ratio your print should be, but that should be flexible as well.
The first thing to consider, even before entering or accepting a show, is the cost and the logistics. Some shows are easier to participate in than others. The Southeast Center of Photography requires nothing more than an electronic file. If you wish, they will print and frame your image for the show, and keep the print on hand after the show should
someone want to purchase it. Yosemite Renaissance is at the other end of the spectrum. It requires delivery of a galleryquality framed print that is packaged robustly enough to travel to four other venues, after which it must be picked up or shipped home via FedEx. And then there are shows completely outside my comfort zone for participation. In-person delivery and pickup at a museum in Wyoming? It sounds like a great show, but we can’t justify the energy or the expense.
The second consideration is framing. Not all shows require a frame. As noted earlier, the S.E. Center of Photography will print for you. The Los Angeles Center of Photography show “Life Cycles” (opening April 1, 2023) hangs unframed prints using magnets at the corners. Several years ago a group show in Oakhurst asked for only matted prints, to be displayed on narrow shelves. We had bought those mats in a gallery garage sale, and printed to fit them. Most shows, however, require a frame.
Check whether the show has limits on frame size, although don’t be surprised when people ignore it. We have been in shows where a significant number of the entries were larger than allowed, but that’s their problem. If you want to go over-sized, ask the organizers first. You will also want to know if the organizers have a preferred hanging method. We hang with wire, with the high point on the wire two inches below the top of the frame, using readily available D-rings and multi-strand wire. This assumes you have matted prints behind glass, and not canvas wrap or metal or
acrylic or another format. For those the rules are likely going to be different.
Frames can be expensive, custom framing is more expensive, and custom mats increase the cost significantly. We used to have everything custom framed. We didn’t get into many shows, and thought that was the norm. It wasn’t the norm. Custom framing can be great and it doesn’t have to be terribly expensive (we recommend Framing House Design on Spring Street in Los Angeles), but if you sell a print in a gallery there will be a commission on the whole item, not just the print. To recover the cost of a $150 frame you may need to add $250-$300 to your price, depending on the commission. We find it’s useful to have two prices, for framed and unframed art.
We now use less expensive frames almost exclusively. We have never had a photo rejected because it was in a frame from Michaels or Ikea. Our go-to Michaels frame is a 16x22 black frame with a 12x18 mat opening ($44 full price, $21 on sale). The Ikea frames (“Ribba”) are even less expensive (16x20 with a 12x16 mat opening costs $15). The aspect ratio of 12x18 is that of a fullframe digital camera, and nicely fits on a 13x19 paper with even white borders. The Ikea frames allow for a little cropping. They both look good on the wall and are lightweight, but the Ikea frames are relatively fragile and probably aren’t suitable for a traveling show. We used to have a surplus of both, but that surplus is now exhausted by the events of this year. We have ordered more.
The prices for these frames allow you some flexibility in where and how you display framed prints, and how much you charge for
them. For example, we are each going to display eight photographs at an event at UCLA in May. We could not do that at $150 per frame, but we can at $15-25 per frame with no loss in apparent quality. At that price it’s not a big investment to buy extra frames, which in turn gives us some flexibility in how we crop. It’s at this point that we can think about what goes inside of the frames.
The different mat openings in my examples (12x18 and 12x16) give flexibility in cropping and printing. It’s important to standardize the processes to a few different sizes in order to keep from getting overwhelmed, so by having a few frames of each type on hand we can choose to print full frame or to crop a little. We also have a small supply of square frames. This all means that we don’t need to worry about the mechanics of framing, and can think creatively about which photographs will look best when collected together on a wall. We can work on themes, and order (or make) prints for the exhibition.
Getting the prints into the frame is another matter. Both of the frames mentioned above come with mats, but the backing boards leave something to be desired. We replace those with boards the same size as the mat (from ClearBags.com or Michaels). We lay both the mat and the backing board on a table, butting them together on the long side, so that the side of the mat with the opening that will face forward in the frame is face down on the table. White artists tape is used to create a hinge that links the backing board and the mat. Next, we place the photograph on the backing board and fold the two pieces together, and position the print to show in the mat opening. The photograph is moved
around to make sure it’s correctly placed within the mat frame, and we use photo mount corners (Canson) to secure the print to the backing board. If we have not done so already, we sign the print before closing the mat. I recommend using a Pigma Micro 0.5 pen for this. Sometimes we sign the mat as well, using a pencil.
At this point the photograph is almost ready to frame. The glass is removed and cleaned thoroughly, away from the assembly area. A big bottle of window cleaner and a soft microfiber cloth works wonders. If we need to ship our print, we replace the glass with acrylic (Solters Plastic on Pico is our supplier). When we have assembled the mat and put the glass/acrylic in place, we blow everything clean with a can of compressed air. Following this, the matted print is inserted into the frame and inspected carefully to make sure that no stray dust, hairs, wood fibers, or fingerprints are going to mar the exhibit. It is disheartening to have a beautiful image tarnished by something so easily corrected. Finally, we close it up using framing points or whatever closure system is available.
We also create labels for our work, and attach them to the back of the framed pieces. This can range from an Avery label (No. 8163) to a Certificate of Authenticity. The minimum information on the label is name, the title of the photograph, the medium (e.g., pigment ink on cotton rag), the year of the photograph, and contact info (website or email address). A Certificate of Authenticity includes these things, as well as the year printed, whether it is part of a series or open, and a signature. Examples of these are as varied as internet search results.
When shipping our work, whether by FedEx/ UPS/USPS or in the trunk of the car, it’s important that it arrive with the edges and corners of the frame unchipped and the glass/ acrylic unblemished. So far this year we have delivered everything in person. At a box supply/packing company we purchased 100 frame corners, some bubblewrap, and some packing tape. That was sufficient, if a little bulky, for all of it. For the largest print (Yosemite Renaissance), which will also travel to four different galleries, we went to a different box store and had them package it (about $35). Keep in mind that the exhibitor needs to keep packing on hand for when the show is over, so loose material like foam peanuts are discouraged. There is no hard evidence for this, but if you wrap your framed photograph like it is a precious jewel, others will treat it that way.
Now we come to our least favorite topic: pricing. We hold conflicting points of view on this. The work needs to be affordable but not inexpensive. It shouldn’t undercut other photographers. Galleries need to make money or they can’t stay in business. Prices should also be consistent, more or less. When we are pricing for a specific show we think it’s important to know who is likely to buy a print, and to price for them. If the average visitor to the gallery is spending a week at a nearby resort, higher prices are in order. If it’s a less-well-off clientele in the middle of a burgeoning arts district, we might adjust downward. But even in the luxury area, we try to make sure there is something affordable for everyone. To this end, ask if the gallery has a bin to hold unframed photographs. We try to put 8x10 and similar-sized prints in the bin at lower prices ($40 and up).
Two more things about pricing. It is bad form to advertise a photograph at a lower price than is being charged in the gallery during the show. Don’t undercut the gallery. Sometimes it’s explicitly forbidden by the terms of the exhibition. Also, if you have a limited series you must make sure that the gallery collects all of the buyer’s information and provides it to you. The possible repercussions of failing to keep accurate and detailed records are one reason why we don’t do limited series.
It’s very possible that there isn’t the time, or the energy, or the money to mat or frame a print, but you still want to give your image a polished look. George Lepp and Kathy Lepp created a Photoshop technique that makes a “faux mat” that creates the illusion of a mat as part of the print. They explained the technique on the Outdoor Photographer Blog in 2010, (updated 2016). https://www. outdoorphotographer.com/blog/making-afaux-mat/ I know from personal experience that these look pretty cool at a distance.
Finally the photographs are printed, framed, and ready to be delivered to the gallery. There are two more steps. We needed to provide both an artist’s bio and an artist’s statement. The bio is obvious and vague. We edit ours for each show. The artist’s statement relates to the photographs in the show, the reason why we made and are presenting these specific images. Our personal taste limits both the bio and the statement to 100-200 words each, but yours may be different. Also, check to see if the gallery/show has any idiosyncrasies in its agreement with artists. Is there a liability waiver you need to sign?
One of the things I’ve learned as a photographer is to be prepared. This typically refers to being prepared for the subject in front of the camera, whether it’s a sunset, a crashing wave, or a charging lion. It also refers to the process of getting my prints in a place where people can see them. We’ve now got a process in place that allows us to grow that side of our photographic practice.
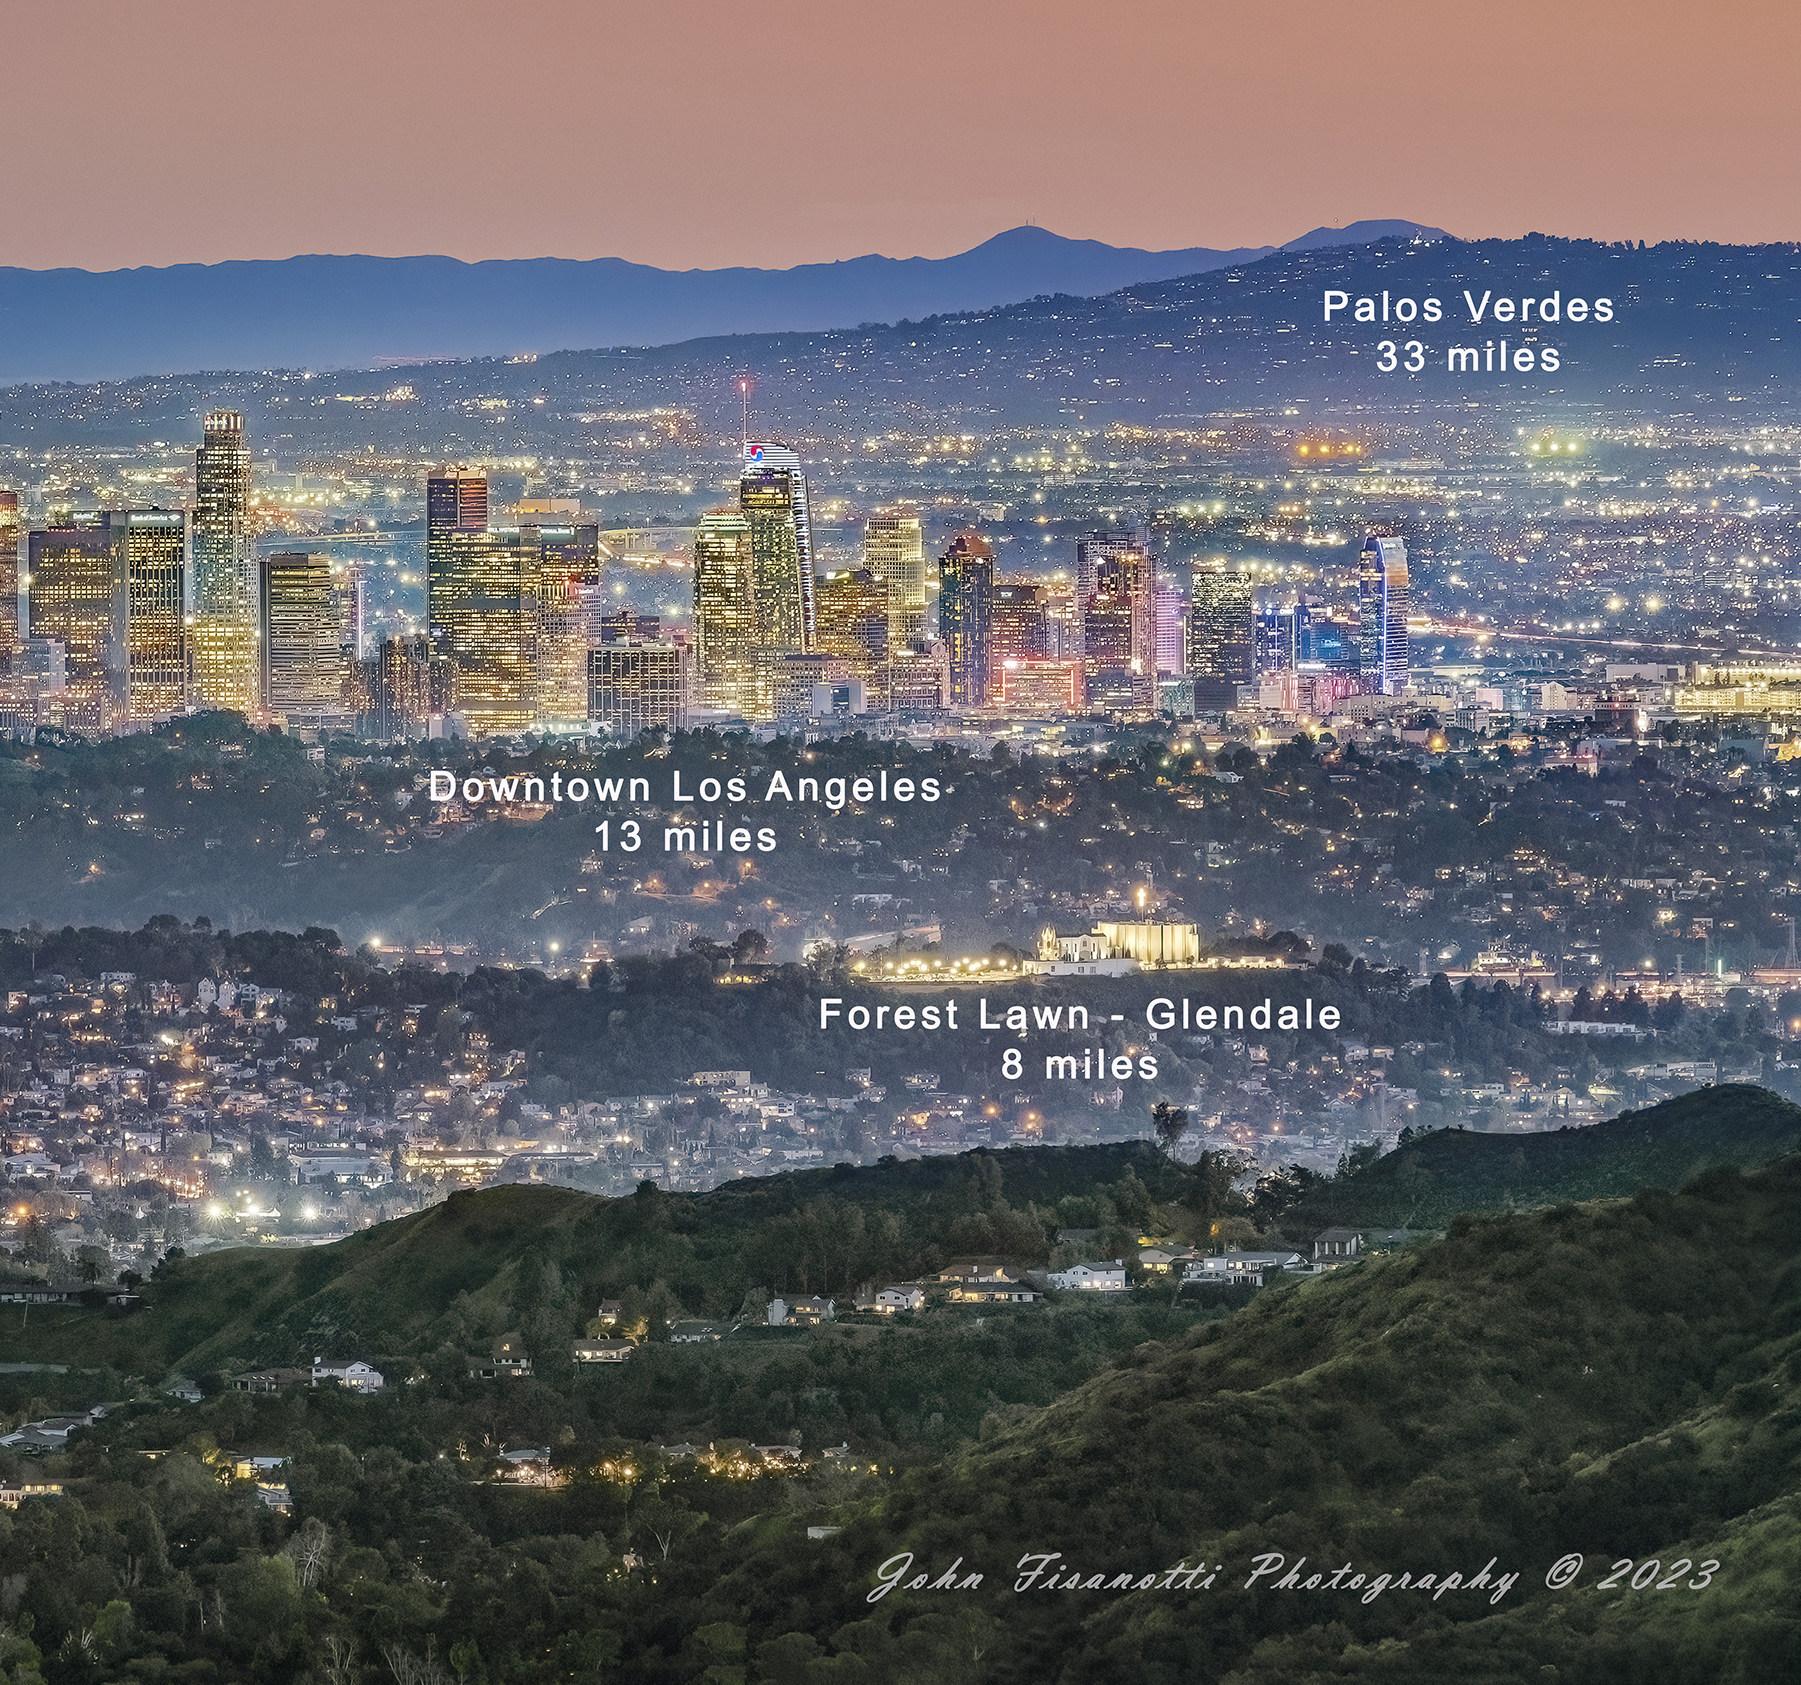
Text and Photograph © John Fisanotti
In 1967, my parents bought a house in La Crescenta, which, on clear day has a view out to Catalina Island. We thought only movie stars had a home with a view like this and it has remained the most impressive feature of living there for my family. As a teenager, I
took pictures of the city lights from the backyard. Winter is the best time to try this shot, typically as a storm is leaving the area. From the house, the east end of Catalina Island is situated behind downtown LA.
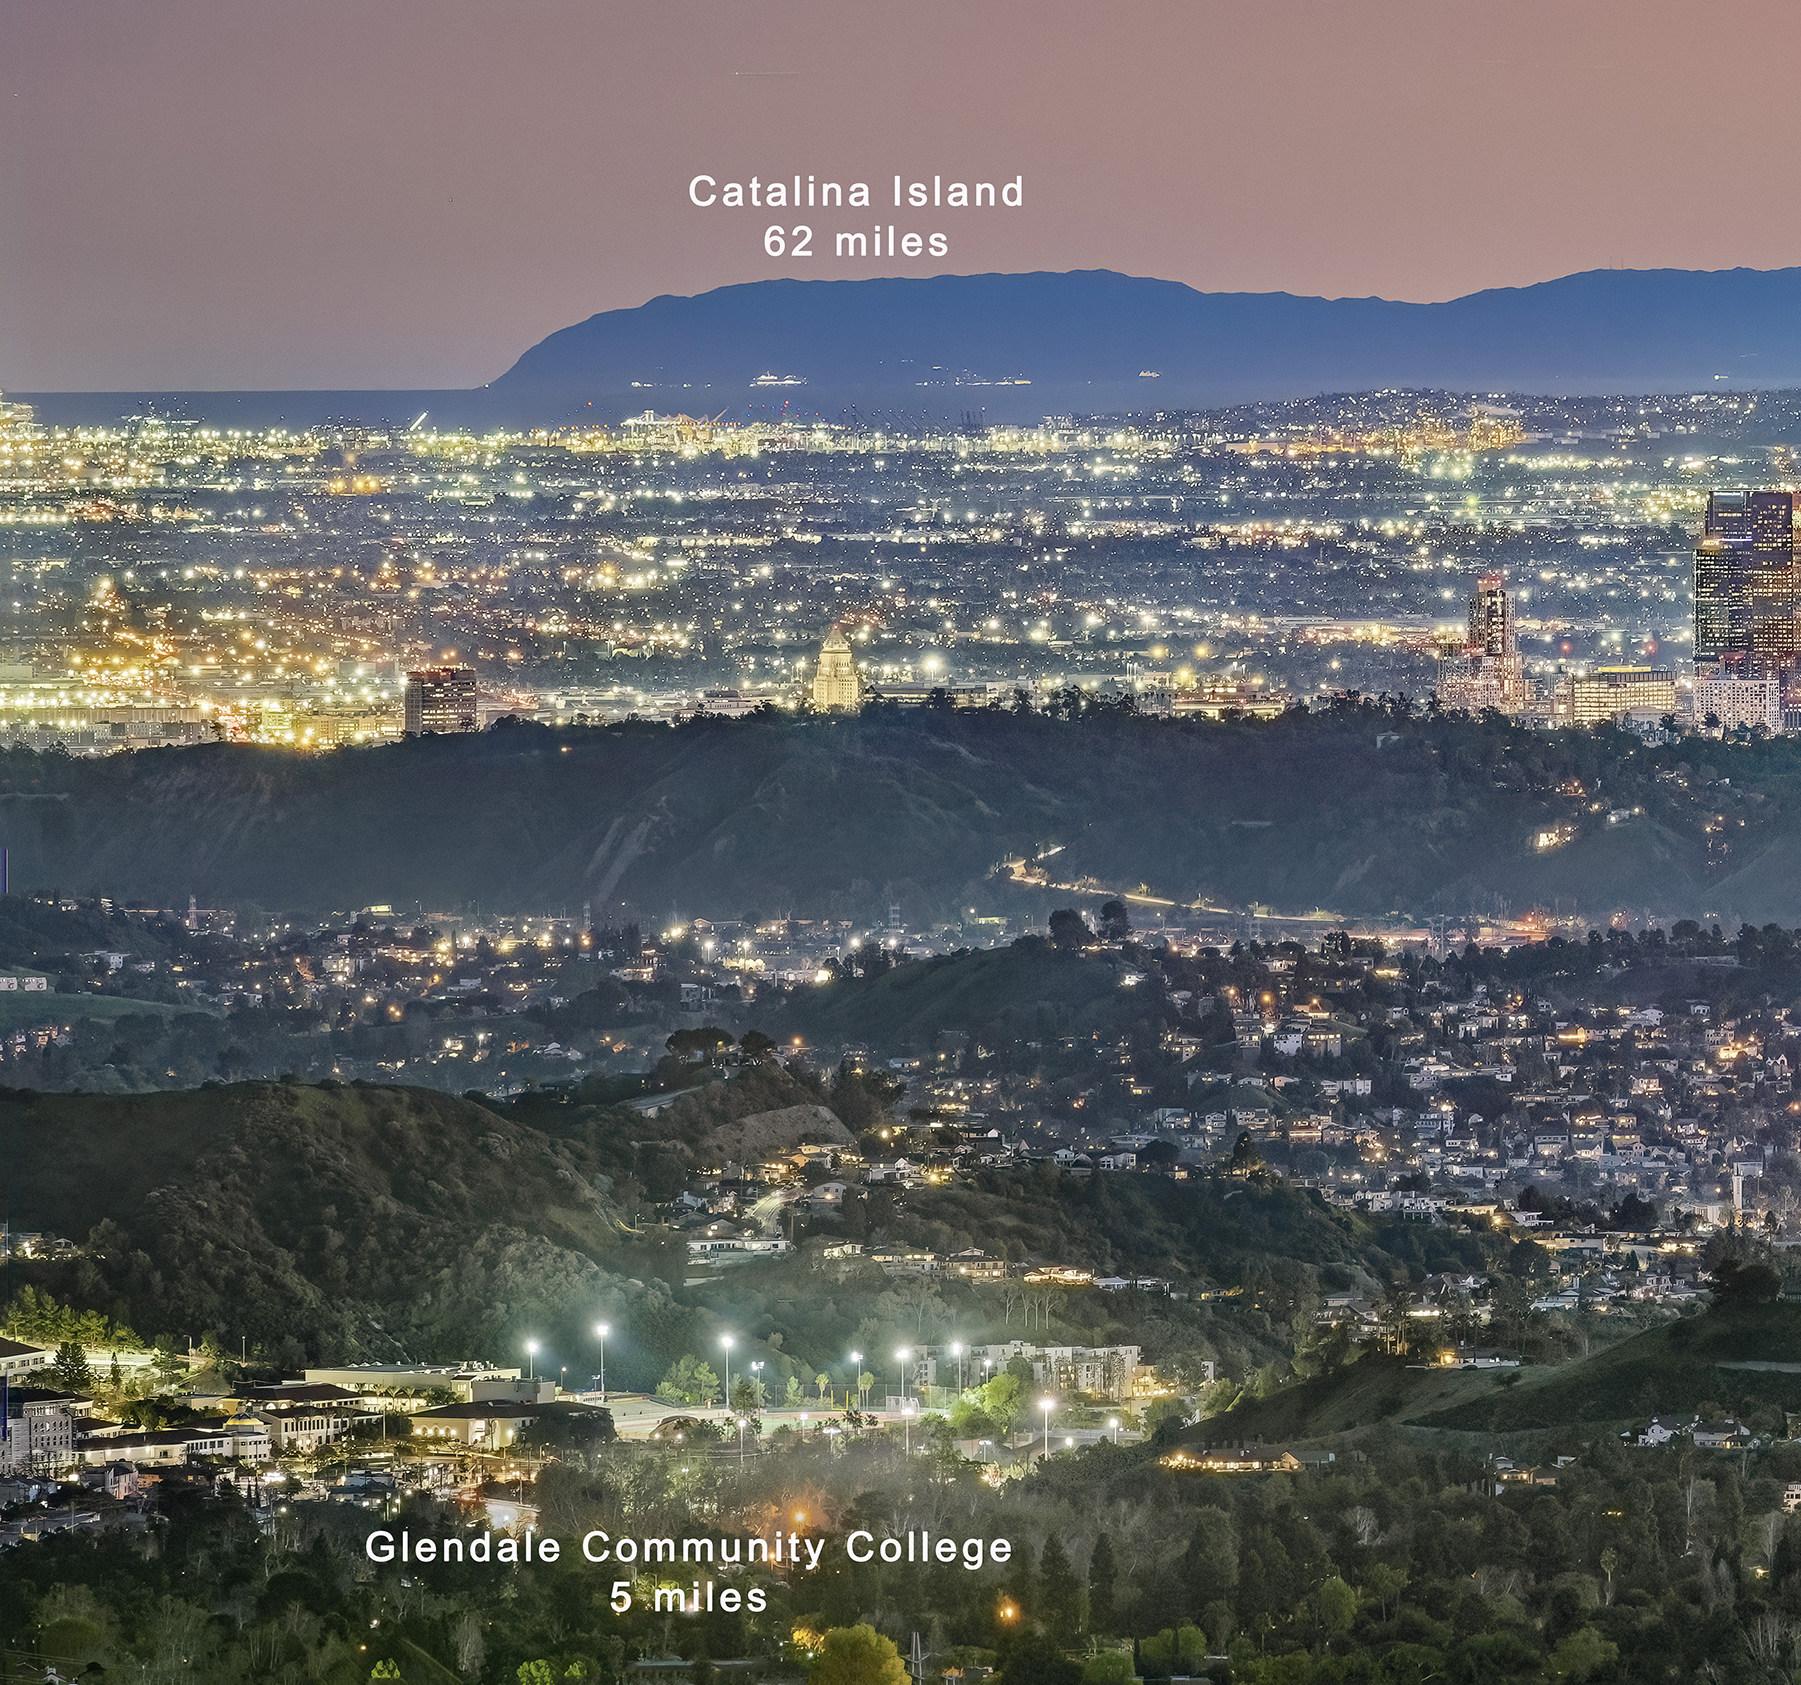
Since the last time I took this photo, I am using a higher resolution camera, and the skyline in downtown has changed, so I’ve wanted to update this photo. This winter, I have been shooting this scene from a variety of locations in La Crescenta or La Canada-Flintridge, to test various viewpoints.
For this photo, I looked for a viewpoint that had a less obstructed view of downtown Los Angeles, and I wanted to take the shot during twilight. I
prefer to shoot at a time of day when the city lights are coming on, yet there still is light enough to make out the ocean, Catalina Island and its shoreline. This “decisive moment” occurs near the end of civil twilight. As for the location, I knew I wanted a place a little east of my house and at an elevation, between 2,000 and 2,500 feet. If I’m too low, the angle of view is too flat to separate the ocean from the mainland, and if I’m too high, the downtown skyscrapers appear too far from the coast. This winter, I found a new location in La
Canada-Flintridge. Just 0.6 miles from my house, as the crow flies, it is a three-mile drive. I can get there in minutes, whenever I see the right atmospheric conditions.
I arrived at the location at sunset, in time to set up, level and focus the camera, and compose the shot. As twilight deepened and the city lights appeared, I bracketed my shots, shooting a sequence of five images with an Exposure Value from EV -2 to EV +2 at one f/stop intervals, over and over. To determine my exposure, I used the live histogram on the camera’s LCD screen. I adjusted the shutter speed to find the exposure that gave me a good curve, and used that as my nominal (EV = 0) exposure. I repeated this process as the light fell so the exposures on my series of brackets kept lengthening, because I was always re-setting my nominal exposure. This gave me a lot of frames to work from when processing the image. Here are the specifications for this image:
Camera: Nikon Z7II
Lens: 70-200 mm f/2.8 Nikkor Zoom and a Nikon 1.4x teleconverter. A Nikon FTZ adapter was used to mate the combination to the mirrorless body.
Focal Length: 230 mm
White Balance: 4760K
ISO: 250
Exposure Control: Manual
Focus Control: Autofocus
Aperture: f/8
Shutter speed: 4 seconds
Color Space: Adobe RGB
Support: Heavy duty carbon fiber tripod and Really Right Stuff BH-55 ball head.
My processing on this image was neither linear nor step-by-step. First, I tried creating HDR blends from the bracketed series using Lightroom and also Aurora HDR, but wasn’t happy with either result. Instead, I selected various individual frames and worked on them in Lightroom and Photoshop. I created a number of images, and every result had some areas that looked good and other areas that didn’t. I probably had six to eight versions saved on my computer.
In the end, I would describe what you see here as a hand-made HDR. By that, I mean 90% of the image is from a single frame, but many of the more extreme parts (i.e., the darkest shadows and the brightest highlights) were taken from other frames, of a different exposure. As the camera was locked down on the tripod, all frames could easily layer on top of each other in registration. Other software used at various stages were Topaz Labs DeNoise AI and Sharpen AI, and Nik Collection Viveza 2.
Finally, I used Google Earth to measure the distance from the camera position to various landmarks in the photo.
John Fisanotti
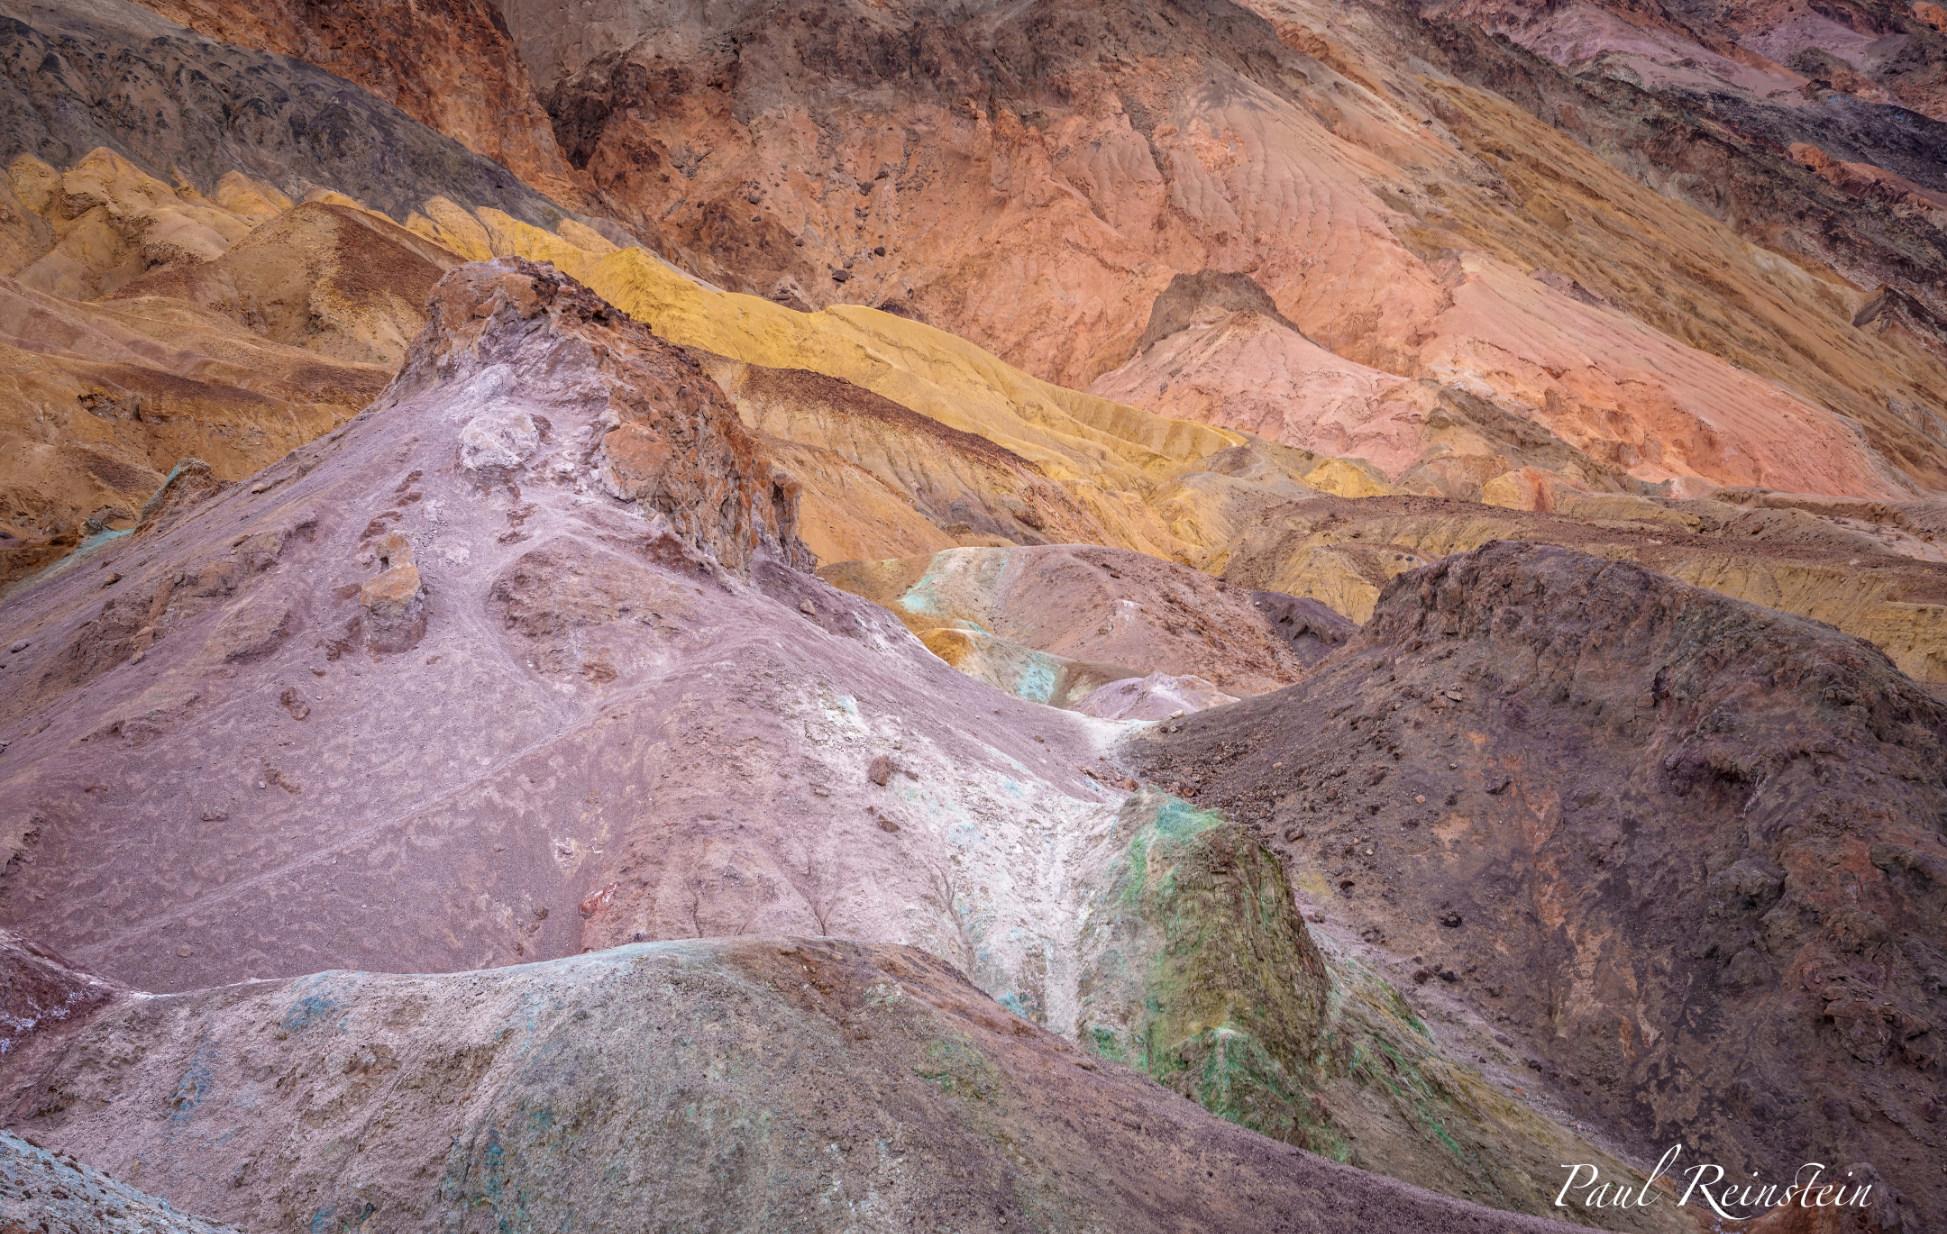
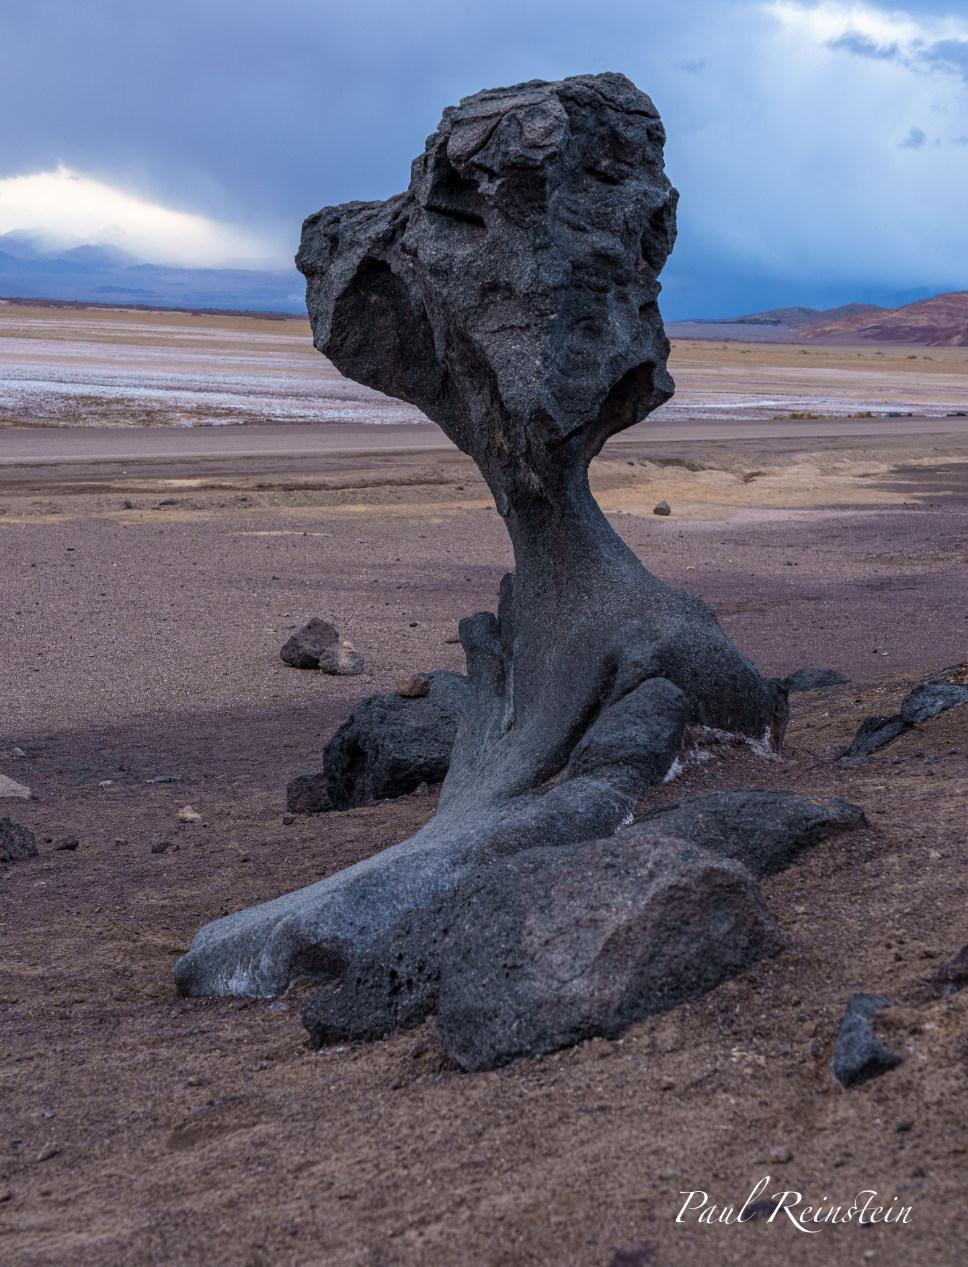
Paul Reinstein
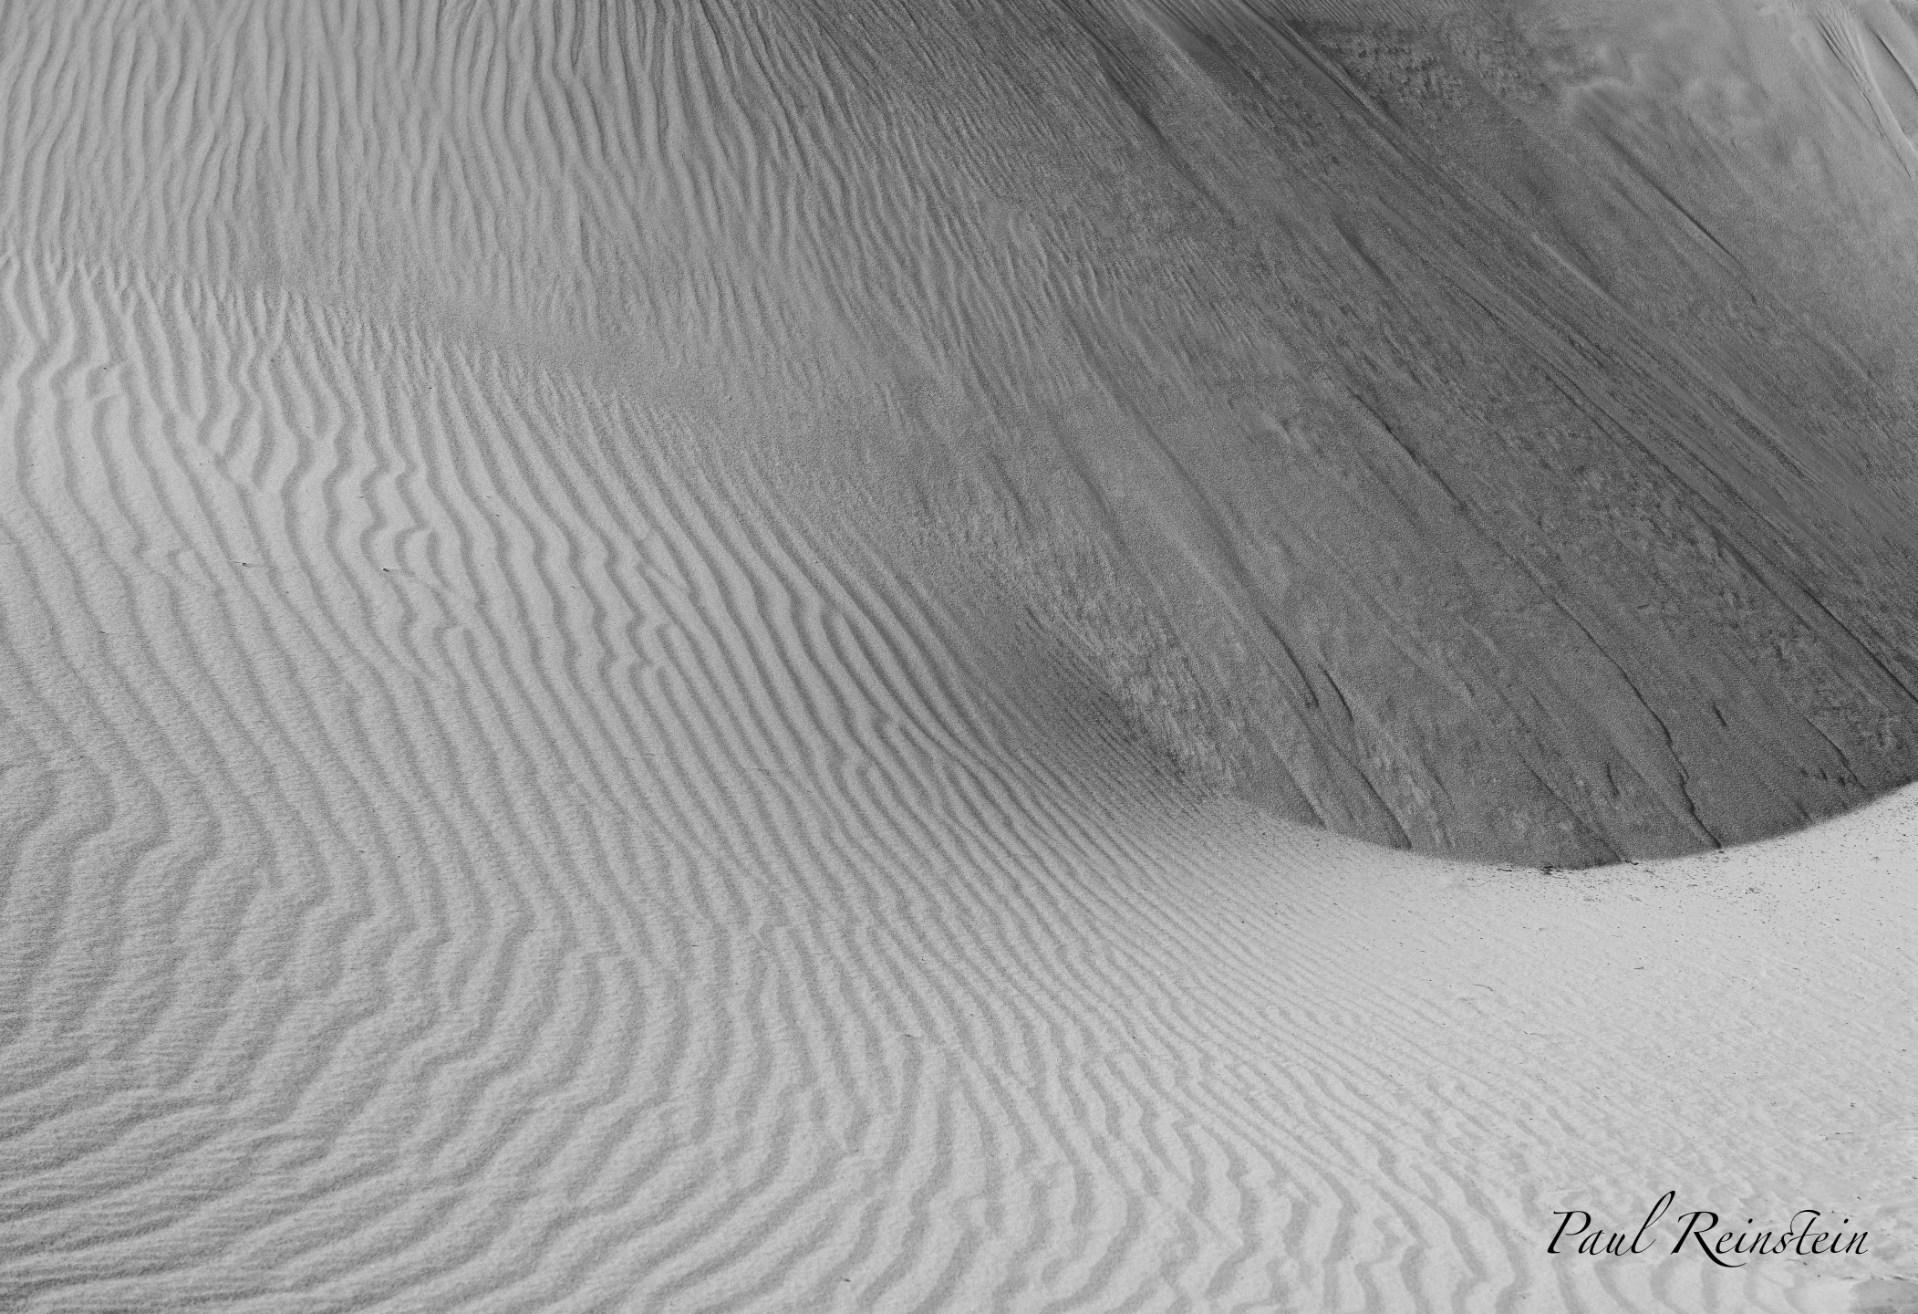
Last year I went to Death Valley in a workshop and got a lot of great images (see March 2022 issue), but there were several shots I either didn't get, or wasn't happy with. I still wanted a great shot of the sand dunes, reflections of the mountains off water in the basin, a good shot of Artists Palette and the white salt formations at Badwater Basin. I decided that for good shots of the dunes I needed wind to clean up the footsteps; for good shots of Artist's Palette I needed rain to wet the rocks and bring out the colors; and, well, for reflections, I needed water (rain). Basically, I needed a front to move in with wind and rain just before I took the shots. Of course, this is Death Valley we're talking about, where it rarely rains (hence the name). The stars lined up in late February early March, so at the last minute, I invited my friend Louis to join me for a three-day photographic adventure, and his schedule was open, so it was game on.
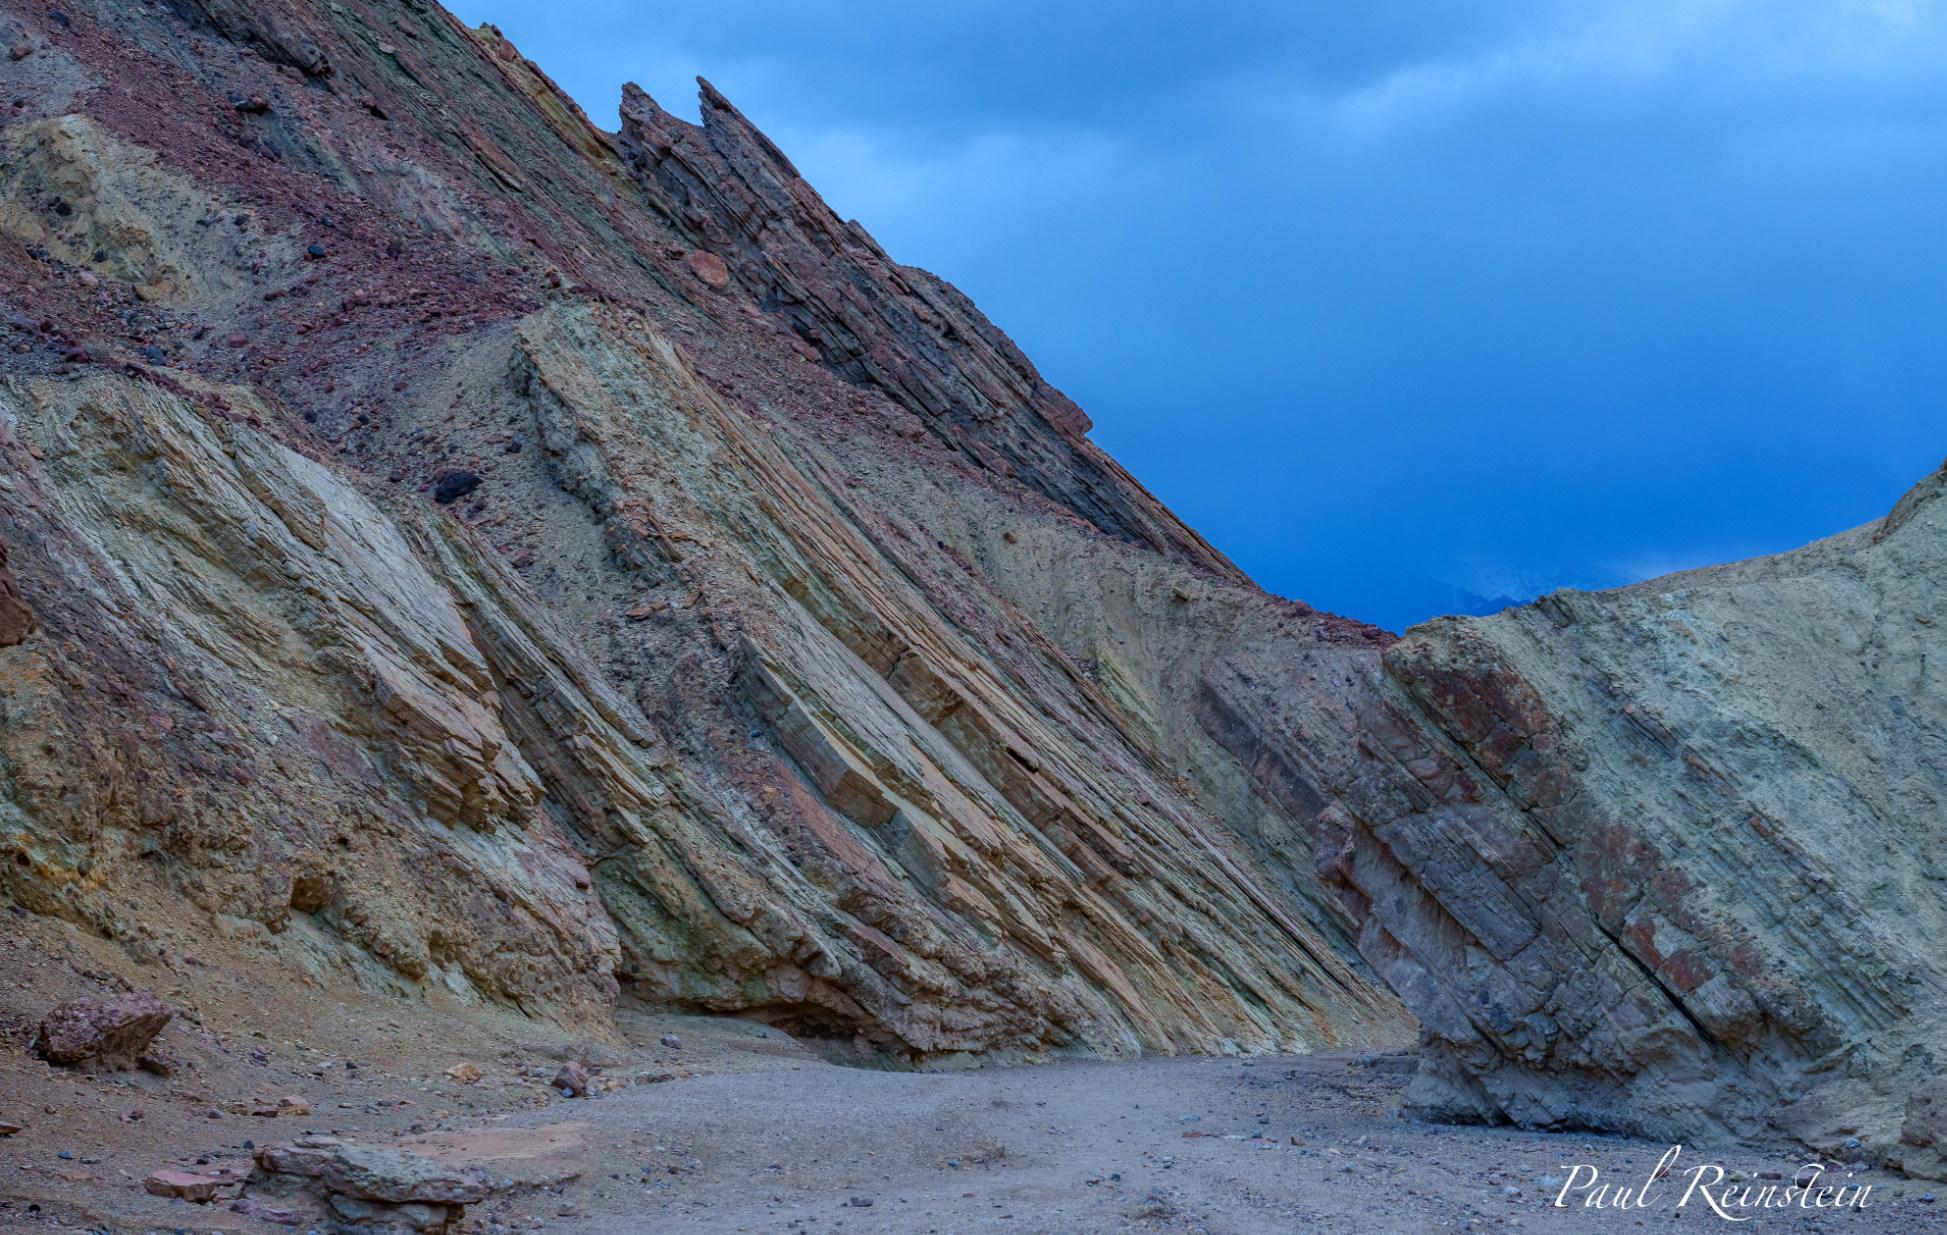
We drove up the day before the storm and hit Badwater on the way in. I got my shot. The next day it rained on and off all day. We shot Zabriskie Point, Mesquite Flat Sand Dunes, Artists Palette, a crazy shaped rock along the road, and then Golden Canyon. We tried to get to the Charcoal Kilns too, but the road up was covered in snow and the temperature dropped to 26o, so we turned around.
Zabriskie was dark, wet, super windy, and we were pelted with small rocks. The dunes were just windy, and I got one nice shot and one
grain of sand in my eye. Ouch. I managed to shoot Artists Palette during a break in the rain. And with the clouds still thick, Golden Canyon wasn't remotely golden.
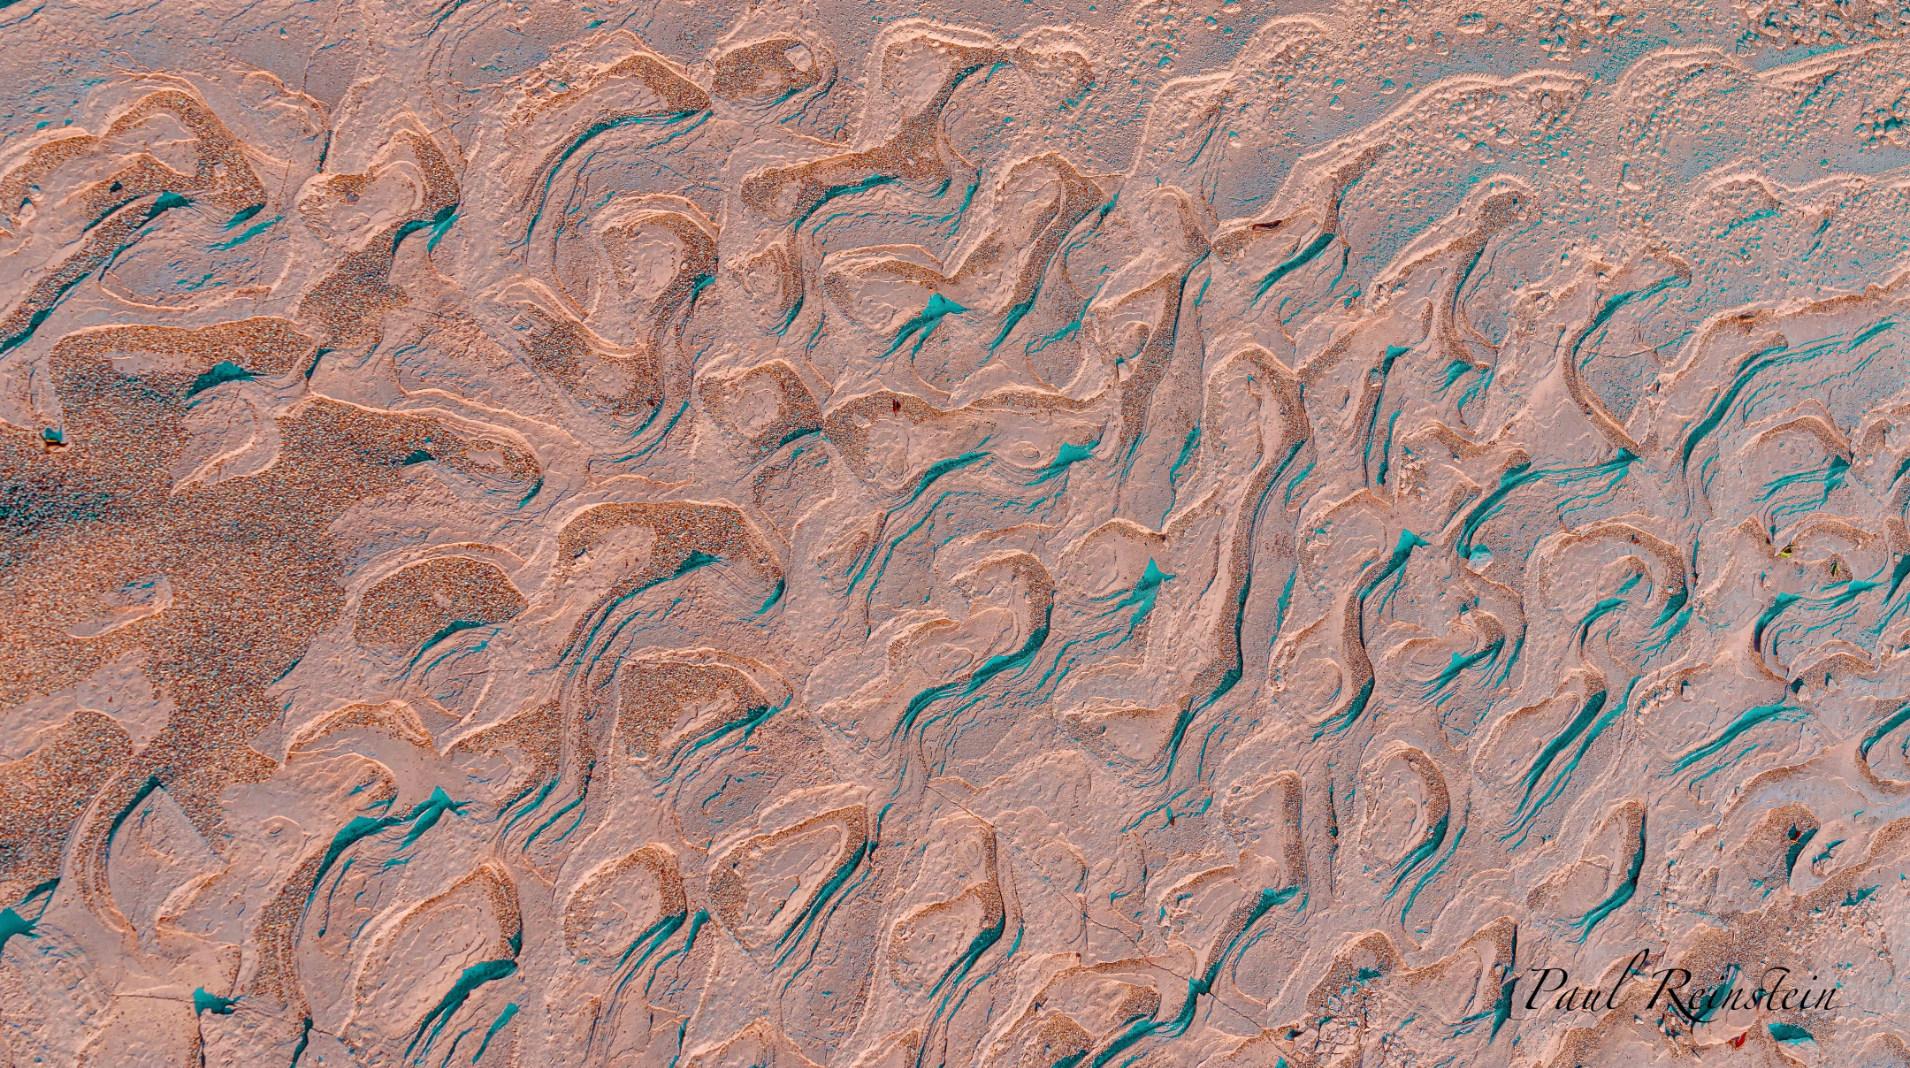
The next two days had clear blue skies and the light was harsh, so between sunrise and sunset, we just toured around. We went to Rhyolite, a ghost town near Beatty, Nevada. That was a bust, but the road was surrounded by gorgeous white capped mountains. When we got back to the valley, we tried the dunes again, and I did get some nice shots of the patterns in the dry mud, and a couple of sand dune shots, but I'm still wanting for a great dunes shot. On one of the mud shots, I will admit, I did play with the colors, a lot. It started off almost white, with a hint of tan. It ended up seriously colorful. We saw some water about a mile away from the road, but it required hiking through a lot of muck, so we decided to skip it.
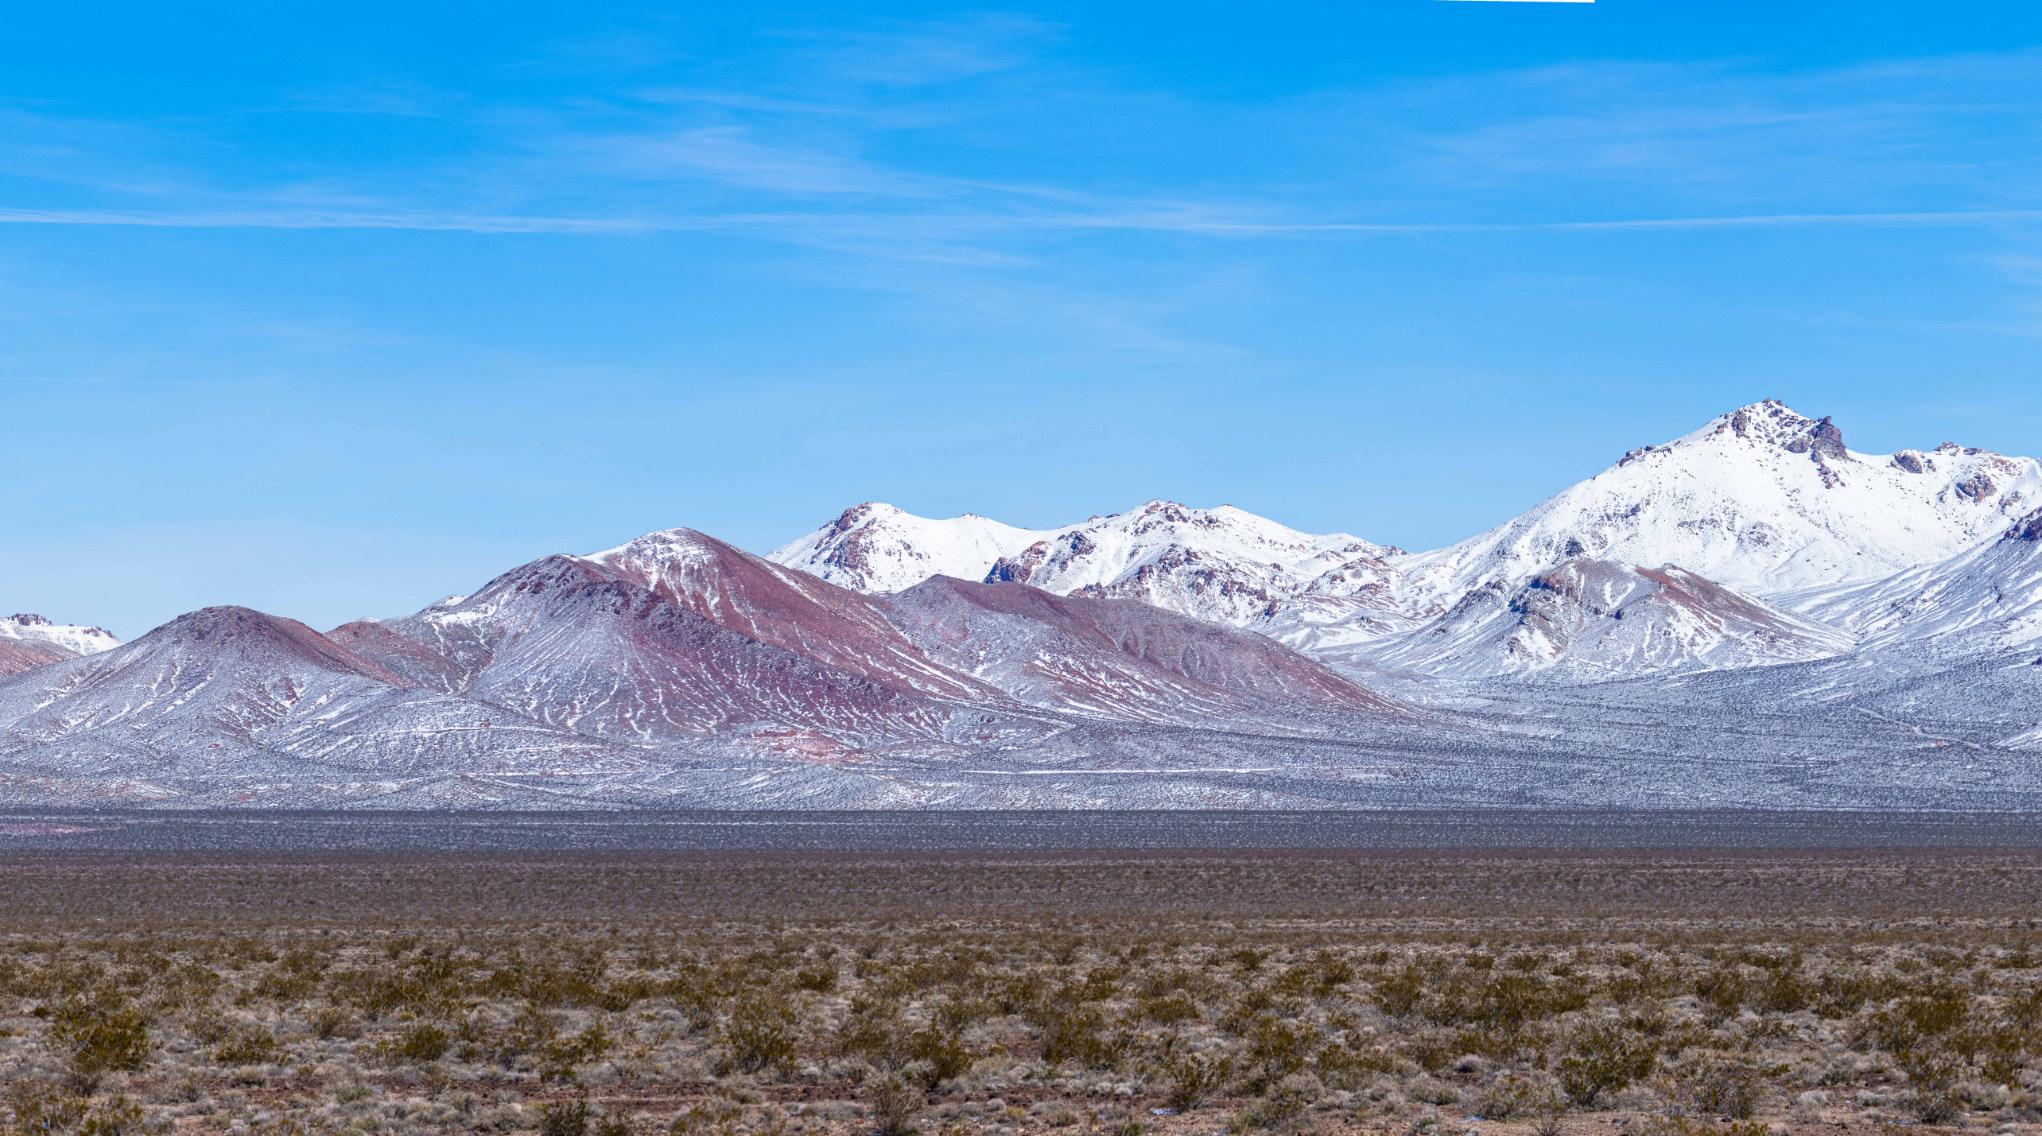
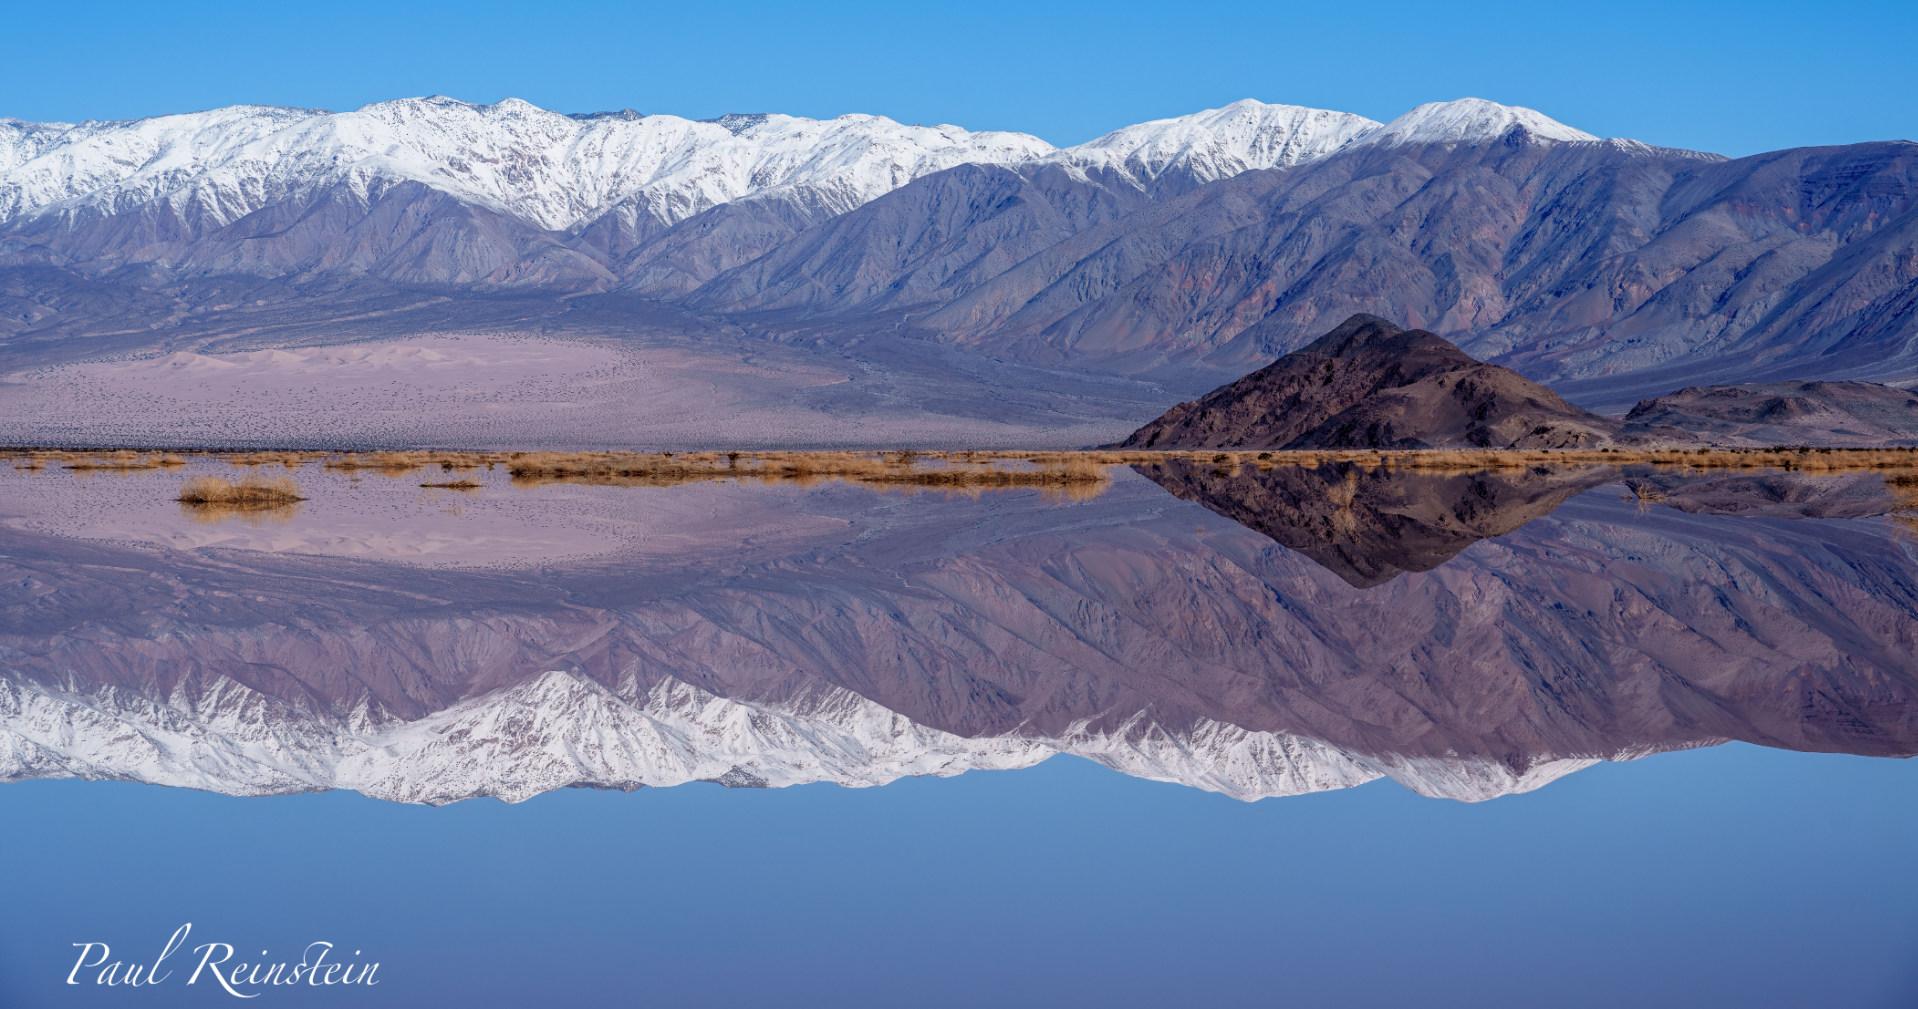
On the drive home, we took the Owens Valley route, and on the way, we stopped at the North Panamint Dry Lake Area, which wasn't dry at all, so I got my reflection shots. We next stopped to shoot Joshua trees surrounded by 6" of snow. When we got to Owens Valley itself, the snow in the Sierras and the Inyo Mountains was lower than I had ever seen it, so we headed north towards Lone Pine and shot reflections off Owens Lake, and later some snow-covered rocks in the Alabama Hills with Mt. Whitney in the background.

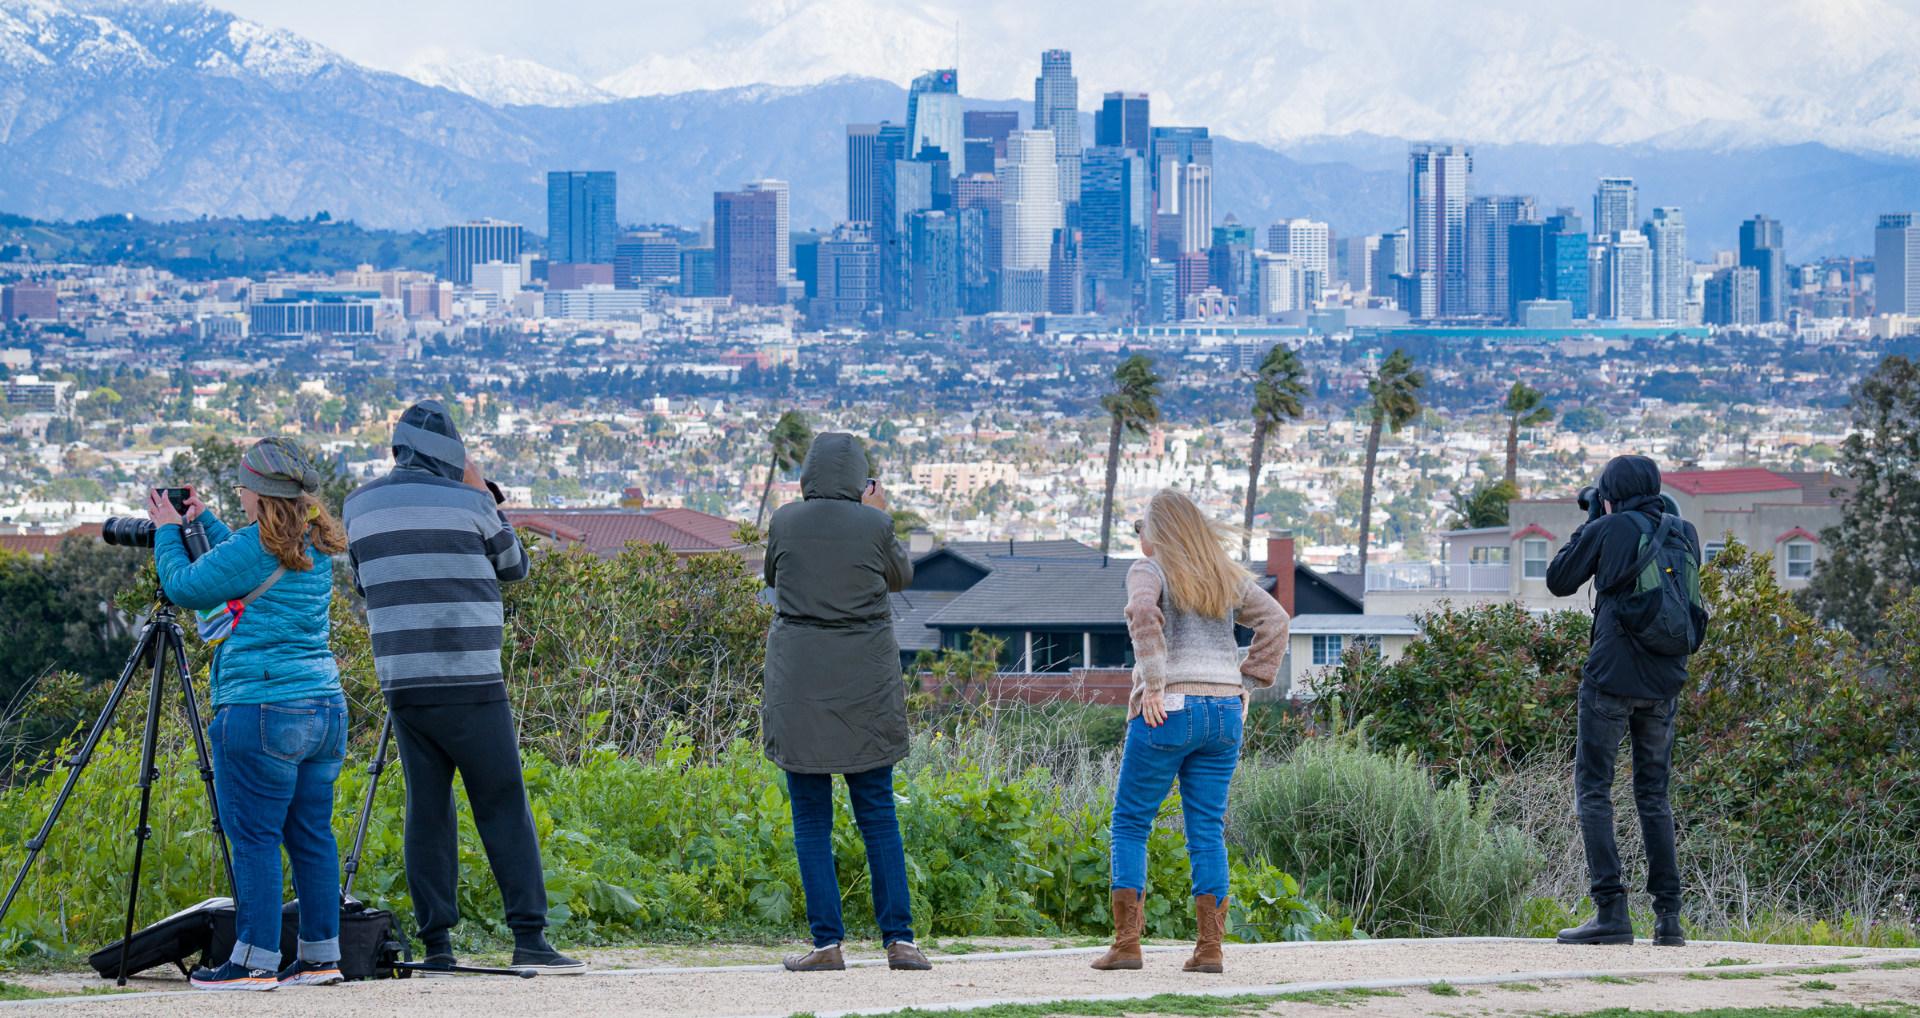
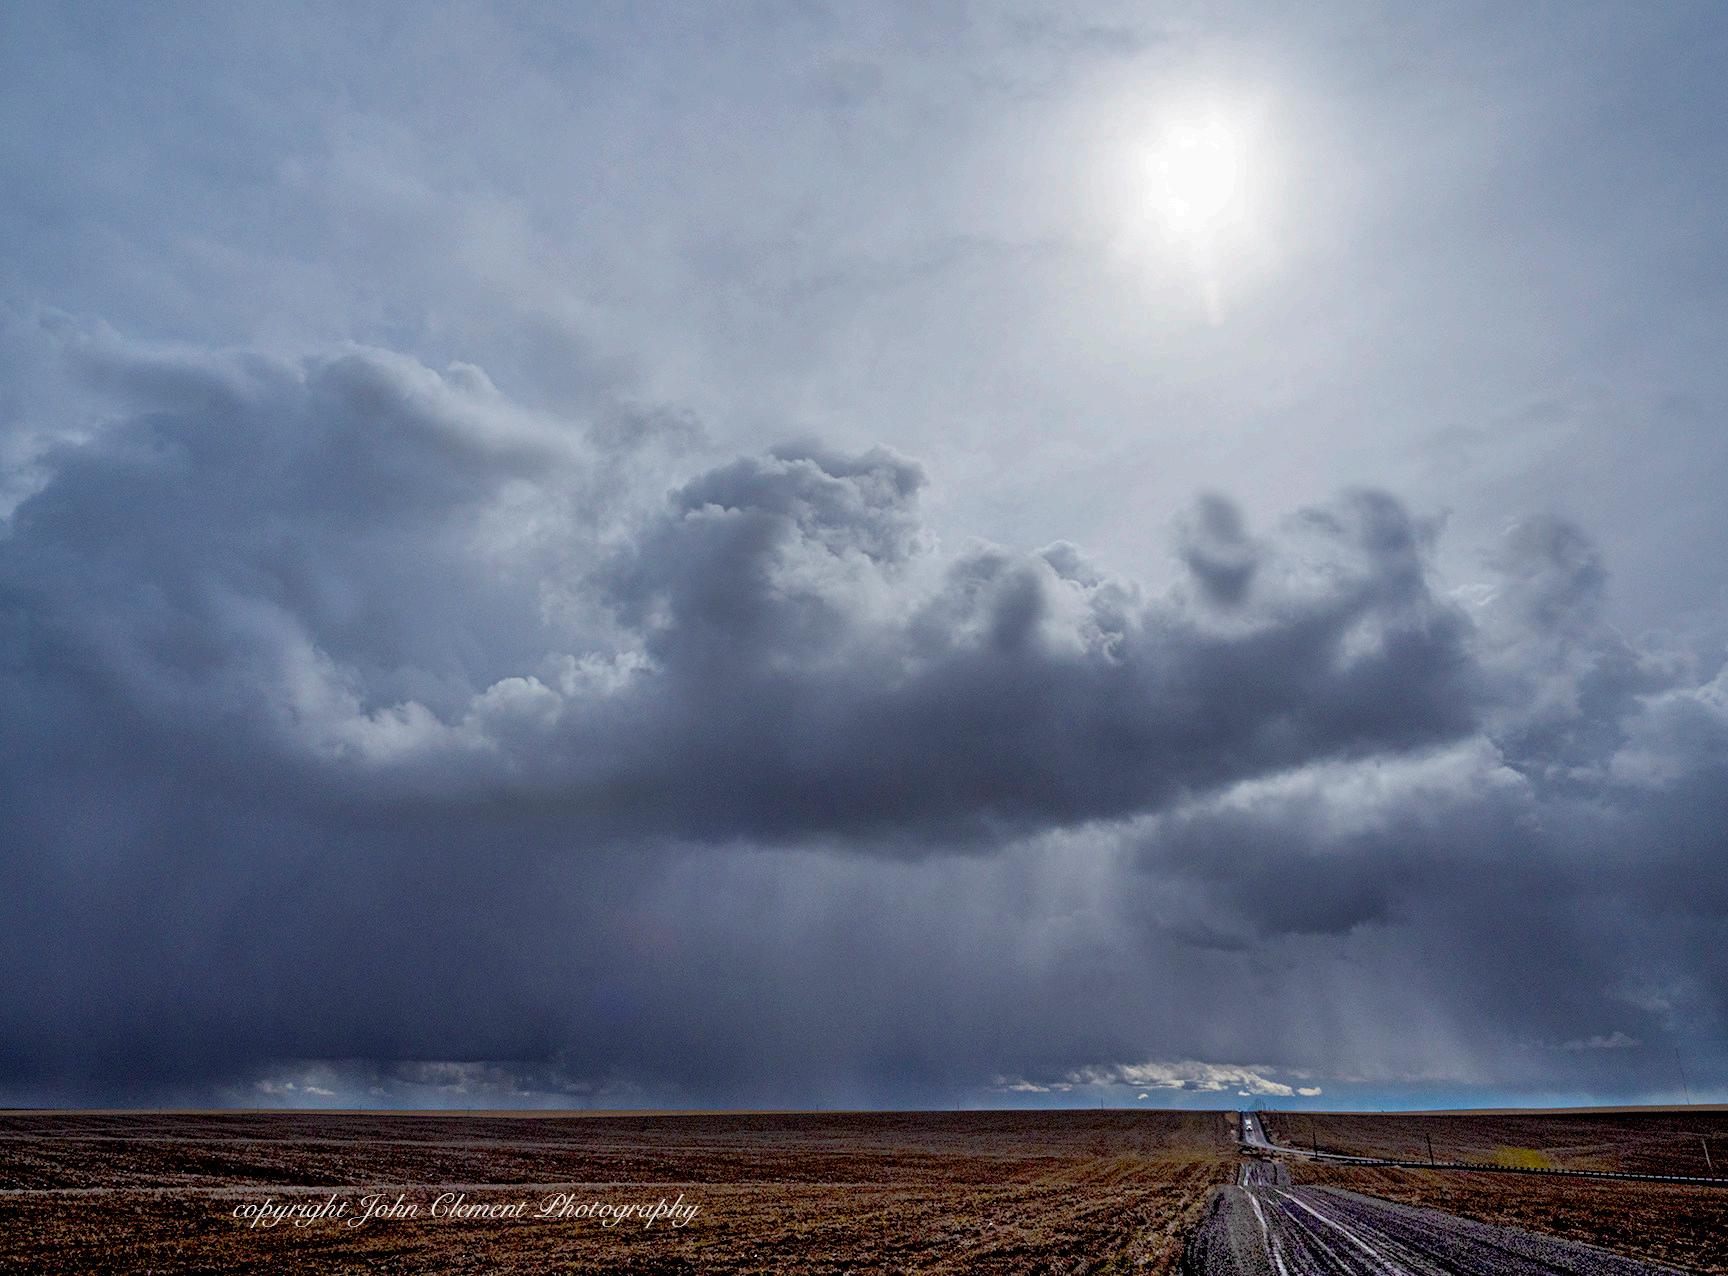
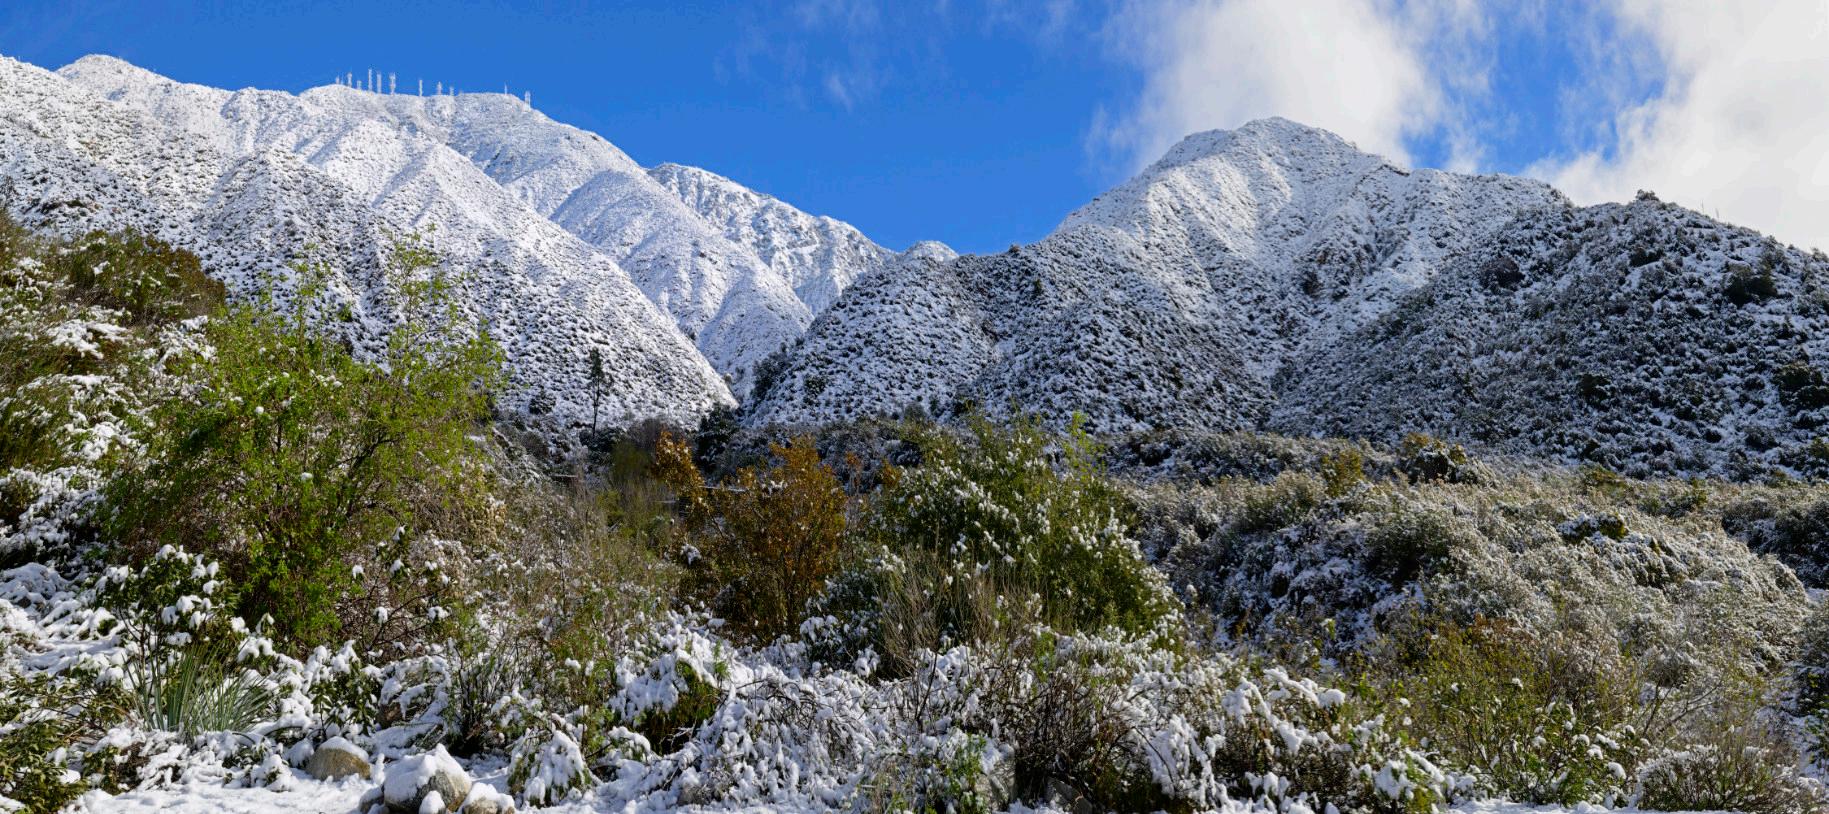
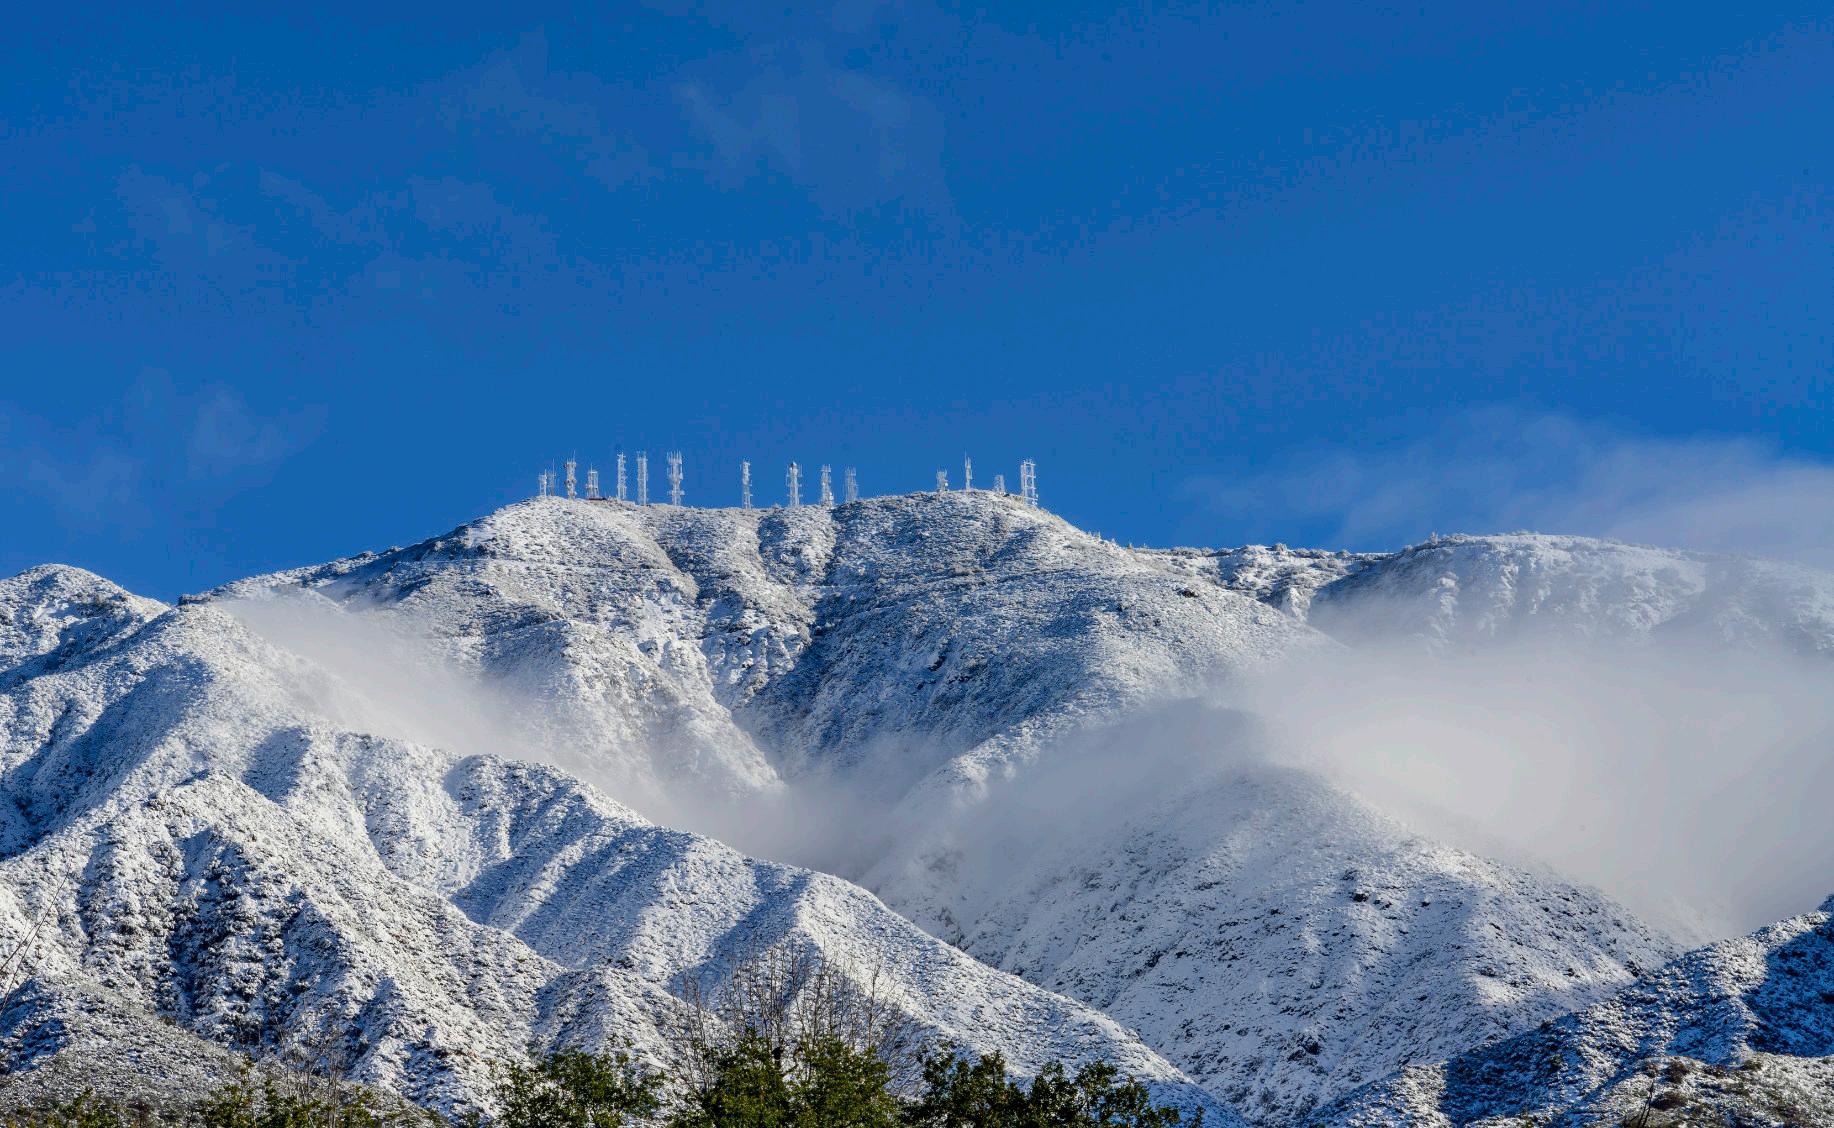
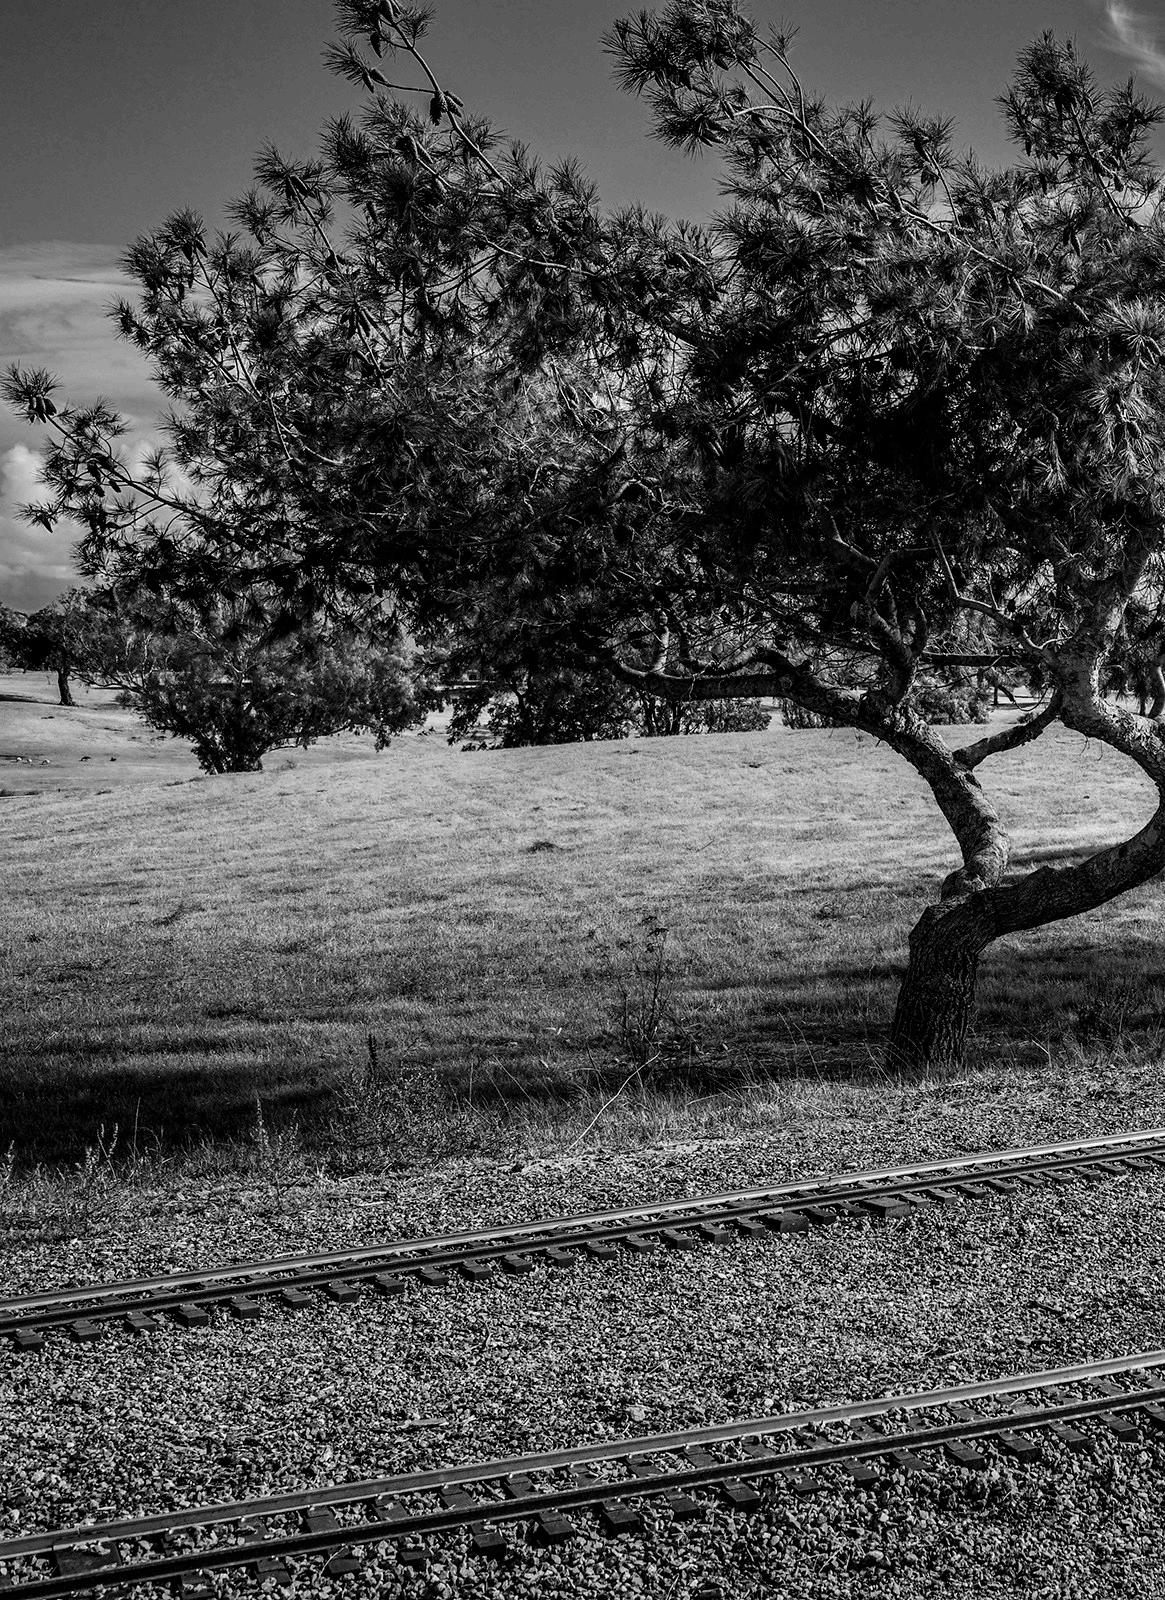
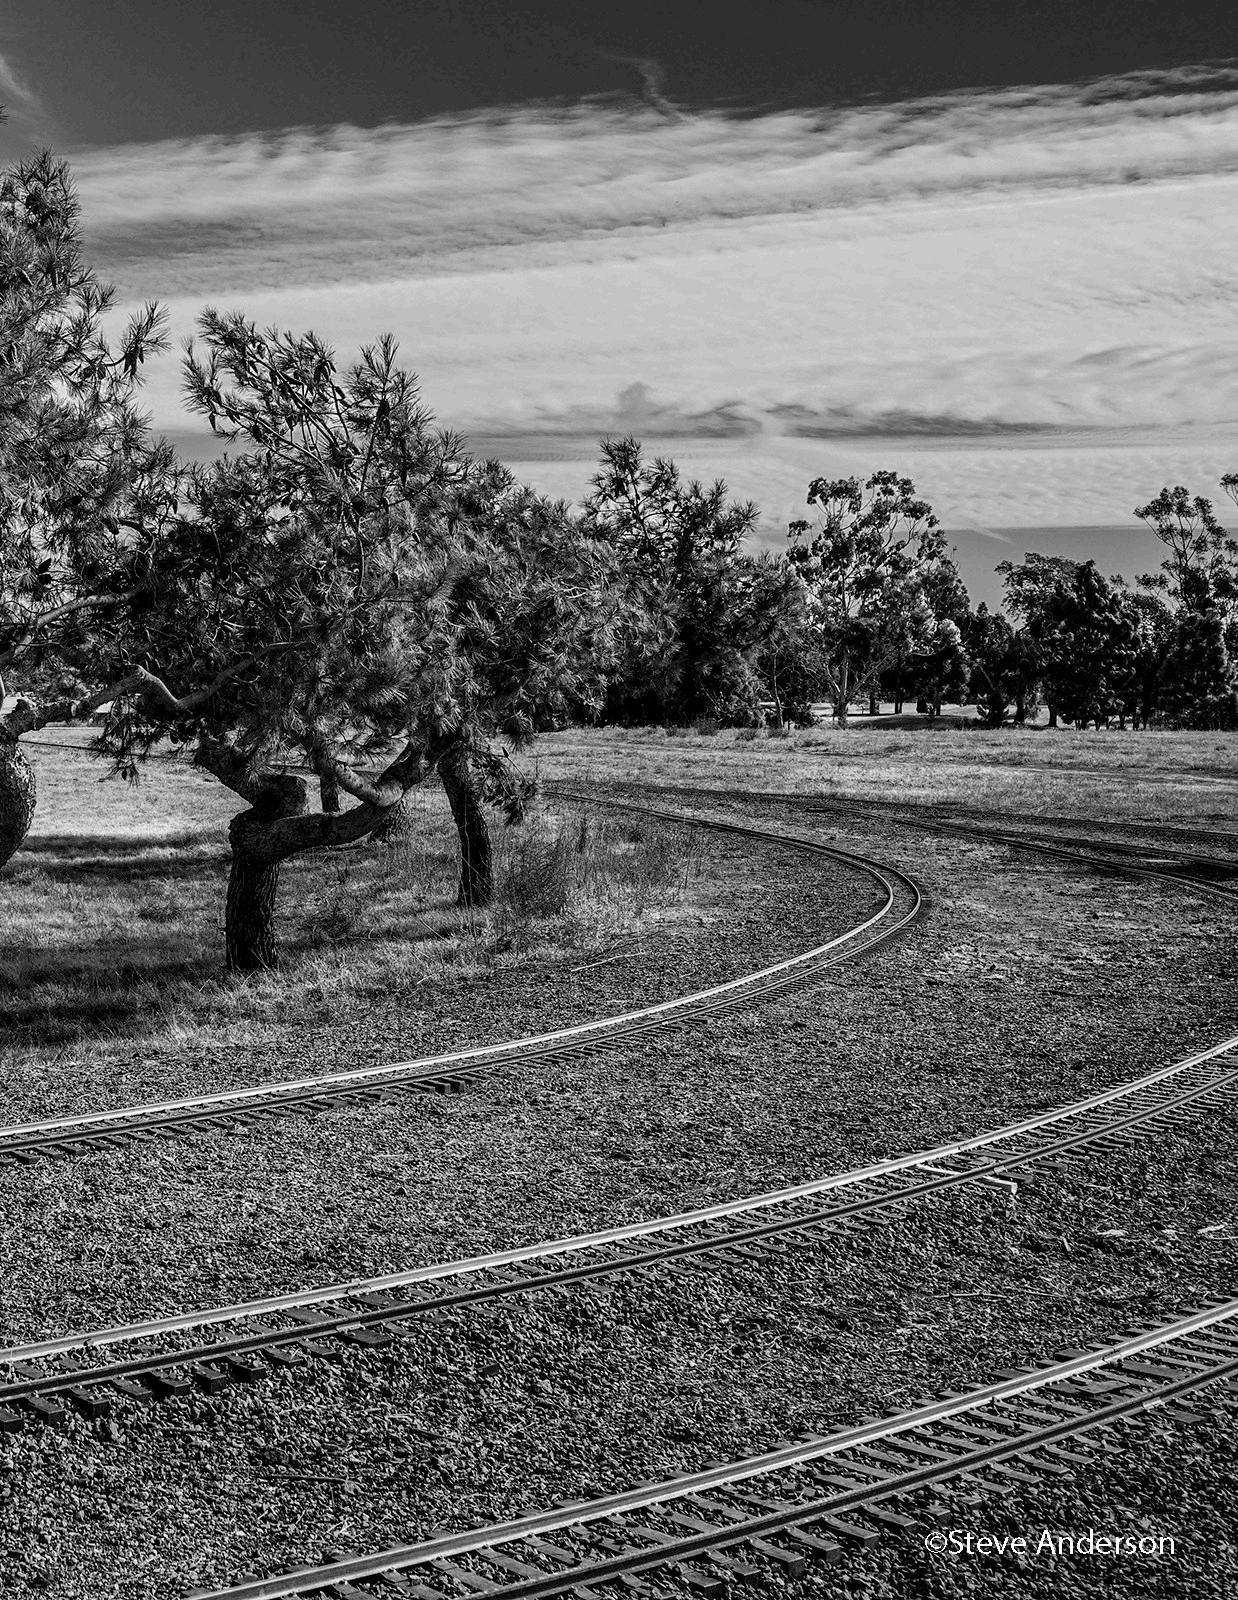
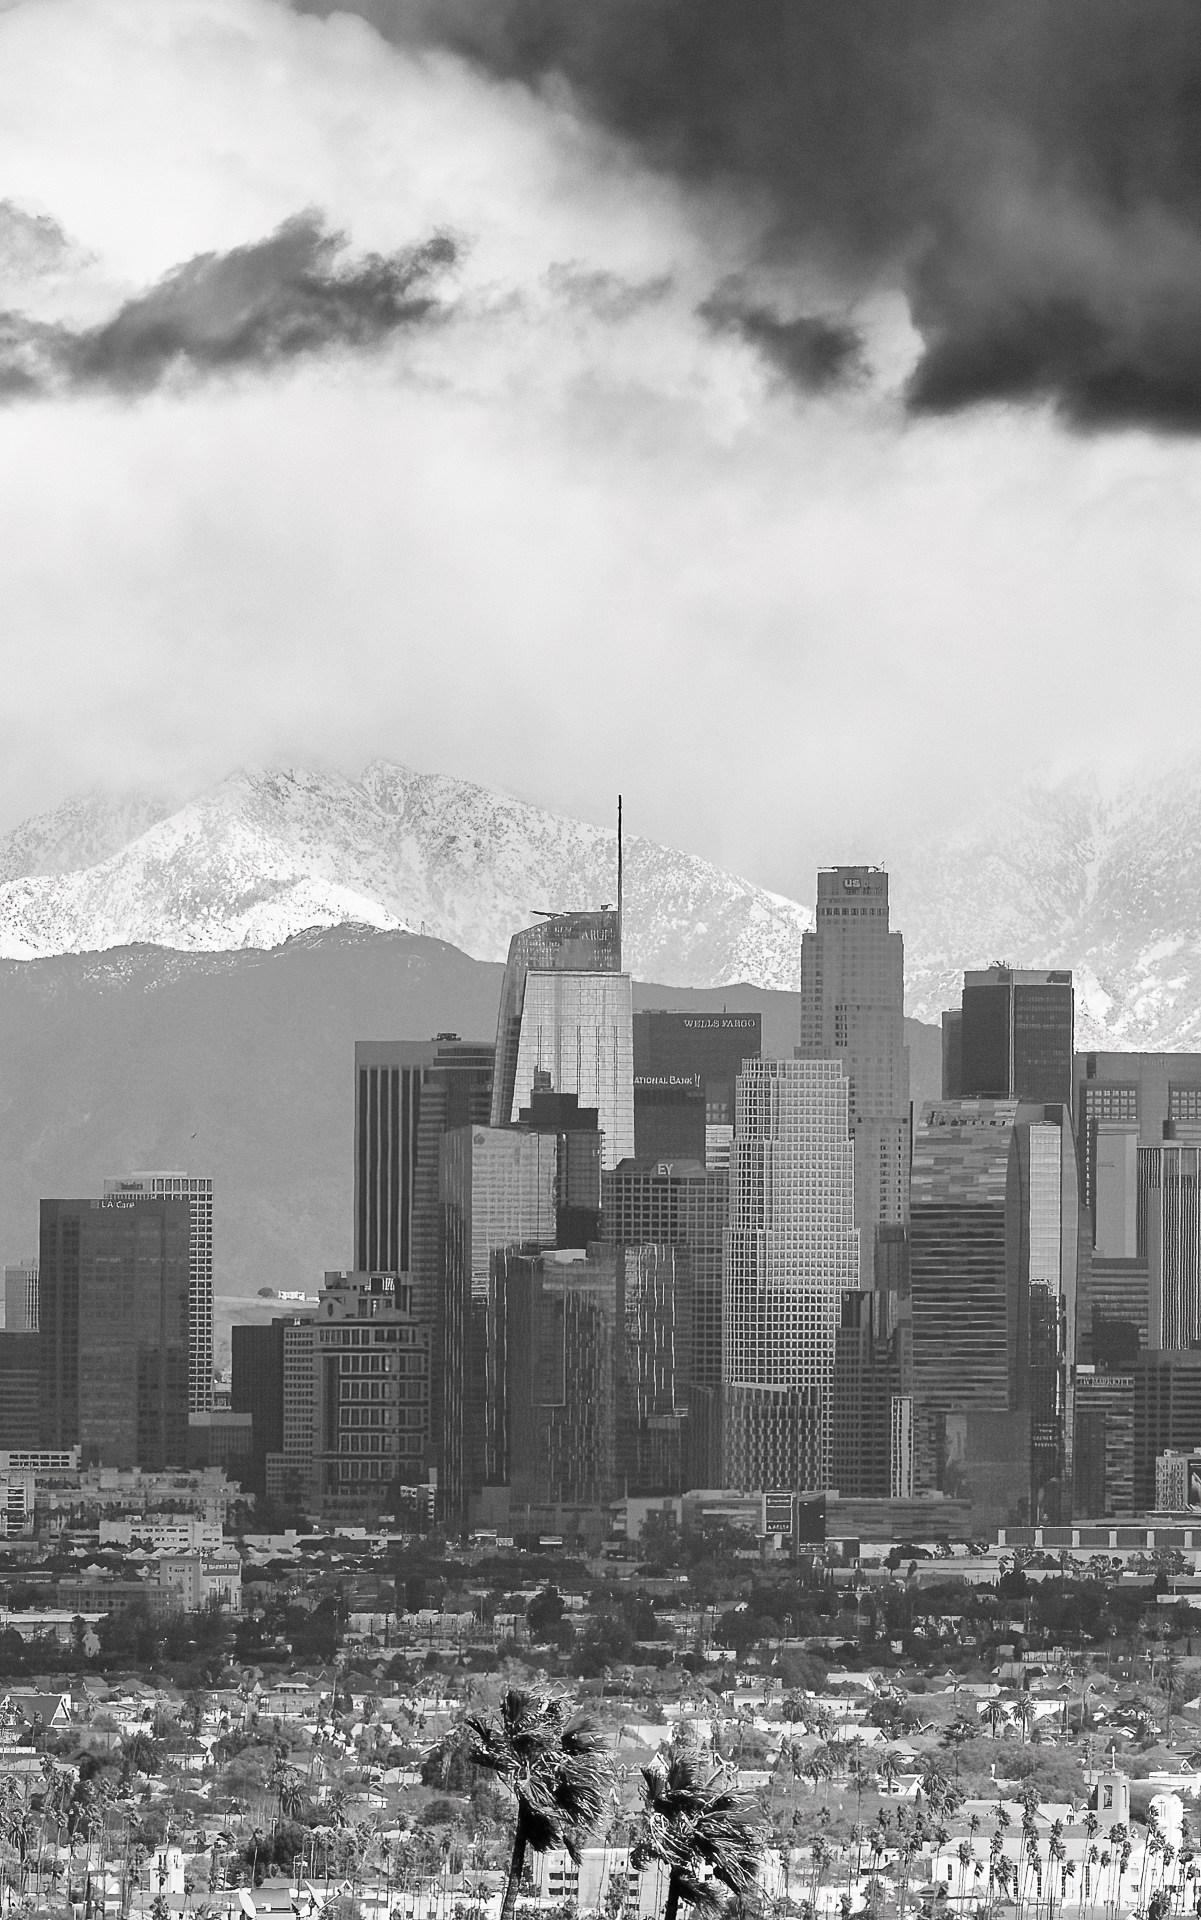
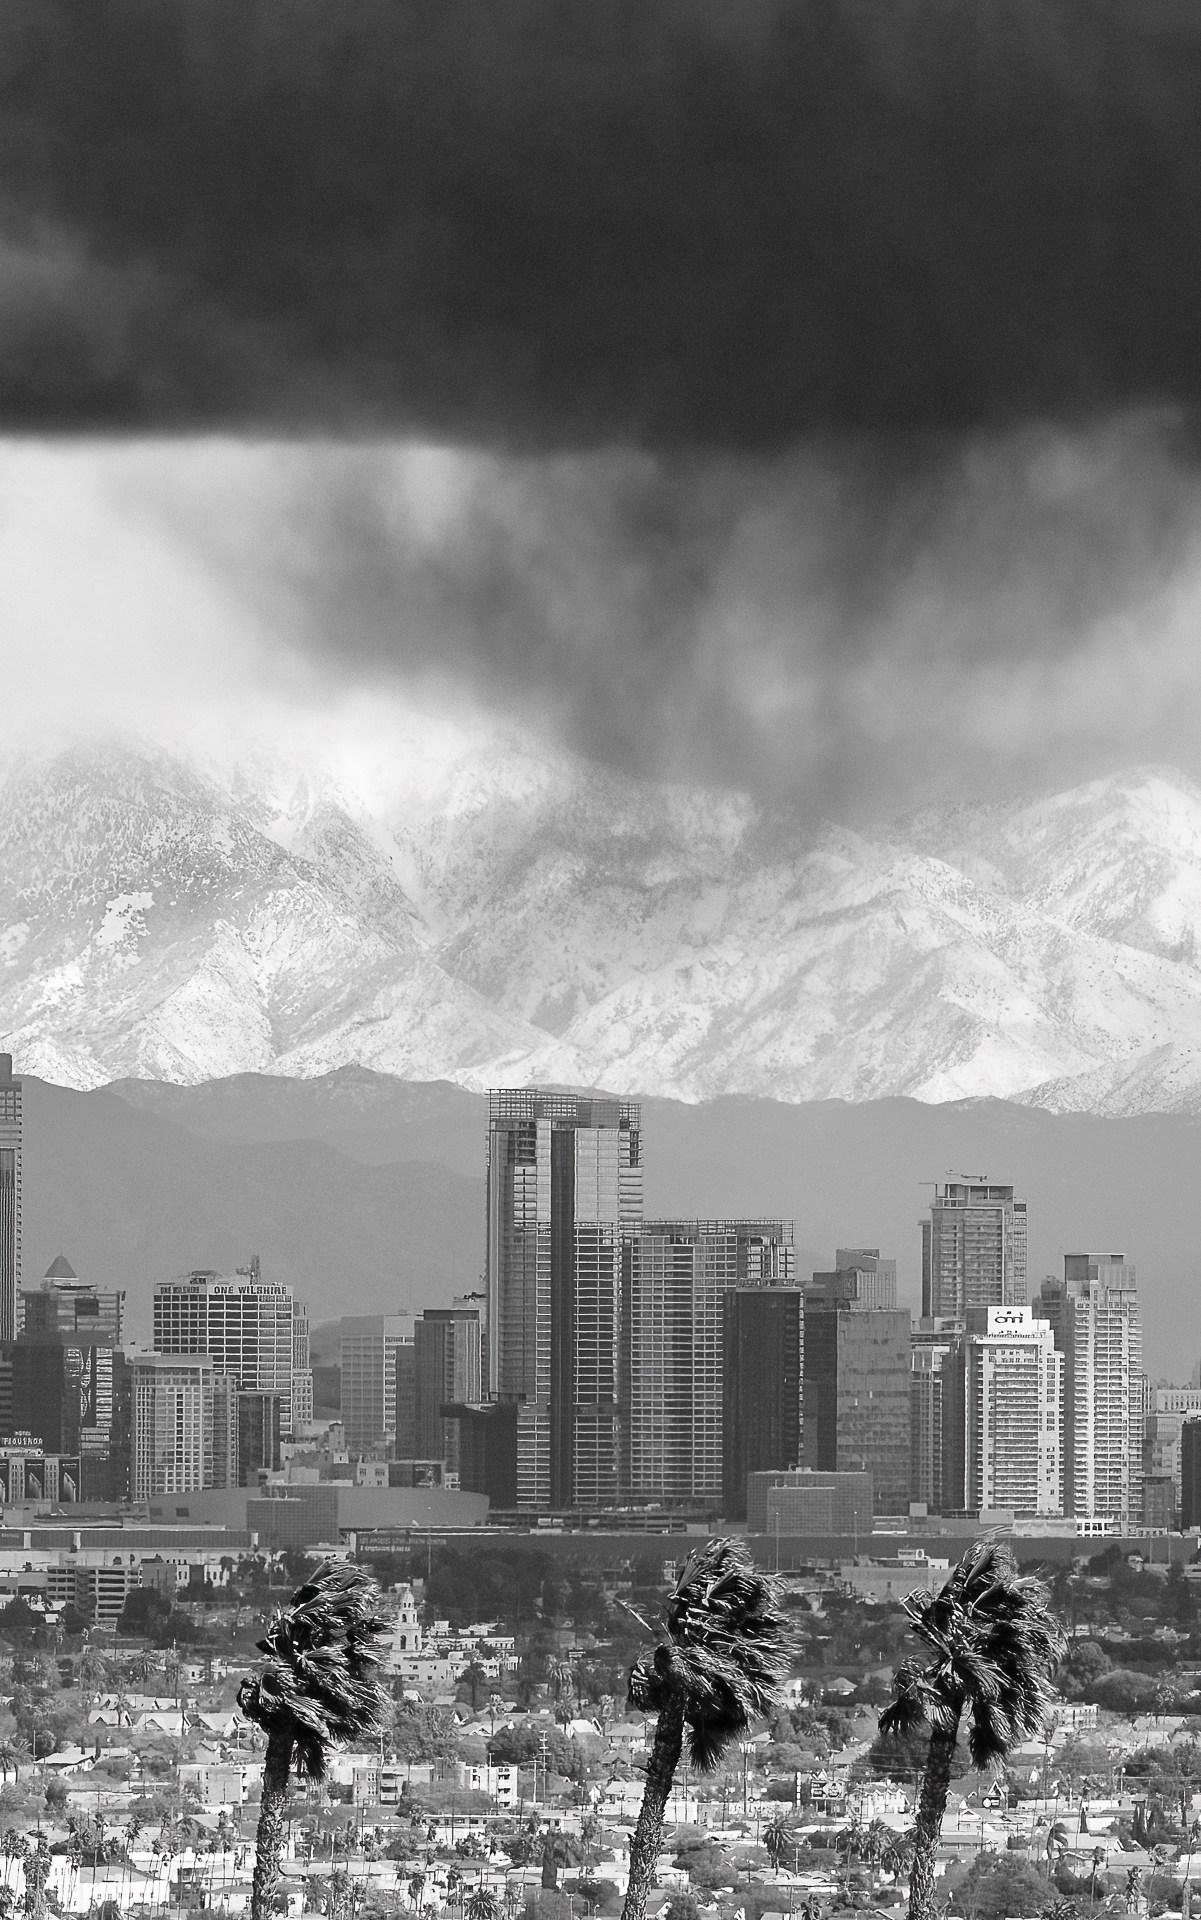
The winter of 2022-23 has brought record amounts of snow and water to the West. A seemingly endless queue of atmospheric rivers have lined up off the coast since December, crashing the shores, saturating the valleys, filling reservoirs, and dumping yards of snow on the mountains. SCCC members Dave Glazier, John Clement, John Fisanotti, Steve Anderson, and Joe Doherty responded to a special call for images of the storms.
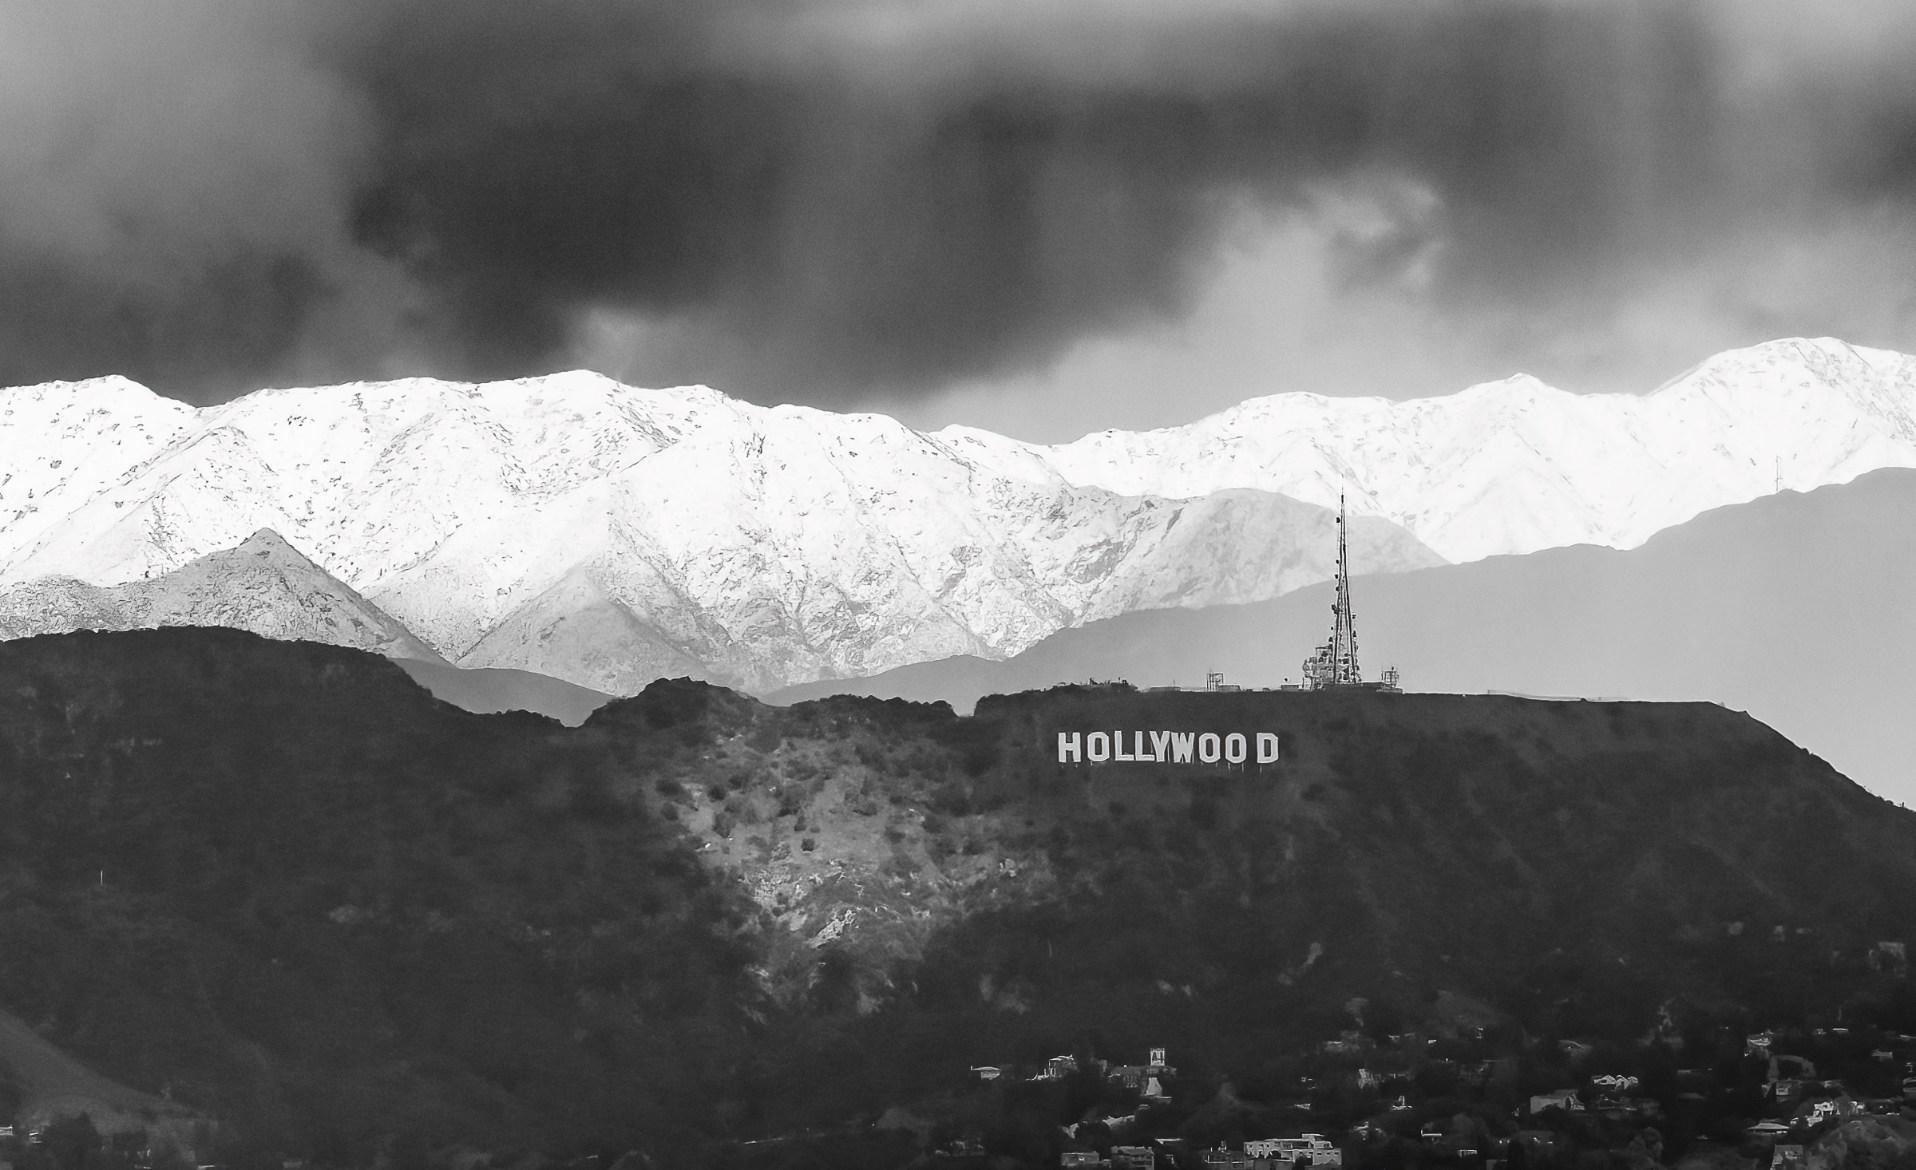
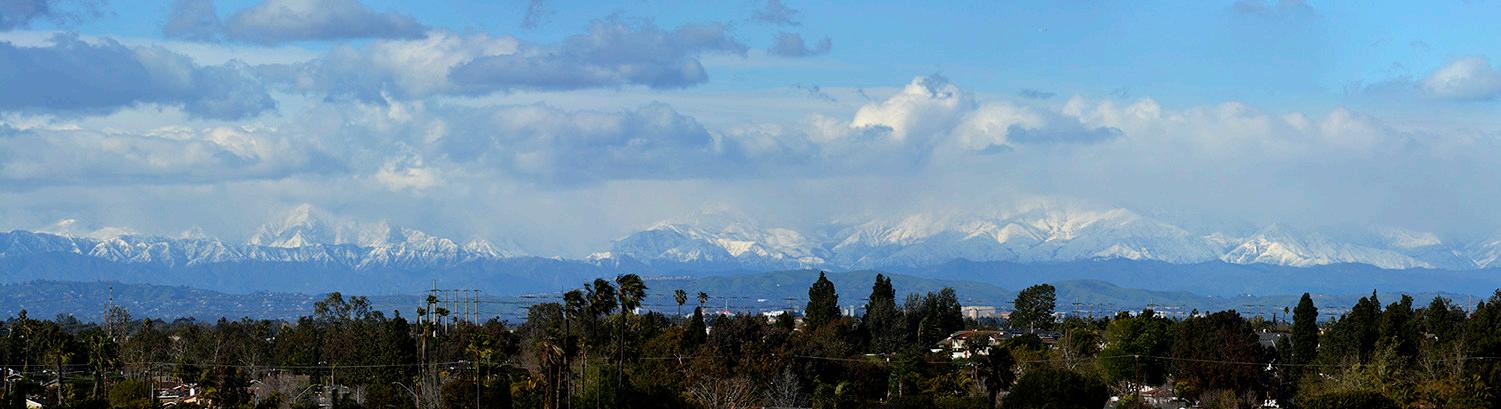
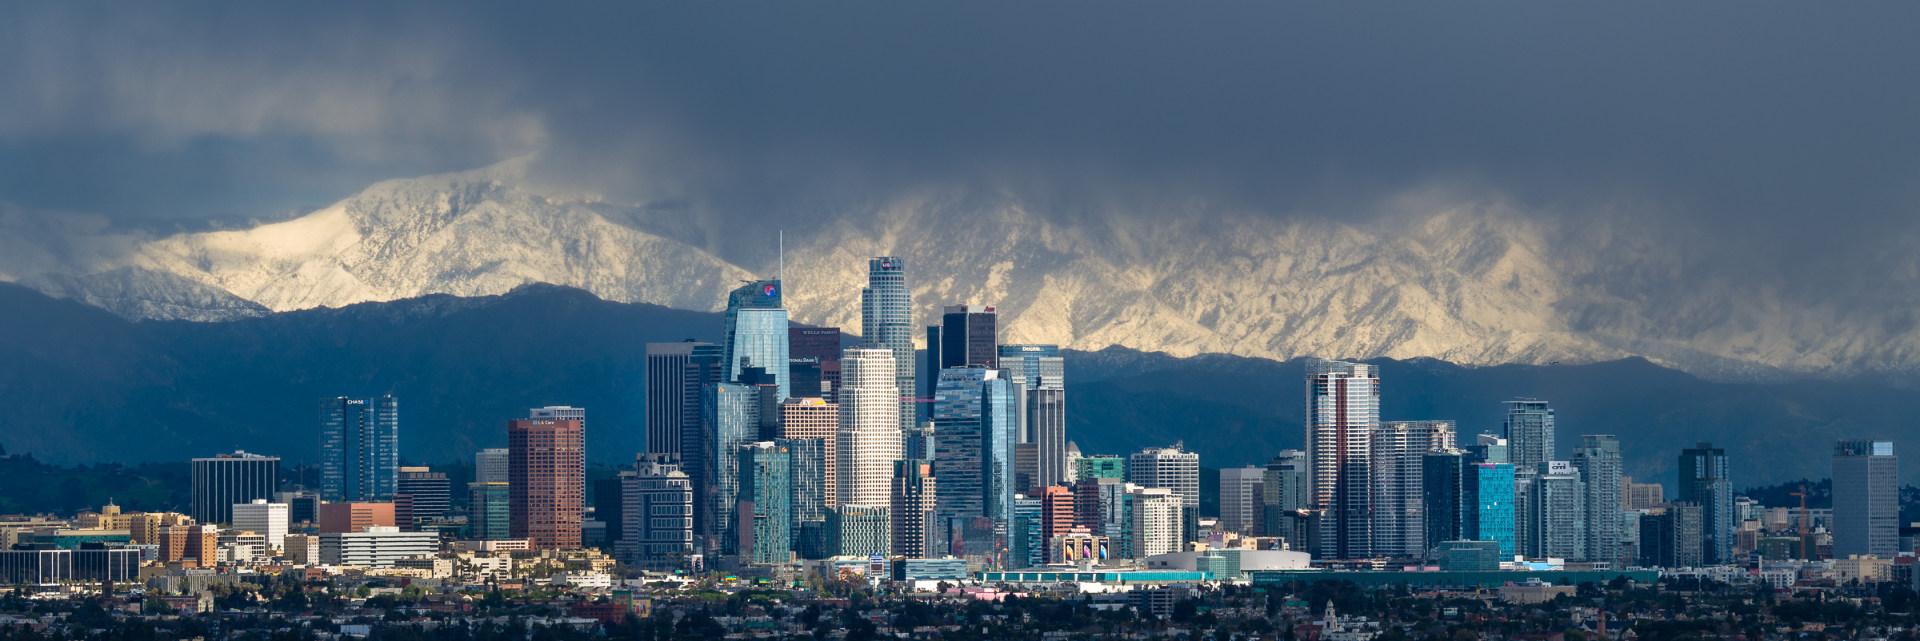
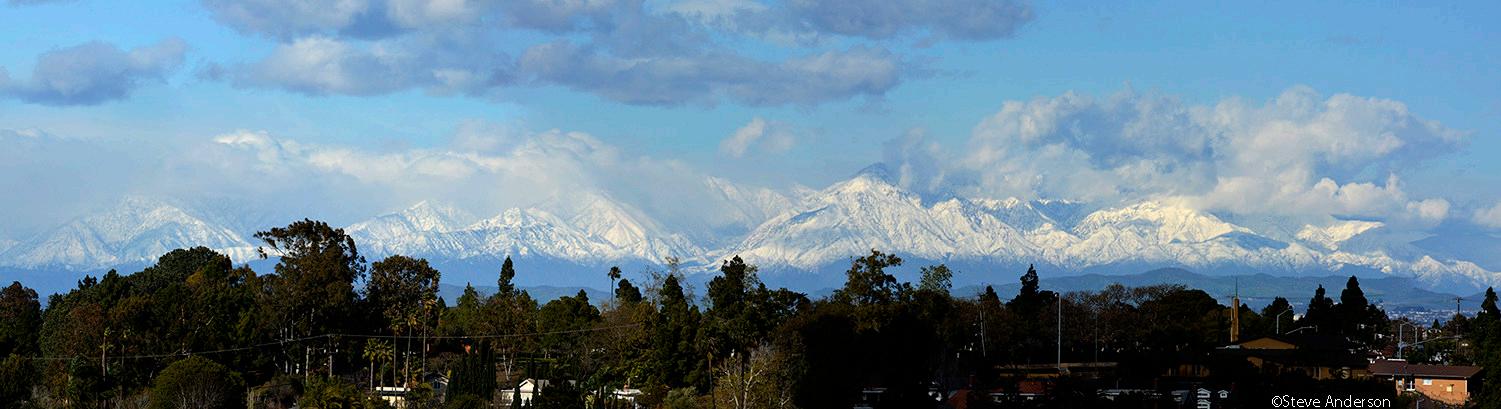
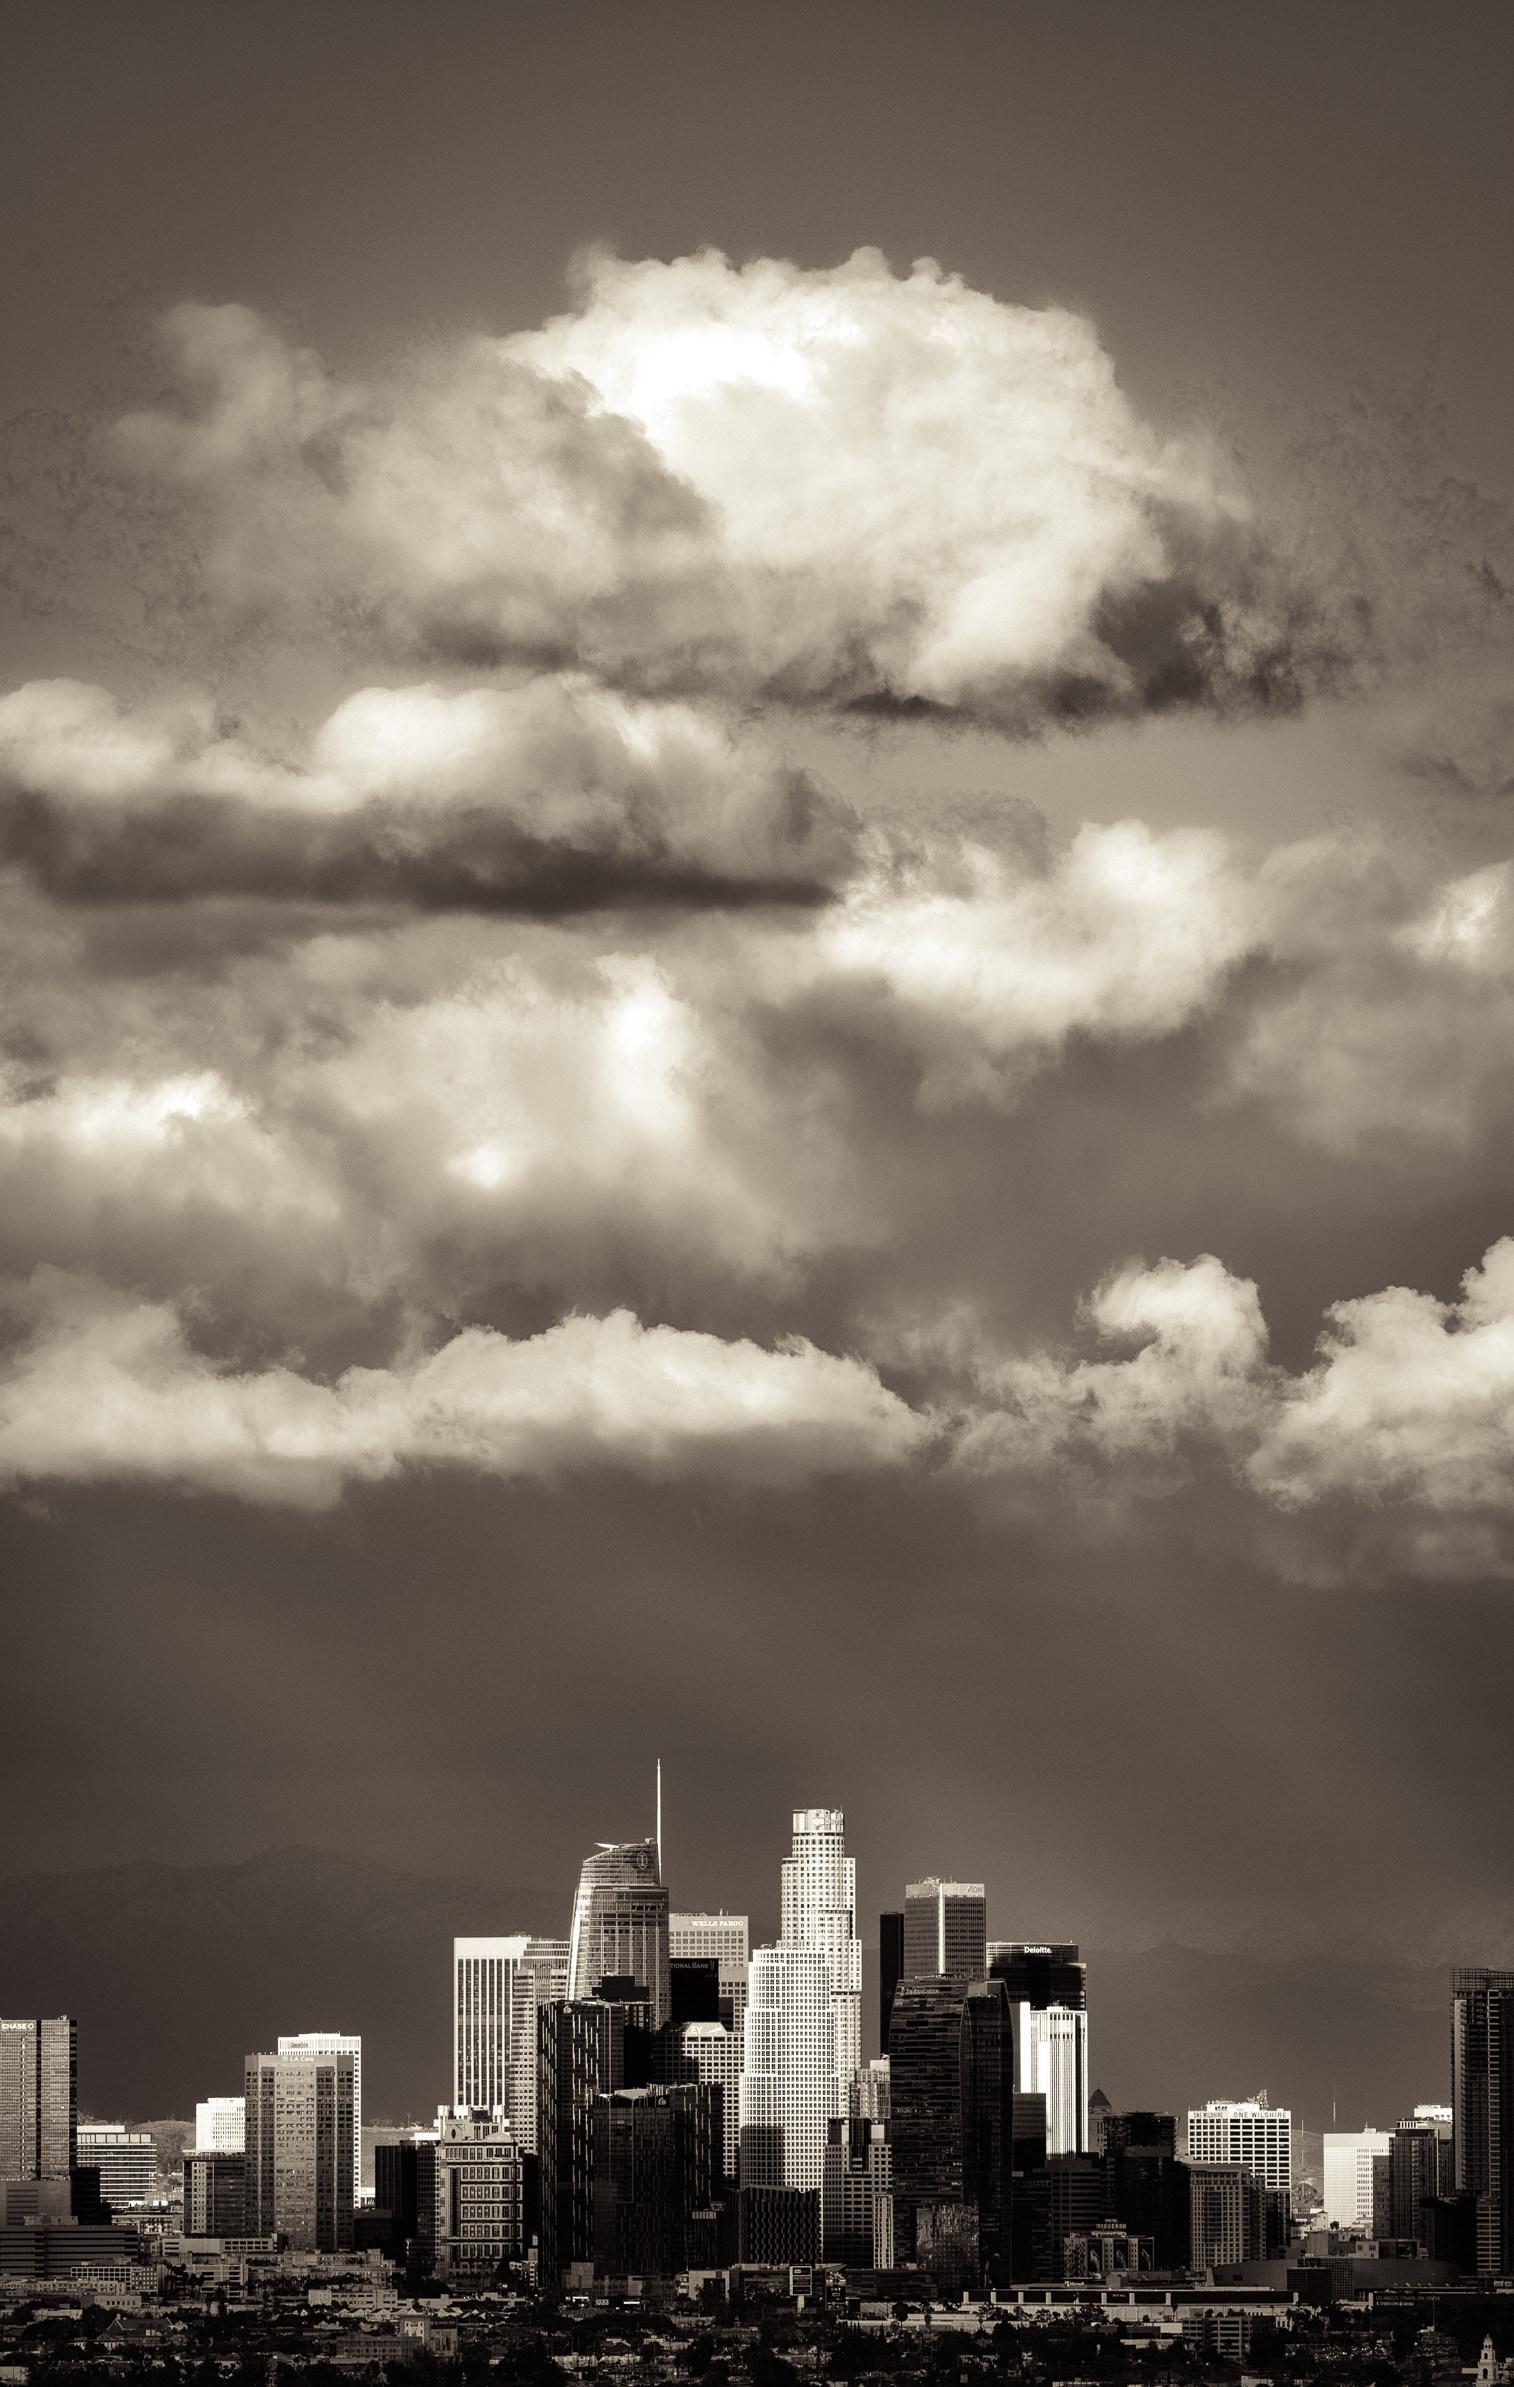
Winter Storm panorama, San Gabriel Mountains. © Steve Anderson

All photos © Larry Miller
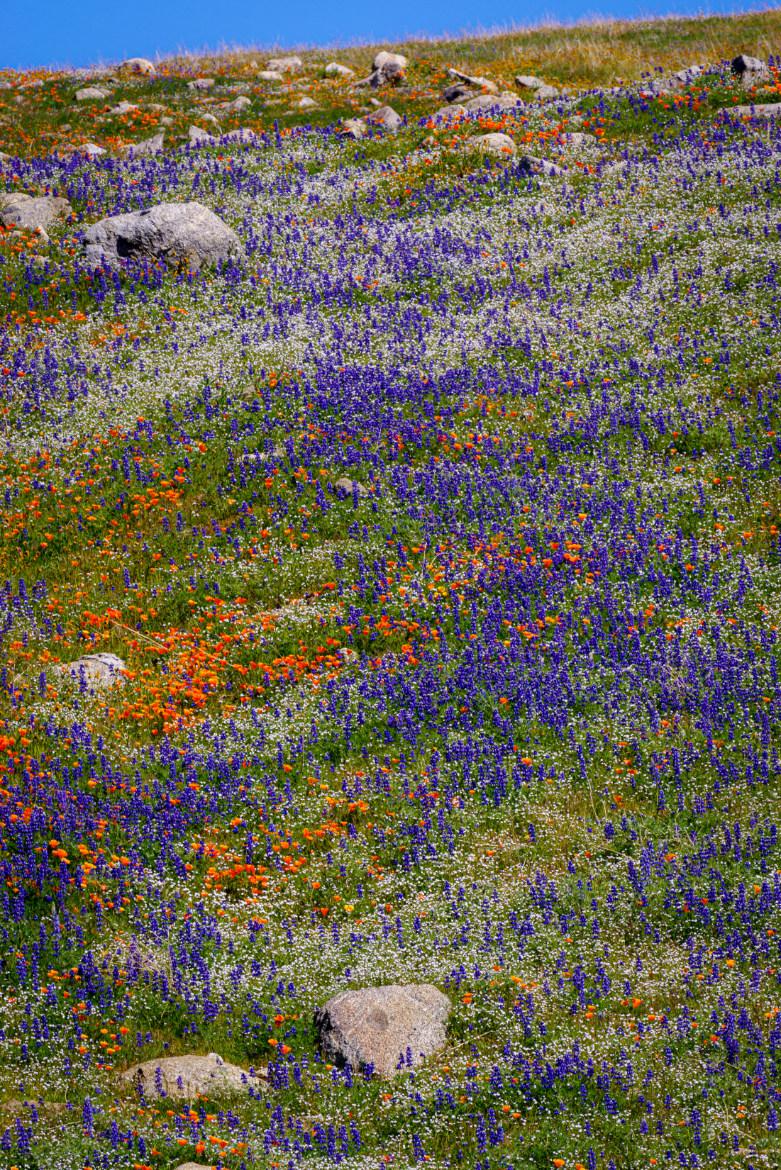
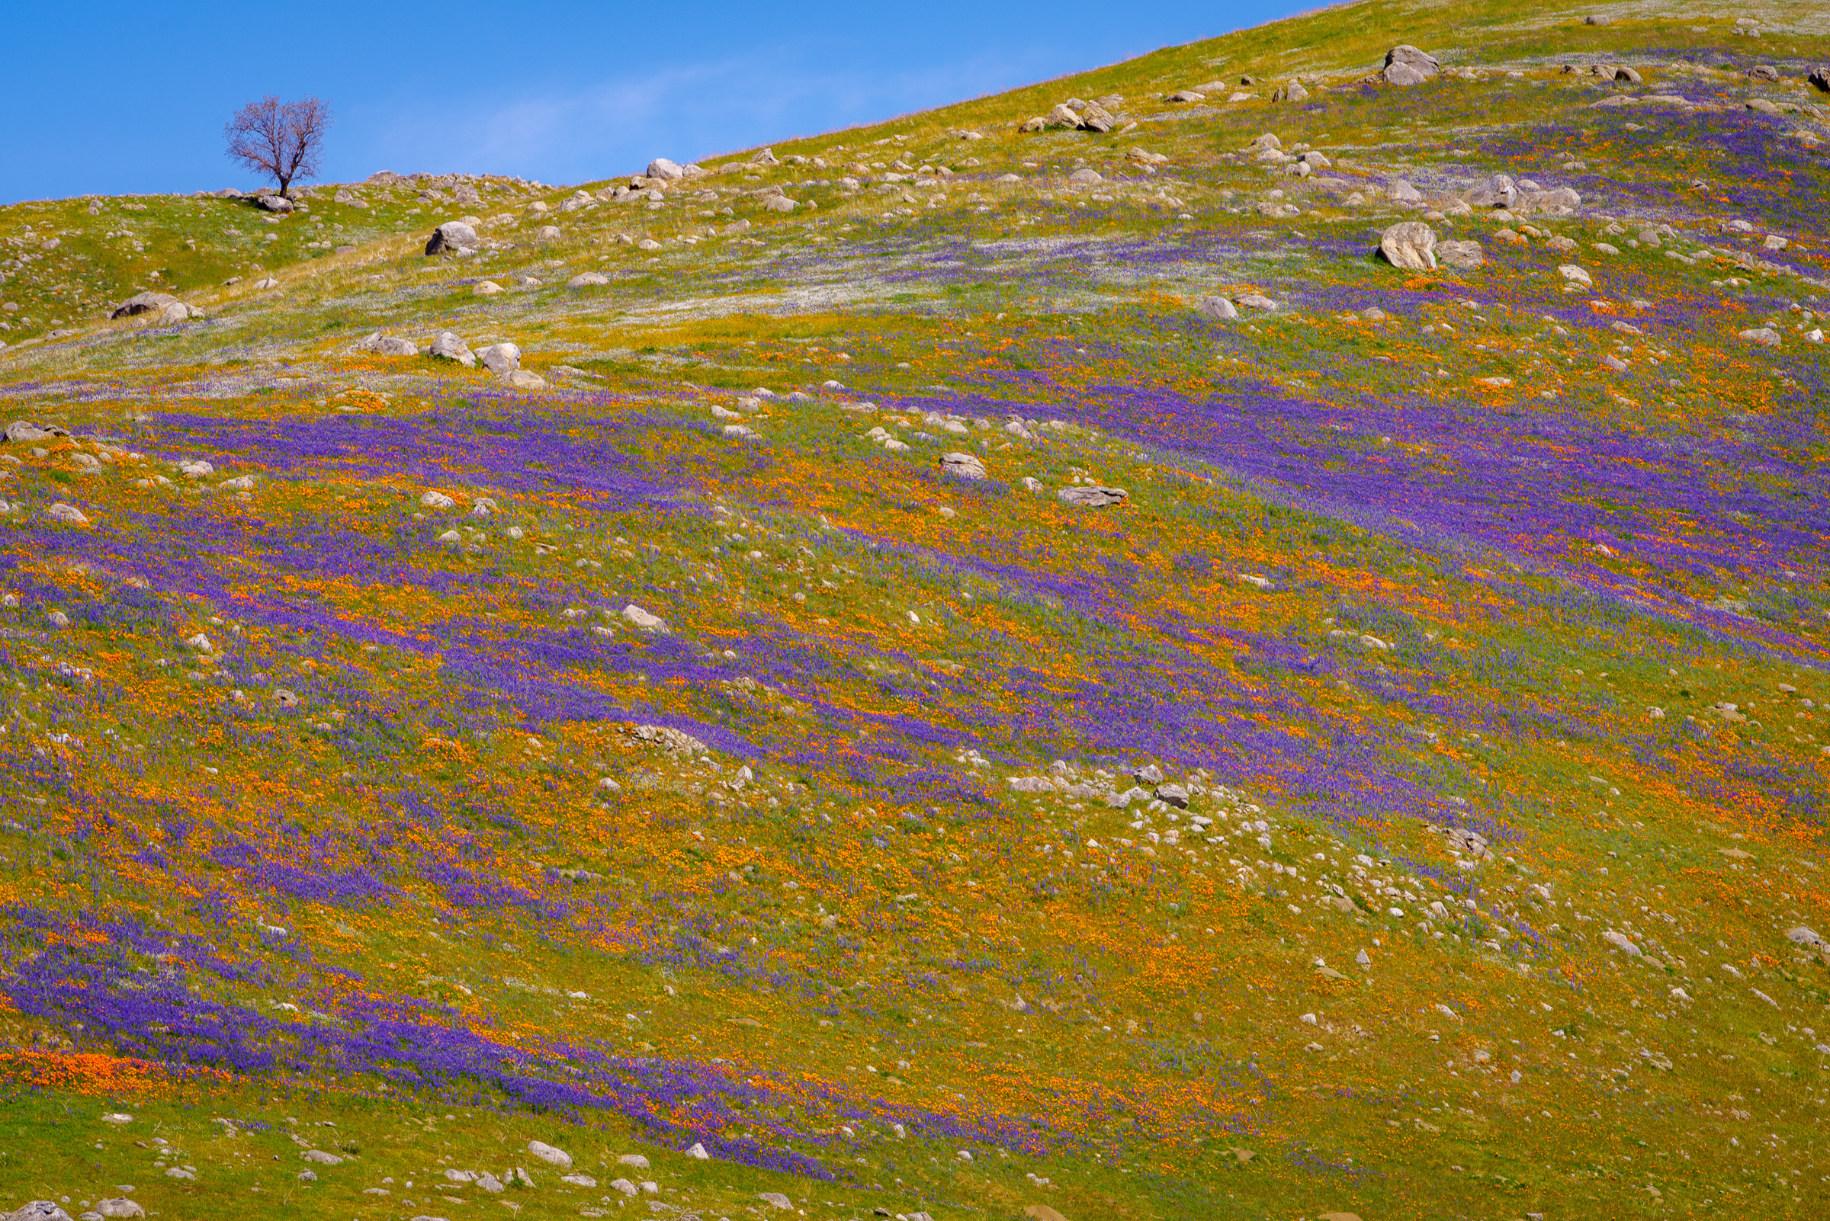
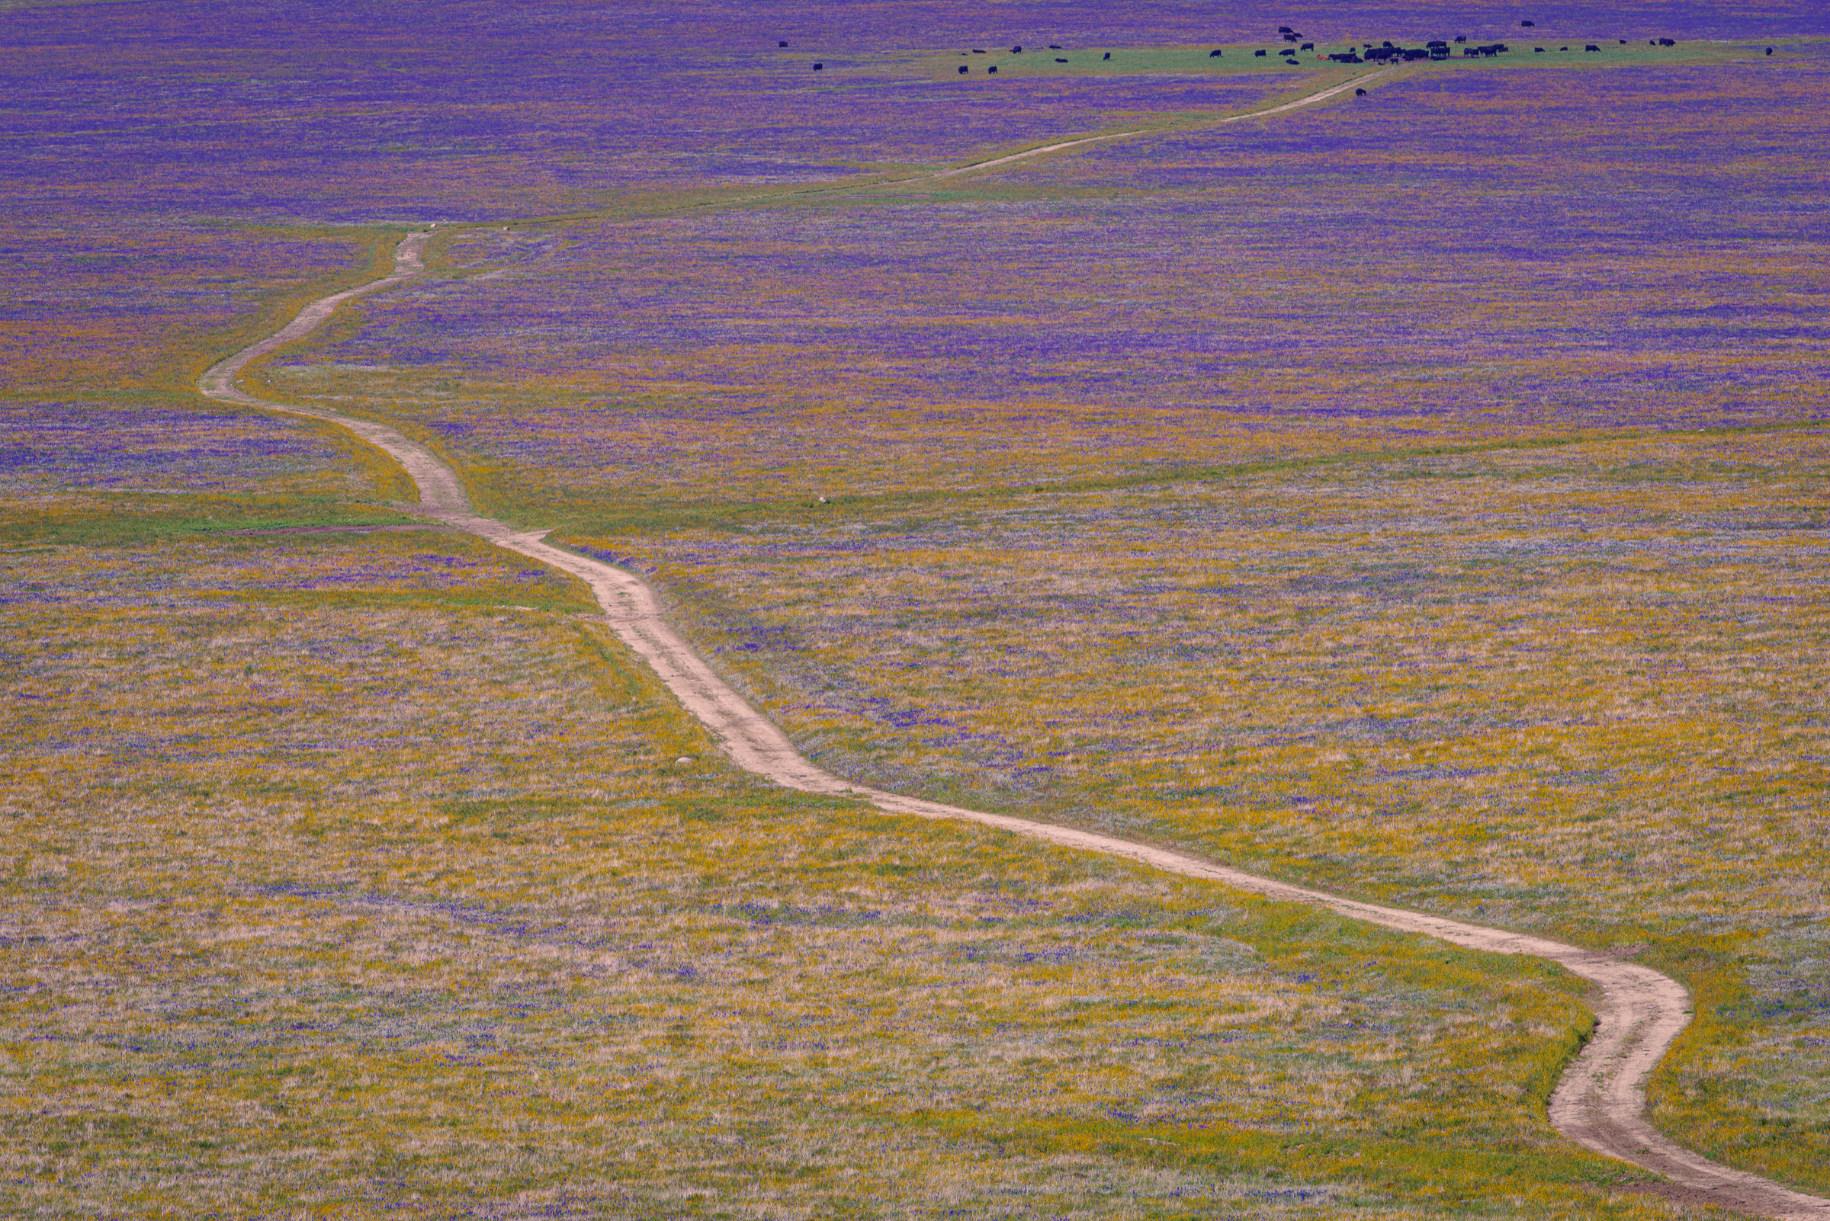
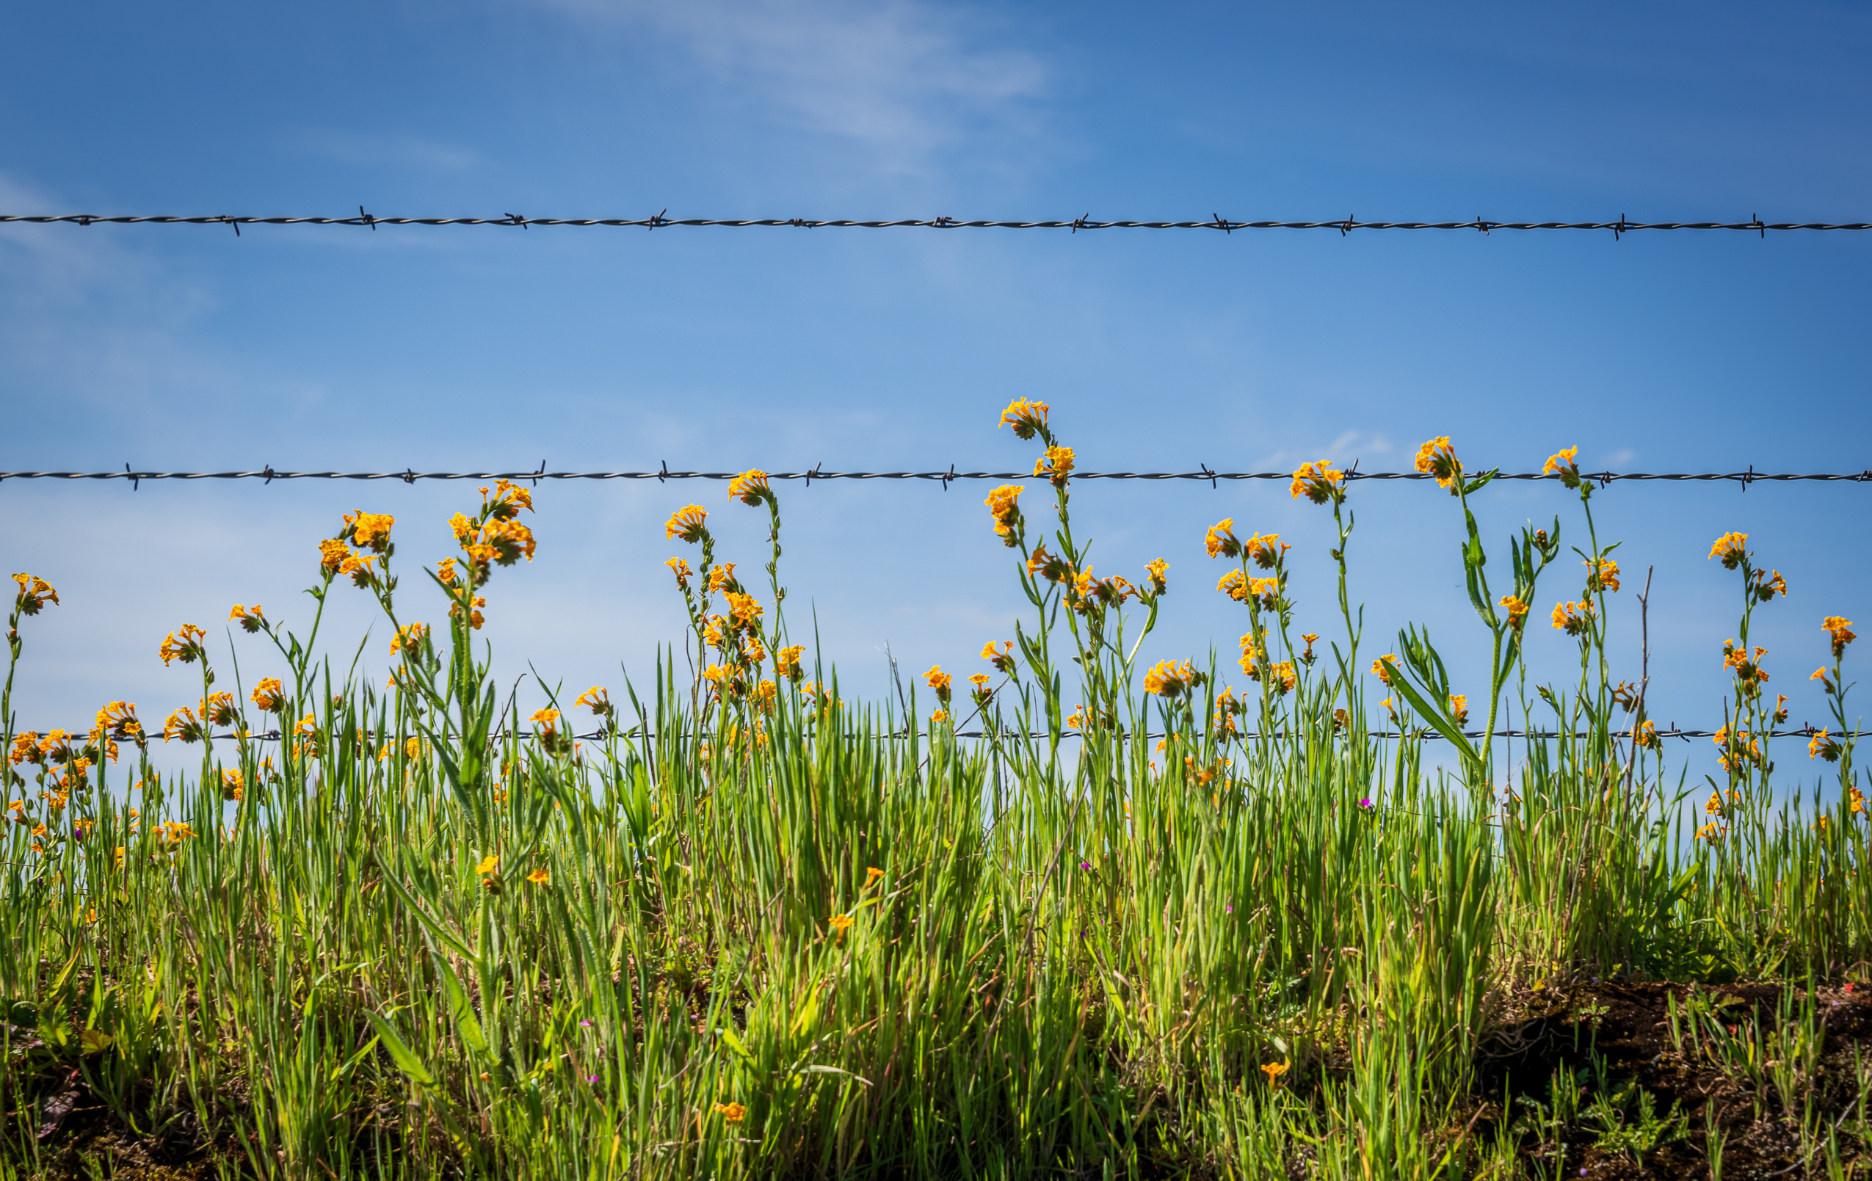
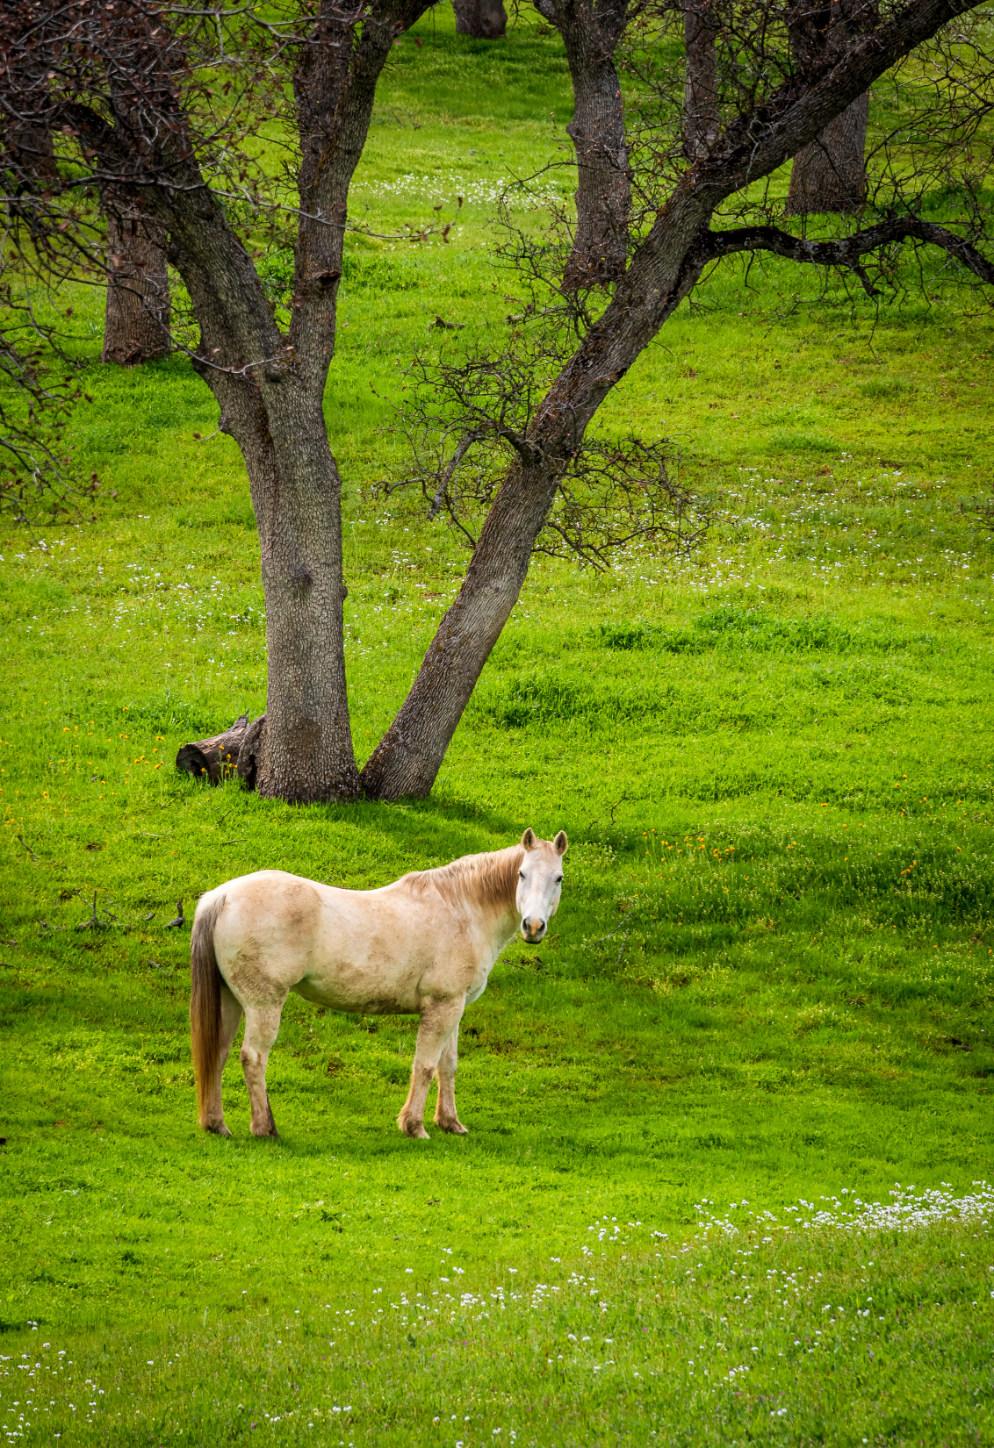
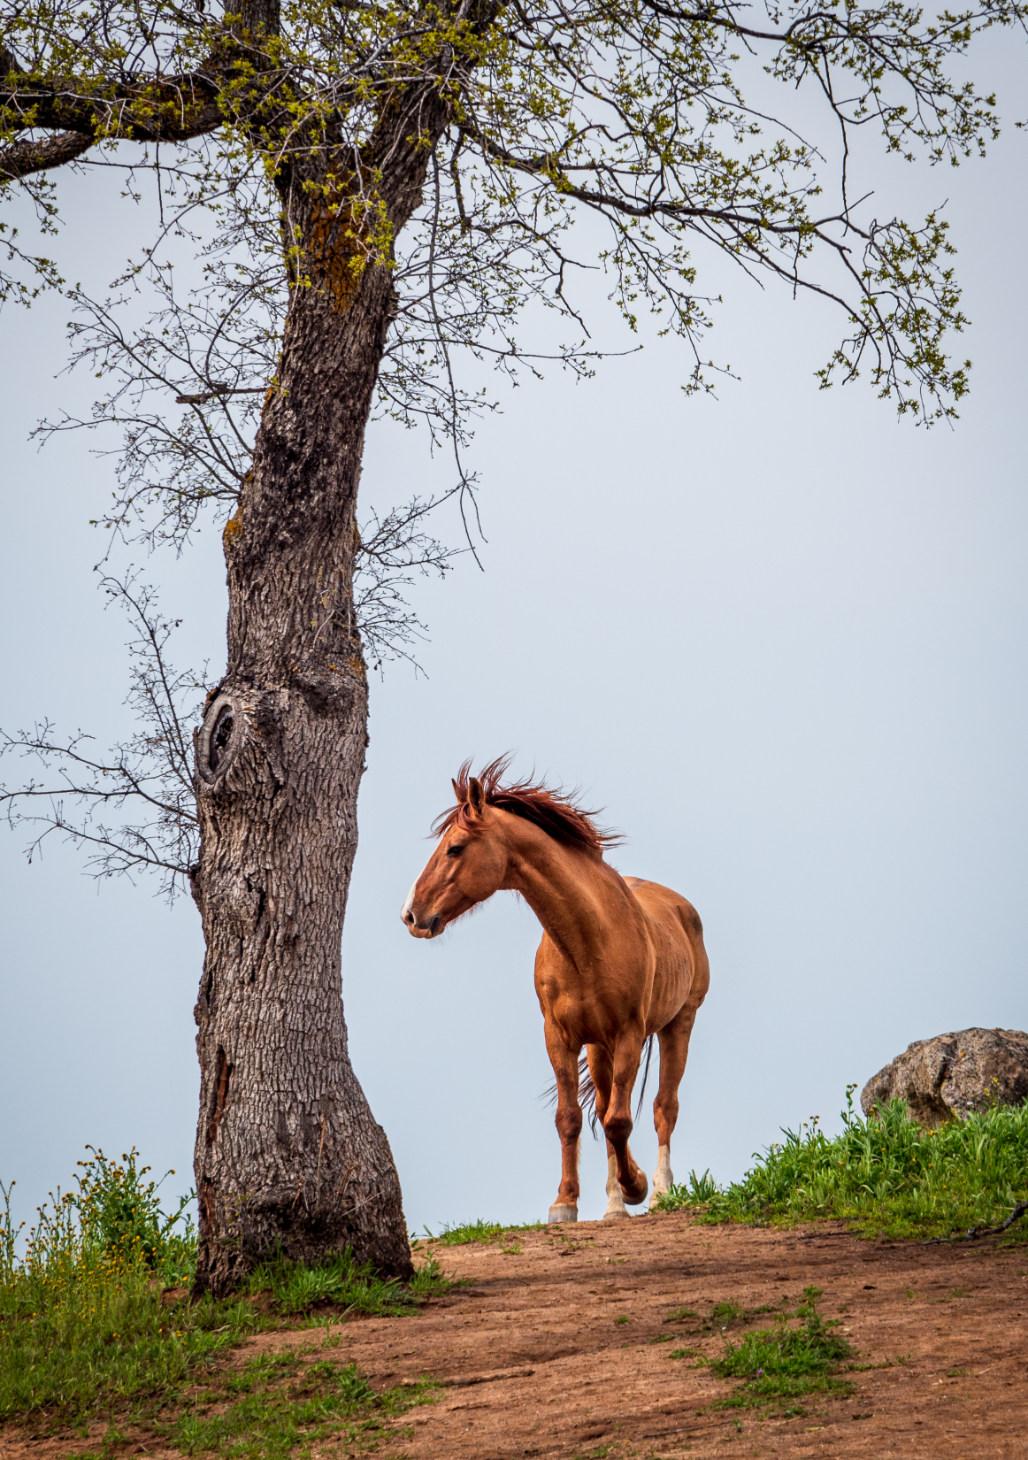
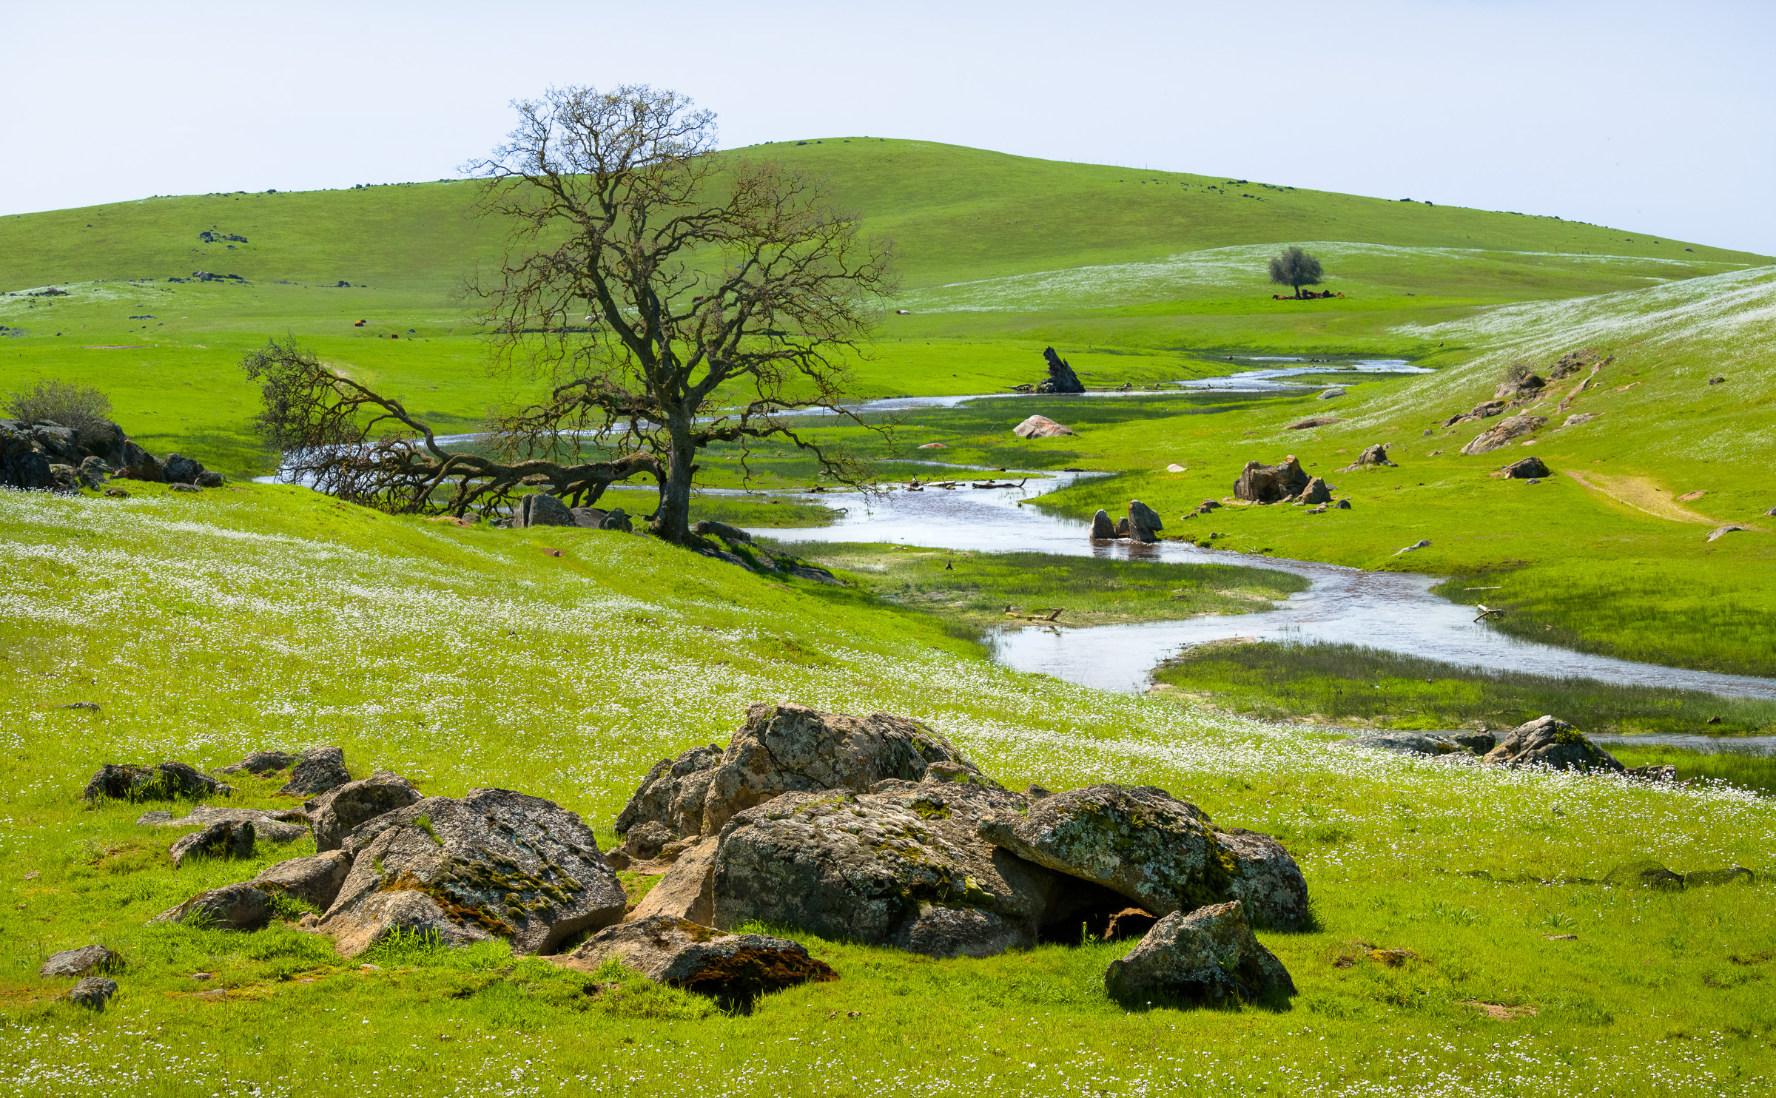
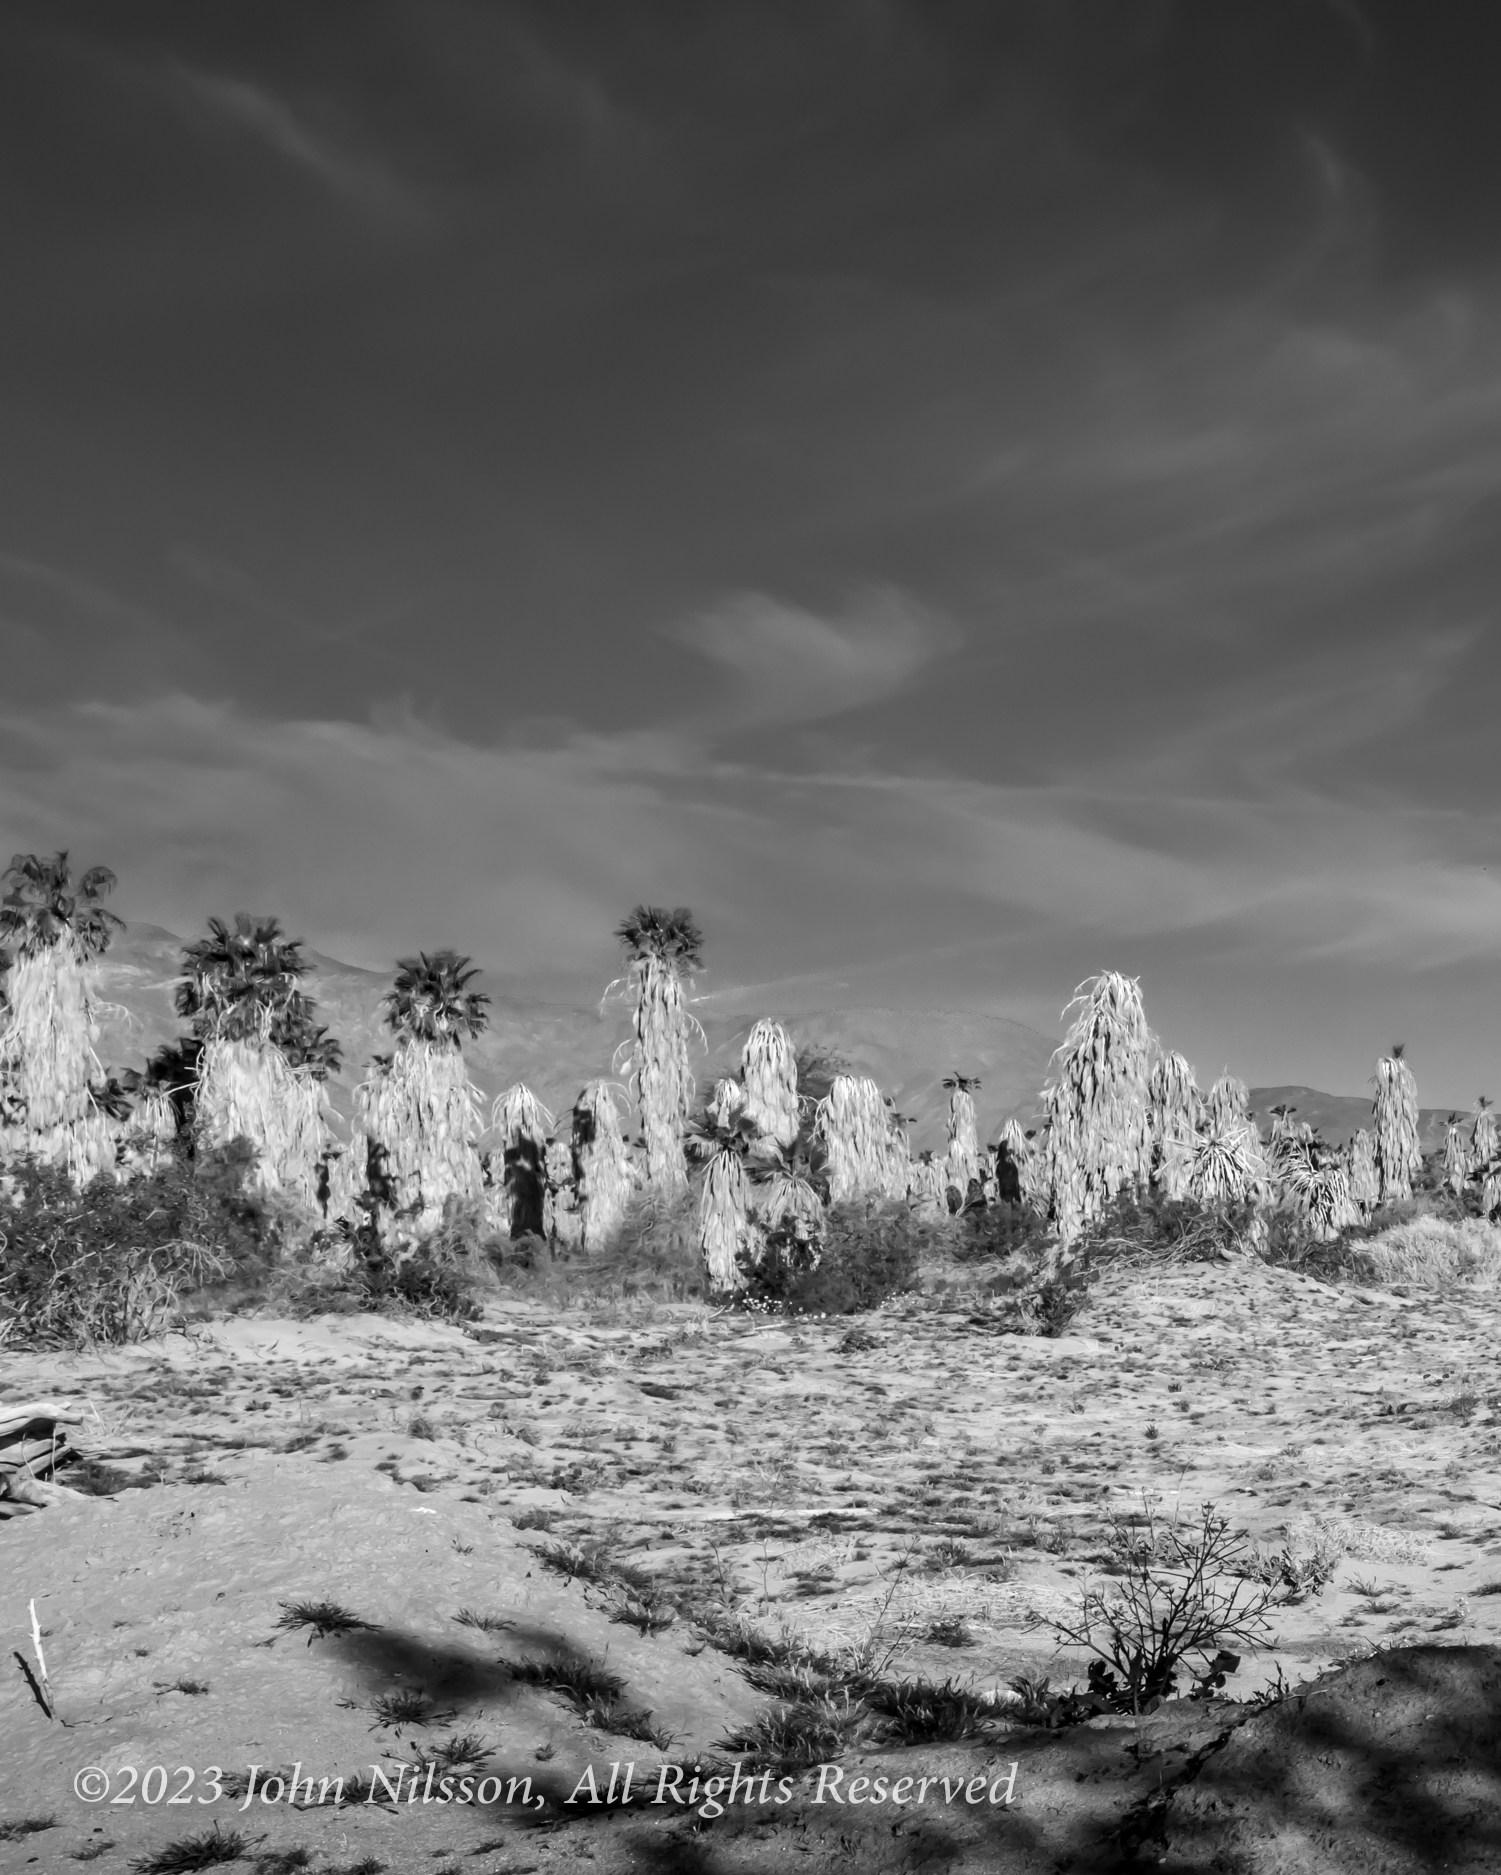
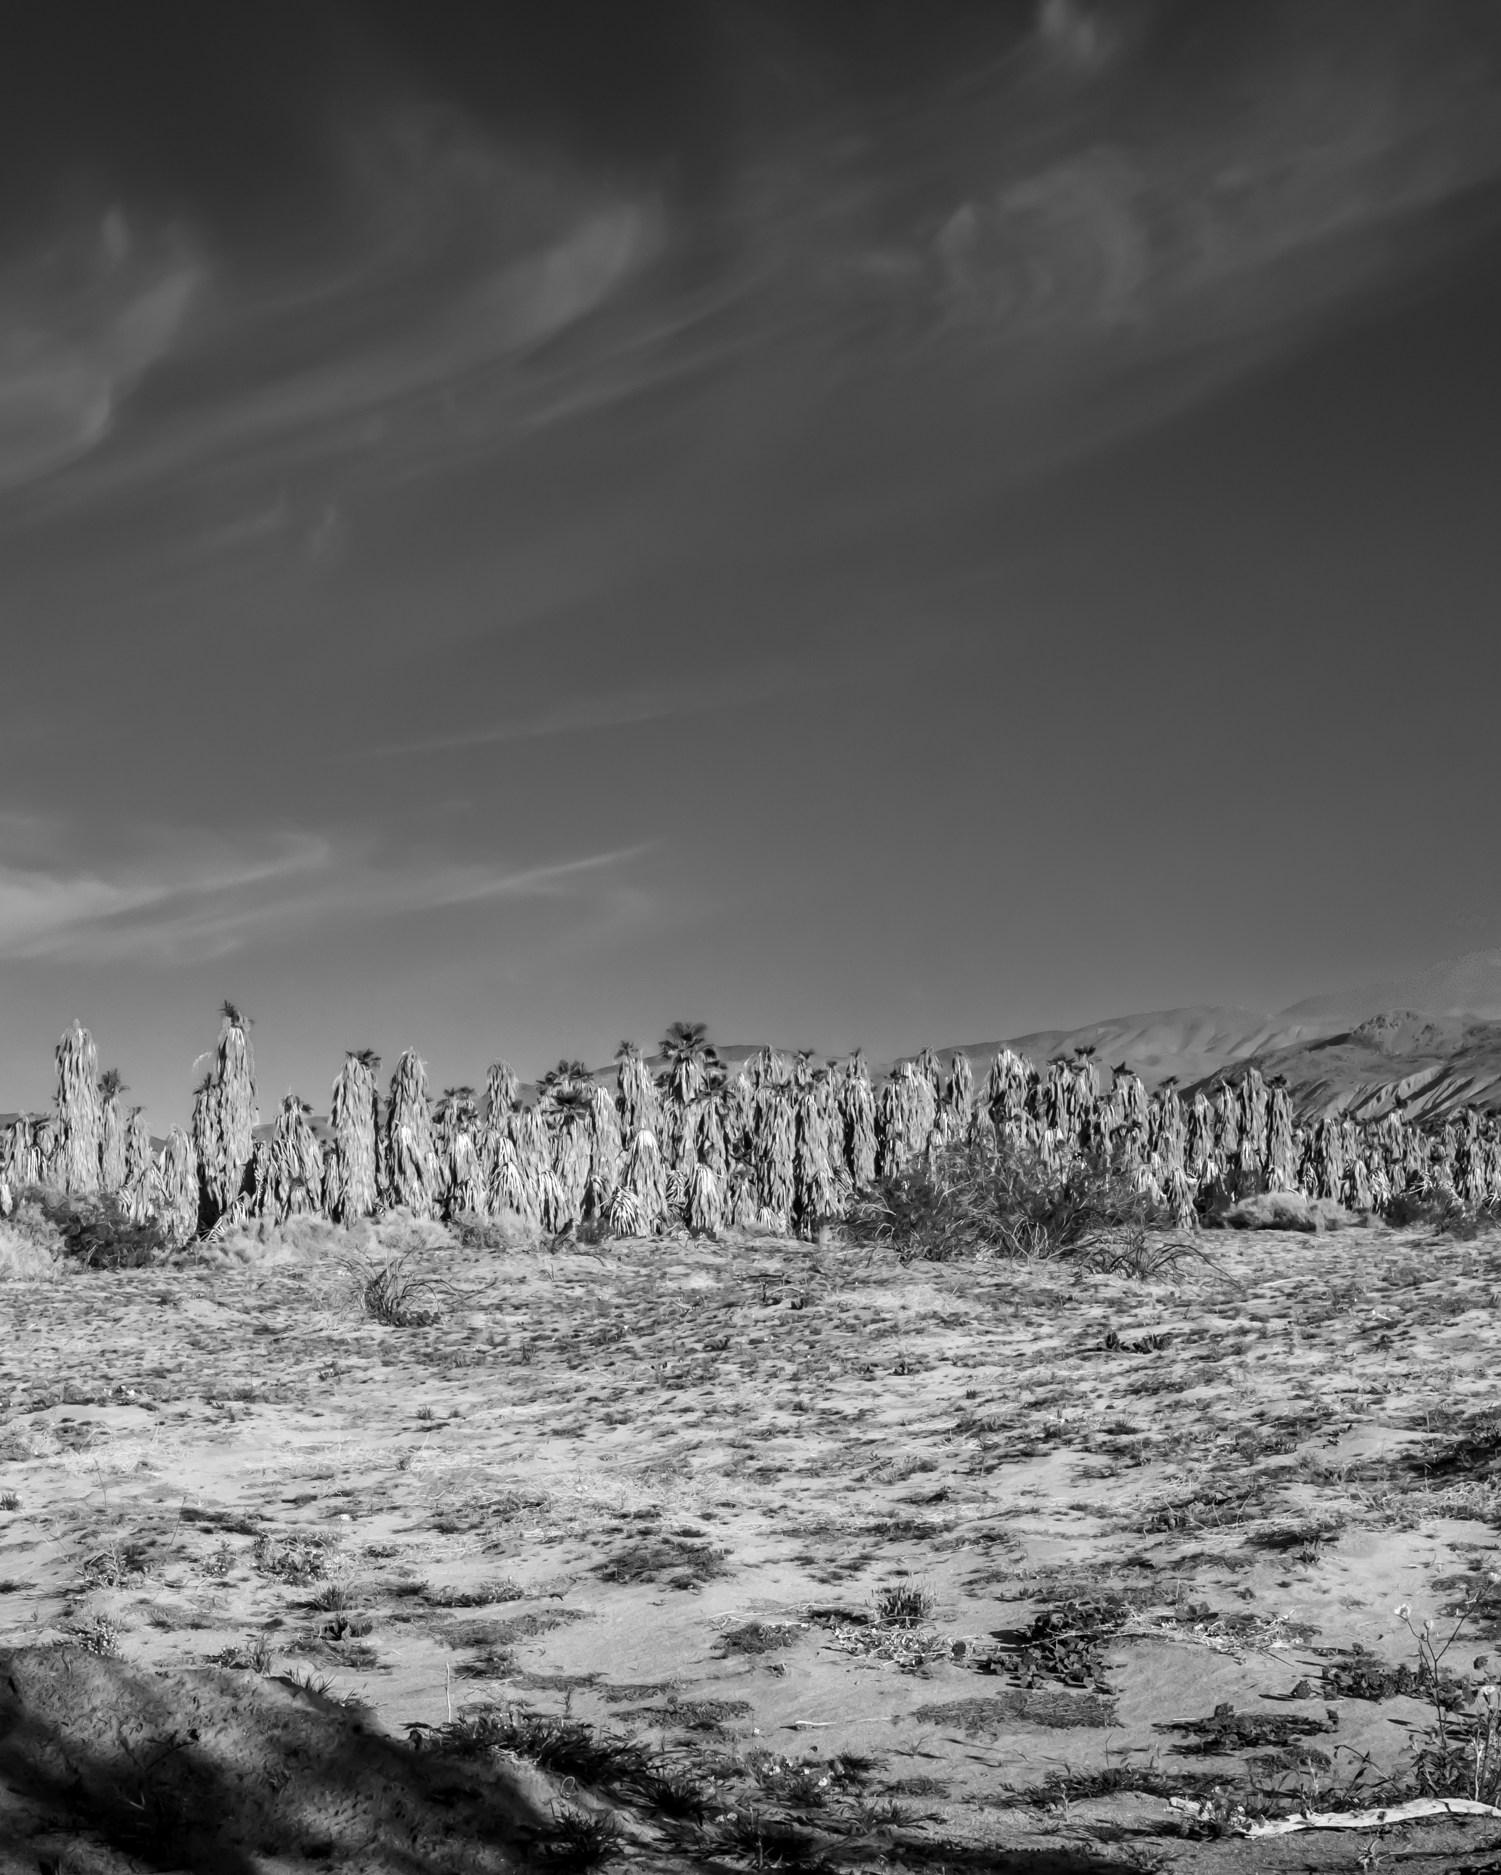
The foothills of the Tehachapi Mountains in California are a prime area to view rolling grasslands, blue oaks, and spring wildflowers. I took these photos on March 9 along Highway 223 east of Arvin.
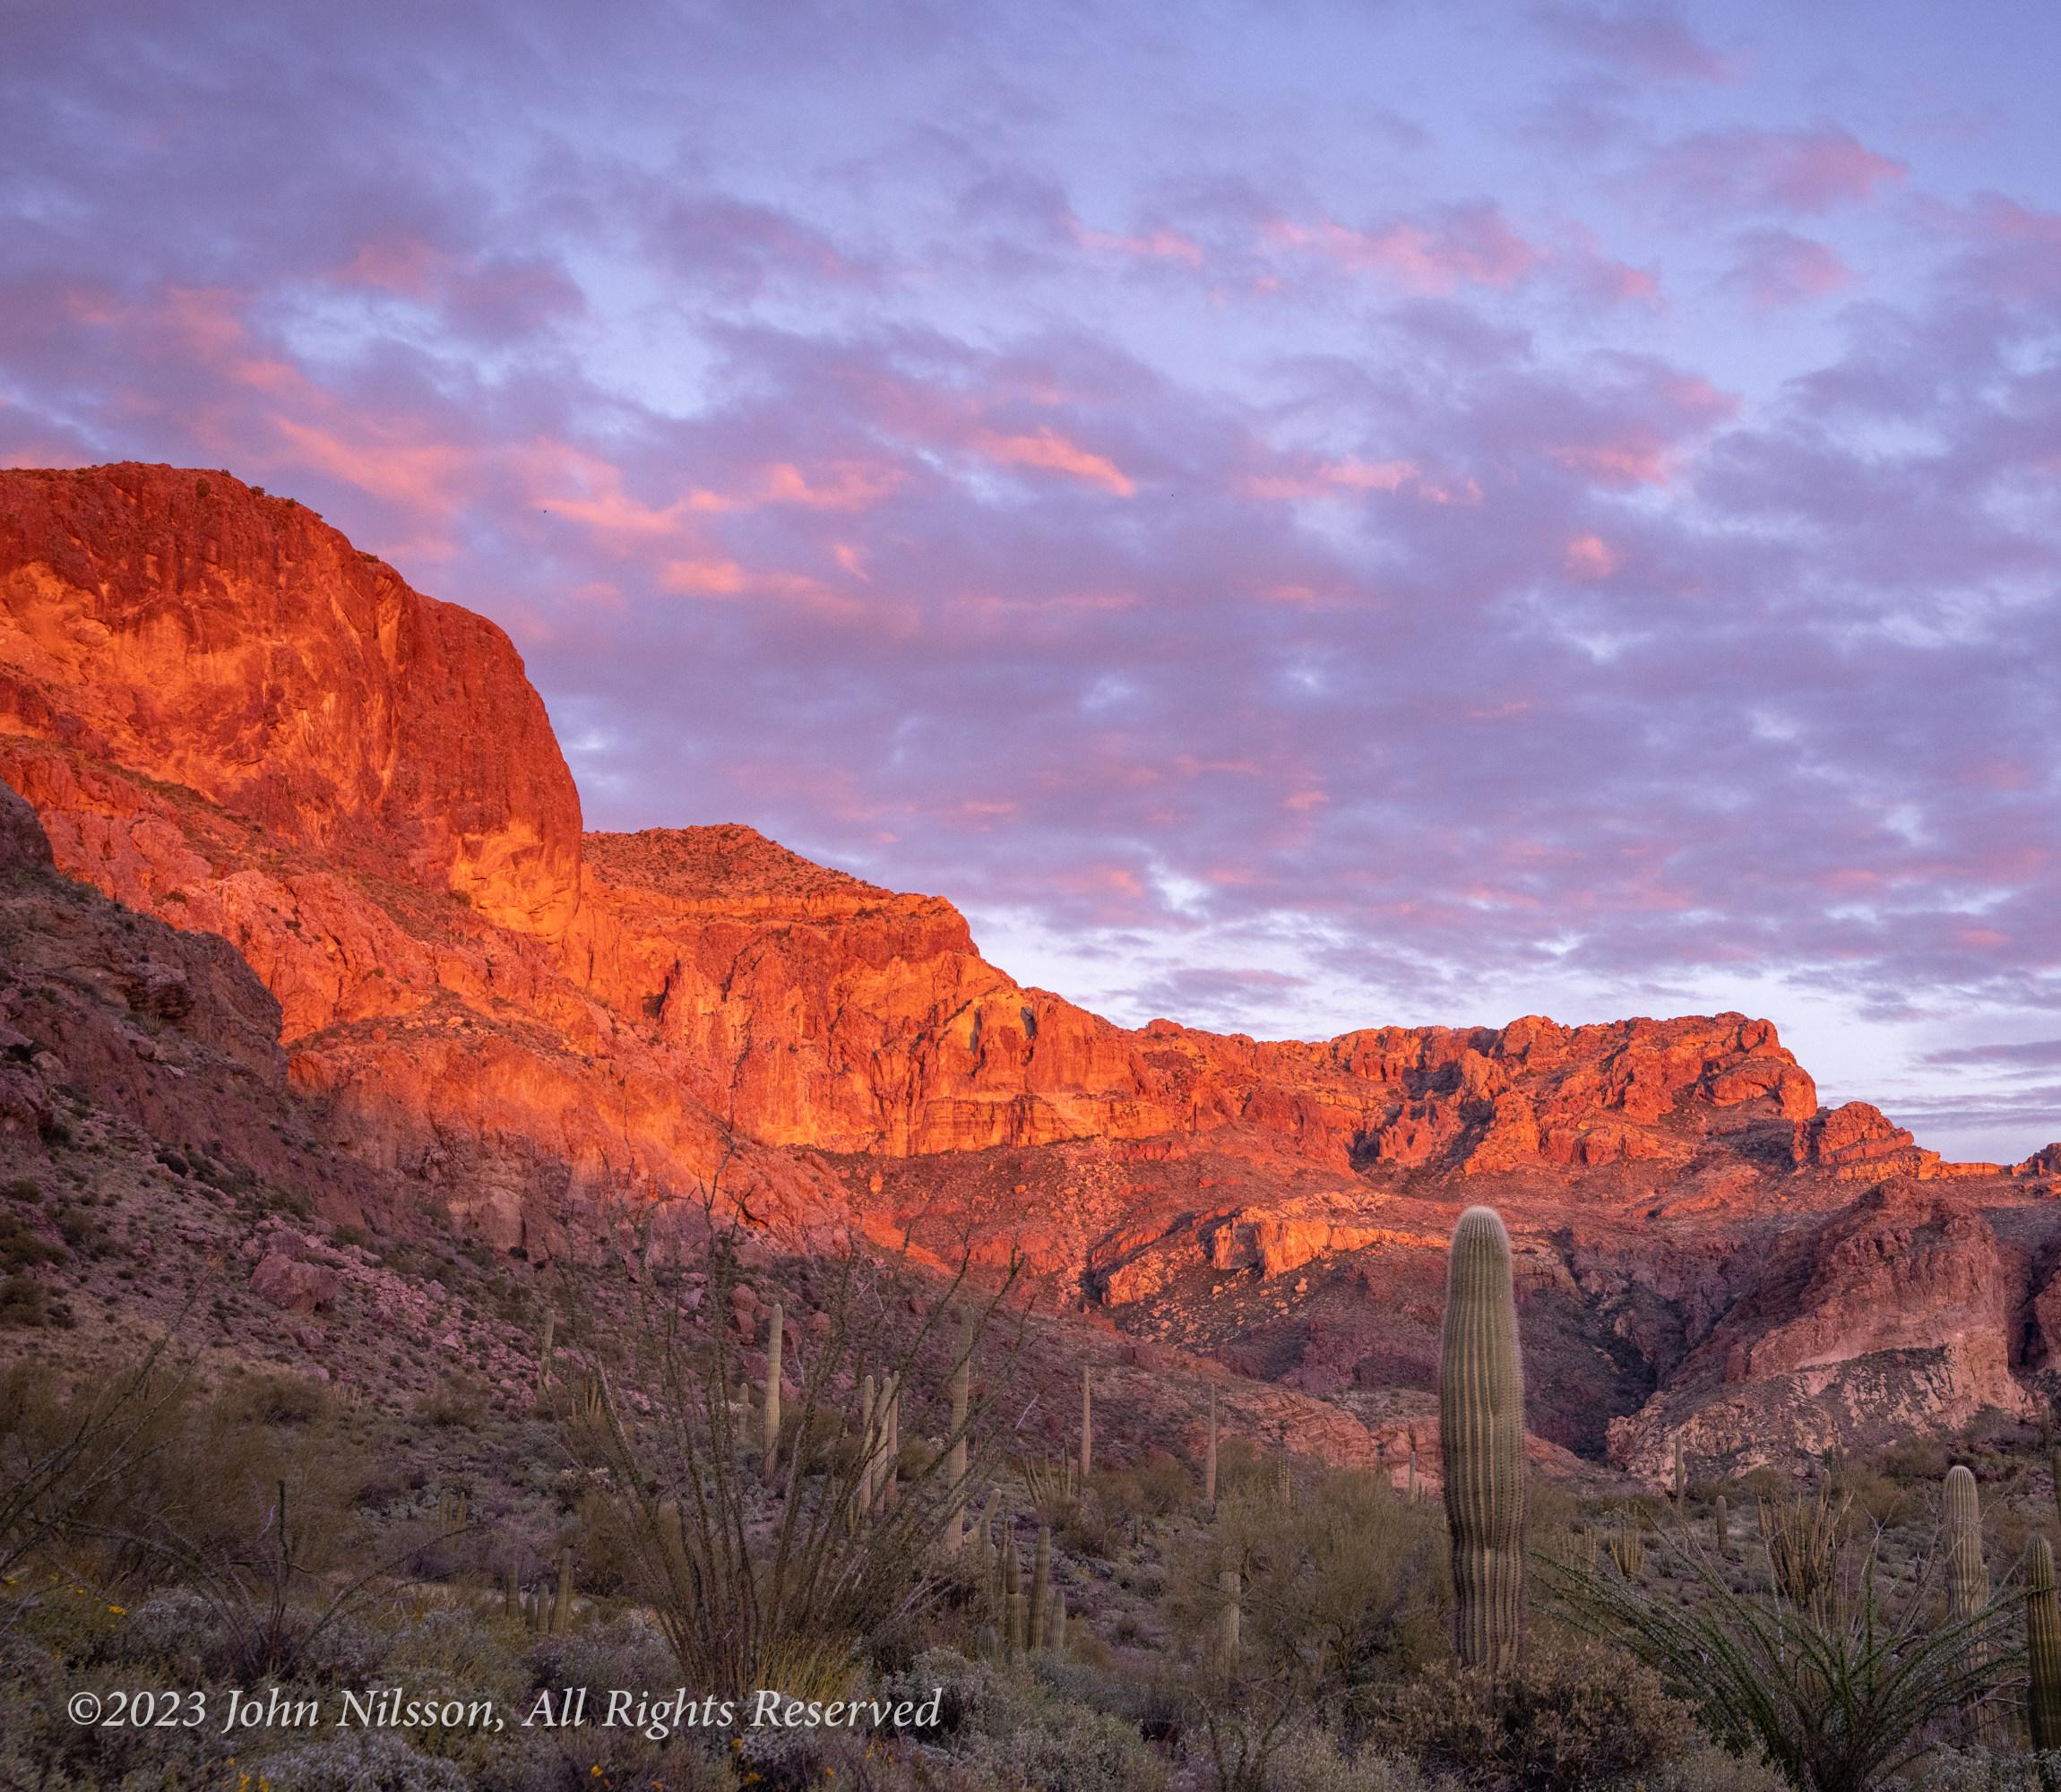
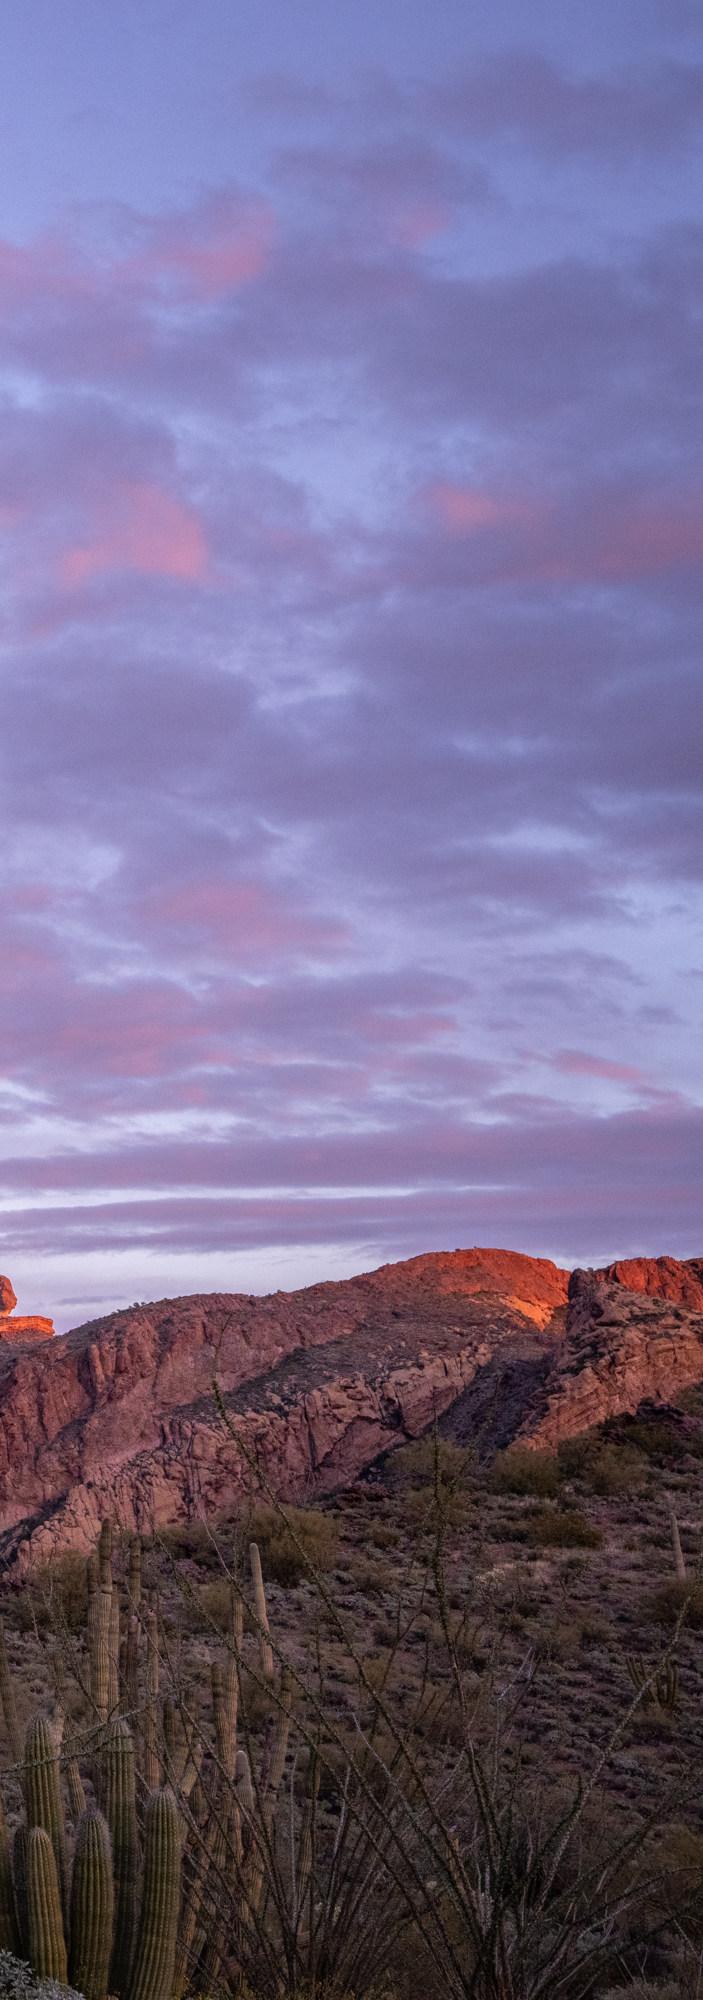
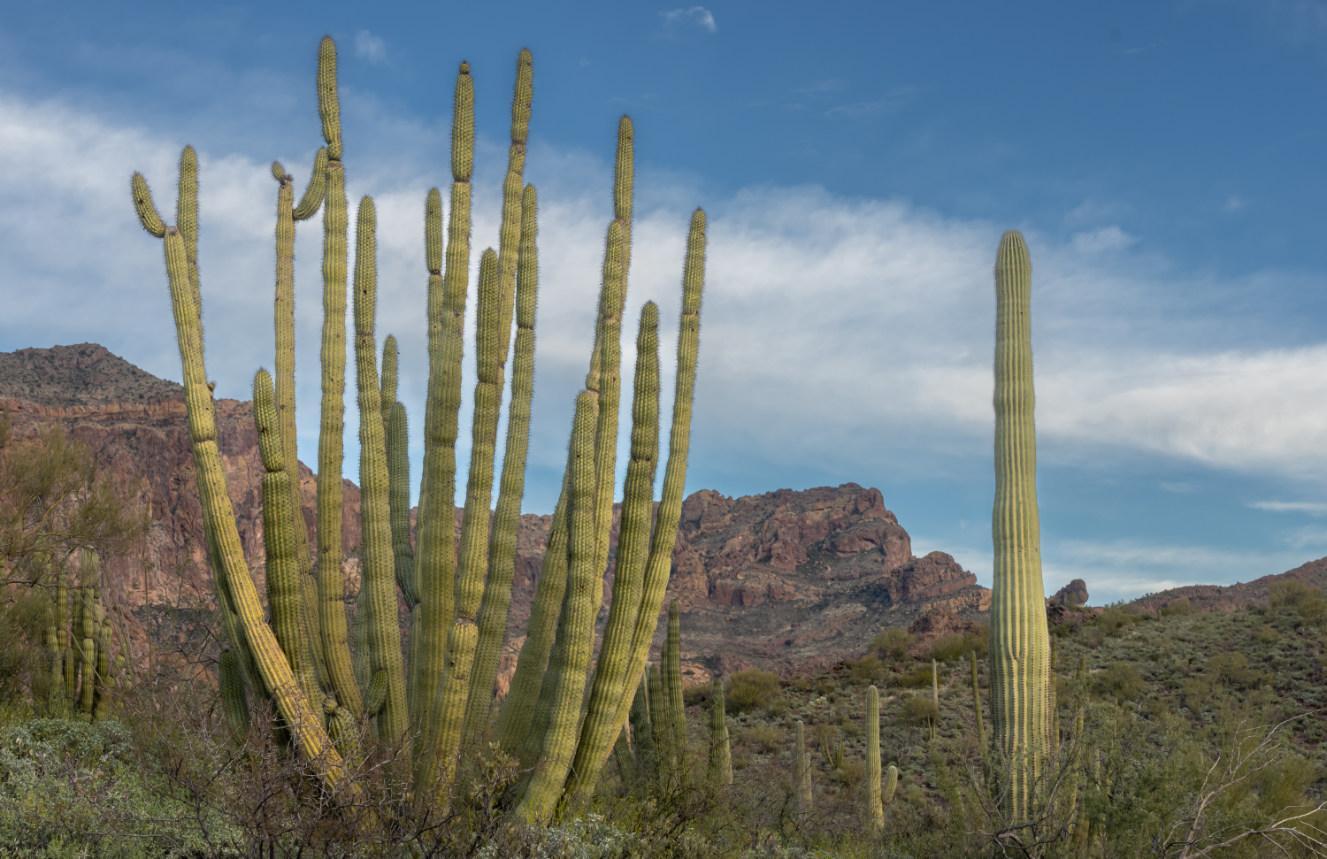
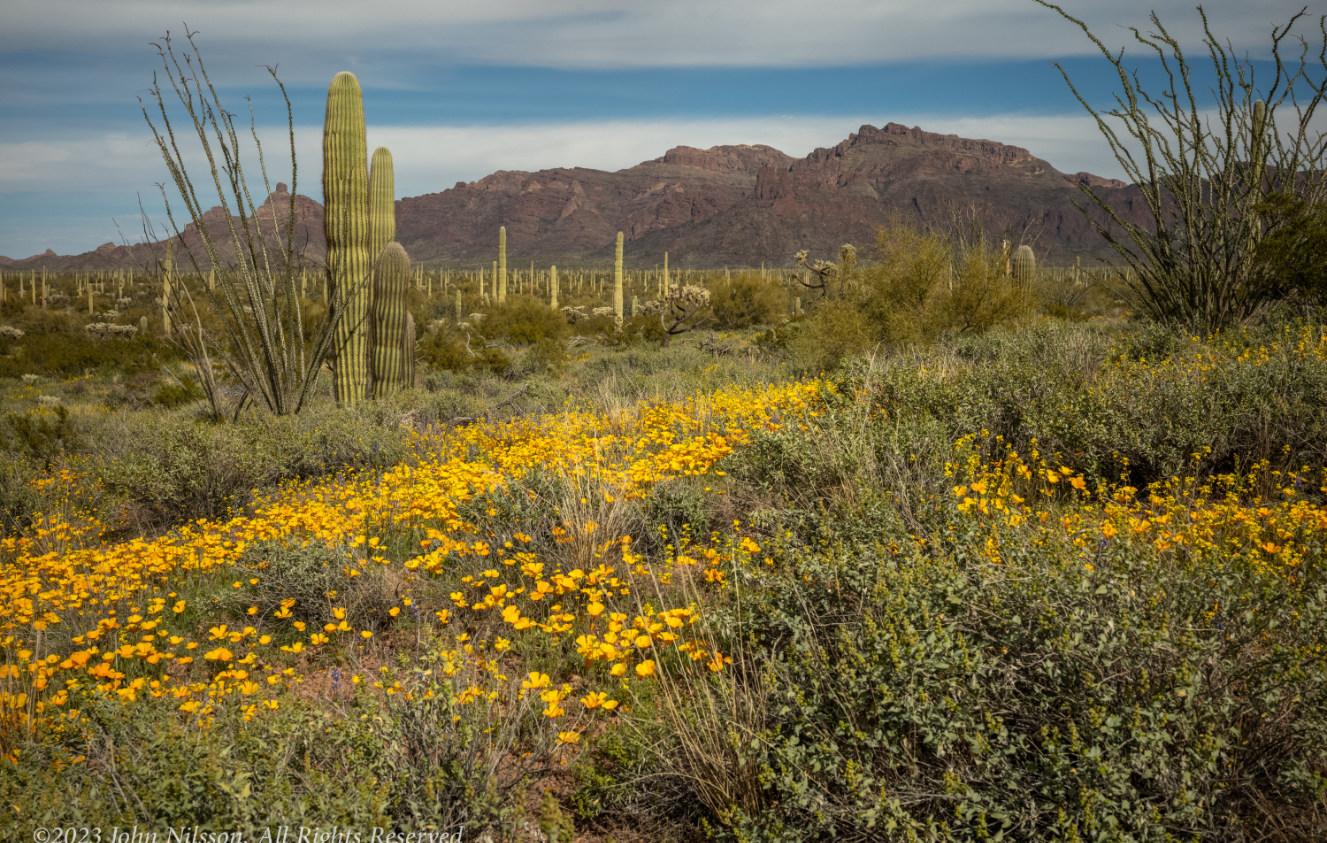
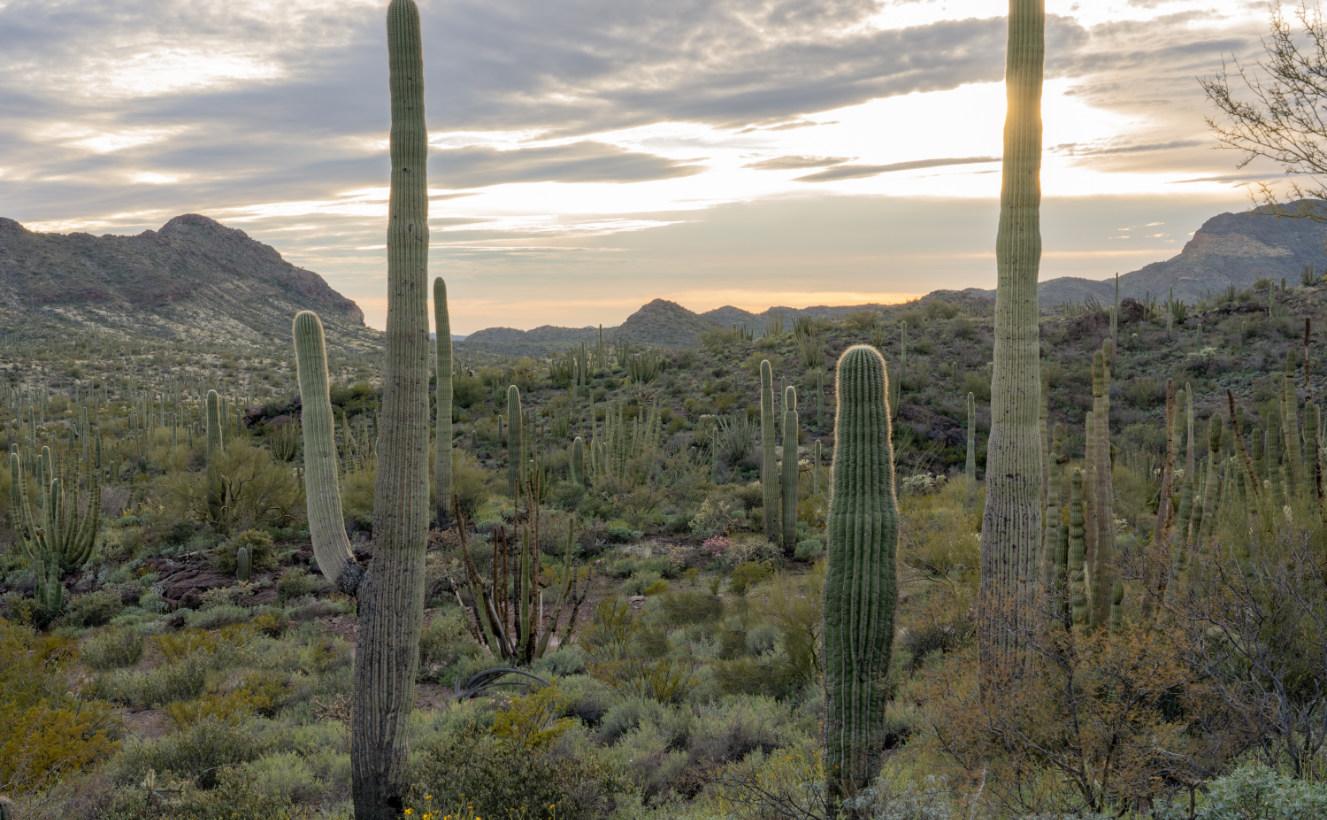
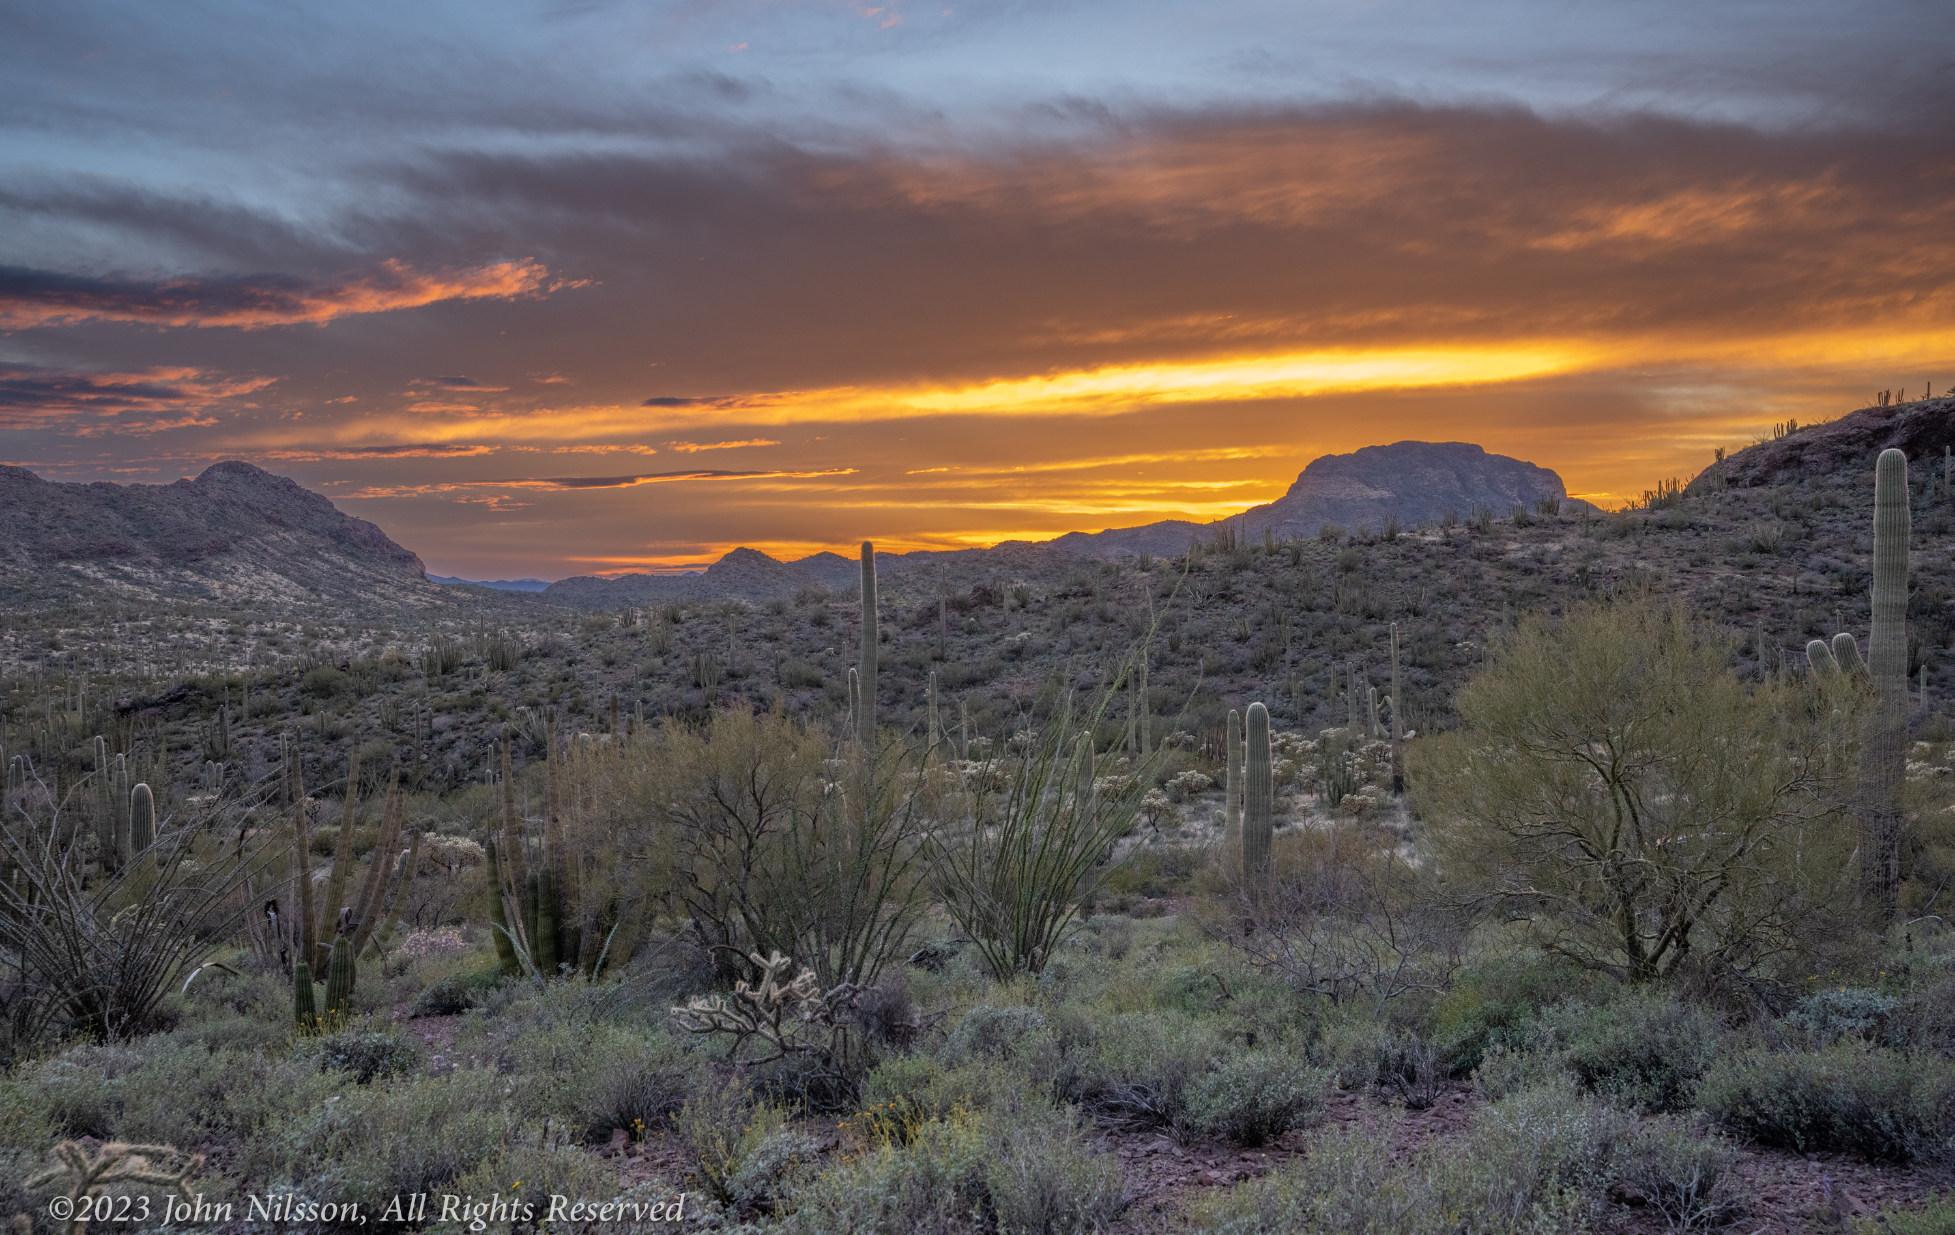
It was so wet in LA, SCCC members John Fisanotti, Mike Caley, Basil Katsaros, and I decided to meet in Ajo, AZ for an Arizona Highways PhotoScapes shoot in the Organ Pipe Cactus National Monument just north of the Mexican Border in central Arizona. Not a raindrop was to be found here, but we were treated to terrific sunset skies in a normally blue-sky environment. We also experienced a pristine desert landscape with every imaginable variety of cactus including the Organ Pipe. Our timing was perfect except we were a little early for the Cactus Flower bloom which appears to be a couple of weeks away.
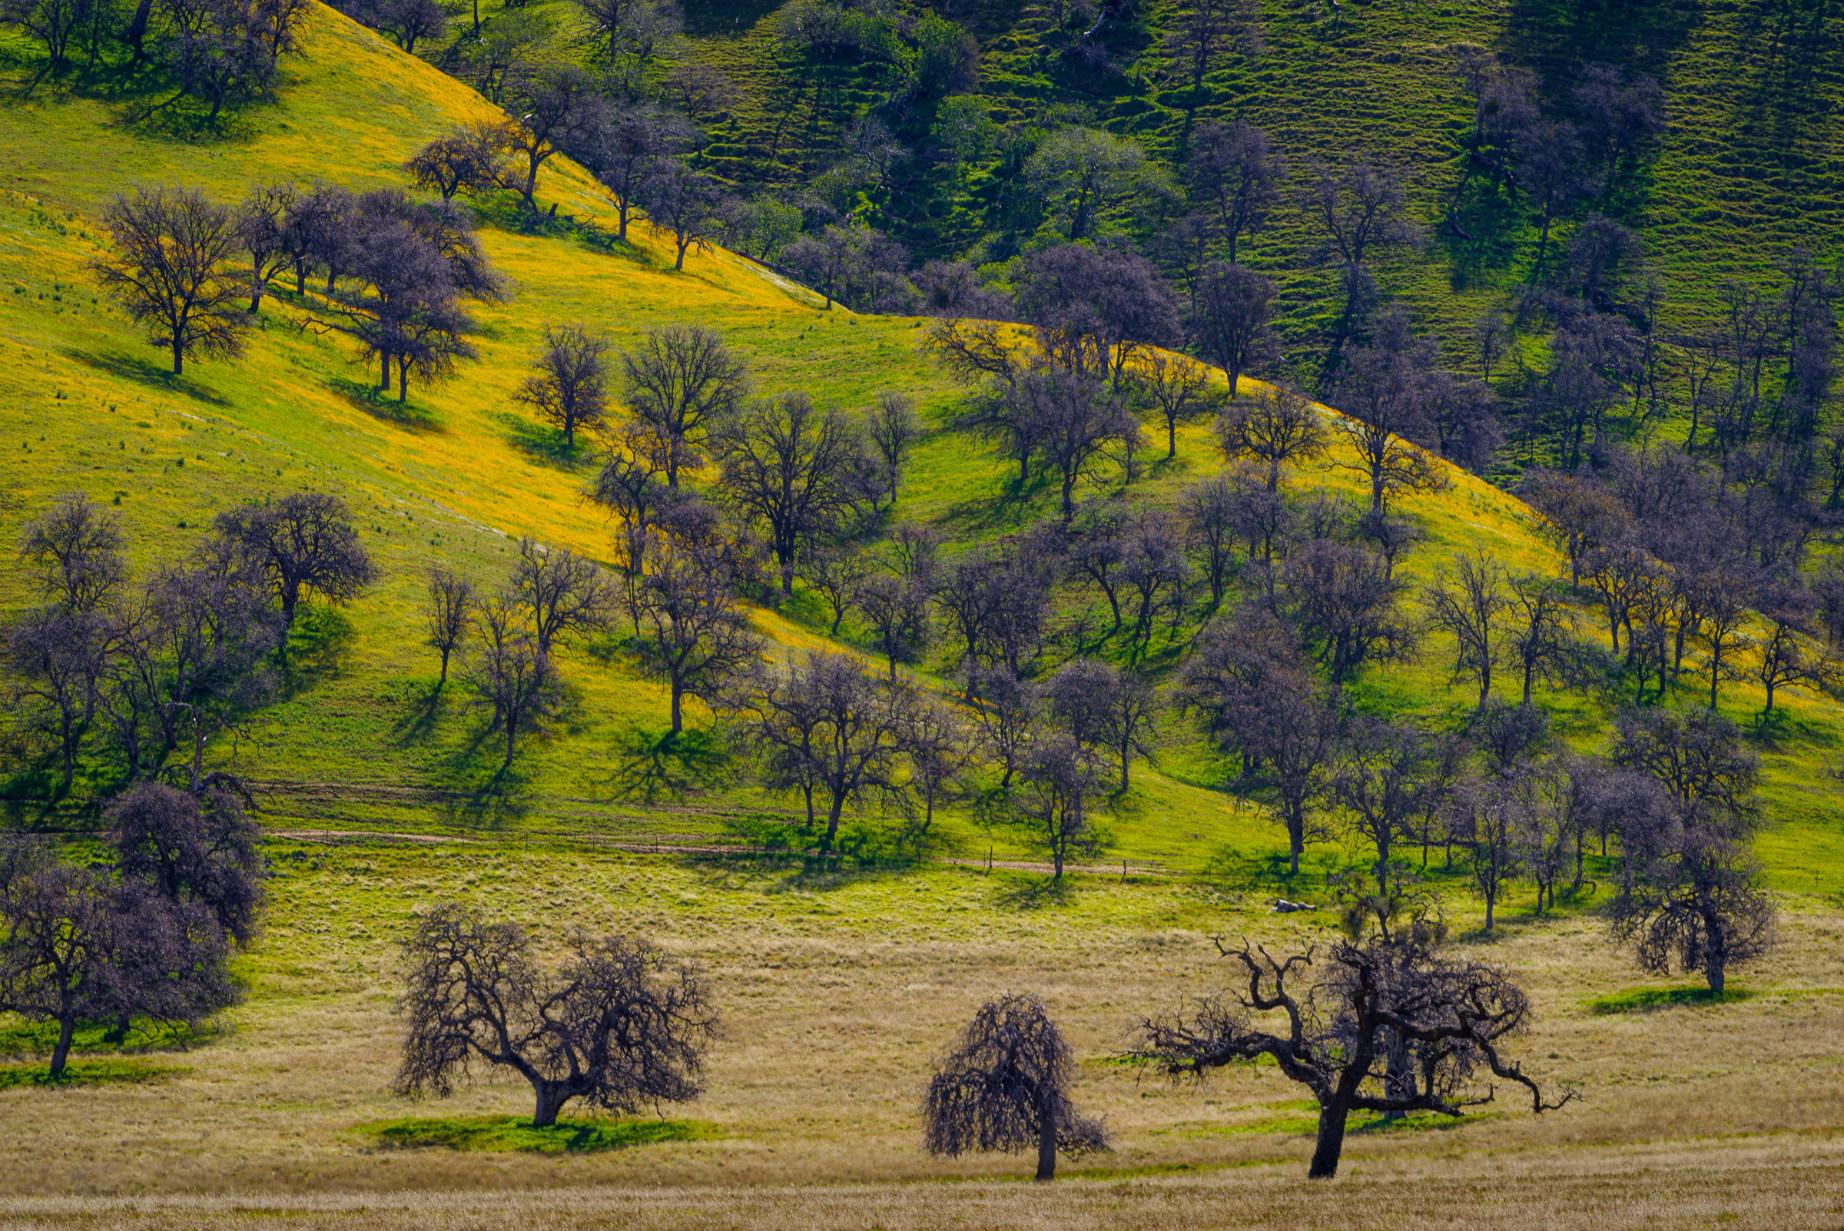
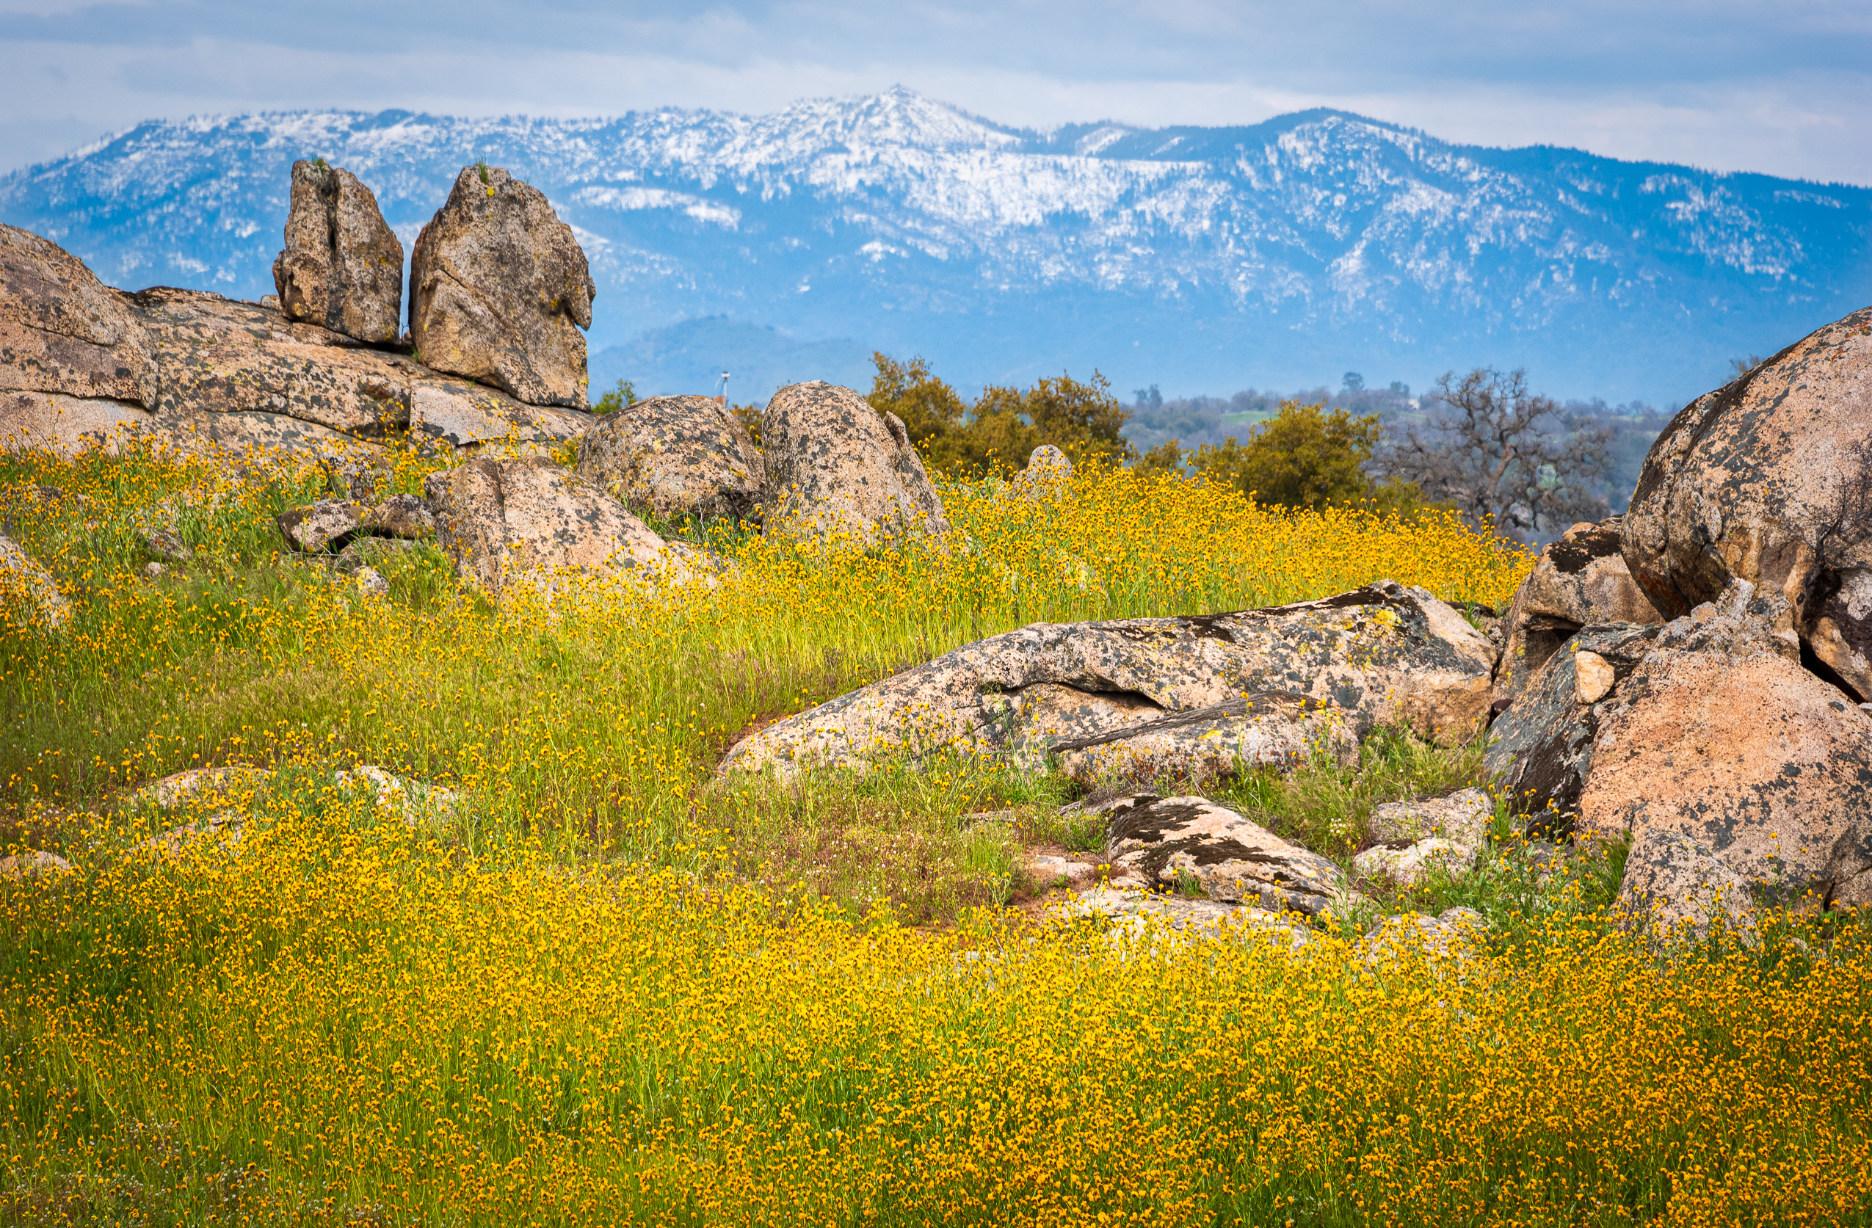
It has been a cold, wet, snowy month. However, when we went to the Sierra foothills recently we discovered Spring had suddenly made an appearance!
All photos © Velda Ruddock

All photos © John Clement
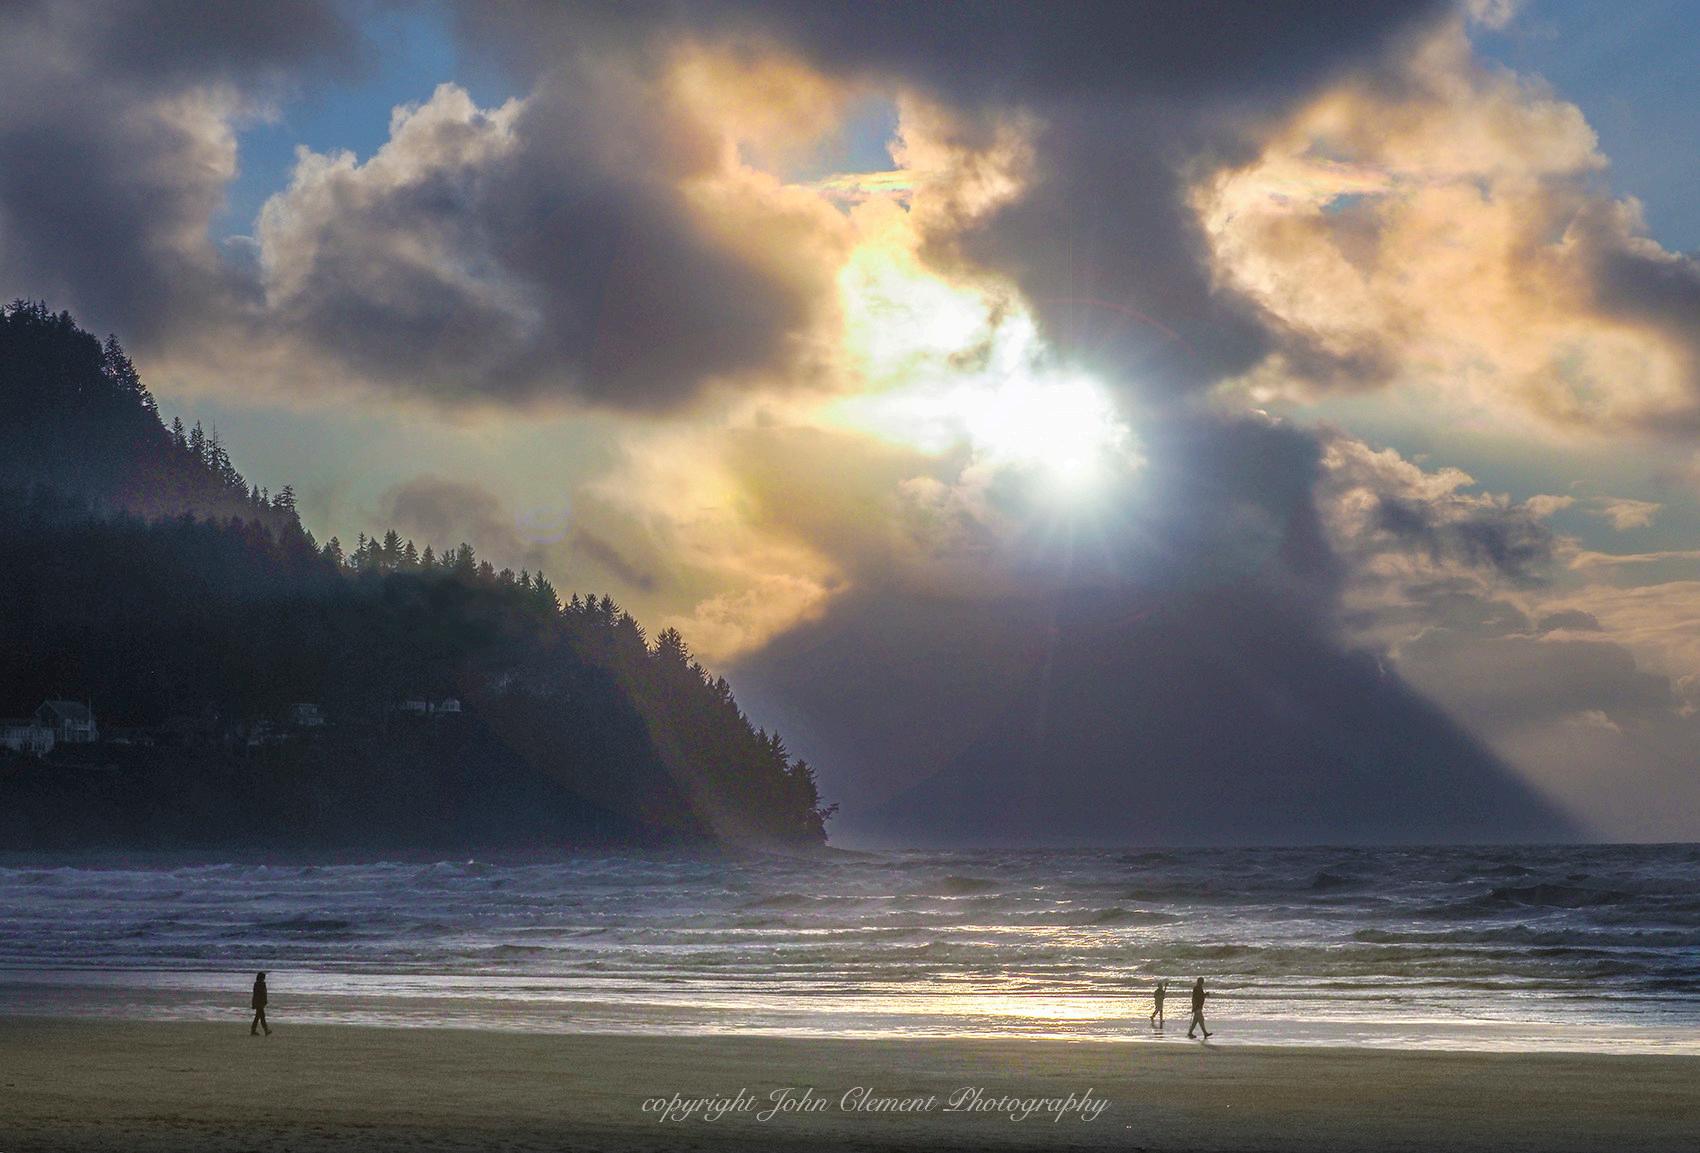
Walking in the Light.
Oregon Coast, Tillamook Head, 2002. Low heavy clouds created an unusual cloud shadow over the ocean.
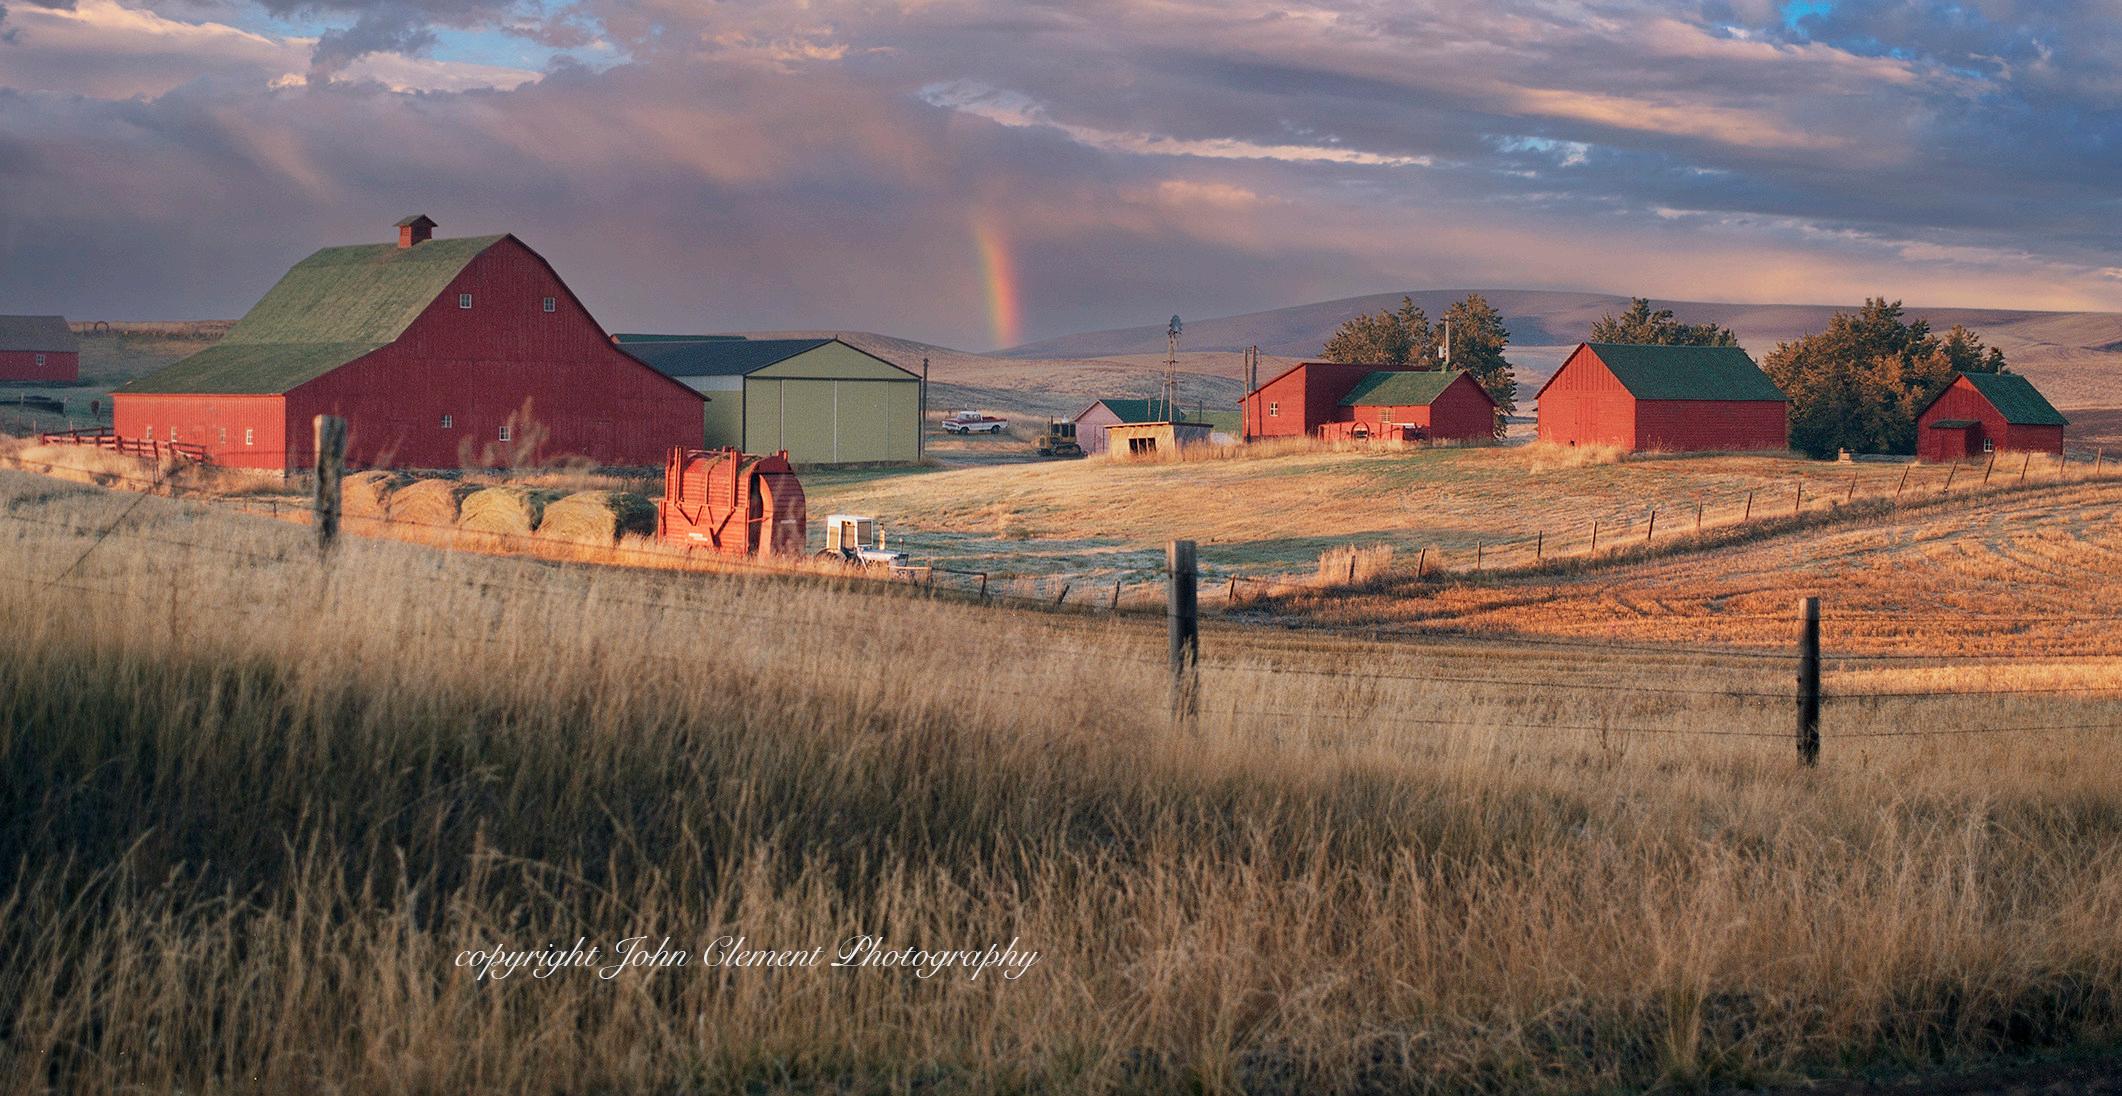
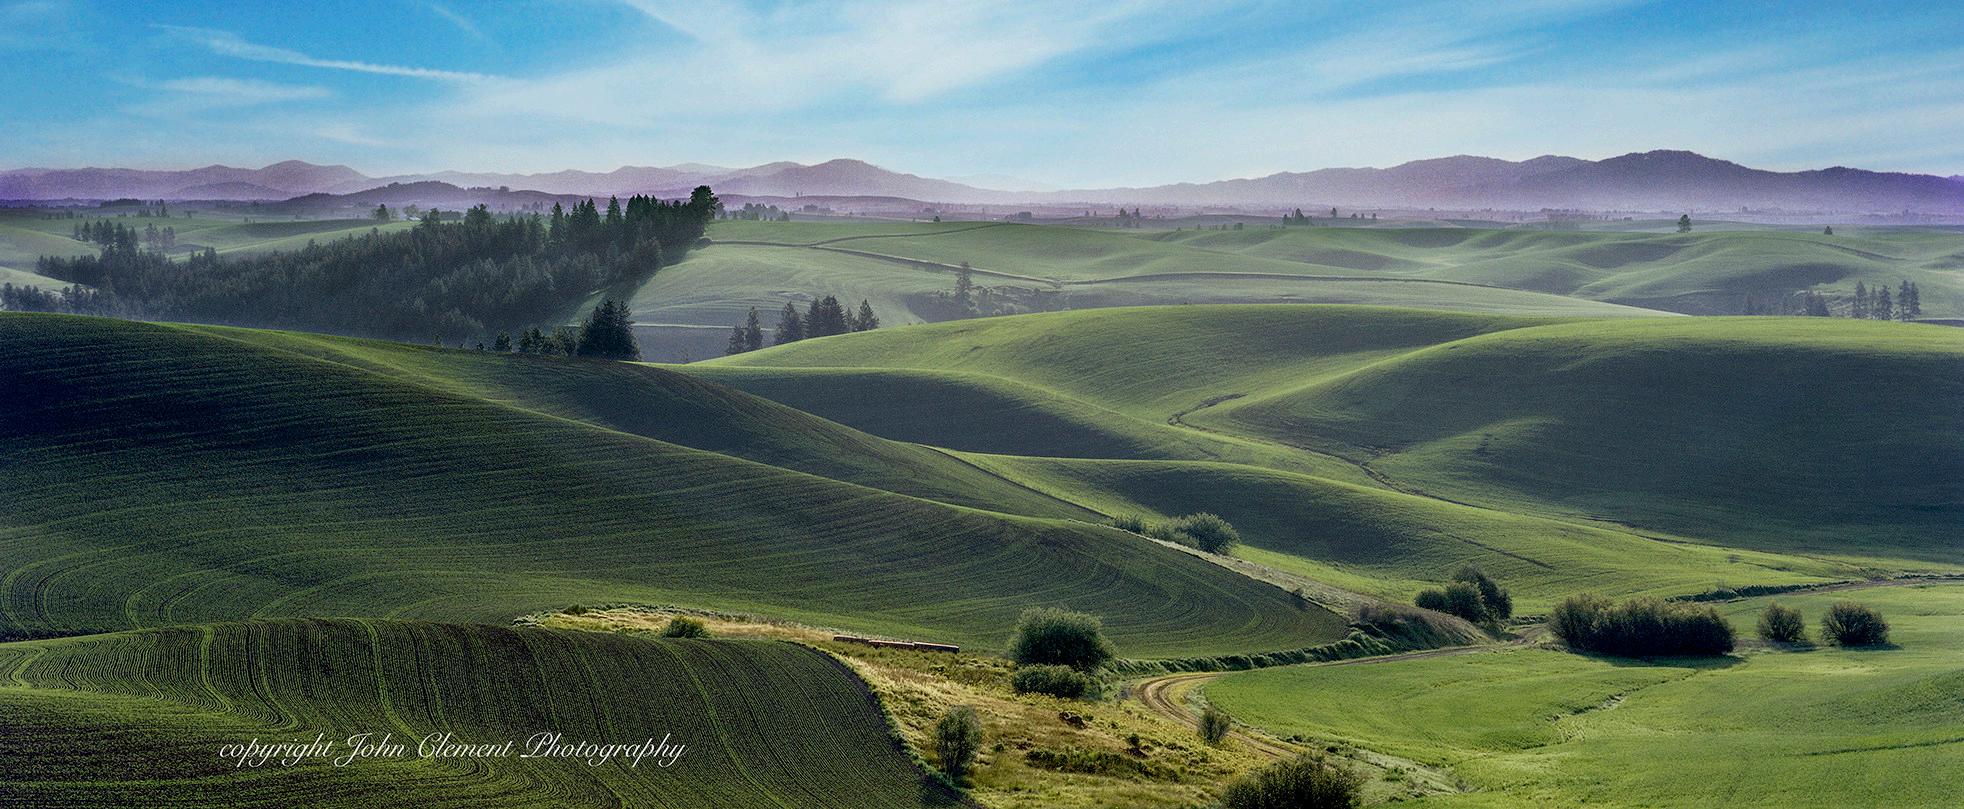
Morning Reds. West of Spokane, WA. This location has long been a favorite of mine since the mid-80’s. This image was taken in 1988 with my Mamiya RB 6x7 medium format film camera just after sunrise.
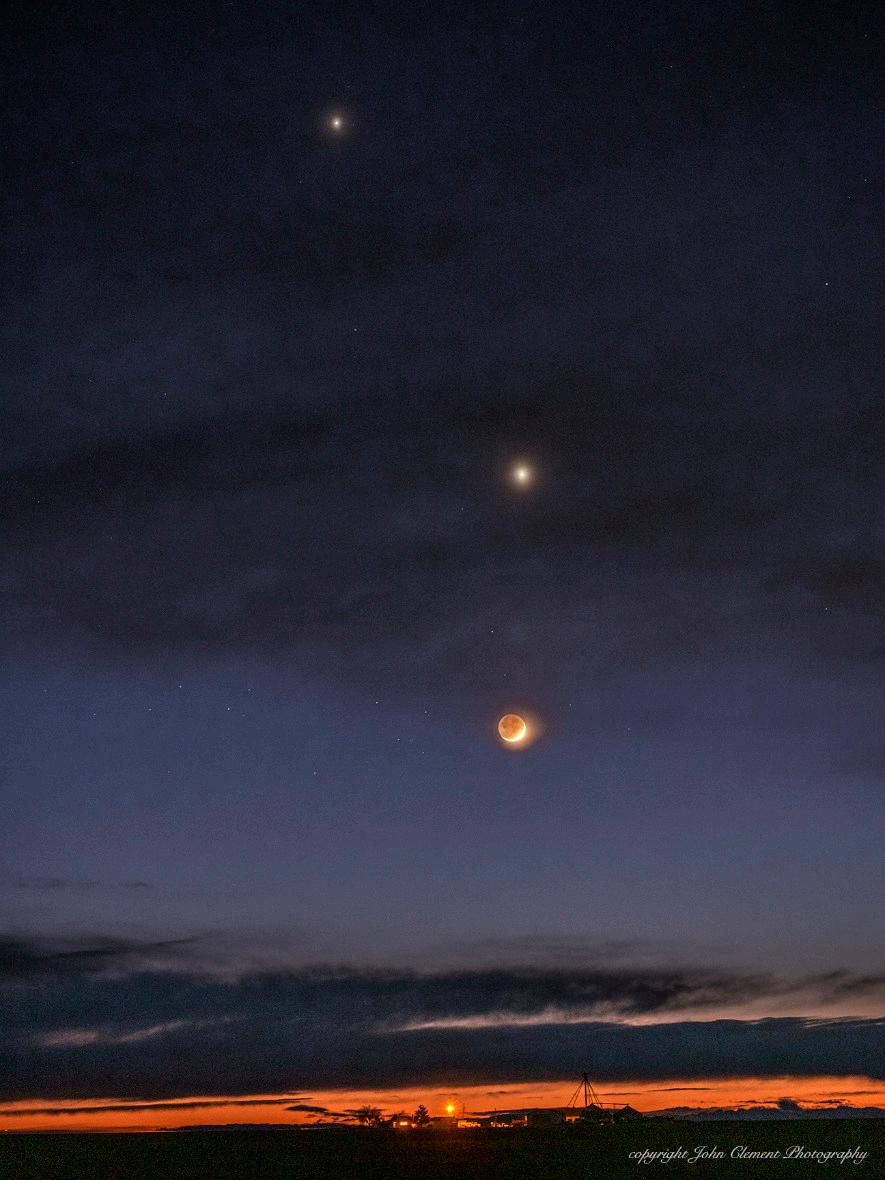
Convergence of New Moon, Jupiter, and Venus on February 21, 2023. Olympus OMD EM1-Mark II, 12-40mm lens ISO 1250.
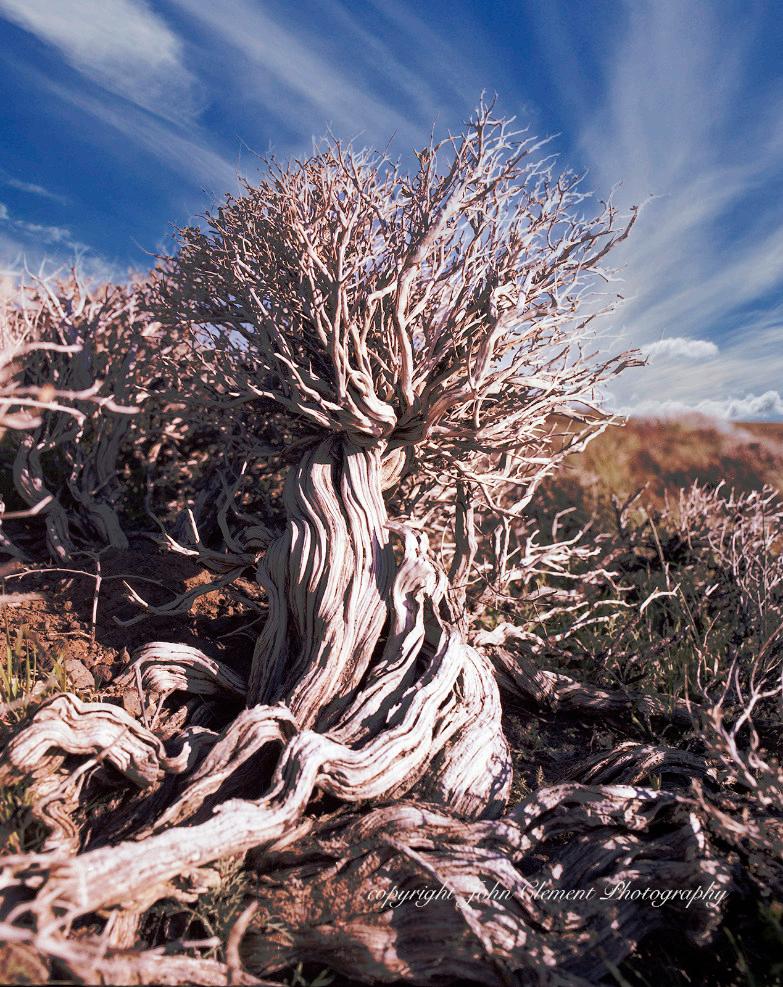
Ancient sage II near the summit of Rattlesnake Mt. Just under 4,000’ elevation. 1979. It lies on the Ebberheart-Fitzner Preserve on the Hanford Reservation here in Eastern, WA. Winds often exceed 100mph over its summit. The sage is only about 8 inches tall. Taken with my Mamiya RB 6x7 and 50mm lens.

Mist at Owens Ranch, December 2022. After a night of rain and snow mix and warming temperatures, I knew there would be some ground fog opportunities.
After a short hike to get my perspective,
Images from the saturated Sierra Foothills near Madera.
All photos © Joe Doherty
© Steve Anderson
© Dave Glazier
© Joe Doherty
Steve has explored the natural landscape of the San Gabriel range as well as the High Sierra using conventional film and digital photography for decades. He has self-published four photo books available through Blurb.com.
His interest in making personally significant contributions to theenvironmentalmovement started in college then expanded into becoming a life-time member of the Sierra Club and an Outings Leader. He has been a member of the Mono Lake committee for more than 40 years and was Chair of the Camera Committee for 5 years.
Steve's images haveappeared in Sierra magazine, Images of the West, A Portrait of Bodie, the Angeles Chapter Schedule of Activities covers, and the Camera Committee's Focal Points. He has shown work in local galleries, art shows, and was the San Gabriel Mountains National Monument Artist-in-Residence in 2015. Some of his monochrome images in Mono Lake Committee's literature weresignificantin helping to save Mono Lake.
sandersonimagery@outlook.com www.pbase.com/spanderson
John Clement began his career in photography in the early ‘70s after graduating from Central Washington University with a double major in Geology and Geography. Since then he has earned a Masters of Photography from the Professional Photographers of America. He has received over 65 regional, national and international awards for his pictorial and commercial work. His photographs grace the walls of many businesses in the Northwest and have been published in numerous calendars and coffee table books.
Clement has provided photographs for Country Music Magazine and Northwest Travel Magazine. He has supplied murals for the Seattle Seahawks Stadium and images for The Carousel of Dreams in Kennewick, WA.
Current projects include 17 – 4x8 foot glass panels featuring his landscapes in Eastern Washington for the Pasco Airport Remodel. Last year he finished a major project for the Othello Medical Clinic where almost 200 images were used to decorate the facilities.
www.johnclementgallery.com
John Clement Photography (Face Book) Allied Arts Gallery in Richland, WA.
Joe Doherty grew up in Los Angeles and developed his first roll of film in 1972. He has been a visual communicator ever since. He spent his teens and twenties working in photography, much of it behind a camera as a freelance editorial shooter.
Doherty switched careers when his son was born, earning a PhD in political science from UCLA, specializing in American politics and research methods. This led to an opportunity to run a research center and teach at UCLA Law, where he became best known as an empirical bankruptcy scholar.
After retiring from UCLA in 2016 Doherty continued to consult, but now he and his wife, Velda Ruddock, spend much of their time in the field, across the West, capturing the landscape.
www.joedohertyphotography.com
John Fisanotti was a photography major in his first three years of college. He has used 35mm, 2-1/4 medium format and 4x5 view cameras. He worked briefly in a commercial photo laboratory.
In 1980, Fisanotti pivoted from photography and began his 32-year career in public service. Fisanotti worked for Redevelopment Agencies at four different Southern California cities.
After retiring from public service in 2012, Fisanotti continued his photographic interests. He concentrates on outdoors, landscape, travel and astronomical images (view here at http://www.johnfisanottiphotography.com). Since 2018, he expanded his repertoire to include architectural and real estate photography (view here at http://www.architecturalphotosbyfisanotti.com).
Fisanotti lives In La Crescenta and can be contacted at either: jfisanotti@sbcglobal.net or fisanottifotos@gmail.com
Dave Glazier saved his allowance to buy his first SLR in 1974 to photograph for his high school newspaper. After college he deferred grad school and joined the Navy to seek adventure and see the world. For the next twenty-one years he shot hundreds of rolls of slide film, focused on ships and travel, as he got to sail every ocean except the Arctic and visit forty countries. After commanding a guided missile frigate, Dave decided it was time to grow up, settle down and be home for his kids. He retired, attended law school; and is now in his second career as a law professor.
Glazier got seriously back into shooting a couple of years ago when his son enrolled in a high school photography class and they began a two year odyssey of weekly photo outings together. After years of being entirely self-taught, Dave realized that good digital photography was far more complex than shooting film and began taking advantage of the wealth of online learning opportunities that emerged during the pandemic and has taken classes offered by the Los Angeles Center of Photography and the Professional Photographers of California.
Charlie was born in South Africa and emigrated to the U.S. at age 14. He lives in the Portland, Oregon area, and travels frequently to destinations in Oregon, Washington, Nevada, and California with his wife, Karen, in their camper. They have also made trips to Vietnam, Malaysia, Mongolia, Scotland, Hawaii, and the Caribbean.
Photography has been in Charlie’s DNA since age 7, when he experimented with a box camera and his dad’s twin-lens reflex. He got his first SLR, a Nikkormat, while in college, and used it extensively for the next twenty years shooting mostly transparencies and B&W. He learned darkroom skills and was the lead photographer for his college yearbook. Charlie’s photography got a boost in 2008 when he got his first DSLR. Since then he has taken several workshops from well-known landscape photographers that influenced his approach to photography.
Although his primary interest is landscapes, he enjoys urban, astro, animal, travel, and abstract photography. Charlie taught photography at the high school level for four years and has had several successful shows in the Portland area. He has sold many of his prints, the largest of which was a mural that measured 8x21 feet.
charliehymanphoto@gmail.com www.charliehymanphoto.org
Larry Miller bought his first SLR camera in 1985 to document hikes in the local mountains. In fact, his first Sierra Club Camera Committee outing was a wildflower photo shoot in the Santa Monica Mountains led by Steve Cohen in 1991. Since then the SCCC has introduced him to many other scenic destinations, including the Antelope Valley California Poppy Reserve, the Gorman hills, and Saddleback Butte State Park.
Miller’s own photography trips gradually expanded in scope over the years to include most of the western National Parks and National Monuments, with the Colorado Plateau becoming a personal favorite.
Photography took a backseat to Miller’s career during the 32+ years that he worked as a radar systems engineer at Hughes Aircraft/Raytheon Company.
Since retiring in 2013, he has been able to devote more time to developing his photographic skills. Experiencing and sharing the beauty of nature continues to be Miller’s primary motivation.
lemiller49@gmail.com
John Nilsson has a fond memory of his father dragging him to the Denver Museum of Natural History on a winter Sunday afternoon. His father had just purchased a Bosely 35mm camera and had decided he desperately wanted to photograph one of the dioramas of several Seal Lions in a beautiful blue halflight of the Arctic winter. The photo required a tricky long exposure and the transparency his father showed him several weeks later was spectacular and mysterious to Nilsson’s young eyes. Although the demands of Medical School made this photo one of the first and last Nilsson’s Dad shot, at five years old the son was hooked.
The arrival of the digital age brought photography back to Nilsson as a conscious endeavor - first as a pastime enjoyed with friends who were also afflicted, and then as a practitioner of real estate and architectural photography during his 40 years as a real estate broker.
Since retiring and moving to Los Angeles, Nilsson continued his hobby as a nature and landscape photographer through active membership in the Sierra Club Angeles Chapter Camera Committee, as well as his vocation as a real estate photographer through his company Oz Images LA. The camera is now a tool for adventure!
www.OzImagesLA.com
My father taught me photography at the age of 14, and I shot landscapes while backpacking until my early 20s, when I hung it up. I even had my own dark room for a while. When digital arrived in my early 50s, it rekindled my interest.
At first it was landscapes again, but after I captured a few birds, it occurred to me that I could ID the species. After about ten species, I decided to join some bird photography walks, and after about 30
species, I wondered what it would take to get to 100. After retiring, it became my passion. My count is now around 525, and I travel locally and worldwide for wildlife photography.
With degrees in biochemistry (half biology and half chemistry) and electrical engineering, I love being out in nature and exploring photography technology. There are endless things to learn, an entirely new community, and good exercise too! Although I no longer have a presence on FB or IG, I do send out occasional emails with photos, or a link to my Flickr page to friends, and folks I've met along the trail. I hope it encourages people to value wildlife.
paulreinstein@me.com www.flickr.com/photos/preinstein54/albums
Velda Ruddock
What brings us joy? For me, curiosity and creativity rank highly. In my career curiosity led me to research, and creativity led me to the setting of a global advertising and marketing agency. My husband, Joe Doherty, also loved research (imagine our first dates!) and we both photographed wherever we went. By 2016 we had both left our “day jobs,” and started traveling – and photographing nature – big and small. Our four-wheel-drive popup camper allowed us to go to areas many others can’t, and digital cameras and darkrooms gave us the flexibility to learn, fail, and succeed in ways that were unexpected and delightful.
The pandemic stopped most of our travel in 2020 but it gave us the opportunity to explore other photographic projects. For me that was photographing and sharing beautiful flowers, and called the series, "Flowers in a Time of Quarantine."
My photos have been published in two Lenswork books (Our Magnificent Planet and Trilogies), Shutterbug, and in Sierra Club’s Focal Points Magazine. Also, my images have hung in several galleries, including a two-woman show January 2023. www.veldaruddock.com VeldaRuddockPhotography@gmail.com