The MupasMini Instruction Manual


Setting up your MUPAS Mini device is quick and straightforward, requiring only a few simple steps that can be completed in a few minutes. Once configured, the device will operate seamlessly without ongoing maintenance. To set up and monitor your device's readings, you will need the unique serial number, which is located on the back of your unit.

The MUPAS Mini monitors and records environmental changes in your home or office. To achieve the most accurate results, choose a location carefully
● Identify Key Areas: Select a spot where you have noticed unusual phenomena, such as strange sensations, visions, or sounds. These locations provide the best opportunity for MUPAS’s sensors to detect simultaneous environmental changes.
● Check Wi-Fi Signal: Ensure the device has a strong Wi-Fi connection. The device may not connect properly if the chosen spot is too far from your router. You will also need to know your WifI name and password.
● Ensure Power Access: The device requires a nearby power outlet. Make sure the location you select allows for an easy and reliable connection to power
By carefully considering placement, you’ll maximize the effectiveness of your MUPAS Mini.
First time Powering up your MUPAS Device using a Wi-Fi Connection
After selecting the optimal location for your MUPAS Mini device, connect the power adapter to nearby outlet. Within few minutes, the following screen
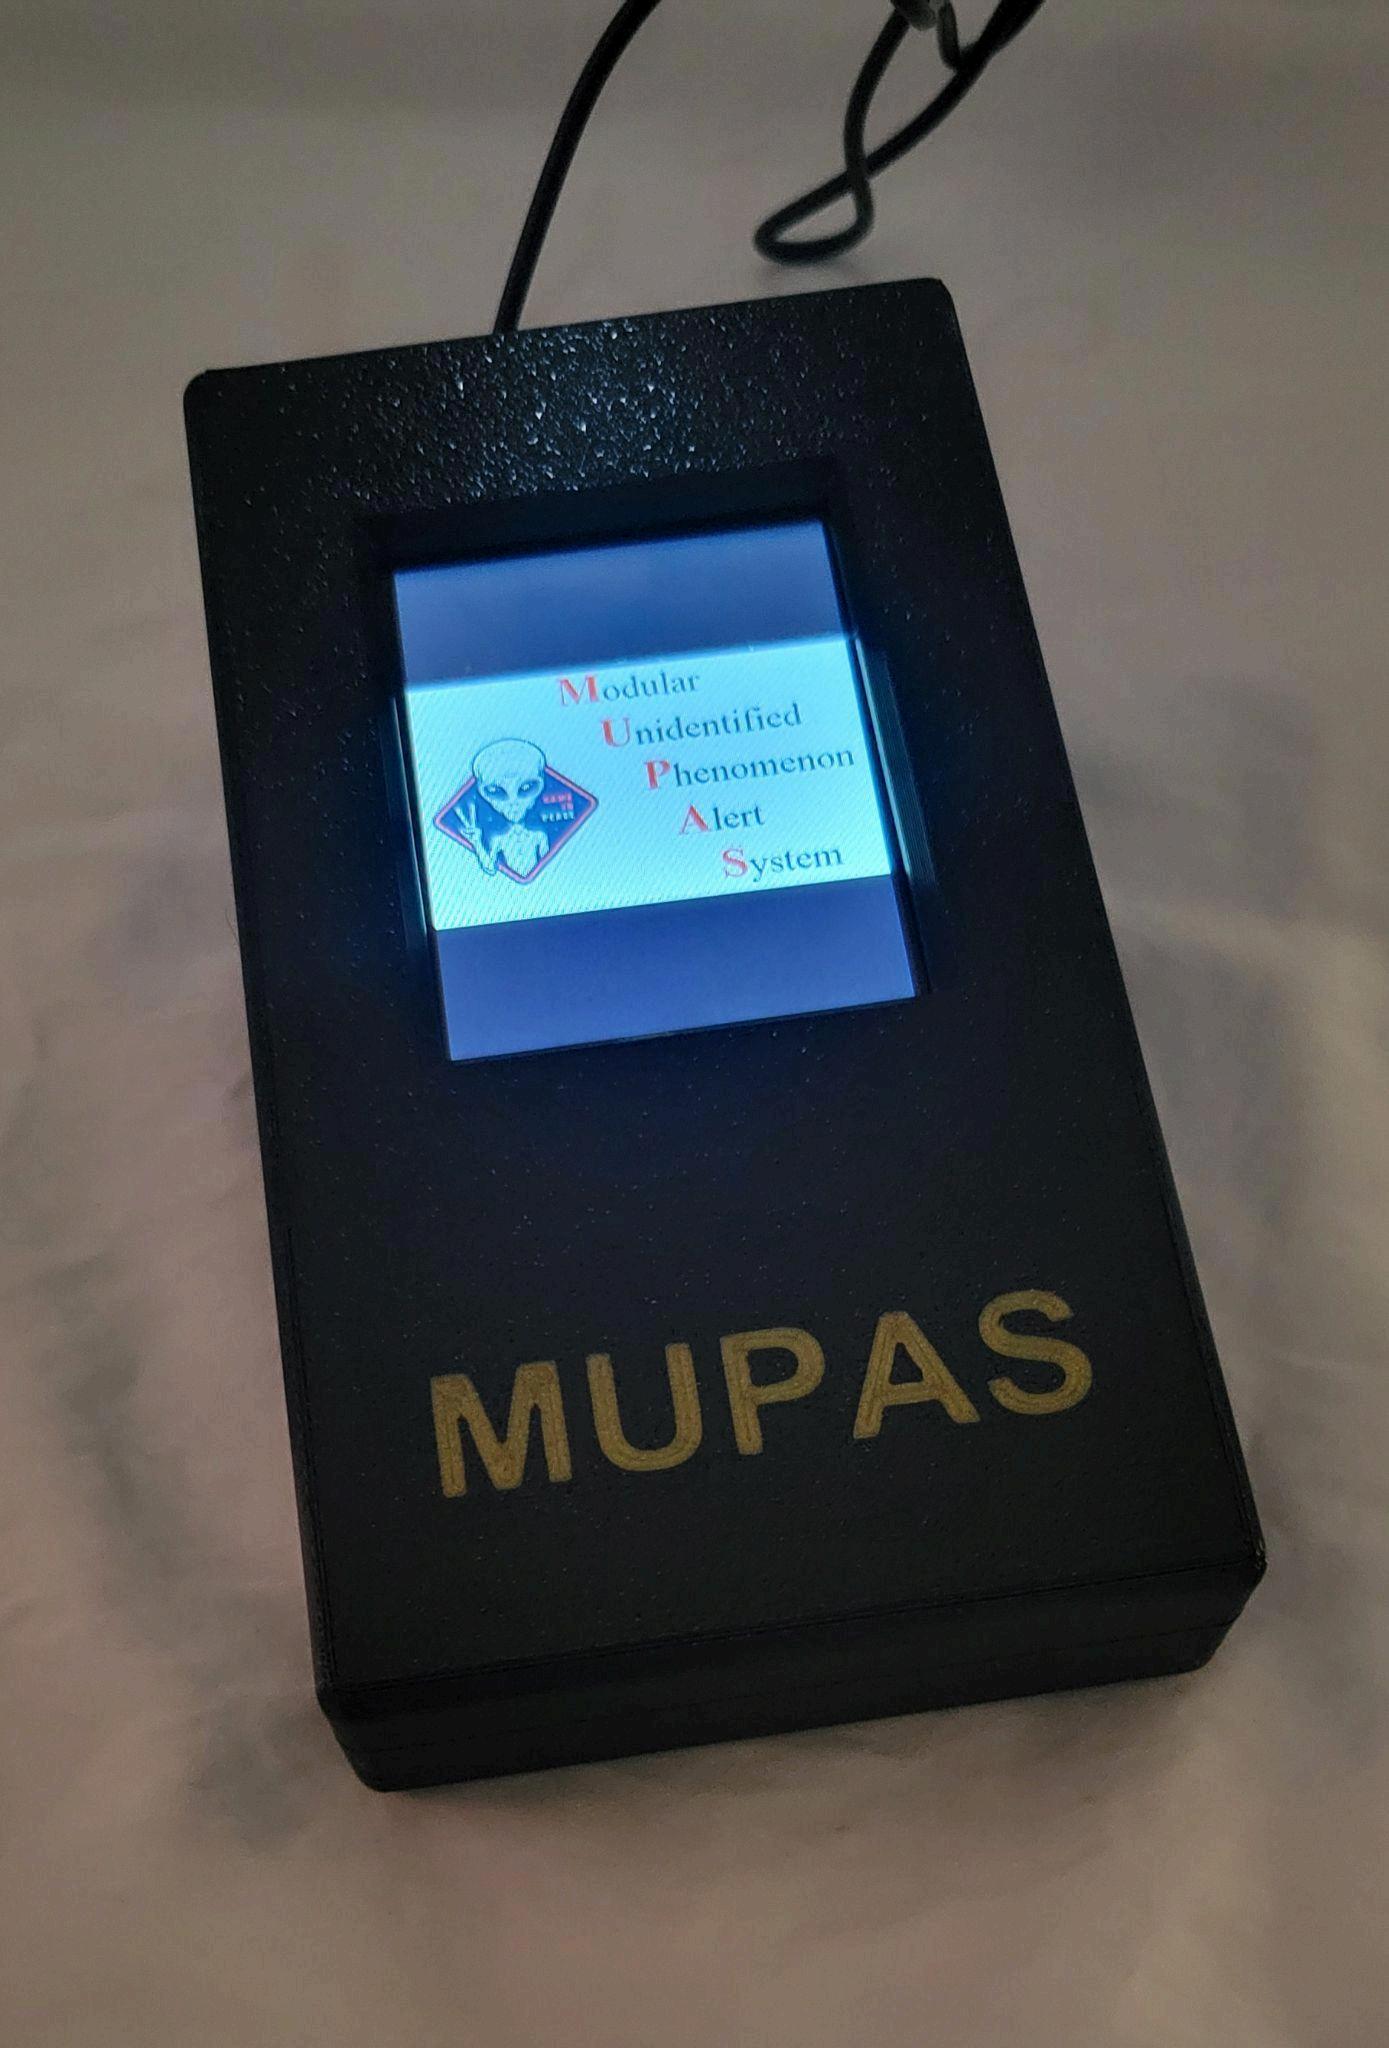
Immediately spinner. This is your home screen, which indicates that your unit is properly plugged in and has begun uploading data.
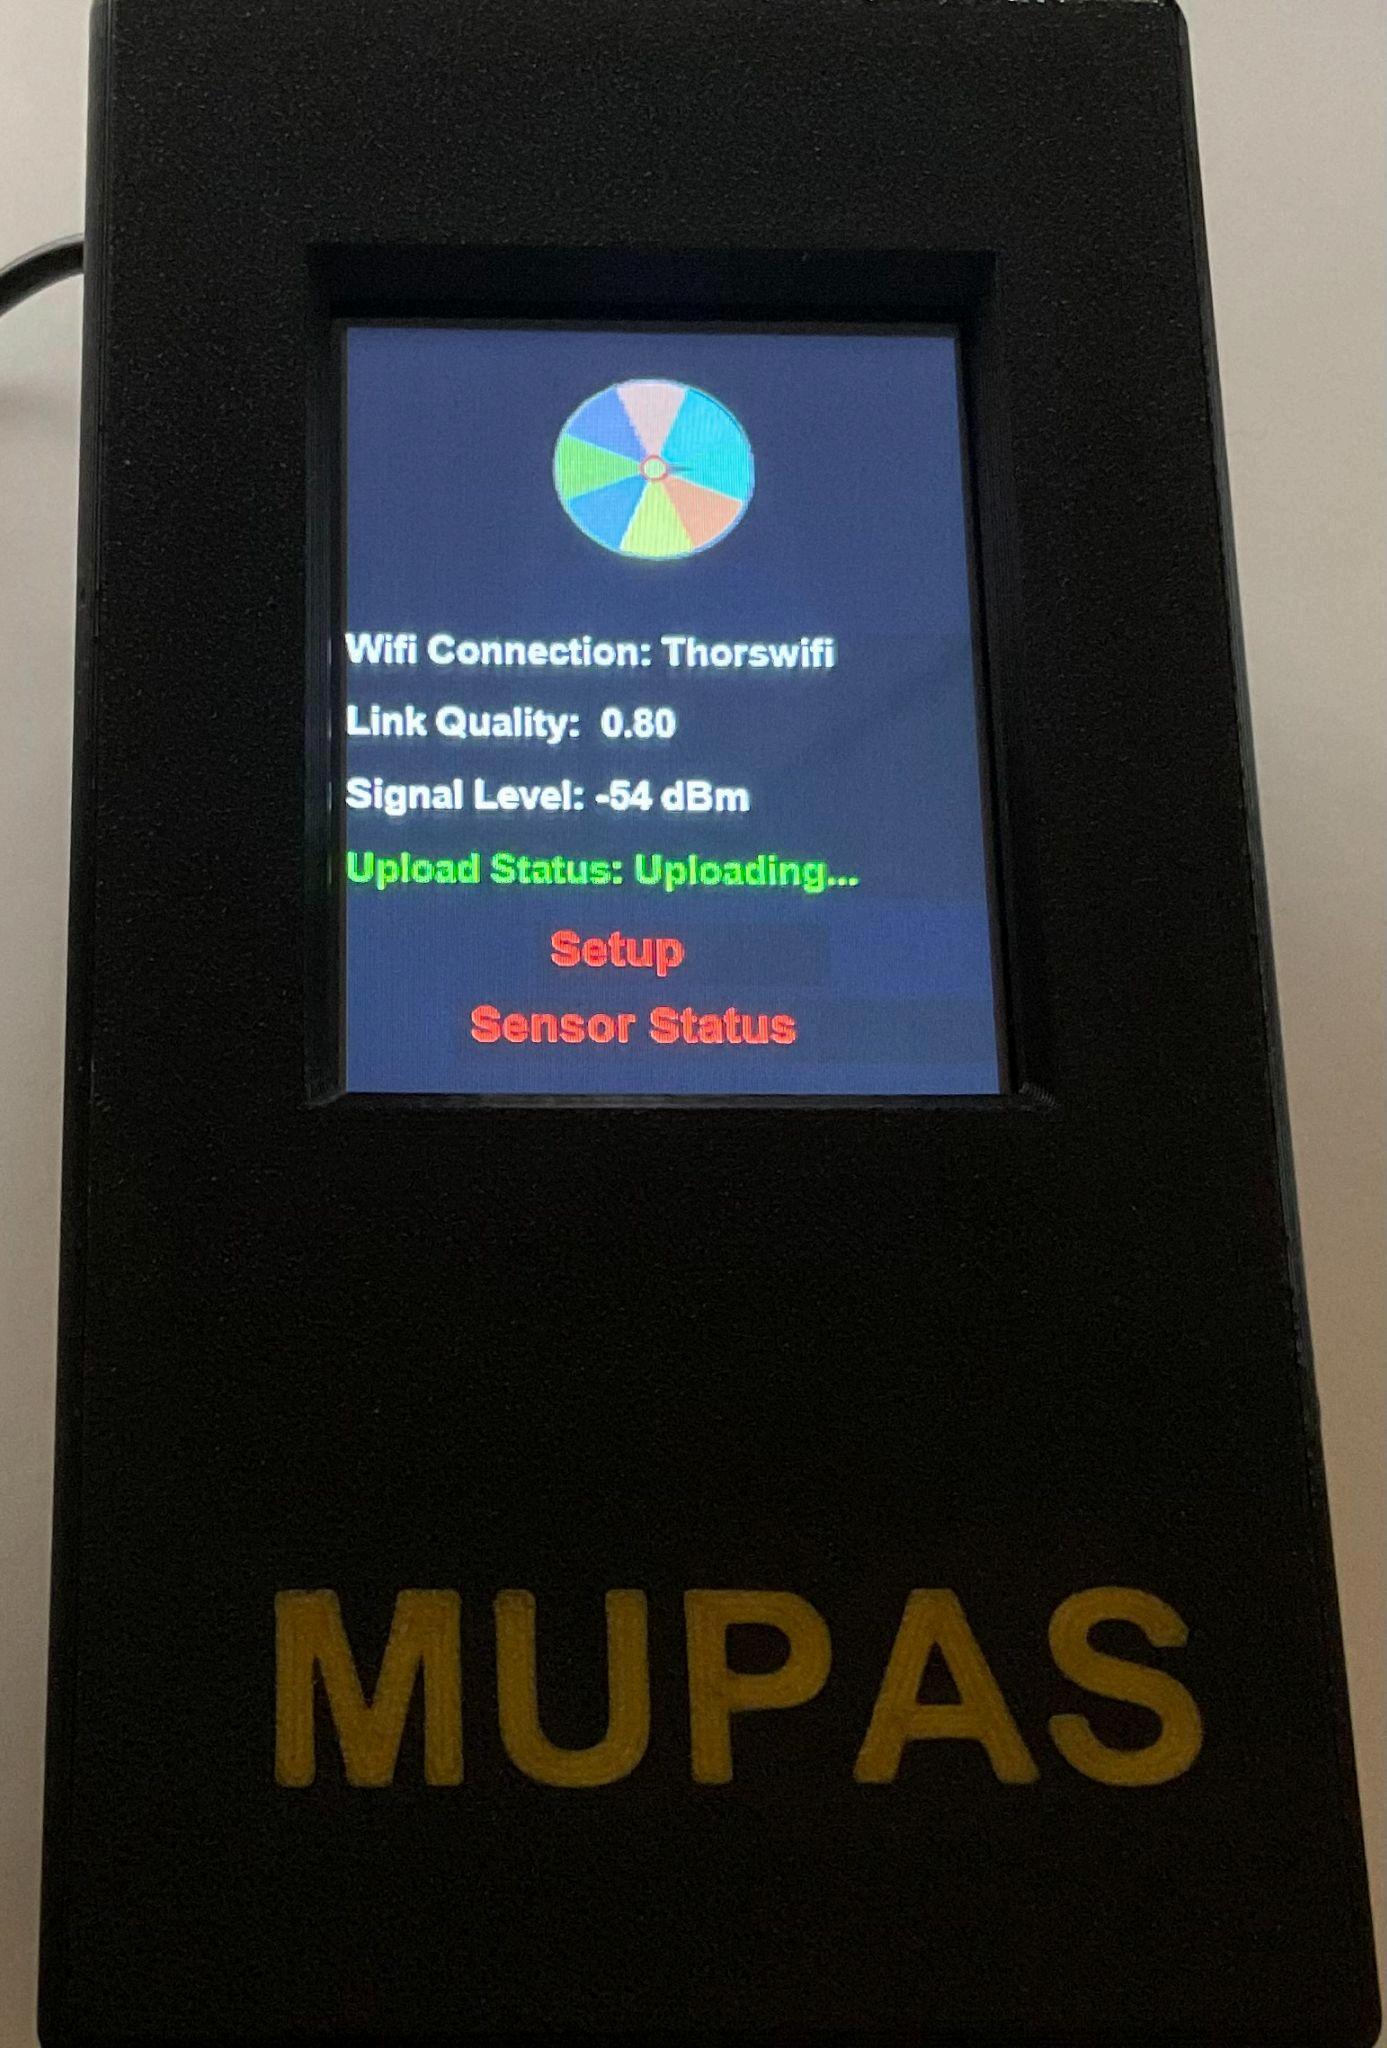
The following status information is displayed on the screen:
Wifi Connection: The Wifi network you are connected to.
Link Quality: Indication of the quality of the data packets received by the Wifi router.
Signal Level: Wi-Fi link quality is measured in decibel milliwatts
Upload Status: Informs you if your data is being sent to the Mupas Server for processing. The Message “Uploading…” tells you everything is working. It will turn red when you are not uploading.
From this screen, you will also be able to perform setup and view further status information by pressing the following buttons:
Setup: Connect to a Wifi network and perform other setup tasks.
Sensor Status: View the current state of your Mupas Mini sensors
Using the stylus pen or your finger, tap on Setup from the main screen.
Note: If you are unfamiliar with using a stylus pen, hold it as you would a pen or pencil, but instead of slanted, you want the soft end to be upright and gently pushed down on the screen.
Tap on the Wifi network you want to connect to from the list. Once selected, it will be displayed on the top of the display.
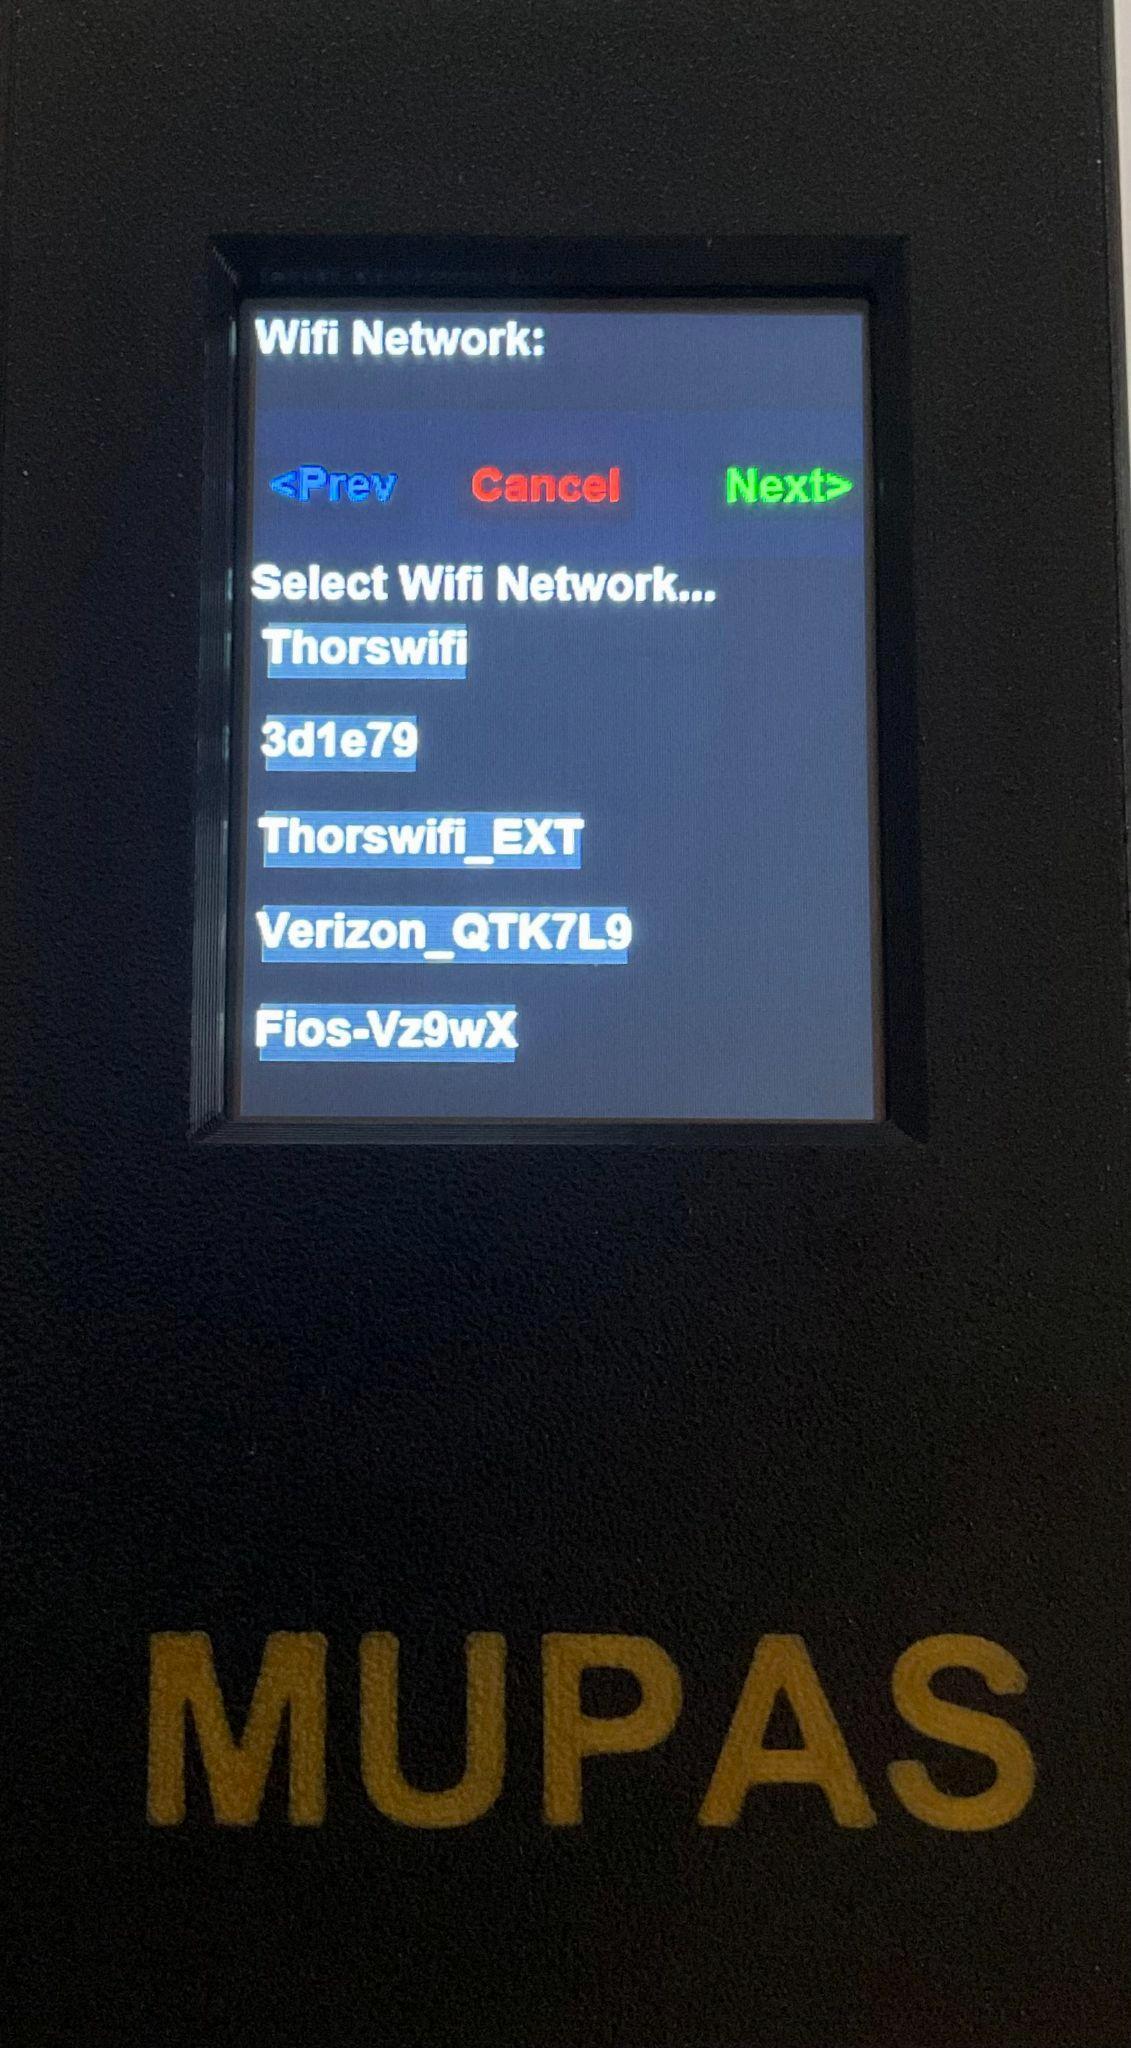
After selecting the desired network, tap “Next>” to enter the Wifi network password.
Use your stylus pen or finger to enter the Wifi password. Pay attention to the uppercase, lowercase, numbers, symbols, and backspace tabs. When finished, tap the green "NEXT>” button.

The WIFI connection is now complete.
After tapping NEXT>, a " Connecting " screen will appear, followed by a confirmation screen indicating a successful connection. If you see the word "Failed" in red, re-enter your Wi-Fi credentials or password.


Note: Please note that the device may time out between steps, clearing the screen, this is normal. Simply tap on the screen to proceed with your setup.
Once you have completed the above steps, you will be transmitting data to the MUPAS portal.
Back on your home screen, you will find the words Sensor Status. Tapping on Sensor Status will display the following information about your devices attached sensors.
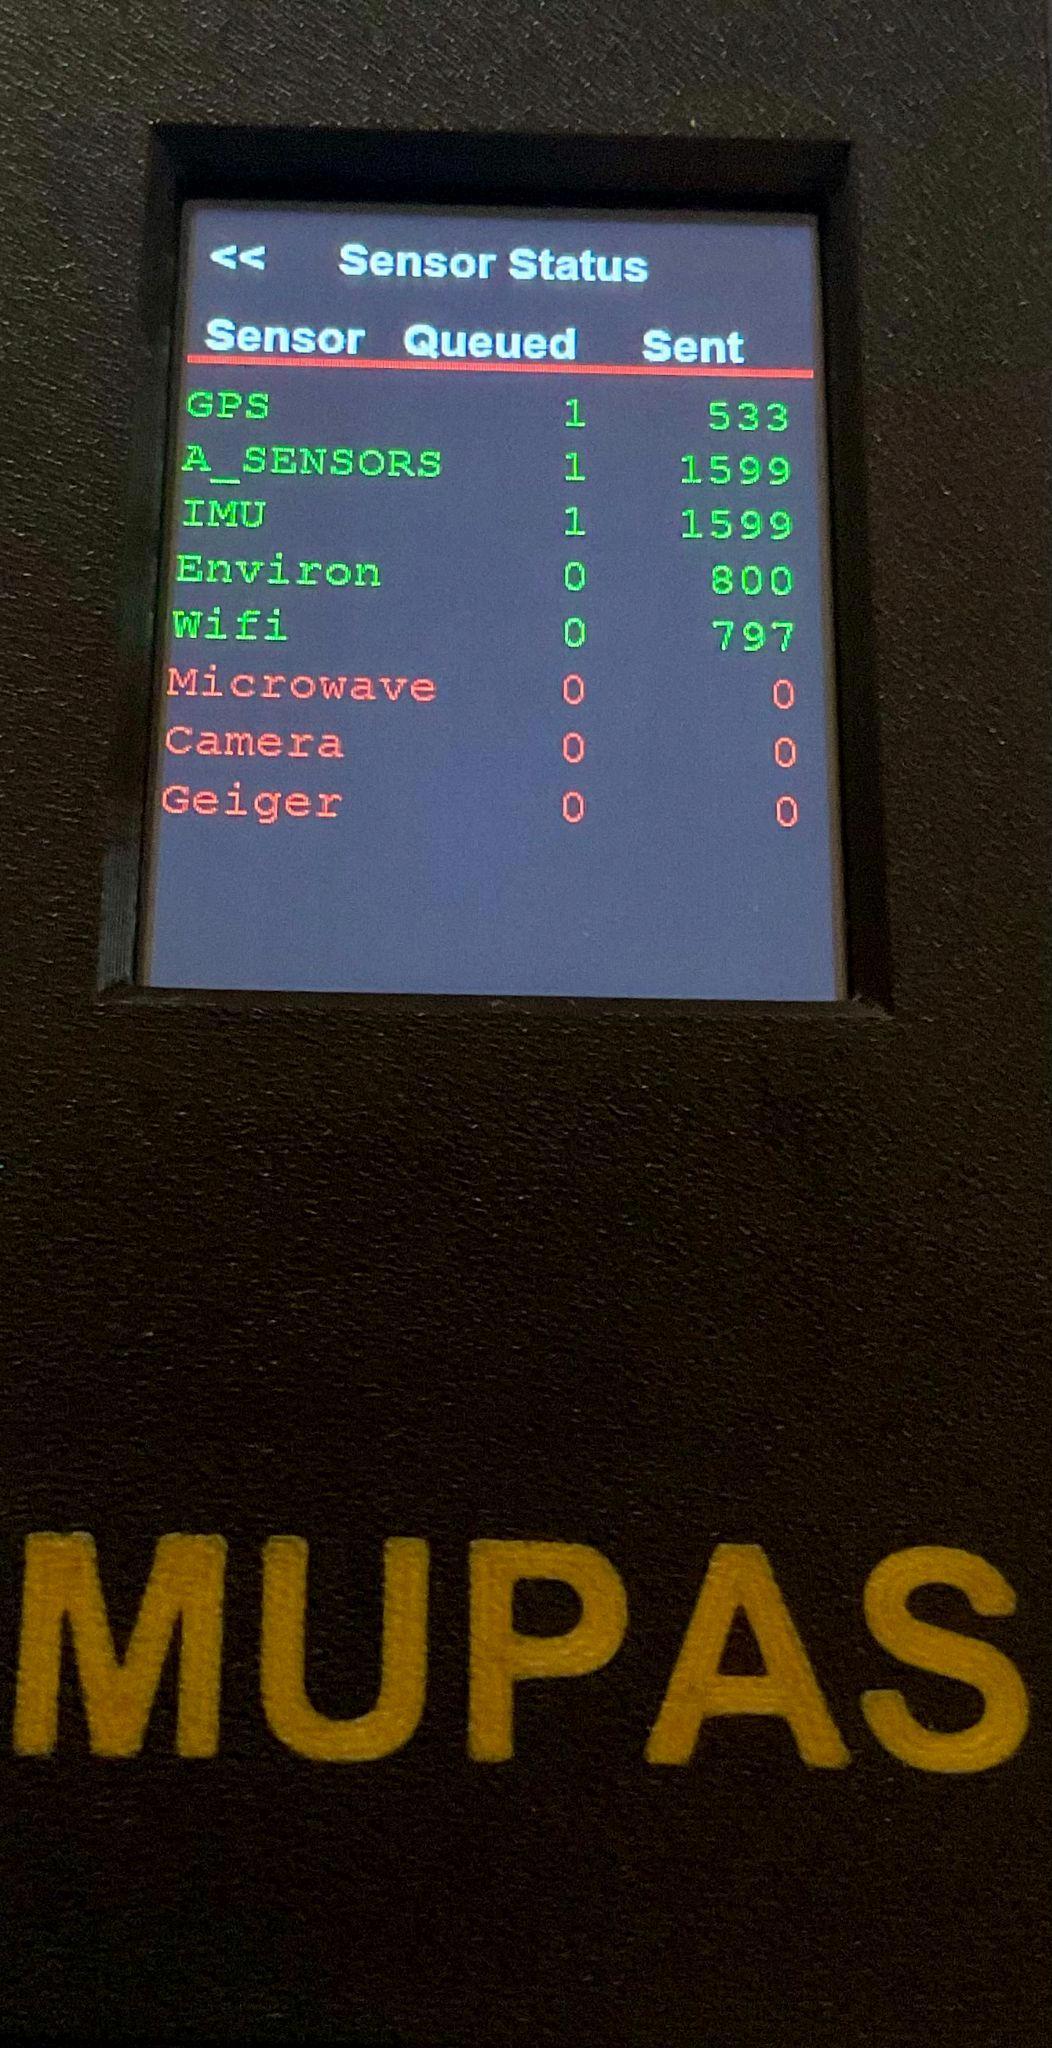
Here, you can view live data measurements in real-time. If you have purchased the additional Microwave Spectrum Sensor Module or Radiation Detector Module, their readings will also be displayed. Our newest add-on, the Camera, can be placed outdoors to capture anomalies such as orbs.
The screen shows how many readings are currently Queued to be sent to the Mupas Server and how many readings have already been Sent out for all the sensors currently attached to the Mupas Mini.
The sensor list also indicates if the sensor is connected correctly to the Mupas Mini by turning green if the sensor is connected. Here is a list of the sensors included in your Mupas Mini.
GPS: Records how many satellites are connected to the GPS receiver in the MUpas Mini. Anomalous activity, such as orbs and UAPs, are known to affect the ability of GPS systems to connect to satellites.
A_Sensors: These are the sensors connected to the Mupas Mini's analog channels; they consist of the microwave energy and infra-sound energy sensors.
IMU: These are sensors that look at how your local space-time metric is being affected by any anomalies. These consist of the acceleration, magnetic, and gyroscopic sensors.
Environ: These are the sensors that look at your local environment. These include temperature, barometric pressure, relative humidity, and air quality sensors.
Wifi: This records the signal levels of your WIfi connection. Anomalous activity, such as orbs and UAPs, are known to affect the ability of devices to communicate via Wifi networks.
A USB port for your external sensors is located on the top back of your device.

Setting up your Microwave Sensor Module
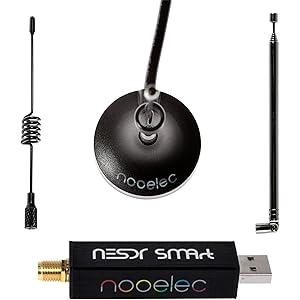

Microwave Spectrum Sensor Module Experiencer Studies
The Microwave Spectrum Sensor Module enables the MUPAS AI Alert Engine to identify the frequencies that most significantly affect your environment.
With your Microwave Sensor Module, you will find an NESDR SMArt v5 RTL-SDR, a magnetic antenna base with a 2m (6.5') RG-58 feed cable, and three different antenna masts for UHF and VHF operation, including a variable-frequency telescopic antenna.
Note: The shorter black antenna is designed for higher frequencies, typically around 2 GHz. The longer black antenna performs better at lower frequencies, ranging from 1 GHz to 2 GHz. The expandable silver antenna covers frequencies from 100 kHz to 1 MHz.)
Plug the NESDR SMArt v5 RTL-SDR directly into the USB expansion port on the back of the Mupas Mini. Alternatively, you can use the provided extension cable to increase the distance between the NESDR sensor and your Mupas Mini. Then attach one of the antennas to the rear of the NESDR sensor as shown below.
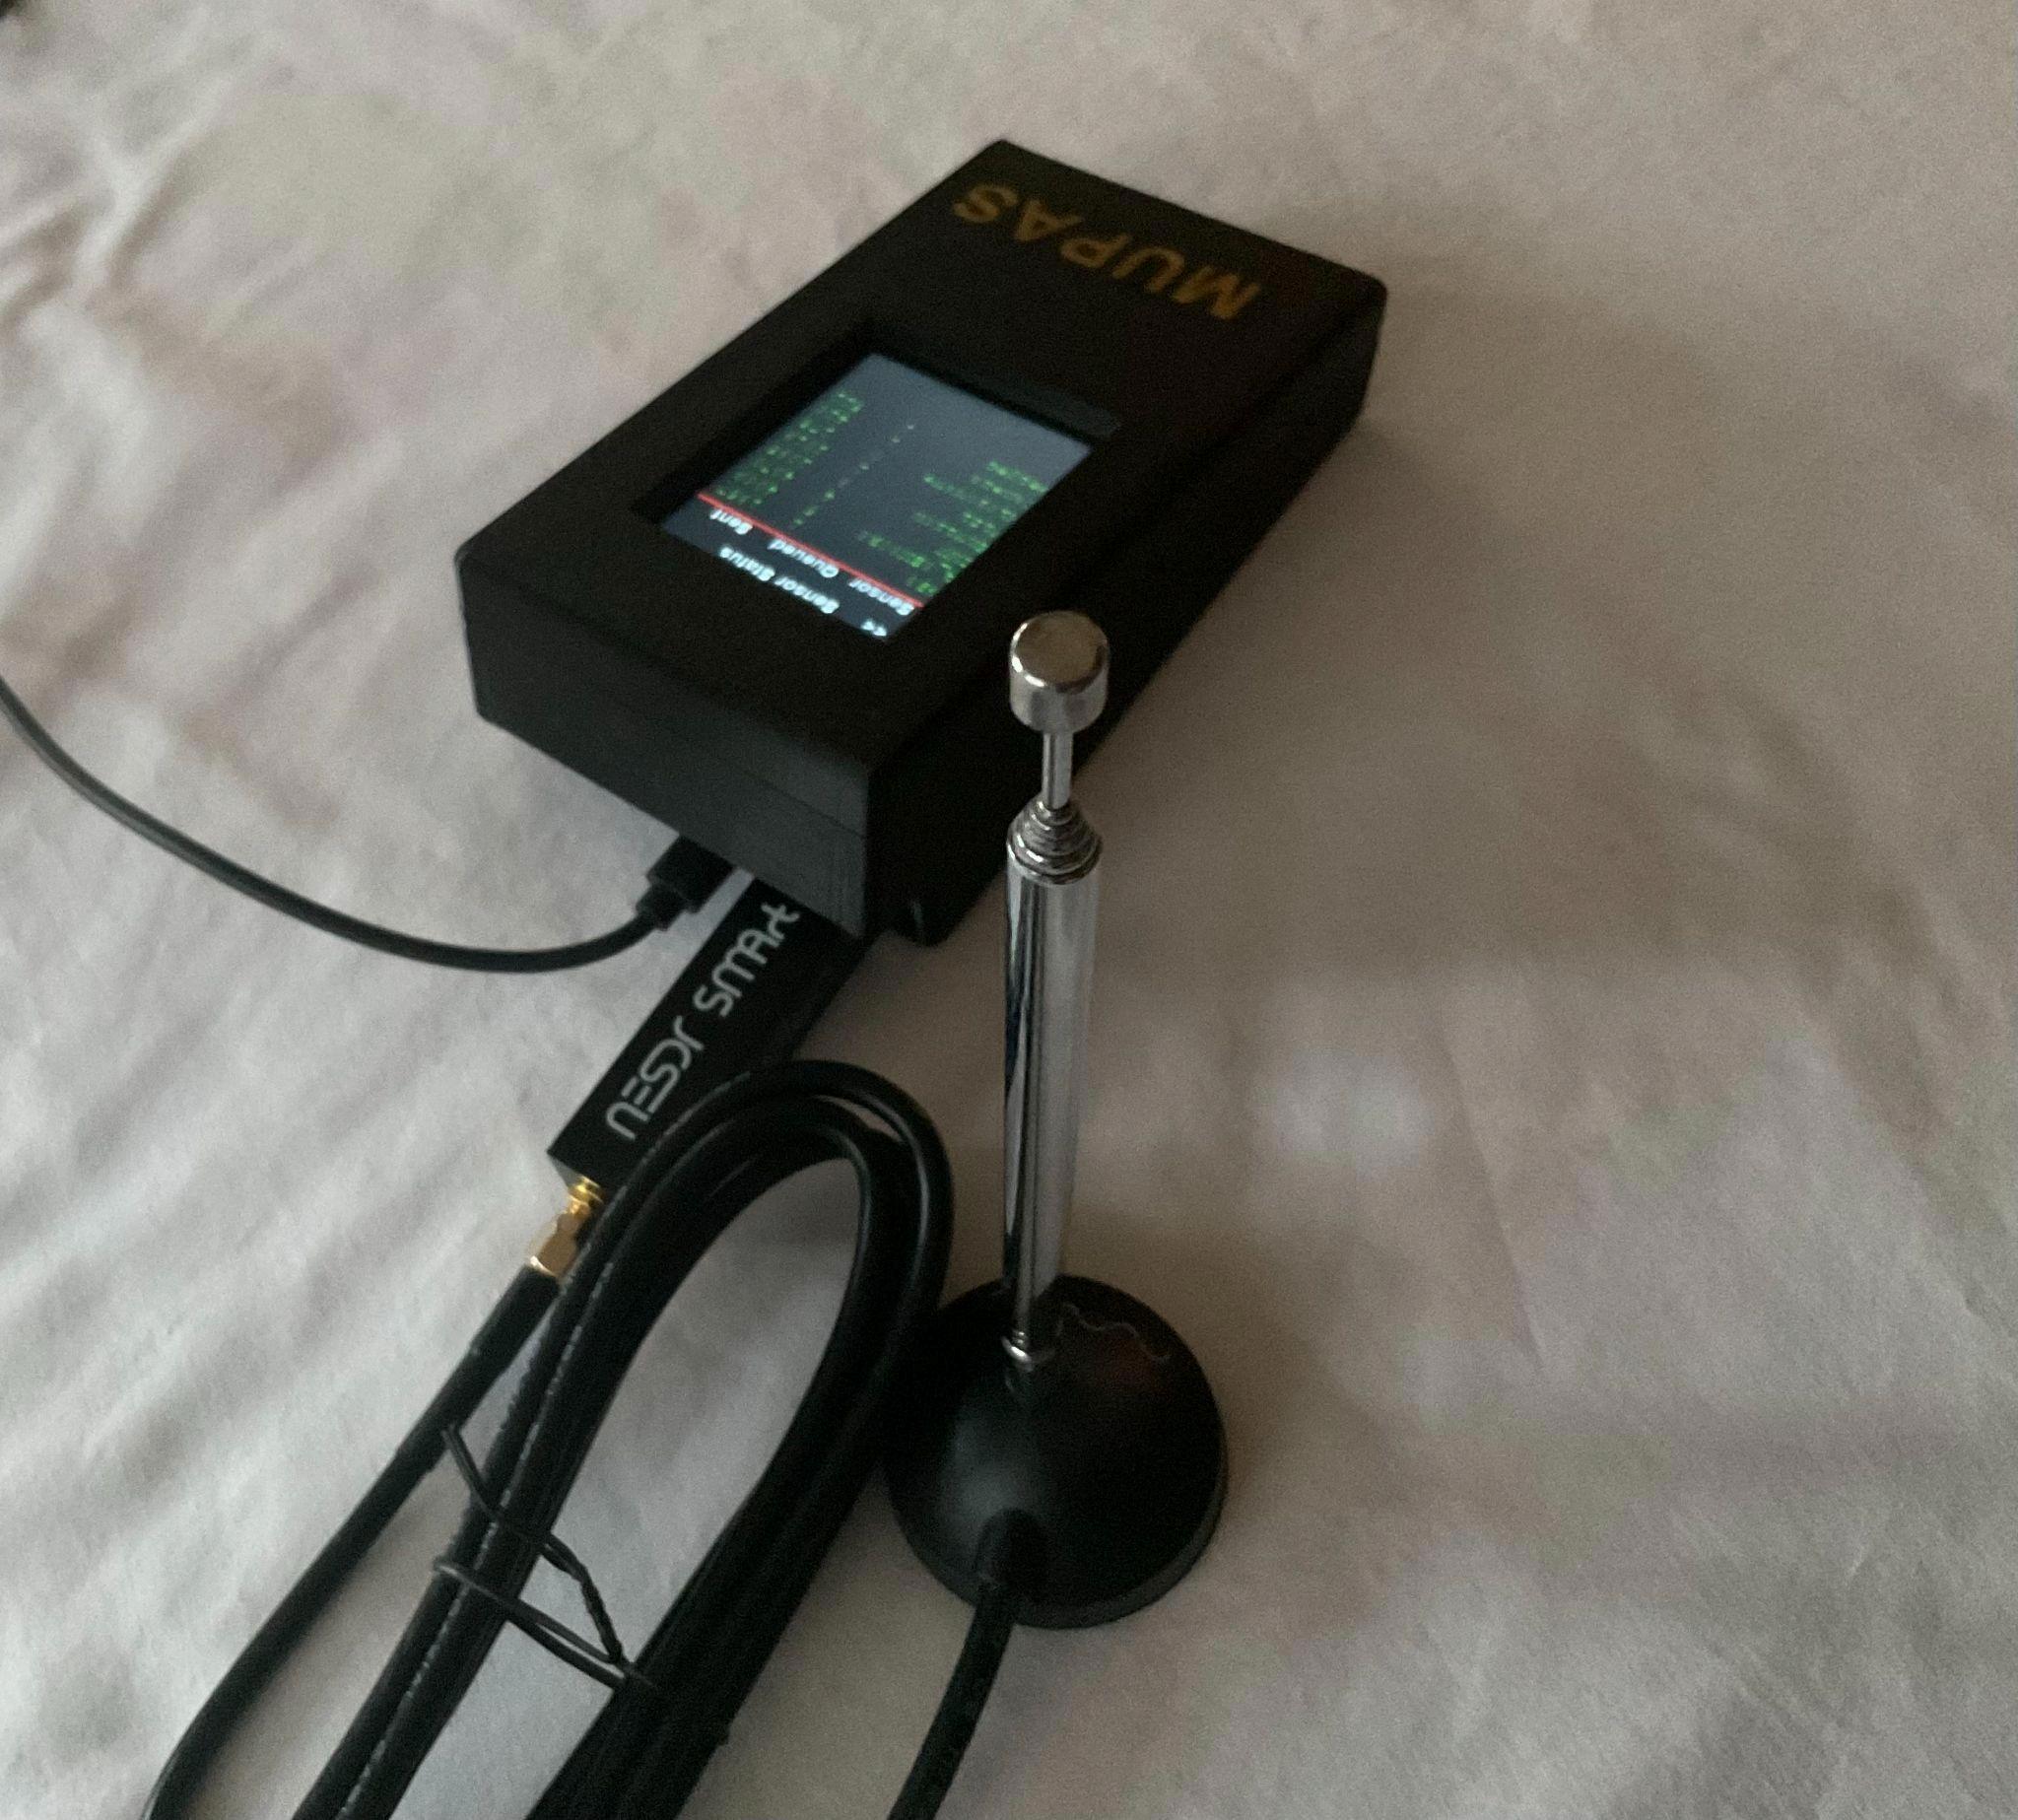
When everything is plugged in, the Microwave entry in your Sensor Status list turns green.

This module equips the MUPAS Mini with a radiation detector, enabling it to provide alerts when high-energy particles are present in your environment. High-energy particles are known to affect our physiology, specifically our neural processes. The Mupas AI Engine monitors the readings from your radiation sensors and correlates them with your other signals and narratives describing your experiences.
Plug the provided USB cable into the USB expansion port on the back of the Mupas Mini and the other end into the side of the Radiation Detector Module

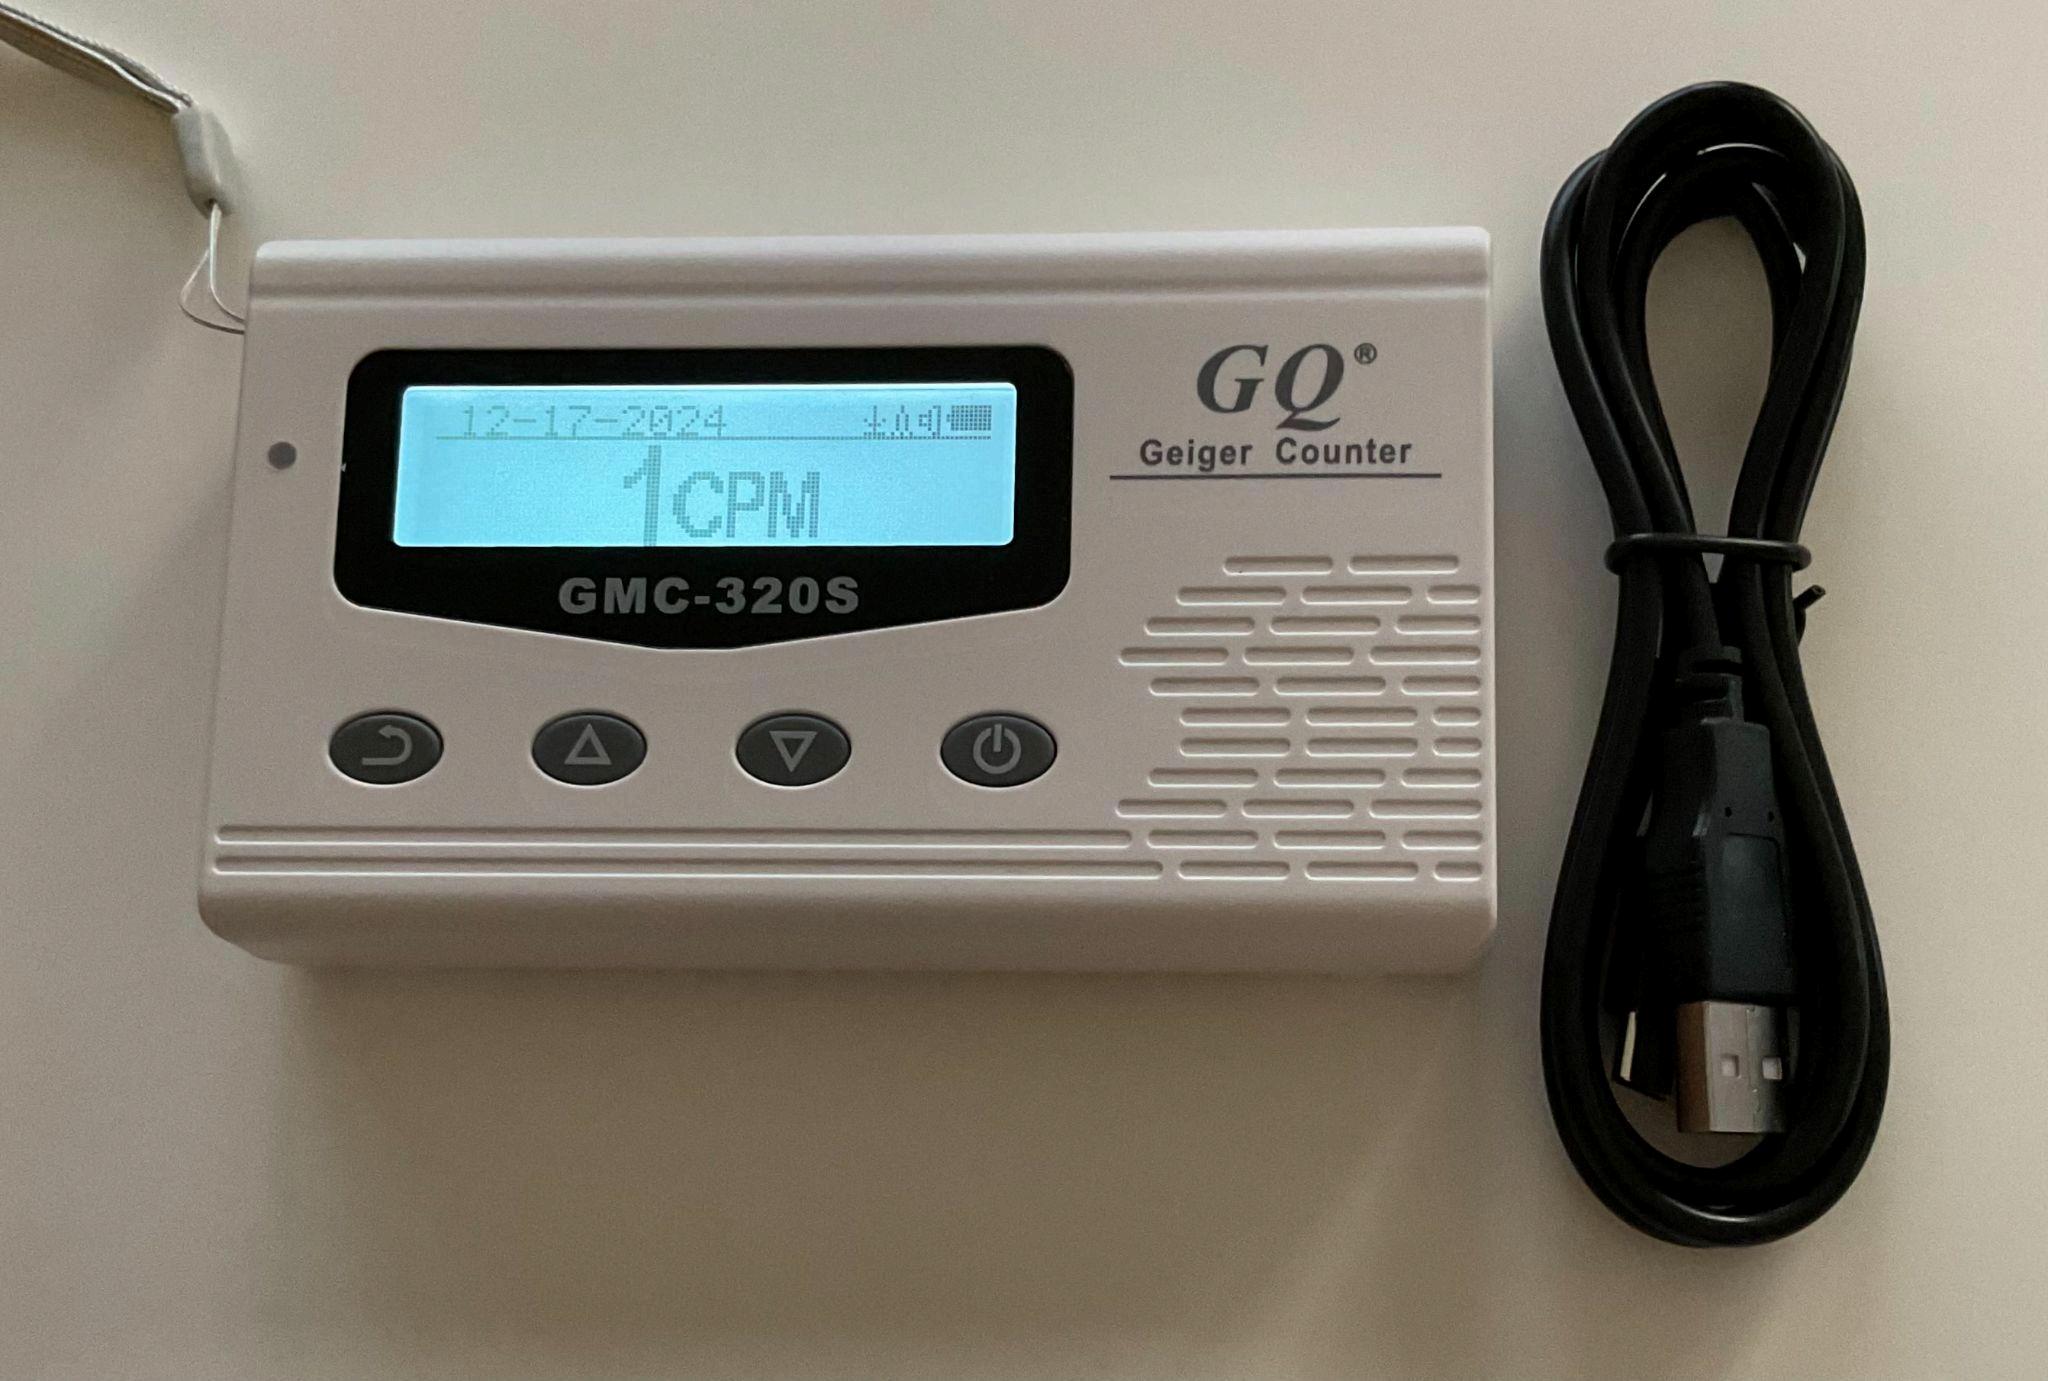
Once plugged in, press the power button in the front of the Radiation Detector Module After the module is powered, it will begin to send readings to the Mupas. You will also see the Geiger entry in your Sensor Status list turn green.

Setting up your IR Camera

The ELP 3.6mm 1080P Dome Camera features IR LED night vision and HD webcam capabilities with infrared technology. It is designed to detect external anomalies, such as orbs or other unusual occurrences. The Mupas AI Engine monitors the images from your infrared camera and correlates them with your other signals and narratives describing your experiences.
Plug the USB cable from the camera into the USB expansion port on the back of the Mupas Mini and the other end into the side of the Radiation Detector Module.
Once plugged in, position the camera to look at the areas where you expect to find strange phenomena occurring. After the camera is plugged in, it will begin sending images to the Mupas. You will also see the Camera entry in your Sensor Status list turn green.

Adding multiple sensors to your Mupas Mini through the USB expansion port is possible using a USB 3.0 Hub adapter available here.
USB 3 0 Hub
