26 minute read
VAIO Support Agent


VAIO Support Agent helps you repair your own software problems without the assistance of a support analyst. VAIO Support Agent's advanced diagnostic technology identifies and tracks characteristics of your software applications and basic network settings. These diagnostics protect and store information in a retrievable format that enables you to restore your software to a previous working state. Sony has identified the software items that are protected by the VAIO Support Agent utility. VAIO Support Agent has three features to help you fix your software problems: Quick Fix Wizard, Common Solutions, and Support Central. This section briefly describes these three features, and the automatic update capability of the VAIO Support Agent.
Using the Quick Fix Wizard
The VAIO Support Agent records and maintains a history of the VAIO Support Agent protected applications by taking a “snapshot” of the application at regular, timed intervals and storing it for future use. Should a problem develop with one of the protected applications, you can use the Quick Fix Wizard feature to retrieve the date/time (snapshot) that was recorded when the application worked correctly. The Quick Fix Wizard repairs the protected application files without altering the data files you have created using the application.
VAIO Support Agent main window
To use the Quick Fix Wizard, follow these steps: 1 From the VAIO Support Agent main window, click the Quick Fix Wizard button. The Welcome window appears. 2 Click Next. The “Quick Fix Wizard: Begin VAIO Support Agent
Diagnostics” dialog box appears. 3 Select the “Diagnose and fix my software” option. 4 Select the software you wish to repair from the drop-down list.
5 Next, select a date/time from the drop-down list that corresponds to the last time when the software worked properly. 6 Click Next to continue. Follow the instructions on the screen.
✍To view a list of software applications protected by VAIO Support Agent, click on the
“Pick the software:” drop-down list.
Quick Fix Wizard: Begin VAIO Support Agent Diagnostics dialog box

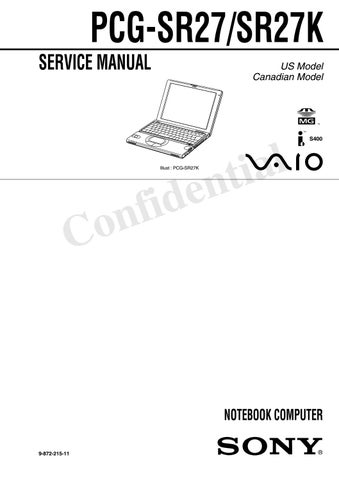
Using Common Solutions
Common Solutions offers automated, One-Click Fixes to repair common software problems. These solutions can integrate information such as knowledge base articles and Frequently Asked Questions (FAQs). You can run One-Click Fixes directly from VAIO Support Agent or from a Web browser. 1 Click the Common Solutions button. The Common Solutions dialog box appears. 2 Double-click on the desired category to expand and view available
SupportActions. ❑ VAIO Support Local Server (c:/program files/support.com...) provides a list of SupportActions available on your notebook’s hard disk drive. ❑ VAIO Support Local Server (http://sdcglobal4.sel.sony.com...) provides a list of SupportActions available from the Internet.
3 Click the resize arrows next to the SupportAction categories to expand or collapse the categories.
Common Solutions dialog box (1st level)
✍Connect to the Internet before attempting to view the category, “Vaio Support Local
Server (http://sdcglobal4.sel.sony.com...).” This category is unavailable without an
Internet connection.
Common Solutions dialog box (2nd level)

4 Select the appropriate SupportAction from the list. 5 Click Run or double-click the desired SupportAction. The available
SupportActions are shown in bold type.
✍You cannot undo One-Click Fixes.
Using Support Central
The Support Central feature uses Internet resources to help you fix your software. Support Central searches the Internet for answers to your questions, additional information from knowledge base systems, and the latest software updates for your protected software. Support Central also lets you contact live support agents for additional help. 1 Connect to the Internet.
2 From the VAIO Support Agent main window, click Support Central. The
Support Central Welcome page appears.
3 Click Enter Portal to begin using Support Central. First-time users will be asked to register with Support Central.
✍You must have Internet access to use Support Central.
Support Central: Welcome page

✍Support Central retains your registration information, so you are only required to register once. If you log on to your notebook with a different user name or have recovered your system using the System Recovery CDs, Support Central may require you to register again.
Support Central: Registration page

Support Central: Current Issues page
Support Central: Support Wizard page

When you log on to Support Central, the Current Issues page displays, enabling you to continue working on your open issues or to close them if you are finished. Support Central has a tracking feature that stores your current issues, enabling you to return and work on them later.

If you log on to Support Central with a new issue, or if you do not have any open issues, the Support Wizard appears. You can begin searching on the new issues.
About Automatic Updates
The VAIO Support Agent is dormant as a background process. Every 24 hours, the Agent self-activates to contact the Sony Support Server to check for new updates or fixes needed for your system. This updating action only occurs while you are connected to the Internet and when more than 24 hours has passed since the last update. Each time the VAIO Support Agent prepares to check for updates, the Agent Status Update dialog box appears and asks you to respond, unless you have previously selected the option, “Always accept updates and do not prompt me again.”
✍You must be connected to the Internet to use Support Central.
Agent Status Update

You can choose from four response options: ❑ Give the Agent your permission to contact the Sony Support Server for any updates or fixes that are available specifically for your notebook. The Agent continues to prompt you for your permission to retrieve updates. ❑ Give the Agent your permission to contact the Sony Support Server for any updates or fixes that are available specifically for your notebook. The Agent automatically retrieves updates without further prompting. ❑ Deny the Agent your permission to contact the Sony Support Server for any updates or fixes. The Agent discontinues any update retrieval and does not prompt again for your permission to update. ❑ Deny the Agent your permission to contact the Sony Support Server for the current update or fix. The Agent discontinues the current update retrieval, but prompts again for your permission for the next scheduled update.
Update Notification Once you have granted permission for the system to check for updates or fixes, the Agent contacts the Sony Support Server. Available updates or fixes may be displayed to you in one of two ways. An update or fix may be displayed in a window with an explanation and instructions to follow. Others will cause the ambulance icon on your task tray to blink. You should always check the ambulance icon in the task tray after the system checks for updates. If the icon is blinking, double-click the ambulance icon to view the update.
✍When clicking on the flashing ambulance icon, you must be connected to the Internet to receive an update.
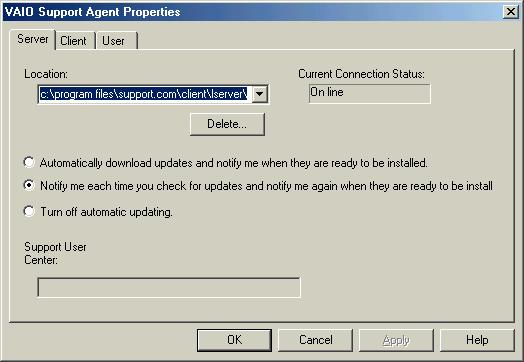
VAIO Support Agent Properties To control the VAIO Support Agent automatic update feature, follow these steps: 1 In the VAIO Support Agent main screen, select Tools, then select Properties.
The VAIO Support Agent Properties dialog box appears. 2 Select one of three options to customize the automatic update feature. 3 Click OK.
VAIO Support Agent Properties window
Troubleshooting
This section describes how to solve common problems you may encounter when using your notebook. Since many problems have simple solutions, try these suggestions before you contact Sony PC Support (http://www.sony.com/pcsupport).
Troubleshooting Your Notebook
(Windows Me only) When starting your notebook for the first time, the VAIO InitManager dialog box will appear. Please select “OK” to begin initial setup. If you do not execute the initial setup, you cannot use part of VAIO original hardware functions such as Jog Dial, Power Management tool, scroll function of touchpad, and keyboard shortcut key function combined with the Fn key.
My notebook does not start. ❑ Check that the notebook is plugged into a power source and that it is turned on. Check that the power indicator on the front panel of the notebook indicates that the power is on. ❑ Check that the battery packs are inserted properly and that they are charged. ❑ Make sure there is no diskette in the floppy disk drive. ❑ Confirm that the power cord and all cables are connected firmly, as described in “To Connect a USB Device” . ❑ If you plugged the notebook into a power strip or UPS, make sure the power strip or UPS is turned on and working. ❑ If you are using an external display, check that it is plugged into a power source and turned on. Check that the brightness and contrast controls are adjusted correctly. See the manual that came with your display for details. ❑ Moisture condensation may have occurred. Do not use the notebook for at least one hour and then turn on the notebook. ❑ Take the battery pack off the notebook, unplug the power cord and plug it again, then turn on the power.
My notebook starts, but my system doesn’t start properly. ❑ When the internal backup battery is low on power, it may not start your system properly. The message “Press <F1> to resume, <F2> to setup” appears at the bottom of the screen. Follow these steps: 1 Press F2. The BIOS Setup menu appears. 2 Set the date (month/day/year). Press Enter. 3 Press to select System Time, then set the time (hour: minute: second). Press Enter. 4 Press to select Exit, then press to select Get Default Values. The message “Load default configuration now?” appears. 5 Select Yes and press Enter. 6 Select Exit (Save Changes), and then press Enter. The message “Save Configuration changes and exit now?” appears. 7 Select Yes, then press Enter. The notebook restarts.
My notebook starts, but the message “Operating system not found” appears and Windows does not start. ❑ Make sure there is no diskette in the floppy disk drive (non-bootable). ❑ If a non-bootable diskette is in the drive, follow these steps: 1 Turn off the notebook, and then remove the diskette. 2 Restart the notebook and confirm that Windows starts properly. ❑ If Windows still does not start, follow the steps below to initialize the BIOS: 1 Remove any diskette from the floppy disk drive. 2 Turn off the notebook.
3 Remove any peripheral devices connected to the notebook. 4 Turn on the notebook.
5 Press the F2 key when the Sony logo appears. The BIOS setup menu screen appears. 6 Press the directional arrow keys to select the Exit menu.
7 Press the arrow keys to select “Get Default Values” and then press Enter. The message “Load default configuration now?” appears. 8 Select Yes, then press Enter. 9 Use the directional arrow keys to select “Exit” (Save Changes), and then press Enter. The message “Save configuration changes and exit now?” appears. 10 Select Yes, then press Enter. The notebook restarts. If your notebook continues to display the message “Operating system not found” , and Windows does not start, contact Sony Customer Support.
My notebook stops responding or does not shut down. It is best to shut down your notebook using the Shut Down command on the Windows Start menu. Using other methods, including those listed here, may result in loss of unsaved data. ❑ Try restarting the notebook. On the Windows taskbar, click the Start button, click Shut Down, and then click Restart. ❑ If you cannot restart as described in the preceding step, you can restart the notebook by pressing Ctrl+Alt+Delete. ❑ If the previous step does not work, press and hold the power button for at least four seconds. This turns off the power. ❑ If your notebook stops responding while playing a CD, stop the CD, and restart the notebook by pressing Ctrl+Alt+Delete. ❑ Unplug the notebook from the AC adapter and remove the battery pack from your notebook.
✍Pressing Ctrl+Alt+Delete or turning off the notebook with the power switch may result in data loss in files that are currently open.
My notebook does not enter the power saving mode I selected. (Windows Me only) To enable your notebook to enter the power saving mode you select, proceed as follows:
1 Click Start, point to Program, point to Accessories, point to System Tools, then click System Information. The Help and Support window appears. 2 Click System Configuration Utility under the Tools menu. 3 Click the Advanced button on the General tab, and confirm the following information:
❑ The message “Standby function is enabled” is displayed. If the message reads “Standby function is disabled”, click the Enable button. ❑ The message “Hibernate feature is enabled” is displayed. If the message reads “Hibernate feature is disabled”, click the Enable button. 4 Click OK and restart your notebook.
My system enters System Idle mode when System Suspend mode has been selected. ❑ If you are connecting an optical disc drive with a PC card, disconnect it by stopping the PC card. Use the Sony Notebook Setup utility to disable devices that you are not currently using. See “Removing a PC card” for more information. ❑ Make sure the PC Card is compatible with your notebook’s Windows® operating system.
The Power Management setting is not responding. Your notebook’s operating system may become unstable if a lower power state, such as system hibernation is initiated and then changed before the notebook completely enters the lower power state. To restore the notebook to its normal operating stability: 1 Close all open applications. 2 Push and hold the power button for four seconds or longer to shut down the notebook.
✍(Windows 2000 only) When the notebook enters and returns from a power saving mode after removing the optical drive, the message “Unsafe Removal of Device” may appear and the device name is shown listed as Secondary IDE Channel. Click OK.
The sound of my notebook’s fan is too loud. Use the PowerPanel utility to change the Thermal Control Strategy setting to Quiet. This setting slows down the CPU speed. See PowerPanel Help for more information.
Troubleshooting the LCD Screen
My LCD screen is blank. ❑ Verify that the notebook is plugged into a power source and that it is turned on. ❑ Verify that the power indicator on the notebook is on. ❑ Verify that the battery pack(s) is inserted properly and that they are charged. ❑ The notebook may be in LCD (Video) Standby mode. Press any key to activate the screen. ❑ The display mode may be set to external display mode. Press and hold the Fn key while pressing F7 several times.
My LCD screen continues to show the previous screen. (Windows Me only) Press the Windows key and D key twice to refresh the screen.
The image on my connected external display is not centered or sized properly. Use the controls on your external display to adjust the image. See the manual that came with your display for more information.
I want to change the video resolution of my display. 1 Click Start, point to Settings, point to Control Panel, and then click the
Display icon. The Display Properties dialog box appears. 2 Click on the Settings tab. 3 Move the Screen Area slider to change your video resolution.
Troubleshooting the Mouse and Touchpad
My mouse does not work. ❑ If you are using an external mouse, verify that the mouse is plugged into the mouse connector. See “Connecting a Universal Serial Bus (USB) Device” for details. ❑ If you are using an optional Sony USB mouse PCGA-UMS1 series, verify that the mouse is plugged into the USB connector, and restart your notebook.
My touchpad does not work properly. ❑ You may have disabled the touchpad without connecting a mouse to the notebook. To enable the touchpad: 1 Click Start > Programs > Sony Notebook Setup. 2 Select the Touchpad tab. 3 Click Use touchpad and click OK. ❑ If your touchpad is interpreting a single tap as a double-click, adjust the button assignments as follows: 1 Click Start, point to Control Panel, then double-click on the Mouse icon. The Mouse Properties dialog box appears. 2 Change the button assignments in the Mouse Properties dialog box. (One of the buttons is assigned to the double-click action.)
The pointer does not move while using the touchpad or mouse. Click the Start button on the Windows taskbar, select Shut Down to display the Shut Down Windows dialog box, then press Enter. ❑ (Windows Me)
If you cannot turn off your notebook as described in the step above, press
Ctrl+Alt+Delete twice to restart the notebook. (Windows 2000)
If you cannot turn off your notebook as described in the step above, press
Ctrl+Alt+Delete and click Shut Down on the Windows Security screen to restart the notebook. ❑ If you cannot restart your notebook as described in the step above, press and hold the power button for more than four seconds to turn off the notebook. ❑ If the pointer does not move while playing a disc, press Ctrl+Alt+Delete to stop playback and restart the notebook.
Troubleshooting Drives, PC Cards, and Peripheral Devices
My (optional) floppy disk drive can not write to a floppy disk. ❑ If the floppy disk is write-protected, disable the write-protect feature or use a floppy disk that is not write-protected. ❑ Verify that the floppy disk is properly inserted into the floppy disk drive.
My (optional) floppy disk drive icon doesn’t appear even though it is connected. ❑ Click Start, point to Settings, point to Control panel, then click System.
The System Properties dialog box appears. ❑ Click the Device Manager tab. ❑ Double-click Floppy Disk Controller, then click Standard Floppy Disk
Controller. ❑ Click Delete. The Confirmation window will appear. ❑ Verify that Delete From All Settings is selected and press OK. ❑ Click Update in the System Properties window. ❑ Double click Disk Drive and confirm that GENERIC NEC FLOPPY DISK is shown.
My CD-ROM drive is not playing my CD properly. ❑ Make sure the label of the disc is facing up. ❑ If the disc requires software, make sure the software is installed according to the manufacturer’s instructions. ❑ A dirty or damaged disc may cause the notebook to stop responding while it tries to read the disc. If necessary, restart the notebook, remove the disc, and then check it for dirt or damage. ❑ If you are using an optional DVD Rom Drive, and can see video but not hear audio, check all of the following: ❑ Check that your DVD-ROM drive does not have the mute setting enabled. ❑ Check the volume setting in the audio mixer. ❑ If you are using external speakers, check the volume settings, then check the connections between your external speakers and the notebook.
❑ Click Start, point to Settings, point to Control panel, then double-click System. The System Properties dialog box appears. ❑ Click the Device Manager tab. ❑ Verify that the correct drivers are installed properly. ❑ Do not use adhesive labels to identify the CD. The label may come off while the disc is in use in the optical drive and cause the drive to malfunction. ❑ Moisture condensation may have occurred. Leave the notebook idle for at least 1 hour with the notebook turned on.
My optical drive tray does not open. ❑ Make sure the notebook is turned on. ❑ Press the Eject button on the optical drive. ❑ If the Eject button does not work, open the tray by inserting a thin pen tip in the hole to the right of the Eject button.
I cannot use digital video (DV) devices. The message “DV equipment seems to be disconnected or turned off” appears. ❑ Verify that the DV device is turned on and that the cables are properly connected. ❑ If you are using multiple i.LINK devices, the combination of the connected devices may cause unstable operation. In this case, proceed as follows: 1 Turn off your notebook and all connected devices. 2 Disconnect the devices that are not in use.
3 Ensure that all other devises are properly connected. 4 Restart your notebook.
The i.LINK-compatible devices connected to my notebook do notwork. ❑ Use the i.LINK connector that is located on your notebook. ❑ If the message “There are no Digital Video devices connected to this computer, or the power is off” appears, unplug the i.LINK cable and try plugging it in again.
My PC card does not work. ❑ Make sure the PC card is compatible with Microsoft® Windows® . ❑ Use the Sony Notebook Setup utility to disable devices you are not currently using. ❑ If you are using two PC cards, use the Sony Notebook Setup utility to disable the devices you are not currently using.
Troubleshooting Software
My software program stops responding or crashes. Contact the software publisher or designated provider for technical support. See Software Support Information.
When I click an application icon, the message “You must insert the application CD into your optical drive” appears and the software does not start. ❑ Some titles require specific files that are located on the application CD.
Insert the disc and try starting the program again. ❑ Make sure you place the CD in the tray with the label side facing up.
I can not use the DVgate software. If your notebook is using the Ultimate Battery Life profile for its power saving mode, you cannot use DVgate or Smart Connect software. You must select another profile.
My voice-related software does not work properly. ❑ Disable the microphone echo function as follows: 1 Click Start, point to Settings, then point to Control Panel. 2 Click Yamaha DS-XG.
3 Click the Echo tab and remove the checkmark. Click OK.
❑ Contact the software publisher or designated provider for technical support
Troubleshooting the Modem
My modem does not work. ❑ Verify that the phone line is plugged into the line jack. See “Using a Phone
Line” for details. ❑ Verify that the phone line is working properly by plugging the line in an ordinary phone and listening for a dial tone. ❑ Verify that the phone number the program is dialing is correct. ❑ Verify that the software you are using is compatible with the notebook’s modem. (All preinstalled Sony programs are compatible.)
My modem connection is slow. Your notebook is equipped with a 56K/V.90 compatible modem. Many factors may influence modem connection speed, including telephone line noise or compatibility with telephone equipment (such as fax machines or other modems). If you think your modem is not connecting properly to other PC-based modems, fax machines, or your Internet Service Provider, proceed as follows: ❑ Have your phone company check that your phone line is free from any line noise. ❑ If your problem is fax-related, check that there are no problems with the fax machine you are calling and that it is compatible with fax modems. ❑ If you are having a problem connecting with your Internet Service Provider, check that the ISP is not experiencing technical problems. ❑ If you have a second phone line available, try connecting the modem to that line.
Troubleshooting Audio
My speakers have no sound. ❑ If the built-in speakers are turned off, press Fn+F3 or use the Jog Dial control to turn on the speakers. ❑ ‹If the speaker volume is turned to the minimum, press Fn+F4, then press or ➜ to increase the volume or you can use the Jog Dial control to control the volume. ❑ If nothing is displayed when you press Fn+F3 or Fn+F4, proceed as follows: 1 Click Start, point to Settings, point to Control panel, then double-click System. The System Properties dialog box appears. 2 Click the Device Manager tab. 3 Set the sound device to enable. ❑ If your notebook is powered by batteries, verify that the battery packs are inserted properly and that they are charged. ❑ If you are using an application that has its own volume control, verify that the volume is turned up. ❑ Check the volume controls in Windows® . ❑ If you connect external speakers: 1 Verify that the speakers are properly connected and the volume is turned up. 2 If the speakers have a mute button, make sure the button is off. 3 If the speakers are powered by batteries, verify that the batteries are inserted properly and that they are charged. ❑ If you have connected an audio cable to the Headphone connector, disconnect the cable. My microphone does not work. If you are using an external microphone, verify that the microphone is plugged into the Microphone connector. See “Recording from a Microphone or Audio Equipment” for details.
Troubleshooting the Printer
I cannot print. ❑ The default setting for the printer port mode is correct for most printers. If you cannot print, try changing the printer port mode. In Sony Notebook
Setup, select the Printer tab. If the printer port mode is set to ECP, change it to bi-directional. If the printer port mode is set to bi-directional, change it to
ECP. See “Displaying the Sony Notebook Setup Screen” for details on using
Sony Notebook Setup. ❑ Your connected printer may not function after the notebook resumes from a power saving mode. If this occurs, proceed as follows to reset the printer connection: ❑ Windows® Me Only 1 Right-click My Computer icon on the desktop and select Properties. 2 Click the Device Manager tab. 3 Select Refresh, then click OK. The printer should function properly. ❑ Windows® 2000 Only 1 Click My Computer icon on the desktop, then click on the Control Panel folder.
2 Click on the Printers folder.
3 Right-click on the icon of the printer that is malfunctioning, then select Properties to access the Properties window. 4 Click OK to close the Properties window. The printer should function properly.
Index
A
AC adapter 14, 17 AC power 14 air circulation 9 Application Recovery CD 32 B
Batteries 18 battery pack 15, 18 charging 16 connector 12 indicator lights 11, 16 inserting 15 loading 15 power status 16 rechargeable 14 removing 17 battery power 14 brightness adjusting 20 built-in speaker 11 buttons
Start 22
C
charge status indicator light 16 charging battery pack 16 choosing power source 14 Cleaning
Your Notebook 10 cleaning computer 9 computer 39 cleaning 9 condensation 10 setting up 11
starting 20 troubleshooting 59 connecting power source 14 connectors battery 12
DC In 12, 14
D
DC In 12, 14 Driver Recovery CD 33 DV In/Out 13 F
Floppy disk troubleshooting 57 floppy disk drive troubleshooting 57
G
Getting Help 39 H
hard drive indicator light 11 hardware online support 39 headphone connector 13
Help
Getting 39 Hibernate mode 24 I
i.LINK 13 IEEE1394 13
indicator lights battery 11, 16 charge status 16 hard drive 11 power 11
Scroll Lock 11 inserting battery pack 15 interference 9 internal speaker
See speakers
K
keyboard 11 L
LCD 10 lock lever 20 troubleshooting 55
lever
LCD 20 Liquid Crystal Display screen
See LCD loading battery pack 15
M
maintenance 8 Memory Stick card slot 12 microphone 11 troubleshooting 61 microphone connector 13 modem troubleshooting 60 moisture condensation 10 mouse troubleshooting 56
P
PC card troubleshooting 59 Power 11 power indicator light 11 switch 20 power saving modes 23
Hibernate 24
Standby 23 power sources 14 connecting 14 precautions 9 R
radio interference 9 rechargeable battery pack 14, 15 recharging battery pack 16 Recovery CD 32 removing battery pack 17 restoring data 32 S
screen
See LCD Scroll Lock 11 selecting power source 14 setting up your PC support 39 Shut Down Windows dialog box 22 Sony Fax-on-Demand service 39 speakers built-in 11 troubleshooting 61 Standby mode 23 Start button 22 starting computer 20 startup problems 22 System Recovery CD 34 T
touchpad 11 troubleshooting startup 22, 51 turning on computer 20
U
Using
Batteries 18
V
VAIO Support Agent 40 ventilation 9 W
Windows 53
Start button 22 taskbar 22
VAIO® Notebook Update Notice
PCG-SR33
The following information details the changes for the PCG-SR33 VAIO® Notebook and, where applicable, replaces the information provided in the Quick Start, Legal/ Safety Information, and any other supplied documentation.
1) This text updates certain model features and specifications as described on pages 56 in your supplied VAIO® Notebook Quick Start:
2) The section “Troubleshooting the LCD Screen” on page 55 in your supplied, printed VAIO® Notebook Quick Start does not reflect the latest available information. For complete information on LCD screen tips, see the respective section in the online User Guide installed on your notebook.
Processor Low Voltage Mobile Intel® Celeron® processor 600 MHz
© 2001 Sony Electronics Inc. Reproduction in whole or in part without written permission is prohibited. All rights reserved. Sony, VAIO, and the VAIO logo are trademarks of Sony. Microsoft and Windows are registered trademarks of Microsoft Corporation. Intel, Intel SpeedStep, Pentium, and Celeron are trademarks of Intel Corporation. All other trademarks are trademarks of their respective owners Printed in USA
4-656-825-01
Reproduction in whole or in part without permission is prohibited. All rights reserved.
Sony, VAIO, and the VAIO logo are trademarks of Sony. All other trademarks are trademarks of their respective owners.
http://www.sony.com/vaio
SERVICE MANUAL
Ver 1-2001J
All the supplementary information are attached at the end of data files.
PCG-SR33K
For American Area
US Model Canadian Model
Update List
Lineup :PCG-SR33K ConfidentialBasic performances of PCG-SR33K are the same as those of PCG-SR27K. Therefore, this manual describes the differences from PCG-SR27K. Refer to the following manual that is already issued for repair and inspection. PCG-SR27/SR27K SERVICE MANUAL (9-872-215-11) Items CPU Memory HDD LCD PCG-SR27K Mobile Pentium III 750MHz 128MB (128MB × 1) 30GB 10.4XGA (Made by TS)
COMPARISON OF SPECIFICATIONS
PCG-SR33K Low Voltage Mobile Celeron 600MHz 128MB (64MB × 2) 10GB 10.4SVGA (Made by TS)
DIFFERENCES OF PARTS LIST
Page (∗1) PCG-SR27K PCG-SR33K
5-2 Ref.No. Part No. Description 26 A-8025-092-A ASSY HDD 30GB (TOSHIBA) (S) 44 8-749-019-02 IC M463S1724CNO-L1L (128MB) 52 A-8025-089-A C/P MBX-44 (P3/750LV/XGA) (S) 81 4-654-746-01 (SR27K)...LABEL (ID) Part No. Description A-8048-484-A ASSY HDD 10GB T (S) 8-759-686-13 IC M463S0924BTO-L1L (64MB) A-8025-465-A C/P MBX-44 (C 600LV/SVGA) (S) 4-659-233-01 LABEL (ID (HZU))
5-6 305 A-8045-747-A LCD ASSY (S) A-8047-535-A LCD UNIT (10.4SVGA) (S)
∗1 The pages shown above are on "PCG-SR27/SR27K SERVICE MANUAL".
NOTEBOOK COMPUTER
List of PCG-SR Series (As of October, 2001)
Model Name
Service Manual
Part No.
9-872-095-11 9-872-134-11 9-872-215-11 9-872-239-11 9-872-297-01 : Additional Models
This manual and the constituent data may not be replicated, copied nor reprinted in whole or in part without prior written authorization of Sony Corporation.
List of PCG-SR Series (As of June, 2001)
Model Name
PCG-SR5K/SR7K PCG-SR17/SR17K PCG-SR27/SR27K
Service Manual Part No.
9-872-095-11 9-872-134-11 9-872-215-11
: Additional Models
This manual and the constituent data may not be replicated, copied nor reprinted in whole or in part without prior written authorization of Sony Corporation.