7 minute read
MAINTENANCE

Table Of Contents
1. MAINTENANCE AND LUBRICATION
Note
•Never work under a raised loader bucket/loader beam unless the safety strut is installed in LOCKED position.
•Check for leaks using a piece of cardboard.
•Do not use your hands. Escaping hydraulic fluid un-der pressure can penetrate the skin. If skin is penetrated with Hydraulic Fluid, get immediate medical help, it must be surgically removed within a few hours by a suitably qualified doctor familiar with this type of injury or gangrene will result.
•Always use Axle stands or other acceptable rigid sup-port of ample capacity to support the backhoe when raised clear of the floor.
•Refer to the SAFETY section of this manual before performing any maintenance tasks on this machine.
Before carrying out any service or maintenance work ,ensure that the following precautions have been taken.
Procedure
•Stop engine and chock the wheels. Park the machine on a flat, level surface away from any soft ground, excavations or poorly shored cavity.
•Lower the loader bucket until it is pressing on the ground.
•Place the backhoe attachment in the road travel position.
•Place the direction of travel and gear change levers in the neutral position.
•Immobilize the machine by means of the parking brake.
•Raise the stabilizers completely.
•Stop the engine and remove the ignition key.
•Release the hydraulic pressure by operating the control levers in both directions.
•Lock the loader attachment controls (if equipped).
•Place a warning tag on the machine to prevent accidental start up.
•Chock the wheels to prevent accidental movement of the machine.
•Only jack or raise the backhoe using the correct equipment.
•Refer to Service Schedules. See “Service Schedule”.
•When checking fluid levels the machine must be placed on a firm, level surface, in a well ventilated position away from naked flames, grinding sparks etc.
•Ensure strict cleanliness is observed while dealing with the hydraulic systems.
•Isolate electrical system by using the battery isolator switch or by disconnecting the battery( if equipped).
•Ensure all guards and covers removed during maintenance, are refitted before the machine is put back into work.
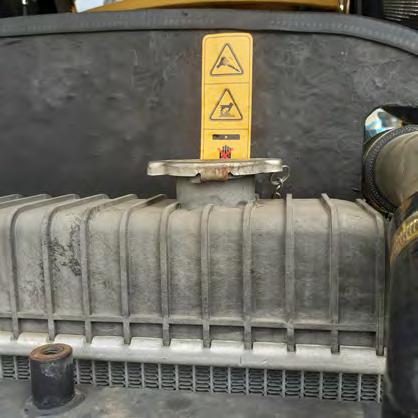
1.1 SafetySigns
All safety decals pasted on the machine must be legible. Use mild soap and water to clean safety decal - DO N OT use solvent based cleaners because they may damage them. All safety decals MUST be replaced immediately if they become damaged or unreadable.
1.2 HydraulicOilUnderPressure
•Release any pressure in the hydraulic circuit before carrying out any repairs to the hydraulic system or components.
•Fine jets of hydraulic fluid under pressure can penetrate the skin.
•Do not use your fingers to check for small leaks or expose uncovered areas of your body to leaks.
•Check for leaks using a piece of cardboard.
2. CLEANING
•Avoid Spraying Electrical Equipment with Pressure Washers.
•Contaminated Water / Fluids / Oils Must Be Disposed of Legally.
•Clean the backhoe thoroughly, this will make it easier to find oil leaks and loose fittings etc.
•Take care to clean the oil, fuel and water tank filler necks.
•Drain plugs should also be cleaned.
•Using water or a pressure washer to wash down the exterior of the backhoe with or without detergent is generally all that is required.
•When cleaning the backhoe it is preferable to use a biodegradable cleaner. Do not use solvents or like products which can damage rubber and plastics
3. FLUIDS AND LUBRICANTS
Note
It is mandatory to observe the instructions for use of the various fluids and lubricants.
Fluids and lubricants must have the correct properties for each application.
1. Hydraulic fluid - Hydraulic fluid is specially designed for high pressure applications and for hydraulic system. The type of fluid to be used depends upon the ambient temperature. Use AWHEHM46 grade oil.
2. Engine oil - The engine oil to be used depends on the ambient temperature. Use only CI4 SAE 15W40 API CI-4/SL grade oil
3. Brake fluid - Fluid type : Recommended Brake Fluid grade -HLP-15.
4. Transmission component oil - Extreme pressure oil is used for all synchroshuttle transmission components. Use UNITRACFR2 grade oil.
5. Grease - The type of grease to be used depends on the ambient temperature. Use ELF LEX EP2 grade grease .
6. Rear axle oil - Use only UNITRACFR2 grade oil in differential and reduction gears.
7. Front axle oil - Type of oil to be used: UNITRACFR2 grade oil.
Note
Do not put any performance additive or other additive in the sump. Oil change intervals shown in this manual are based on tests carried out on lubricants.
(A) FAHRENHEIT TEMPERATURE
(B)CENTIGRADE T EMPERATURE
8.Anti-Freeze/Anti-Corrosion
•Use anti-freeze in all seasons to protect the cooling system from corrosion and all risk of freezing. •For areas where ambient temperatures are over - 36°C (- 33°F), use a blend of 50% ethyleneglycol based anti-freeze. For areas where temperatures are below - 36°C (- 33°F), it is advisable to use a blend of 40% water and 60% antifreeze.
Note
In cold weather, fill the fuel tank after each day’s work, to prevent the formation of condensation.
The fuel to be used must be in conformity with the D975 standard of the American Society for Testing and Materials (ASTM). Use fuel type no. 2. The use of other fuels may cause loss of engine power and excessive fuel consumption. In cold weather, a mixture of fuel no. 1 and no. 2 is temporarily permitted. Consult your fuel supplier. If the temperature falls below the fuel cloud point (point at which wax appears), wax crystals in the fuel will cause a loss of engine power or make. it impossible to start the engine.
10.Fuel Storage
Prolonged fuel storage causes foreign bodies or condensation water to accumulate in the storage tank. Many engine failures are caused by the presence of water in fuel. The storage tank should be placed outdoors and the fuel should be kept at as low a temperature as possible. Condensation water should be drained off at regular intervals.
4. ENVIRONMENT
Before carrying out any maintenance operation on the machine and before disposing of used fluids or lubricants, always think of the environment. N ever throw oil or fluid on the ground and never put them in leaky receptacles. Consult a local recycling or environmental centre, or a local dealer to obtain information on the correct method of disposing of these materials.
5. PLASTIC AND RESIN PARTS
When cleaning plastic windows, the console, the instrument panel, the gauges, etc., avoid the use of petrol, paraffin, paint solvents, etc. Use only water, soap and a soft cloth. The use of petrol, paraffin, paint solvents, etc. will cause discoloration, cracks or deformation of these parts.
6. FLUID AND LUBRICANT CAPACITIES
FLUID /LUBRICANT
7. ENGINE ACCESS
Procedure
1. Park the machine on flat, level ground.
2. Raise the loader attachment, stop the engine, engage parking brake, remove the starter switch key and install the safety strut.

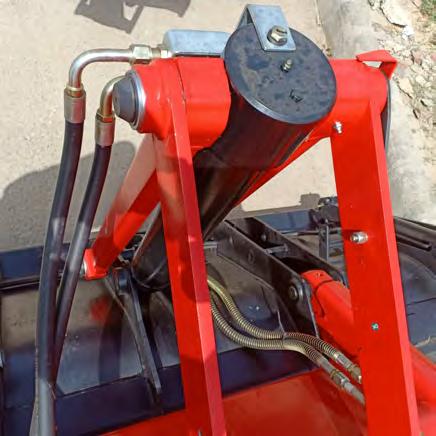
8. GREASING POINTS
8.1 Machine
Use the following grease : ELF LEX EP2
Tool required - Grease gun


Every 10 hours
Every 50 hours
Front cardan shaft joints
Every 50 hours
Every 10 hours
Rear cardan shaft joints

Pedal Pivot
Tool required One oil can
Every 250 hours
8.2 LoaderAttachment-

The figures shown in brackets indicate the number of grease points.
Tool required - Grease gun
Use the following grease : ELF LEX EP2
Every 10 hours
Every 10 hours
Every 10 hours
Loader Beam Top pins


Every 10 hours
Every 10 hours
Every 10 hours
Every 10 hours
Every 10 hours
Every 10 hours
Clam cylinder to 7 in 1 bucket (if equipped)


8.3 Backhoeattachment
The figures shown in brackets indicate the number of grease points.
Tool required - Grease gun


Use the following grease: ELF LEX EP2. Every 10 hours
Every 10 hours
Every 10 hours
Every 10 hours
Every 10 hours
Every 10 hours
Every 10 hours
Every 10 hours
Every 10 hours
Every 10 hours
Every 10 hours
9. LEVELS
Every 10 hours
Every 50 hours
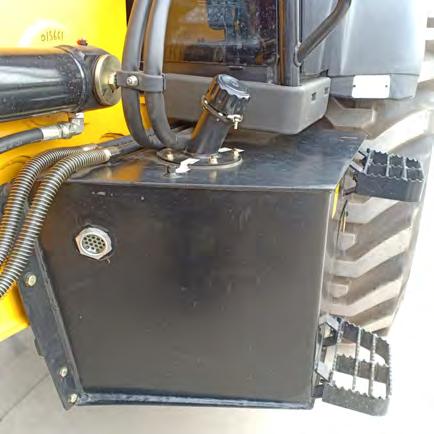
Hydraulic reservoir
Every 50 hours
Radiator
Every 50 hours
Every 250 hours
Transmission oil


Front drive axle

Every 250 hours
Every 250 hours
Reduction gears


10. ENGINE
For detailed information regarding engine consult Kirloskar/Perkins operation and maintenance manual. Drain the engine when it is still hot. The oil will flow more easily. The machine must be parked on flat level ground. Do not use the filter wrench to install the filter. Excess tightening can damage the seal and the filter. Always wait 15 minutes to allow the oil to return to the engine sump before checking the oil level.
Service Specifications
Oil level check
Every 10 hours or every day
Every 500 hours (After the first 100 hours during the running in period) Oil filt
Oil change
10.1 Oil Level
Procedure
1. To access the engine see “Engine Access”.
2.
3.
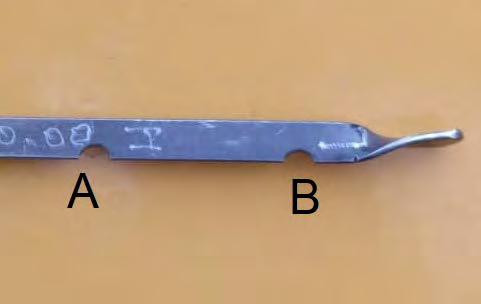
After the engine has been stopped for 15 minutes, remove the dipstick(1), clean it with a clean cloth, replace it in the guide tube as far as it will go and then remove it again. If the oil level is below the (B) mark, remove the filler cap (2)and add oil up to the (A) mark on the dipstick. Then replace the filler cap. The level should not be higher than the (A) mark on the dipstick.
4.Close and lock the engine bonnet.
5.Remove the support strut and lower the loader attachment.
10.2 Oil Change and Oil Filter Replacement
Drain the engine when it is still hot. The oil will flow more easily.
The machine must be parked on flat level ground. Do not use the filter wrench to install the filter. Excess tightening can damage the seal and the filter.
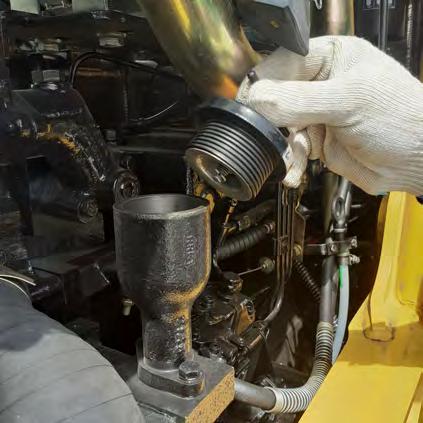

Always wait 15 minutes to allow the oil to return to the engine sump before checking the oil level.
Tools required
1. One 16 mm (5/8 inch) wrench for hexagonal head bolts.
2. One filter wrench.
Procedure
1. To access the engine see “Engine Access”.

2. Place a receptacle of a suitable capacity under the drain plug from the sump, remove the drain plug and allow the oil to flow out.
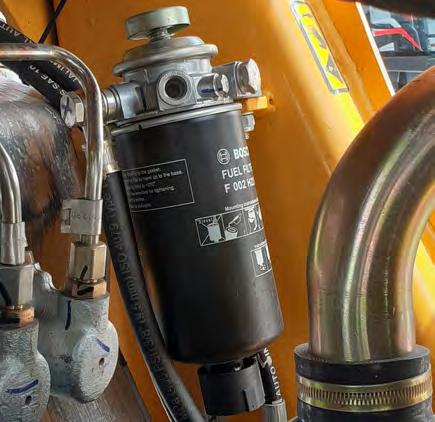
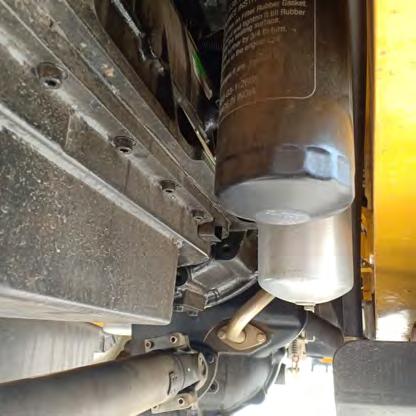
3.Clean around the filter and remove it, using the filter wrench.
4.Apply clean oil to the new filter seal.
5.Install the new filter. Turn the filter until the seal is in contact with the filter head and then tighten it half a turn more by hand.