4 minute read
Fuel System

from Mahindra Tractor‘8000’ Series 8090 8100 4WD CABIN TIER-4 FINAL Operator's Manual - PDF DOWNLOAD

Using Proper Fuel
Use proper diesel fuel to help prevent decreased engine performance and increased exhaust emissions. Failure to follow the fuel requirements listed below can void your engine warranty.
It is recommended to use diesel fuel specified to ASTM D-975 D2 S15, EN 590 (ULSD- 15 PPM S LEVELS)
NOTE: Engine to be run with Diesel fuel only. (No Bio diesel)
Clean Diesel Fuel
Diesel Fuel should be poured so that no sediment can enter the tractor fuel tank whilst it is being filled. Fuel storage facilities should allow for the periodic removal of sediment from the bottom of the storage tank.
The Diesel fuel filters will remove any sediment still present in the fuel and ensure that the fuel reaching the injection pump and injectors is free of impurities. The fuel filter should be serviced regularly to ensure maximum engine reliability.
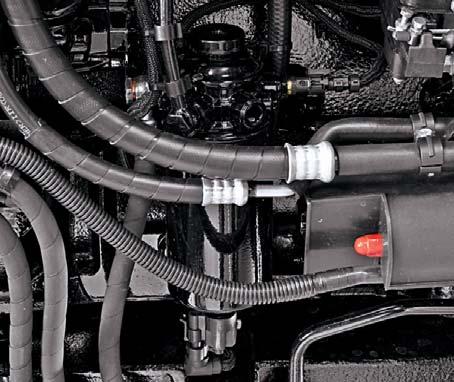
Bleeding the CR Fuel Injection System
In case the low and high pressure circuit of CRS get filled with air re-start can be problematic.
To facilitate re-start after filter change or after driving tank empty, it is necessary to use the hand primer (A) in order to fill the CRS low pressure circuit with fuel.
The air should be completely bled so that the tractor operates satisfactorily. Loosen air bleeding screw (B) on fuel filter and push hand primer (A) down till you get the flow of fuel free of air from air bleeding screw. Retighten the screw (B).
Disconnect the fuel pump backflow hose to the fuel tank. Then push the hand primer (A) until the fuel comes out from the fuel pump backflow and the resistance encountered by activating the hand primer is big enough. Then connect the fuel pump backflow hose.
Fuel Tank and Fuel Pipes
Fill the tank each time the tractor finishes the days work. This prevents condensation inside the fuel tank. Check regularly to ensure all fuel pipe unions are tight and in good order. Ensure that vent hole provided on fuel tank cap is not choked. Water or dirt settled in the bottom of fuel tank should be drained daily, before starting the engine by loosening the drain cock till clean diesel flows.
Escaping hydraulic diesel fluid under pressure can penetrate the skin causing serious injury. Do not use your hand to check for leaks. Use piece of cardboard or paper to search for leaks. Stop engine and relieve pressure before connecting or disconnecting lines.
Tighten all connections before pressurizing lines.
If any fluid is injected into the skin obtain medical attention immediately or else, serious injury may result.
Fuel System
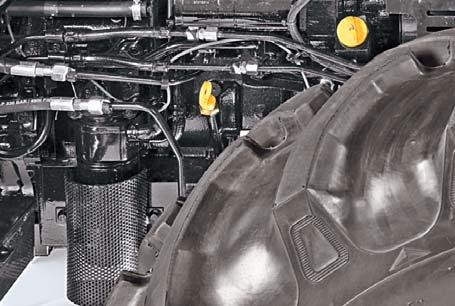
Fuel Filter
This filter provides clean, moisture free fuel for the injection process. A hand primer is provided to manually remove excess air from the fuel filter and fuel lines.
Major Components:
•Hand Primer
•Air Bleeding Screw
•Fuel Filter
Fuel enters the filter at inlet (A) and flows through the filter element separating water its contents before flowing through outlets (B) to the fuel injection pump.
Since water and contaminants settle at the bottom of the sediment bowl, a drain plug (i.e. Adaptor cum Water Sensor) is provided.
Drain water from the fuel filter when water level indicator in instrument cluster glows on.
To drain water from fuel filter, unscrew the water sensor in anticlockwise direction by hand. Rotate only 1 to 2 turns by hand. Place a small tray to collect water or water and diesel emulsion. Tighten water sensor by rotating clockwise. Tightening torque 2 to 3 Nm or hand tighten and fix connector (C).
Servicing the Fuel Filter
1.It is recommended to replace the fuel filter every 250 hrs.
2.To remove Filter, unscrew the filter (D) from adaptor (F).
3.Check O'rings of fuel filter for any crack/damage. Smear oil on the new O'ring before installation.
4.Assemble the new filter. Do not over tighten.
5.Clean Water Sensor to remove sludge & retighten to filter.
6.Prime the system and bleed the filter. Tighten the bleeding screw.
NOTE : Drain water once in a week or whenever the water level indicator on dashboard glows "ON" continuously, if water contamination is excessive. Continued driving with water accumulation in fuel filter will cause damage to the fuel pump / other fuel system components.
NOTE : Replace fuel filter at the recommended period or whenever it gets clogged. Discard the old filter and do not repair or clean the filter. Always fit the spin-on filter dry.
NOT to do any self-service / repair of Fuel system (Removal of fuel lines, filter etc) by operator and it should be done in Service center only.
Oil Level Check
Check engine oil before starting the engine.
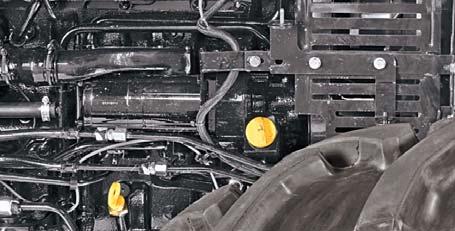
1.Remove dipstick gauge (A) provided on the right hand side of the crankcase.
2.Oil level should be between the two marks provided on the dipstick.
Oil Change
Change Engine Oil as per Routine Service Schedule given in this Manual.
1.Ensure that the engine is stopped before changing oil.
2.Remove the drain plug provided at bottom of oil sump.
3.Allow the oil to drain at least for five minutes. All the oil can be drained out when engine is still warm.
4.Now reinstall the drain plug (B). Service the oil filter as explained below.
5.Remove the oil filler cap (C) in the front cover to expose the oil filler neck.
6.Refill the oil sump slowly by recommended grade of oil (15W40-CJ4).

7.Clean and place the oil filler cap again.
Engine Oil Filter
The life of engine and turbocharger depends upon clean oil being circulated to its bearings. In the normal course of engine operation the lubricating oil undergoes changes which produce harmful by-products. The purpose of the oil filter is to separate and remove dirt and other injurious foreign materials from the oil and prevent these from being circulated in the engine.
The Engine oil filter (D) should be replaced as per Routine Service Schedule given in this Manual or whenever engine oil is changed.


