1 minute read
REPAIR INSTRUCTIONS
INSTALLATION
Refer to Figure 293. Purchase the auxiliary driveshaft as an assembly only. Do not try to dismantle or rework as it may result in damage to the engine.
1.Lubricate front auxiliary driveshaft journal (2), rear auxiliary driveshaft journal (4) and shaft bearings (in cylinder block) with clean engine oil.
2.Install shaft (3) into the rear of auxiliary driveshaft housing. Take care when aligning shaft through rear bearing (1).
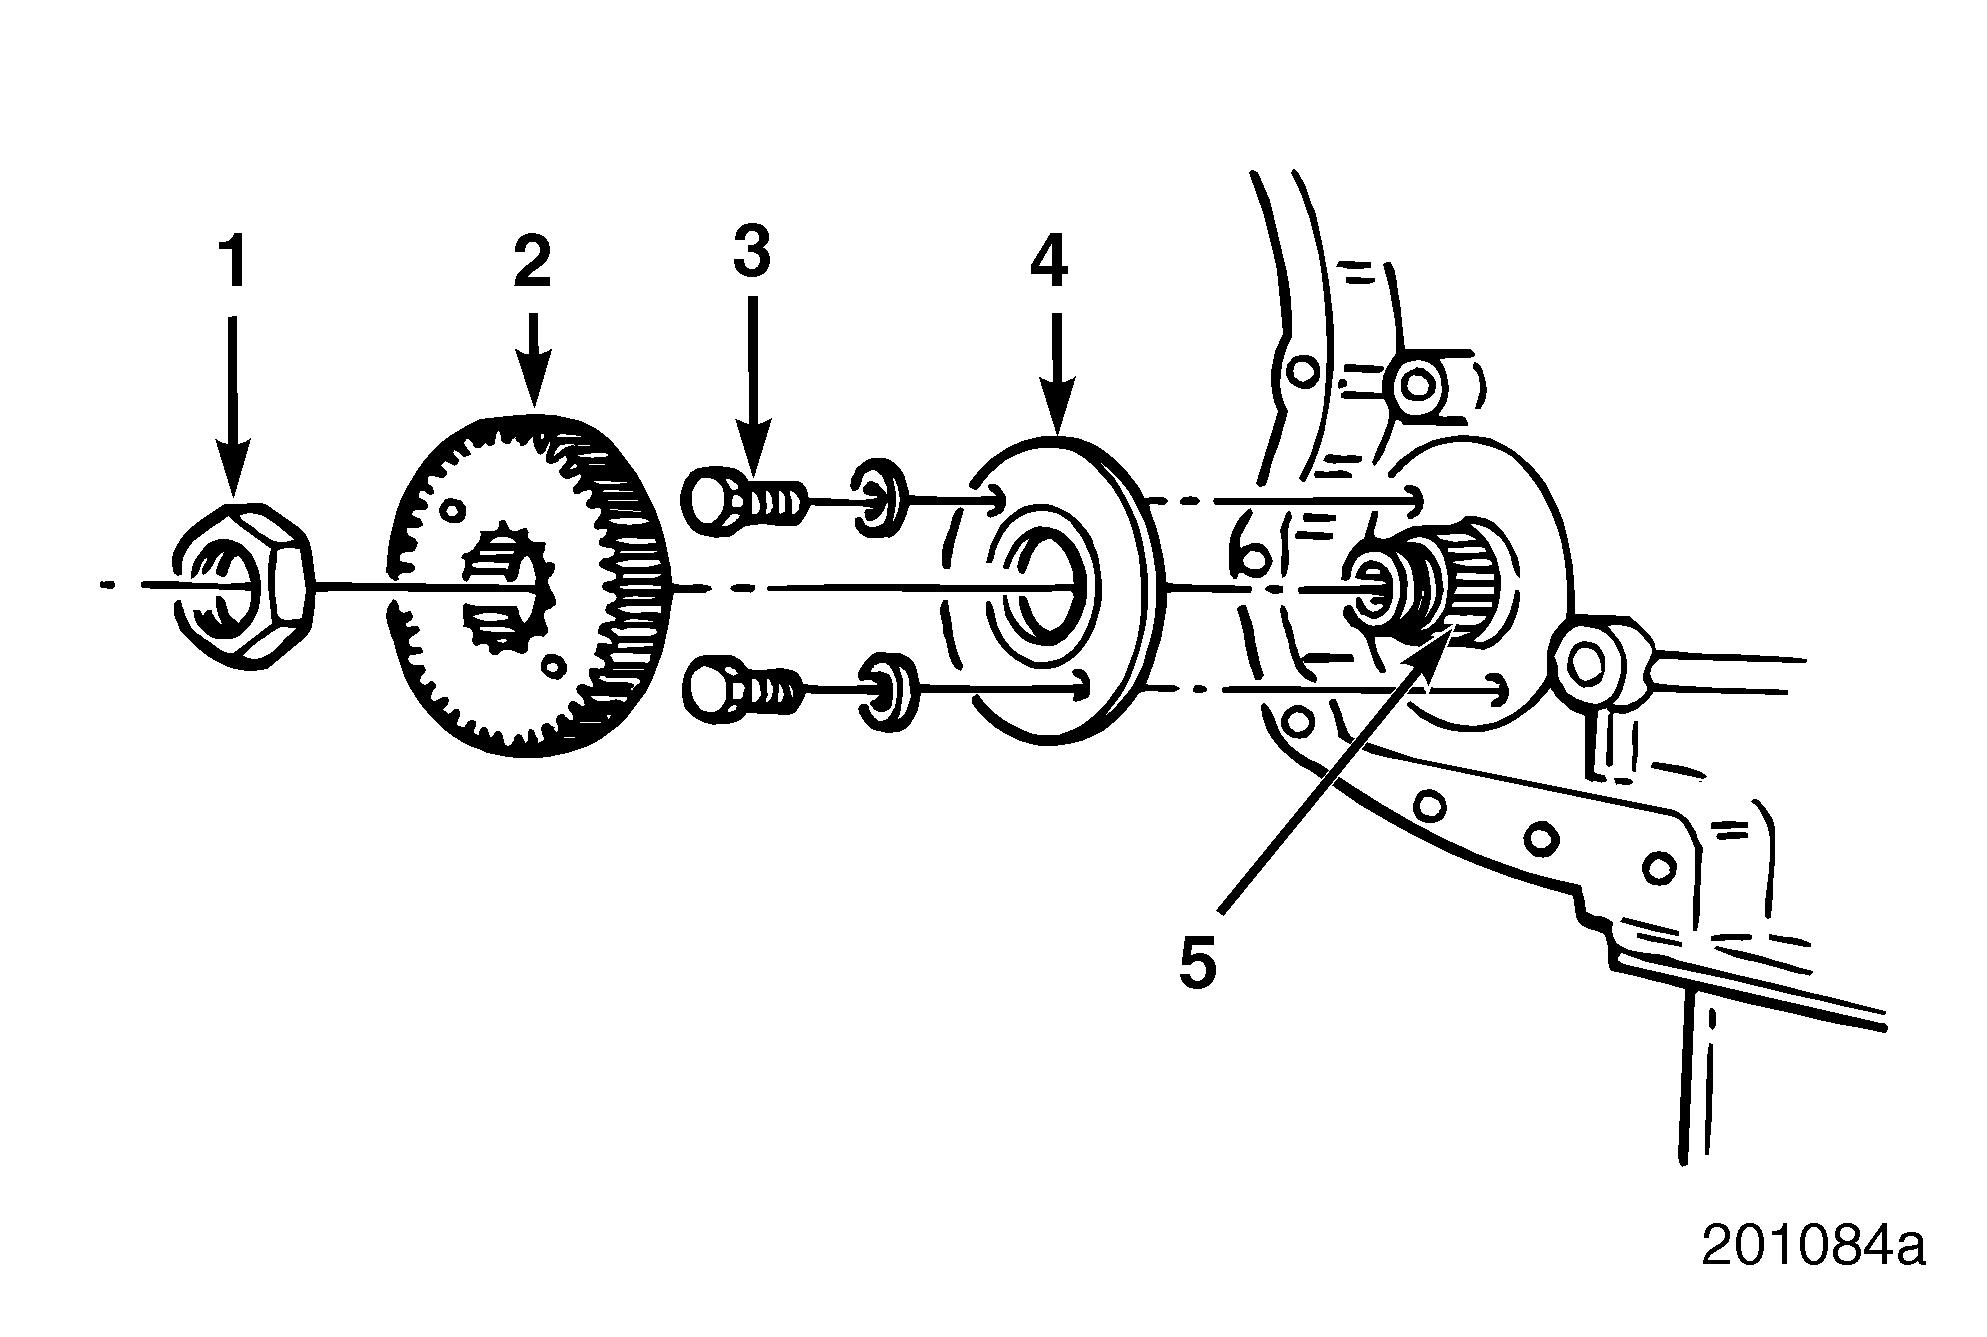
Refer to Figure 294.
3.Install thrust washer (4) and secure it in position with the patch-lock capscrews (3) and hardened washers.
4.Torque the thrust washer retaining patchlock capscrews to 15 lb-ft (20 N•m) using torque wrench J 24406, or equivalent.
5.Install auxiliary driveshaft gear (2) on shaft splines (5).

The auxiliary driveshaft and nut threads must be clean and dry before assembly. Clean the threads thoroughly with Brakleen® or electrical contact cleaner. Apply Loctite® 271 or 277 to the threads and install the nut.
6.Install auxiliary driveshaft nut (1) and torque to 300 lb-ft (407 N•m) using torque wrench J 23775-01, or equivalent.
Page 219


