1 minute read
REPAIR INSTRUCTIONS


17.Install the center main bearing cap, with bearing insert and the correct thrust washer sections in place, and torque the bearing capscrews to specification.
18.Recheck the end play to ensure the thrust washers have been installed correctly and that end play is within specification. Rotate the crankshaft to ensure there is no binding.
Checking Running Clearance
When using the Plastigage method of checking running clearance, do not turn the crankshaft. Doing so will destroy the Plastigage.
1.Use Plastigage to check the main bearing clearance. Check each bearing, one at a time, by placing a piece of Plastigage on the journal and tightening the cap in place. The bearing clearance is determined by measuring the width of the crushed Plastigage with the supplied gauge.
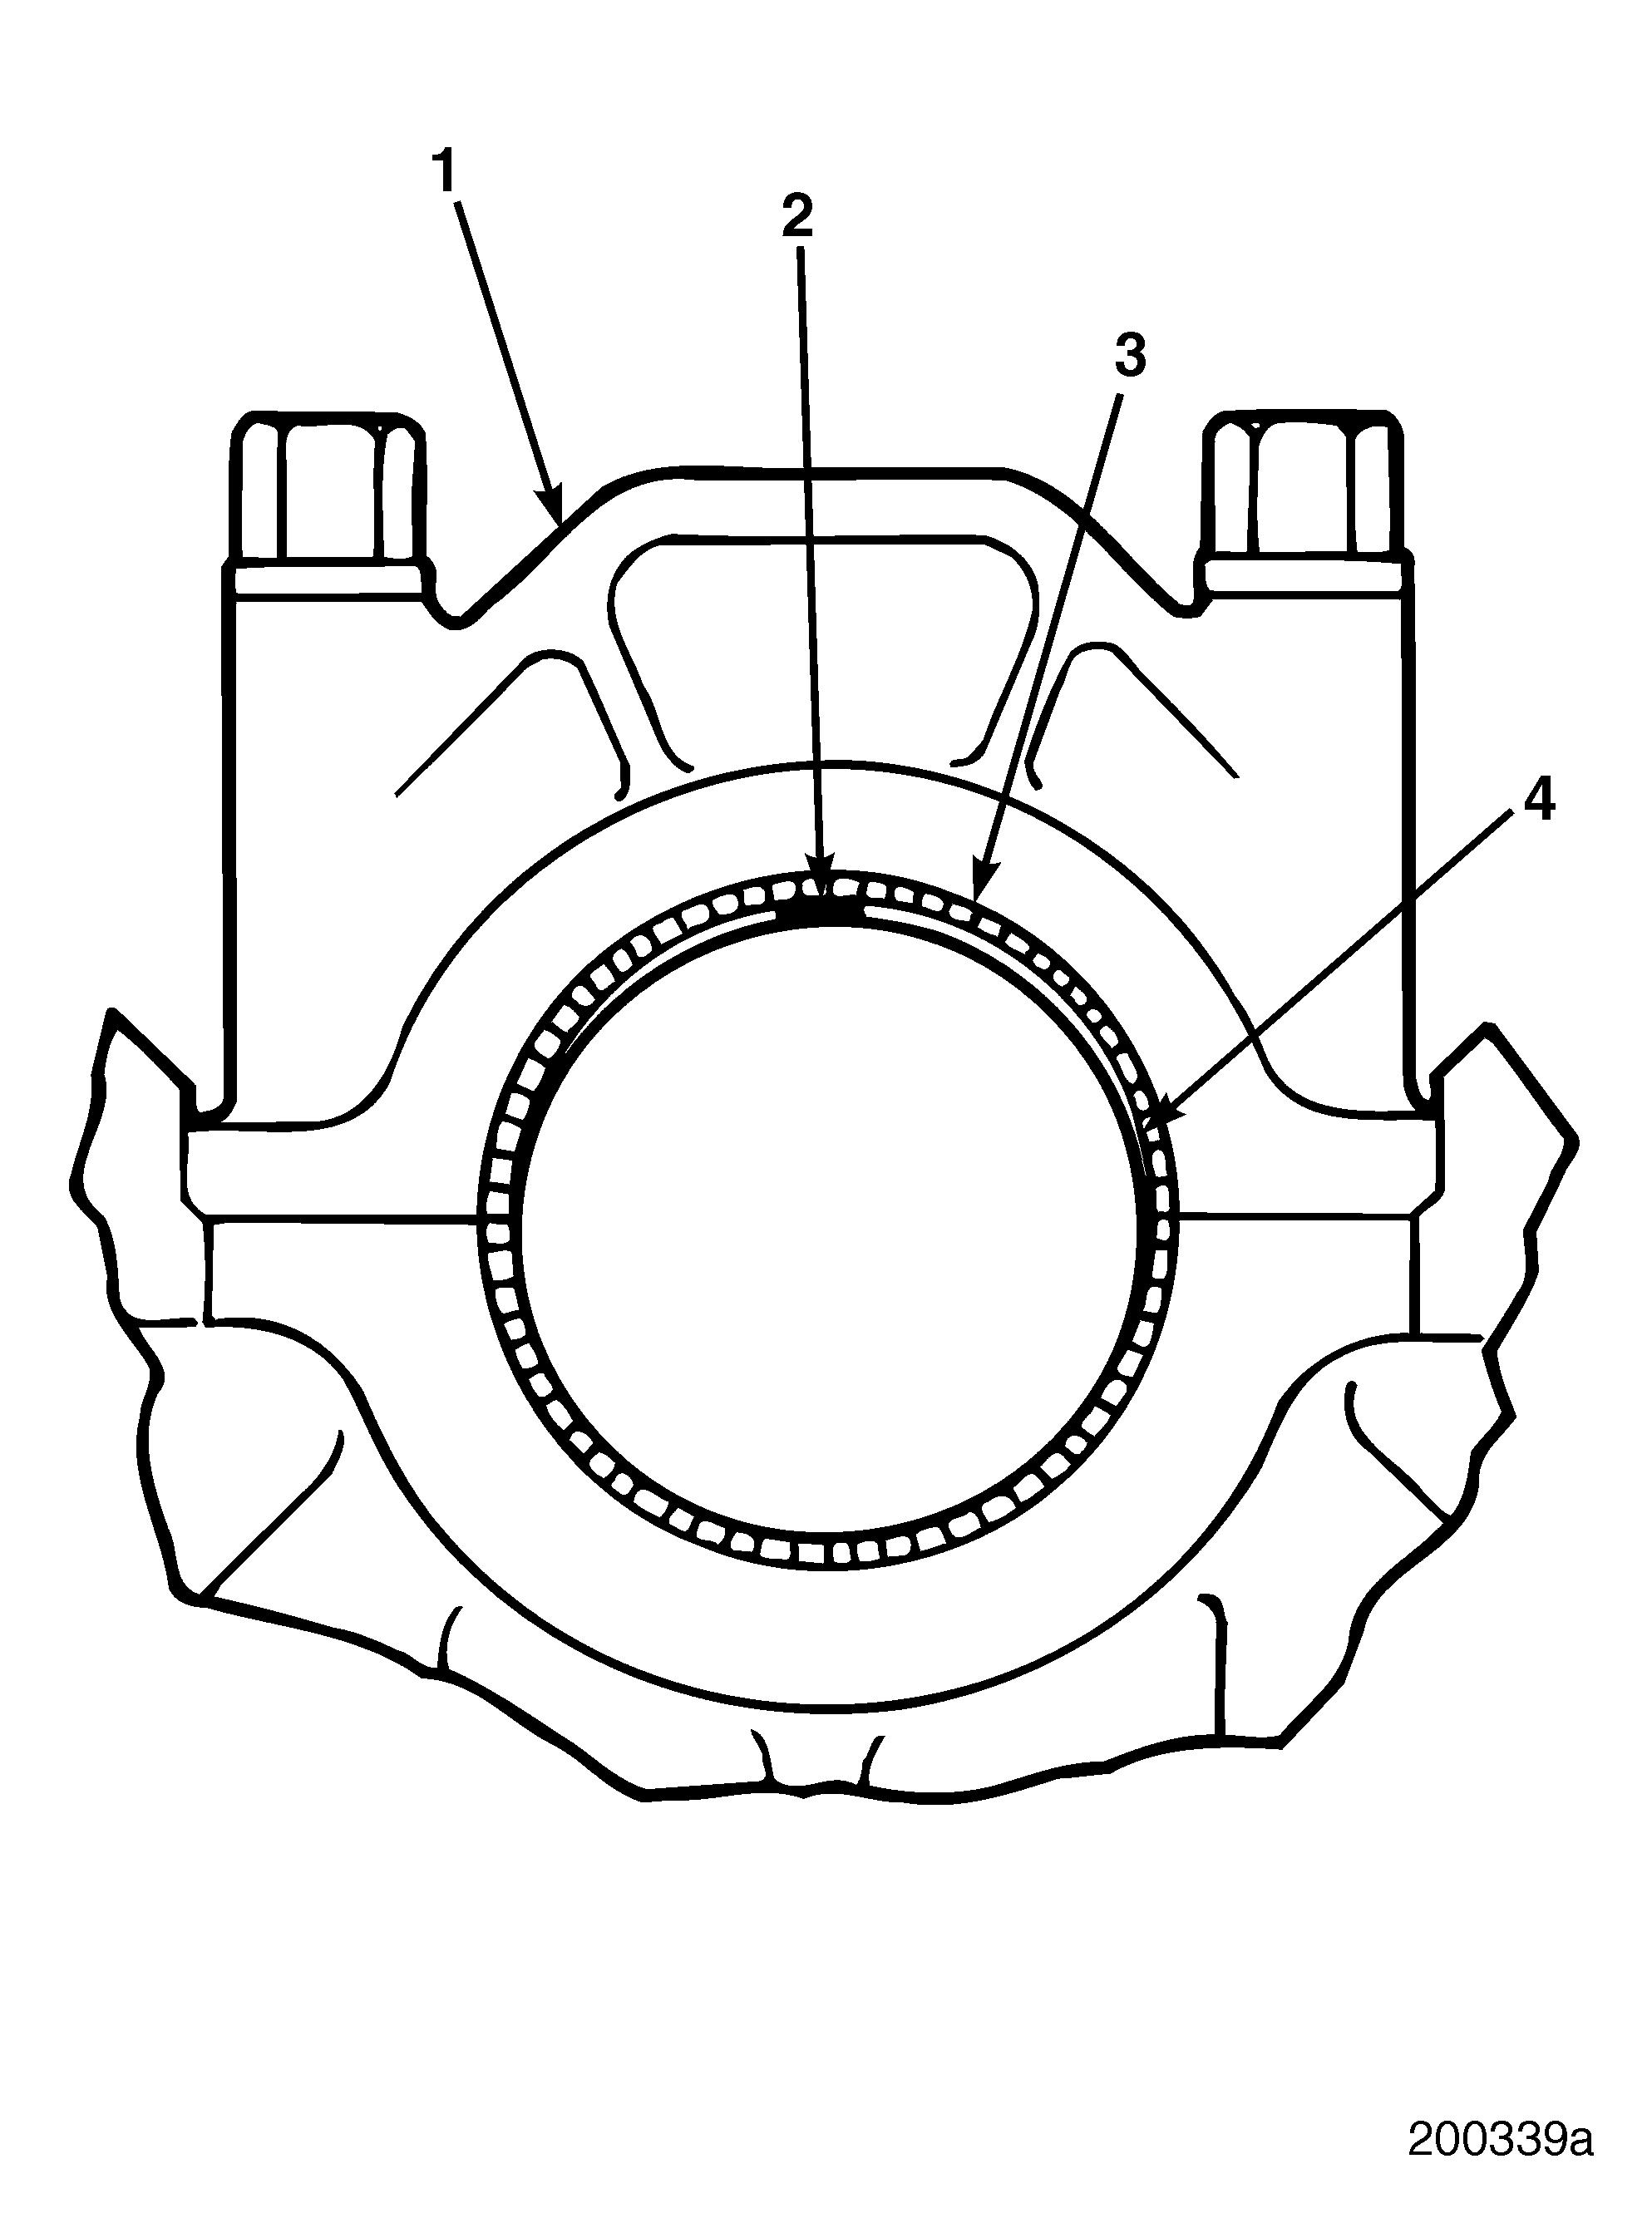
2.Place a section of Plastigage (2) on the journal to be checked and assemble the main bearing cap (1) to the cylinder block as shown in Figure 273.
3.Apply a light coat of oil on the threads of the bearing cap capscrews and secure the cap.
4.Tighten the capscrews to the specified torque, using torque wrench J 24407, or equivalent. The Plastigage strip will be crushed between the bearing insert (3) and the crankshaft journal (4).
5.Remove the capscrews and cap, and check the bearing running clearance.
6.Check the width of the Plastigage using a Plastigage width chart. After measuring width, remove the Plastigage from the bearing.
7.If the clearance is not within specification, correct the clearance as required. Be sure to use the proper size bearing(s).
r If the clearance is less than specified, check behind the bearing for dirt, chips or burrs which would prevent the bearing from seating properly.
r If the bearing bores and inserts are clean and undamaged, replace the inserts with inserts sized to provide the specified clearance.
Page 205


