2 minute read
REPAIR INSTRUCTIONS


8.Install inner wearplate (9) in pump body aligning notch in wearplate with pin in body.
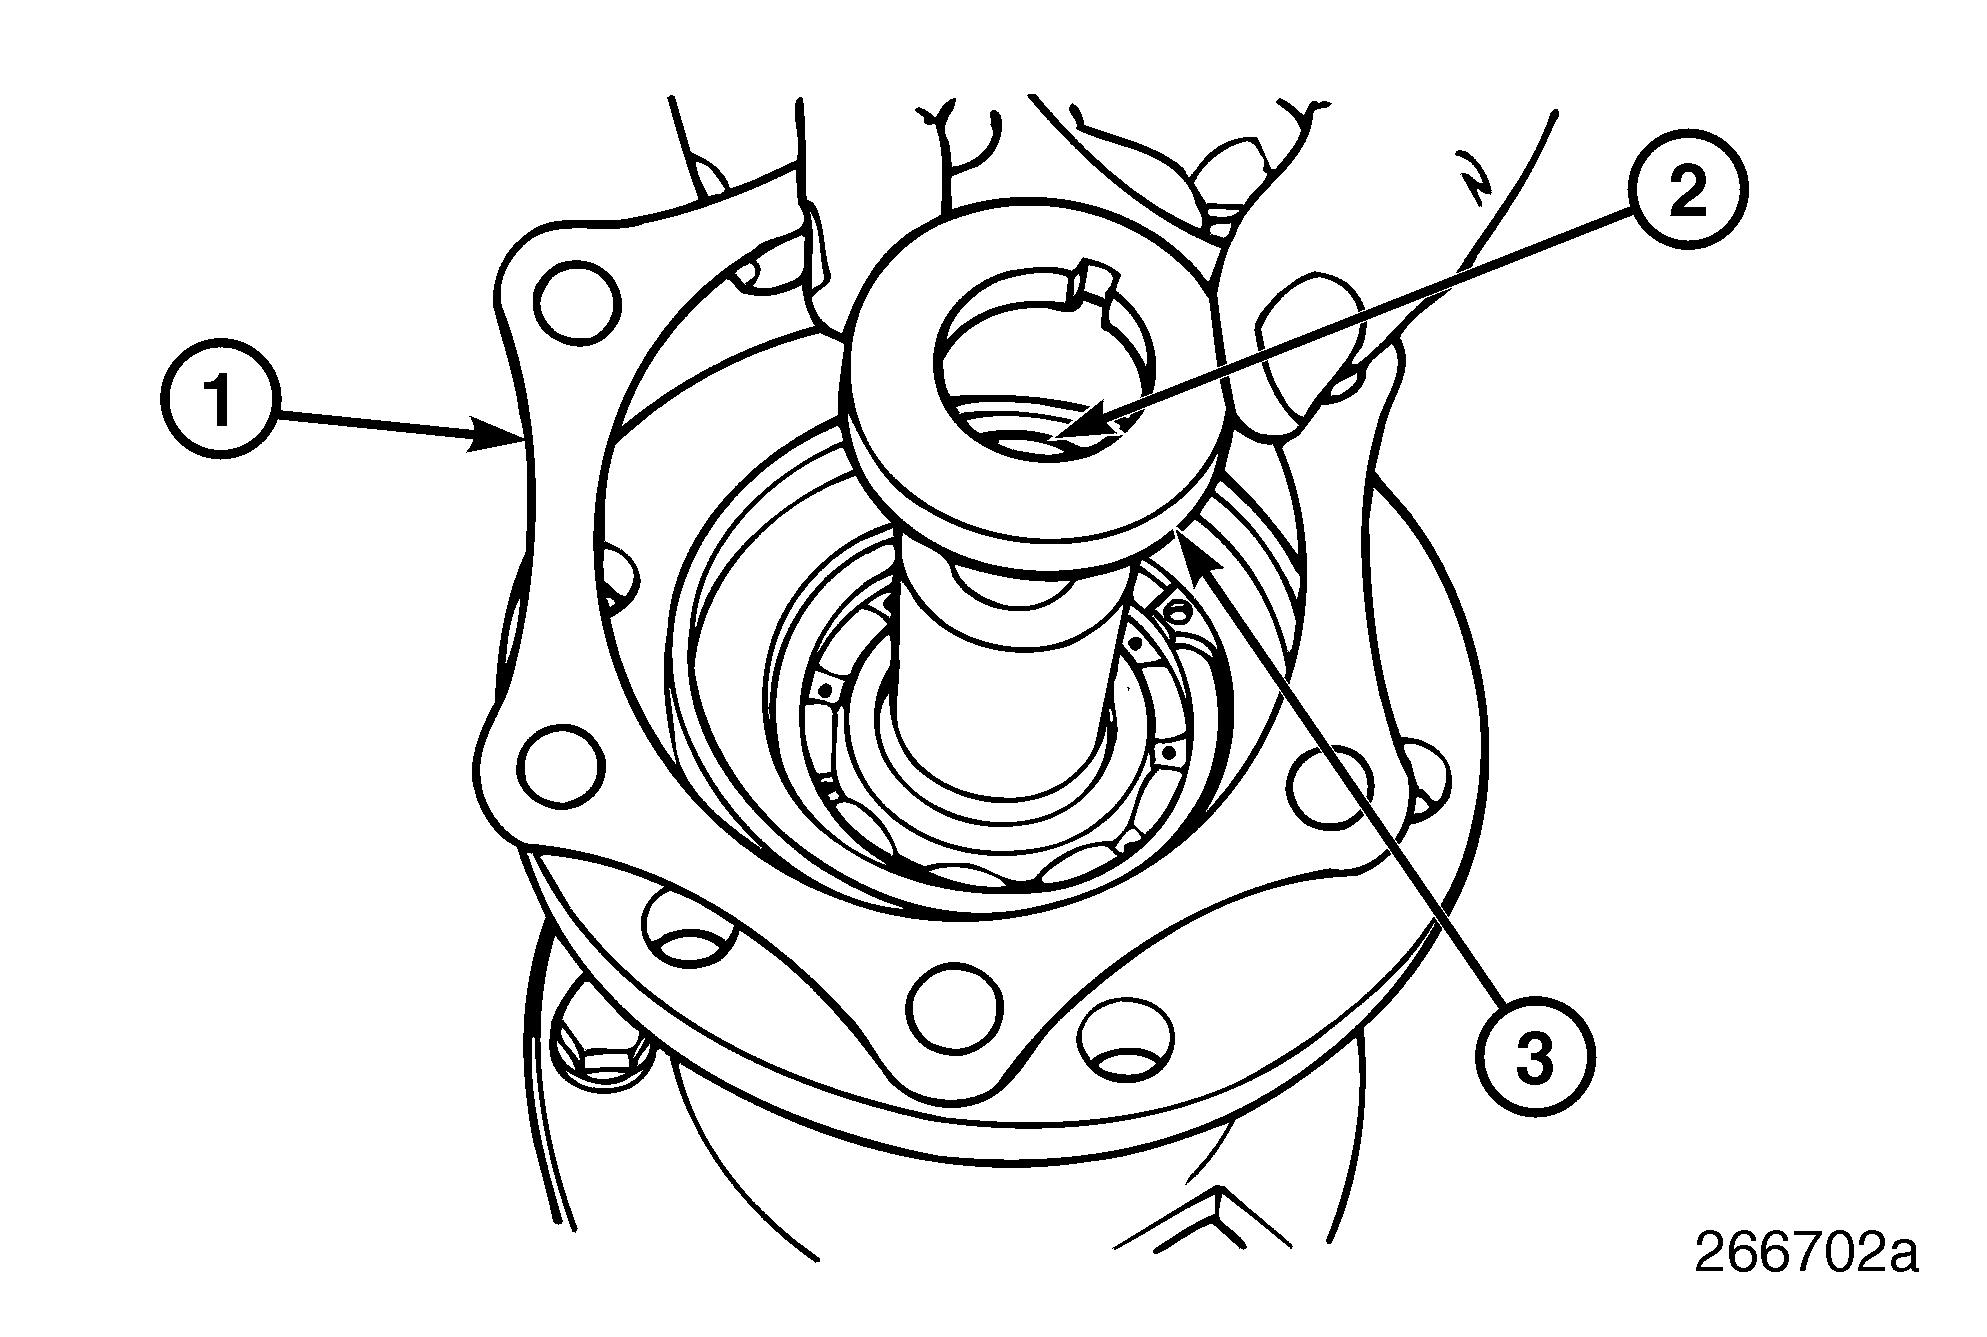
9.Lubricate body with a film of water pump grease and aligning hole in top of cam/liner (3) with pin in pump body (2). Push into body until it is recessed about 1/8″ from end cover surface.
10.Liberally grease the inside of cam/liner with water pump grease.
11.Install impeller O-ring in groove in impeller insert. Inserting end of impeller (7) with O-ring first, rotate impeller in direction of pump rotation to bend blades under cam and push into bore until impeller insert flats align with shaft flats. Then push impeller all the way into impeller bore. End of impeller should be approximately even with cam/ liner. Install rubber spline plug into end of impeller.
12.Install outer wearplate ensuring that notch in wearplate aligns with hole in top cam/liner.
13.Place a new end cover gasket (6) over pin in end cover. Install end cover aligning pin with hole in cam/liner.
Repair Instructions
14.Reinstall the impeller end cover (5) onto the raw water pump and insert the six special brass capscrews (4). Tighten the capscrews to specifications.
15.Open the engine sea water seacock.
Pump will self-prime at low or high speeds. Be sure suction lines are airtight or pump will not self-prime.
Impeller depends on liquid pumped for lubrication. DO NOT RUN DRY for more than 30 seconds. Lack of liquid will burn the impeller.
RAW WATER PUMP OVERHAUL (PUMP REMOVED)
1.Place the raw water pump on a clean work surface.
2.Remove the raw water pump from the MackPower™ supplied adapter by removing the six nuts from the pump studs. Coupling gear must be removed before the gasket can be separated from between the two housings.
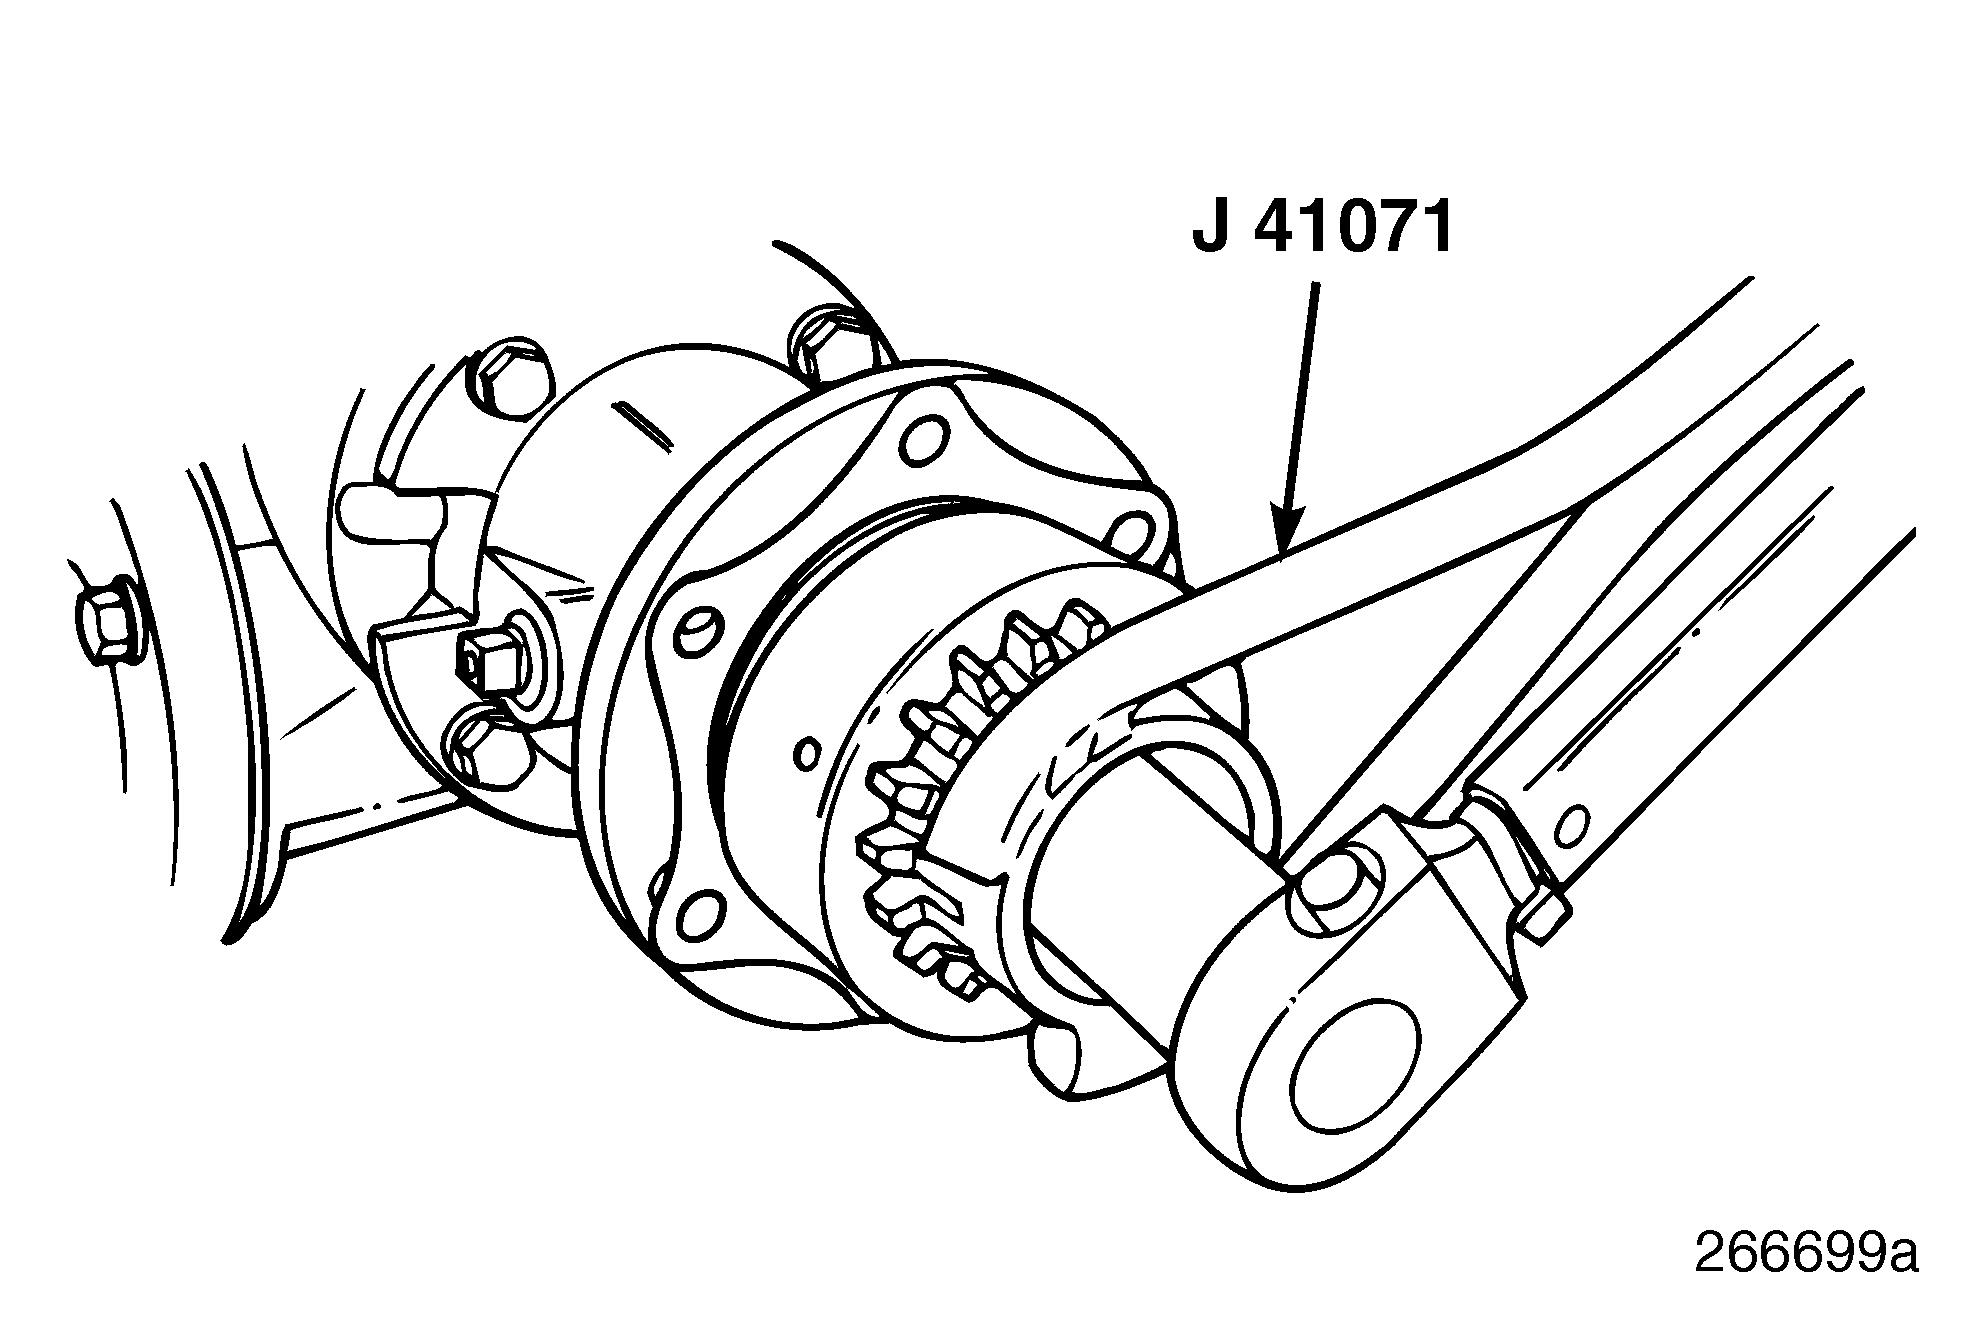
3.Loosen the nut securing coupling gear to the raw water pump shaft using tool J 41071, or equivalent, to hold the gear and a socket and ratchet to loosen the nut. 250
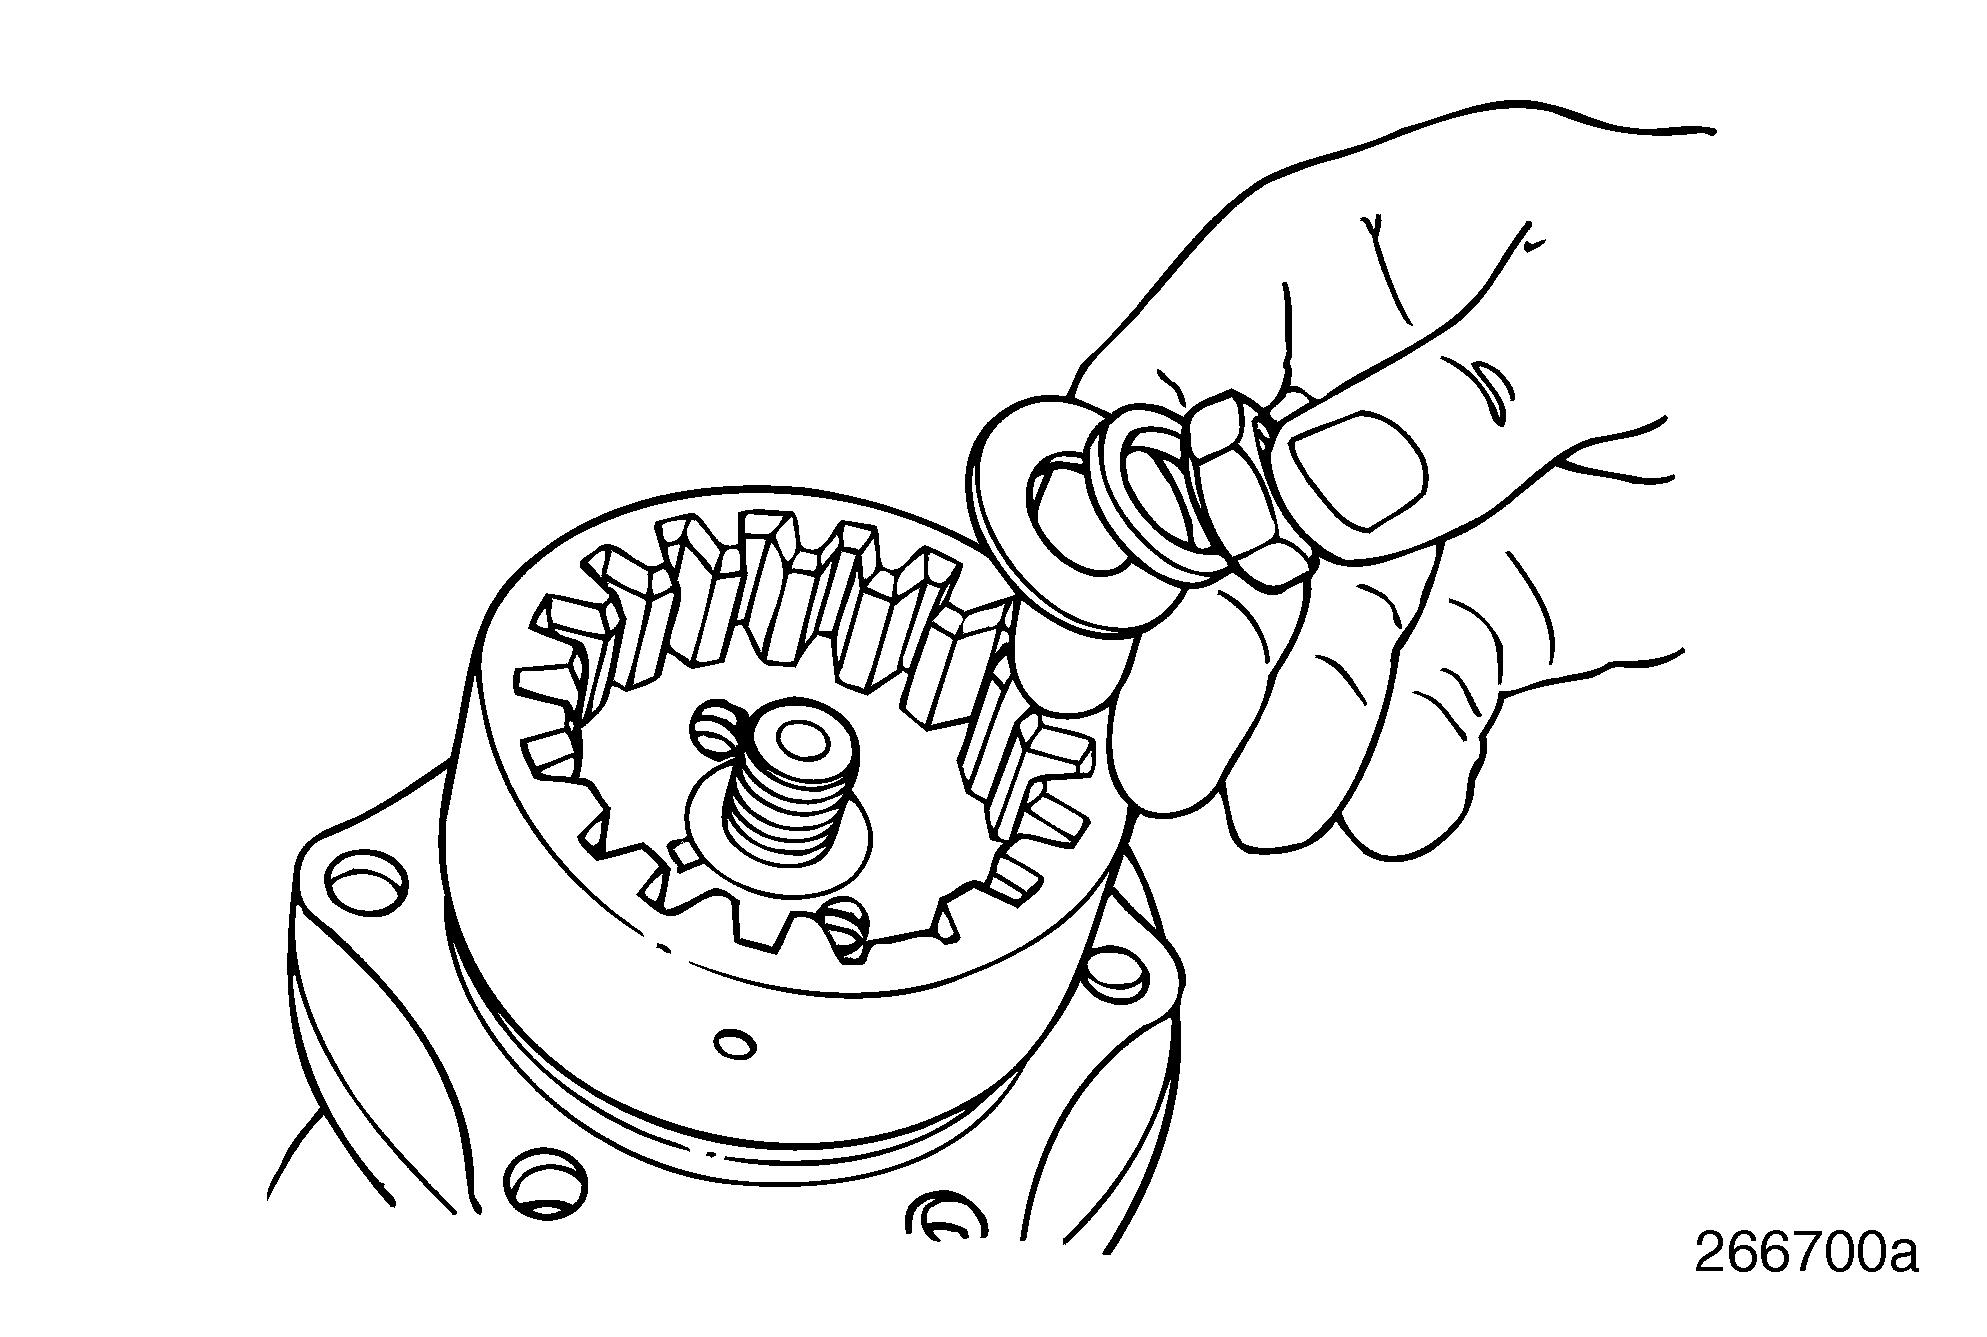
4.Remove in order, a flat washer, a lock washer and a nut from the center of the coupling gear. 251
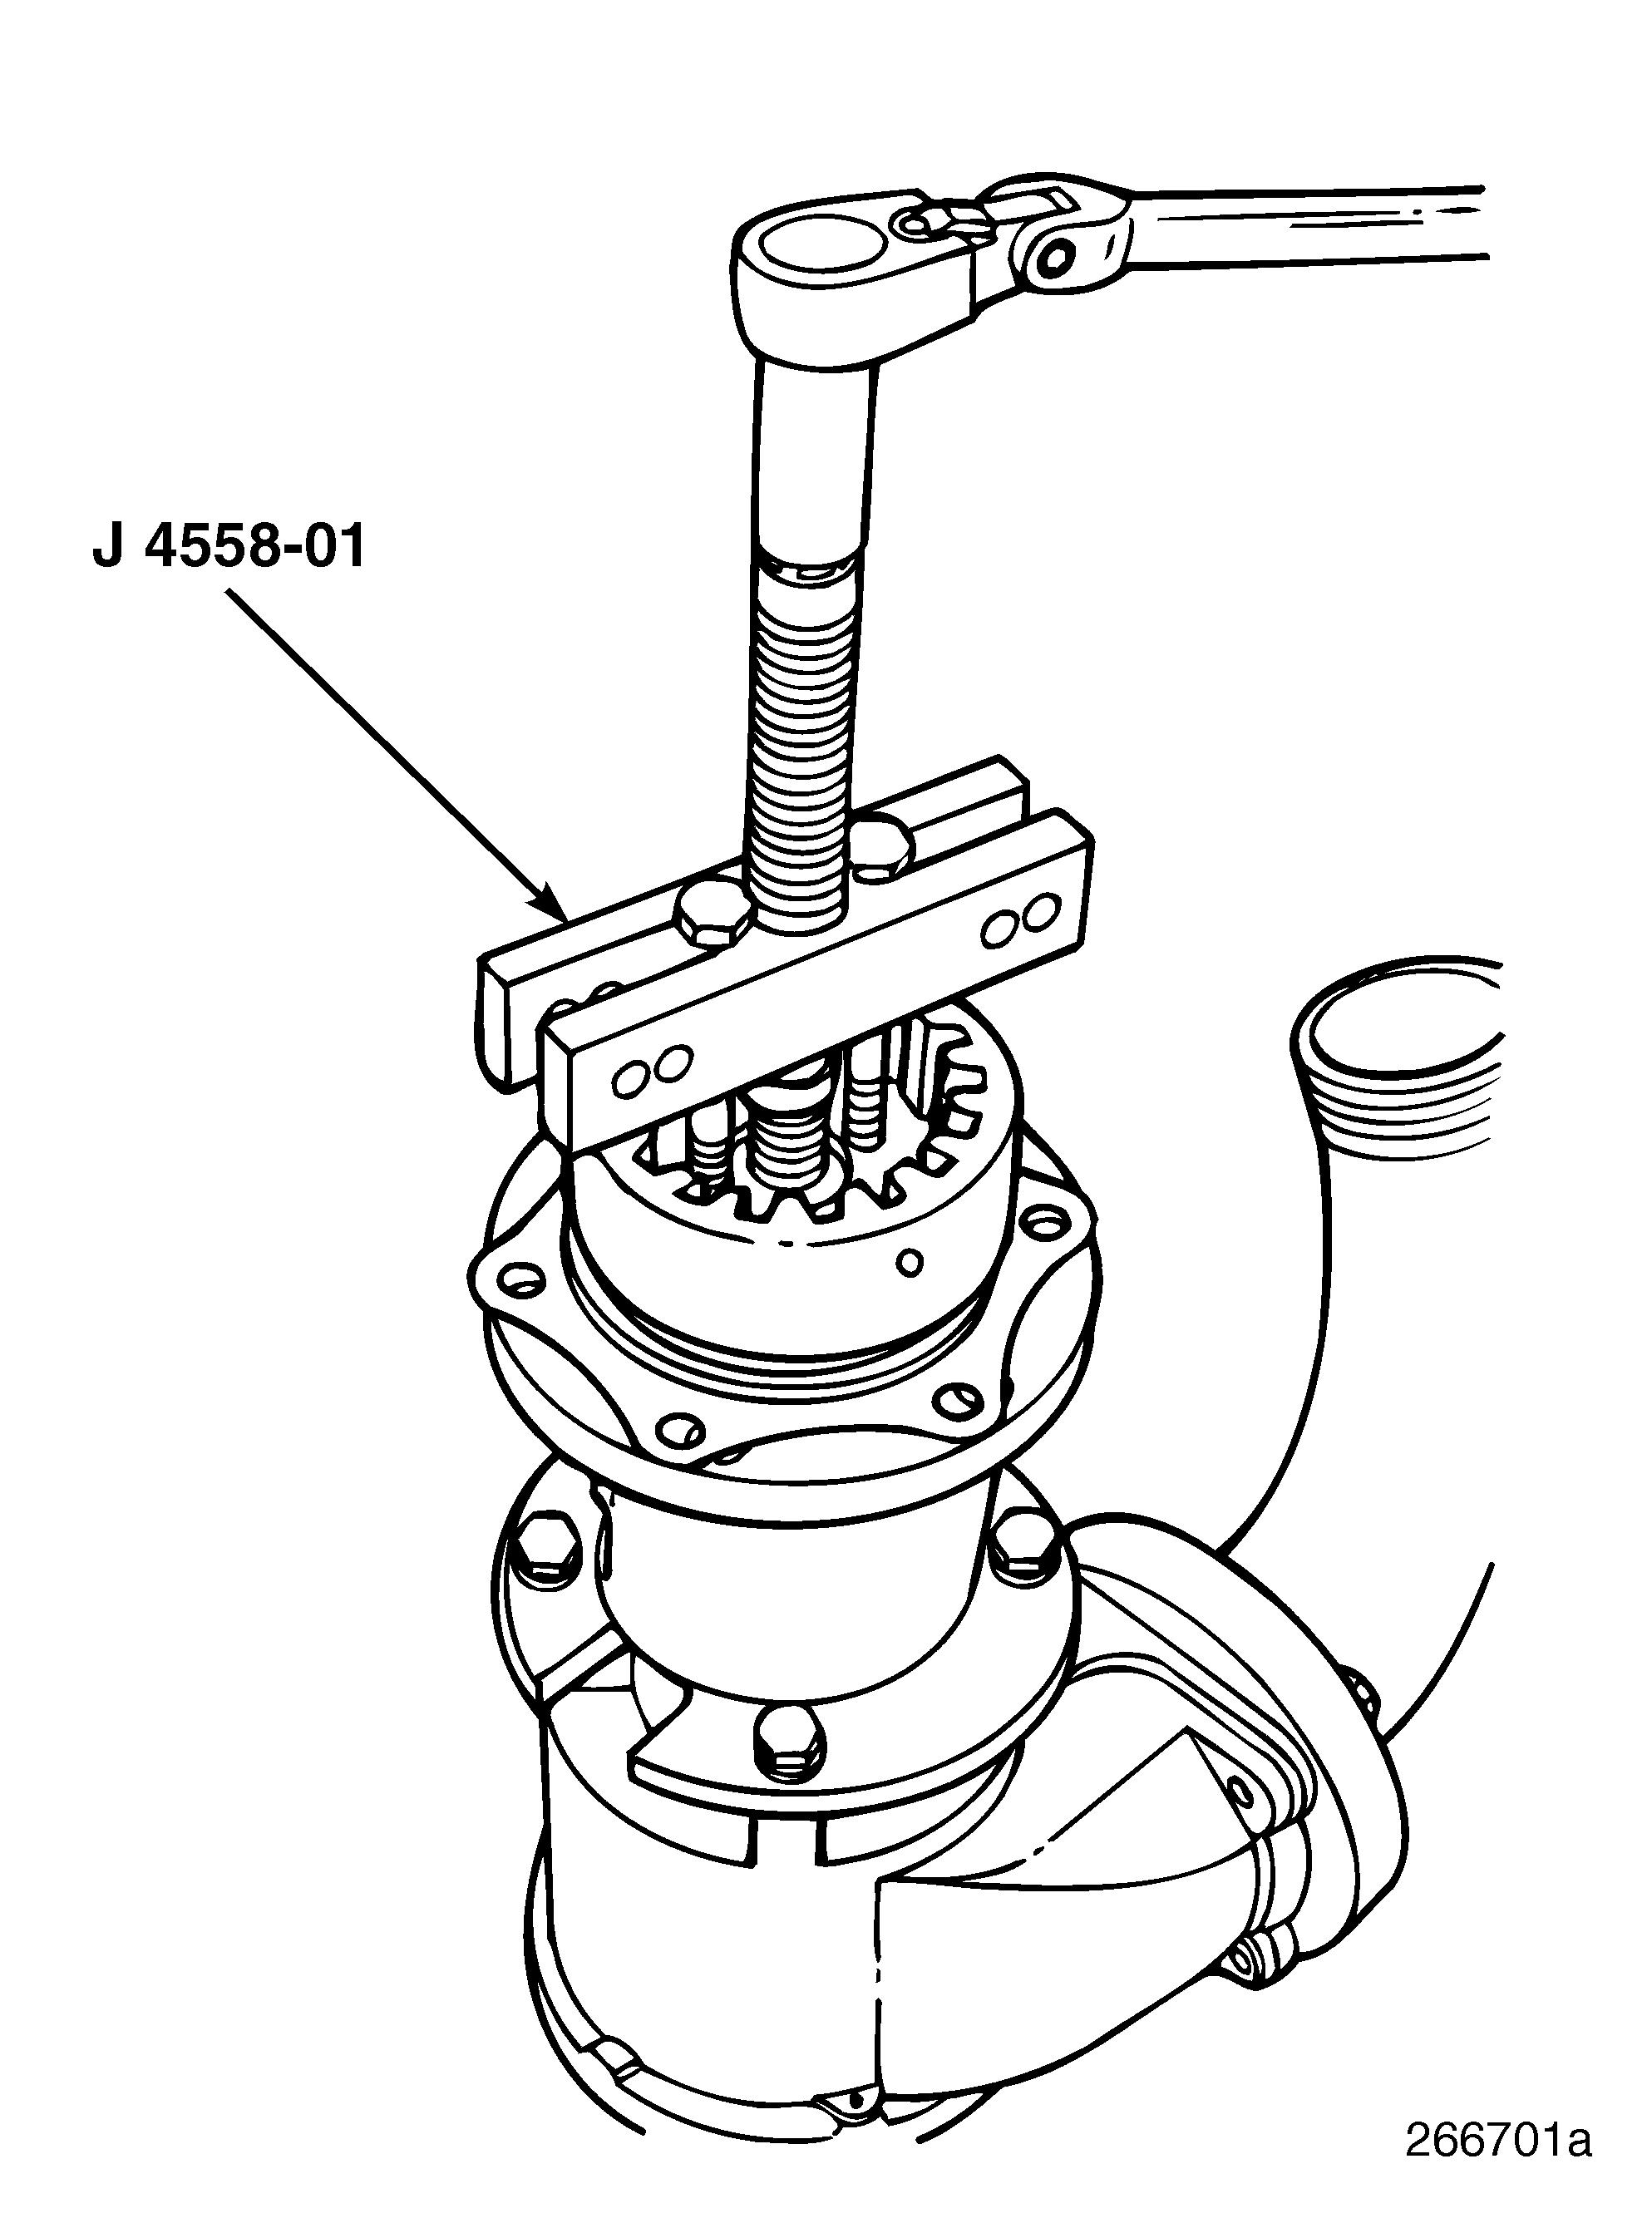
5.Using puller J 4558-01, or equivalent, remove the coupling gear from the end of the raw water pump shaft. 252
Instructions
6.Remove the now-exposed coupling gear spacer, Woodruf key and gasket from the shaft end of the raw water pump.
11.Remove cam/liner (8) from the pump body.
12.Remove inner wearplate (14).
13.Remove the seal retaining ring (13), taking care not to scratch shaft. Remove carbon portion of seal with tensioning spring attached.
14.Remove bolts securing port adapters to ports. Remove four 5/16″ bolts (16) and lock washers (15) holding the pump body to the bearing housing.
15.Remove pump body (7) from bearing housing and shaft sub-assembly. Remove any remaining gasket material from port adapters.
16.Remove slinger O-ring (5) from shaft.
17.From drive end of pump body, press out remaining portions of seal.
18.Remove bearing housing (3) and shaft sub-assembly from adapter flange.
Refer to Figure 254.
7.Remove the six special brass impeller cover capscrews (9) and remove the end cover (10) by prying off with a gasket scrapper. Care should be exercised to avoid scratching or bending the end cover.
8.Remove the impeller outer wearplate.
9.Inspect the impeller area and remove any grass, sea weed, impeller pieces, etc., which are present. Also allow any remaining sea water to drain.
10.Grasp hub of impeller (12) with pliers and remove the impeller from bore. If impeller O-ring remains on shaft, remove it from shaft.
19.Remove retaining ring (19) securing bearing in bearing housing.
20.Press against impeller end of shaft to remove shaft and bearing sub-assembly from bearing housing.
21.Support inner race of bearing and press shaft out of bearing. Repeat procedure on second bearing.
22.From pump end of bearing housing, push oil seal (4) out of bearing housing.
23.Clean and inspect all parts for wear and replace as needed. If wearplates are worn, they should be reversed or replaced. If cam/ liner thickness is 3/8″ or less at its thickest section, it should be replaced. Clean any remaining gasket material from face of adapter on PTO.