5-101.bk Page 8 Friday, March 17, 2006 11:05 AM
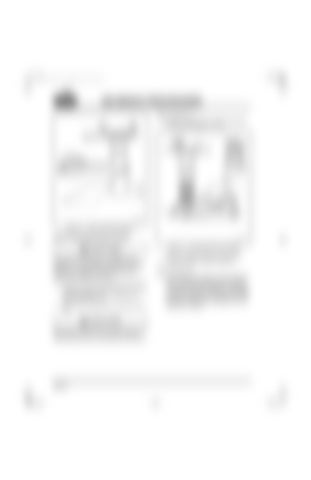
200 BENCH PROCEDURES Refer to Figure 5-5. 3. Position rod assembly in press with piston pin burnishing broach J 37718.
Figure 5-4 — Wrist Pin Bushing Removal
WRIST PIN BUSHING INSTALLATION Figure 5-5 — Burnishing Wrist Pin Bushing
The wrist pin bushing has a lubrication hole through it. This hole MUST be aligned with rifledrilled hole in rod to allow oil flow to wrist pin. If holes are not aligned, wrist pin, piston, and connecting rod failure will result. 1. Position rod, bushing and piston pin bushing remover/installer J 37717 in press, and press bushing into rod. 2. Align hole in bushing with rifle-drilled hole in rod.
Make certain that bushing is fully expanded in the connecting rod bore or it will loosen in service.
Page 5-8
4. Using a suitable lubricant, press broach through bushing to expand bushing. Refer to Figure 5-6. 5. After machining bushing, check connecting rod for twisting or bending. Use Sweeney connecting rod fixture 945-6041. Accessory mandrel and plunger extension assemblies for various engines are required for use with this fixture, and are also available from the Sweeney Company.
